

Table of Contents
Don't have the time to read the entire post? Our human writers will be sad, but we understand. Summarize the post with your preferred LLM here instead.
This tutorial was written by Vivek Maskara, a software development engineer at Remitly. You can check out his website or X account to connect and see more of his work!
Shiny lets you easily build web apps for data science using R and Python without the need for any web development experience. You can deploy these applications on your own web server or use Posit Connect to deploy them directly from your IDE.
Although deploying the applications is straightforward, it’s also vital to set up proper access control for these applications to ensure that only authenticated users can view and interact with the data. Integrating single sign-on (SSO) with Shiny apps can provide a seamless authentication experience for the users. As these apps are often used by different business or enterprise users who might need to log in with their own identity provider (IdP), SSO allows them to use their existing credentials to log in.
Descope offers a no-code Customer Identity Platform (CIAM) that lets you easily define a customized workflow for sign-up, login, multi-factor authentication (MFA), SSO, and Security Assertion Markup Language (SAML).
In this tutorial, you’ll learn how to implement authentication and SSO in a Shiny app.
Prerequisites
Before starting, you need to do the following:
Install RStudio on your development machine.
Install Posit Connect locally and configure its license. This tutorial uses an on-prem installation of Posit Connect on AWS, but alternatively, you can sign up for Posit Connect Cloud and use it to follow along.
Set up Descope
Before you can integrate Descope authentication into your Shiny application, you need to define an authentication flow using the Descope portal.
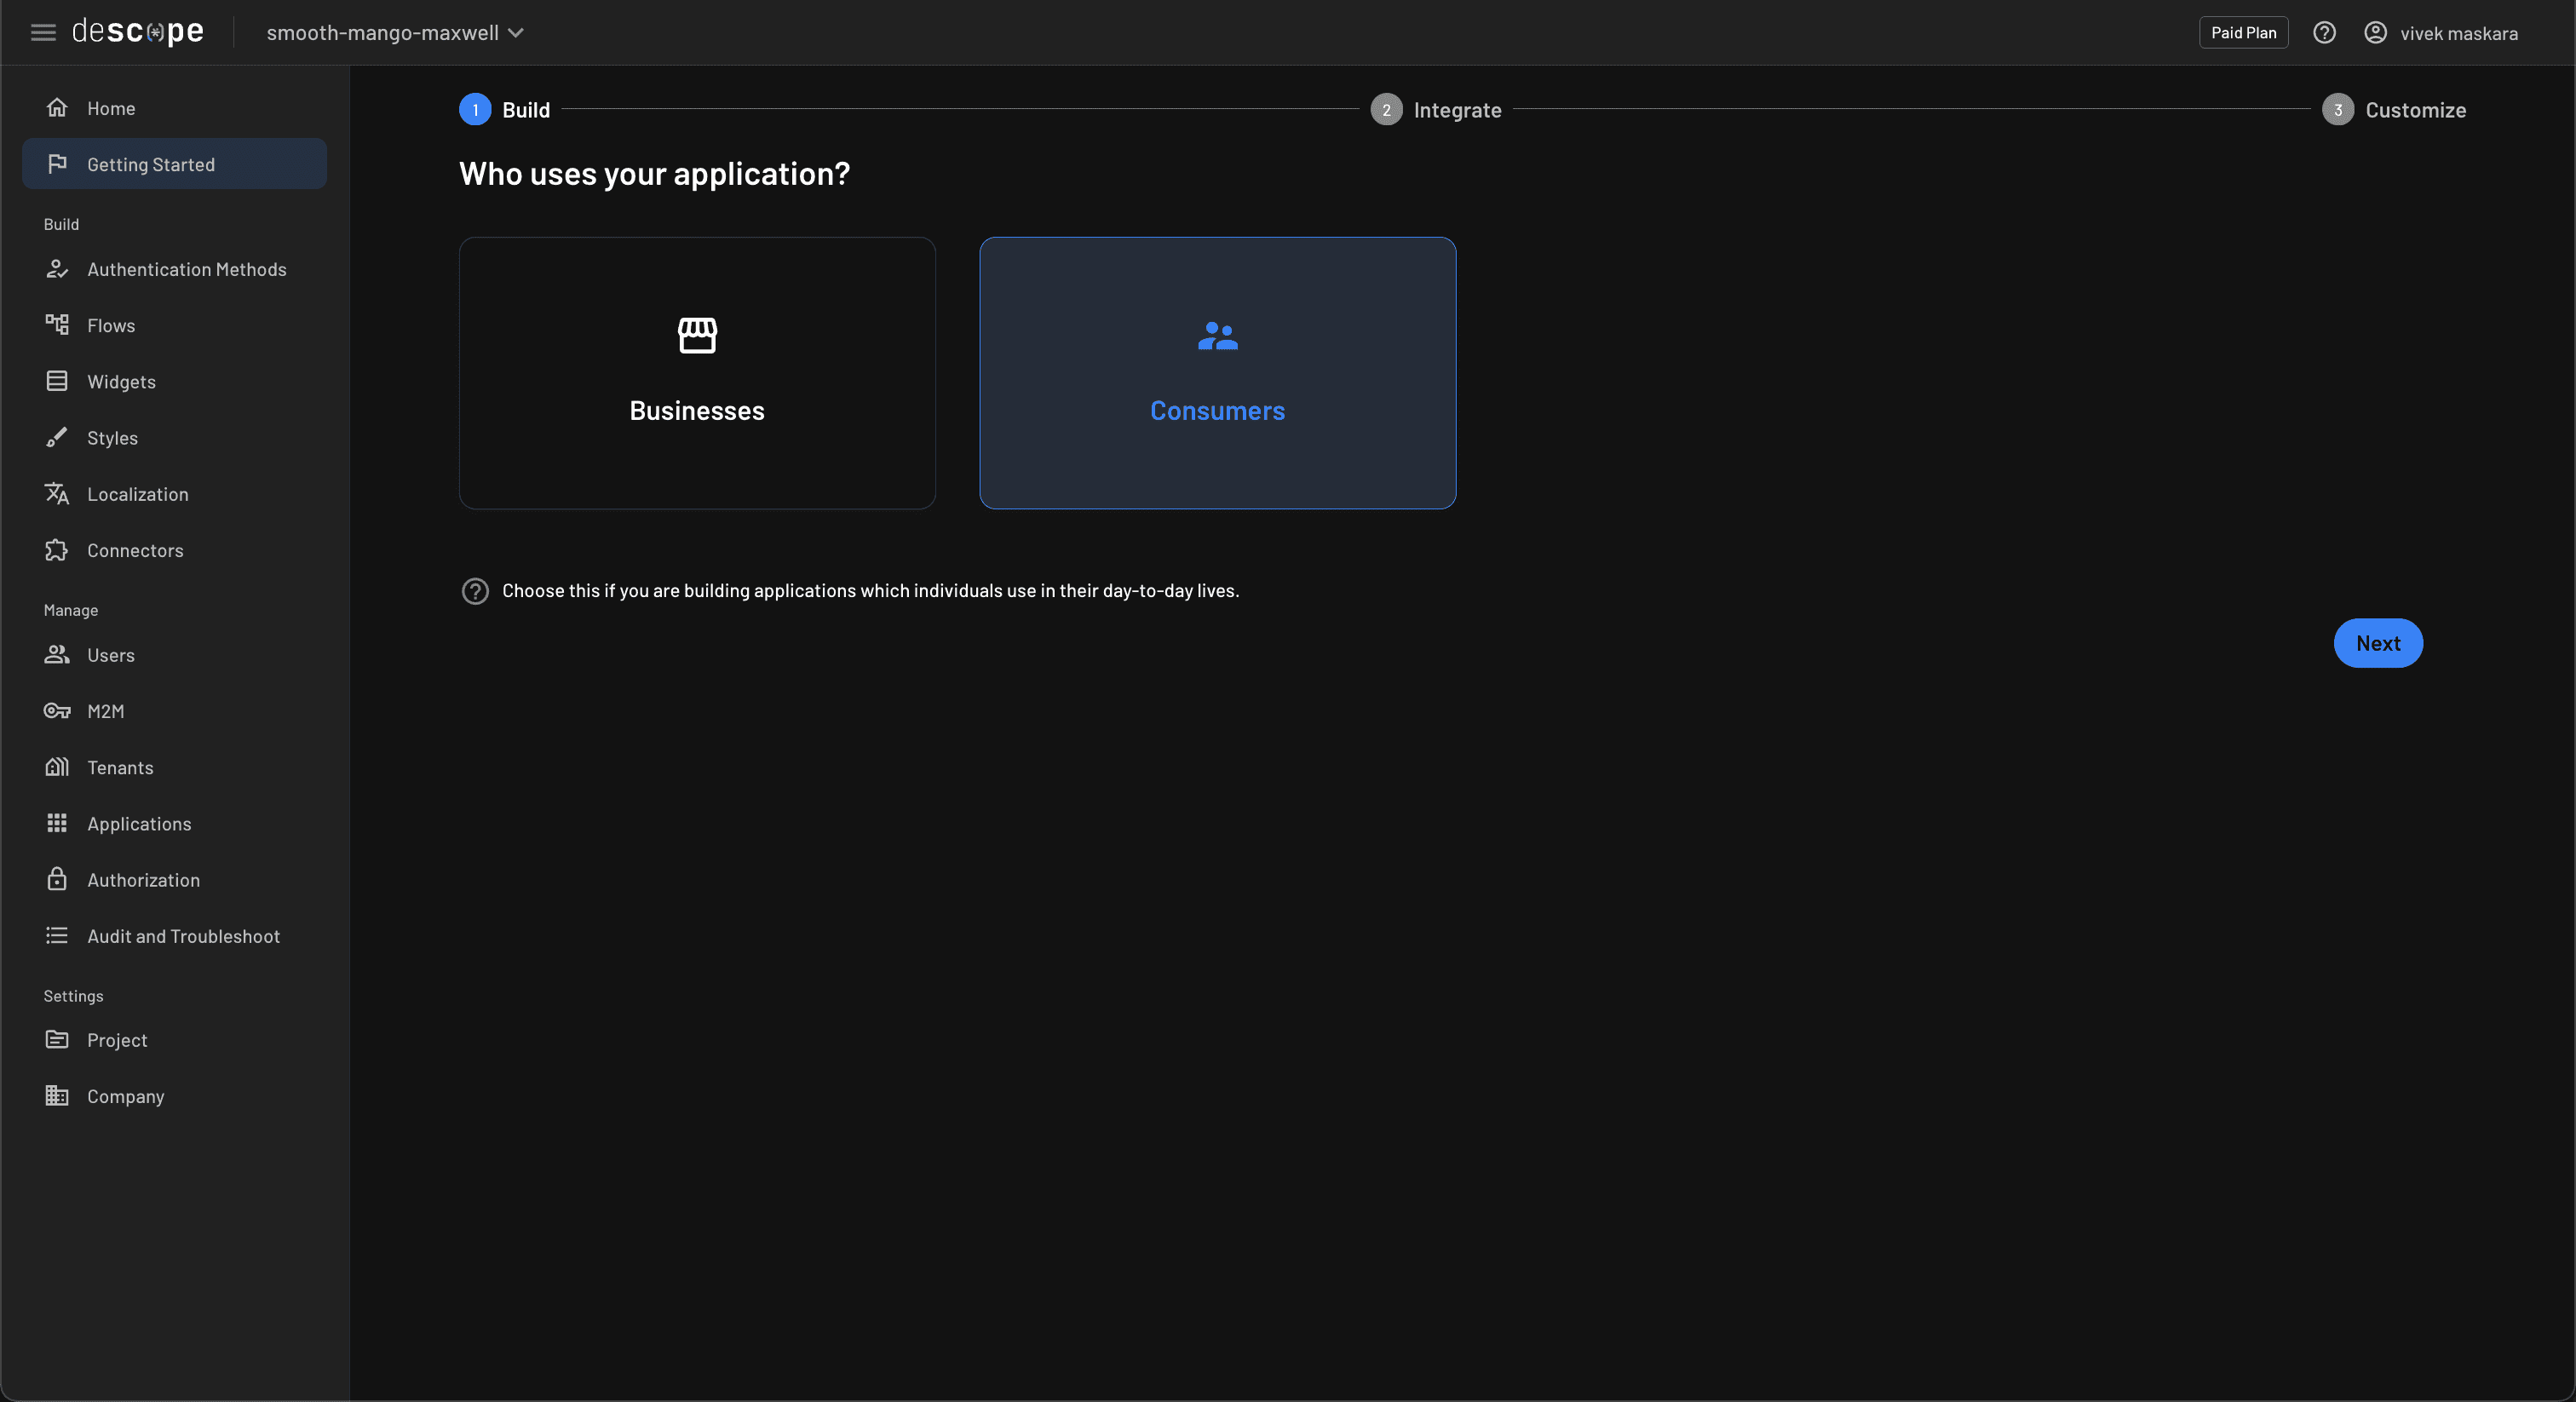
Sign up for a free Descope account if you don’t already have one, and follow the Getting Started wizard to create a new flow. In the wizard, first, choose Consumers as the target audience for your app:
Next, choose the authentication methods you want to use. In this tutorial, you’ll use Magic Link and SSO as the authentication method. You can change these settings in the future if you like:
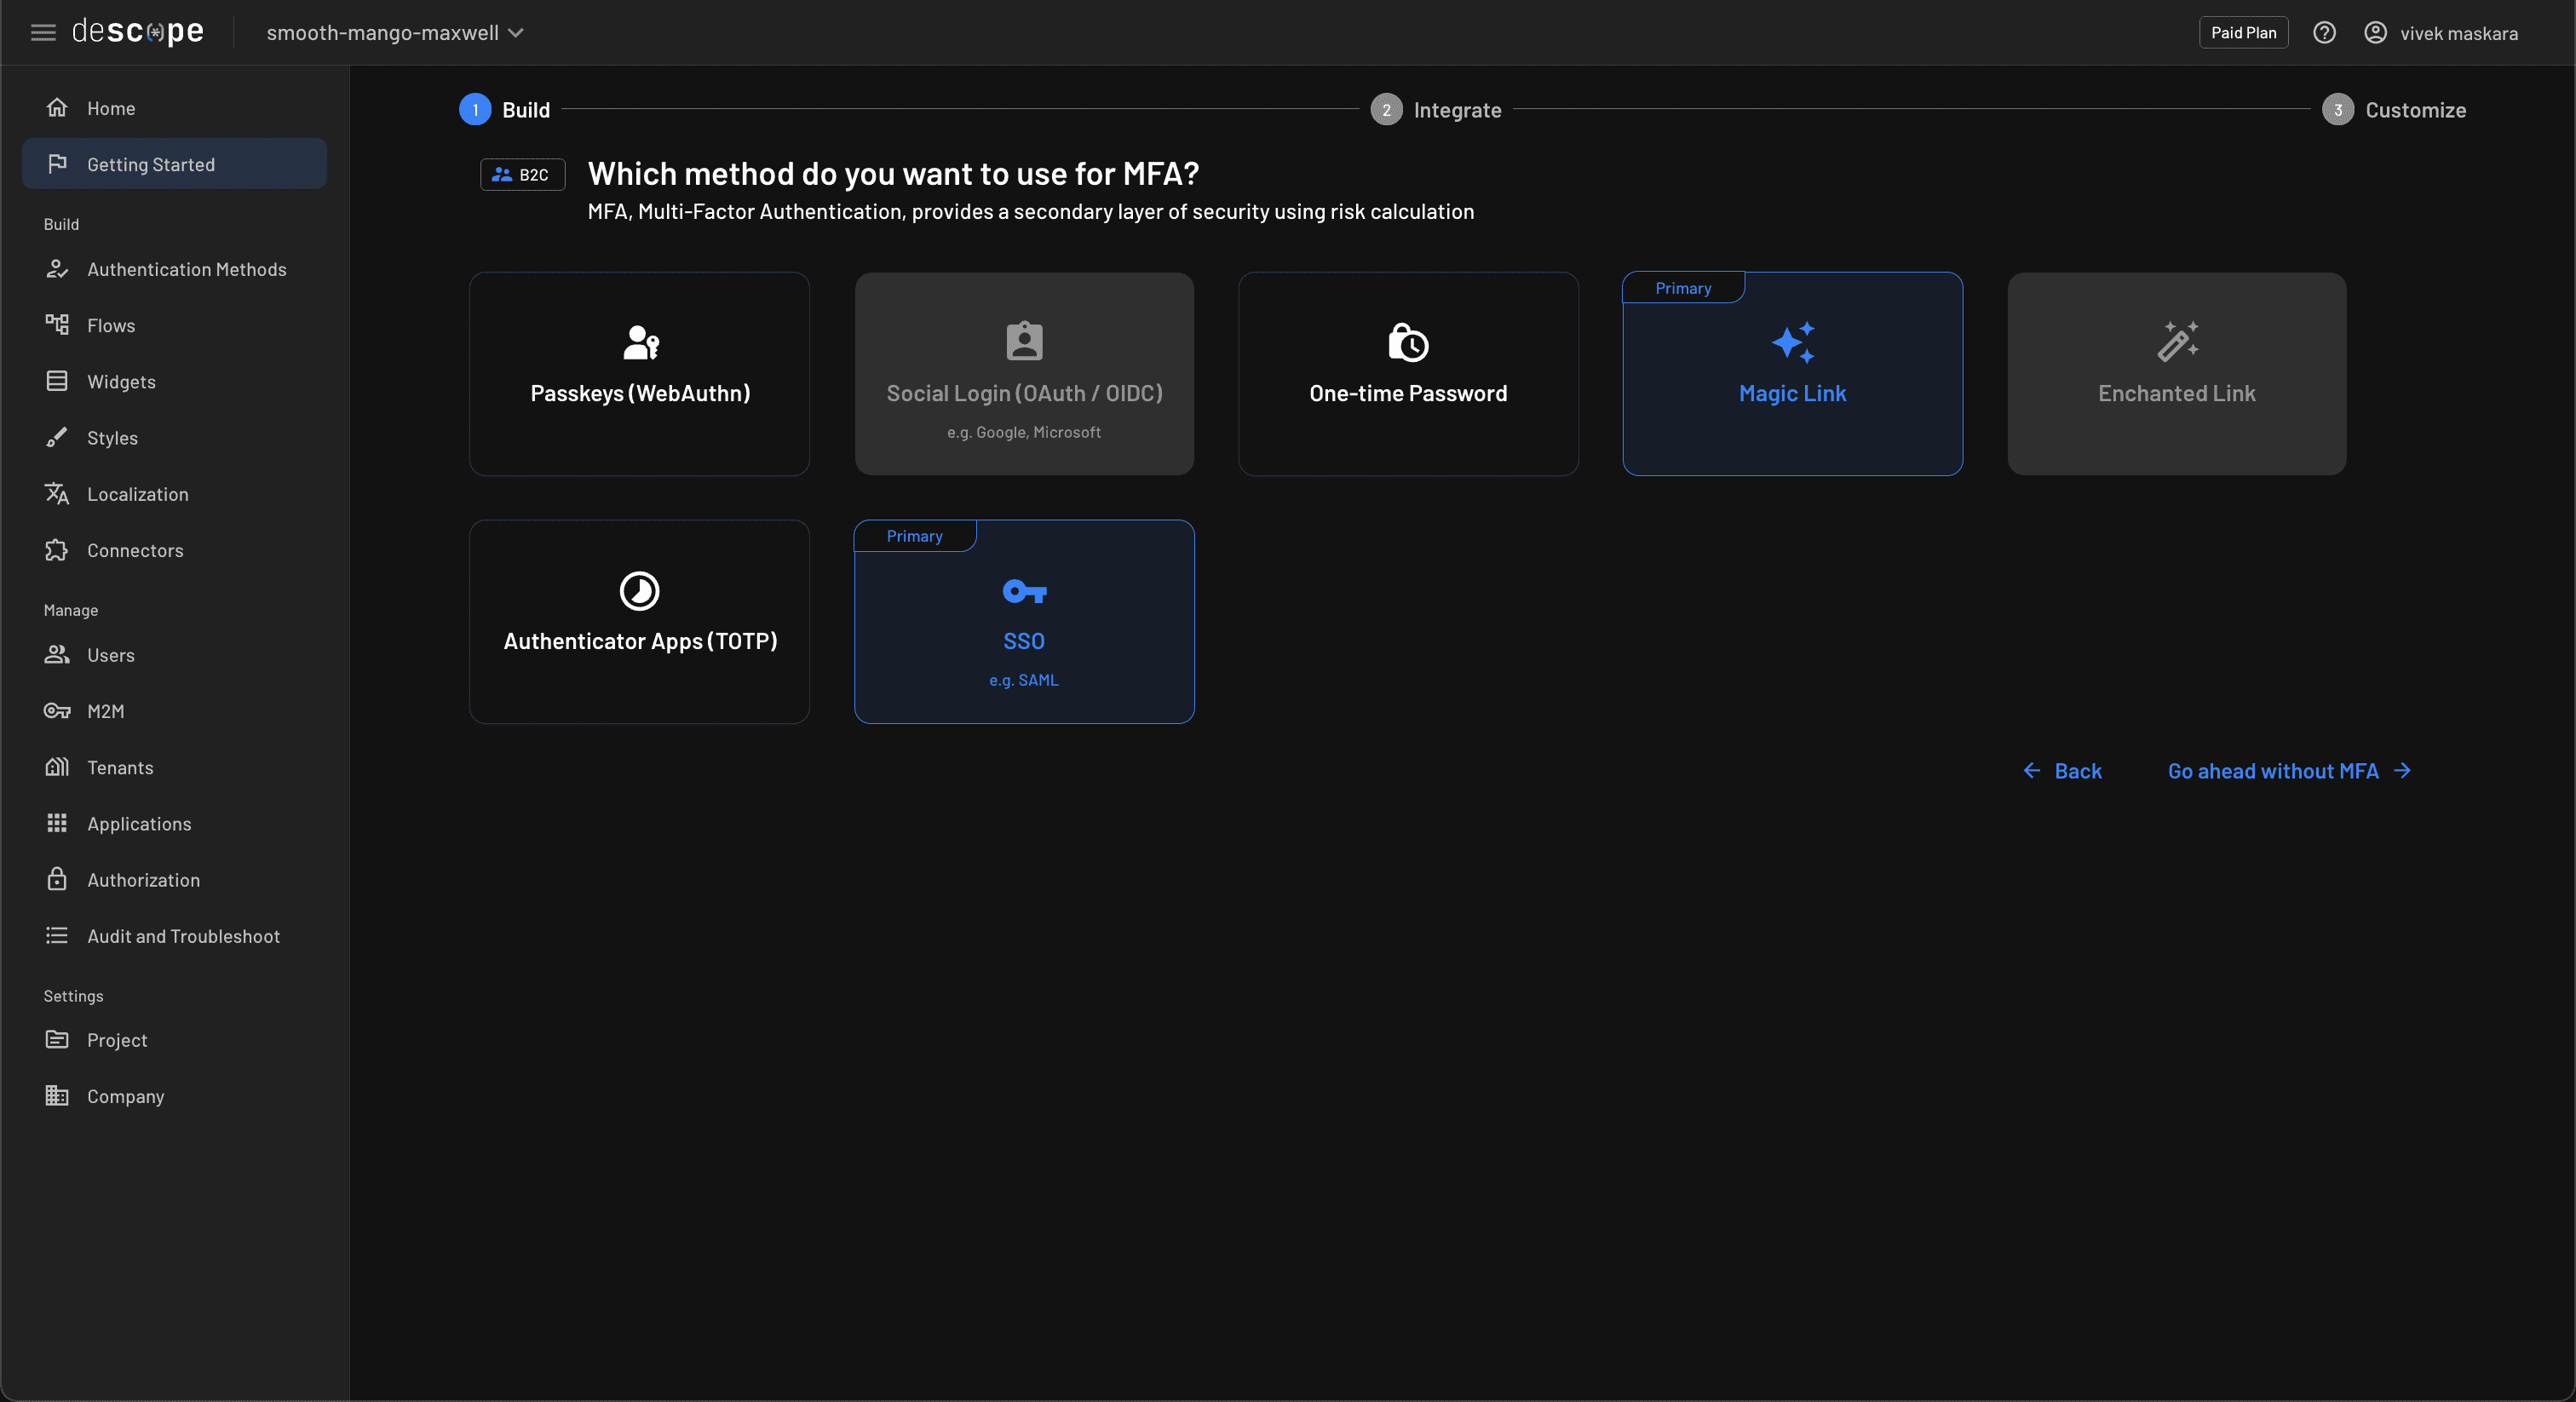
Skip the next step that prompts you to choose an MFA method by clicking Go ahead without MFA. In the next step, review the selected settings and click Next to generate the authentication flow:

Create a Shiny app
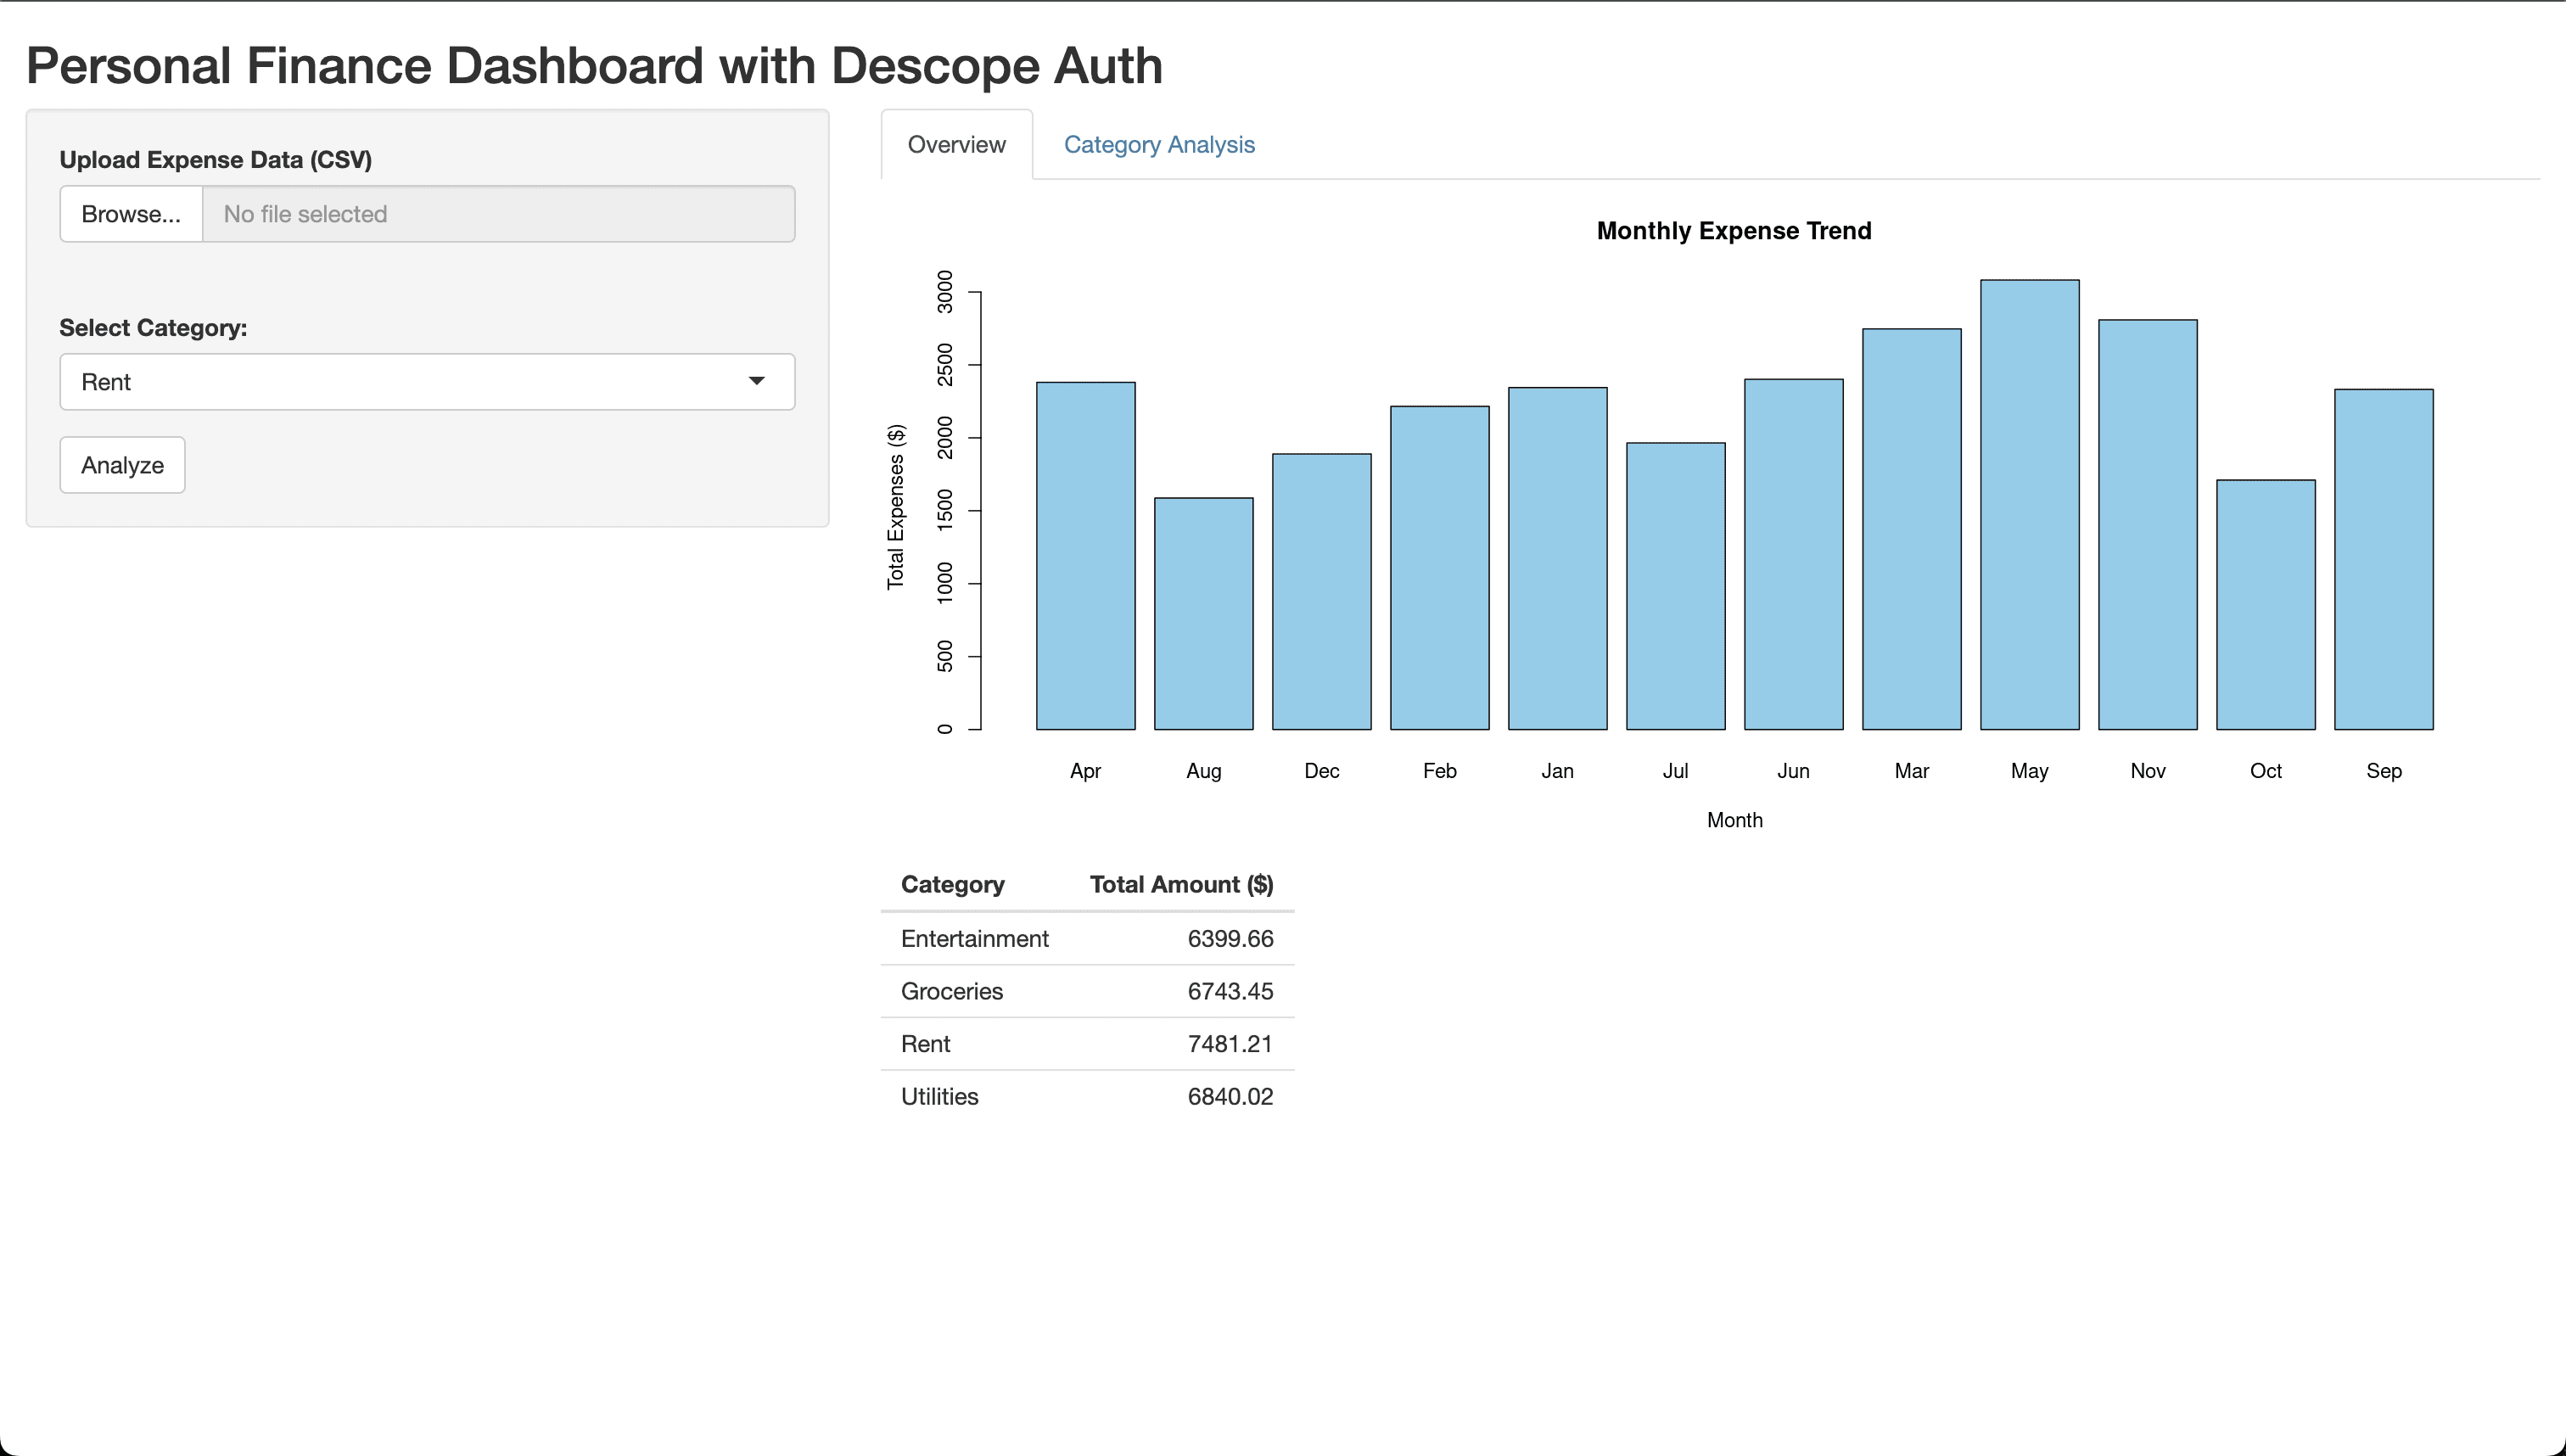
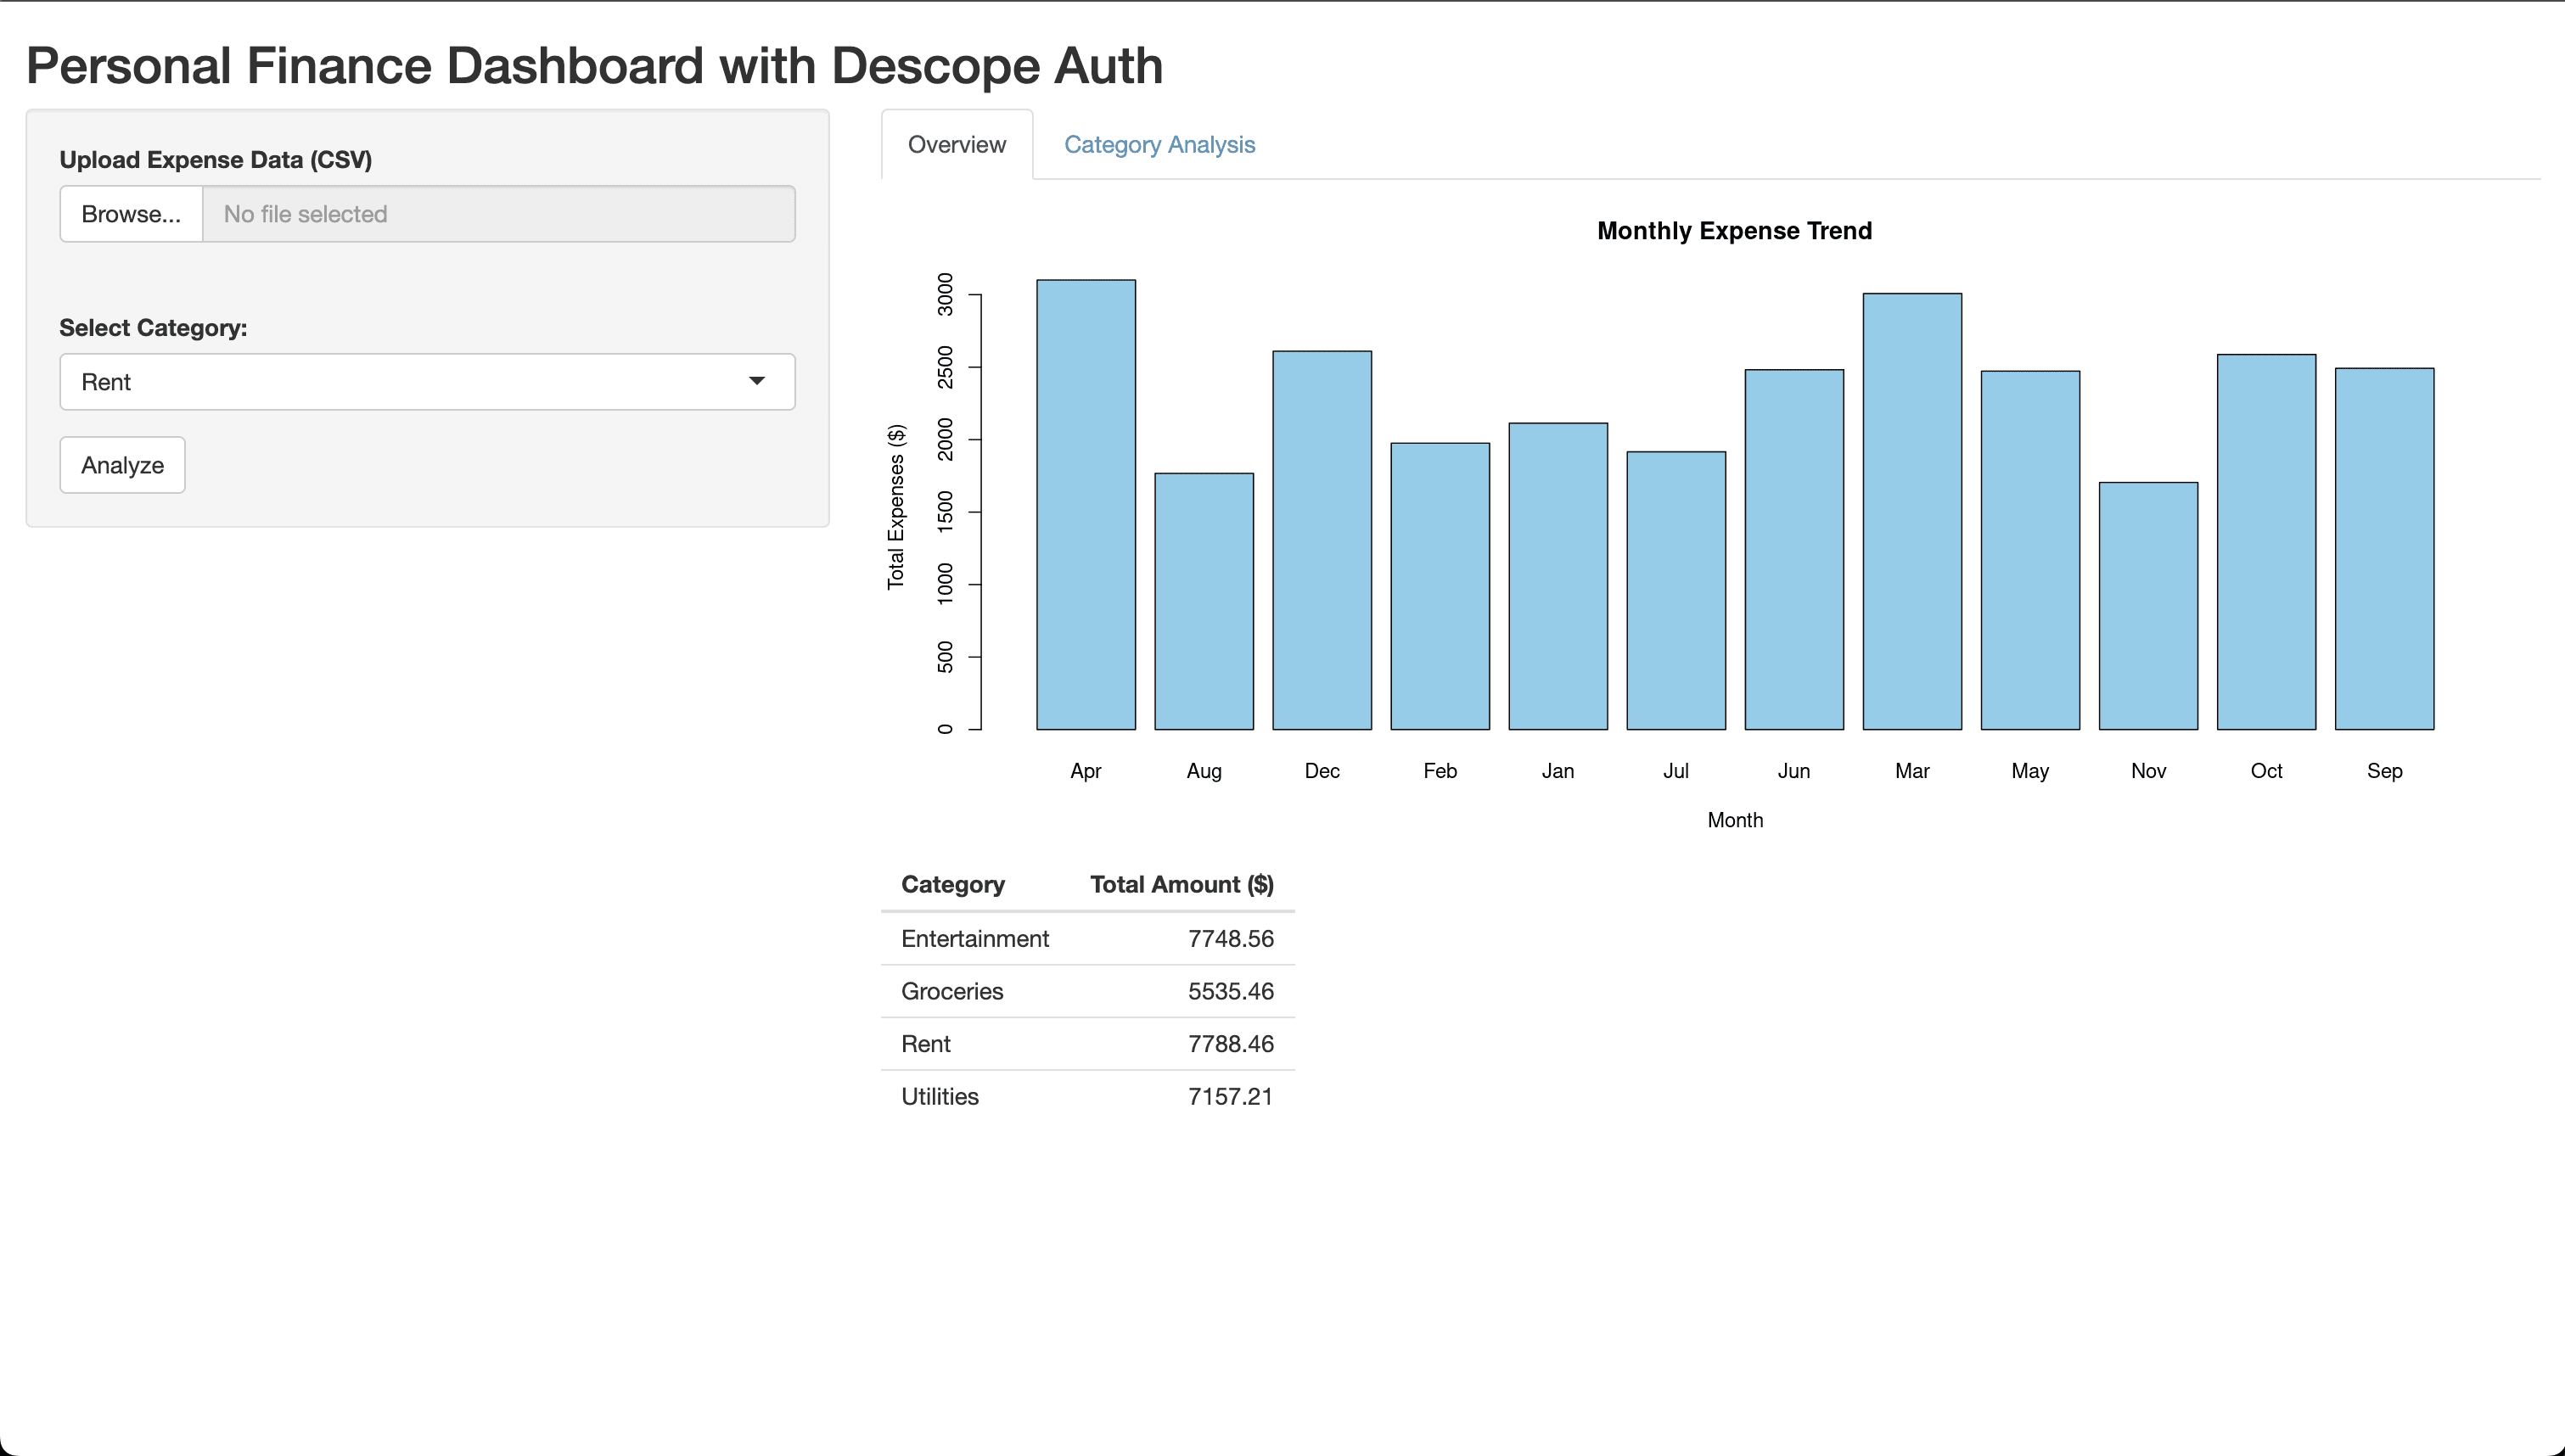
In this tutorial, you’ll create a personal finance application using Shiny and add Descope authentication. The Shiny app will let you upload a CSV file containing month-wise expense data, view a bar chart with monthly expense trends, and also analyze category-wise expenses.
Since the tutorial focuses on adding authentication, you can clone the starter code with the personal finance Shiny app. In the terminal, navigate to the project directory and check out the starter branch.
cd personal-finance-shiny
git checkout starter
Open the application using RStudio and attempt to run the starter app. When you run it for the first time, it will prompt you to install the required packages. After you install the packages and rerun the app, you’ll notice that you’re directly taken to the dashboard page without authentication:
Next, click on the Publish button in RStudio to deploy the app on Posit Connect.
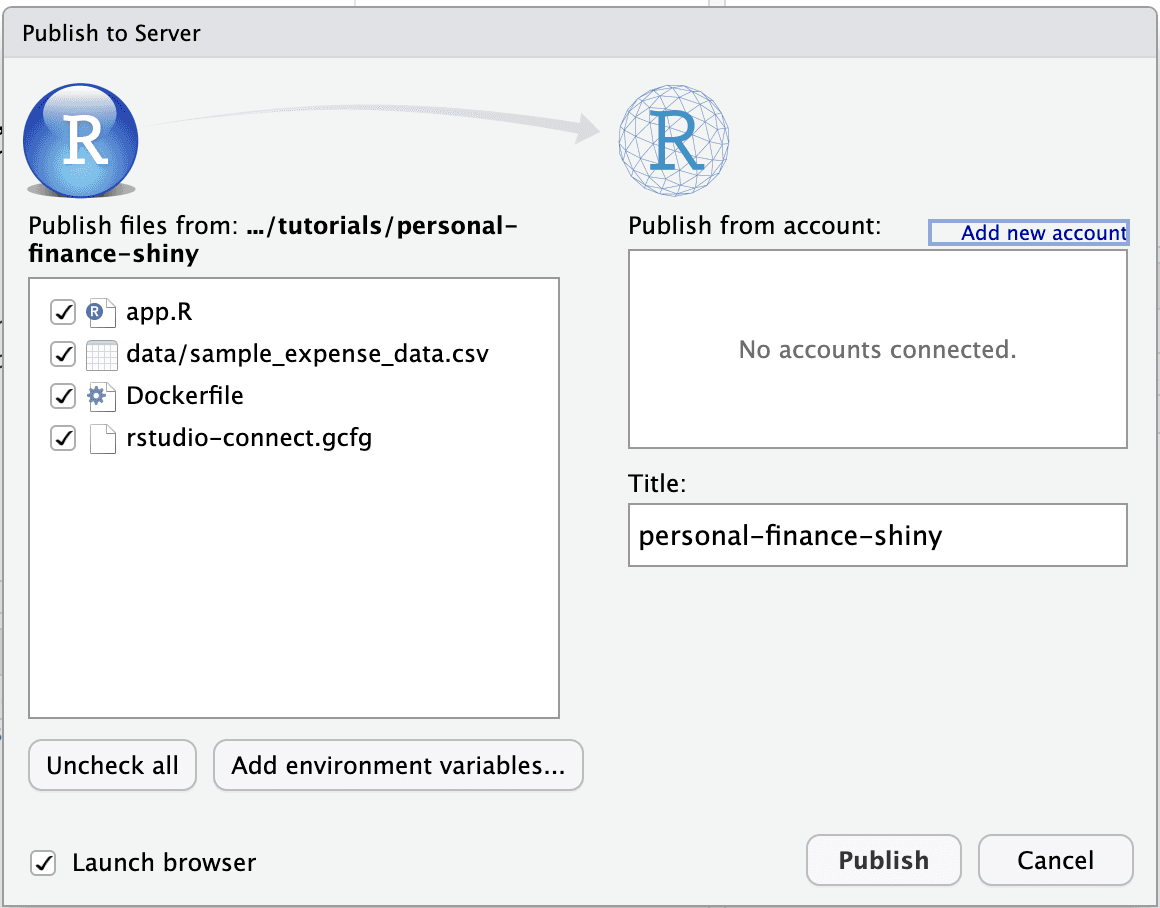
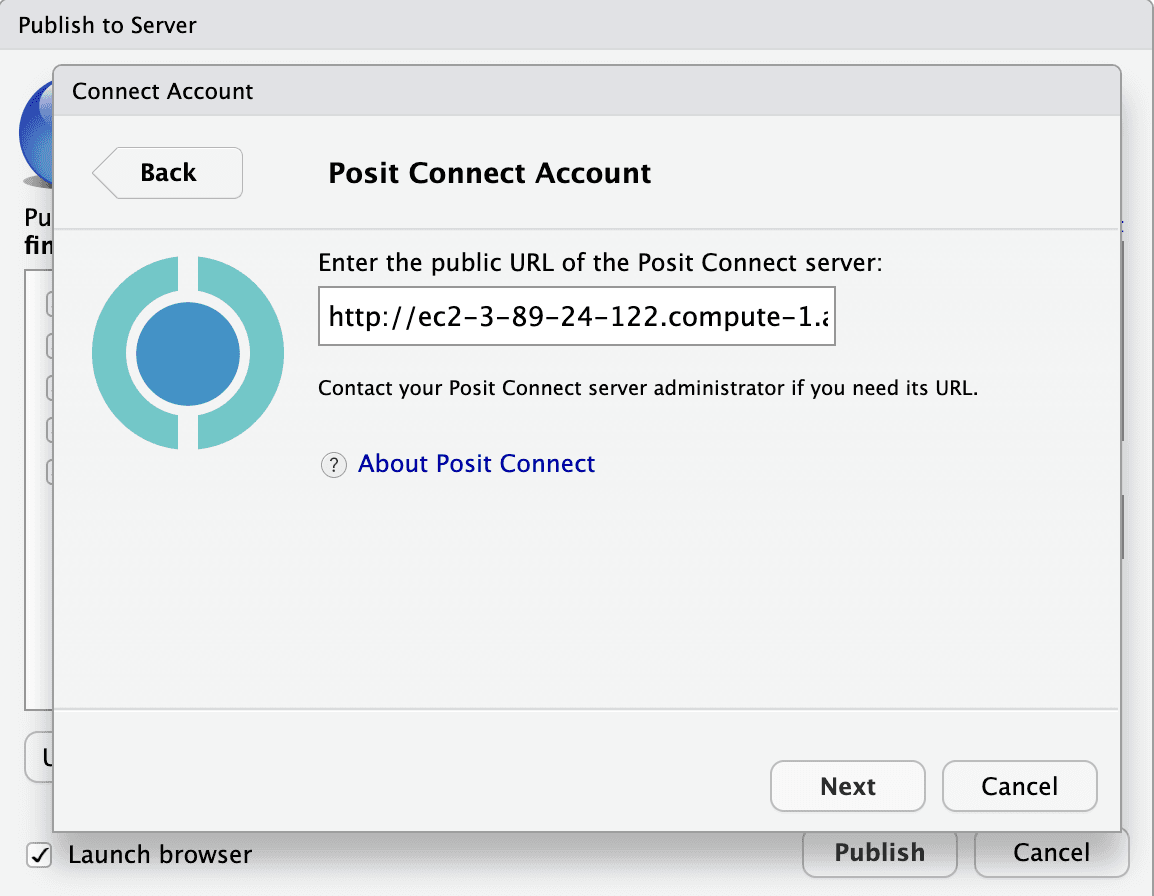
Before you can publish the Shiny app, you need to connect your Posit Connect account by clicking Add new account and choosing Posit Connect. Enter the Posit Connect server URL and click Next to connect the account.
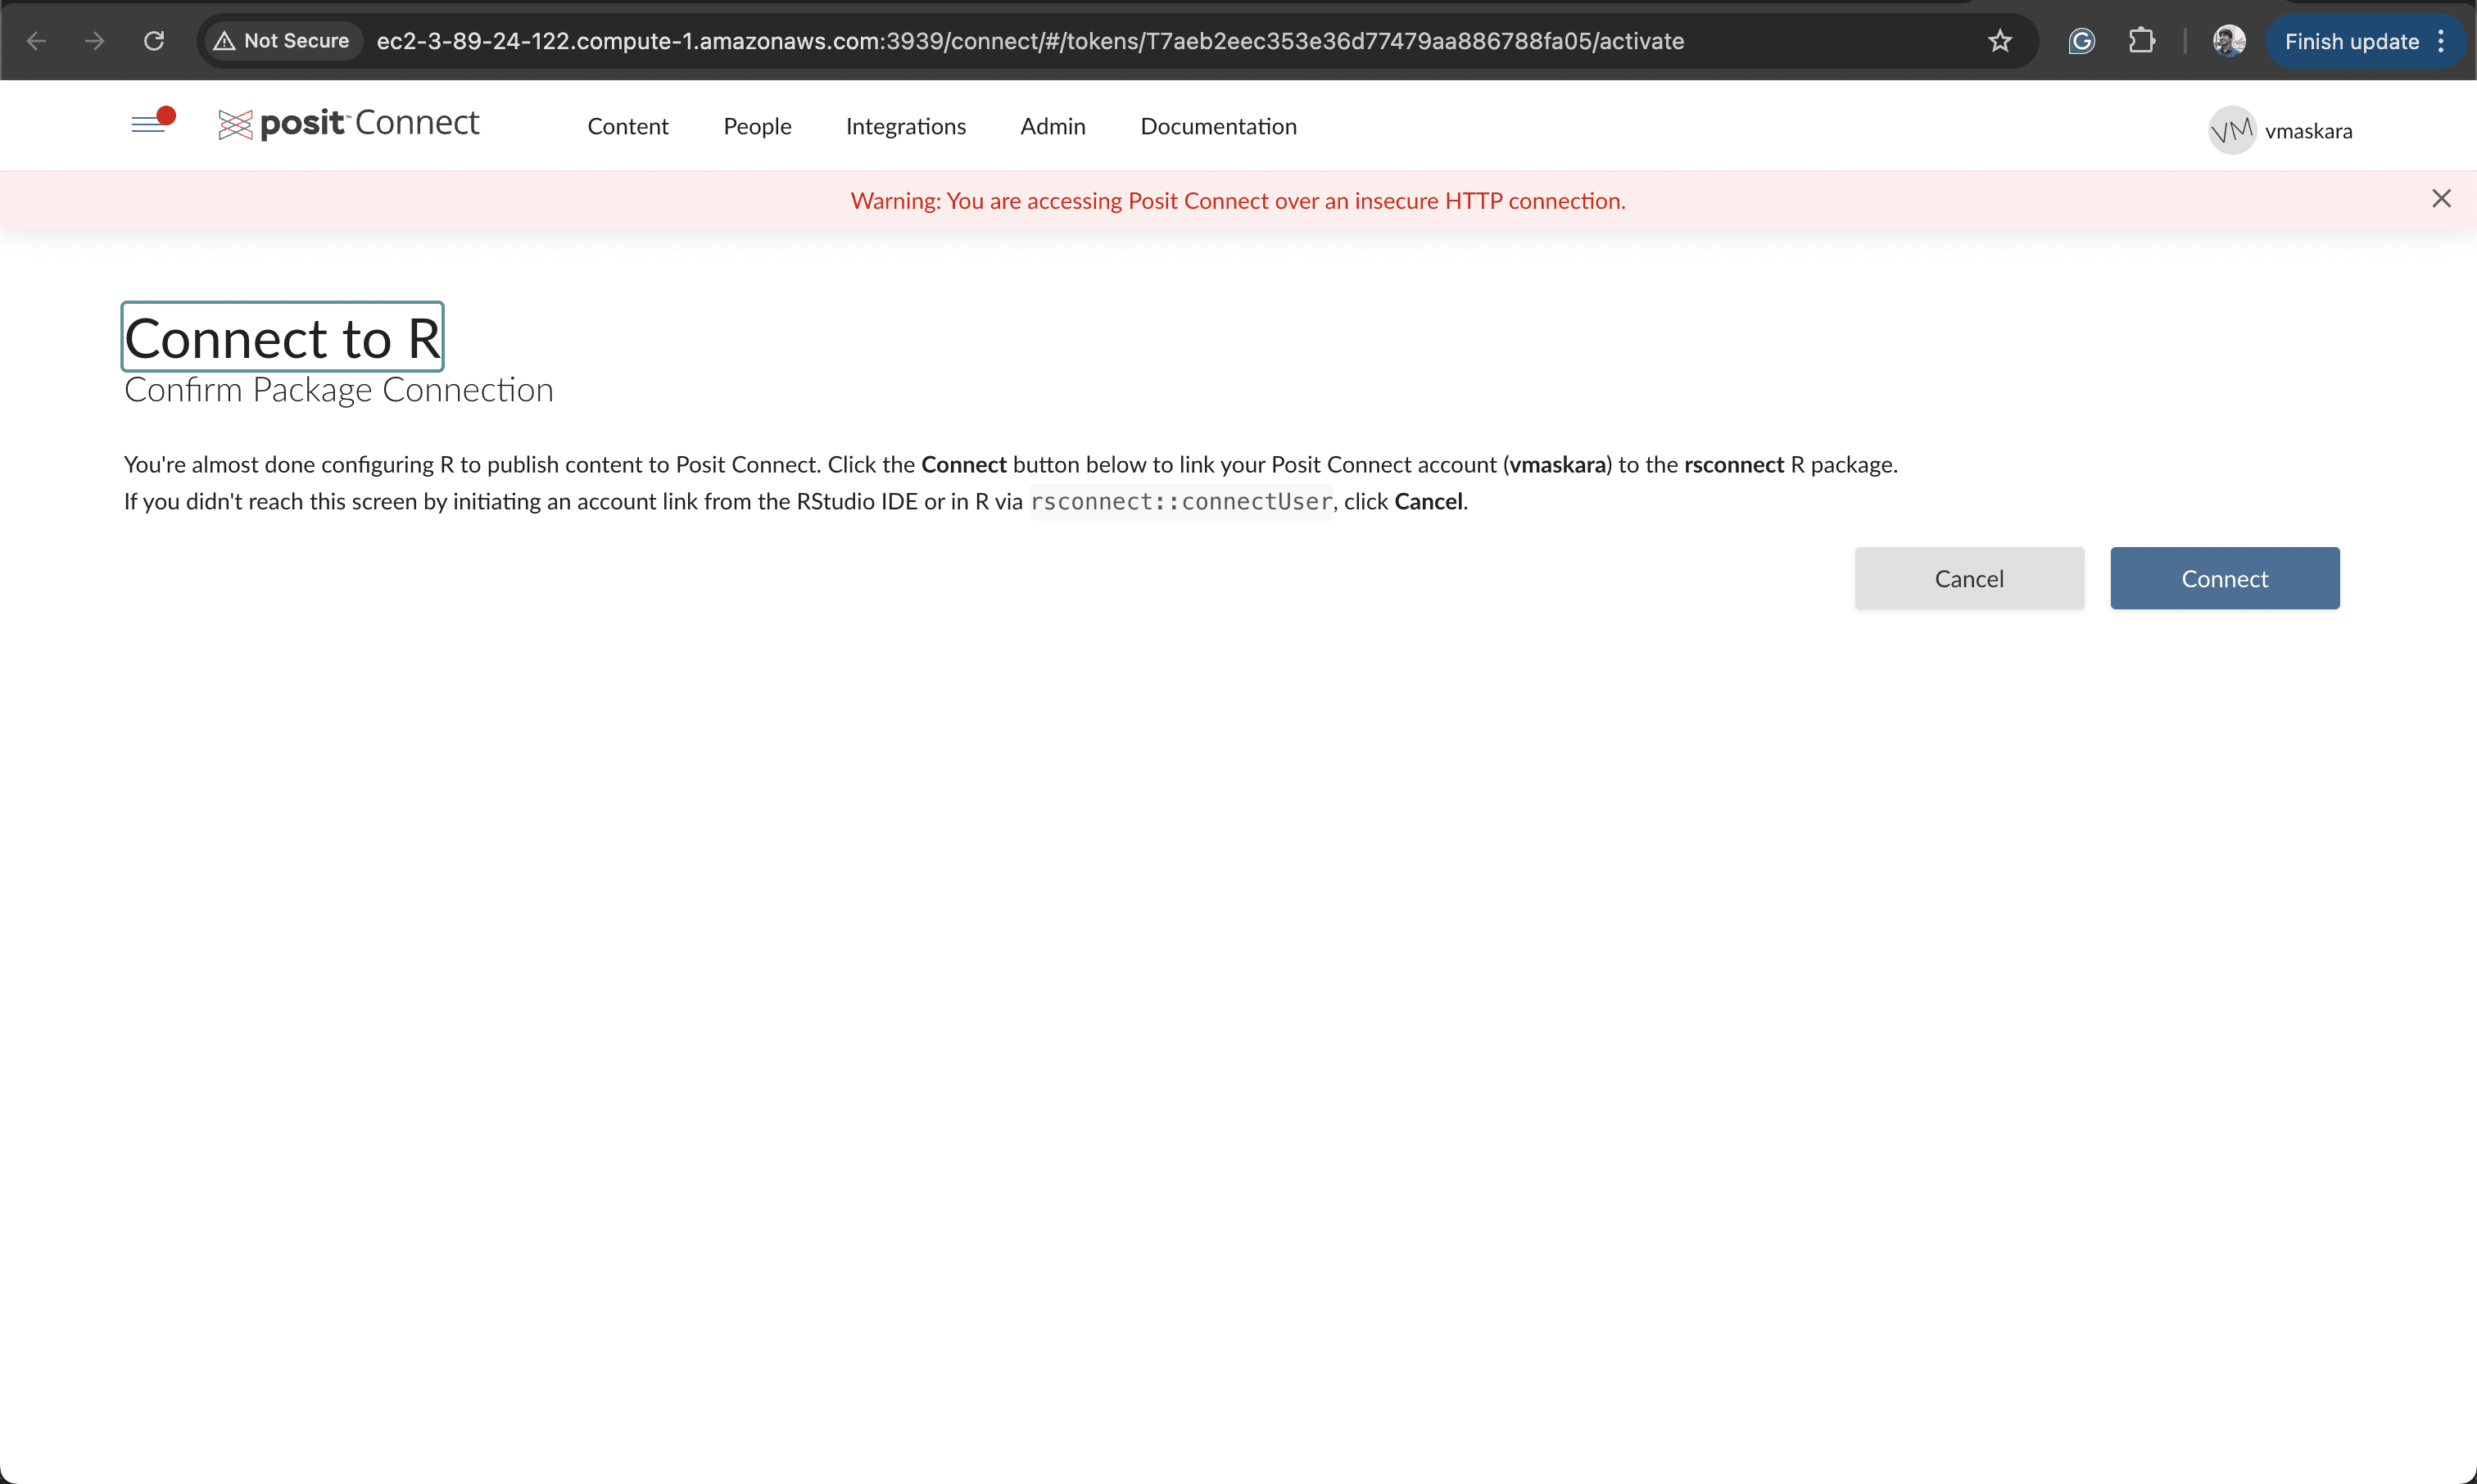
You’ll be redirected to the web browser to confirm the linking between RStudio and Posit Connect. Click Connect to link the account.
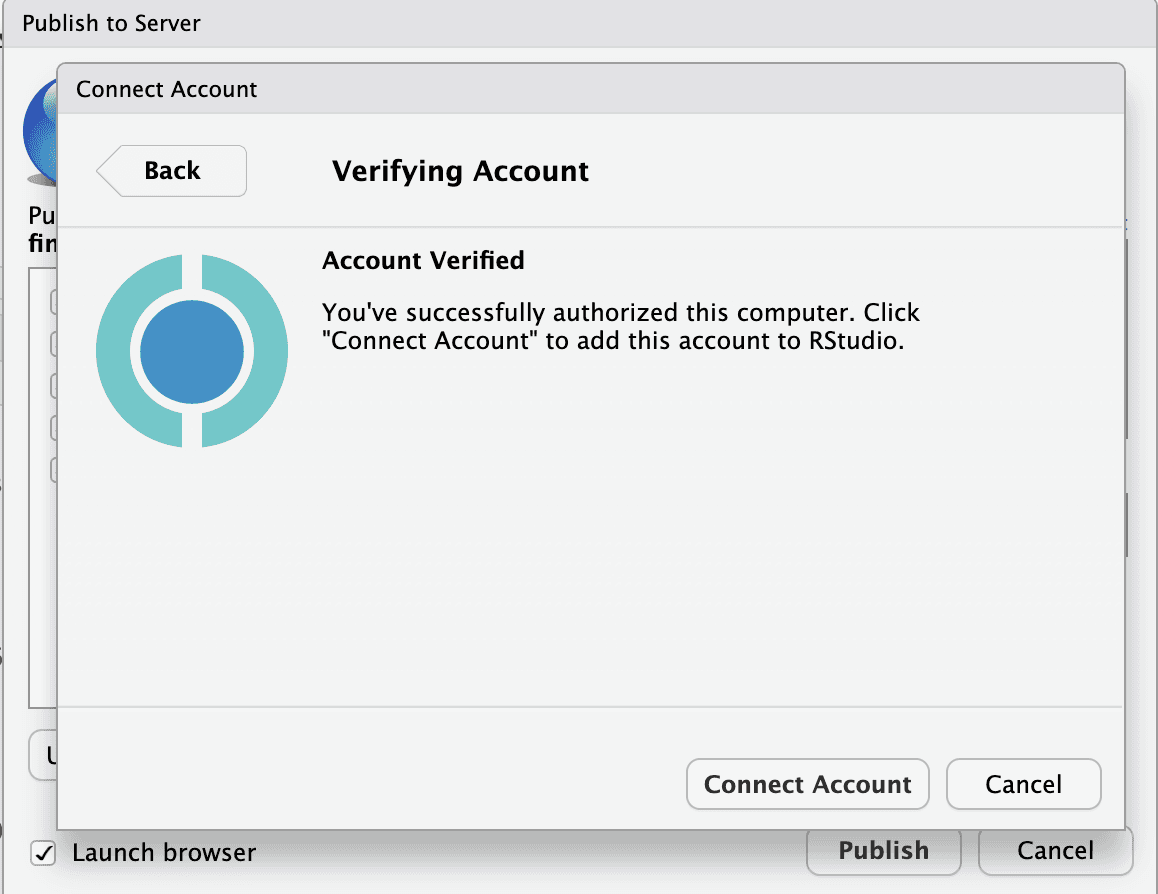
After confirming the connection in the browser, navigate back to RStudio and click Connect Account to verify the account.
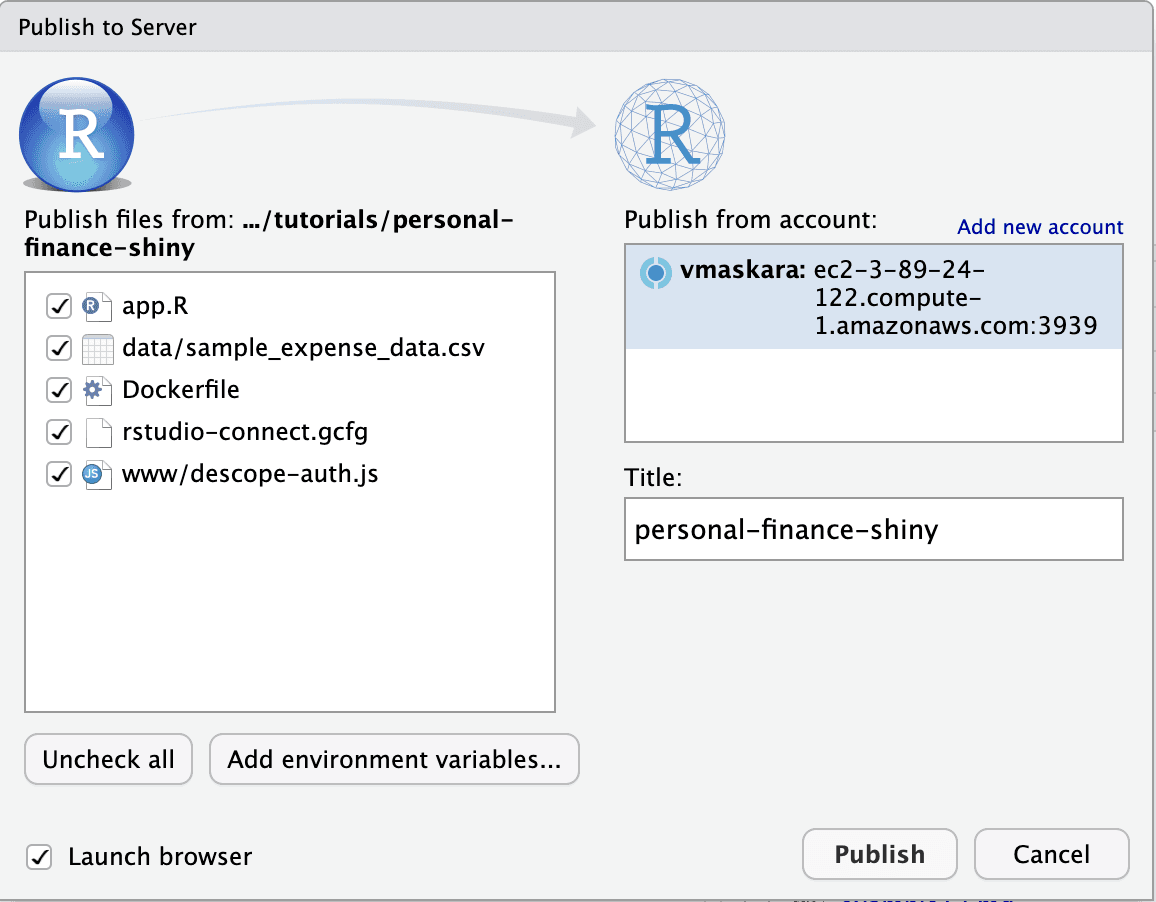
Finally, select the connected account, provide a title for the app, and click Publish to deploy the application.
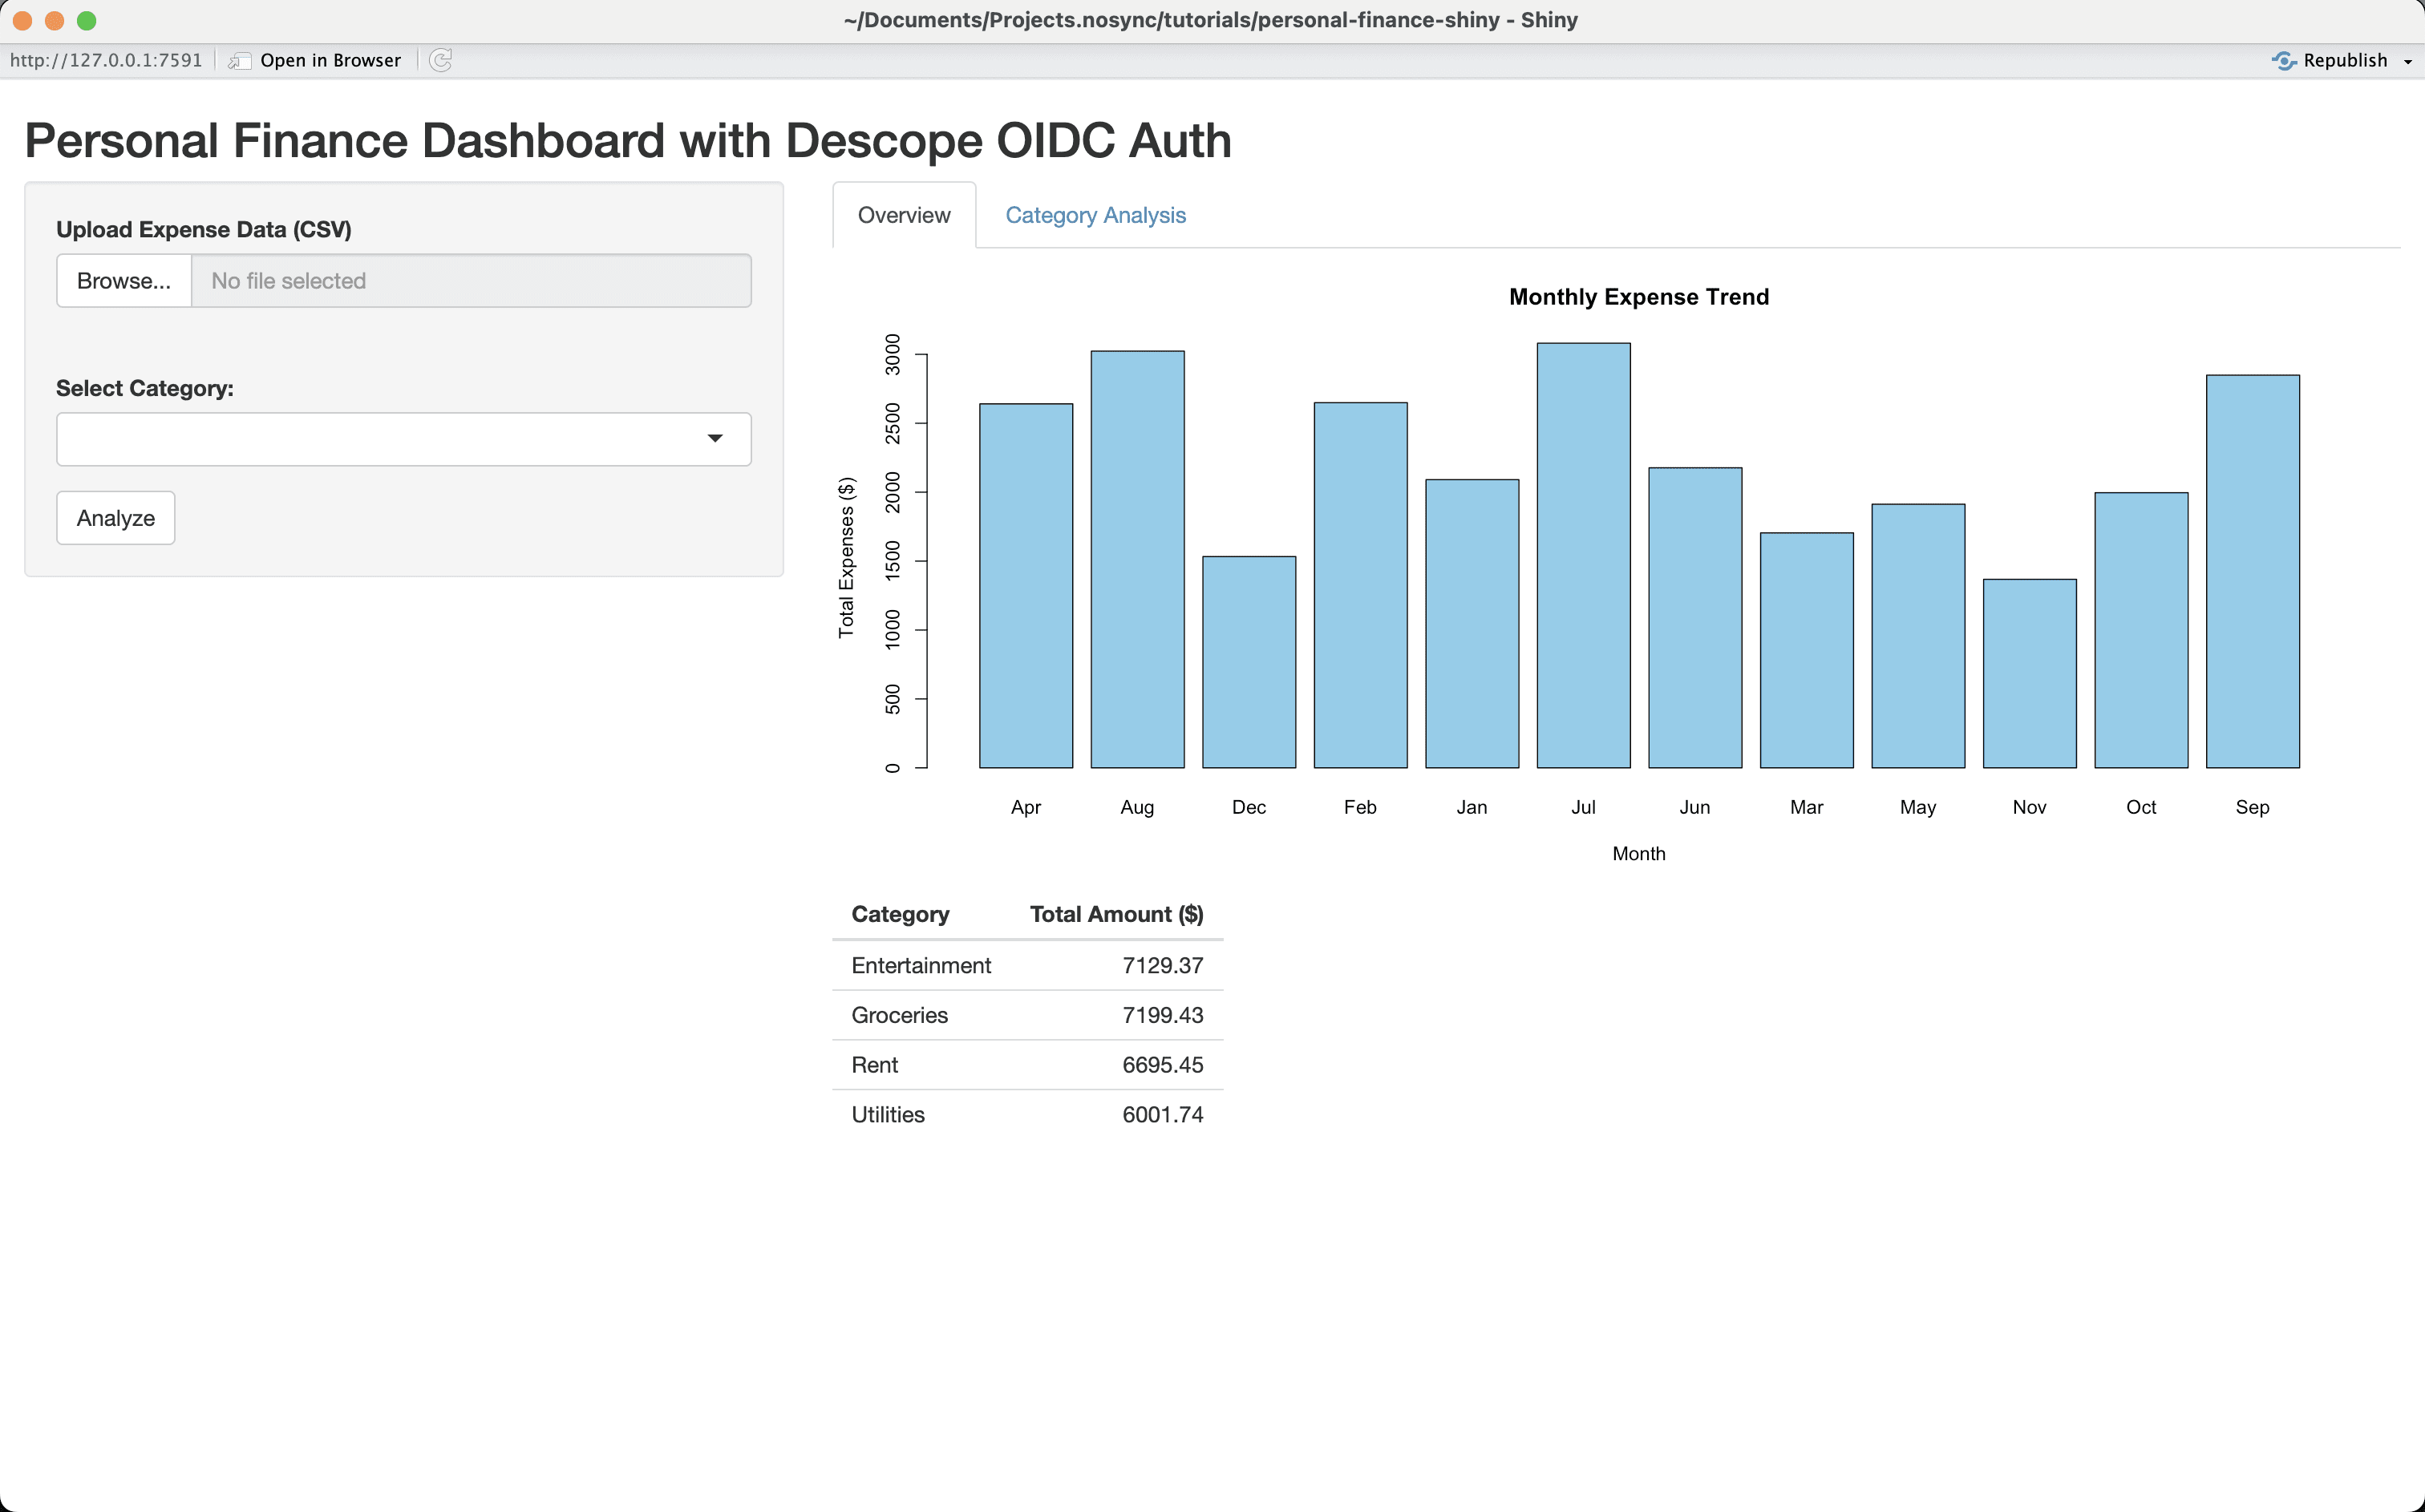
The dashboard of the app has the following components:
The left section lets you upload a CSV file containing personal expense data. The GitHub repo contains a sample CSV that you could use for testing.
When you upload the CSV file, the right section lets you view and analyze the category-wise expenses based on the uploaded data.
Implement vanilla authentication with Descope
You’ve deployed the app to Posit Connect and can now add authentication methods to access it using Descope. In this section, you’ll add auth using magic links and email OTP for simplicity. You can configure and use other authentication methods too but we will focus on magic links and OTP for this tutorial.
Descope offers a WebJS component to integrate its auth flows with HTML-based web apps. You can easily integrate the WebJS component with your Shiny app by adding a custom JavaScript widget.
In your R project, create a www/descope-auth.js file, add the following content to create a container for the Descope element, and set success and failure listeners:
// www/descope-auth.js
Shiny.addCustomMessageHandler('initDescopeAuth', function (config) {
    const wcElement = document.createElement('descope-wc');
    wcElement.setAttribute('project-id', config.projectId);
    wcElement.setAttribute('flow-id', config.flowId);
    wcElement.setAttribute('theme', config.theme);

    wcElement.addEventListener('success', function (e) {
        const user = e.detail.user;
        Shiny.setInputValue(config.successInput, user);
    });

    wcElement.addEventListener('error', function (err) {
        console.error('Authentication error:', err);
        Shiny.setInputValue(config.errorInput, err);
    });

    const container = document.getElementById(config.containerId);
    if (container) {
        container.innerHTML = ''; // Clear any previous instances
        container.appendChild(wcElement);
    }
});
Next, you need to update the UI definition to include the @descope/web-component and descope-auth.js JS scripts. Update the app.R file by replacing it with the following code snippet:
ui <- fluidPage(
  useShinyjs(), # For dynamic UI control
  tags$head(
    tags$script(src = "https://unpkg.com/@descope/web-component@3.32.0/dist/index.js"),
    tags$script(src = "descope-auth.js") # Include custom JavaScript
  ),
  titlePanel("Personal Finance Dashboard with Descope Auth"),

  # Descope Authentication UI
  div(id = "authContainer"),

  hidden(
    div(
      id = "appContent",
      sidebarLayout(
        sidebarPanel(
          fileInput("file", "Upload Expense Data (CSV)", accept = ".csv"),
          selectInput("category", "Select Category:", choices = NULL),
          actionButton("analyze", "Analyze")
        ),
        mainPanel(
          tabsetPanel(
            tabPanel("Overview", plotOutput("expenseTrend"), tableOutput("summaryTable")),
            tabPanel("Category Analysis", plotOutput("categoryTrend"), tableOutput("categoryTable"))
          )
        )
      )
    )
  )
)
Finally, you need to update the server definition to initialize the Descope web component and implement success and failure callbacks. Add the following code snippet at the start of the server section:
server <- function(input, output, session) {
  # Initialize Descope Auth
  session$sendCustomMessage("initDescopeAuth", list(
    projectId = "<YOUR_DESCOPE_PROJECT_ID>",
    flowId = "sign-up-or-in",
    theme = "light",
    containerId = "authContainer",
    successInput = "user_authenticated",
    errorInput = "auth_error"
  ))

  observeEvent(input$user_authenticated, {
    if (!is.null(input$user_authenticated)) {
      showNotification("Login successful!", type = "message")
      show("appContent")
    }
  })

  observeEvent(input$auth_error, {
    if (!is.null(input$auth_error)) {
      showNotification("Authentication failed. Please try again.", type = "error")
    }
  })
  ...
  # existing server definition
}
Replace YOUR_DESCOPE_PROJECT_ID with your Descope project ID, save the changes, and republish the app to Posit Connect using RStudio.
Test authentication using magic link
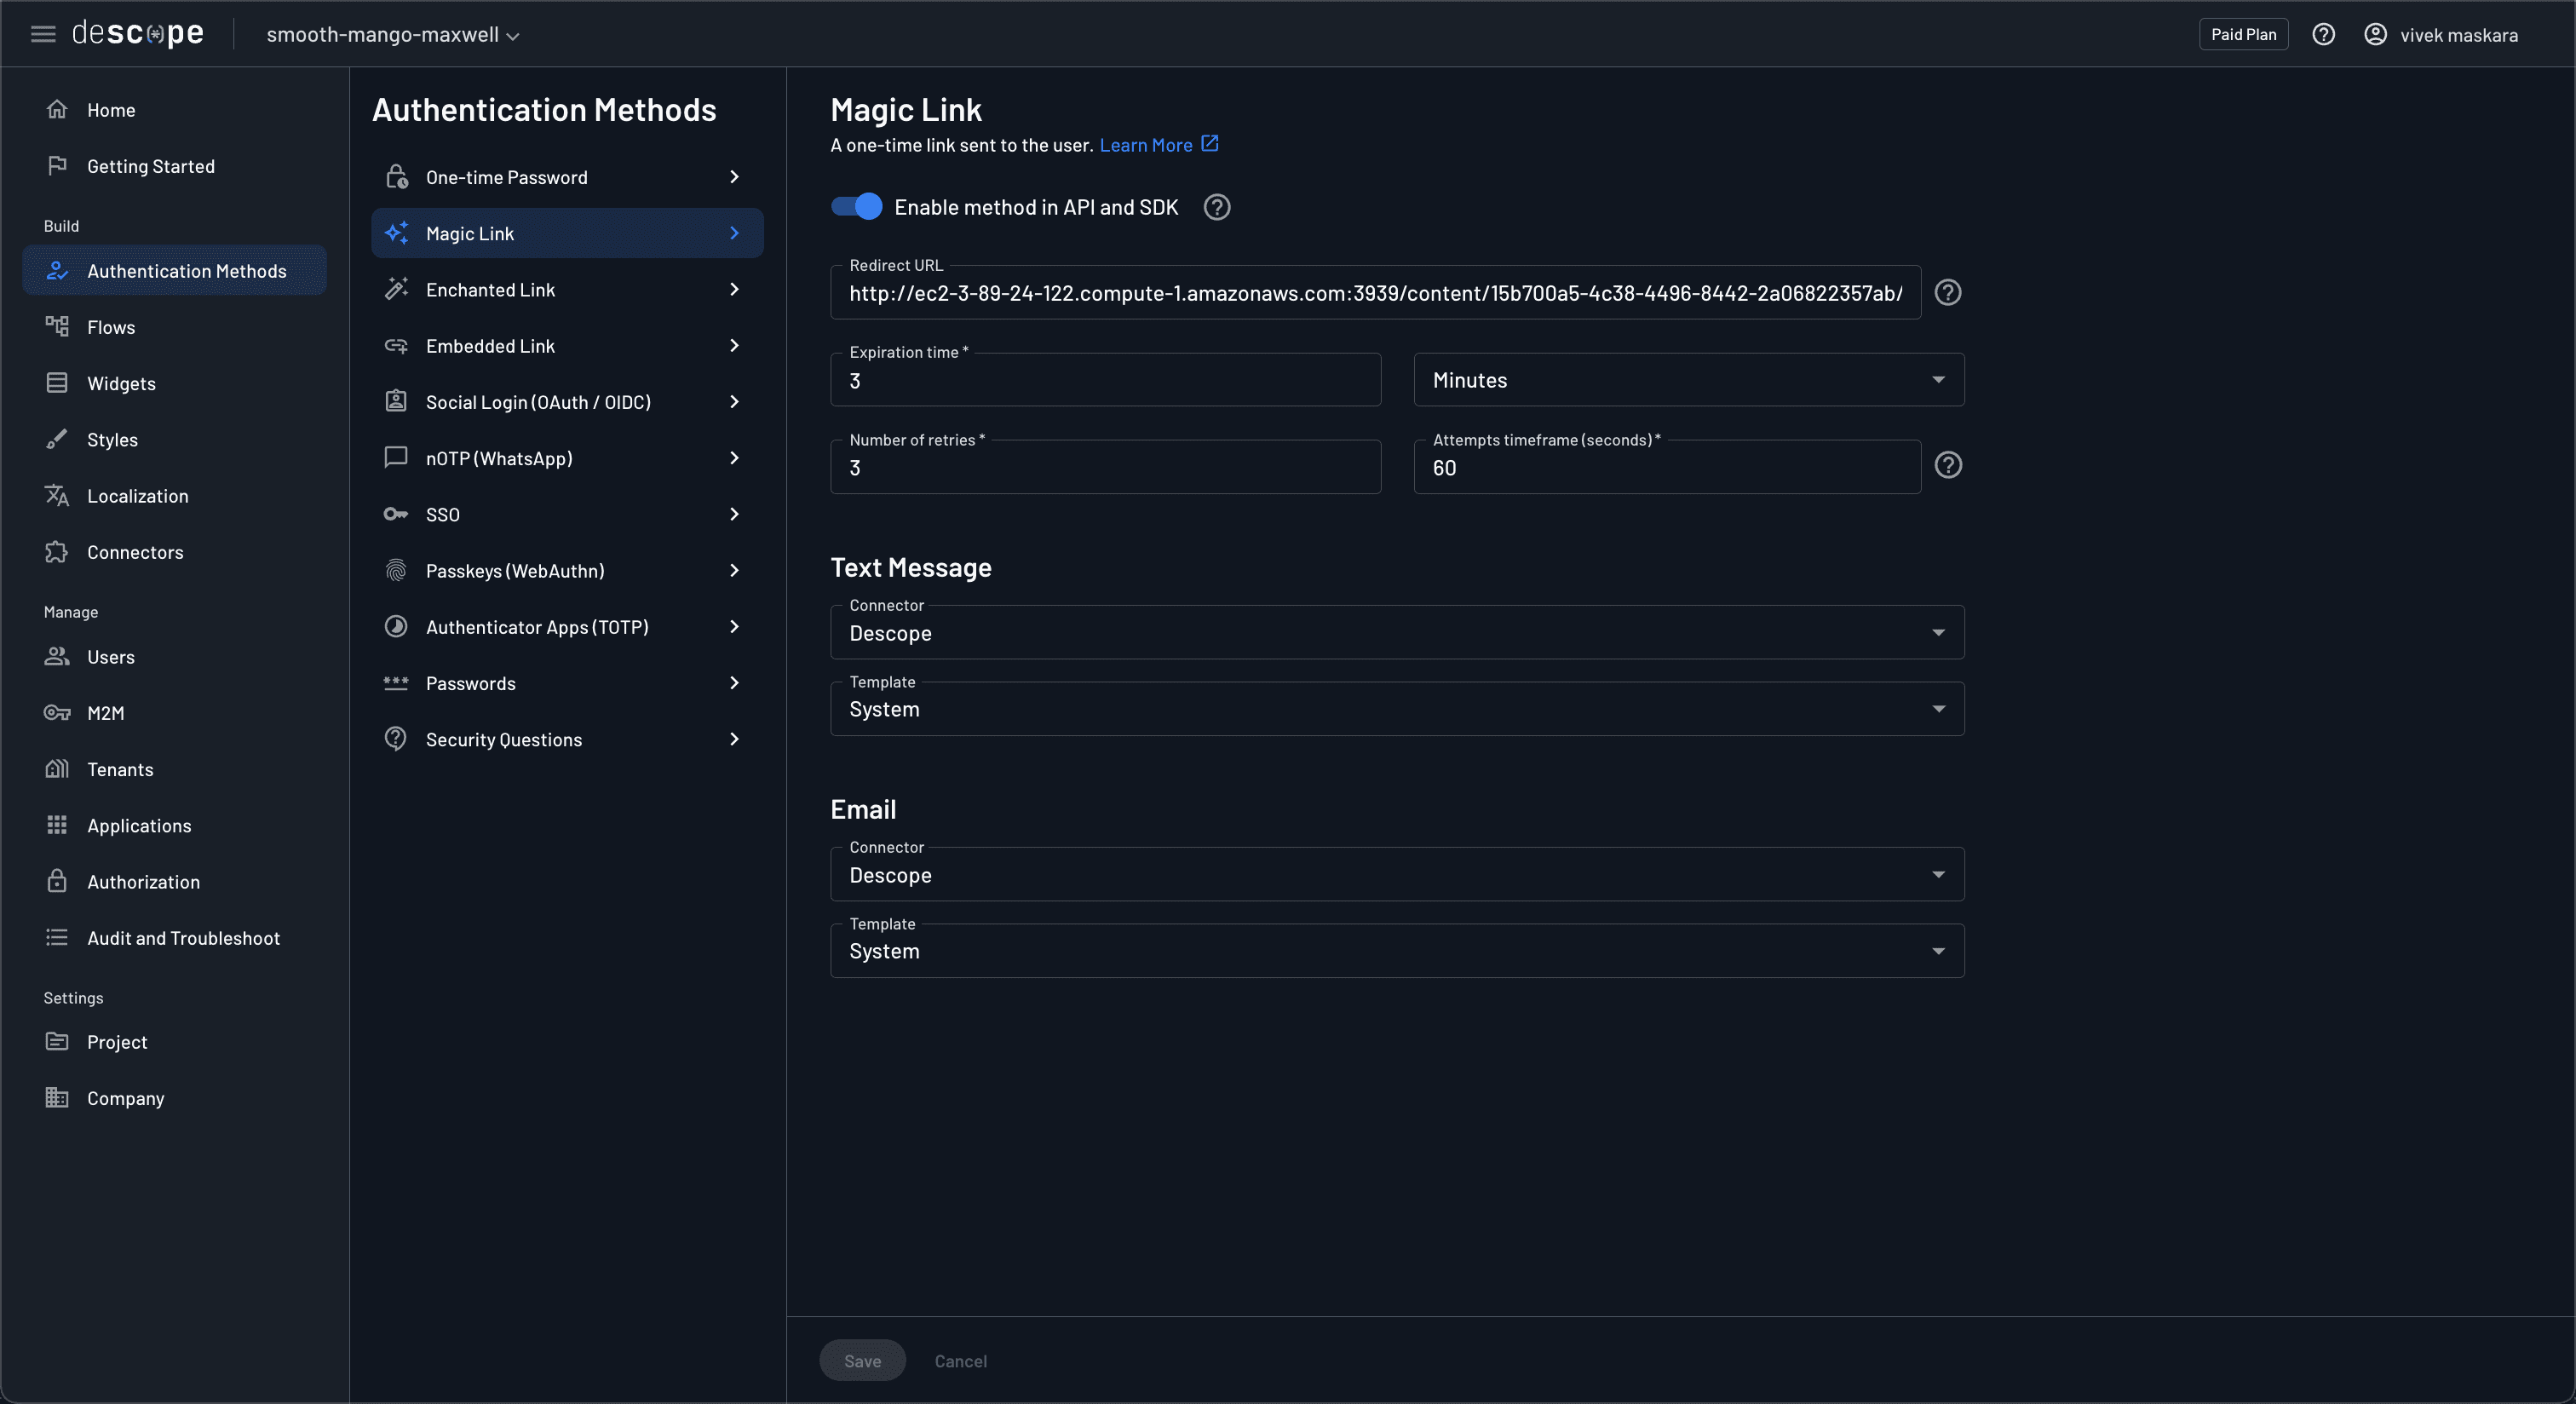
When a user clicks the magic link received in their email for authentication, Descope will validate the auth and redirect the user back to the Shiny application. For redirection to work, you need to configure the auth redirect URL in Descope. Head over to Magic link under Authentication Methods and set the Redirect URL to the published URL of your Shiny app.
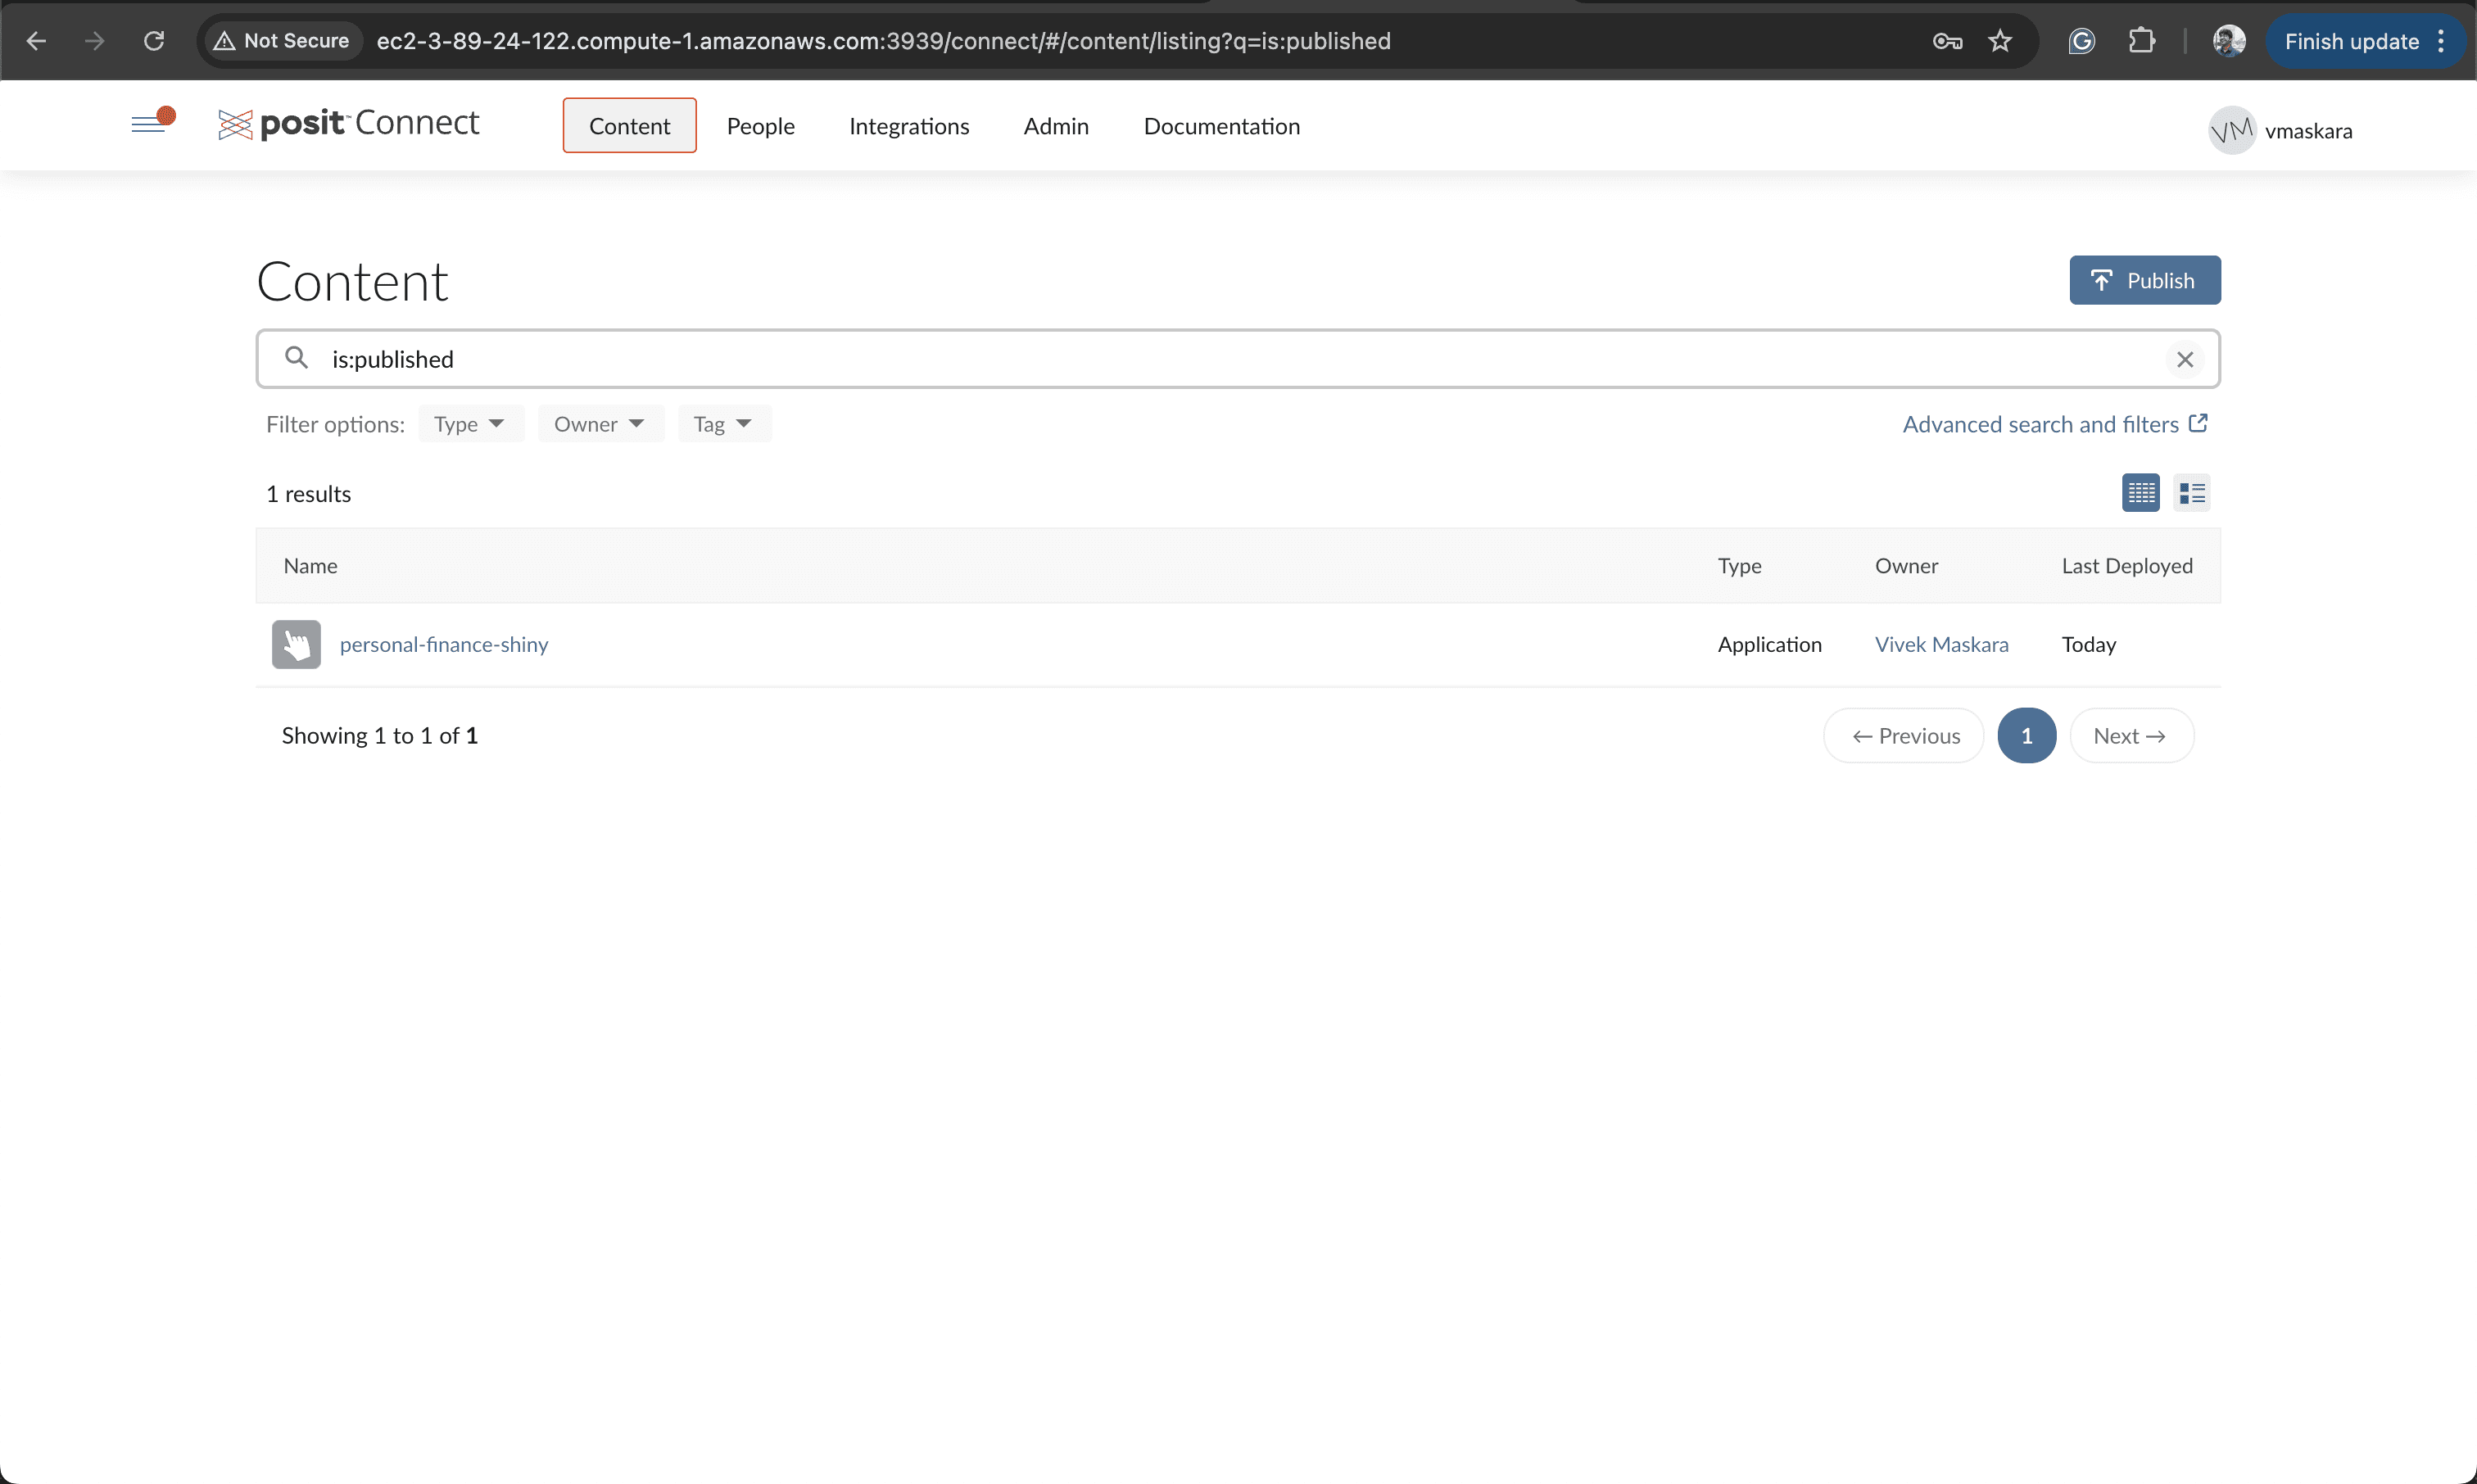
To test the authentication, open the published content under the Content tab on Posit Connect.
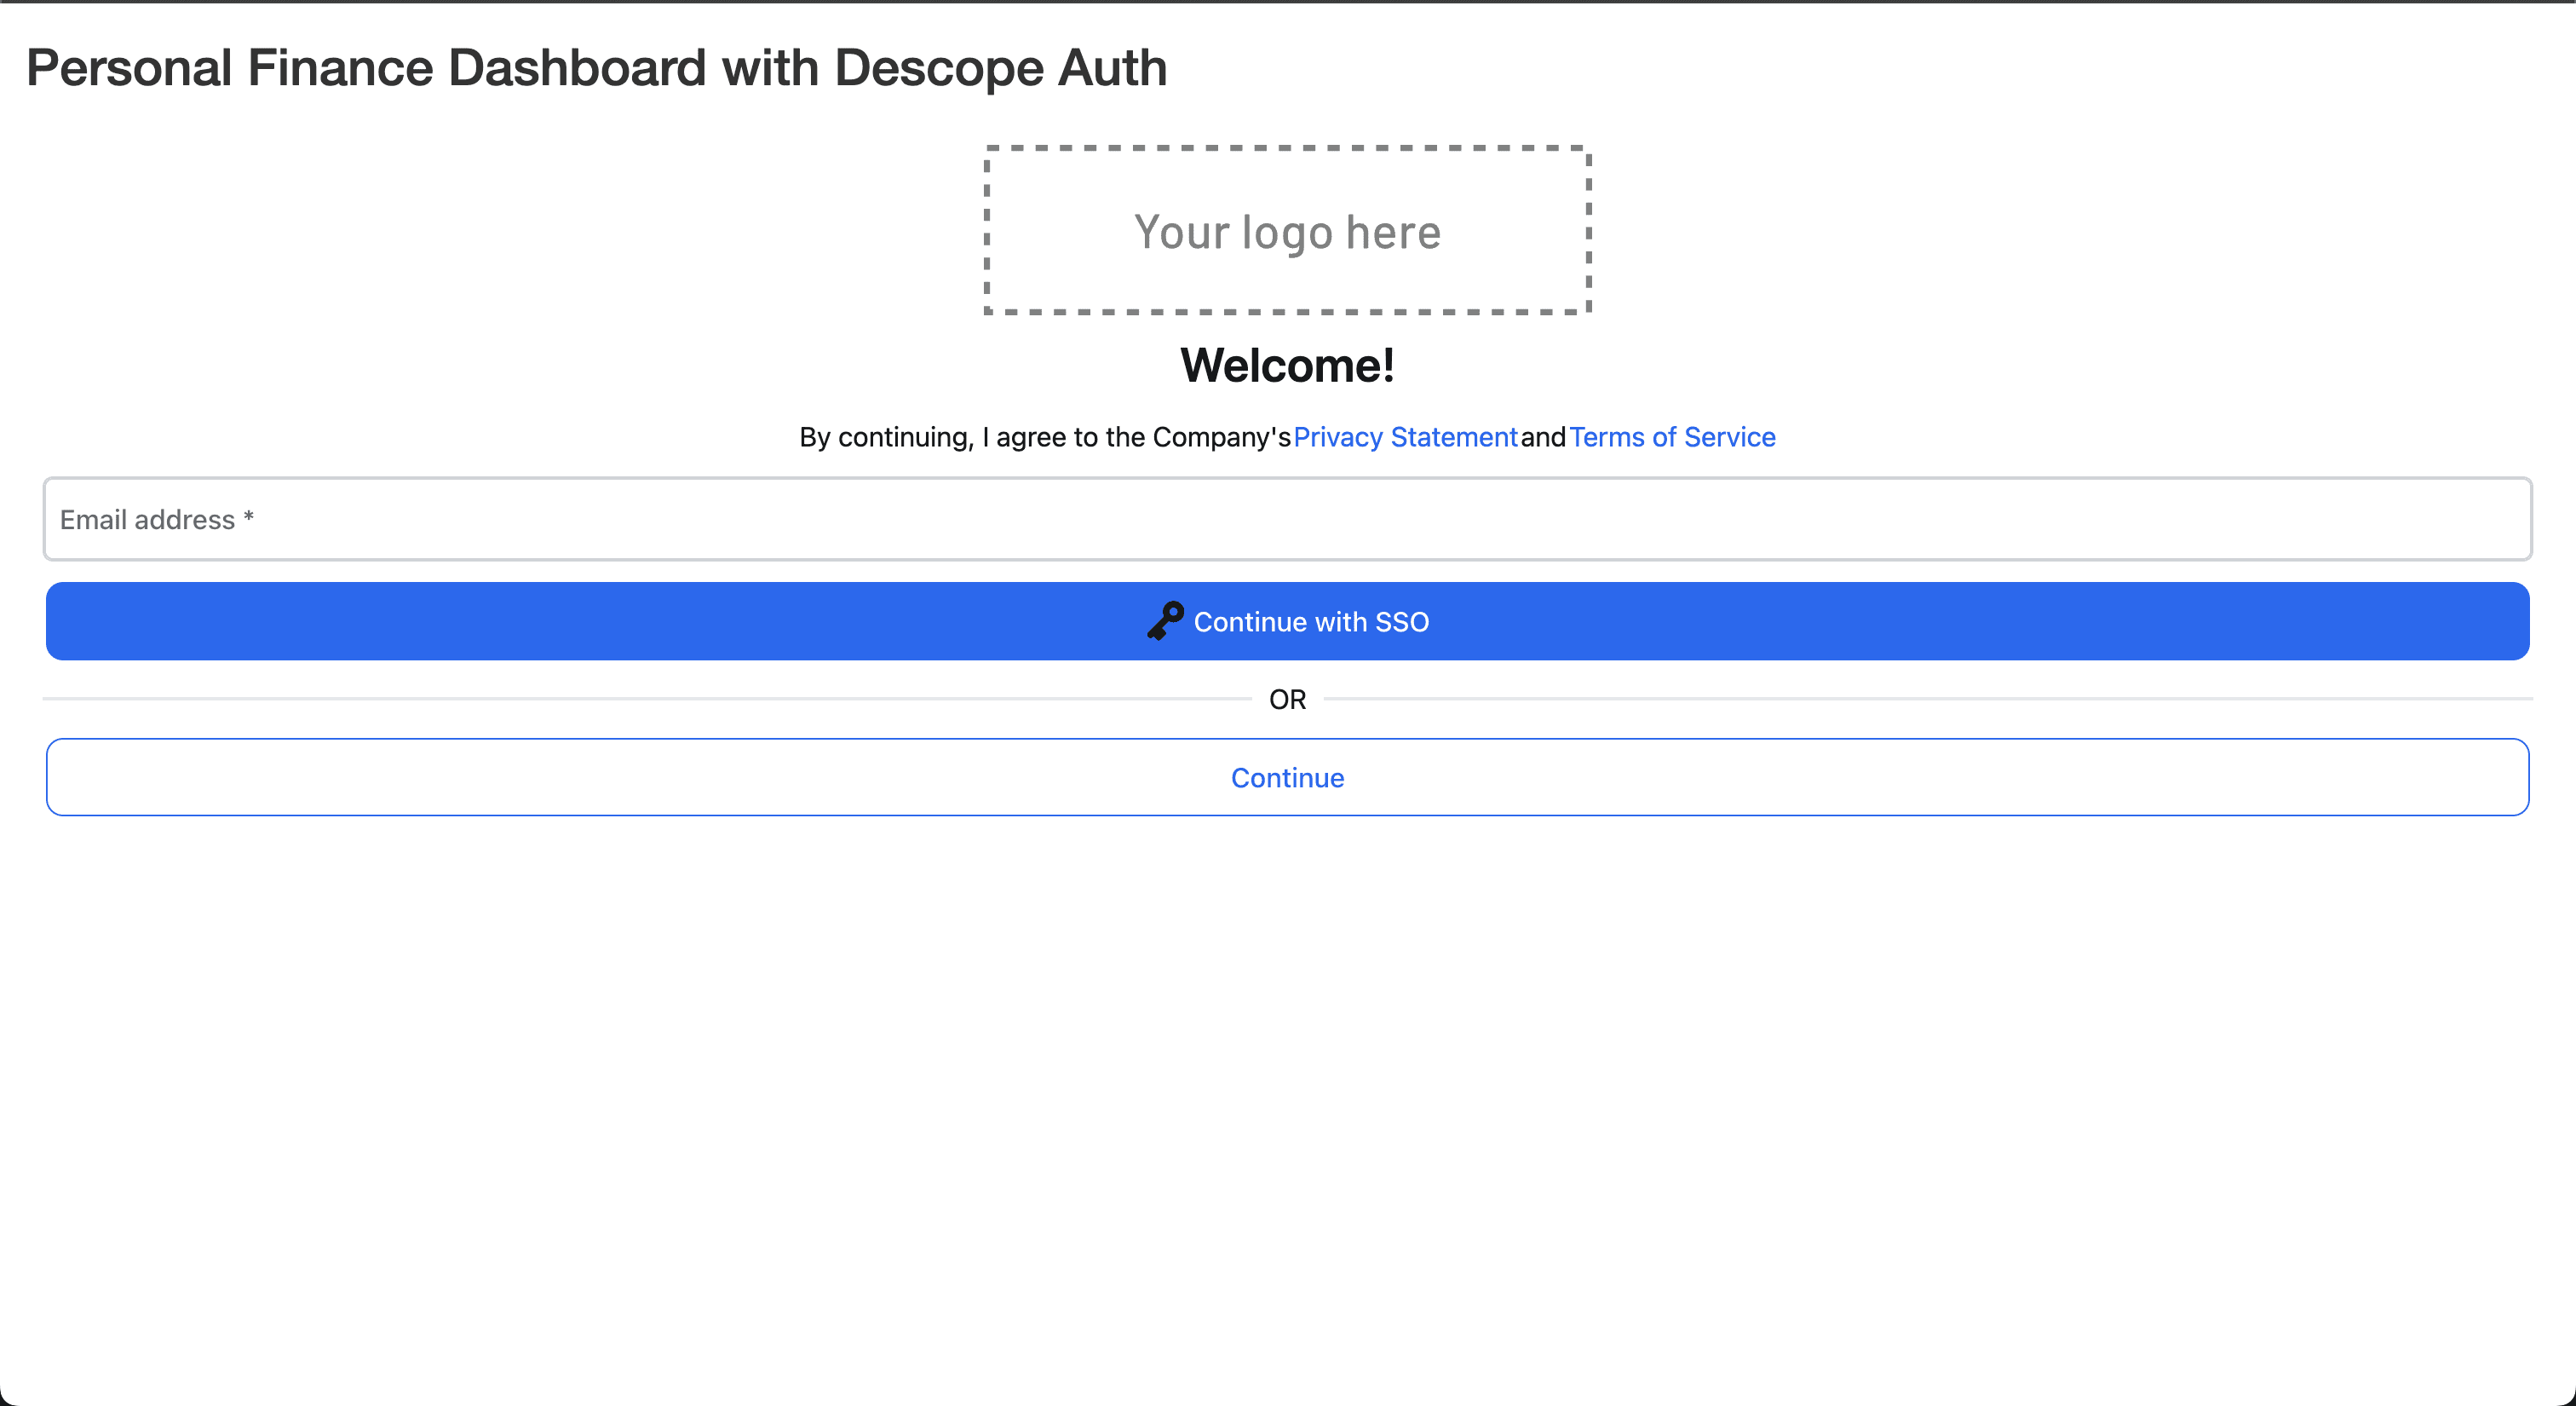
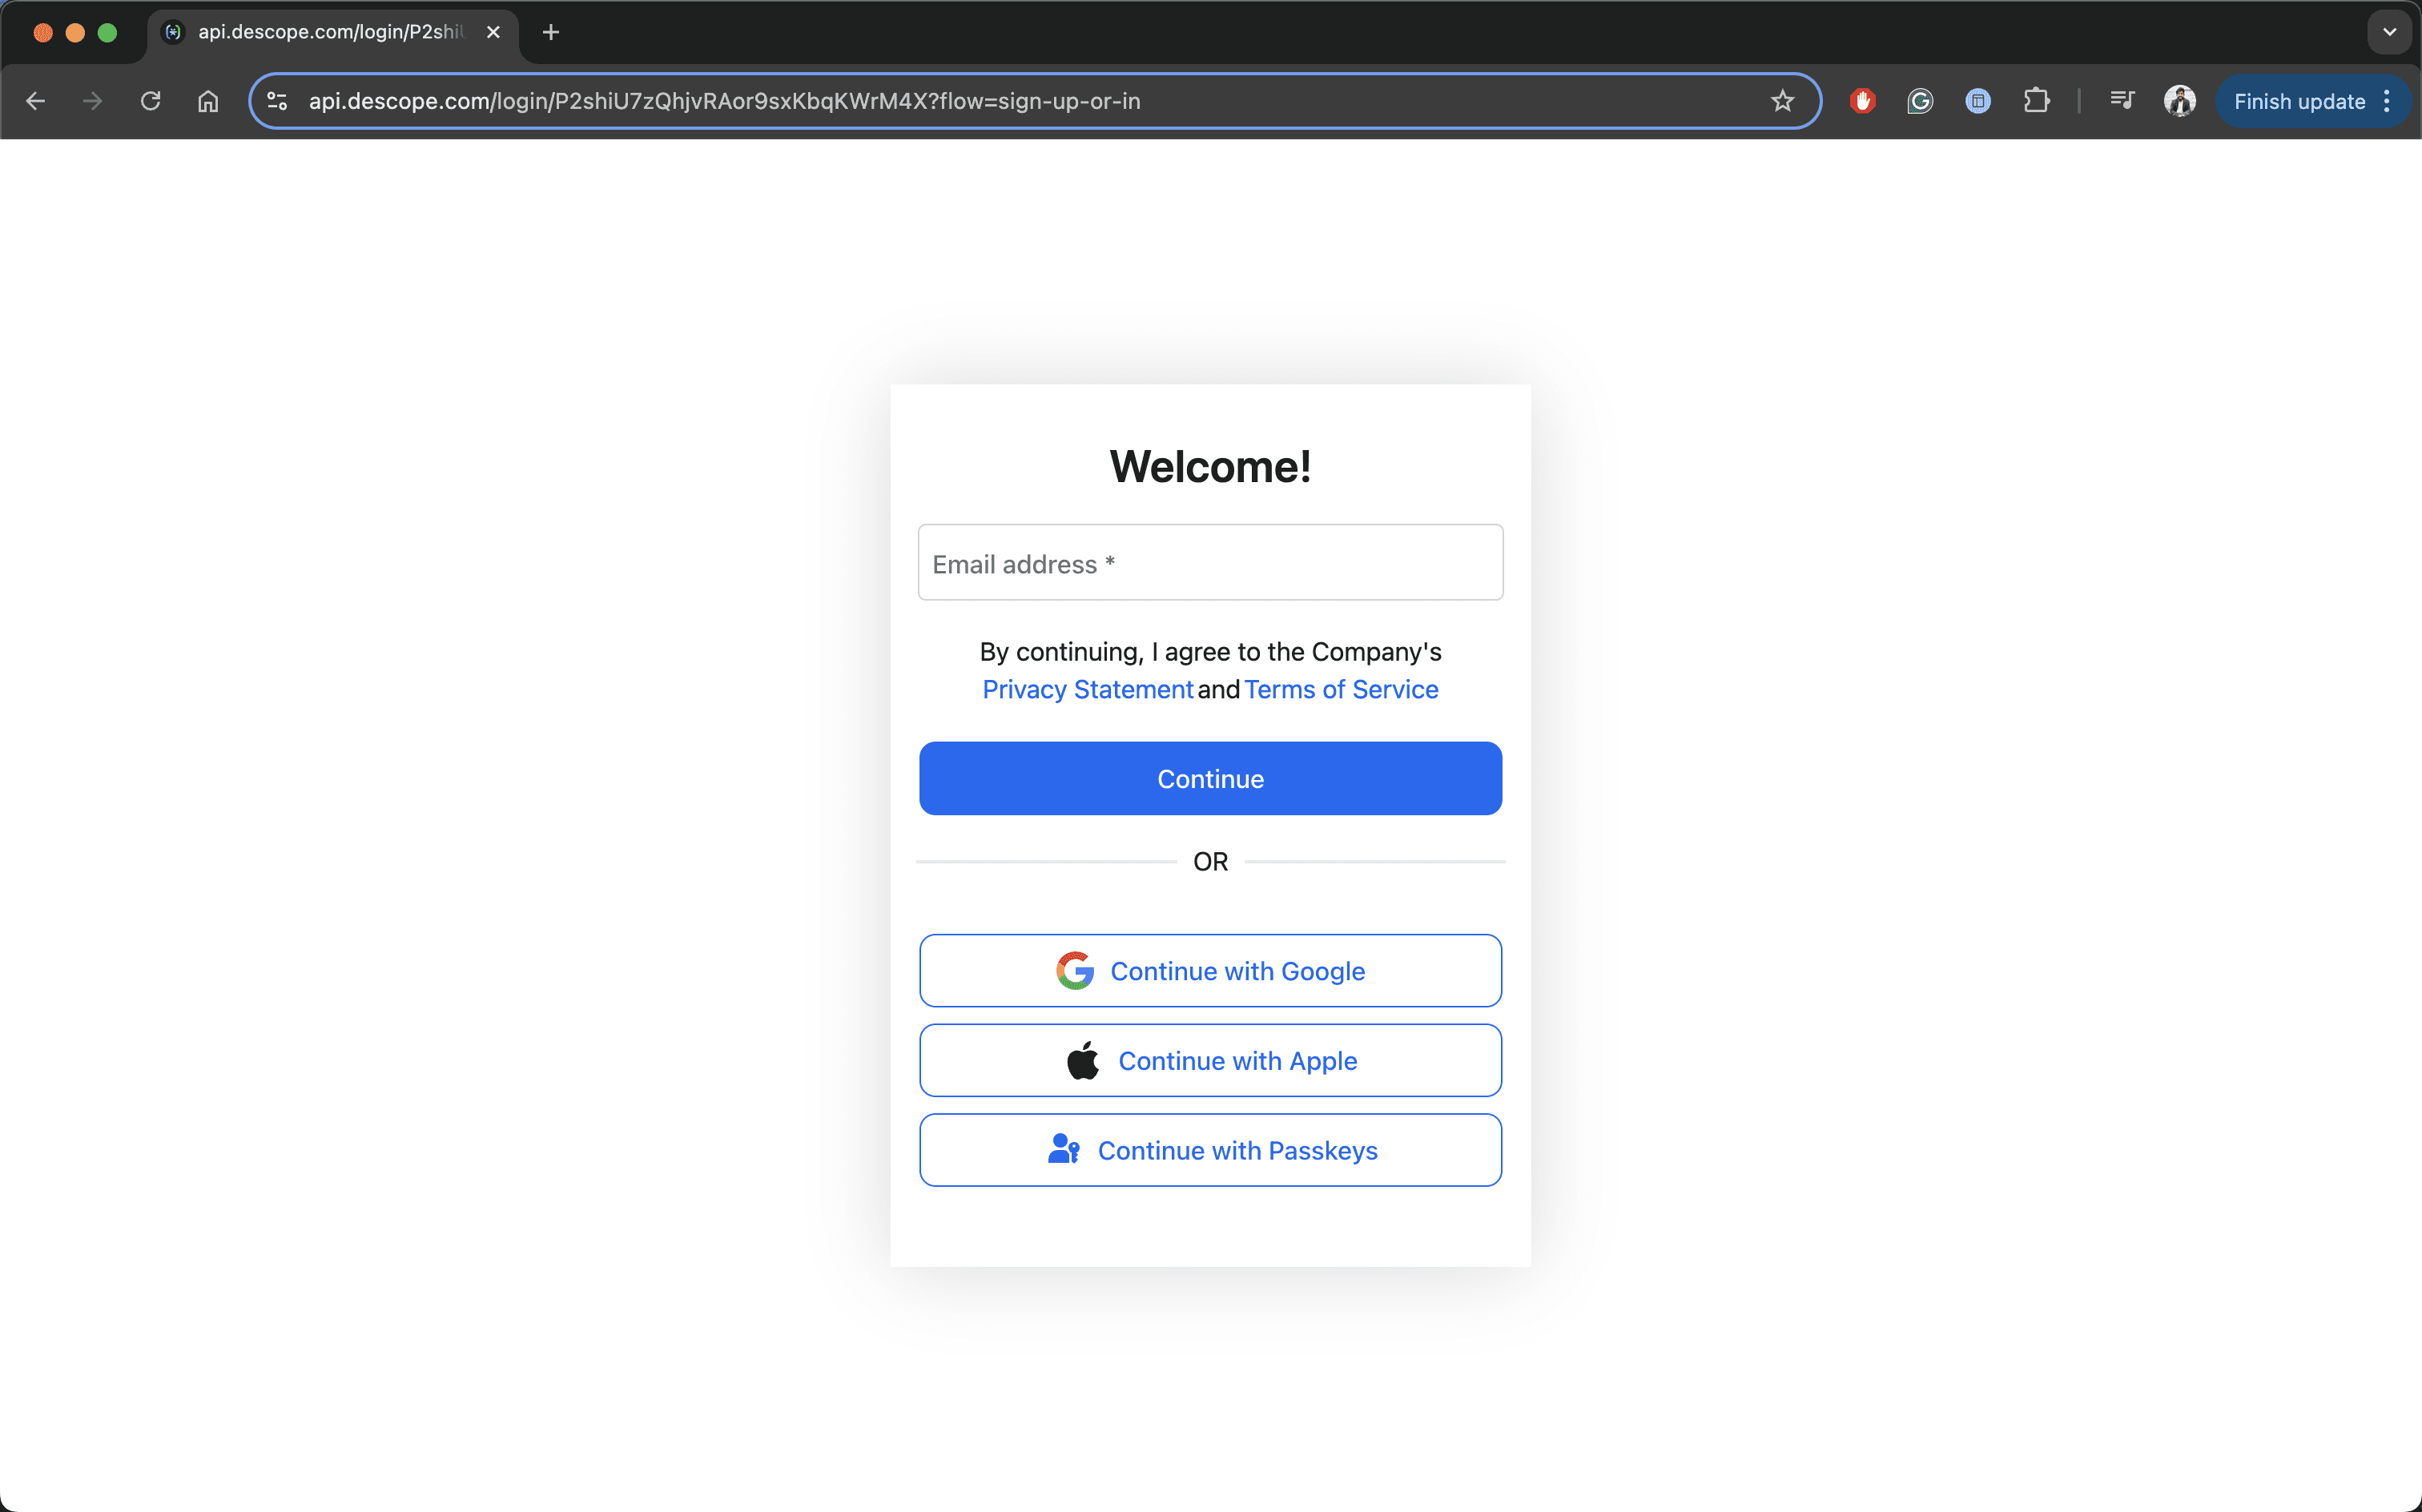
When you run the app, you’ll be redirected to the Descope auth screen. You can test the integration by entering your email ID on this screen and clicking the Continue button to log in with a magic link. You’ll receive an email with a login link, and upon clicking it, you’ll be redirected to the dashboard page of your Shiny app.
Create a new Descope tenant
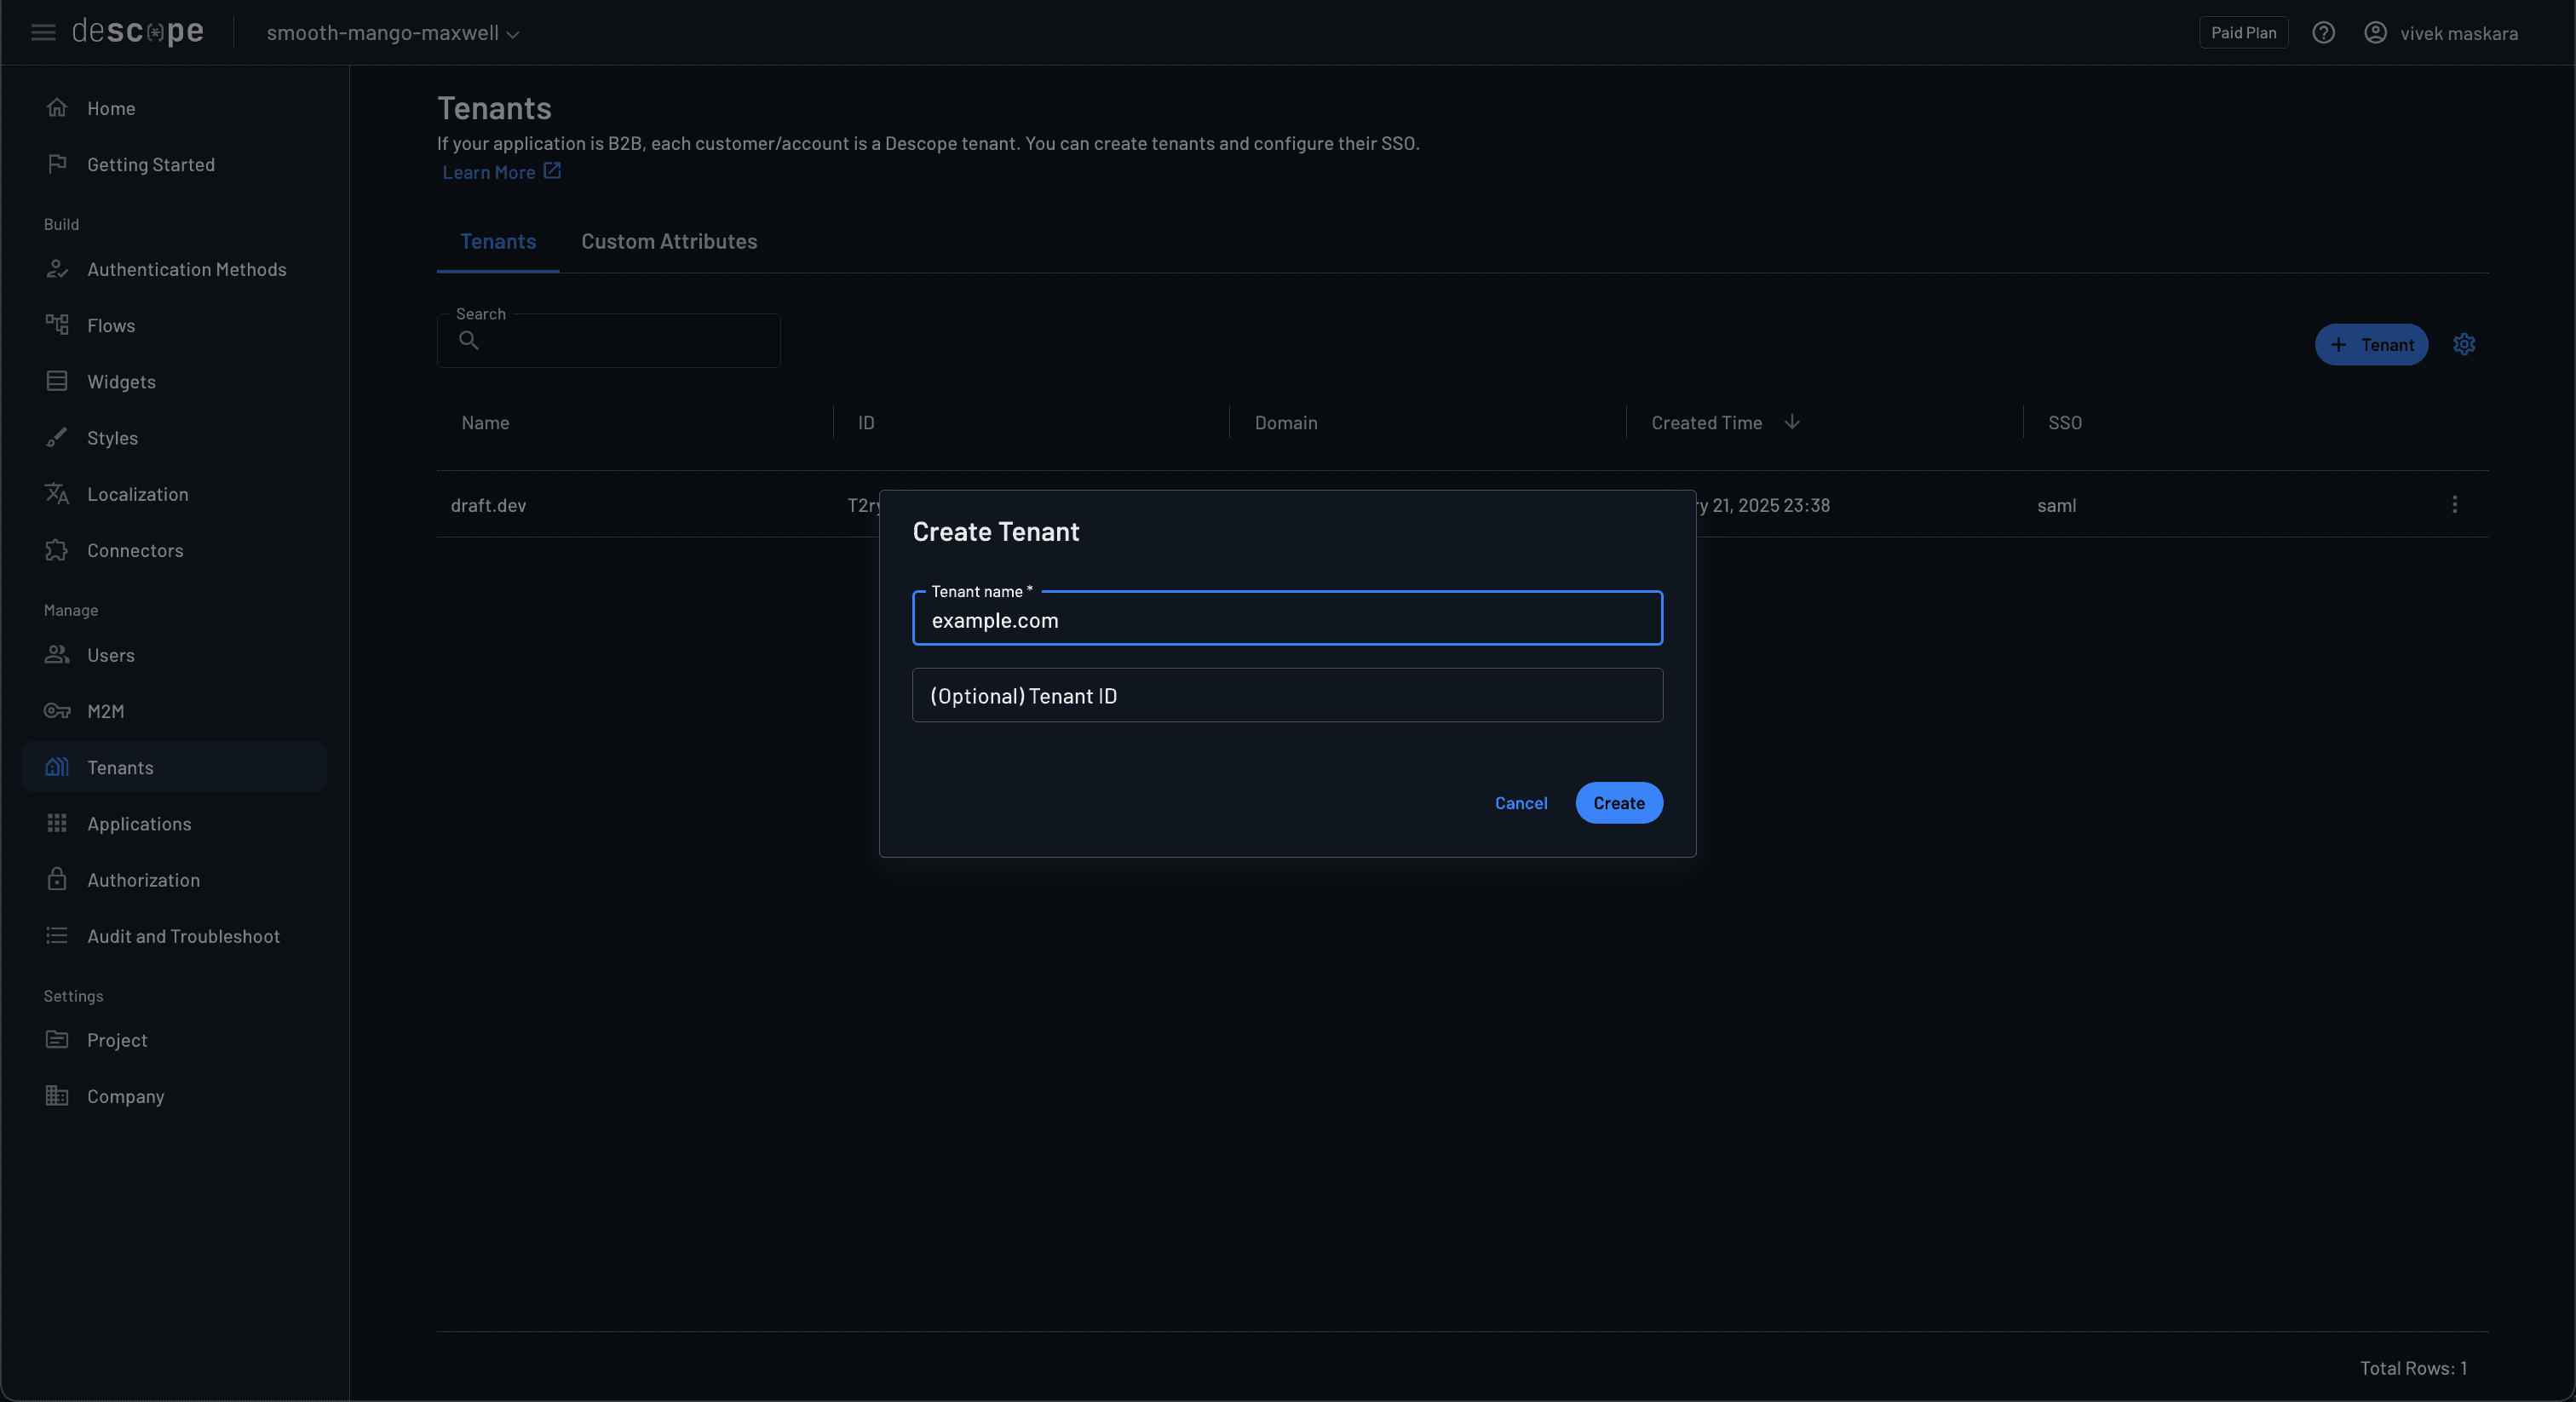
After integrating vanilla authentication, the next step is to add SSO authentication using Descope. To do this, you first need to create a Tenant. Tenants represent organizations that use your application and make it easier to group and manage users, permissions, and authentication flows within the application. In this tutorial, you’ll create a tenant for an example organization and use it to configure the SSO flow.
Navigate to Tenants and click the + Tenant button to create a new tenant.
Implement SSO with OIDC using Descope
OpenID Connect (OIDC) is an extension of the OAuth 2.0 authorization protocol that provides a standardized way for applications to request and receive identity information about users. Instead of managing user credentials for each application, OIDC SSO lets you delegate the authentication mechanism to a single trusted IdP, reducing the maintenance overhead. Once you log in, the IdP returns standardized JSON web tokens (JWTs) on login-containing information about the user’s identity. In this section, you’ll learn how to set up Descope as an OIDC IdP with Posit Connect.
Create a Descope OIDC application in a separate project
The Descope OIDC application acts as a federated IdP for the users. Based on your needs, Descope can act as a Service Provider (SP) or an IdP. An SP is an entity that initiates an authentication request to an IdP, which verifies the user’s identity. After authentication, the SP processes the response from the IdP to determine whether the user should be granted access to the application. In the previous section, you configured the Descope project as an SP entity for auth and SSO.
You’ll now create an OIDC application within Descope to turn it into an IdP, and subsequently, you’ll also integrate it with your authentication flow. Since you’re using Descope for both SP and IdP, to avoid cyclic dependency, both these entities should be configured in separate Descope projects.
First, use the Descope portal to create a new project to host the OIDC application. This tutorial sets the project name as descope-shiny-auth-sso.

You also need to create an OIDC application under the newly created project. Navigate to Applications and click the + Application button to register Generic OIDC Application.
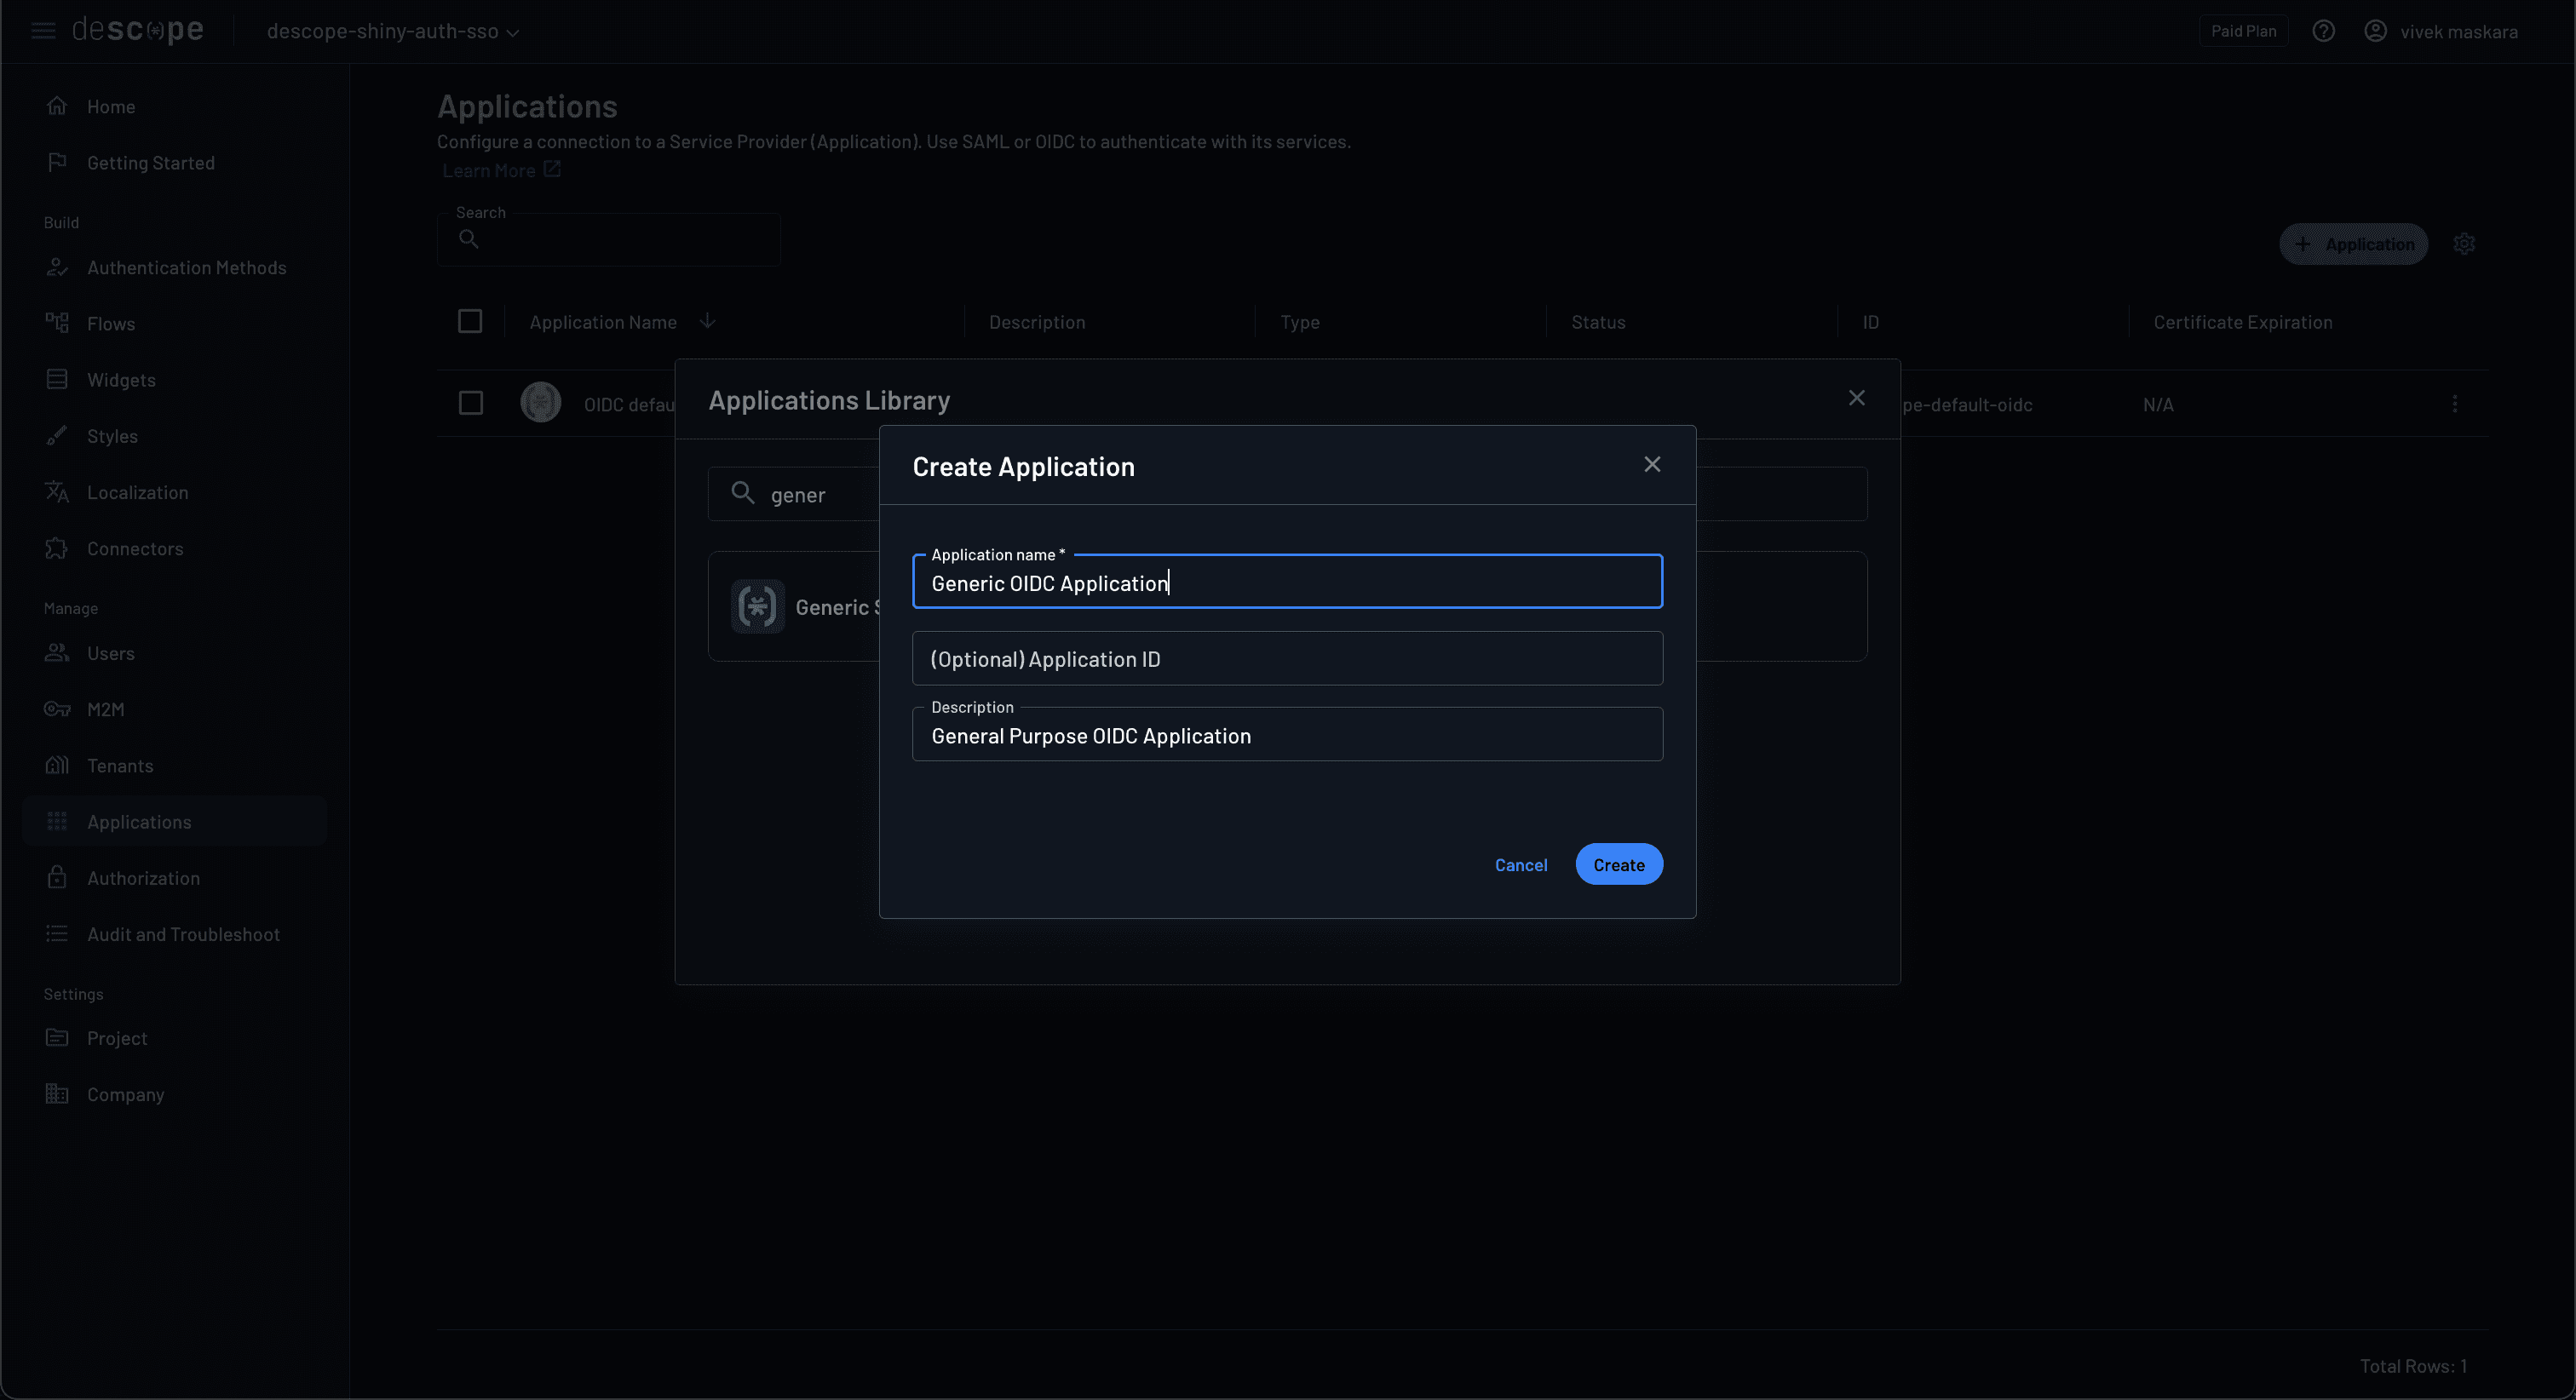
Click Create to create the OIDC application and note the Descope OIDC endpoint configuration, as you’ll need it while configuring the SSO tenant in the original project.
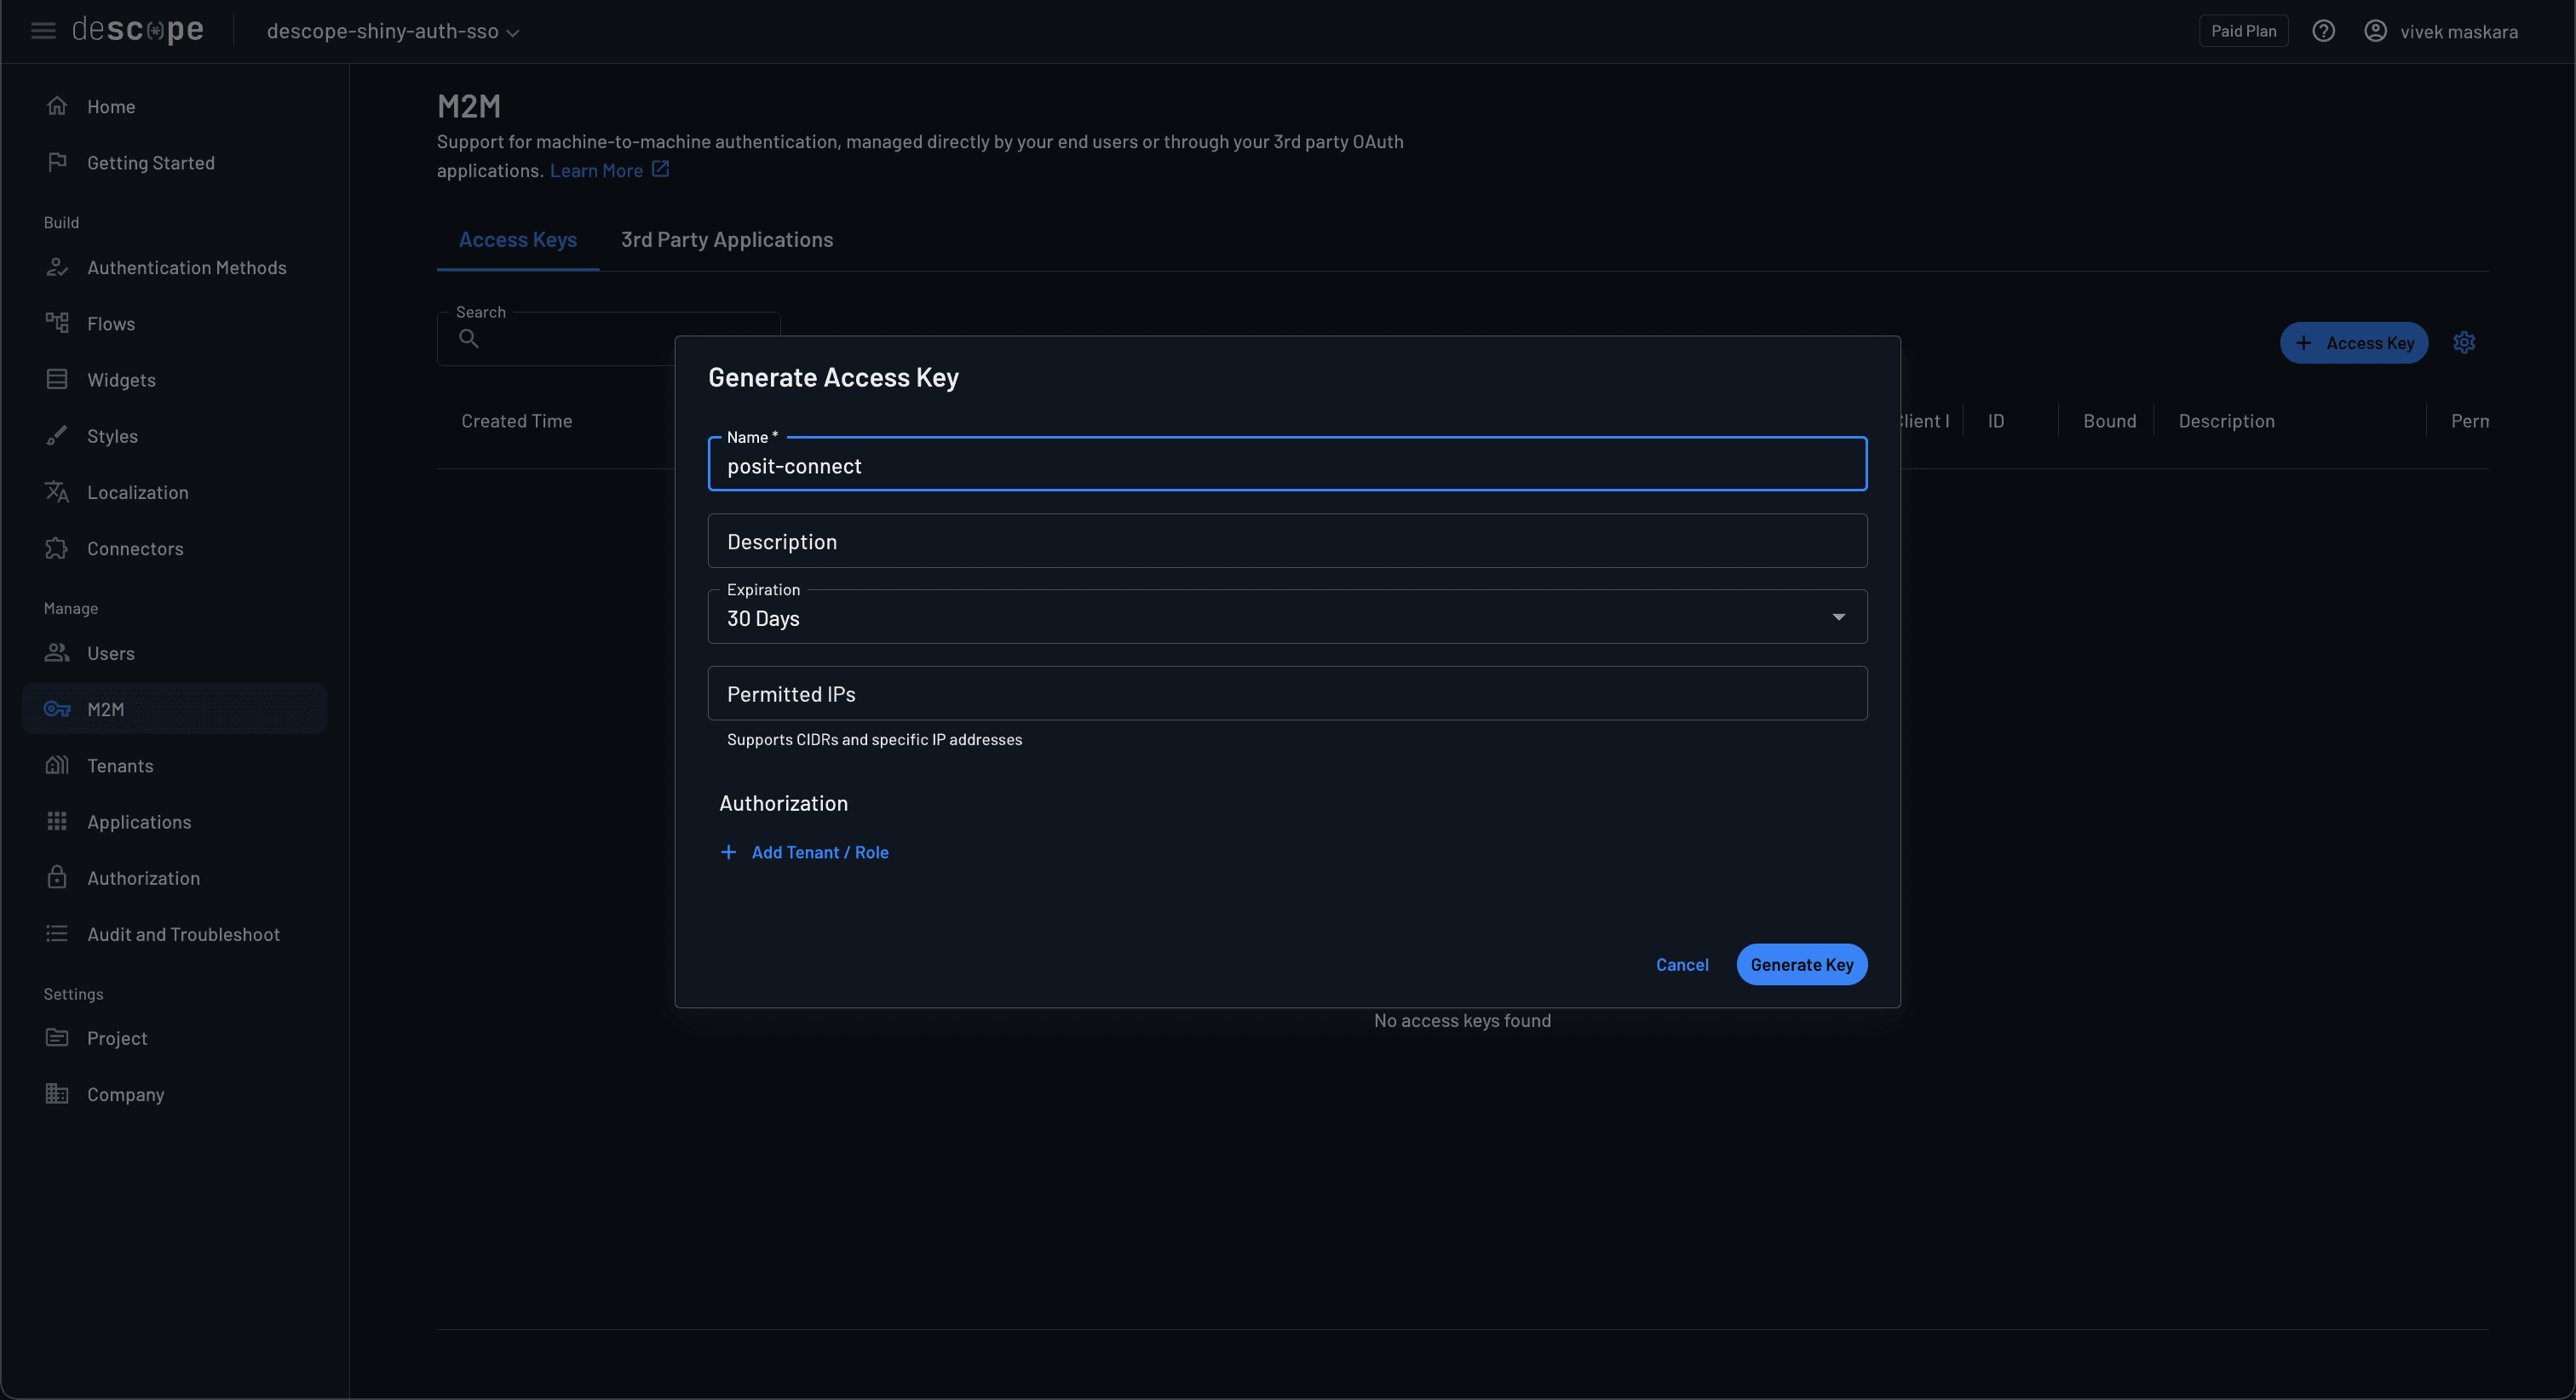
To configure OAuth with Posit Connect, you’ll also need to create a new client secret. Navigate to the Access Keys page and click +Access key to create a new access key.
Configure Descope tenant to use OIDC SSO
To integrate the OIDC application with the authentication flow, you need to configure SSO under the example.com tenant you created under the original Descope SP project. A tenant lets you configure an authentication method using an OIDC or SAML application. This section discusses how to configure SSO using an OIDC application, and in a later section, you’ll learn how to configure SSO using SAML.
Switch back to the Descope SP project and navigate to Tenants, and select the example.com tenant you created earlier. Choose Authentication Methods and select OIDC as the SSO authentication protocol. Make the following changes to configure SSO:
Under Tenant Details, add
example.comto the SSO domains.Update the SSO configuration by adding the following values:
Provider name: Add a value for the provider. For example, the tutorial uses Descope as the provider name.
Client ID: Use the Descope project ID for the descope-shiny-auth-sso project.
Client Secret: Use the access key that you created above.
Scopes: It sets the permissions for the access level that will be granted to the authenticated user. Add
openid,profile, andemailas the scopes.Issuer: Use the Issuer value from the OIDC application you created in the previous step.
Authorization Endpoint: Use the Authorization URL value from the OIDC application.
Token Endpoint: Use the Access Token URL value from the OIDC application.
User Info Endpoint: Use the Access Token URL from the OIDC application by replacing
/tokenwith/userinfo.
Finally, Save the changes for them to take effect.
Configure SSO redirect URL
You also need to configure the Posit Connect application URL as an SSO redirect URL. Since the Shiny app is already configured to use Descope, it doesn’t require any new changes. Grab the application URL, navigate to SSO under Authentication methods, and set it as the Redirect URL.
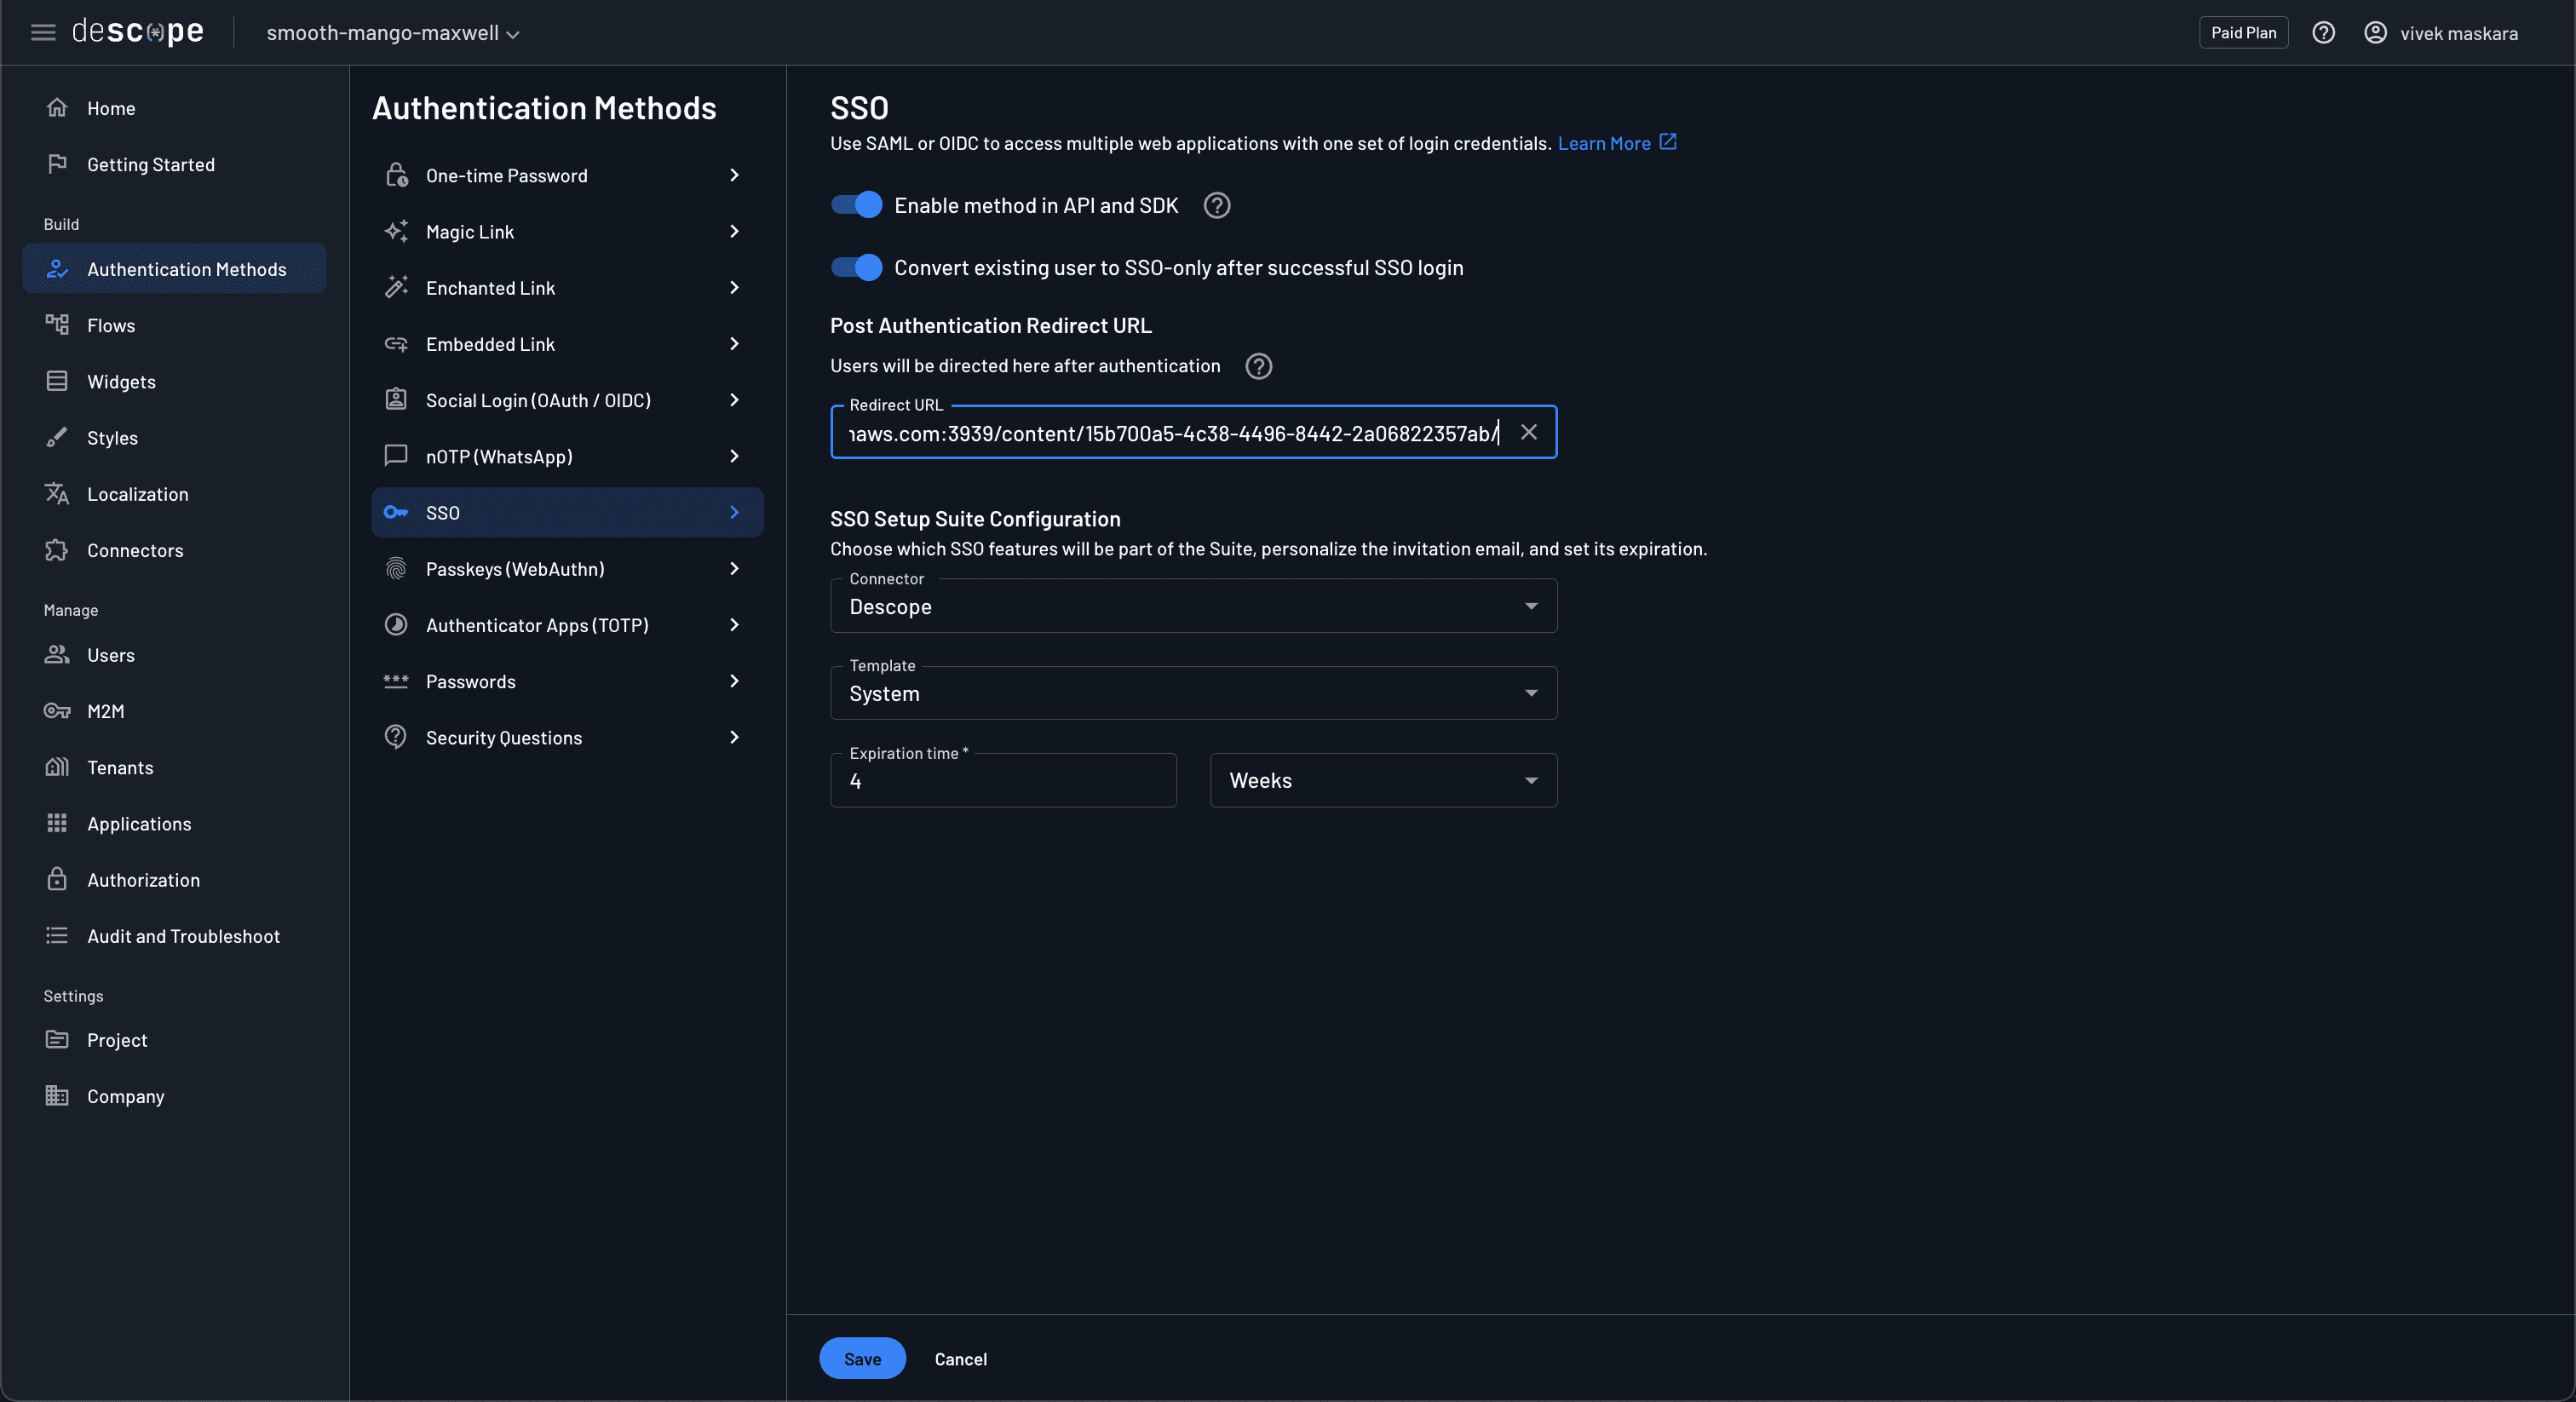
Note that the SSO redirect URL needs to be configured in the Descope SP project.
Test the OIDC SSO integration
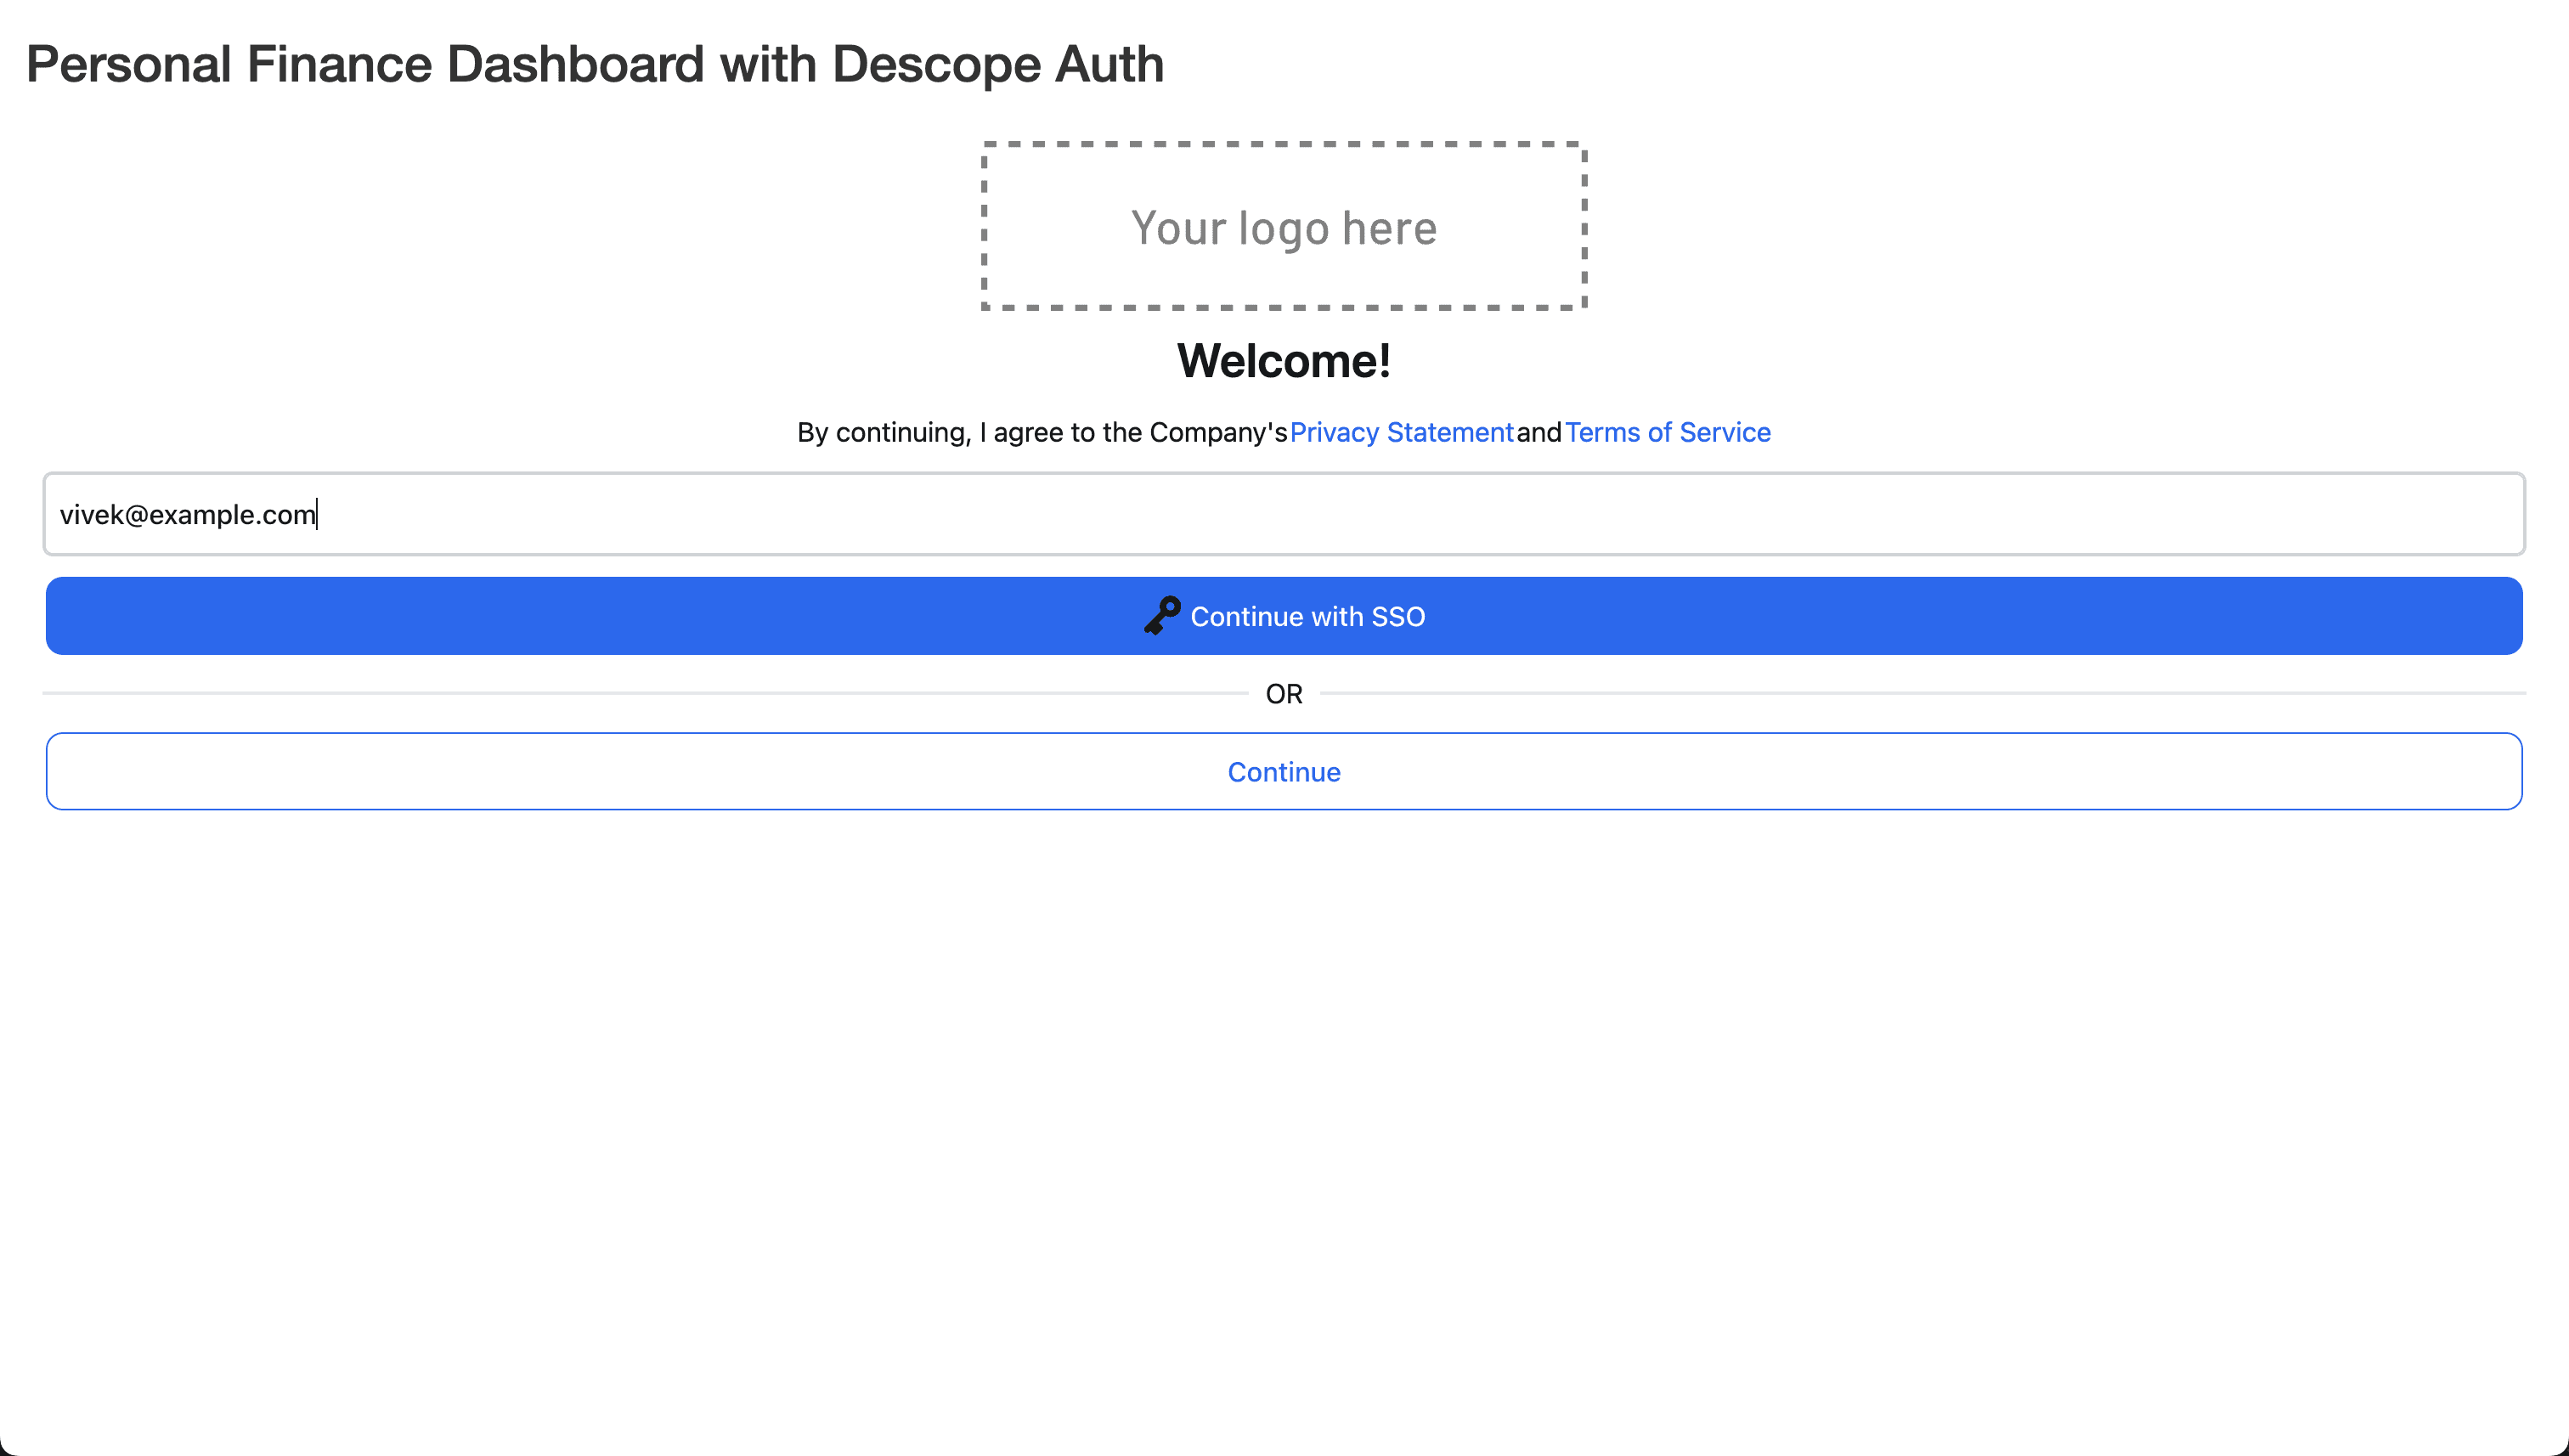
Finally, to test the integration, open the application in the browser, enter your email ID, and click on Continue with SSO to initiate the SSO flow. Note that the email ID should use example.com for SSO to work since you didn’t configure any other domains in Descope.
You’ll be redirected to the IdP login screen, which, in this case, is hosted by the descope-shiny-auth-sso Descope project. You can verify this by comparing the project ID in the address bar with the Descope project ID.
For testing, complete the login using one of the social login options or the magic link, and upon authentication, you’ll be redirected back to the Shiny dashboard.
Implement SAML SSO with Descope
SAML SSO is an XML-based open authentication standard that lets users log in to multiple web applications using a single set of credentials. SAML is a mature identity federation standard and is widely supported by legacy or internal enterprise applications. It serves a similar purpose to OIDC, but instead of JSON, it uses XML during authentication or authorization requests between the IdP and the SPs.
In this section, you’ll learn how to configure SAML SSO with Descope using a mock SAML application and configuring the tenant to use SAML SSO.
Configure mock SAML tenant for testing
As you learned in the OIDC SSO section, Descope can act as both SP and IdP as needed, but this tutorial uses Descope as an SP and Mock SAML as an IdP. Mock SAML is a SAML 2.0 IdP that can test SAML SSO integrations quickly. If you don’t have a SAML SP set up, you can use this tool to test your Descope SAML integration.
Navigate to Tenants and select the example.com tenant you created earlier. Choose Authentication Methods and change the SSO authentication protocol from OIDC to SAML. Make the following changes to configure SAML SSO:
Under Tenant Details, add
example.comto the SSO domains.Update the SSO configuration, select the Retrieve the connection details dynamically option, and set the Metadata URL for IdP to the following:
https://mocksaml.com/api/saml/metadataNote: If you have a SAML SP setup, you can set the Descope Metadata (URL) of the SAML application instead of a Mock SAML URL.
Test the SAML SSO integration
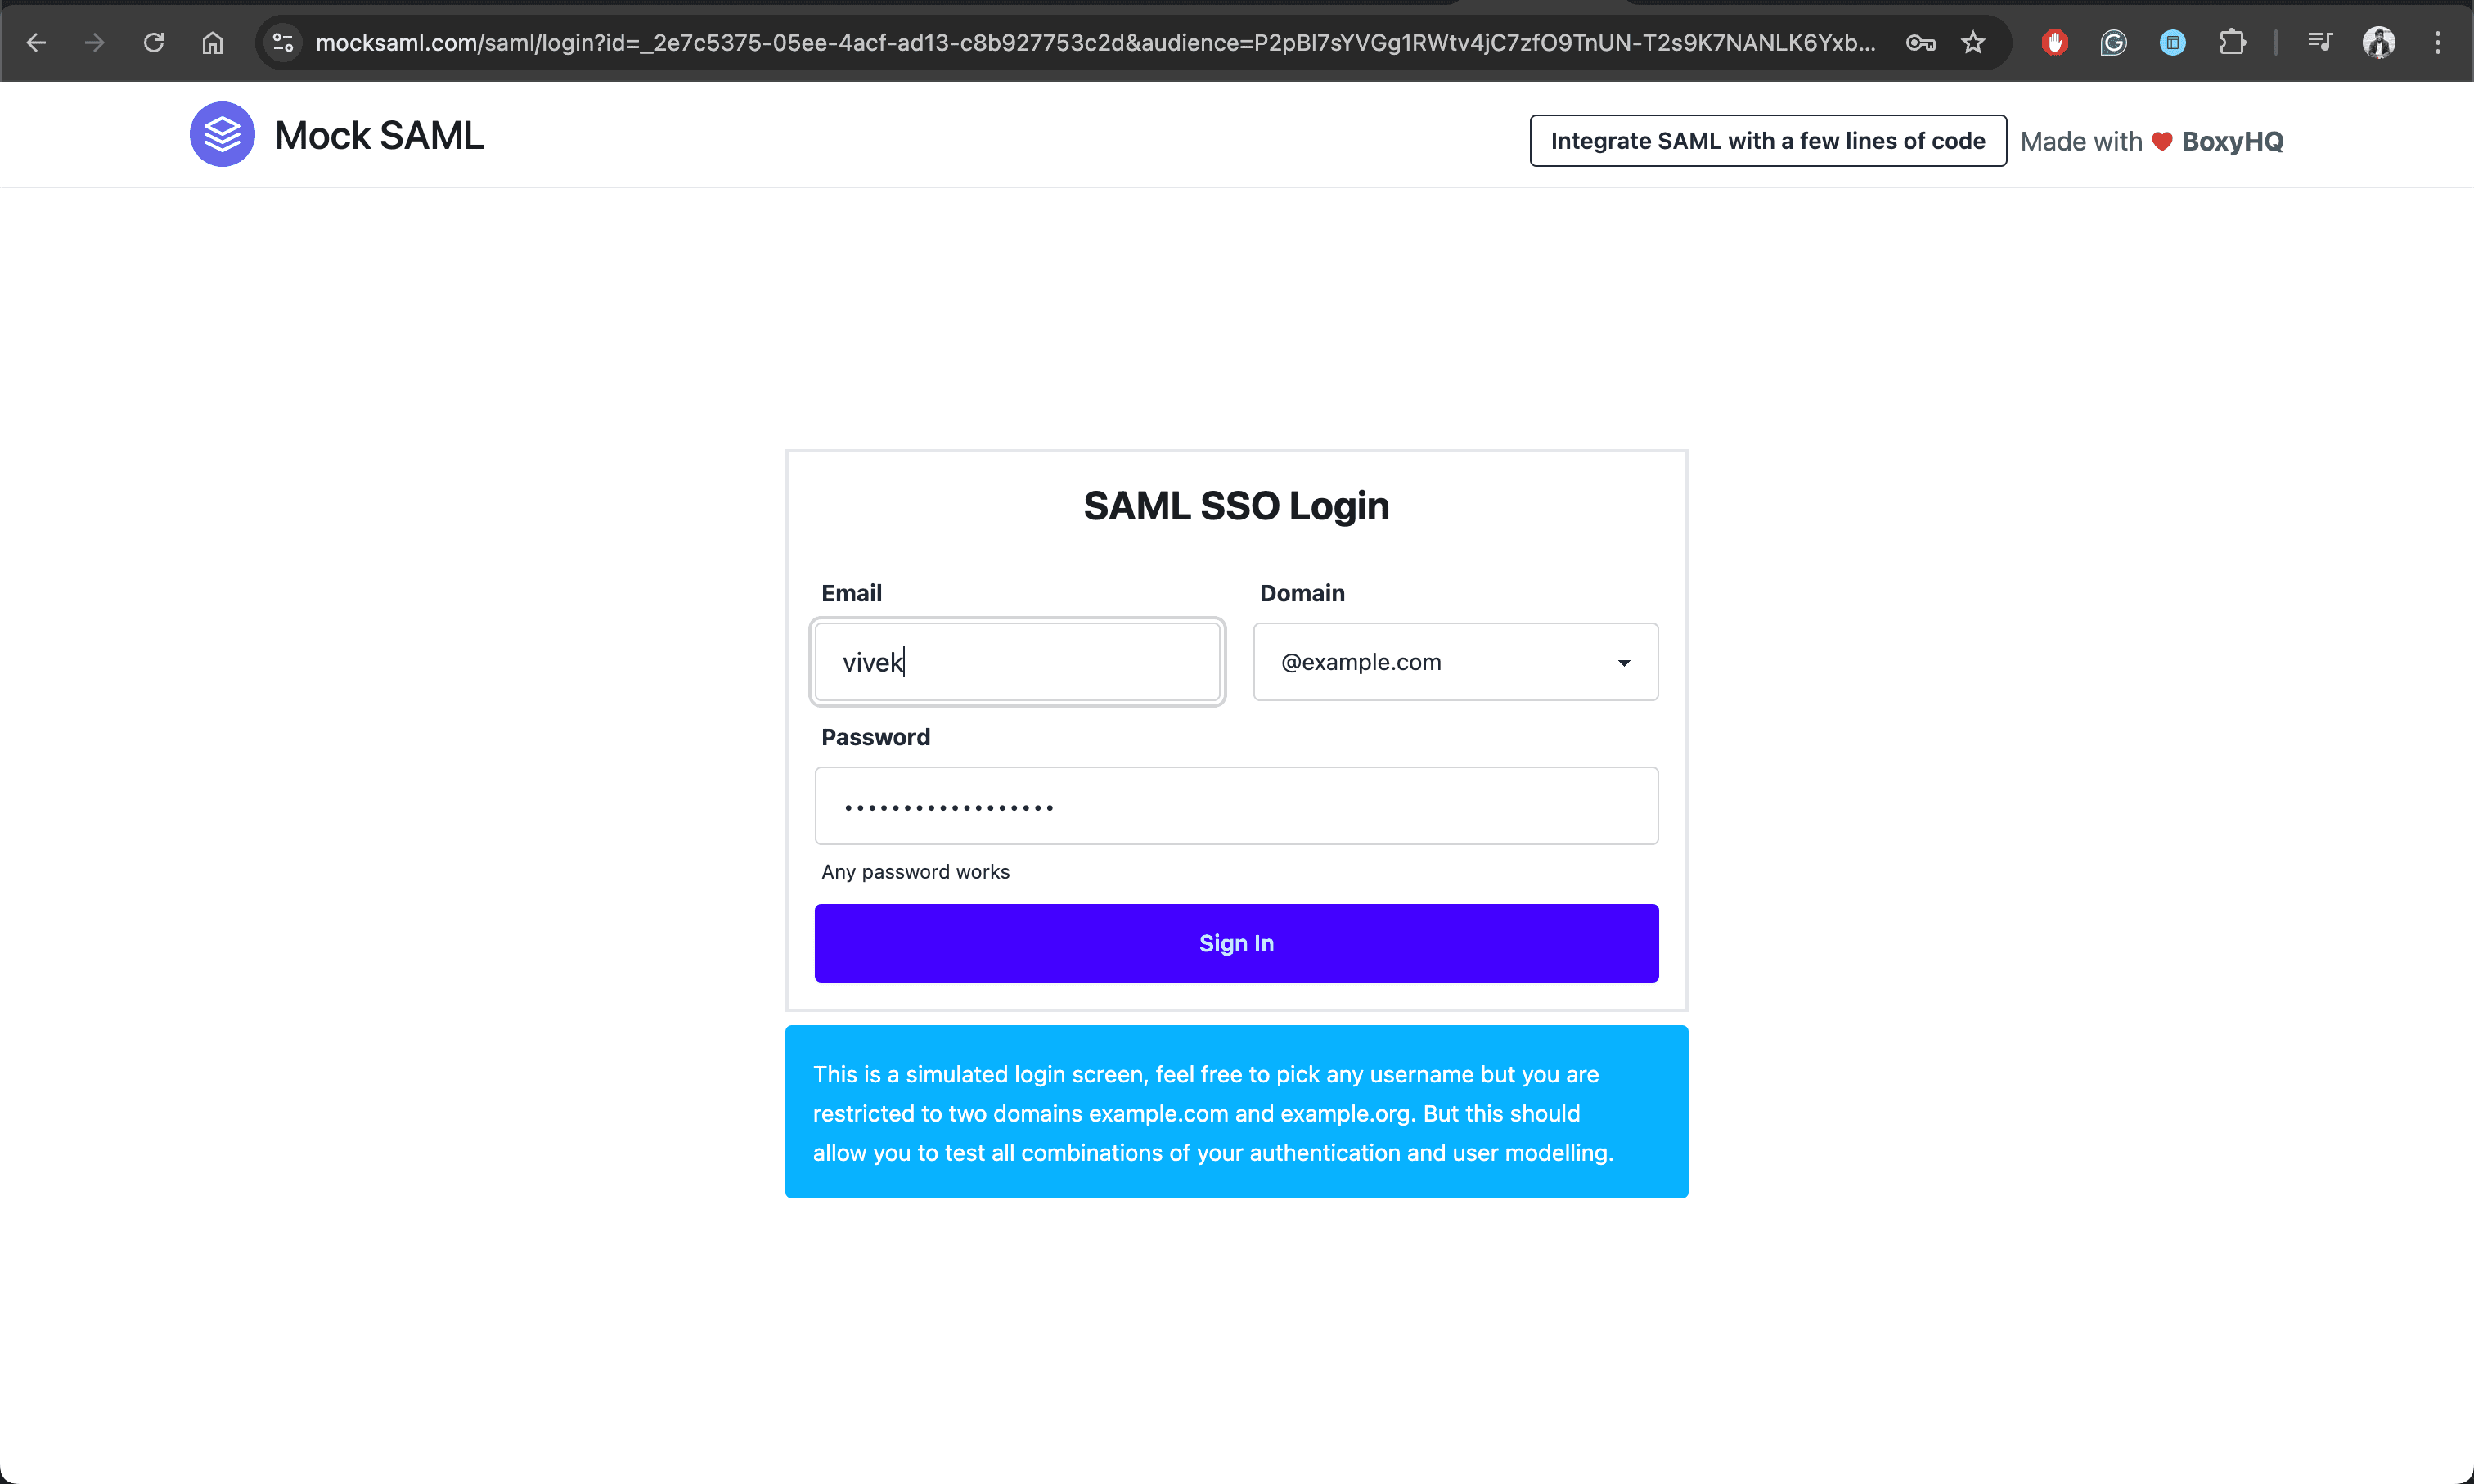
To test the integration, open the application in the browser, enter your email ID, and click on Continue with SSO to initiate the SSO flow. Note that the email ID should use example.com for SSO to work since you didn’t configure any other domains in Descope. If you used a mock URL, you’ll be redirected to a MockSAML login page where you can confirm your email ID and click Sign in.
Note: If you configured a Descope SAML application with SP details, Descope will directly handle the authentication.
After logging in, you’ll be redirected to the dashboard page.
Access users from Shiny
So you’ve now added authentication to the Shiny app using OIDC and SAML, but the Shiny application doesn’t indicate that the user is logged in. This section discusses how to access the logged-in user metadata and display a welcome message in the UI.
You’ll add a UI element to the sidebar and update the server definition to set the welcome message when the user is authenticated. First, add a welcomeText element to the sidebar by updating the sidebarPanel to the following:
sidebarPanel(
  # Add a welcome text element
  h3(textOutput("welcomeText")),
  br(),

  # Existing inputs
  fileInput("file", "Upload Expense Data (CSV)", accept = ".csv"),
  selectInput("category", "Select Category:", choices = NULL),
  actionButton("analyze", "Analyze"),
)
Update the user_authenticated observer under the server definition to set the welcome message:
observeEvent(input$user_authenticated, {
  req(input$user_authenticated)

  user_info <- input$user_authenticated

  # use "name", else fallback to "email", else "User"
  user_name <- user_info$name
  if (is.null(user_name)) user_name <- user_info$email
  if (is.null(user_name)) user_name <- "User"

  output$welcomeText <- renderText({
    paste("Welcome,", user_name)
  })

  showNotification("Login successful!", type = "message")
  show("appContent")
})
Notice that the above code snippet tries to retrieve the user’s name from the user_info object and falls back to email if name is not present.
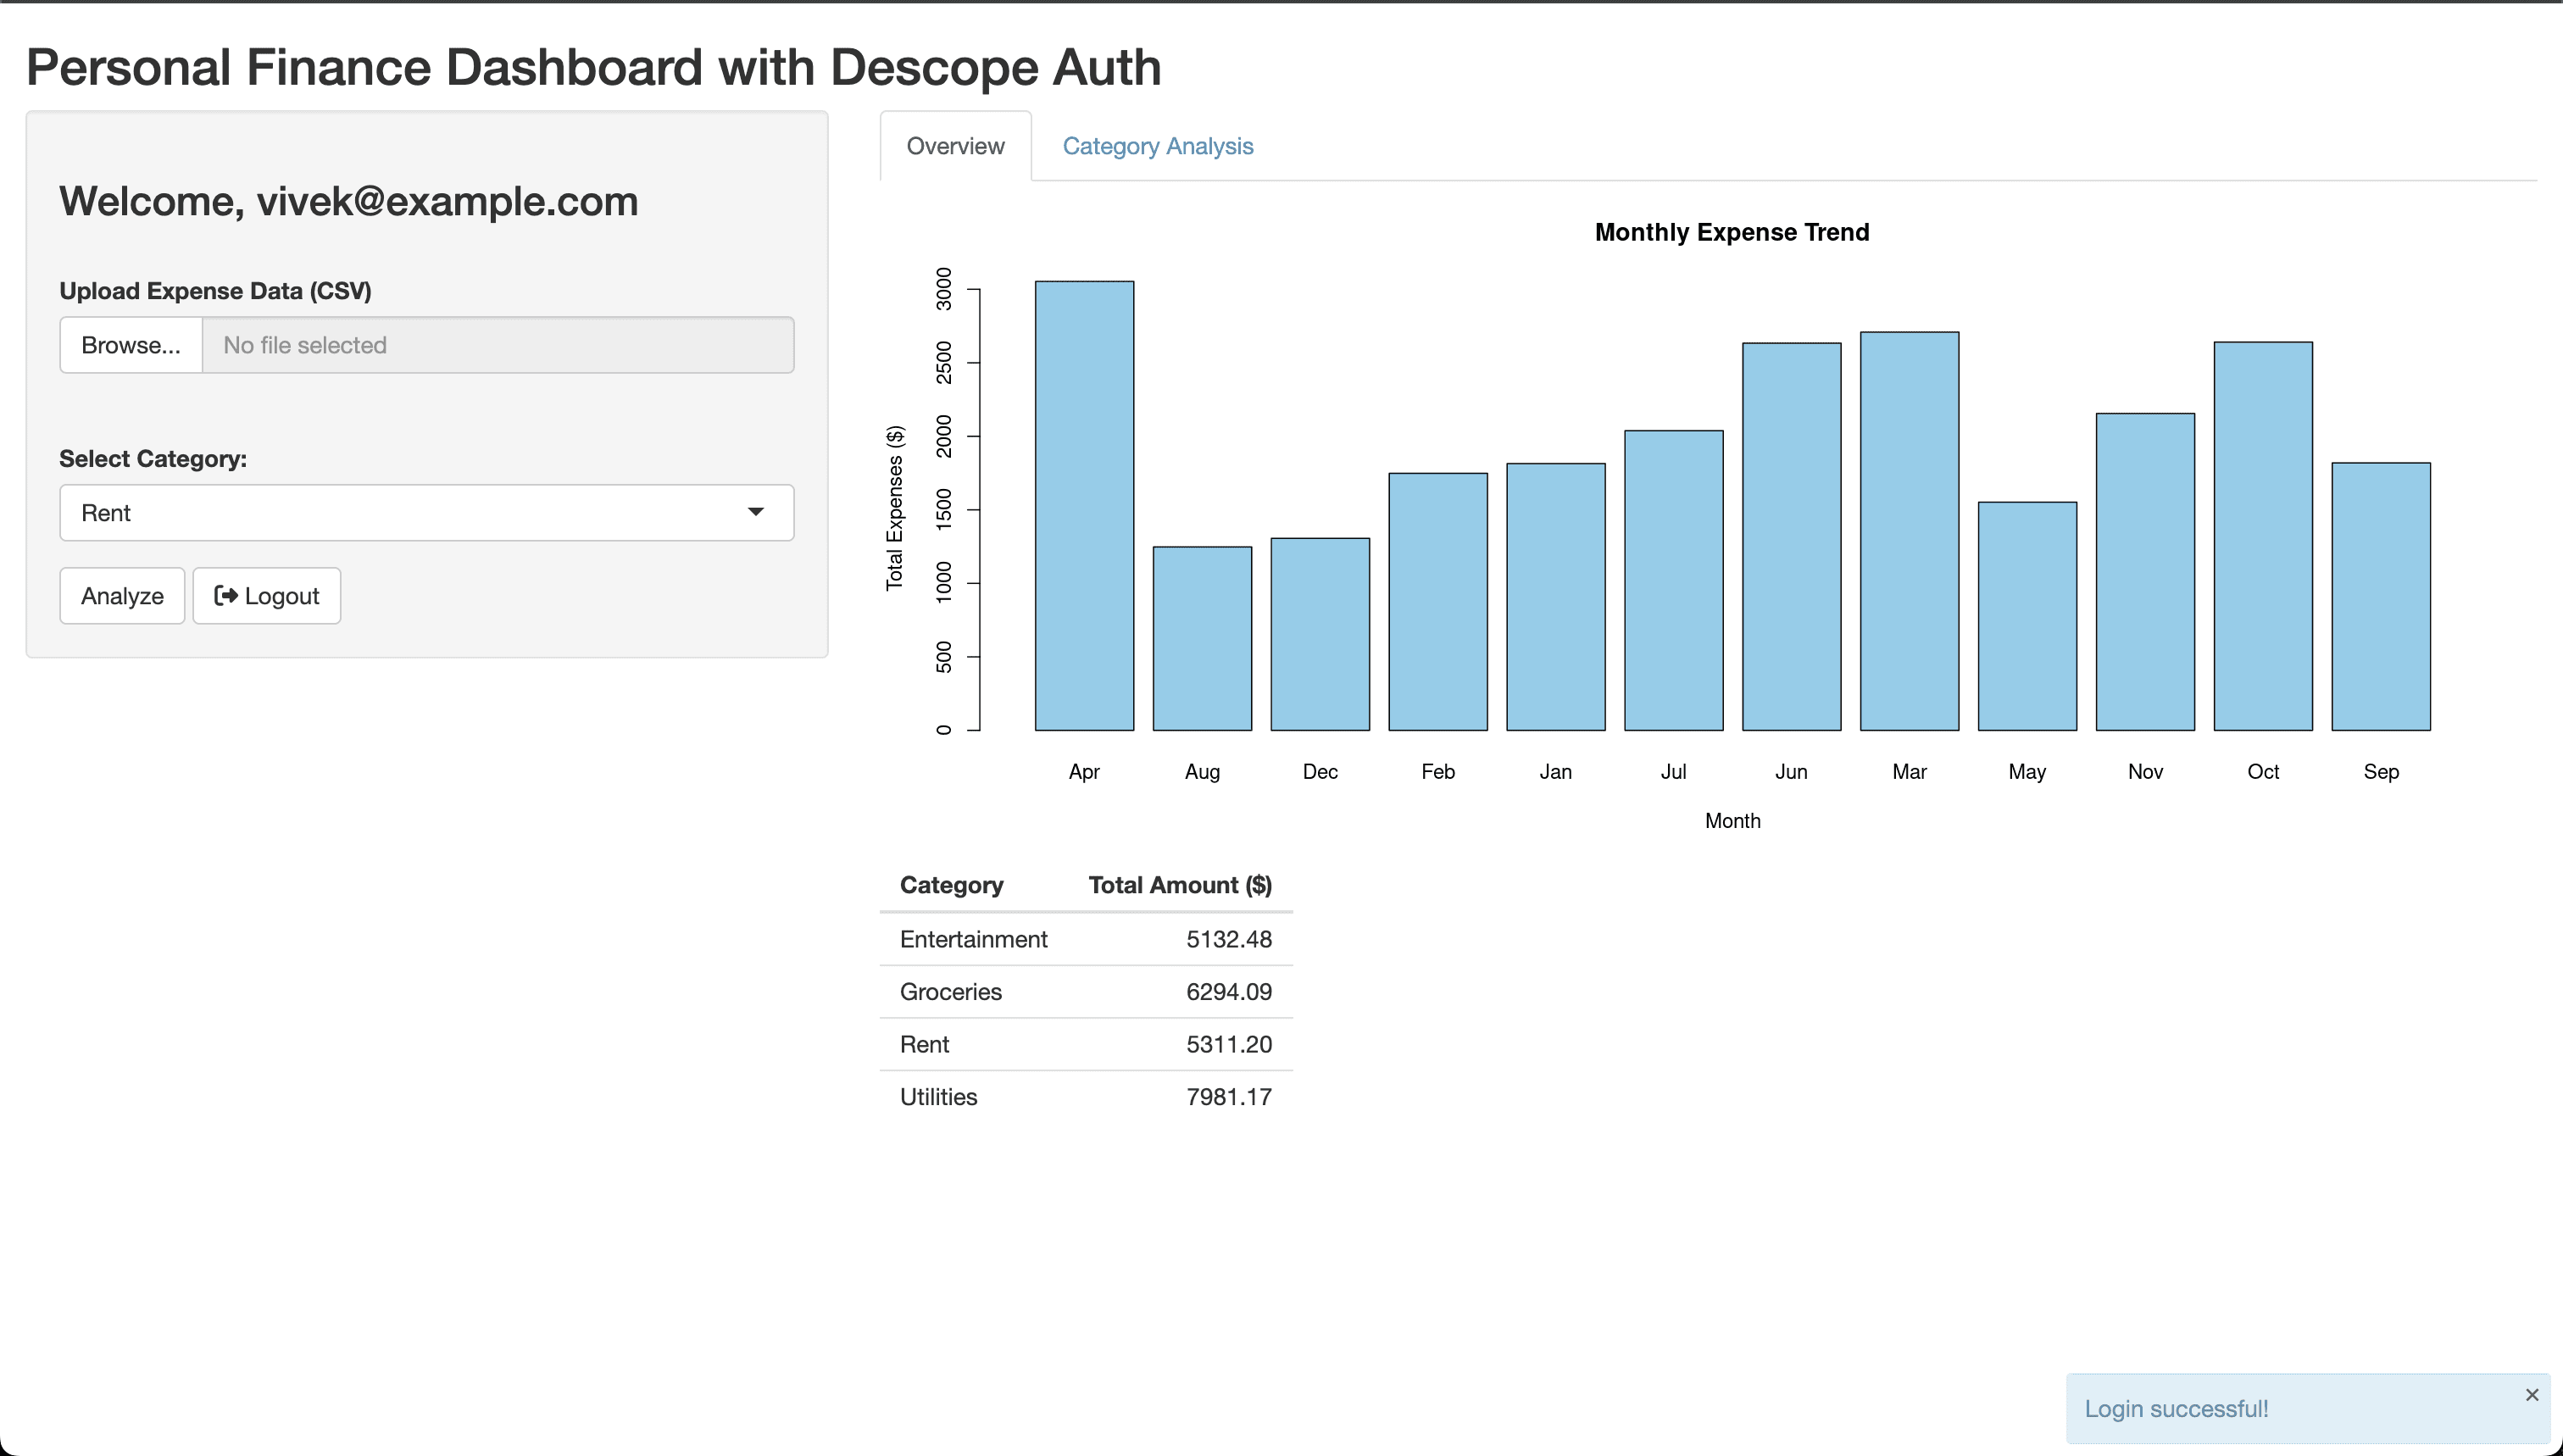
Save and republish the changes to test them. Once you log in to the dashboard, a welcome message will be displayed.

Log out a user
Your users also need logout functionality to enable them to end their sessions. To implement logout, first, add a logout button to the sidebar by updating the sidebarPanel as follows:
sidebarPanel(
  h3(textOutput("welcomeText")),
  br(),

  # Existing inputs
  fileInput("file", "Upload Expense Data (CSV)", accept = ".csv"),
  selectInput("category", "Select Category:", choices = NULL),
  actionButton("analyze", "Analyze"),

  # Logout button
  actionButton("logout", "Logout", icon = icon("sign-out-alt"))
)
Next, add a descopeLogout message handler in the descope-auth.js file that will be invoked when the logout button is clicked:
Shiny.addCustomMessageHandler('descopeLogout', function () {
    const wcElement = document.querySelector('descope-wc');
    if (wcElement) {
        wcElement.logout();
    }
});
Finally, add a logout observer under the server definition to invoke the descopeLogout and initDescopeAuth message handlers.
observeEvent(input$logout, {
  hide("appContent")  # Hide main content
  session$sendCustomMessage("descopeLogout", list())

  session$sendCustomMessage("initDescopeAuth", list(
    projectId = "P2pBl7sYVGg1RWtv4jC7zfO9TnUN",
    flowId = "sign-up-or-in",
    theme = "light",
    containerId = "authContainer",
    successInput = "user_authenticated",
    errorInput = "auth_error"
  ))
})
Save and republish the changes to test them. Once you log in to the dashboard, you’ll notice a Logout button being displayed next to the Analyze button.
When you click the Logout button, you’ll be logged out of the application and redirected to the Descope login page.
Make Shiny authentication simpler with Descope
Shiny makes it easier for data engineers and scientists to share their work with others as web applications without any HTML or JavaScript experience. Posit Connect is a publishing platform that lets you deploy Shiny apps directly from RStudio with a click of a button, eliminating the need to provision and maintain a web server.
In this article, you learned how to implement authentication and authorization in a Shiny app using Descope. You can find this tutorial’s complete source code on GitHub.
Descope is a drag-and-drop customer authentication and identity management platform. Our low- or no-code CIAM solution helps hundreds of organizations easily create and customize their entire user journey using visual workflows—from authentication and authorization to MFA and federated SSO. Customers like Navan, GoFundMe, You.com, and Branch Insurance use Descope to reduce user friction, prevent account takeover, and get a unified view of their customer journey.
To learn more, book a demo with our auth experts or join our dev community, AuthTown.