

Table of Contents
Don't have the time to read the entire post? Our human writers will be sad, but we understand. Summarize the post with your preferred LLM here instead.
In this blog, you will learn how to add the user’s email as a custom attribute to the JWT response / payload using Descope. Adding custom attributes to the JWT response payload is important for getting various user data parameters and building a more customized experience. With the power of Descope Flows, we can accomplish this task in a matter of minutes.
Descope Flows allows you to create entire authentication flows and user journeys with our no-code designer. It’s literally as simple as drag and drop!
Prerequisites
Sign up at Descope to create a free account, and be sure to check out our amazing docs. If you are unfamiliar with Descope Flows there is an awesome blog that explains all about it here!
If you haven’t created a project, get started by logging in to Descope. Create your project, select your authentication methods, and click continue. Open a “sign-up-or-in” Flow.
Action: Custom Claims
This action is called Custom Claims and this is where we add the custom attributes to our JWT.
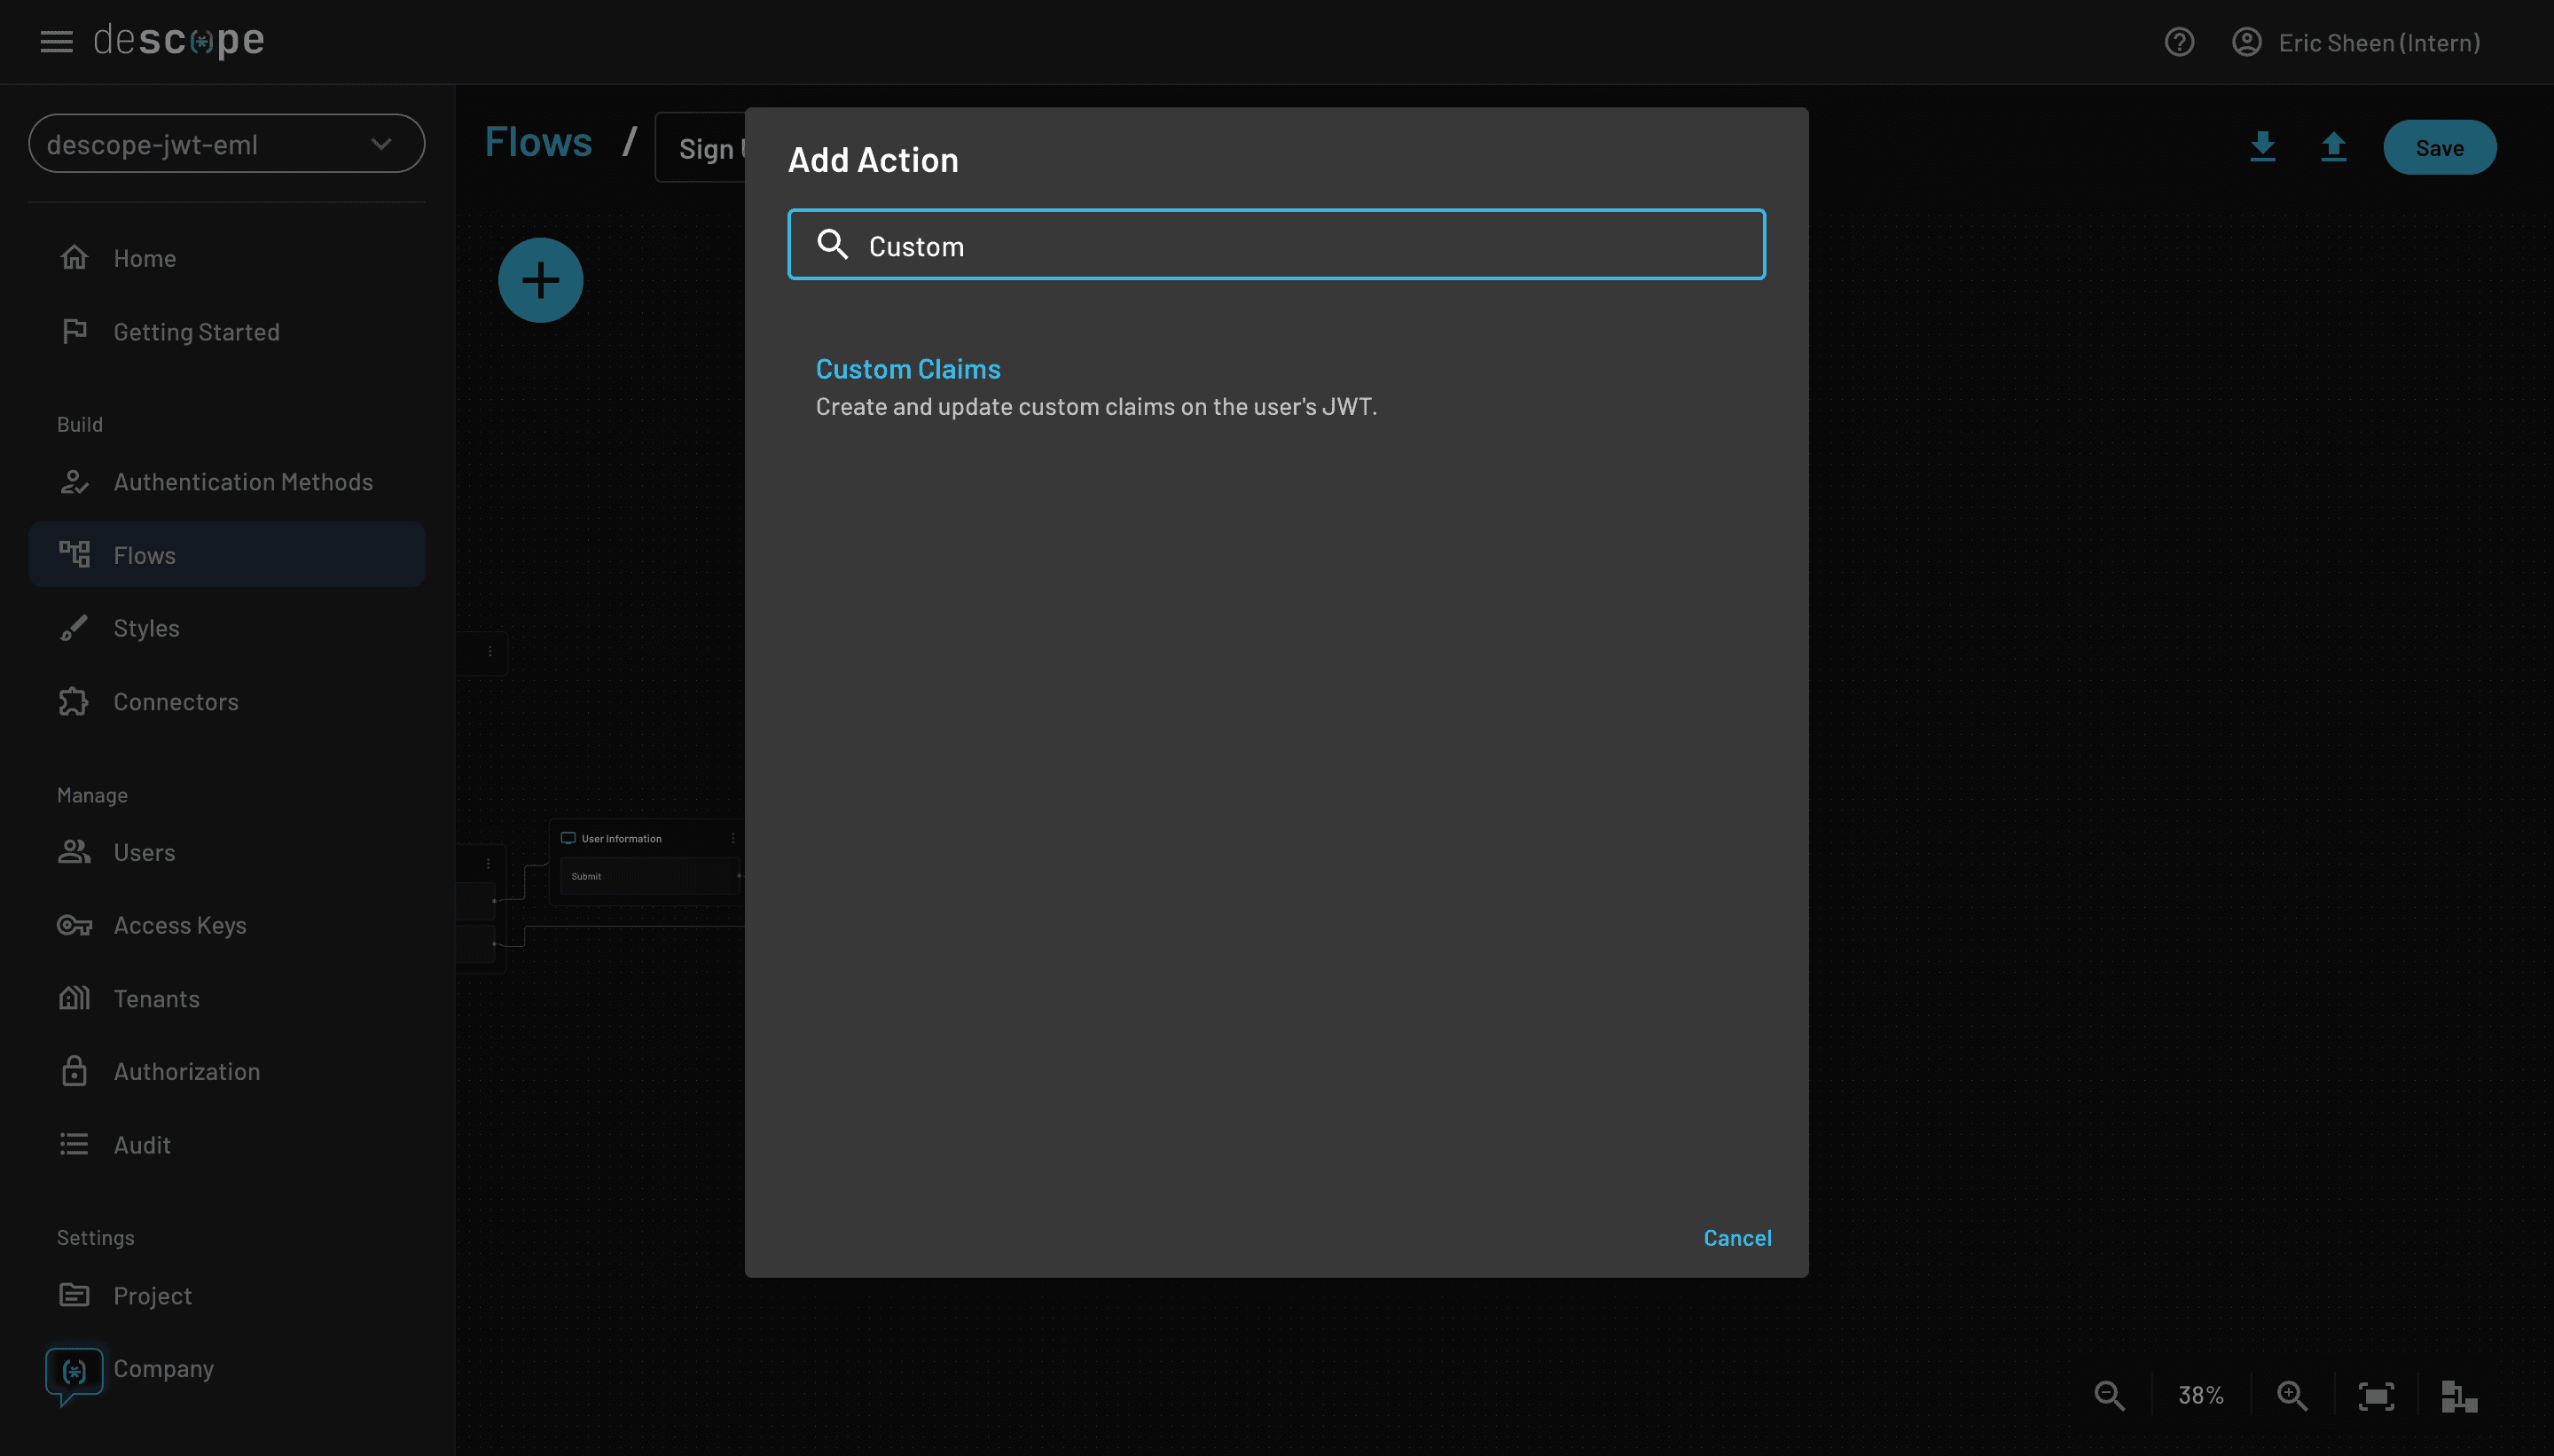
Click the “Custom Claims” option and populate the fields with the values below:
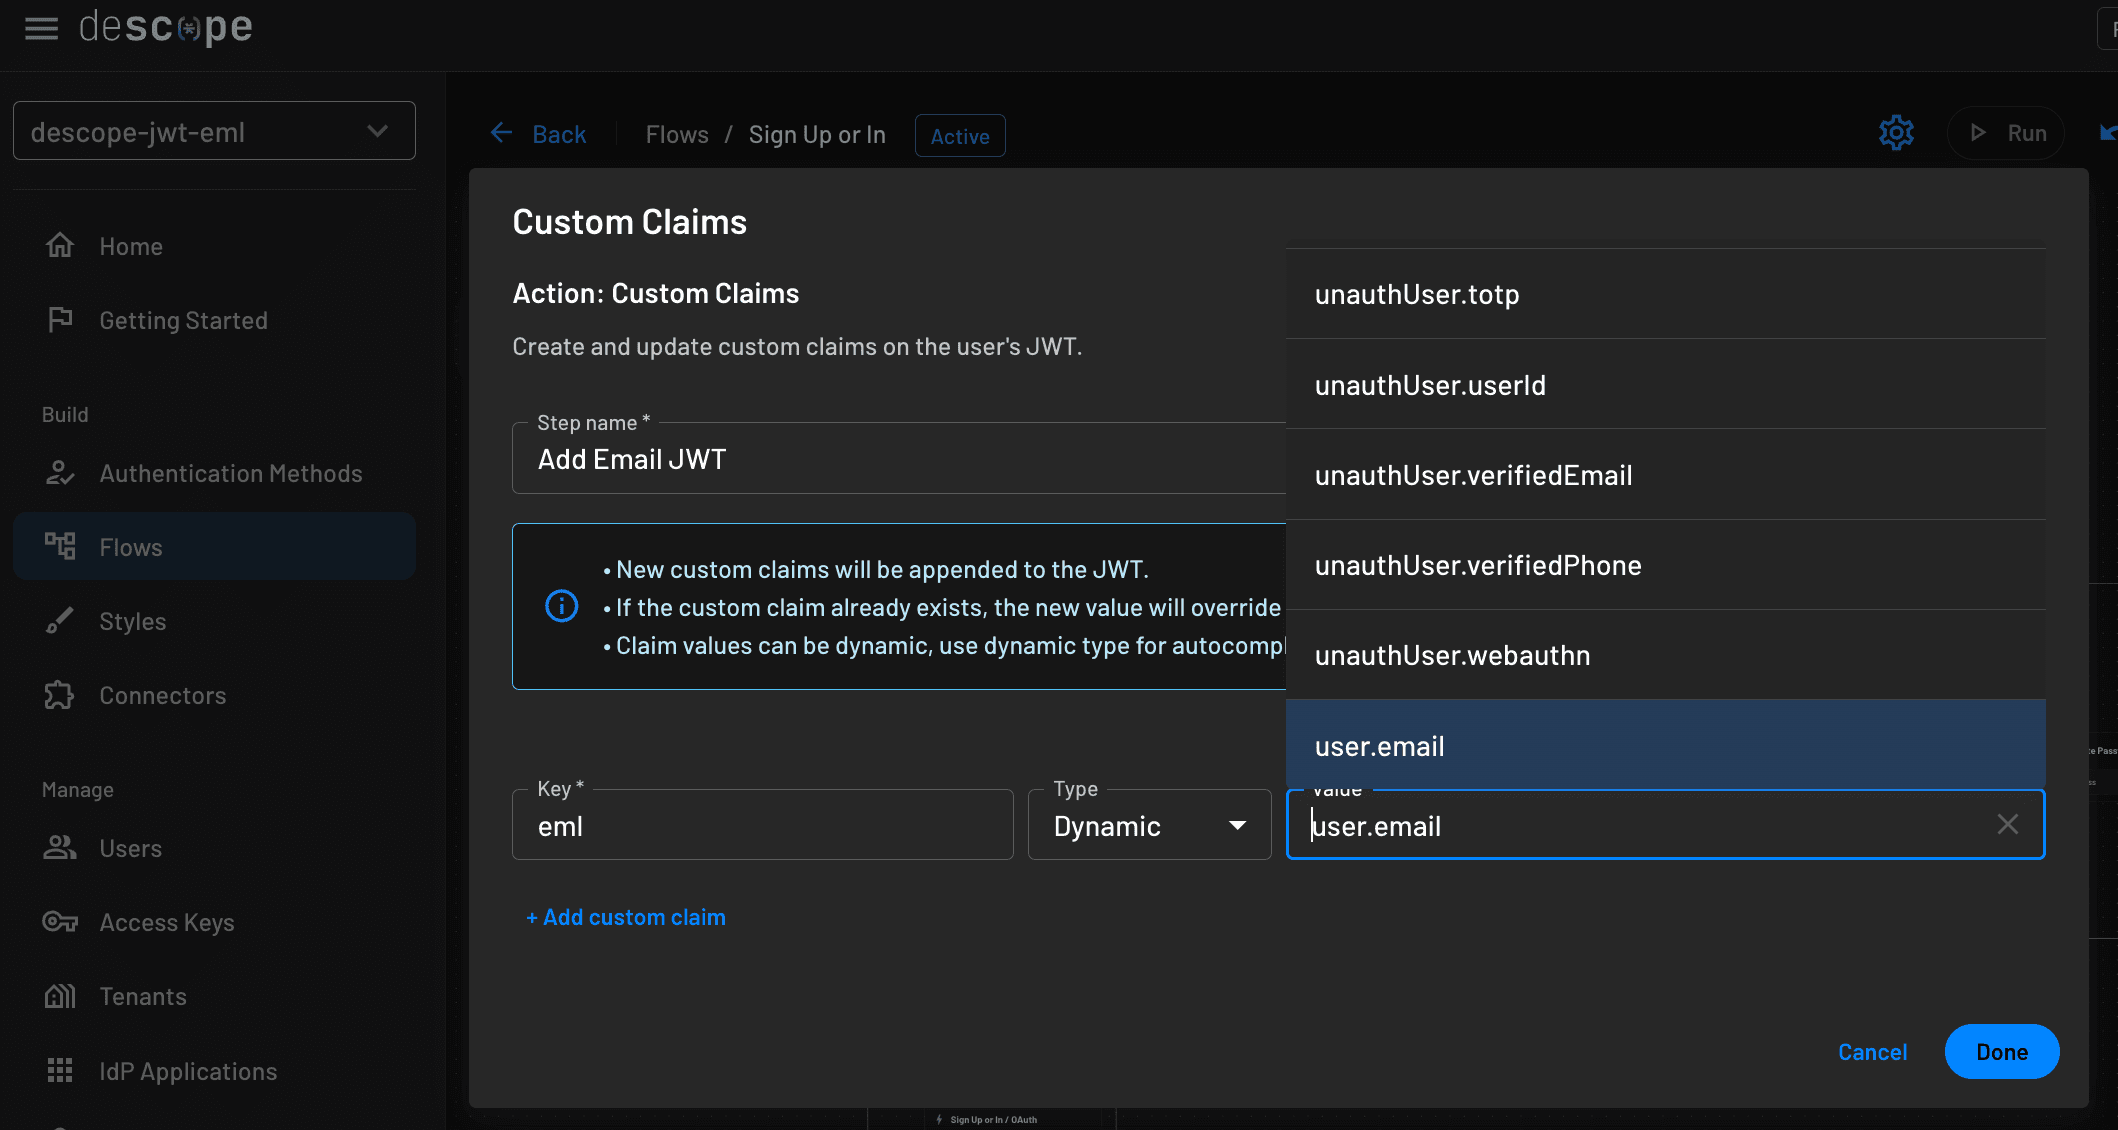
Edit the Step name to be something like “Add Email JWT”.
Set the Key to
emlfor email. By setting the Type to Dynamic you will be able to see the list of various possible attributes as you type.Set the value to
user.emailto add the user's email in the JWT.
Now let’s add our Action to the Flow!
Connecting our Action to the Flow
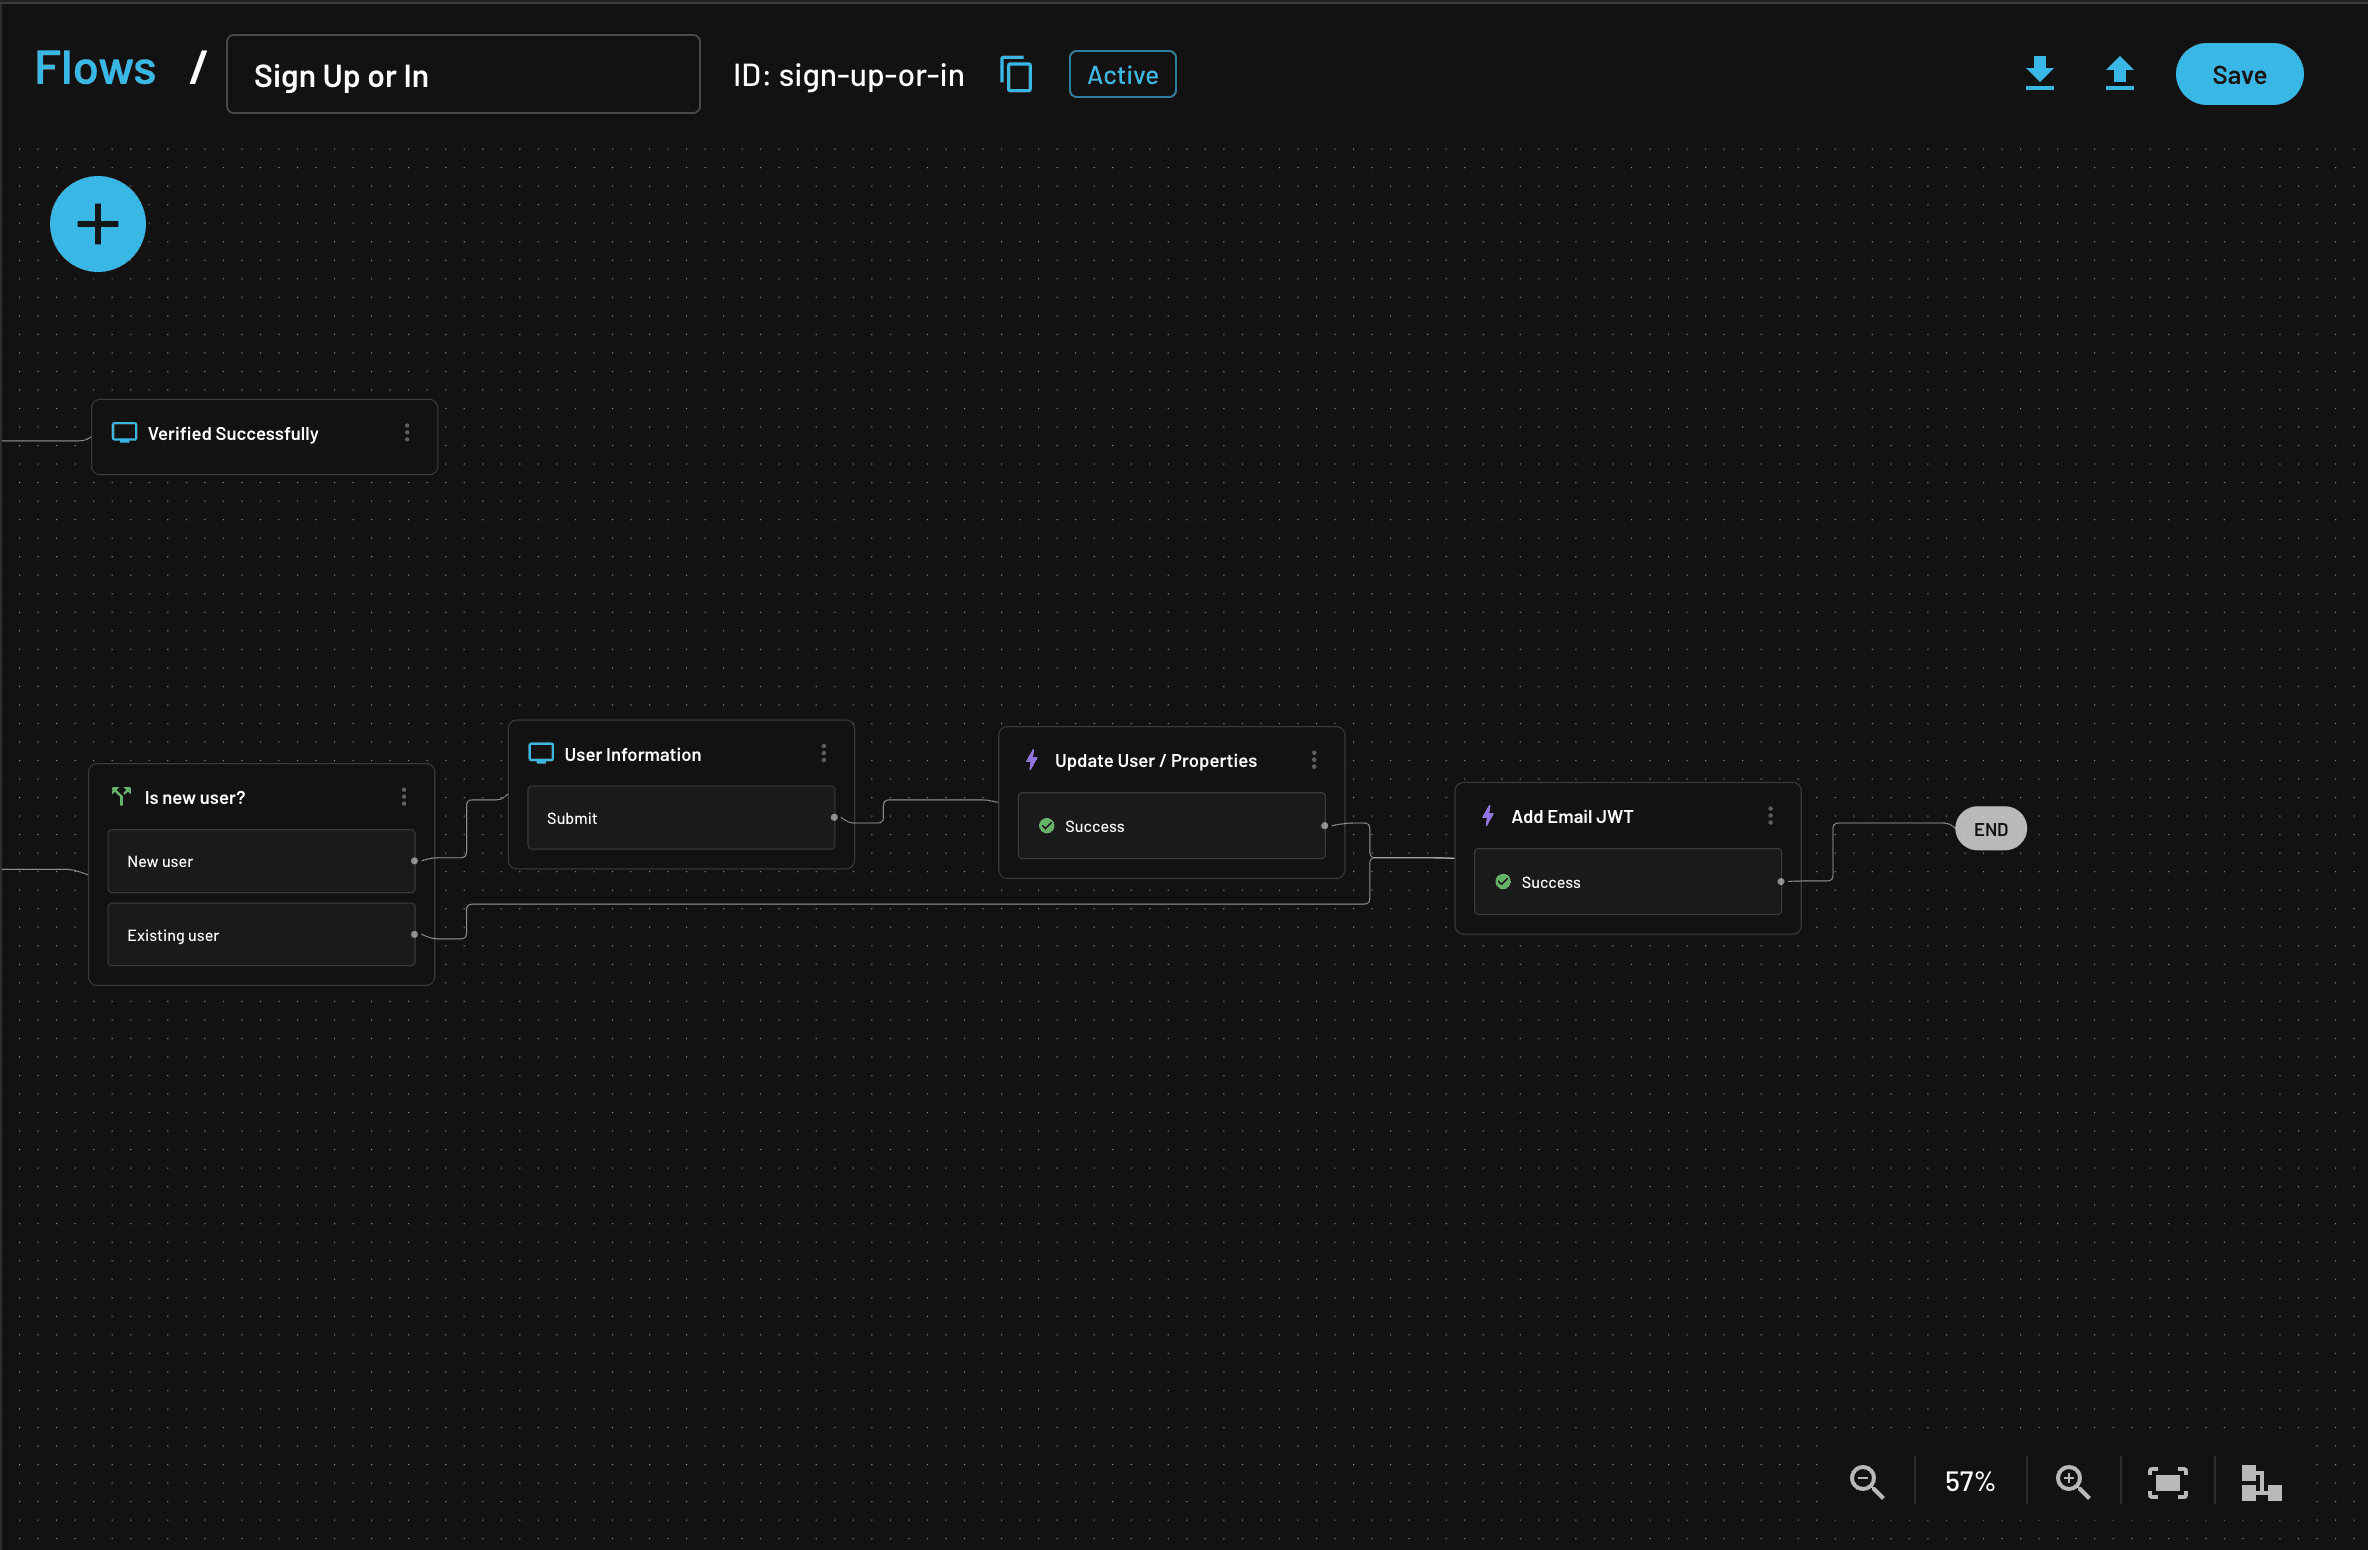
Near the end of the Flow, drag and place the “Add Email JWT” Action as shown above. After this, make two connections:
Connect Update User / Properties → Add Email JWT → End.
Connect Existing User → Add Email JWT → End.
Once you're done, remember to click save on the top right corner! The very end result should look like the figure above.
The Result
You can see the new JWT you’ve created with your custom claims in the Getting Started Wizard.
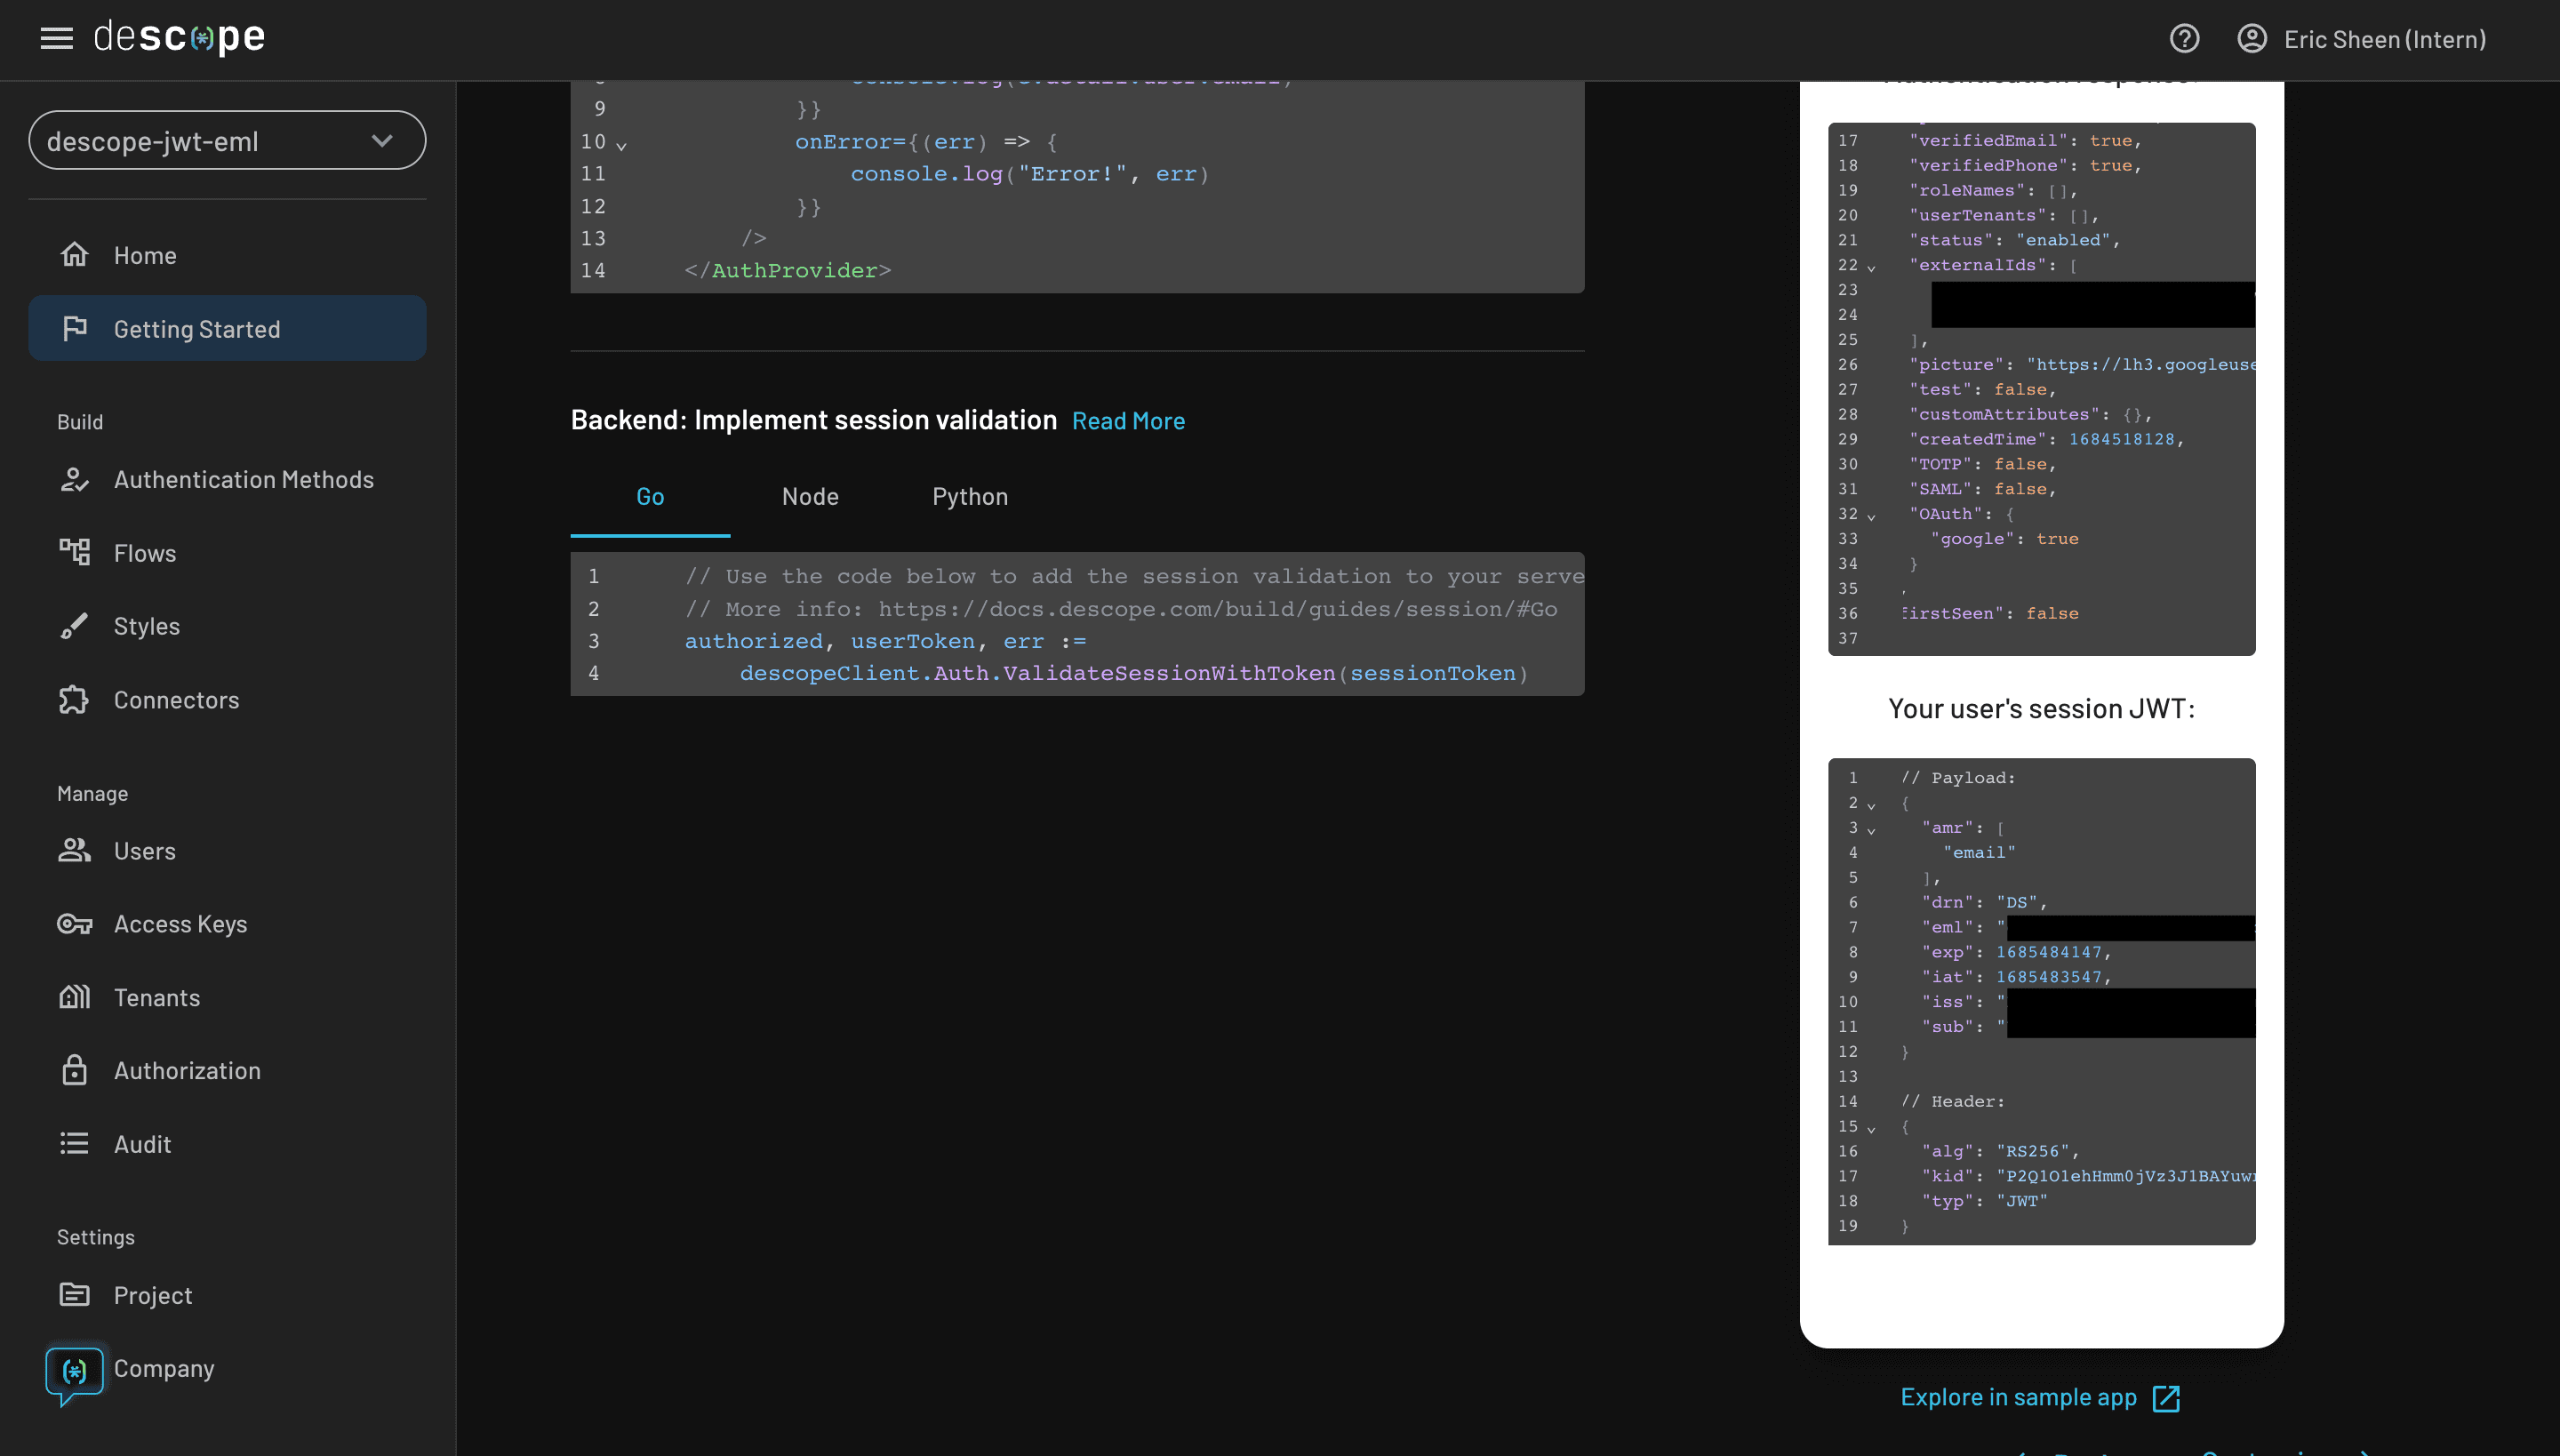
If you want to see your flows running on a proper website, you can click the “Explore in sample app” button. From there, you can log in and see the JWT response in the browser’s local storage.
While this blog covers adding email to the JWT, you can add any other custom fields that suit your needs with Custom Claims. Adding claims with Descope Flows make setup and ongoing modifications a breeze!

If you have any questions or want to start your Descope journey, sign up for our platform and join AuthTown, our open user community for developers to learn about authentication.