


Table of Contents
Don't have the time to read the entire post? Our human writers will be sad, but we understand. Summarize the post with your preferred LLM here instead.
Who hasn’t experienced this: you register for an event, only to get to the event venue and find out they have a list of name tags on a table for anyone to grab. The Good – you find your name tag. The Bad – you don’t find your name tag because you registered too late. The Ugly – someone else, not looking as pretty as you, grabs your name tag and is now impersonating you. Add to that all the no-show guests with their name tags printed and going to waste. Super not green.
When planning an event, you usually choose between a very expensive registration / check-in system or an inefficient one; between expediting the check-in process or validating the user’s identity and delaying the guests in line to do so; between having a host to welcome guests and print name tags manually or having them printed in advance with no validation of the guest list.

So, as we were planning our “Celebrating Innovation Happy Hour” during the TechCrunch Disrupt conference, we decided to do the whole thing better!
Disrupting and innovating the check-in process
The idea was to have guests register in Luma and then – as they come to the event – have them check in using our Descope Flows and automatically print their name tags when they validate their identity (via email).
In reality, it was a bit more complicated and a lot more cool!
The overall approach included 3 major parts:
Luma: where guests pre-registered to the event
Check-in website: where guests’ identity was validated and their information was collected
Label printer: where guests’ name tag labels were automatically printed as they checked in
Selecting Luma was easy. It’s free. It’s customizable. And it’s free. We like free (we have a Free Forever tier too). We created a standard event template and had guests register with their email, phone number, company name, and job title.
When we started promoting the event, it went ballistic. We had almost 1,000 registered guests, while our venue – LightSpeed offices in San Francisco – had room for about 150. Even with the typical 30% no-show rate, we were facing the risk of turning people back at the gates. Eventually, we started “waitlisting” folks in Luma and provided email notifications to guests that registered. We had 300 approved and the rest on the waitlist.
The next piece was the check-in process. We wanted name tags. We wanted to allow approved guests in. And we wanted to ask the waitlisted guests who showed up to wait while we checked if there was room. We didn’t want to pre-print all the name tags. We didn’t want a cumbersome process to print the name tags as guests were coming in.
Armed with these requirements, we decided to build it ourselves.
Building it ourselves
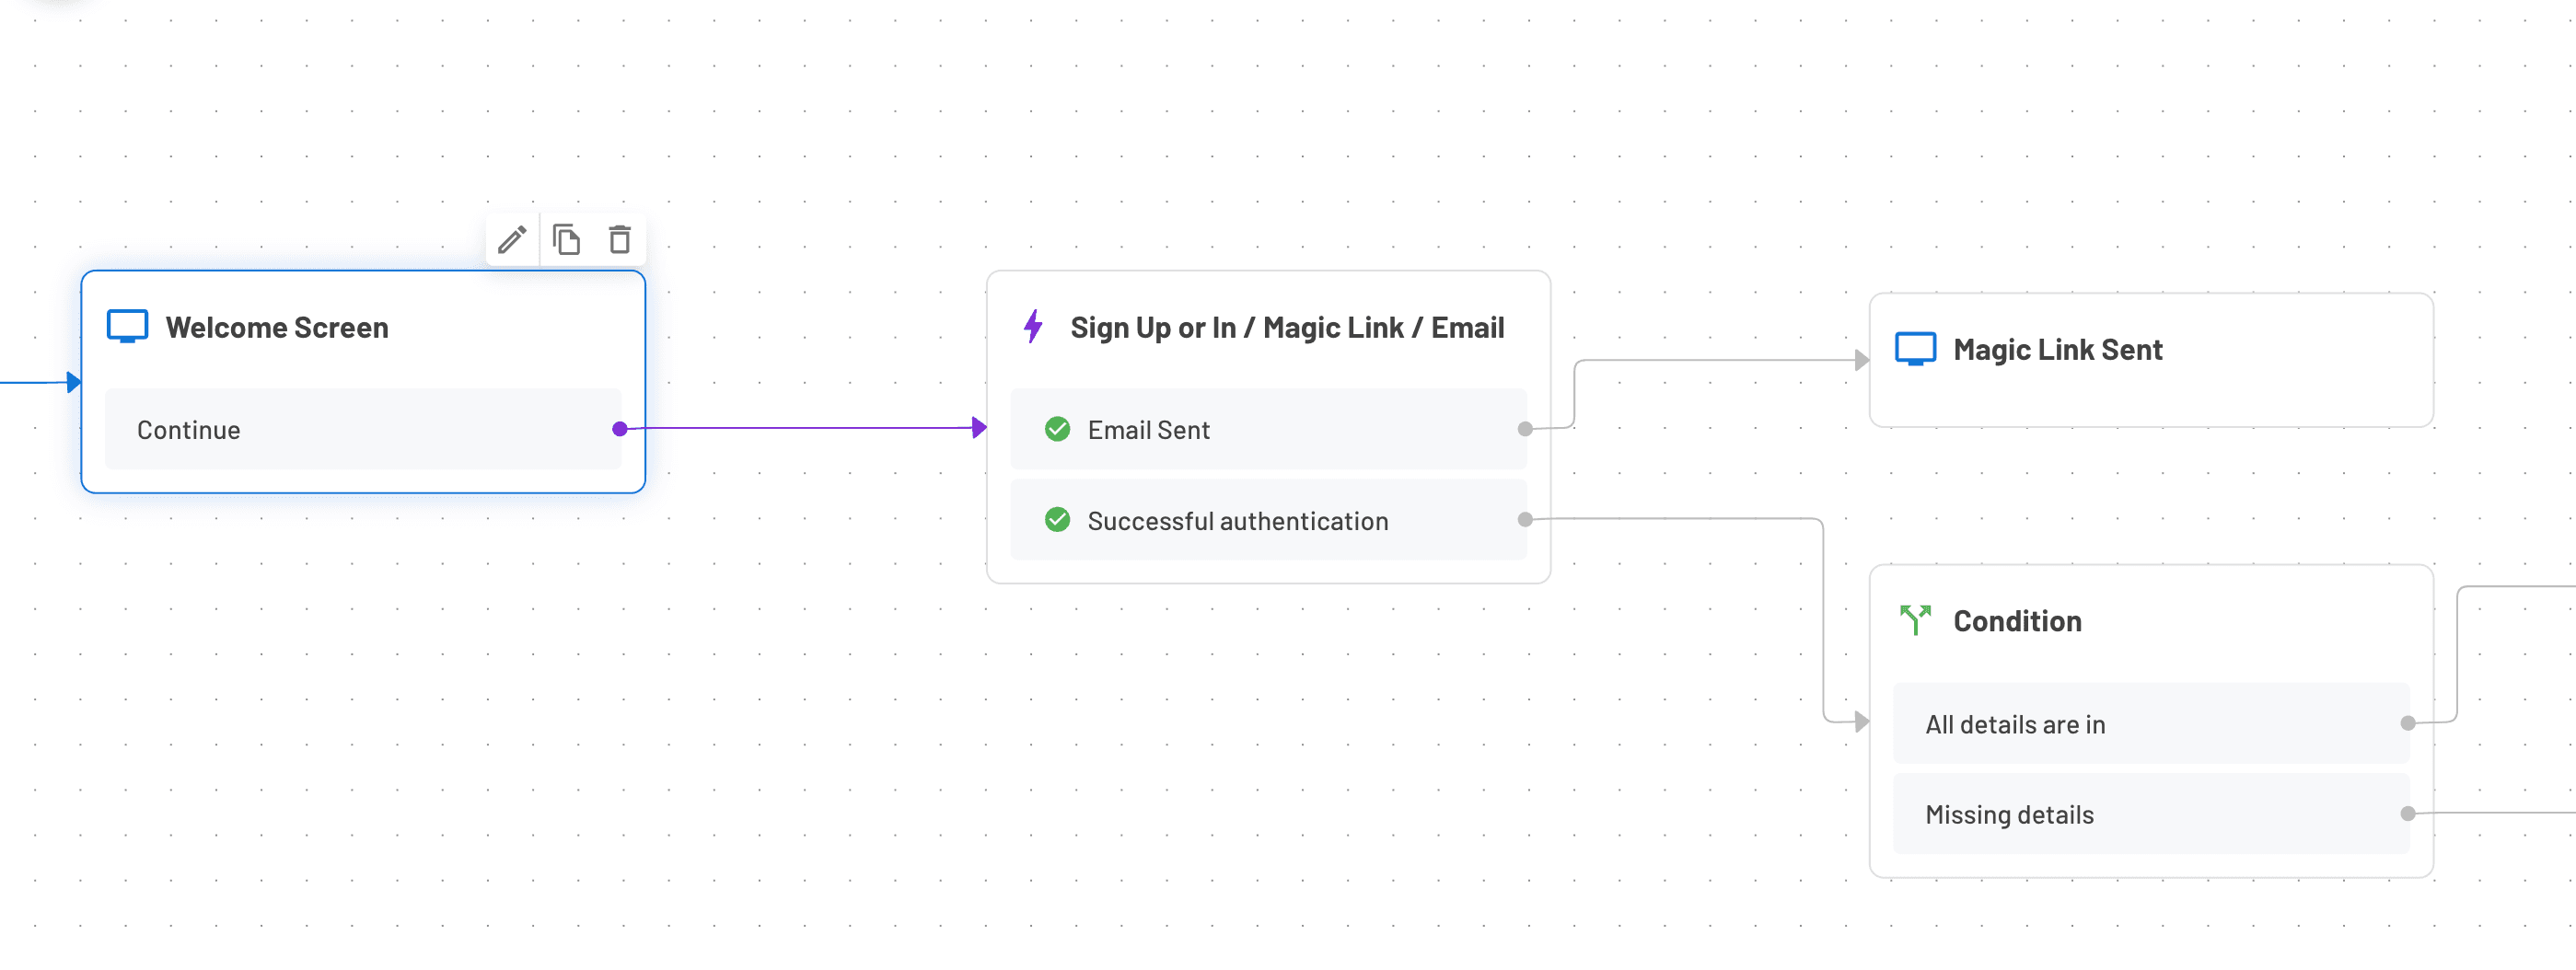
For the check-in website, we decided to use our very own Descope Flows in a ReactJS app that allowed us to take the guest easily through the process of validating their emails and collecting the information we needed (company name and job title).
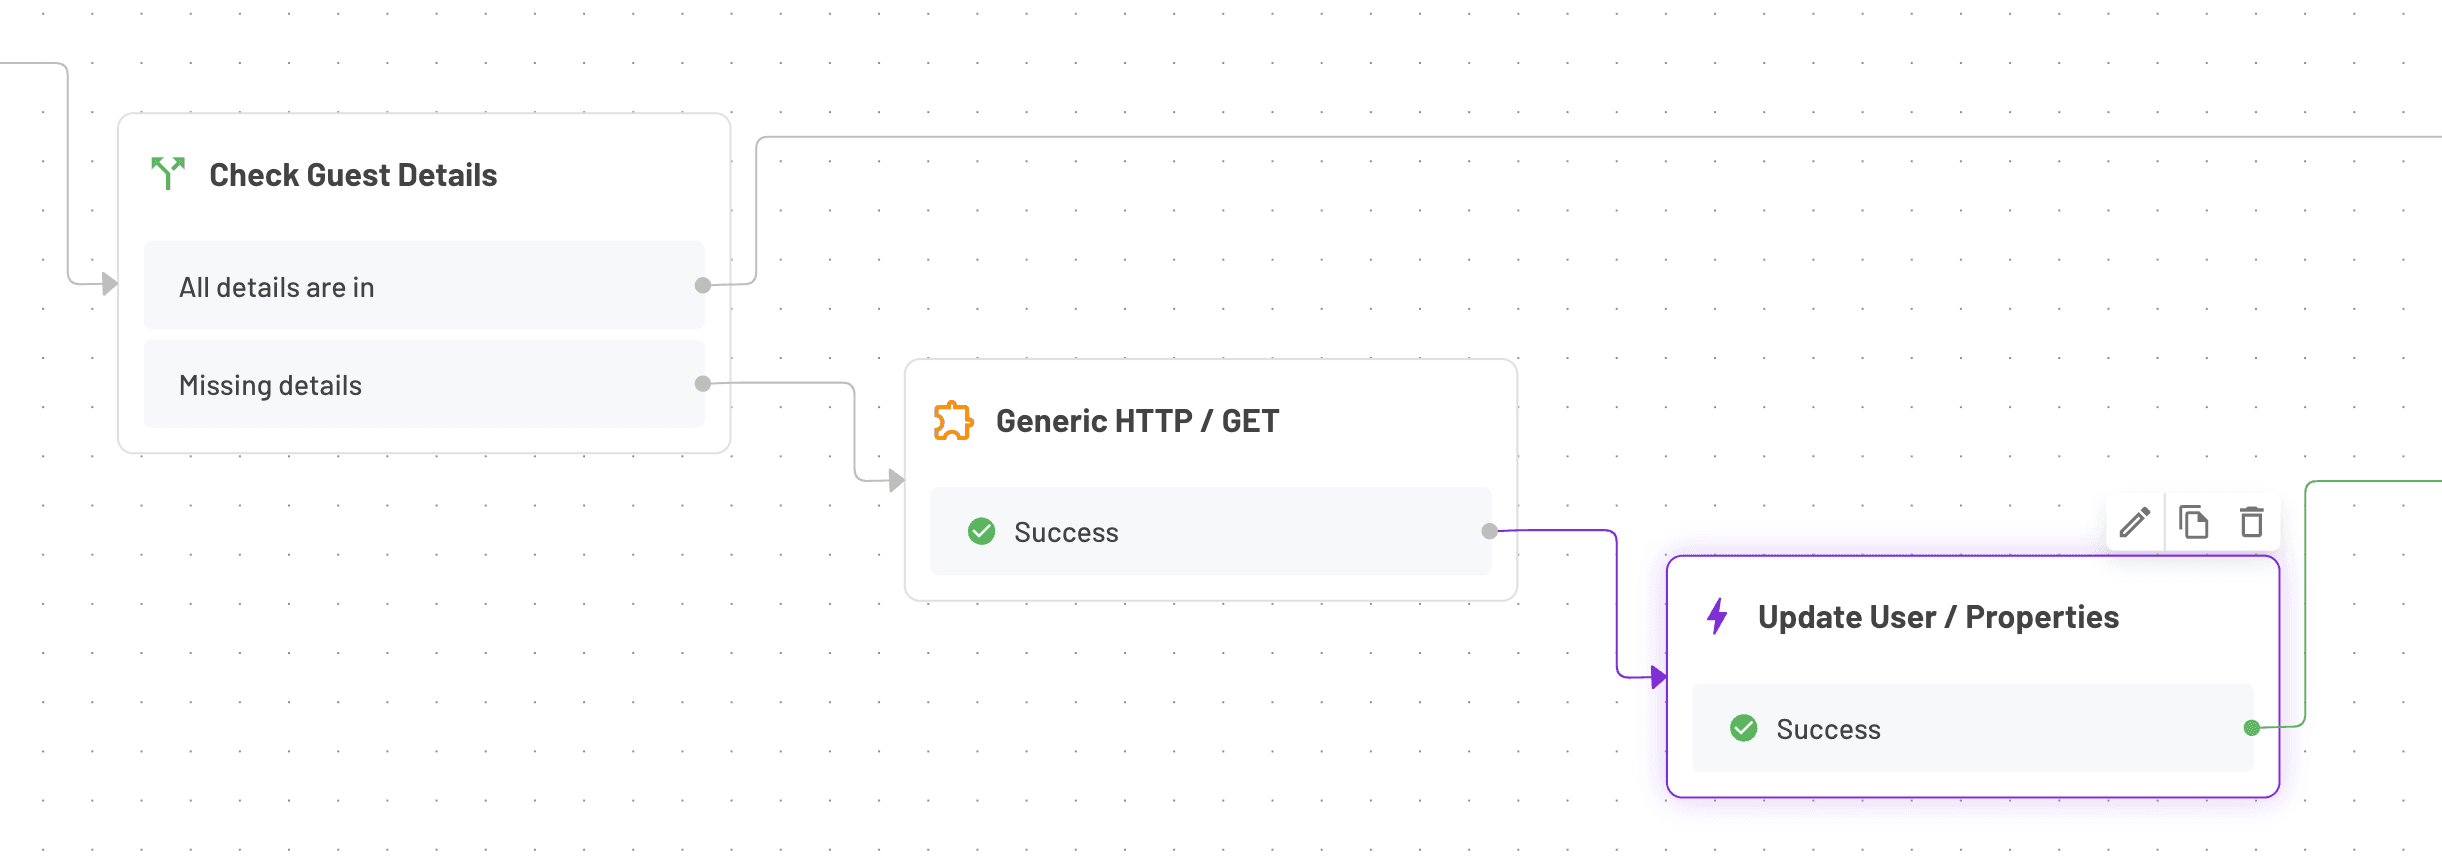
Using Descope Flows allowed us to iterate easily with very minimal effort – A simple ReactJS app that wrapped the flow, and that was about it. The flow was also pretty straightforward – get the user’s email, validate it, gather the information we need (if missing), and mark the guest as checked in.
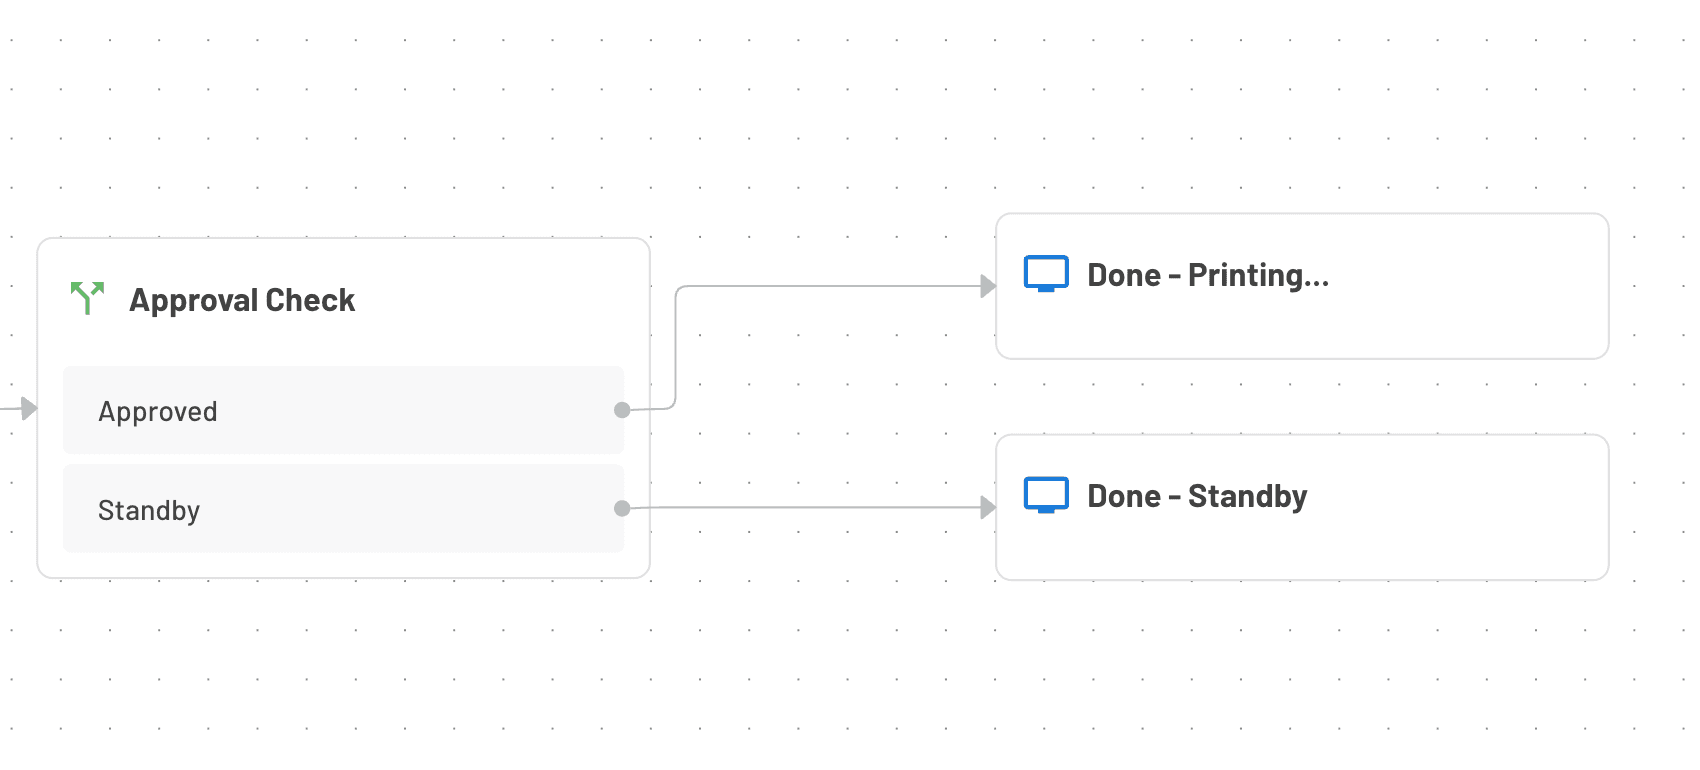
The flow was simple to implement. Making it more robust was also straightforward – integrating with Segment to update our CRM with guests that checked in, and creating the approval vs. waitlist logic in the flow.

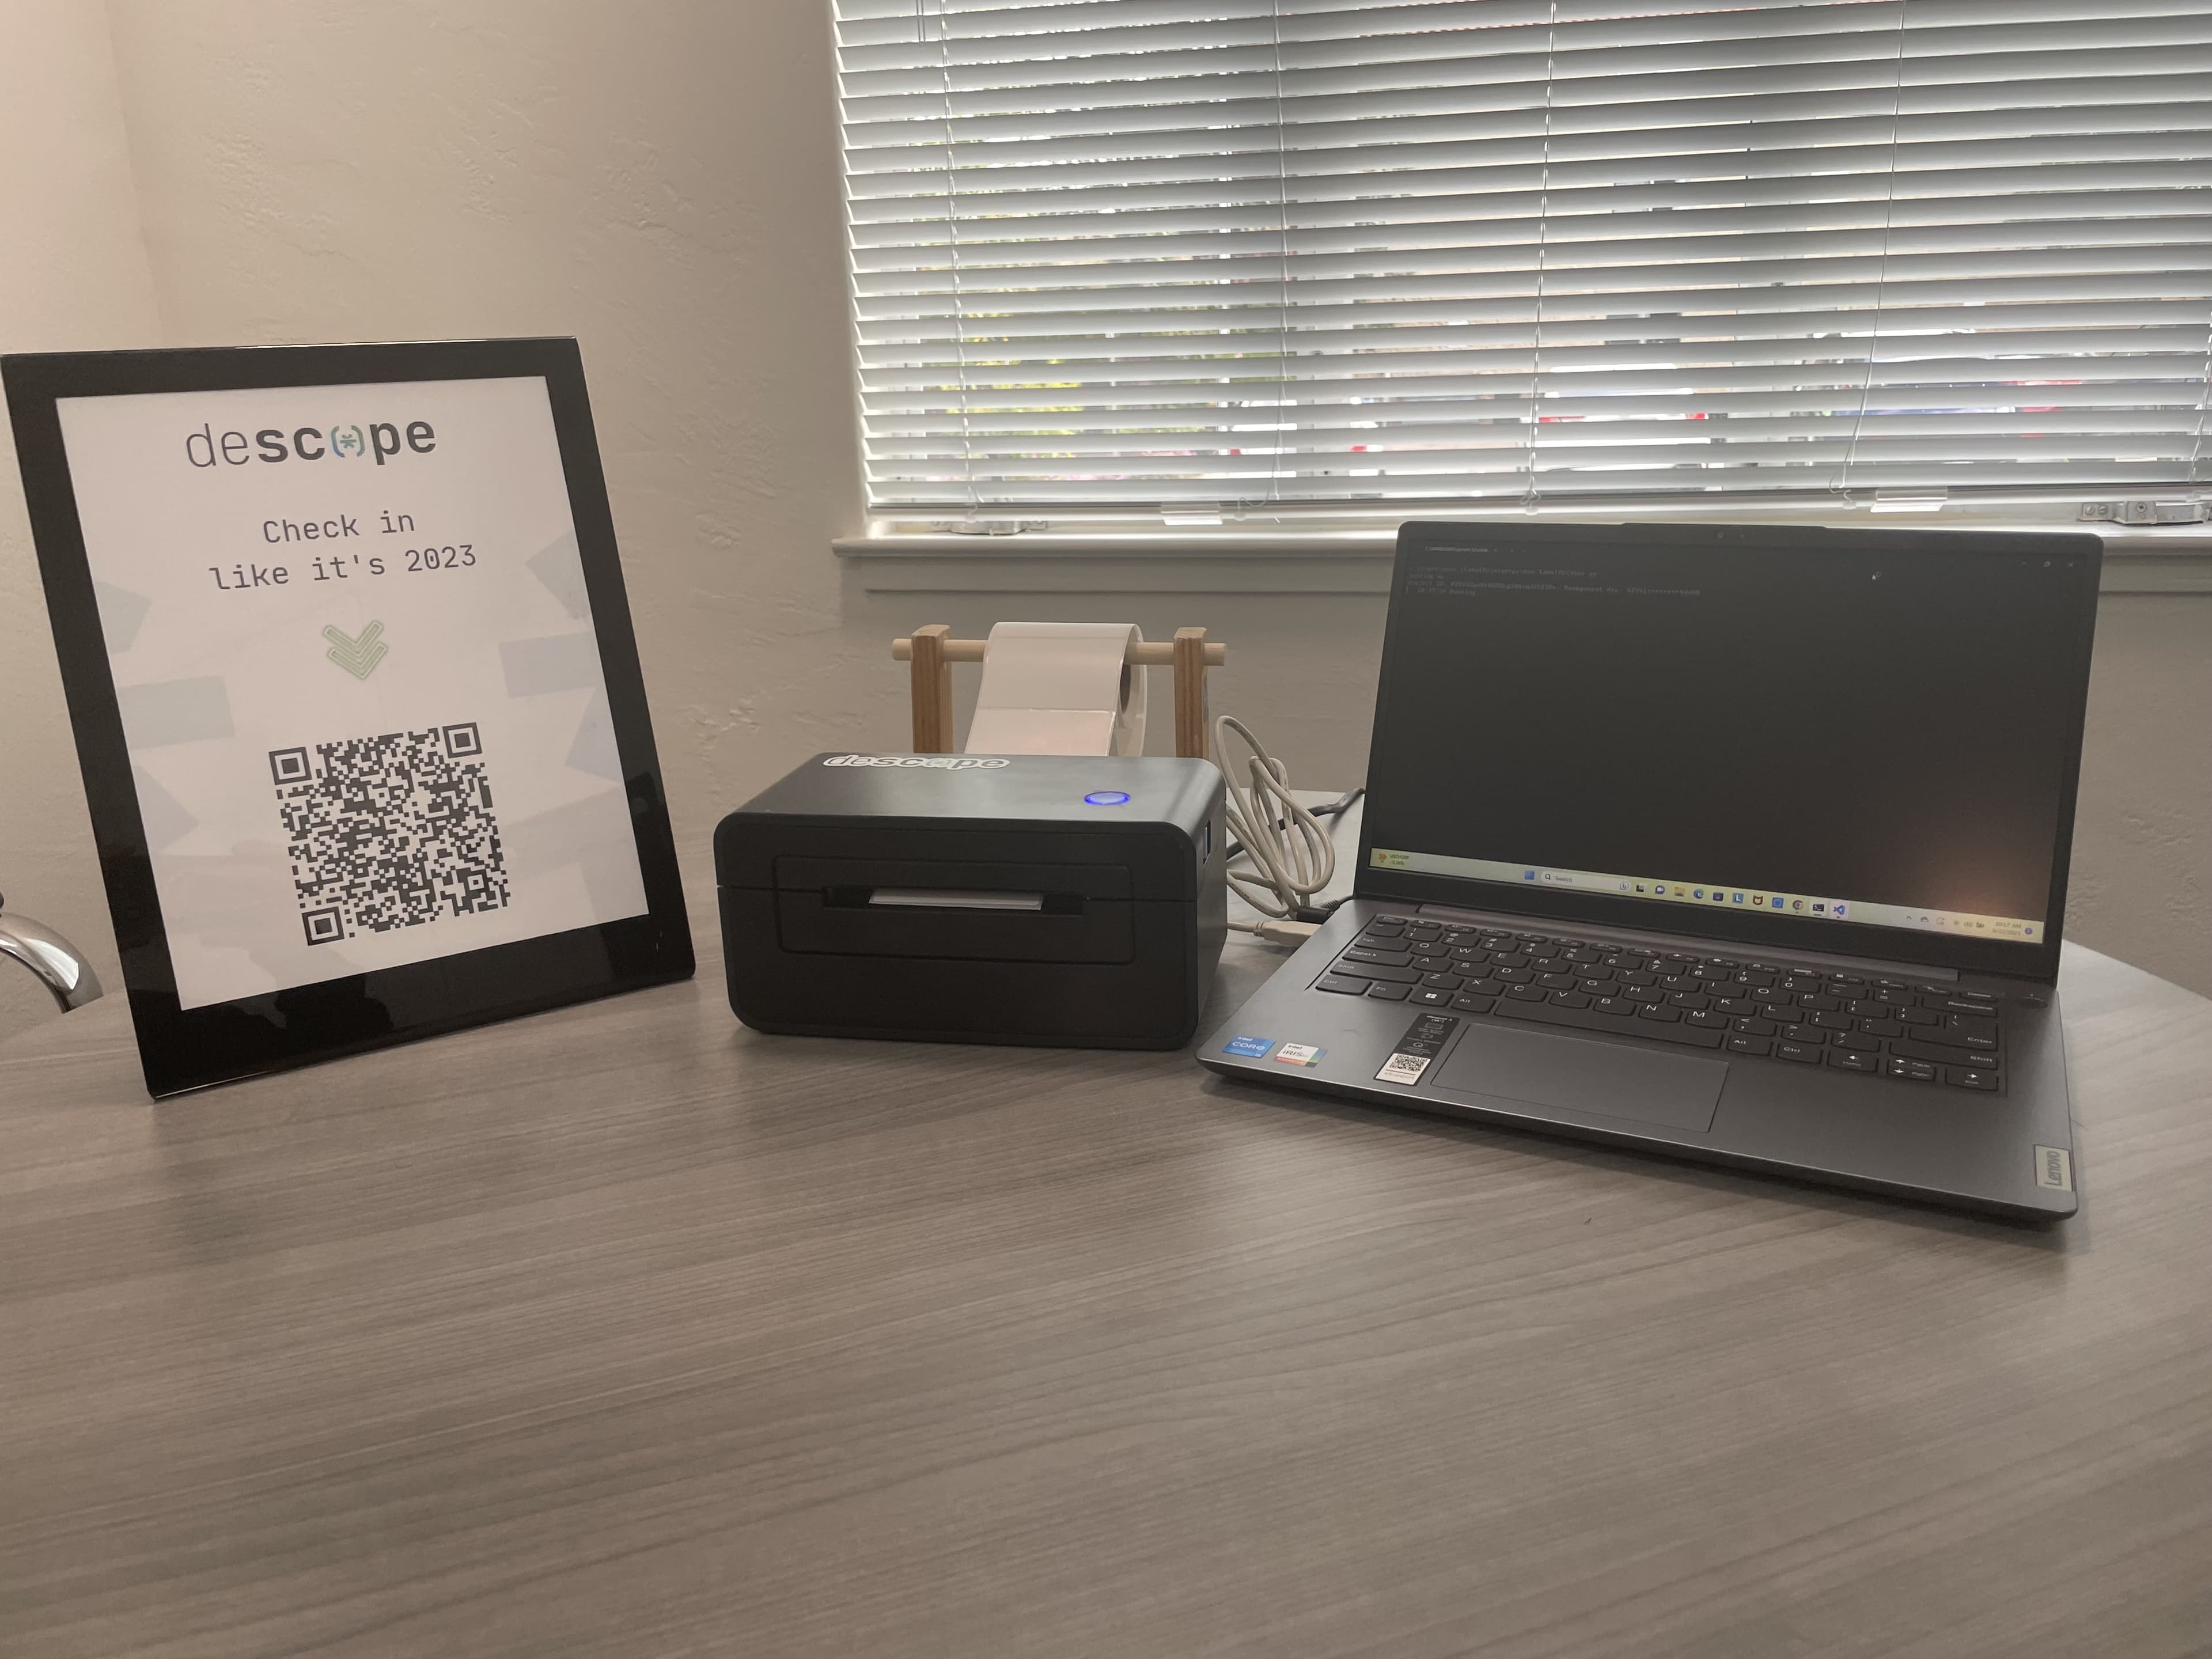
As guests started coming to the event, we had a sign with a barcode to have them start the check in process.

Label printing is tricky business
The next challenge was to print the name tag. And that part was tricky. Printing something without popping up the operating system modal and waiting for user approval is not that simple. For this task, we asked our intern Varun Mangla to create a small Python script that took the guests’ details and printed them – nicely formatted on a small sticker – without any user intervention.
During the event, the script constantly queried the Descope user database to get the information of guests that checked in and were approved. For those guests, it automatically printed the label, and marked the process completed so it wouldn’t print again. Guests that were not checked in, or guests that were not approved were ignored.
This may sound simple, but it is not. Just think of the wide range of names, companies, and titles the script had to cope with, on top of having the label nicely formatted and printed. But Varun made it happen, and the results were just awesome!
But wait, there’s more…
With Descope Flows, it’s very easy to integrate with external tools, so we decided to take this little project to the next level.
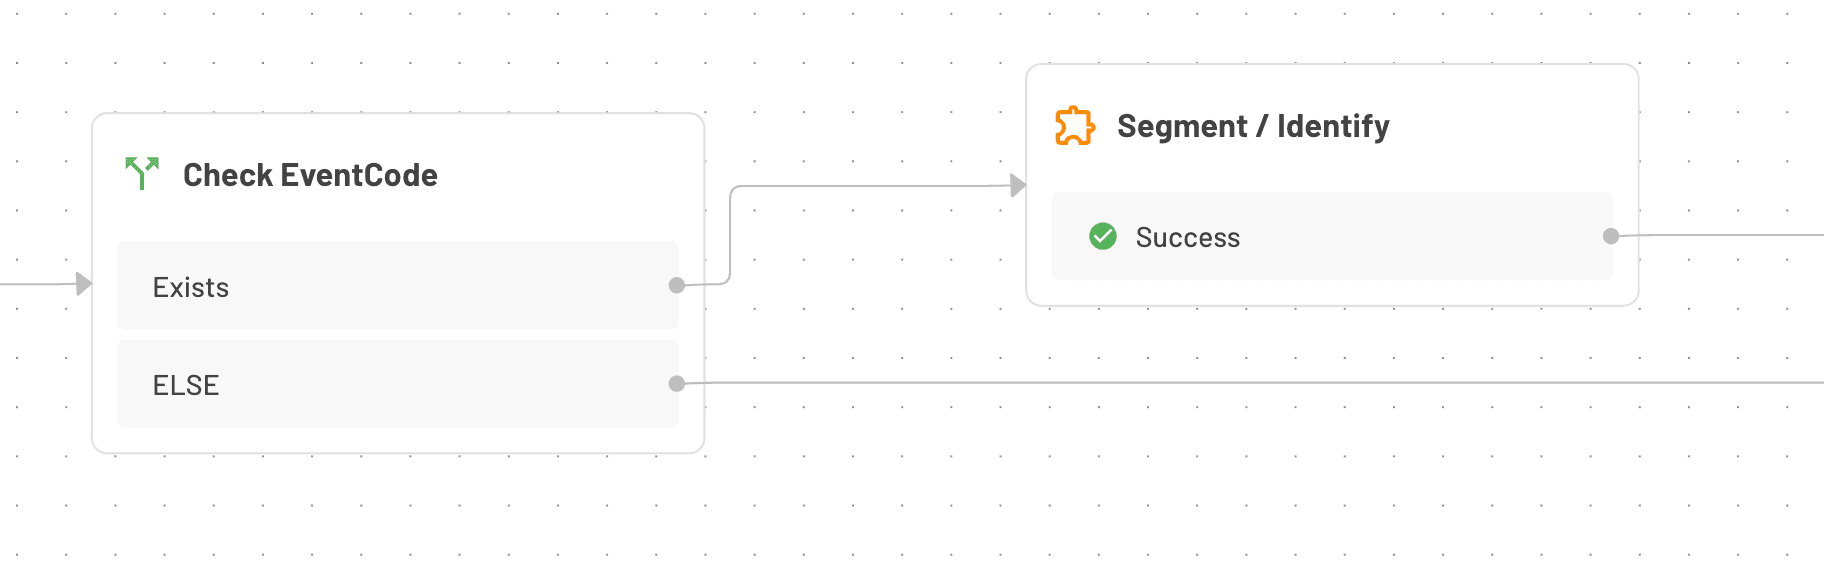
First, we wanted to track guests as they checked in and update our CRM. We used the Segment connector to accomplish this. We simply dragged the connector to the flow, and specified the traits we wanted to track, and that’s it. Imagine the effort needed if we wanted to do that inside the application itself.
We added a URL Query parameter to the link with the eventCode, so we can change it for the next event, and then added it to the Segment call to flow all the way to the relevant contact in HubSpot.

The next challenge was dealing with all those late . Yes, we know who you are… just kidding, we love you too!
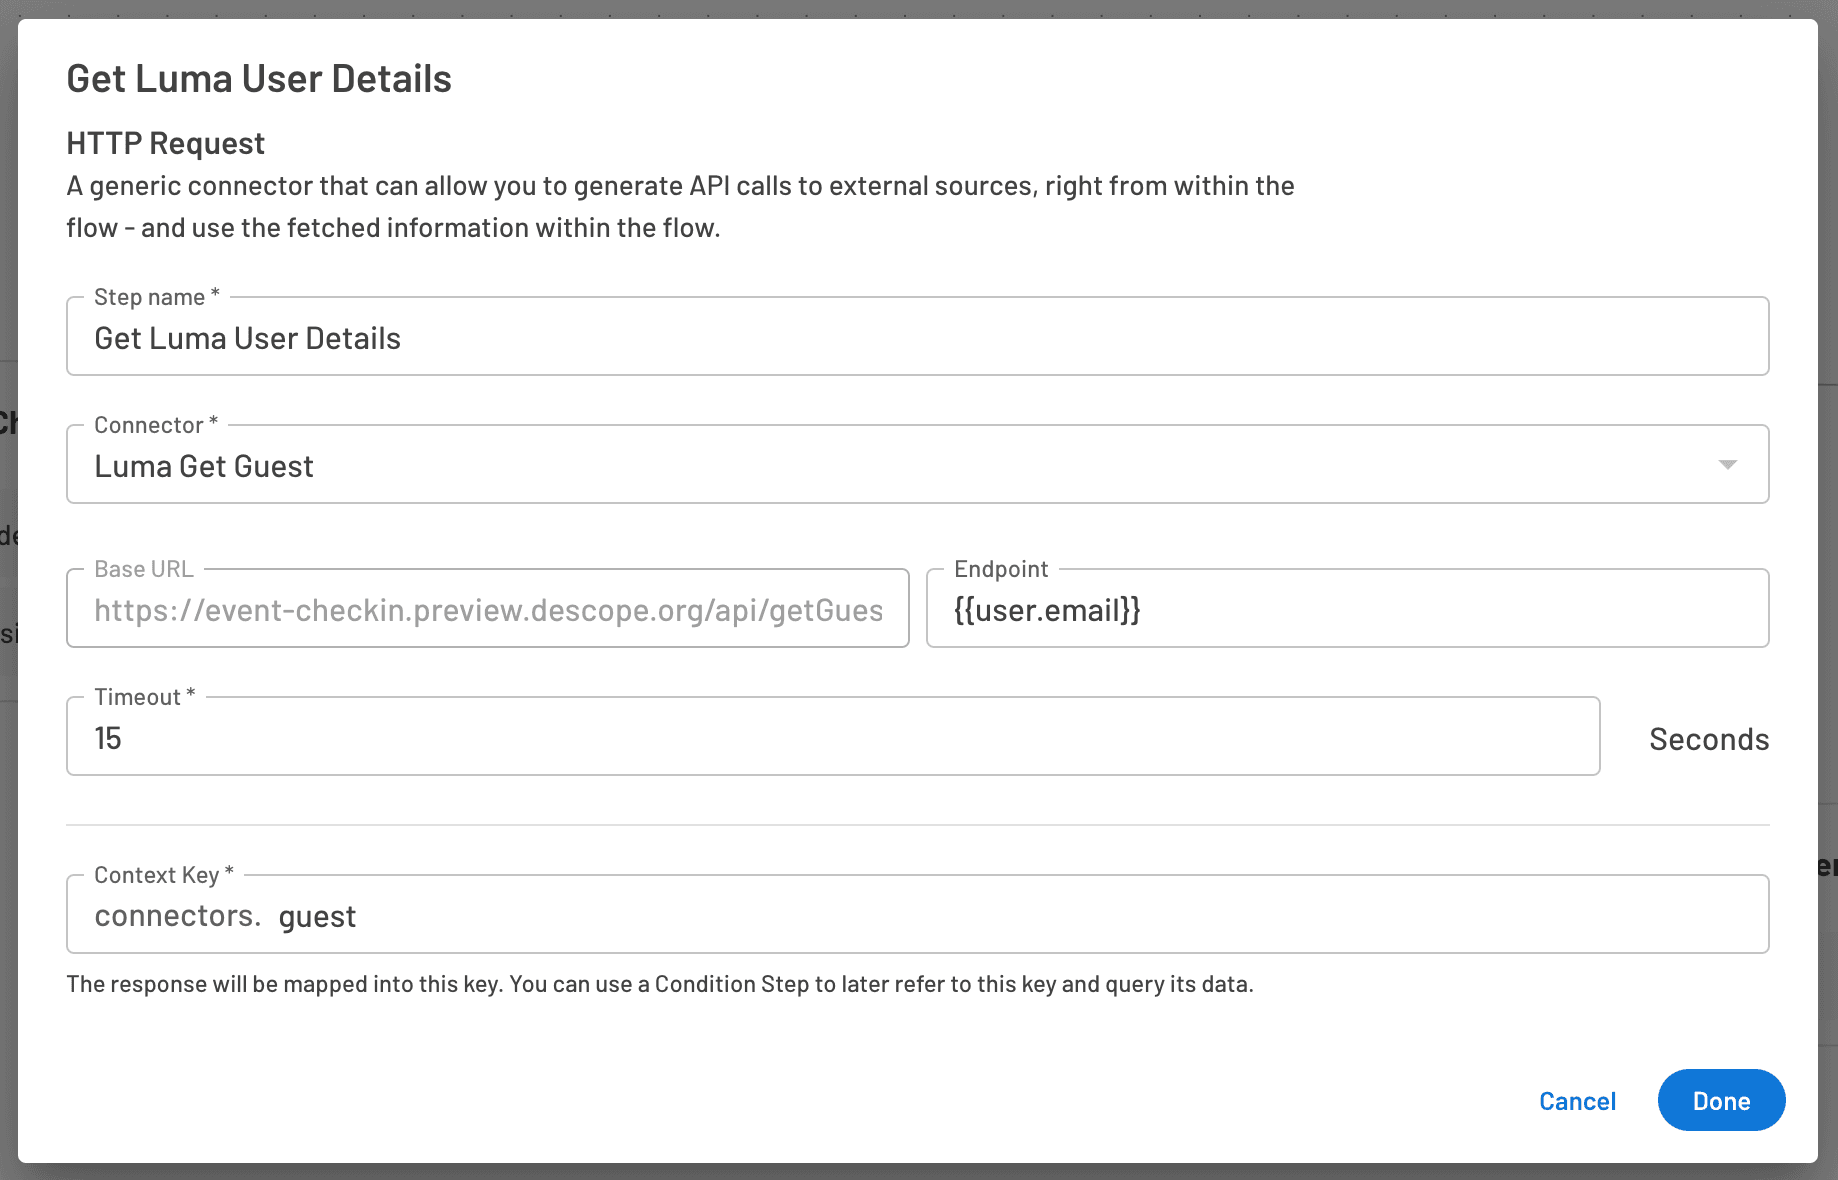
As folks checked in, we wanted to make sure we had the details they provided in Luma, even if they registered late. So we created a small connector to get the guest details if we did not have them. Unfortunately, Luma doesn’t have a “get-guest” API endpoint, so the only way to do this was to get all guests and find the one we needed.
For this, we had to code a little serverless function that would take the email, iterate through all the guests, and return the details if found (or an empty object if not). Then, with the built-in HTTP webhook connector, we just called the function from the flow. Easy!
Conclusion
Descope Flows lets you add and modify user journeys in your application without the hassle of changing the code repeatedly. The user journeys can be simple as signing in with a magic link, and it can be as complicated as taking users through a questionnaire, integrating with third-party systems, and printing a name tag at the end.
Sign up for a Free Forever account and put your auth imagination to work. Have questions about our platform? Schedule time with our auth experts.