

Table of Contents
This is Part 3 of the “The Power of Descope Flows” blog series which will cover how our drag-and-drop authentication platform can be used to add, modify, and update authentication on any app or website. In this blog, we cover how Descope Flows can be used to easily add passkeys to your app.
In today’s world, traditional methods of authentication such as passwords are proving to be both cumbersome for users and susceptible to security breaches. In the ever-evolving landscape of digital identity, one aspect remains a constant challenge: striking the right balance between security and user experience. The FIDO Alliance, along with many large technology companies such as Apple, Google, and Microsoft, are dedicated to finding and promoting a solution to this problem.
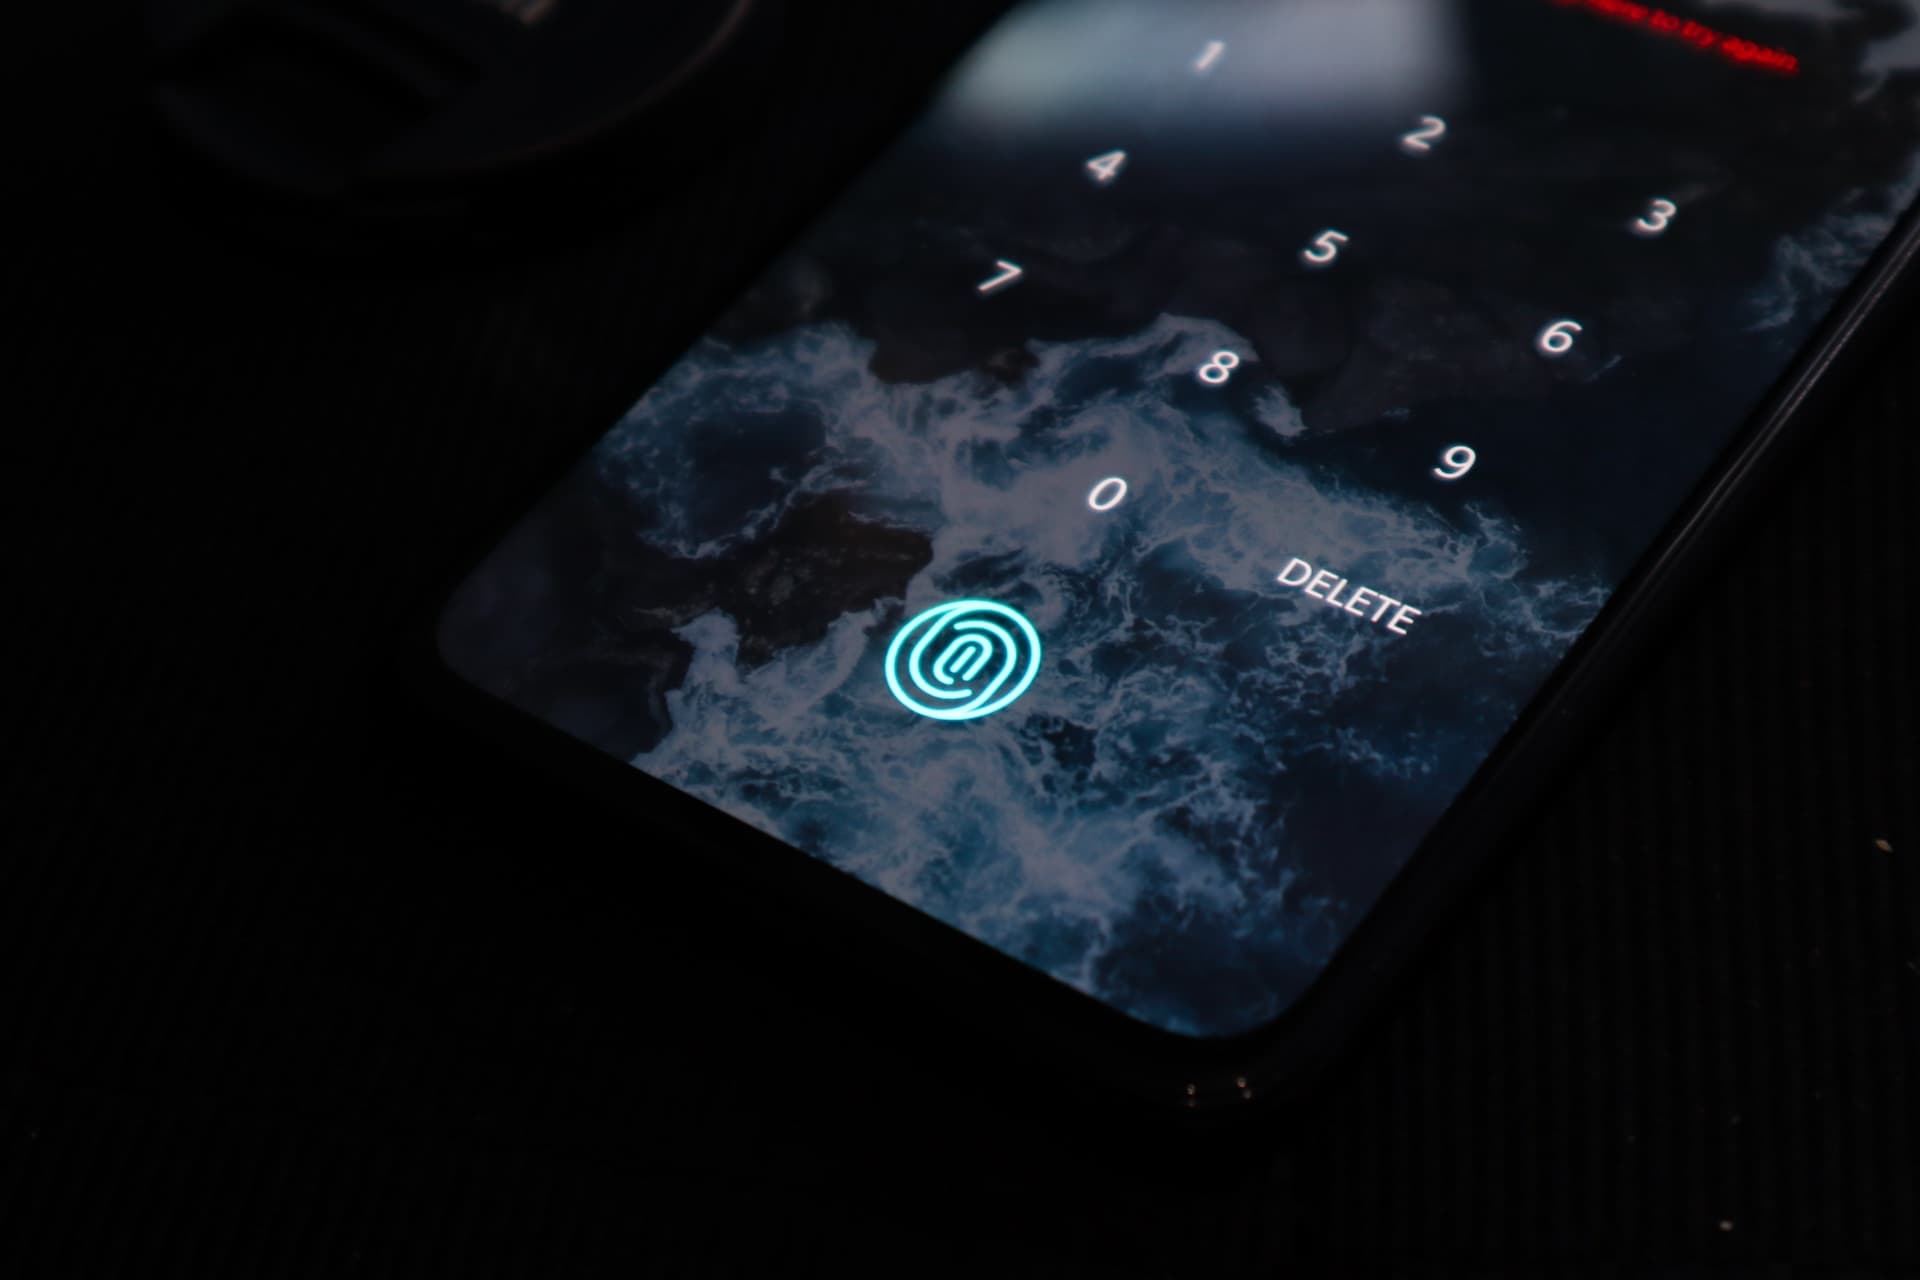
Enter passkeys – a new way for users to log in to accounts the same way they unlock their devices (by using a fingerprint, face scan, or PIN). Passkeys tie user identities to physical attributes, be it biometrics or specific hardware like a mobile device. They use public-private key pairs as part of a standard called WebAuthn to ensure that there is no shared secret between a client and a server (and thus nothing for attackers to steal). Your private key and physical information (biometrics) are saved locally on your device and can easily integrate with most browsers and operating systems.
More and more devices every day are shipping with biometric sensors, increasing user familiarity with these methods and priming the market for passkey adoption. However, because of the development complexity of adding passkey support, they are still not supported by many websites today. This is where Descope Flows come in – our no-code workflow editor lets you add passkey support to your application in a few simple steps.
In this blog post, we’ll go over where you can add passkeys to give your users the best experience, and also show you how easy it is to add passkeys with Descope Flows.
“Descoping” your application with passkeys
Let's delve into how you can use Descope Flows to transition from password-based authentication to a passkey-based system. Passkeys require a unique identifier to associate with the biometric data, typically an email address or phone number. Since you can only add passkeys to a user account with a verified email, they can typically be promoted in the following two places:
Towards the end of your authentication flow
Somewhere else in your application, after authenticating the user - like the user profile page
Implementing passkeys in both of these places will work in tandem to help your users adopt passkeys over time.
Passkeys at the end of the authentication flow
The first step in helping users adopt passkeys is to make sure that new users can adopt passkeys when they first sign up with your application. To promote passkeys at the end of your Flow, follow these few simple steps:
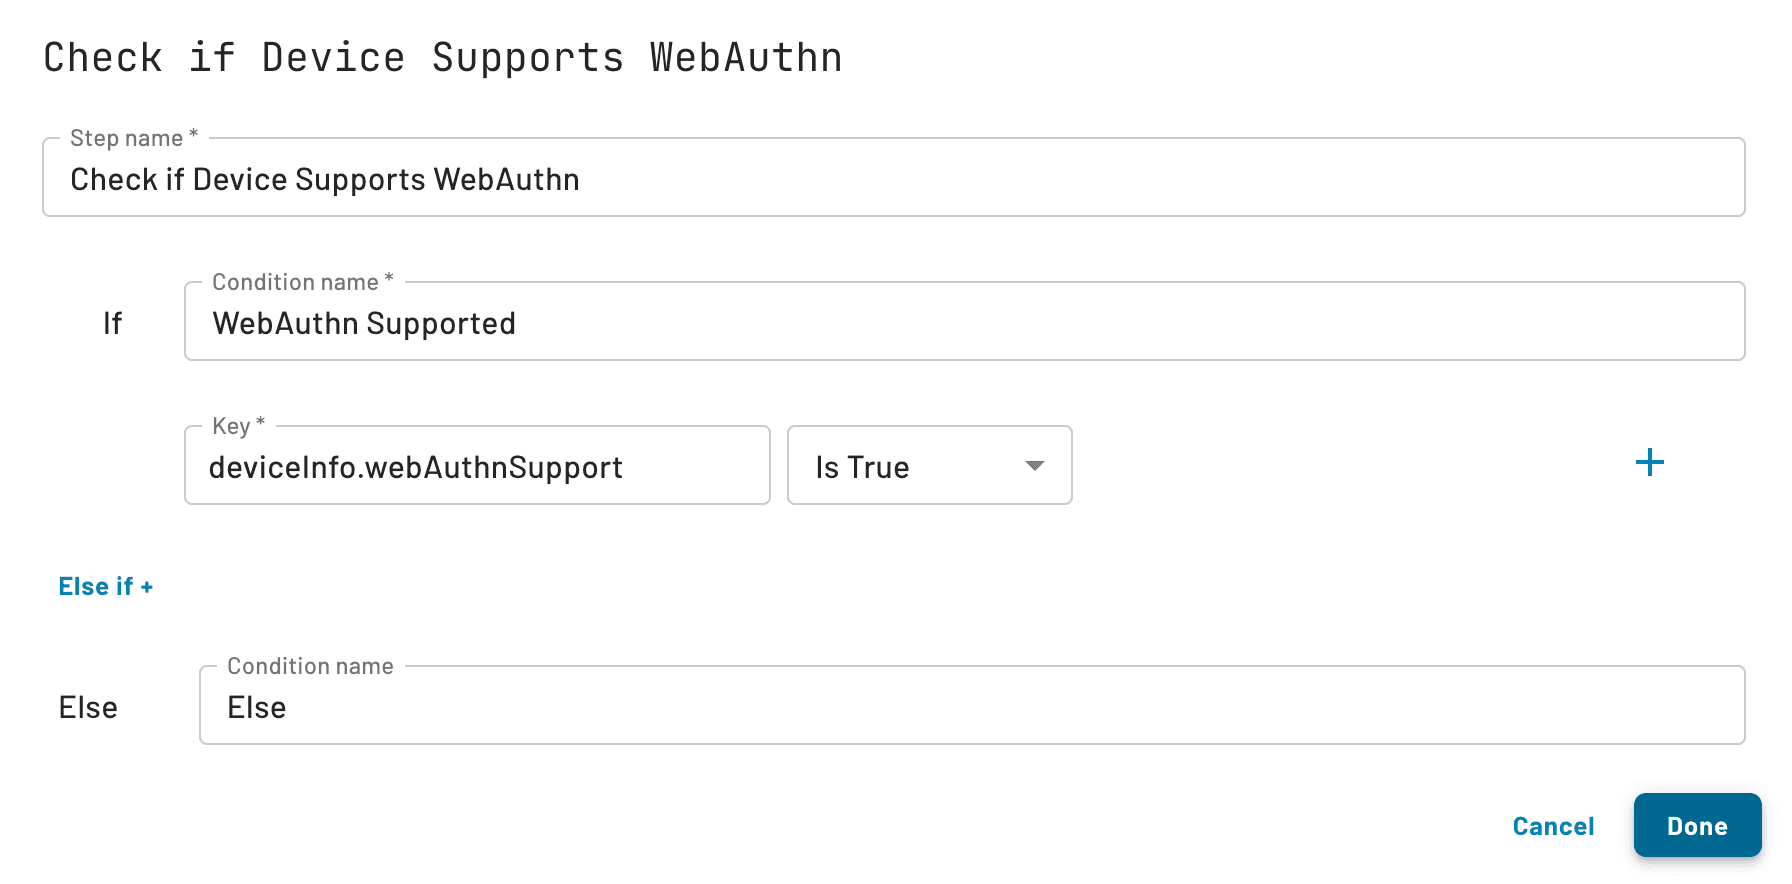
Add a Conditional block to verify that the user’s device supports WebAuthn and biometrics.
Add a Screen block with a Biometrics button, along with a regular button for the user to skip adding biometric information if needed.
Add a Update User / WebAuthn action block after a user clicks the biometric button, so that the information is updated on their specific account.
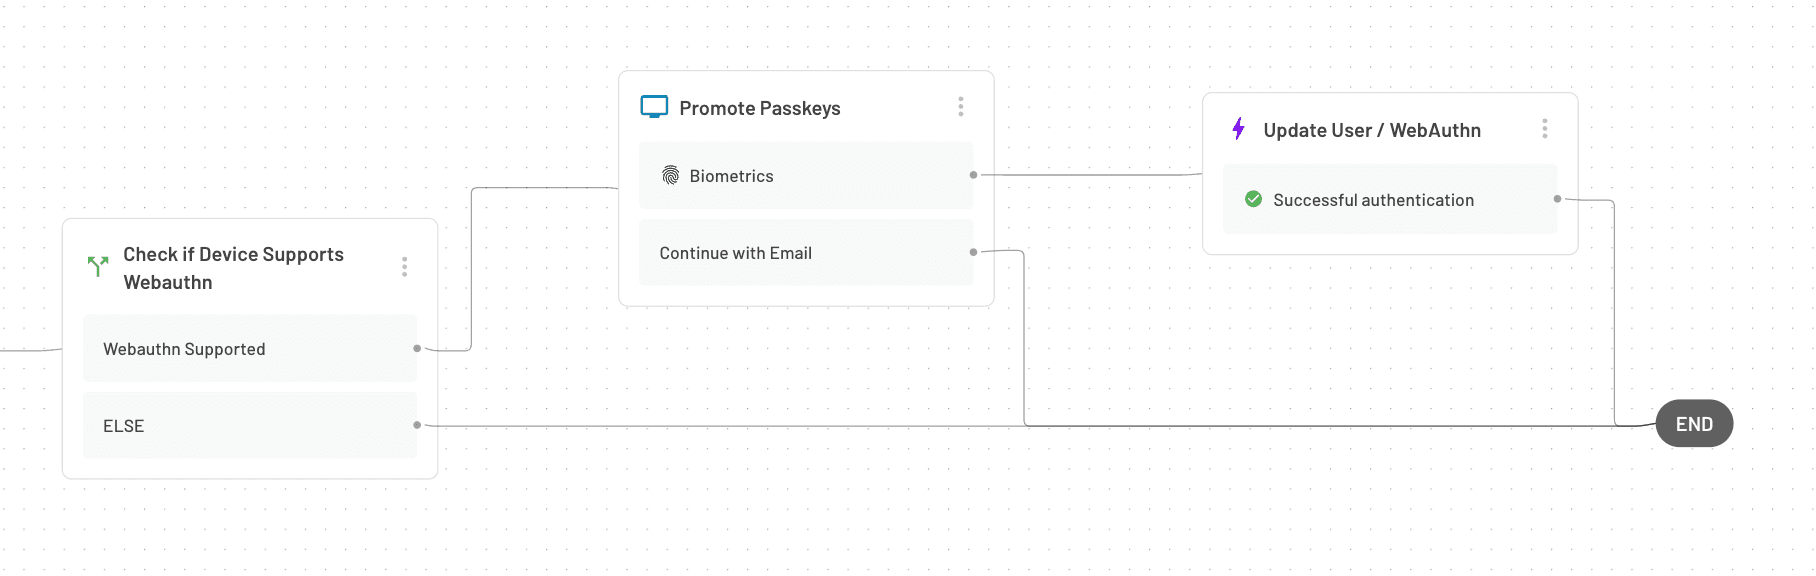
After following these steps, you can now prompt users when they sign in (whether they’re new or existing users) with the ability to add biometric authentication to their accounts. In order to ensure a good user experience, this flow only makes sense for new users, while existing users should continue with their previously used authentication method.
However, existing users should also have a place where they can add their passkey information.
Adding passkeys in the user profile page
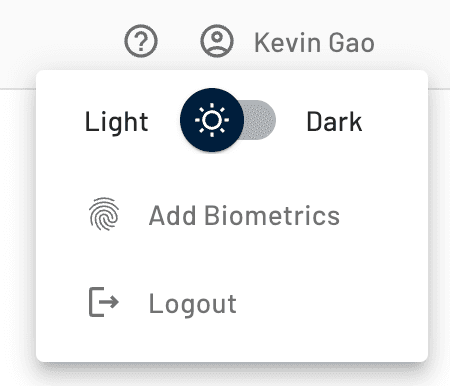
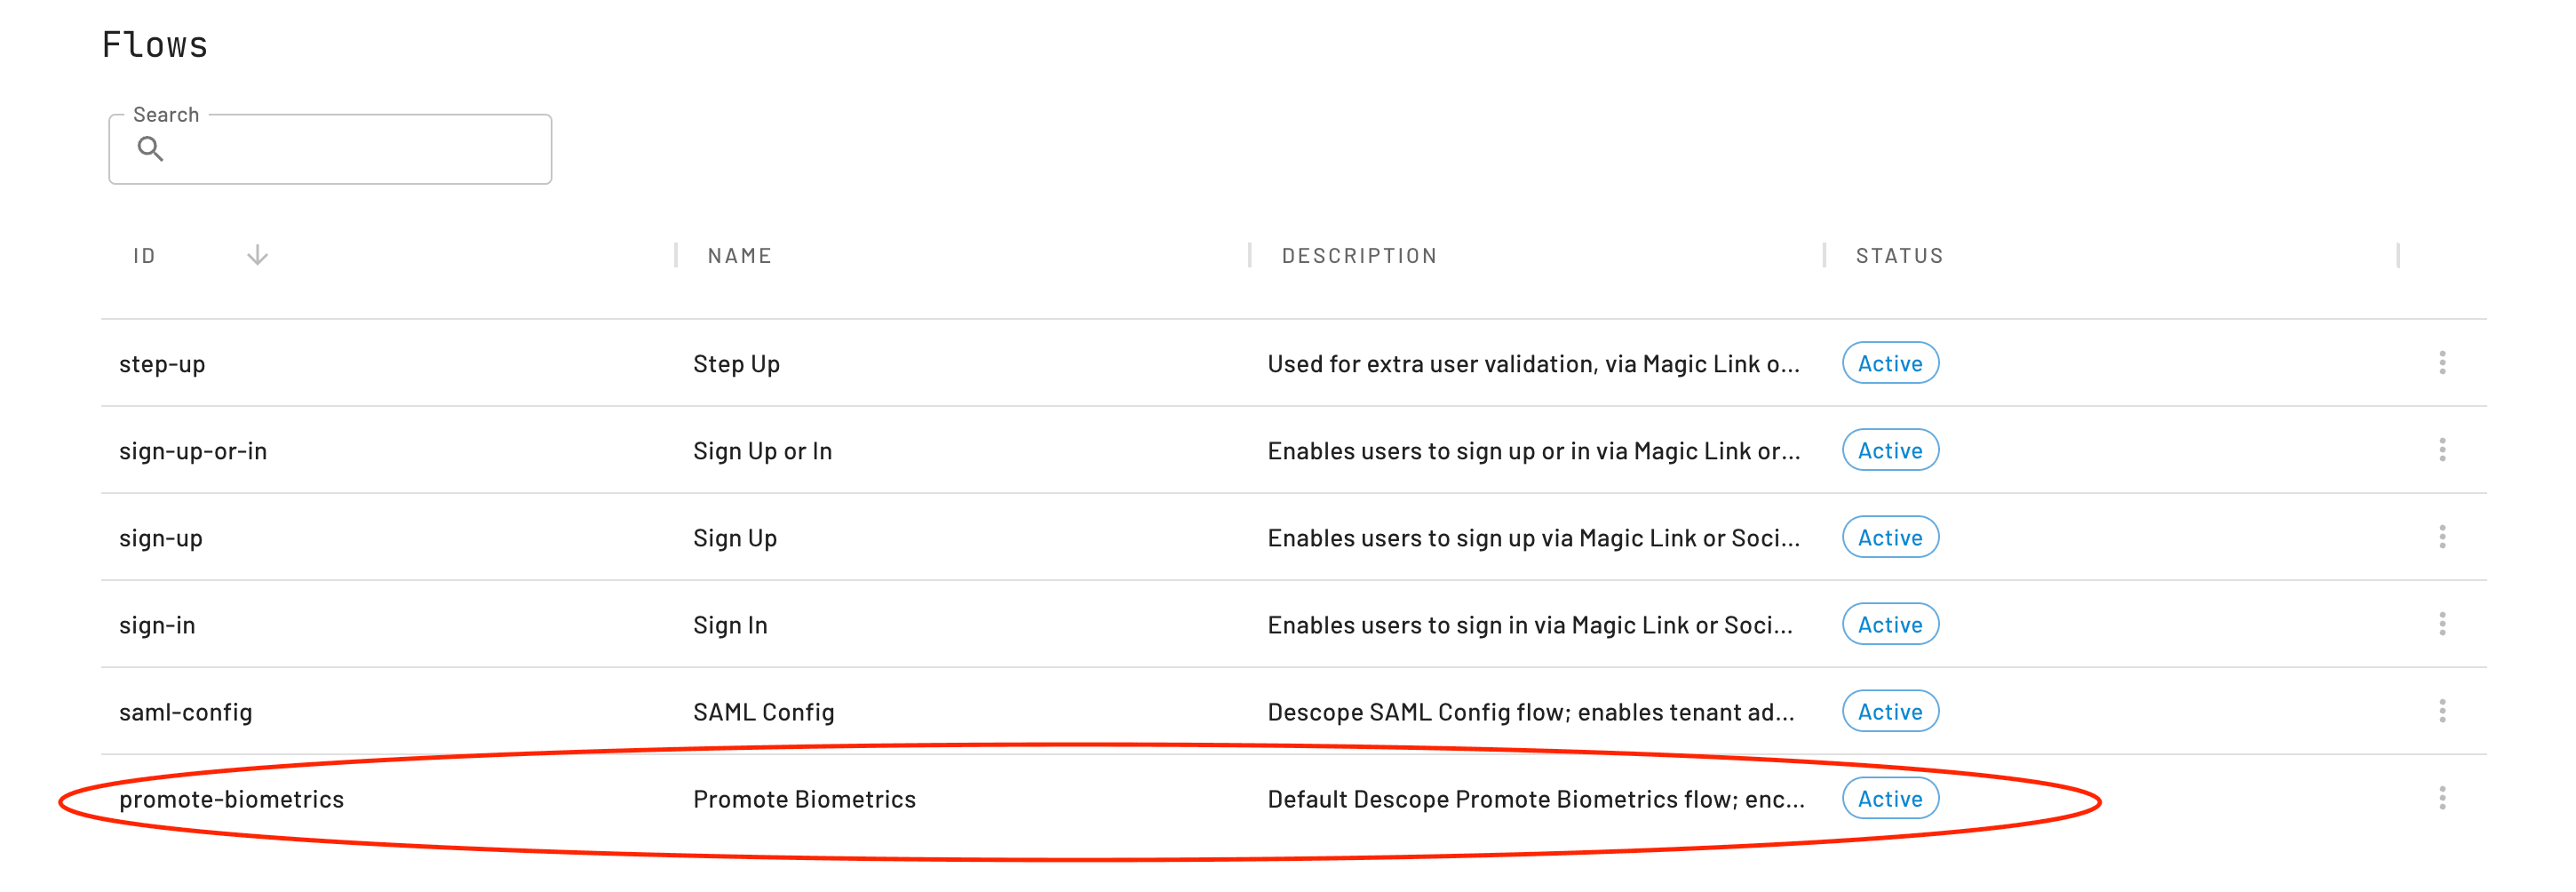
The other recommended spot to promote passkeys is in an entirely different part of your application, like the user profile page. When doing this, we recommend that you use the default Promote Biometrics Flow we’ve created and associate whatever Descope frontend component you’re using with that Flow. As an example, in our Descope Console we have a Promote Biometrics button that looks like this:
The Flow is extraordinarily simple, as it just adds biometric information to an already authenticated user in your application. All you will have to do is use the Flow provided in the Console, with the id="promote-biometrics" as shown below:
If you wish to edit the styling of the screen in the Flow, simply edit it as you would for any other Flow. As an example, if you’re using our React SDK, the component you would use to promote biometrics would be defined in your application like this:
<Descope flowId="promote-biometrics" ... />Through the two parts we’ve covered so far, new users will be able to sign up with passkeys and existing users will be able to add biometrics to their existing account.
Now you’re probably wondering: “How do I login with these new passkeys? Is there a button I need to add to my login screen, or can I just put my fingerprint on the sensor and it’ll log me in?”
We still haven’t created a way for your users to login with their newly created passkeys. For that, you’ll need to configure your login page to include a Biometrics button and Passkey Autofill to allow your users to sign in with passkeys.
Passkeys in your login page
Probably the most intuitive place to put passkey login is in your login page. Assuming you have a login page already configured with Flows, simply select a Biometrics button and add it to your page as shown below:
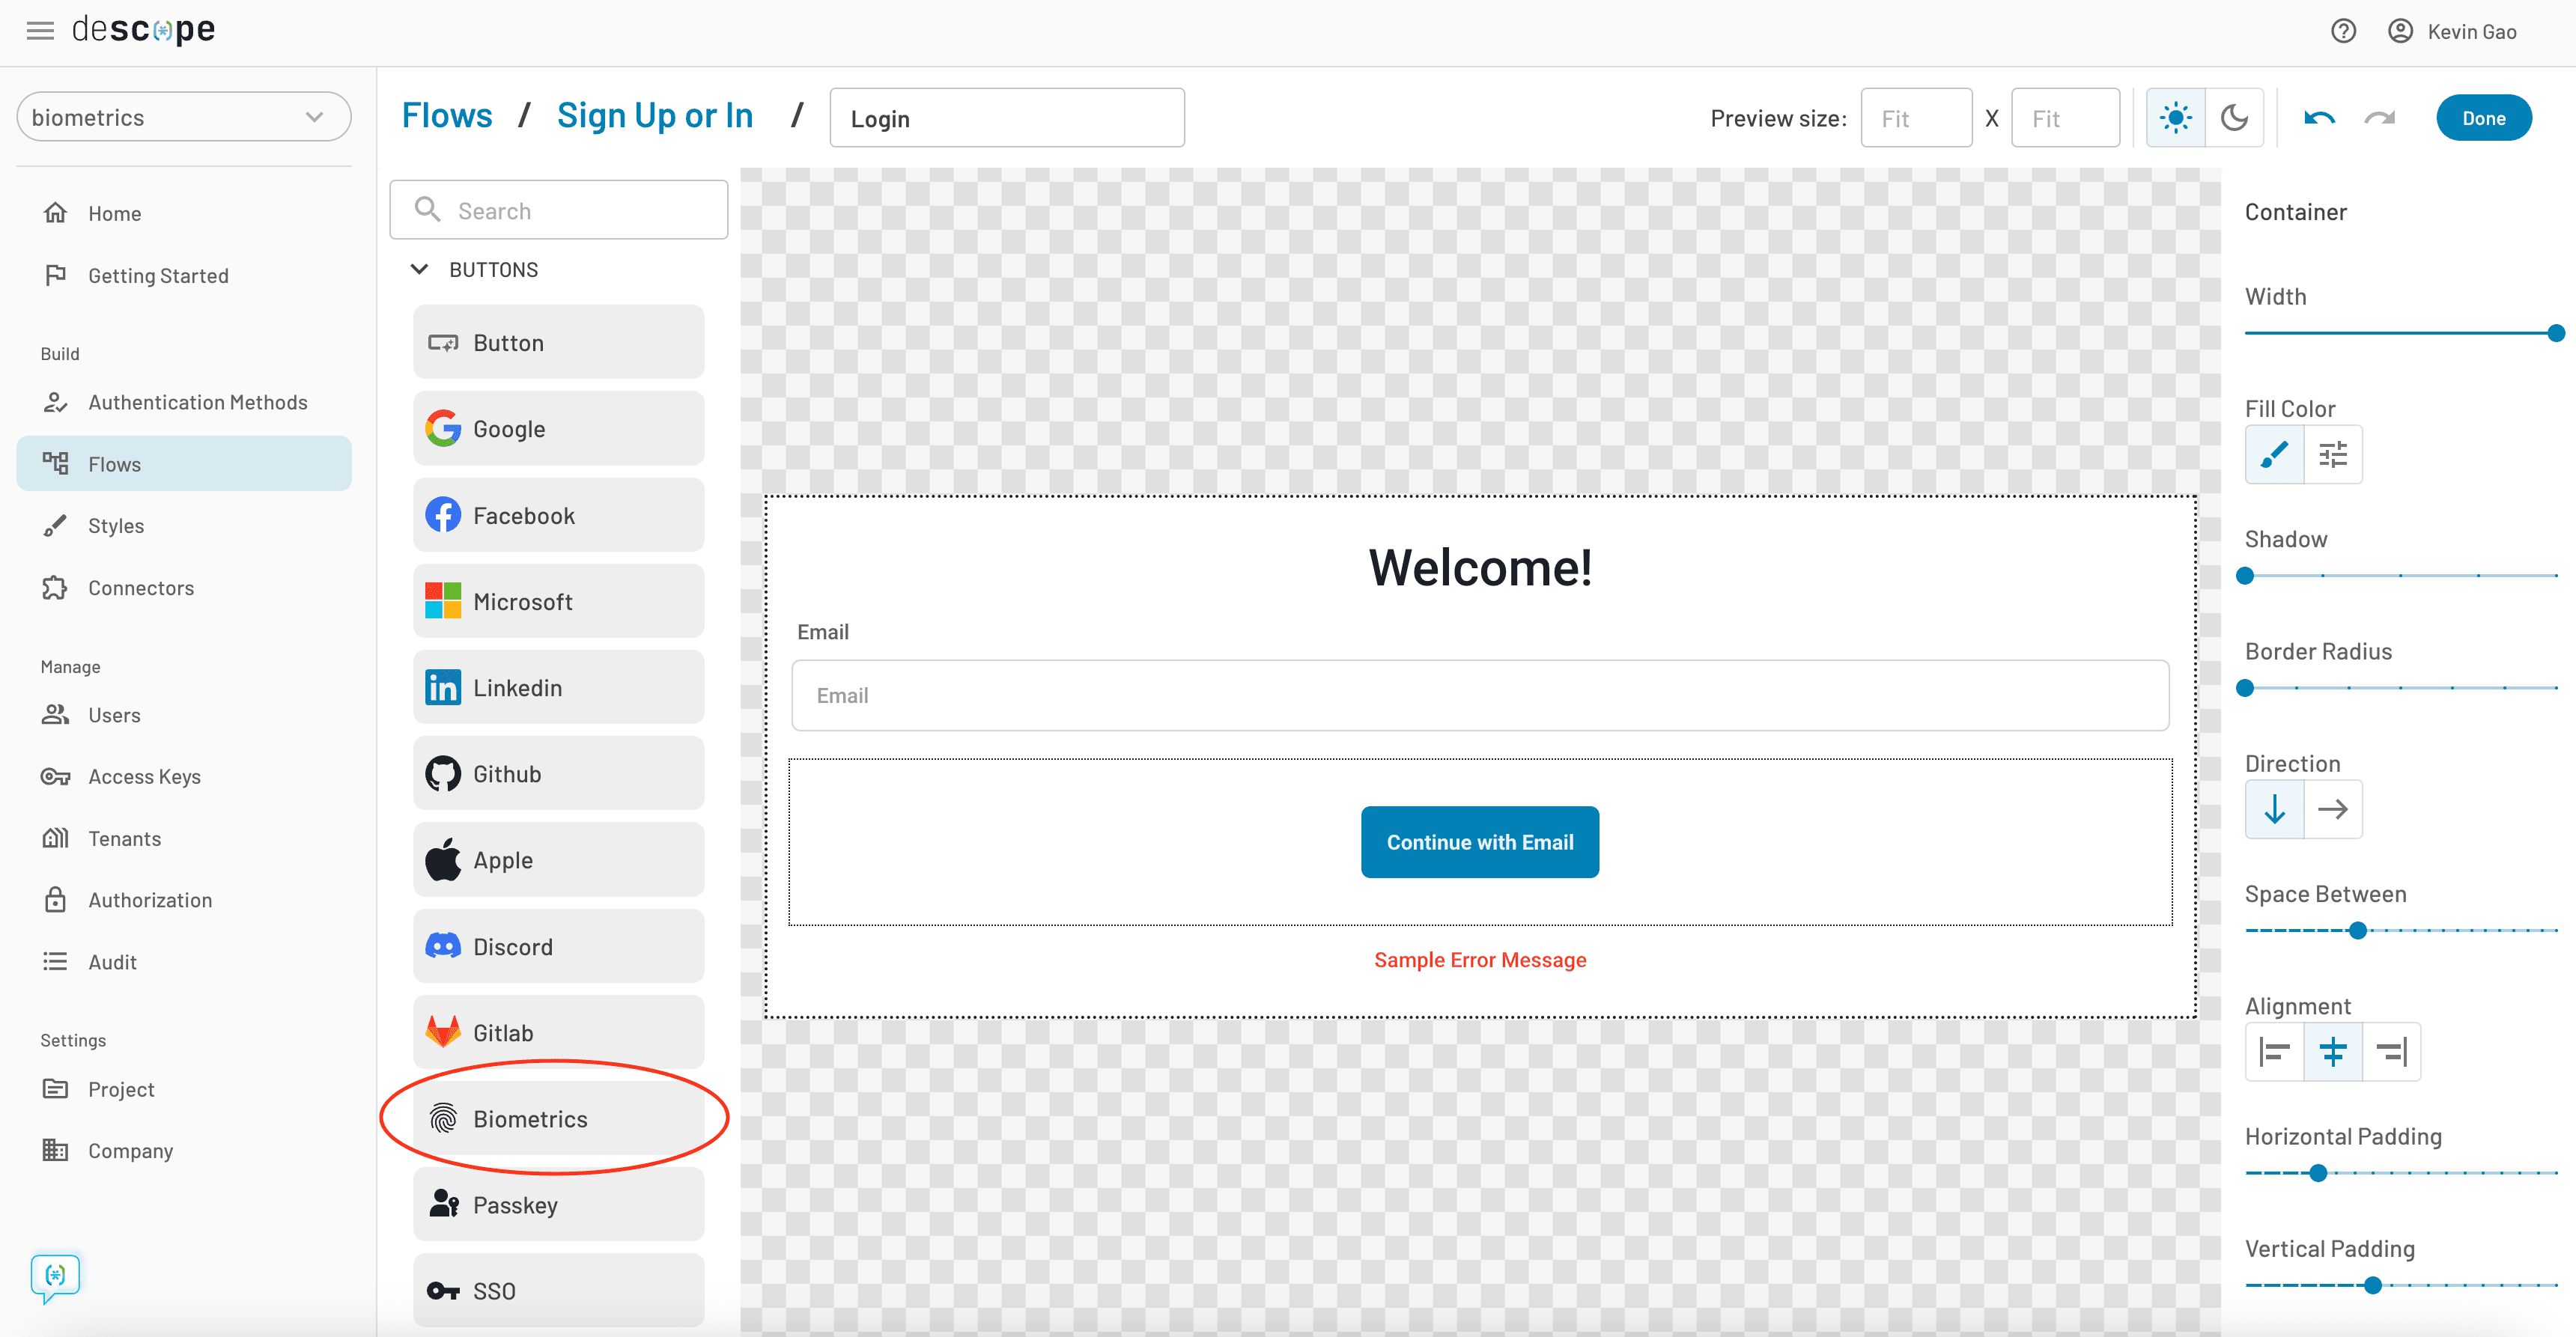
Now a user will be able to type in the login ID they typically use (e.g. username, email) and press the Biometrics button in order to sign in with their passkey. The browser should take care of the rest, prompting them to touch their fingerprint and authenticating them in a few quick seconds!
To speed this process up even more, you can enable an autofill feature with passkeys, which works in a similar manner to password autofill (but much more secure). To do this, you have to toggle the Enable sign in with Passkey Autofill feature in the Email Input as shown below:
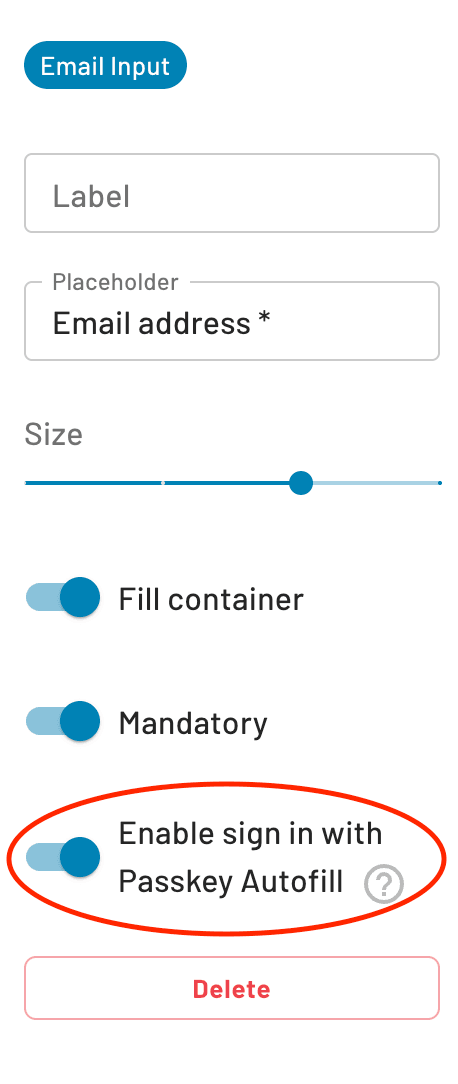
After enabling this, the browser will be able to recognize if you have a private key for a particular site, and a passkey prompt will automatically appear when a user selects the login ID input box.
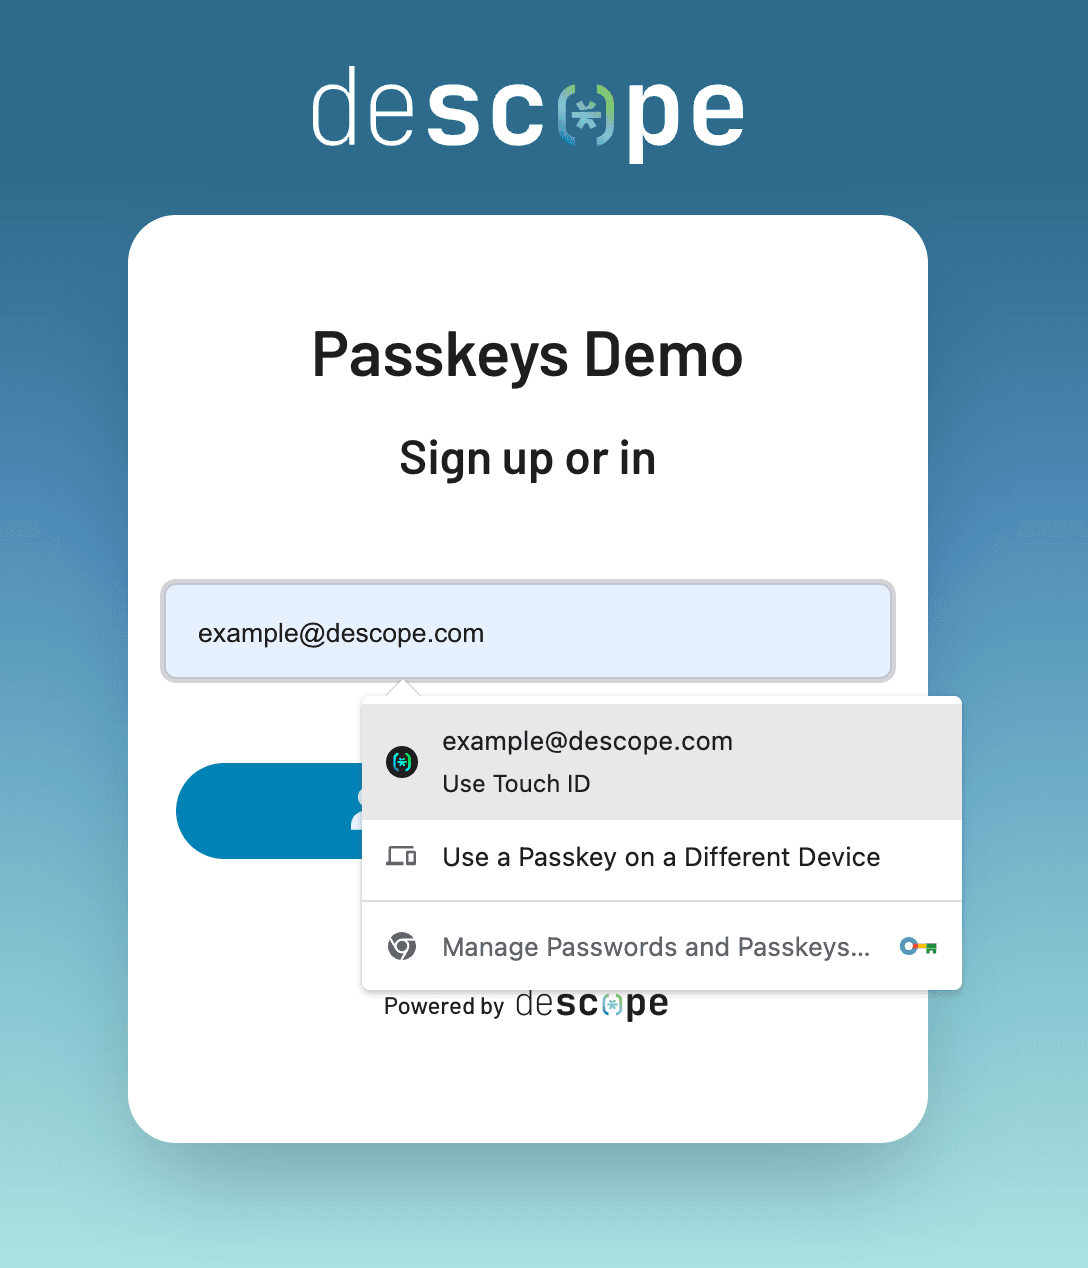
Once the user has selected the passkey option with their email address or phone number, the browser will prompt them to touch their fingerprint on the sensor, and proceed to automatically log them in. Nothing else is required, not even typing in their email or phone number!

Passkeys are a plus for any application, whether it’s the enhanced user experience they provide or the numerous security benefits they possess compared to passwords. With Descope Flows, you can easily promote the use of passkeys for both new and existing users without any big configuration changes or code rewrites.
Check out a working demo of passkeys at passkeys.guru. If you’re ready to start your passkey journey, sign up for our platform and join AuthTown, our open user community for developers to learn more about authentication.