
Table of Contents
This tutorial was written by Kevin Kimani, a software developer and technical writer. Connect with him on his GitHub or X to see more of his work!
Authentication and access control are critical for any Vue.js application that protects private content or admin features. While it may sound straightforward, authentication in Vue.js can quickly become complex as apps scale and require features like session management, MFA, and role-based permissions. Building these systems from scratch often slows development and introduces security risks.
In this tutorial, you’ll learn step by step how to add authentication in Vue.js using Descope. You’ll implement secure login with email one-time passwords (OTP), set up multi-factor authentication (MFA), and configure role-based access control (RBAC) to restrict access to admin functionality. By the end, you’ll have a working Vue.js authentication system backed by Descope’s flow-based identity management—letting you focus on building features instead of handling low-level auth logic.
Prerequisites
To complete this tutorial, you need to have the following:
A Descope account – Sign up for free to follow along with the tutorial
Basic understanding of Descope flows and how to use the flow builder to configure authentication steps.
Node.js v18.3 or higher and npm – Installed locally to run the Vue.js application.
A code editor and a web browser – VS Code and Chrome are recommended, but any editor and browser will work.
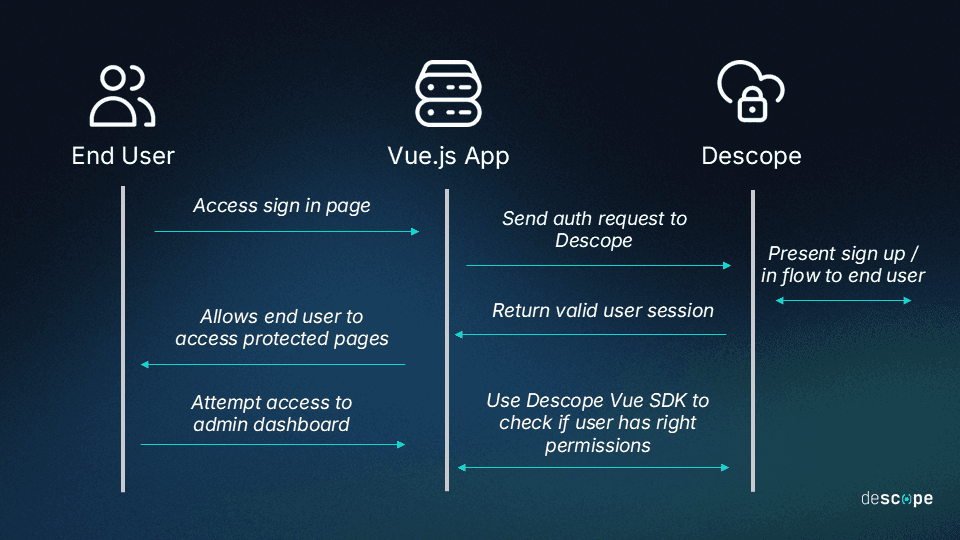
Here’s a quick look at the rough architecture of the Vue.js authentication you’ll create:
Creating a project on Descope
The first step in setting up authentication in Vue.js is creating a new project in your Descope console.
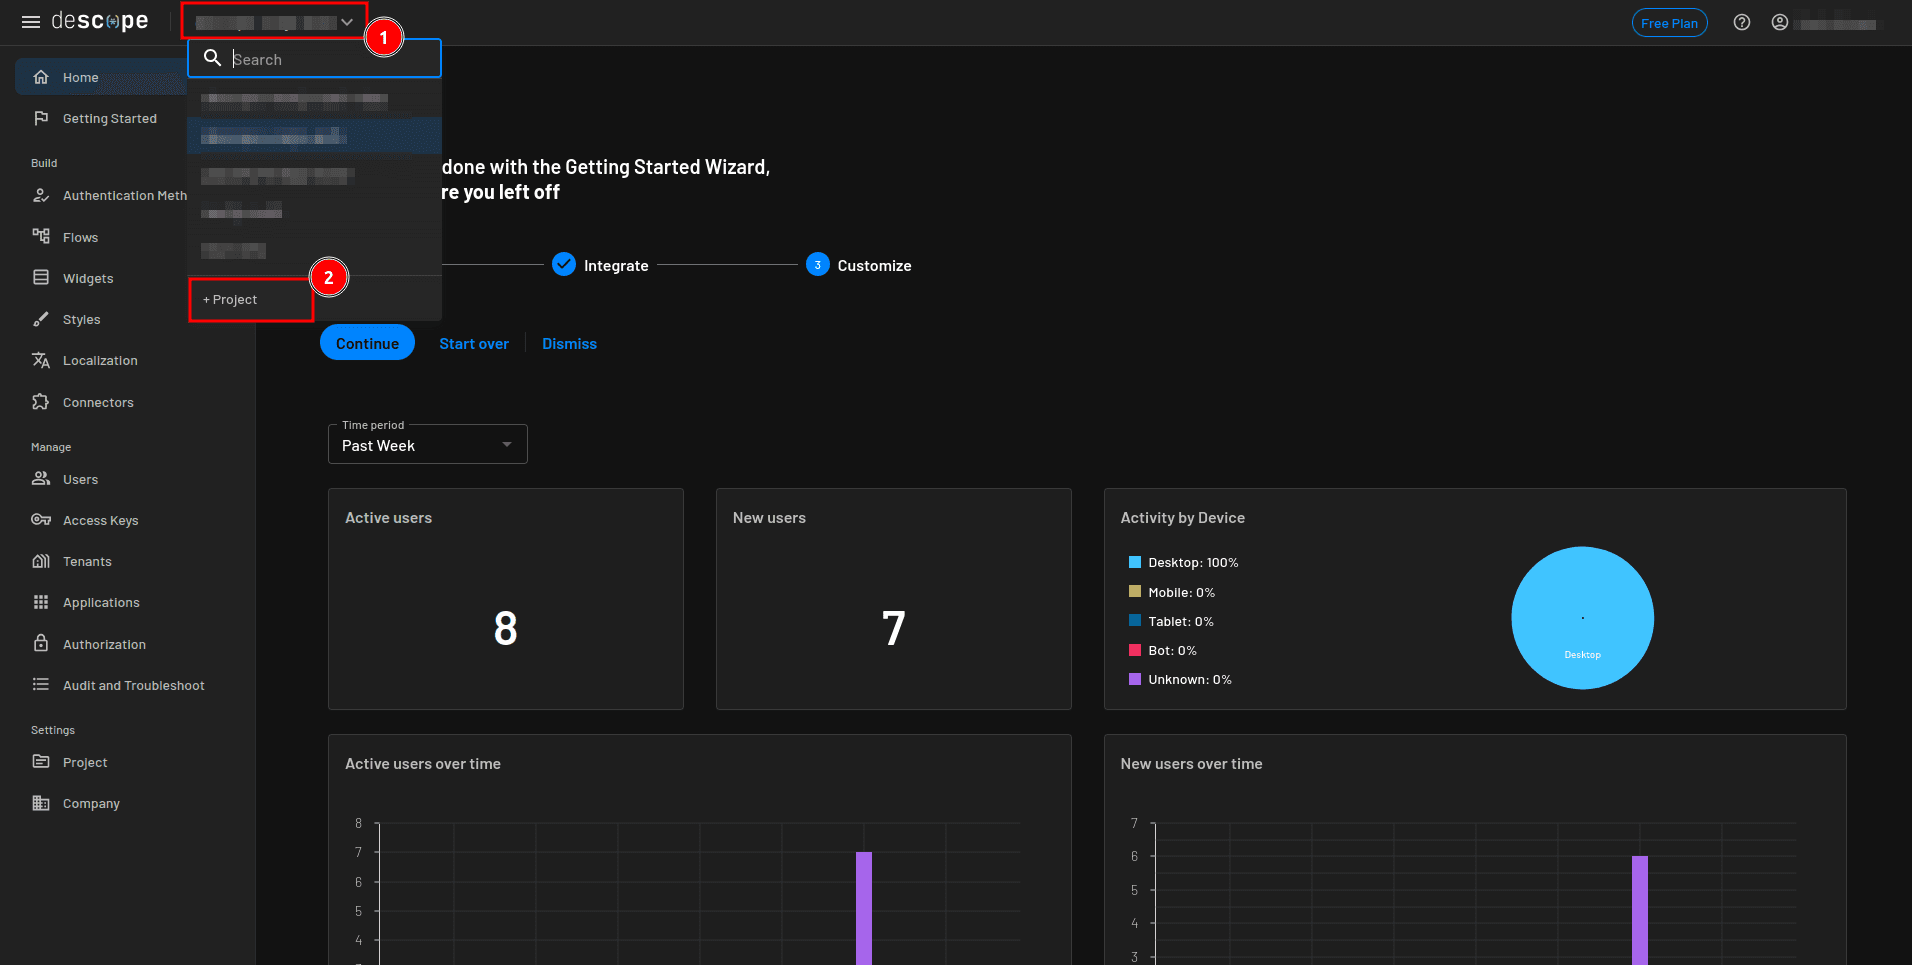
Open your Descope console. From the project drop-down, click + Project to create a new one.
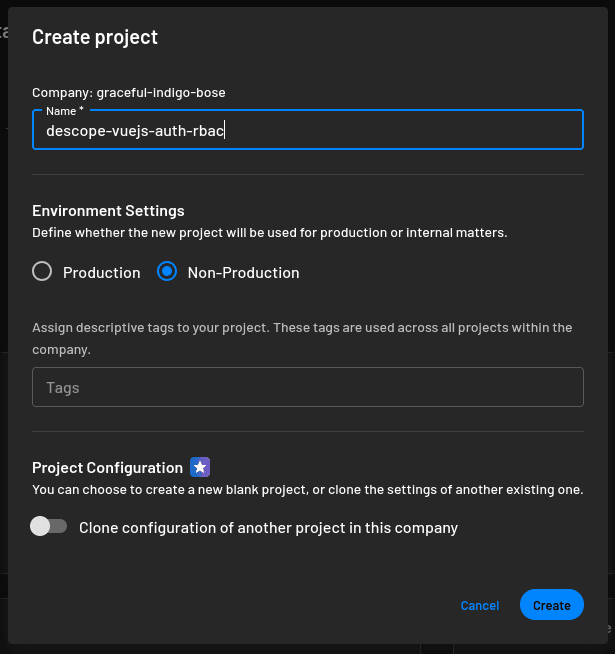
On the Create project modal, provide the project name (for example, descope-vuejs-auth-rbac), and click Create:
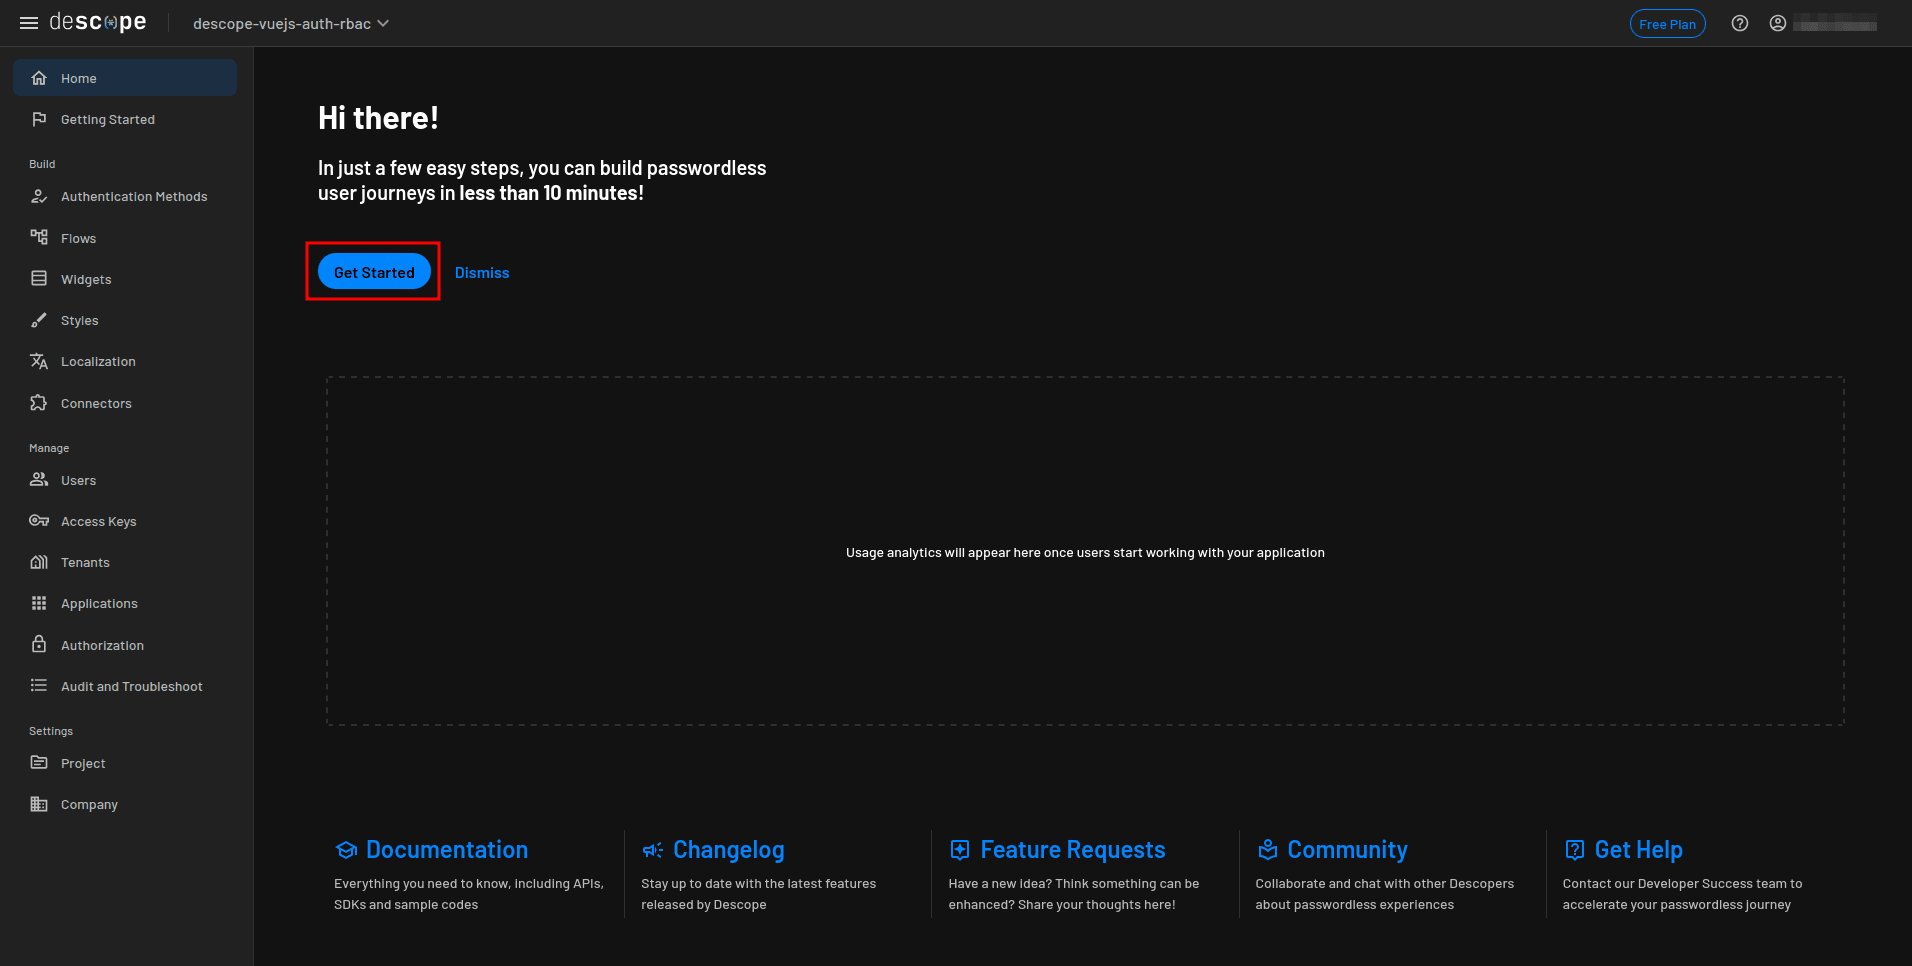
Once created, you’ll land on the project’s home page. Click Get Started to configure authentication.
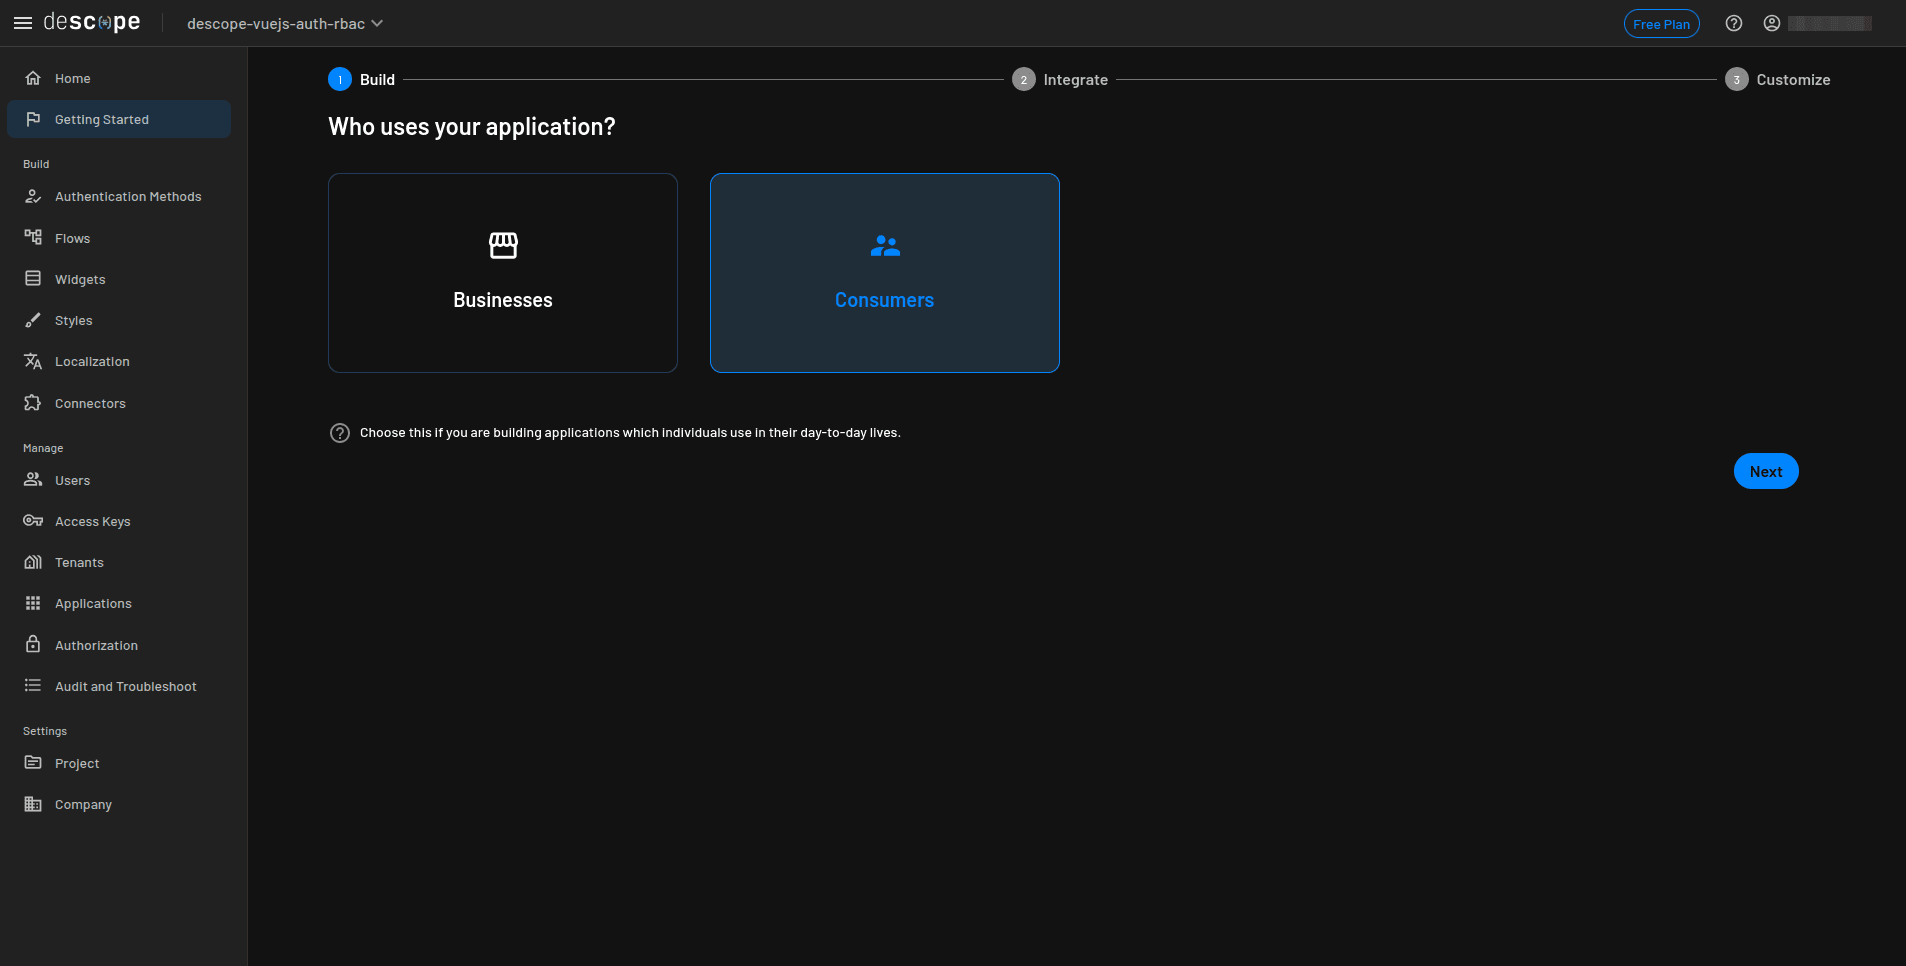
On the Who uses your application? screen, select Consumers and click Next:
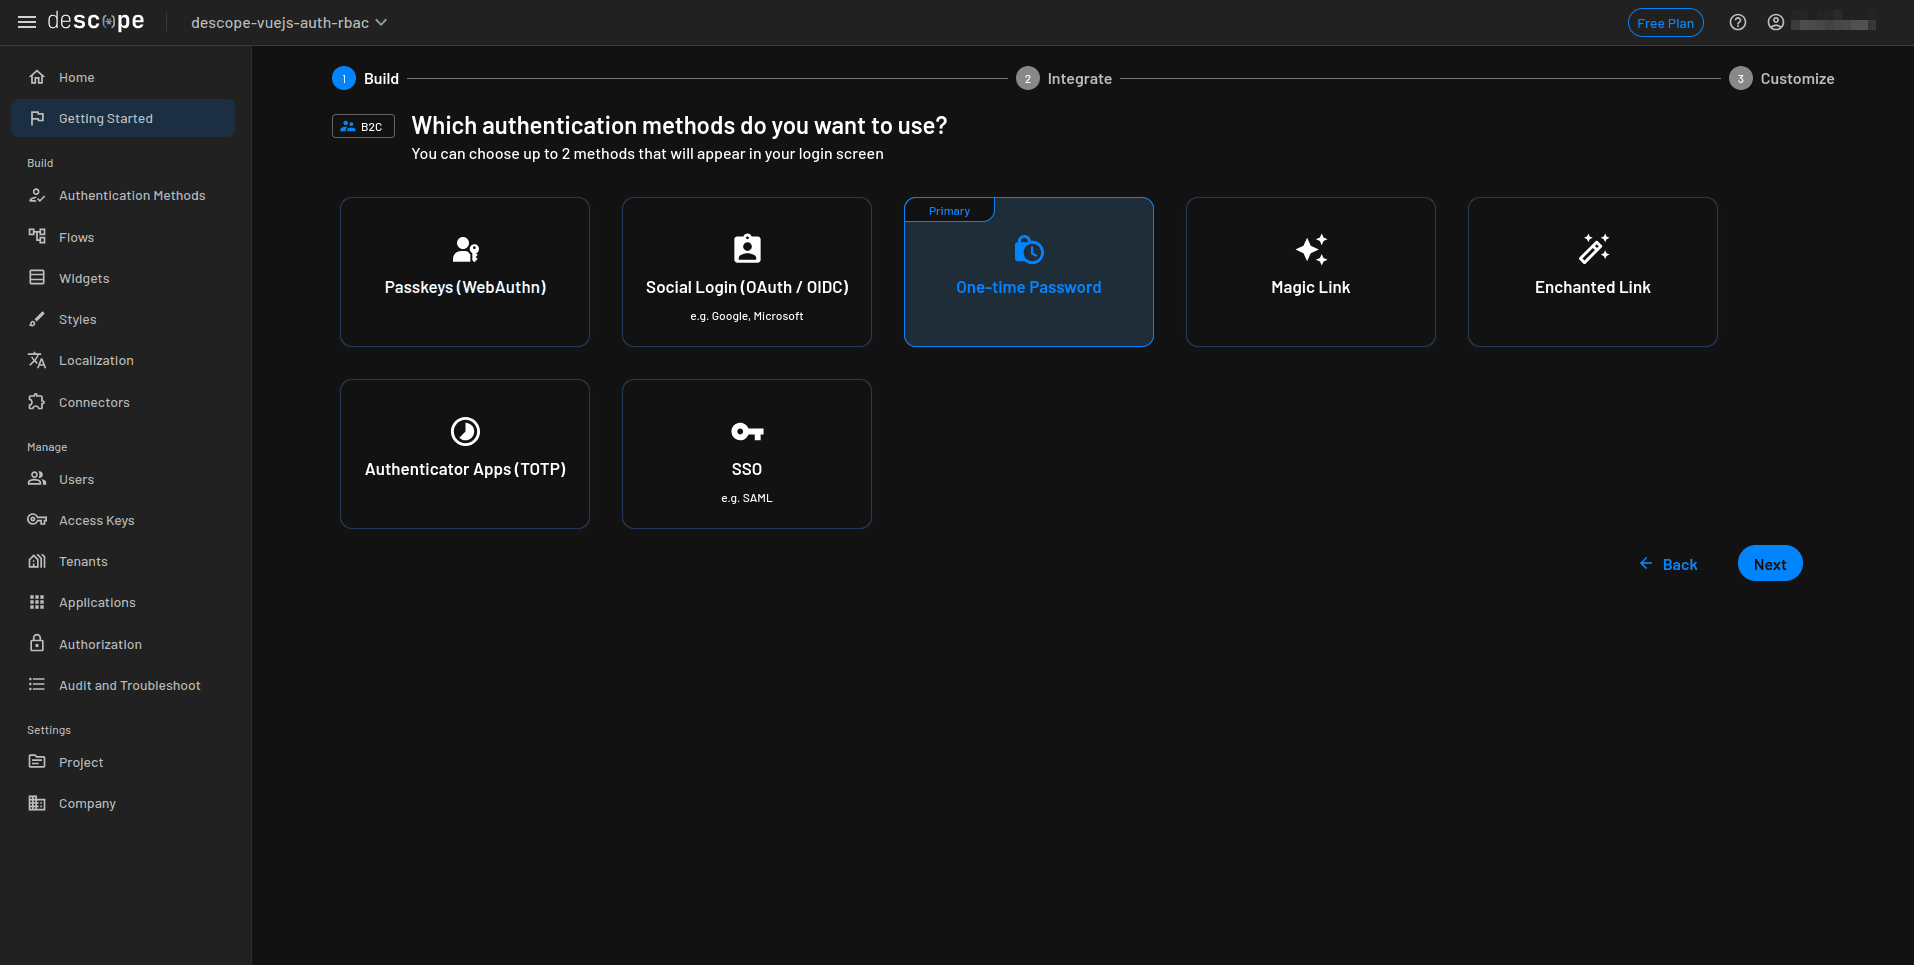
In your Vue.js application, you’ll use OTP via email for authentication and SMS OTP as a second factor. On the Which authentication methods do you want to use? screen, select One-time Password as the primary method, then click Next.
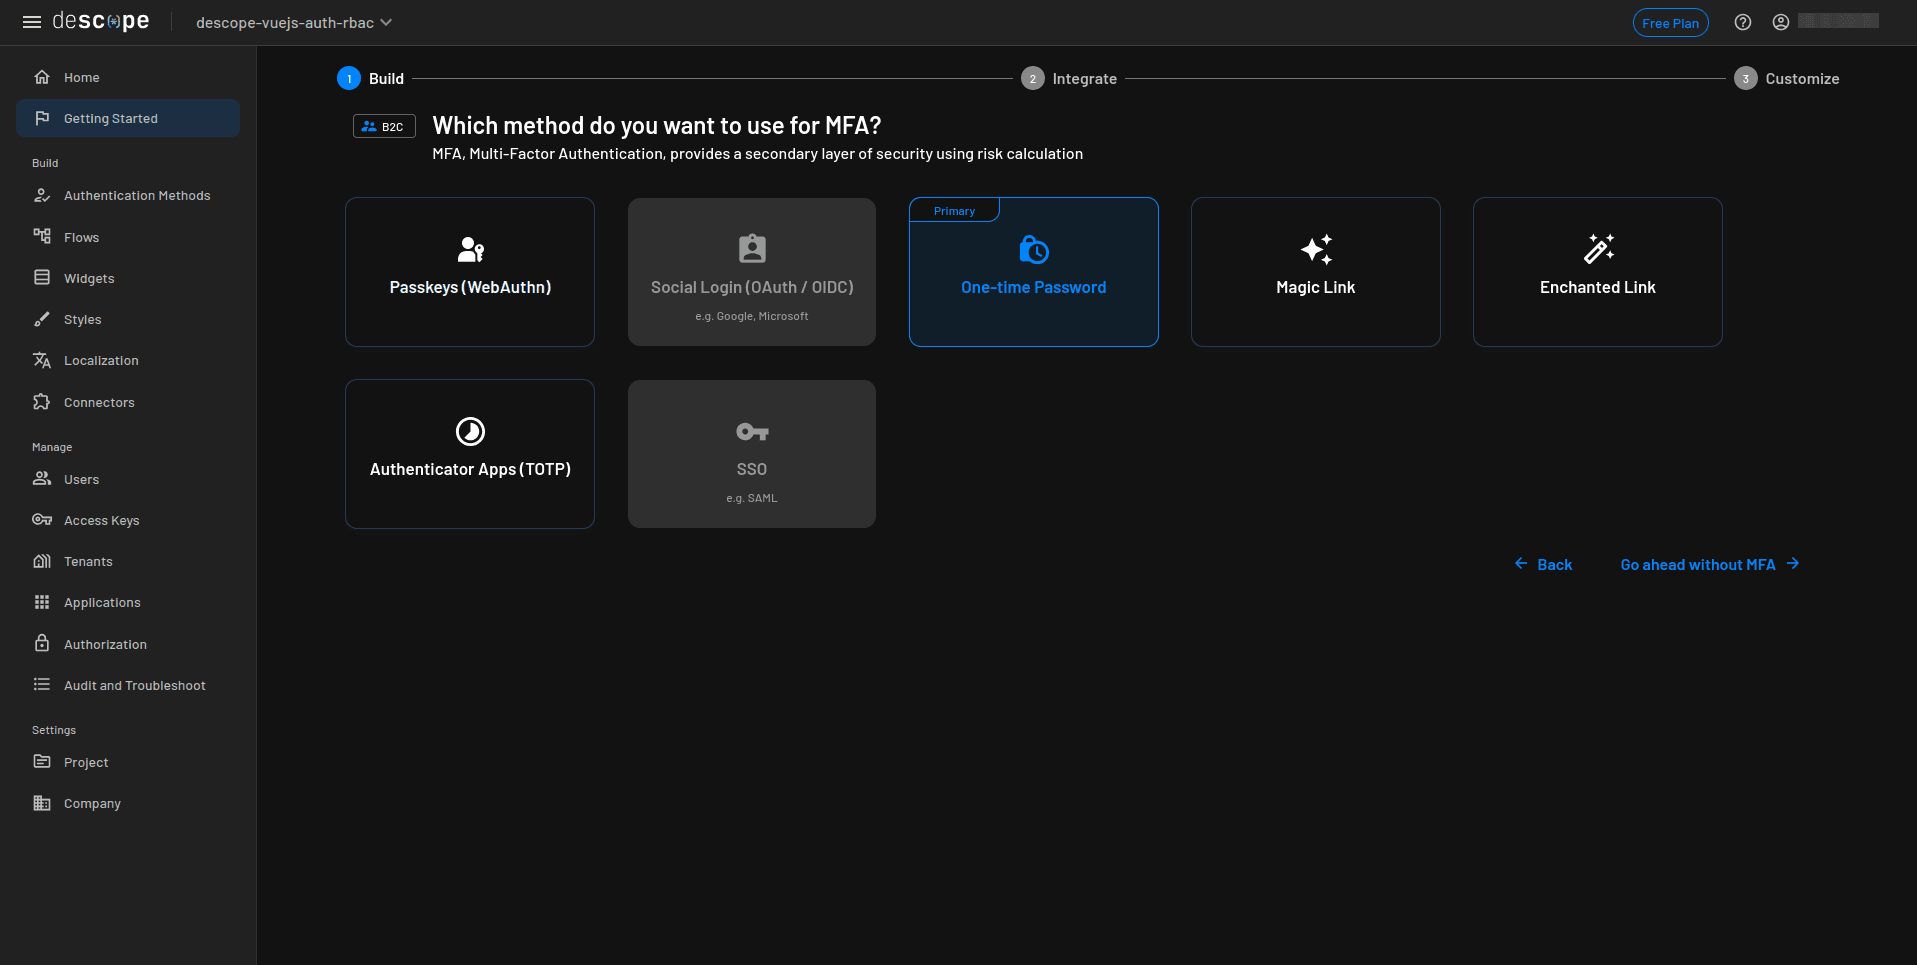
Skip MFA for now by clicking Go ahead without MFA. We’ll configure MFA later in the flow builder, where handle it using the imported flow,:
On the We’re now ready to show you Descope in action! page, select Next to generate your authentication flows:

In just a few steps, you’ve configured a working Vue.js authentication process with Descope, which you can later customize as needed.
Customize the authentication flow
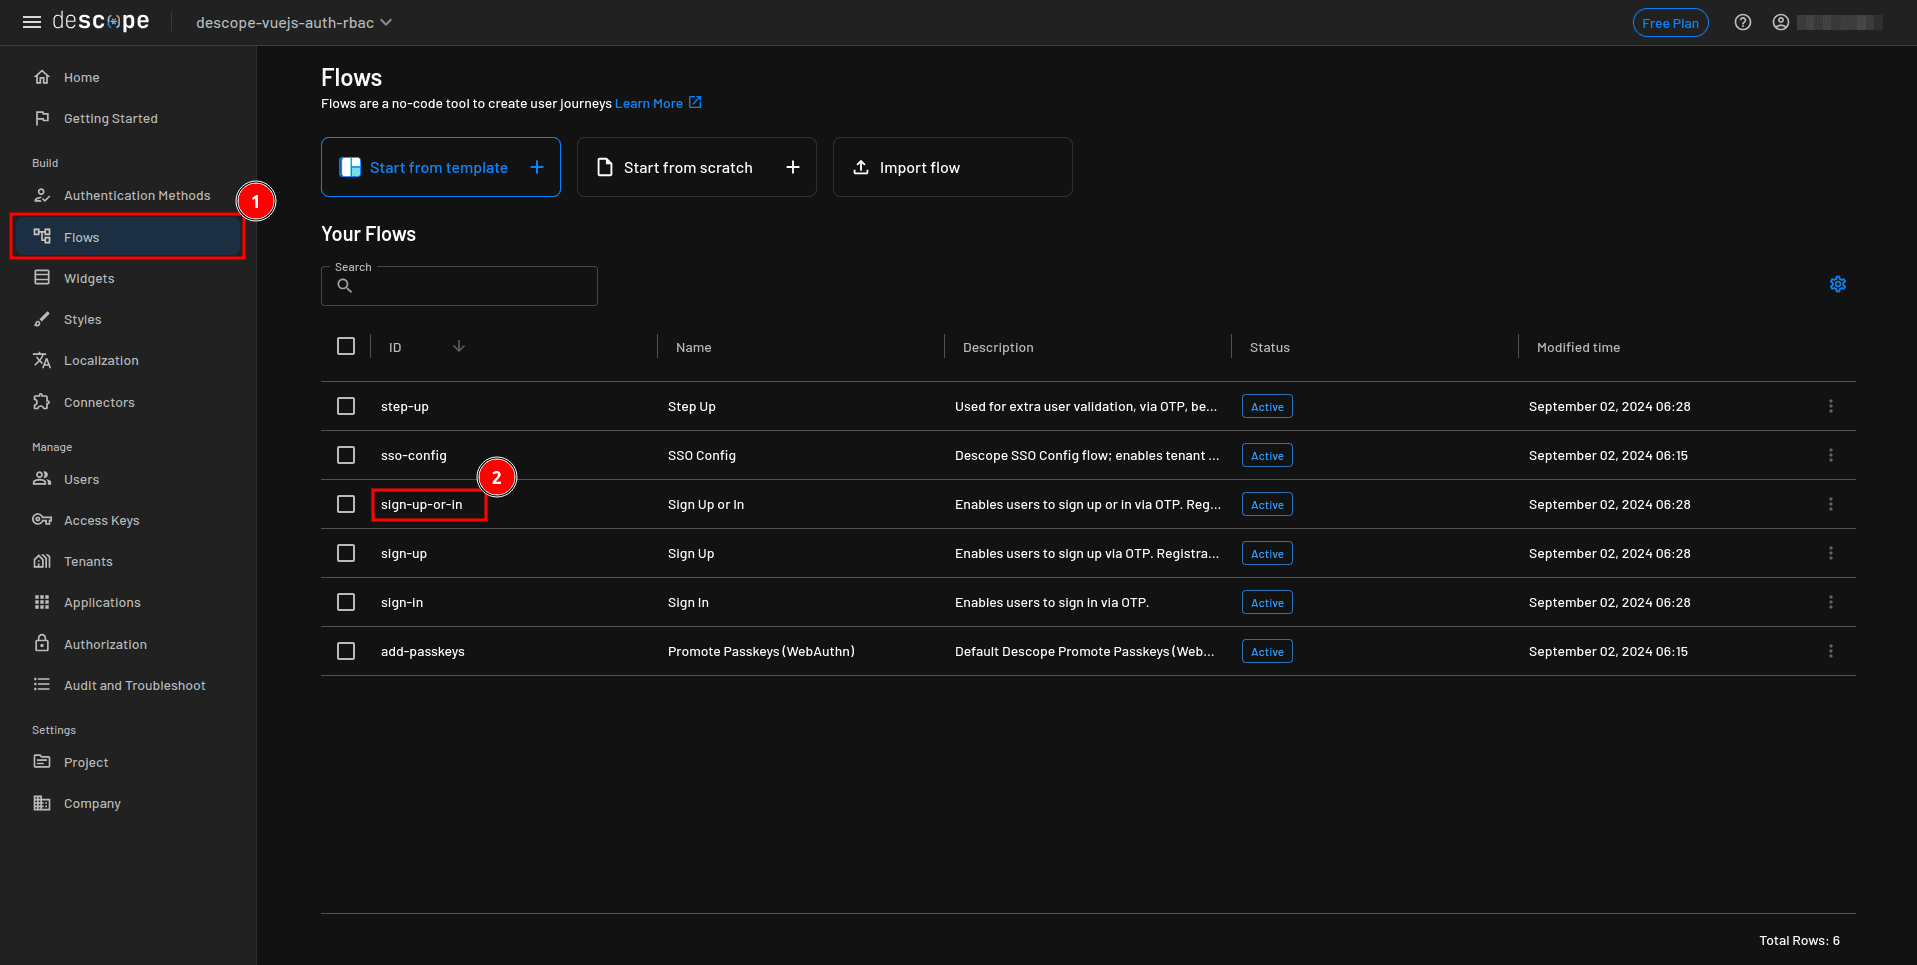
After these steps, Descope generates the default flows. In the sidebar of your console, go to Flows and click the sign-up-or-in flow to open it in the visual builder.
Currently, this flow allows the user to log in via SMS OTP:
For this tutorial, you’ll customize it to use email OTP for sign-in and SMS OTP for MFA. To make it easier to follow along, you’ll use a prepared flow file with these settings already configured.
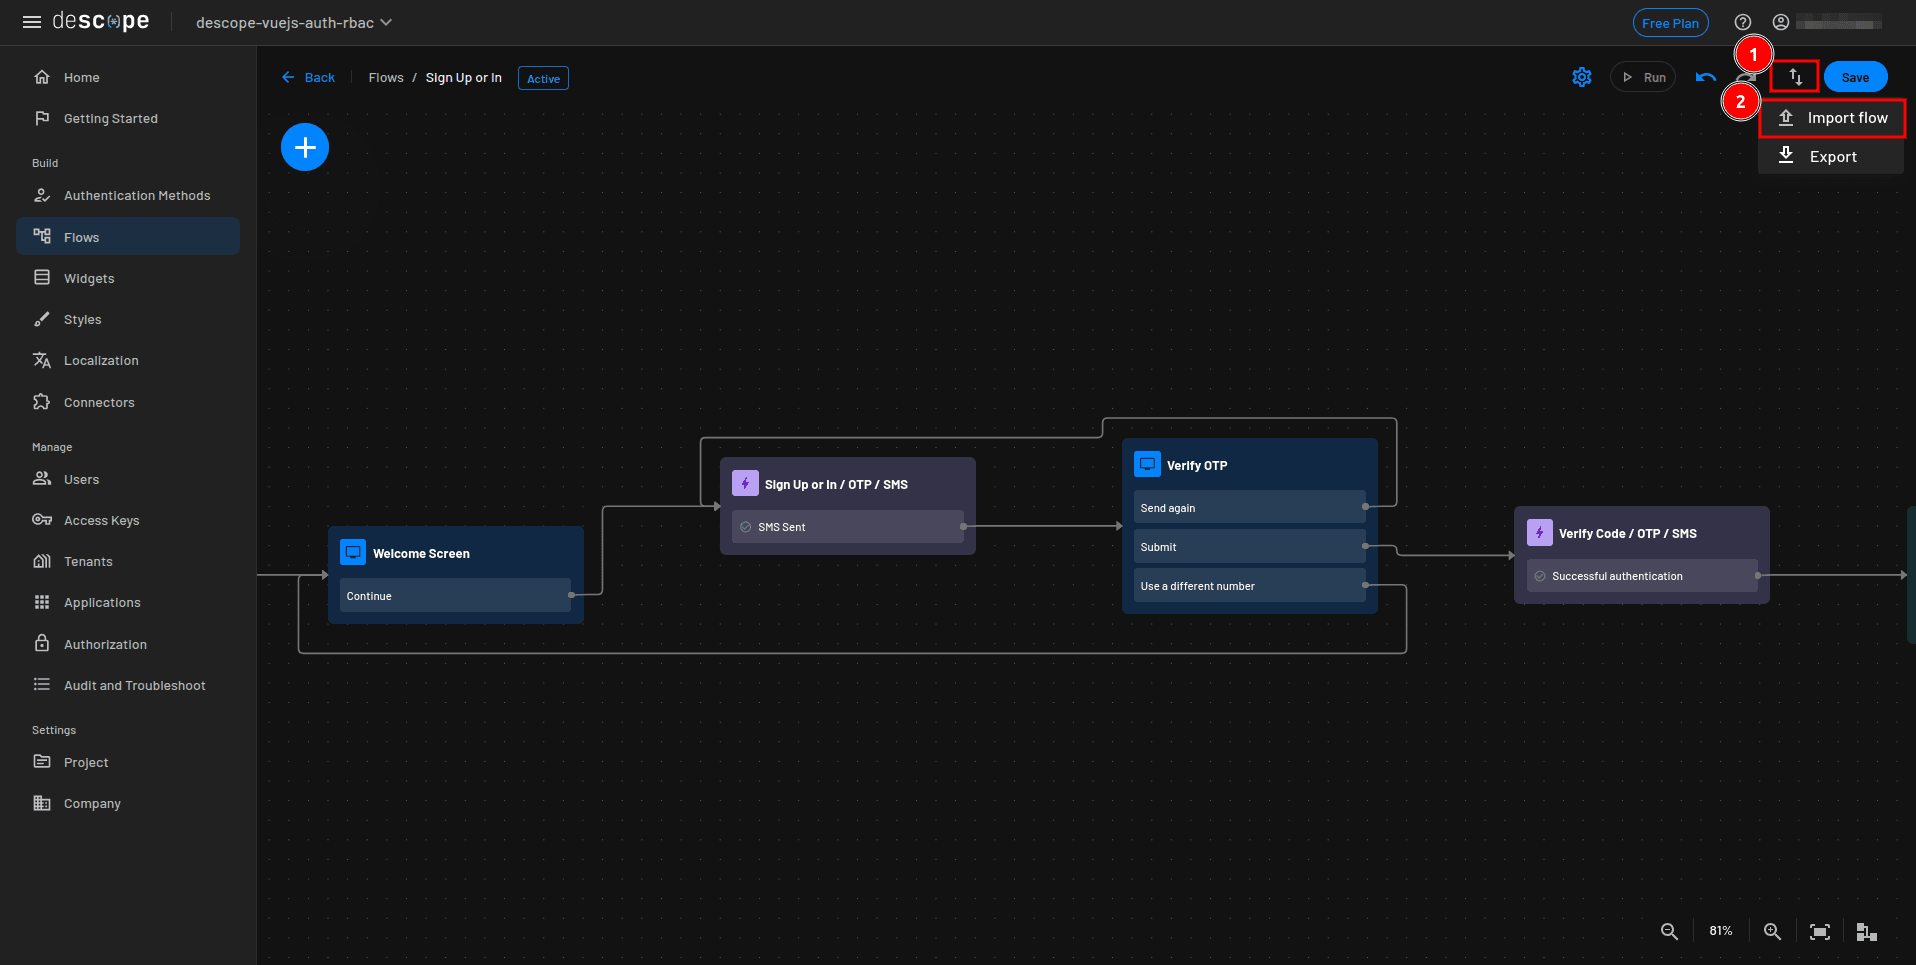
Download the raw flow file from GitHub by clicking the Download button:

Next, in the flow builder, click the Import flow / Export button, select Import flow, and upload the flow you just downloaded in the previous step:
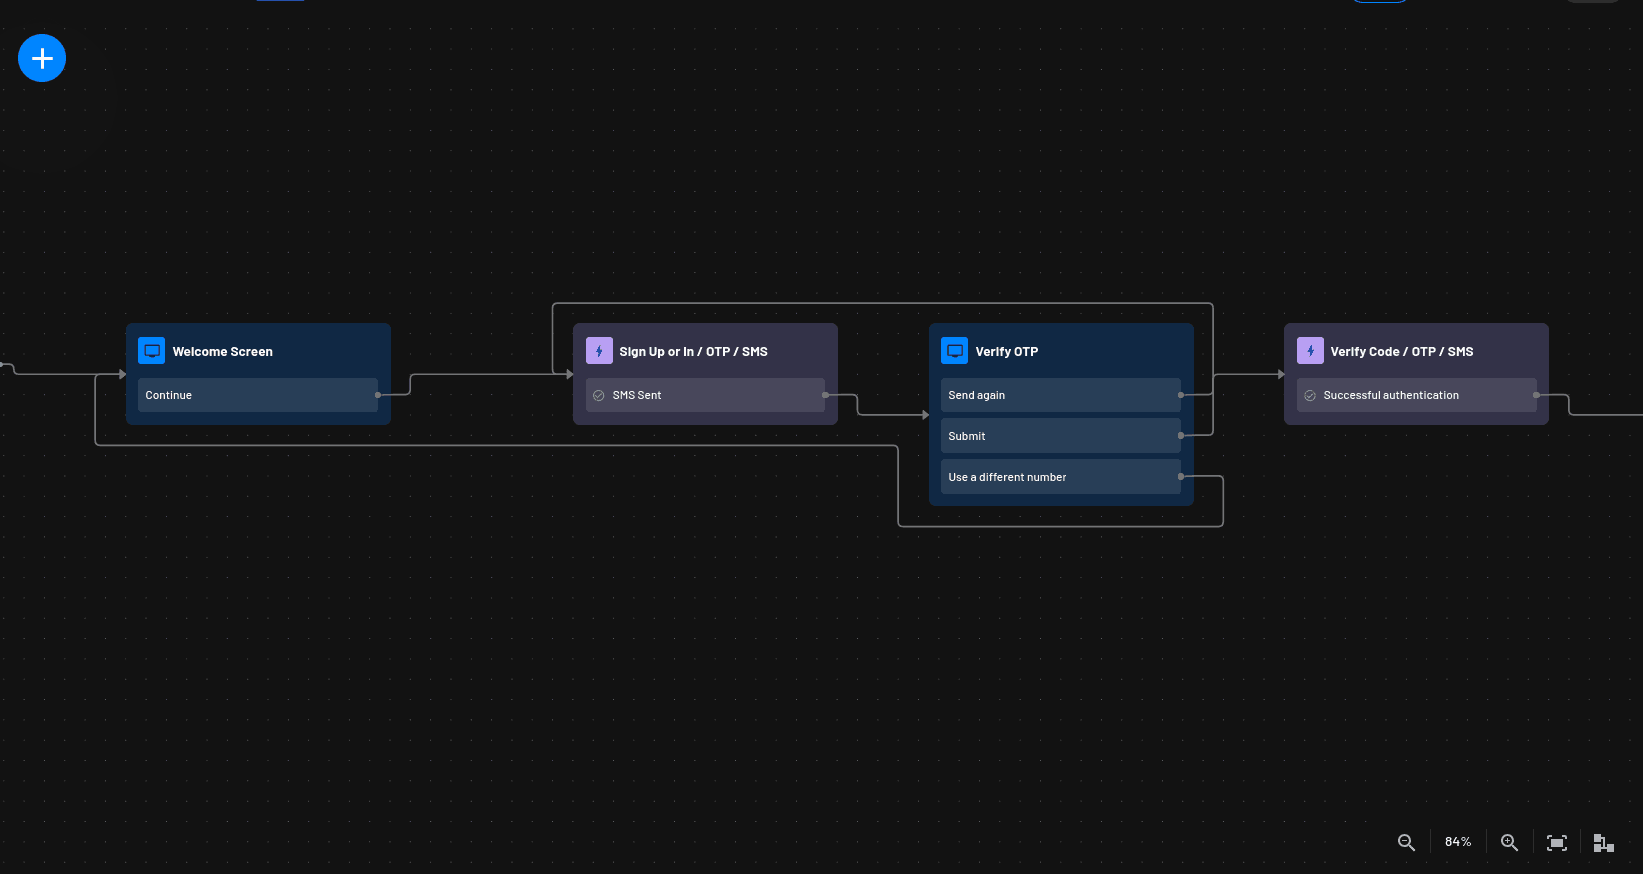
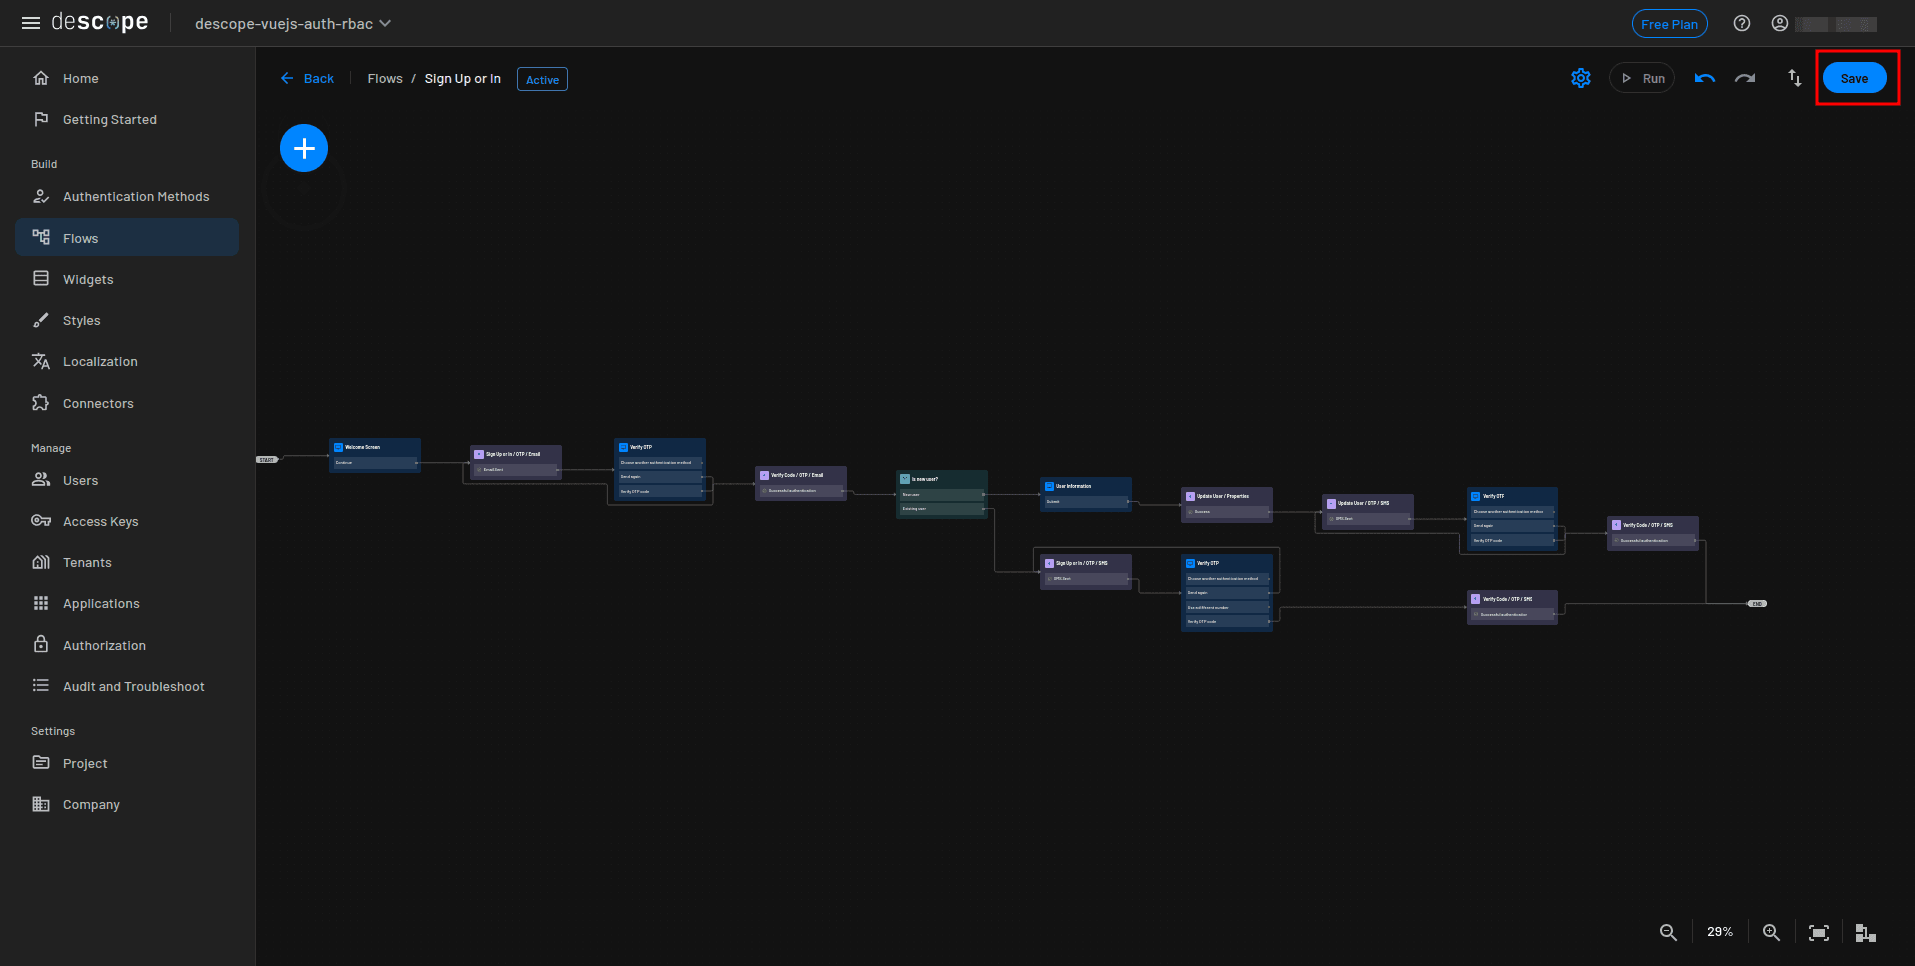
The imported flow begins with a Welcome screen where the user enters their email address. Descope then sends an OTP to that email. After the user enters the correct OTP, the flow checks whether they are a new or returning user. New users are prompted to provide their full name and phone number, which are stored in the Descope data store. They then receive an SMS OTP to verify their phone number before being logged in. Returning users skip this step and simply receive an SMS OTP sent to their registered phone number. Once verified, they are logged in automatically.
Once the flow is imported, click Save.
At this point, you have a functional email-plus-SMS OTP authentication flow. Descope uses its default SMS connector for delivery, but you can also configure your own provider, such as AWS SNS, Twilio, or Twilio Verify if needed. You can use any of these in the Descope console to send messages.
Finally, open the Project tab from the sidebar and copy your Project ID—you’ll need it when setting up the Vue.js application in the next section.
Cloning the starter project
To make it easier to follow along, this tutorial uses a premade starter template that includes the basic structure of the Vue.js application.
Begin by cloning the project to your local machine:
git clone --single-branch -b starter-template https://github.com/kimanikevin254/descope-vuejs-auth-rbac-demo.gitNext, navigate into the project folder and install the dependencies:
cd descope-vuejs-auth-rbac-demo && npm iThe starter template is built around a simple job board concept. Users can browse available jobs, while administrators can publish or unpublish job postings. To keep things simple, the project uses json-server to mock backend functionality, with several predefined jobs stored in json-server/db.json.
To run the application locally, first start the mock server: npm run server. Then, in a separate terminal window, run the development server: npm run dev. Once both servers are running, navigate to http://localhost:5173 in your browser.
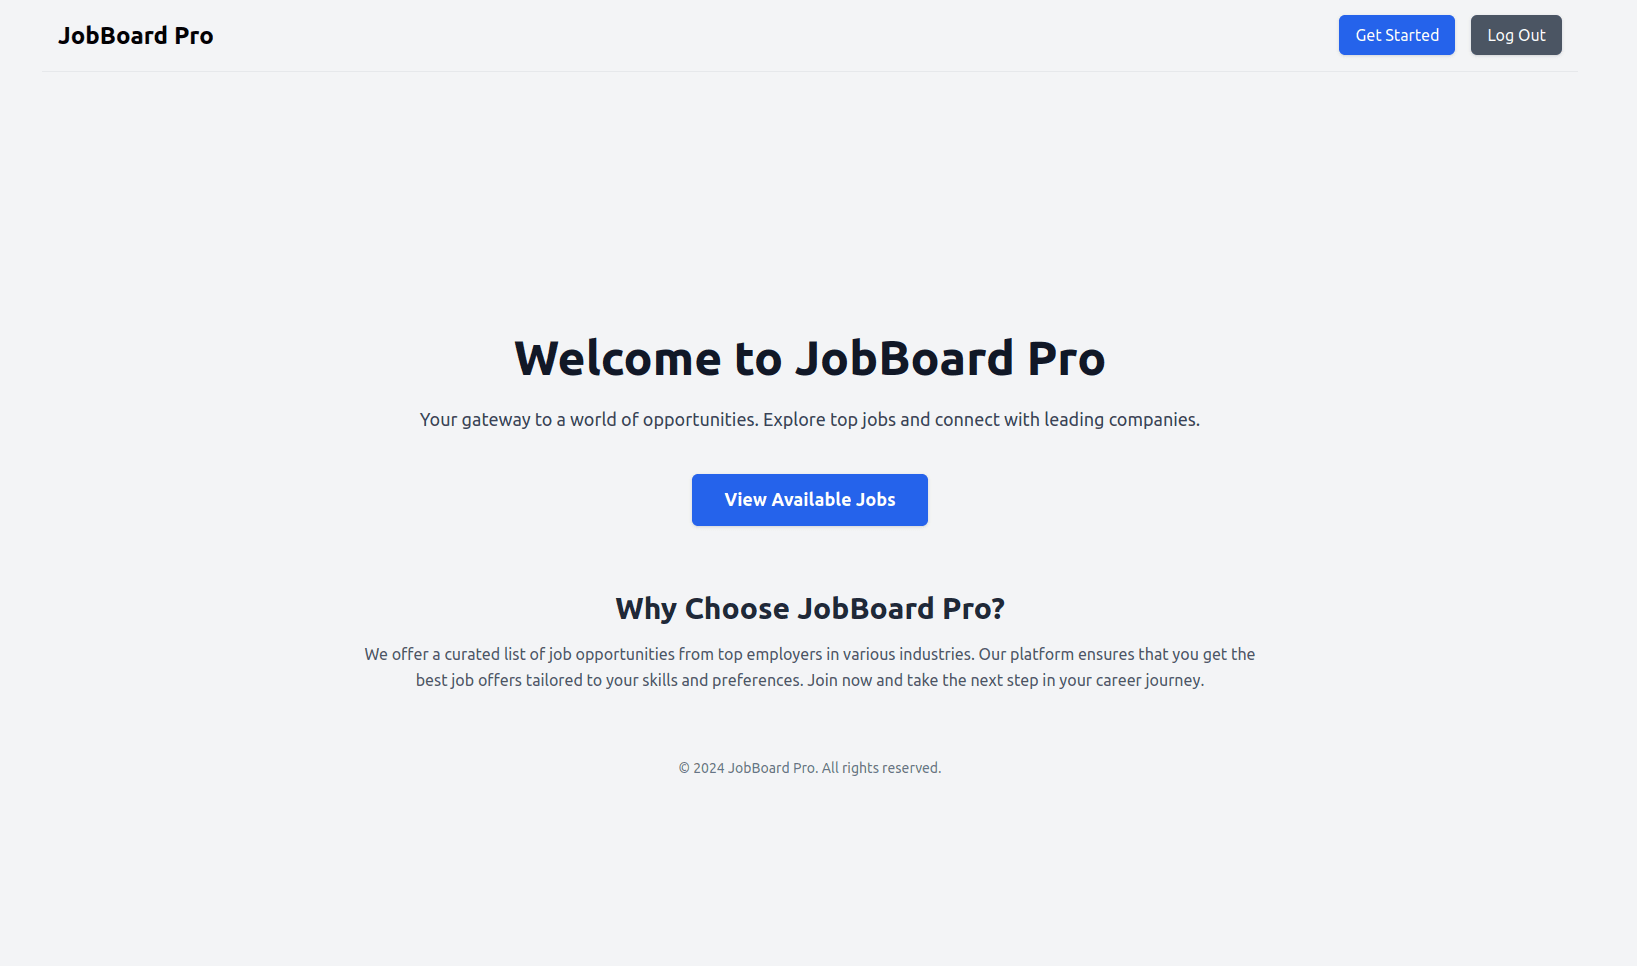
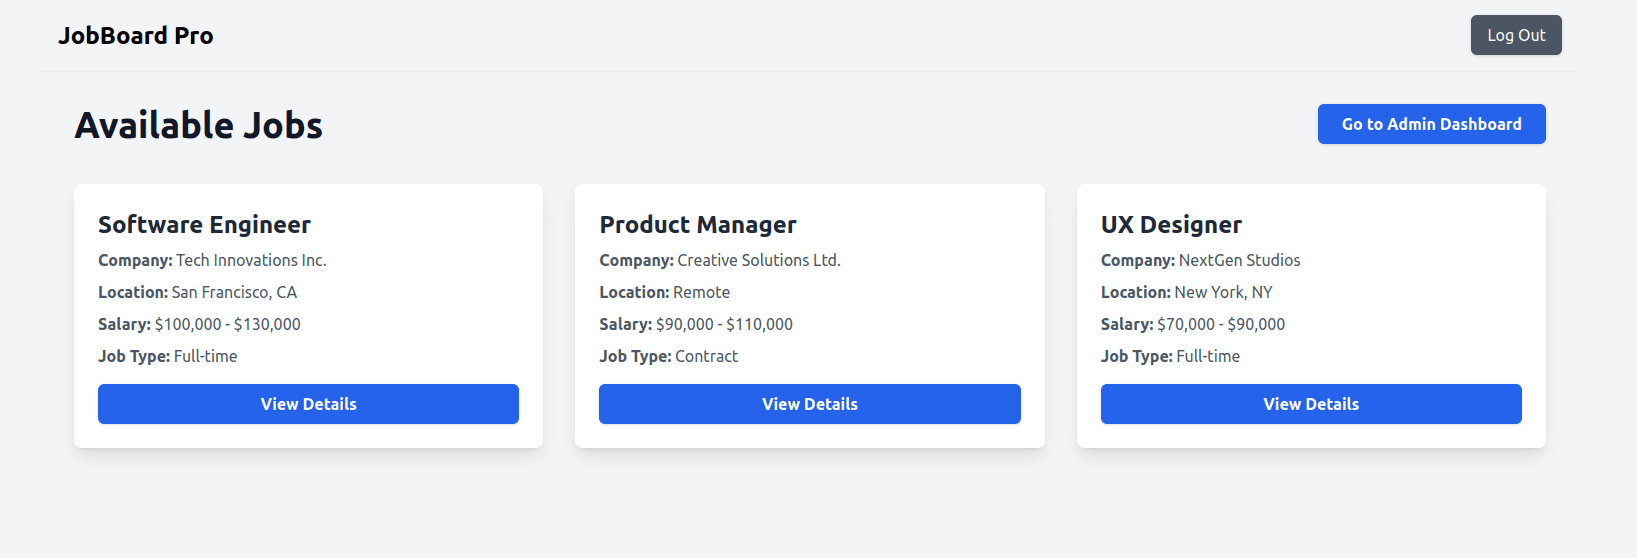
On the home page, you can click View Available Jobs to see all published jobs:
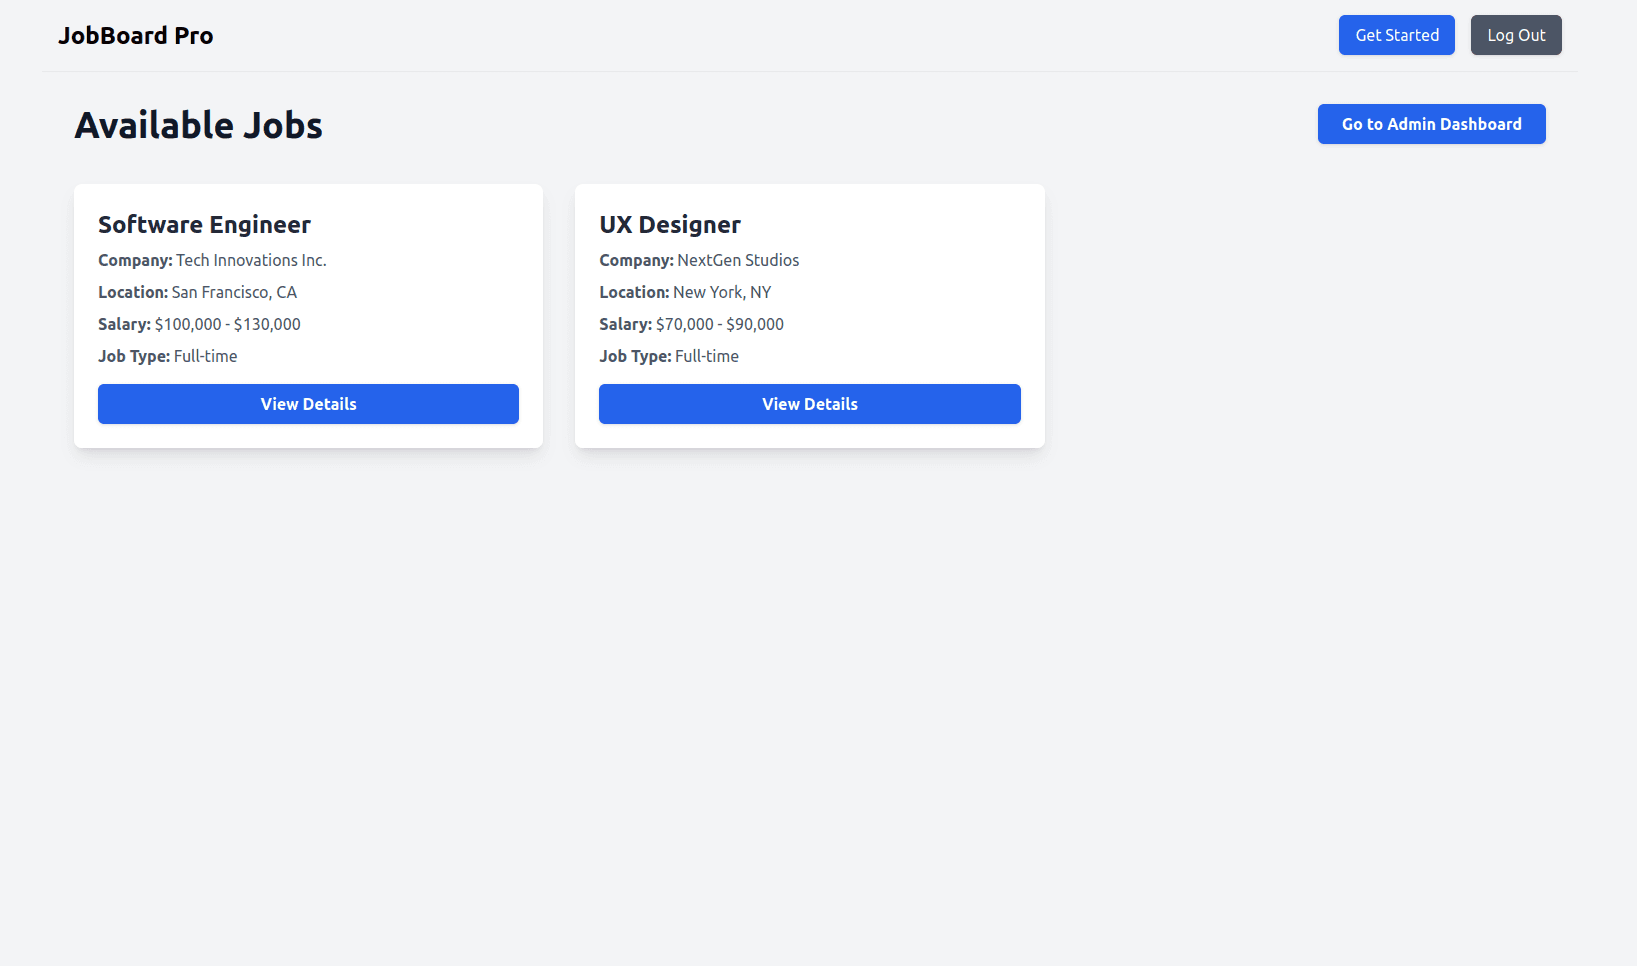
Click the Go to Admin Dashboard web page to access the admin dashboard, where you can toggle the published status of each job.
At this stage, anyone can view jobs and open the Admin Dashboard. In the next section, you’ll integrate authentication in Vue.js with Descope so that only logged-in users can see available jobs, and only those with the proper role can access the dashboard.
Adding authentication to the Vue.js application
You’ll add authentication and RBAC to the Vue.js application with Descope. This ensures that only authenticated users can view available jobs, and only those with the Admin Dashboard Access permission can open the Admin Dashboard. To get started, install the Vue SDK with the following command:
npm i --save @descope/vue-sdkOnce installed, add the Descope plugin to your application. Open src/main.js and replace the existing code with the following:
import "./assets/main.css";

import { createApp } from "vue";
import App from "./App.vue";
import router from "./router";
import descope from "@descope/vue-sdk";

const app = createApp(App);

app.use(descope, {
 projectId: import.meta.env.VITE_DESCOPE_PROJECT_ID,
});

app.use(router);

app.mount("#app");
This code imports the Descope plugin and registers it in your Vue.js application. It requires the Project ID you copied earlier. To keep credentials secure, create a .env file in the project root and add:
VITE_DESCOPE_PROJECT_ID=<YOUR-DESCOPE-PROJECT-ID>Remember to replace the placeholder with your actual project ID.
Next, you need to modify the src/views/LoginView.vue file to allow Descope to handle authentication. Open the file and replace the existing code with the following:
<script setup>
import { Descope, useSession } from "@descope/vue-sdk";
import { ref, watch } from "vue";
import { useRouter } from "vue-router";

const router = useRouter();
const { isLoading, isAuthenticated } = useSession();

// Redirect if isAuthenticated is true
watch(isAuthenticated, (newValue) => {
 console.log("New auth status", newValue);
 if (newValue === true) {
 router.replace({ name: "jobs" });
 }
});
</script>

<template>
 <div class="h-screen max-w-xl mt-4 mx-auto">
 <p v-if="isLoading">Loading...</p>
 <Descope v-if="!isAuthenticated" :flowId="'sign-up-or-in'" />
 </div>
</template>
This code uses the useSession() hook from the Descope SDK to track the user’s authentication status (isAuthenticated) and the session loading state (isLoading). While the session is loading, the template displays a loading message. If the user is not authenticated, the Descope component renders the sign-up-or-in flow you configured earlier. The watch function listens for changes to isAuthenticated, and once the user is authenticated, it redirects them to the Jobs view using Vue Router’s replace() method.
Next, set up Vue Router navigation guards to protect routes that require authentication. While there are several ways to do this, this guide uses a global beforeEach guard. In src/router/index.js file, this guide uses a global beforeEach guard. In src/router/index.js, most route objects already include a meta property with a requiresAuth key.
This flag marks routes that should only be accessible to authenticated users. To enforce this rule, add the following code just before the export default router line:
router.beforeEach(async (to, from, next) => {
 const isAuthenticated = await routeGuard();

 if (to.meta.requiresAuth && !isAuthenticated) {
 next({ name: "login" });
 } else if (to.fullPath.includes("login") && isAuthenticated) {
 next({ name: "home" });
 } else {
 next();
 }
});
This navigation guard verifies the user’s authentication status before granting access to a route. It calls the routeGuard()function from Descope to check if the user is authenticated. If a route is marked with to.meta.requiresAuth) and the user is not authenticated, they are redirected to the login page. If the user is already authenticated and tries to access the login page, they are redirected to the home page instead. In all other cases, navigation continues as normal.
Don’t forget to import the routeGuard method at the top of the same file:
import { routeGuard } from "@descope/vue-sdk";Lastly, update the navigation bar so it displays the right buttons based on the user’s authentication status and provides a way to log out. Open src/components/NavBar.vue and replace the existing code with the following:
<script setup>
import { useDescope, useUser } from "@descope/vue-sdk";
import { ref } from "vue";
import { useRoute, useRouter } from "vue-router";

const router = useRouter();
const route = useRoute();

const { user } = useUser();
const { logout } = useDescope();

const login = () => {
 router.push({ name: "login" });
};

const handleLogout = () => {
 logout();
 router.replace({ name: "login" });
};
</script>

<template>
 <nav class="border-b p-4">
 <div class="container mx-auto flex items-center justify-between">
 <RouterLink to="/" class="text-2xl font-bold">
 JobBoard Pro
 </RouterLink>

 <div class="flex items-center space-x-4">
 <button
 v-if="!user && !route?.fullPath?.includes('login')"
 @click="login"
 class="bg-blue-600 text-white px-4 py-2 rounded-md shadow hover:bg-blue-500 transition duration-300 ease-in-out"
 >
 Get Started
 </button>

 <button
 v-if="user"
 @click="handleLogout"
 class="bg-gray-600 text-white px-4 py-2 rounded-md shadow hover:bg-gray-500 transition duration-300 ease-in-out"
 >
 Log Out
 </button>
 </div>
 </div>
 </nav>
</template>
At this point, authentication in your Vue.js app is working. Next, you’ll add RBAC to limit which users can access the Admin Dashboard.
Adding RBAC to the Vue.js application
At this point, every authenticated user can still access the Admin Dashboard. That’s not ideal—you’ll want to restrict admin functionality so only users with the proper role can use it. To achieve this, you’ll configure RBAC with Descope.
Start by opening the Descope console. From the sidebar, select Authorization, then go to the Permissions tab and click + Permission.
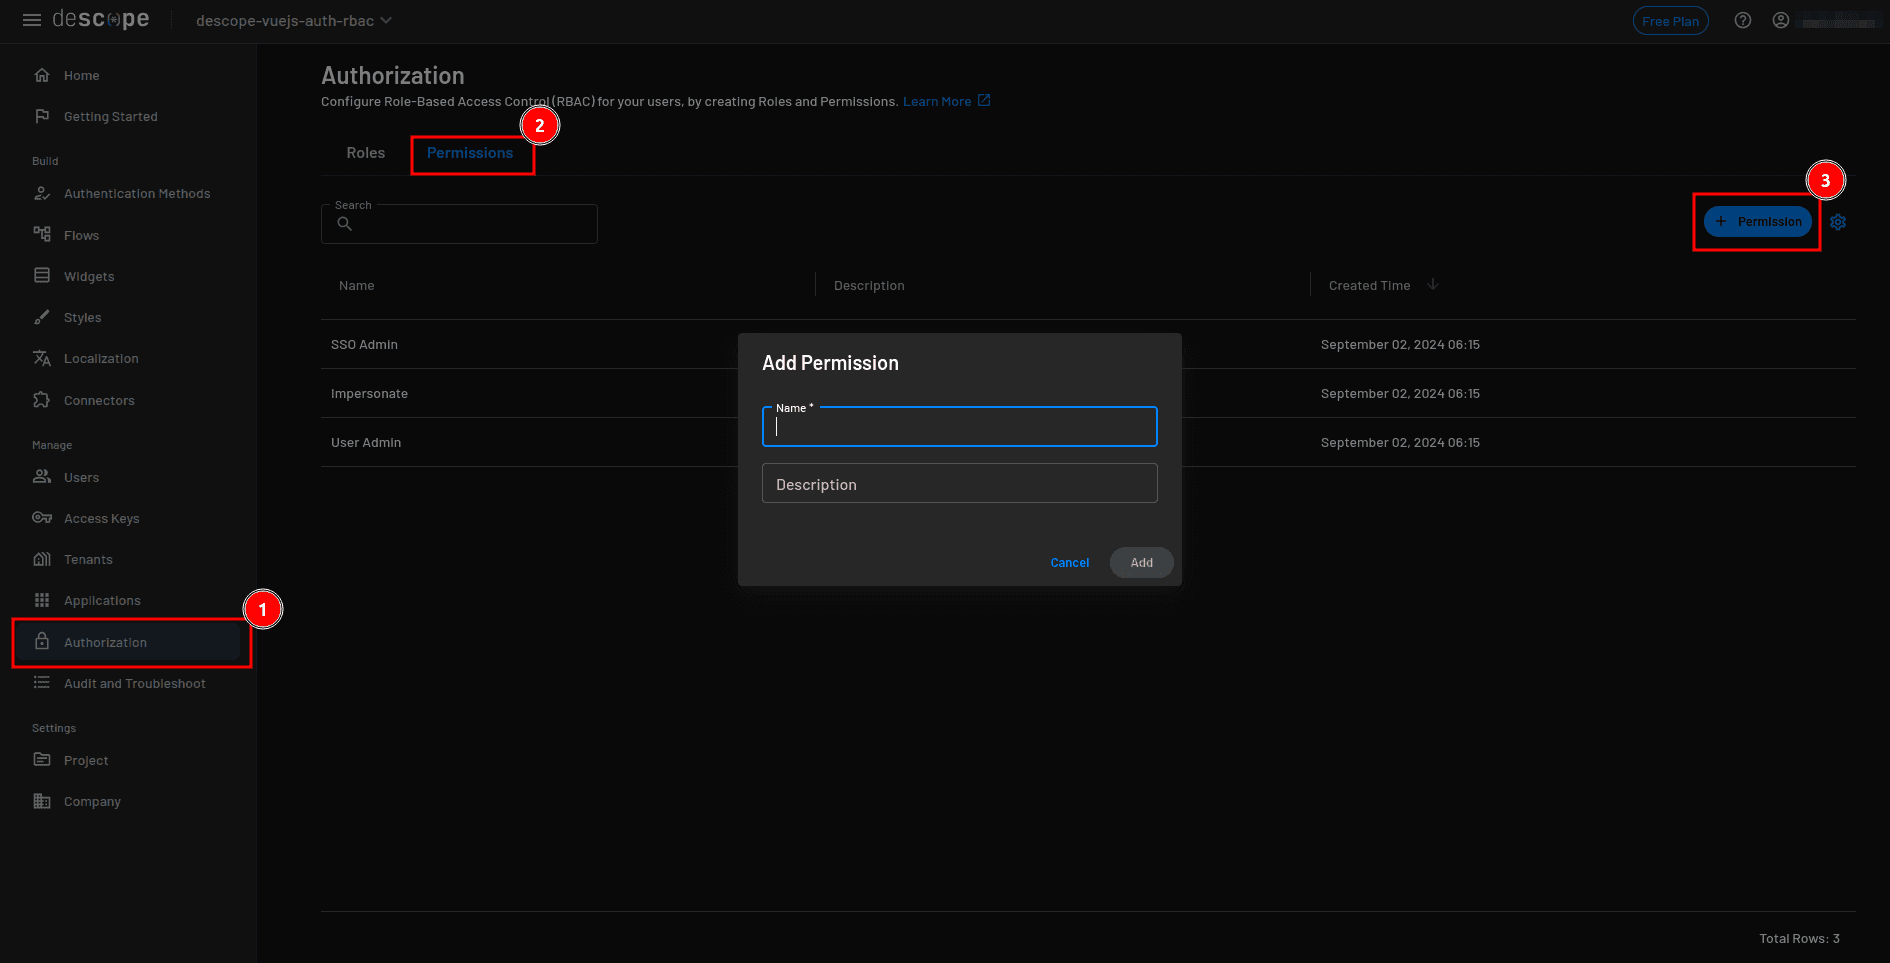
In the modal, name the new permission Admin Dashboard Access, add the description “Can access the admin dashboard”, and click Add.
Next, switch to the Roles tab and click + Role to create a new one. Name it admin, use “Can perform admin functions” as the description, and assign the Admin Dashboard Access permission.
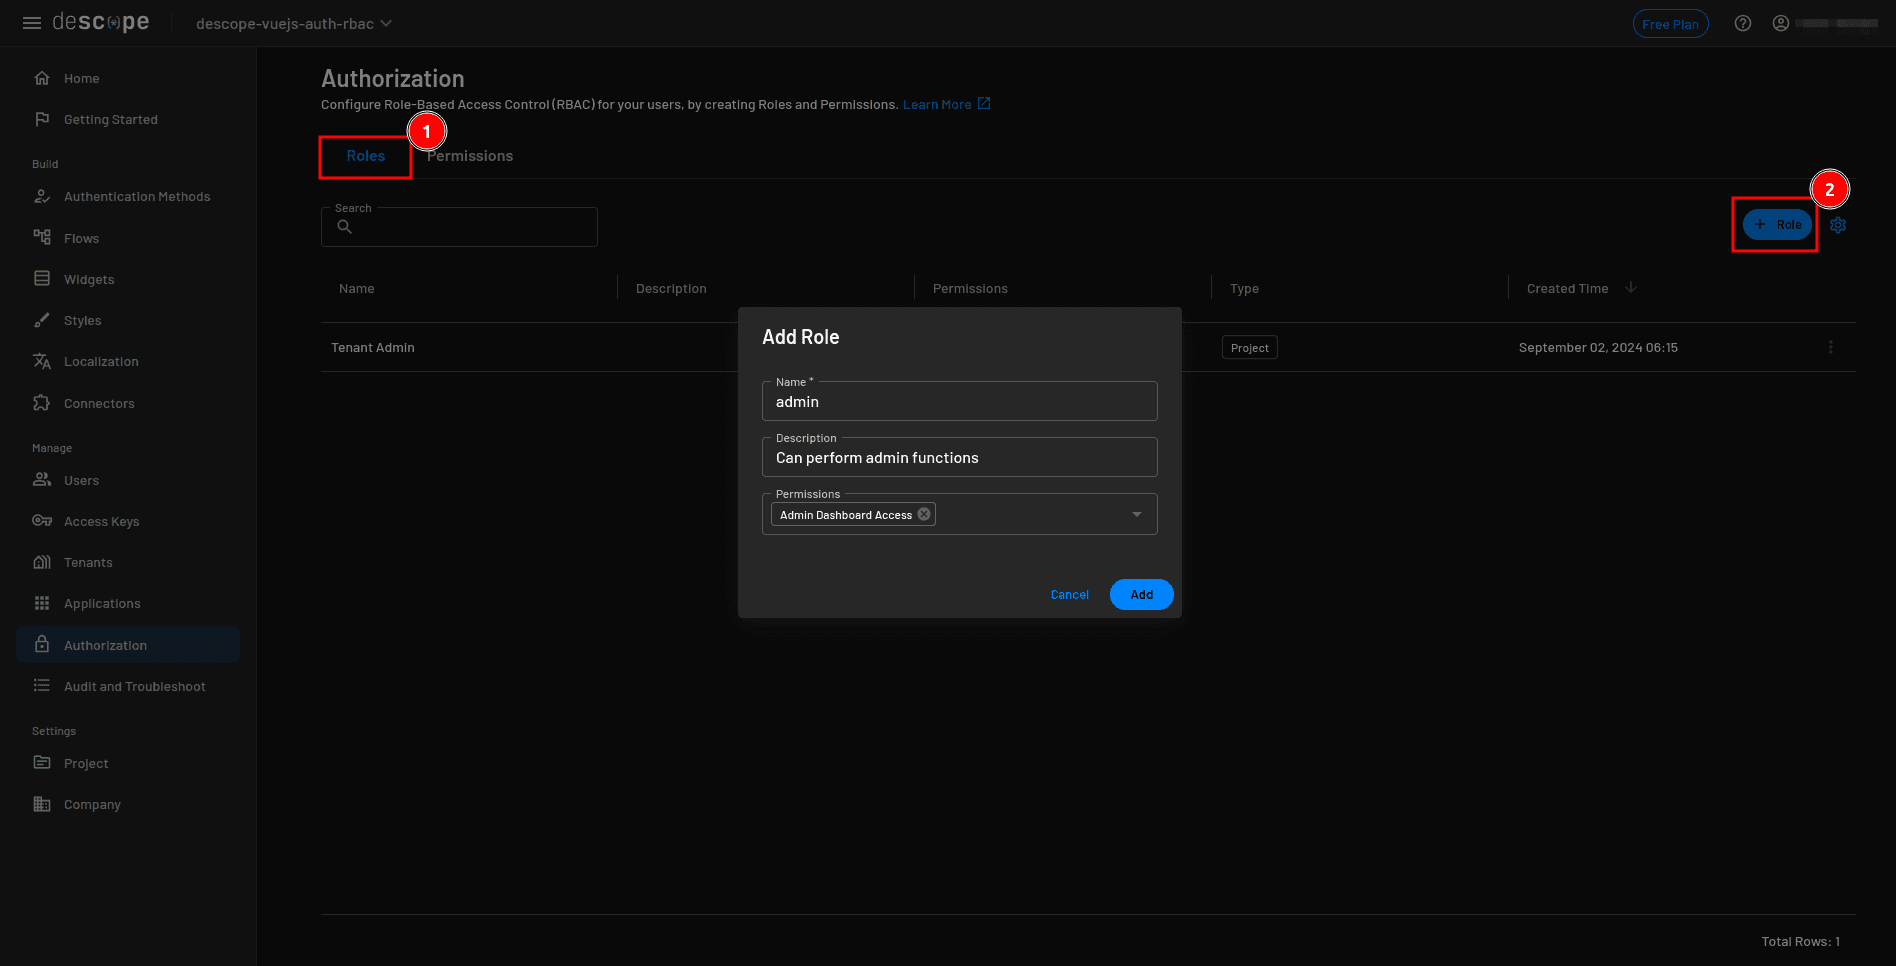
Repeat the process to create a user role with the description “Can view published jobs”. Leave this role without special permissions.
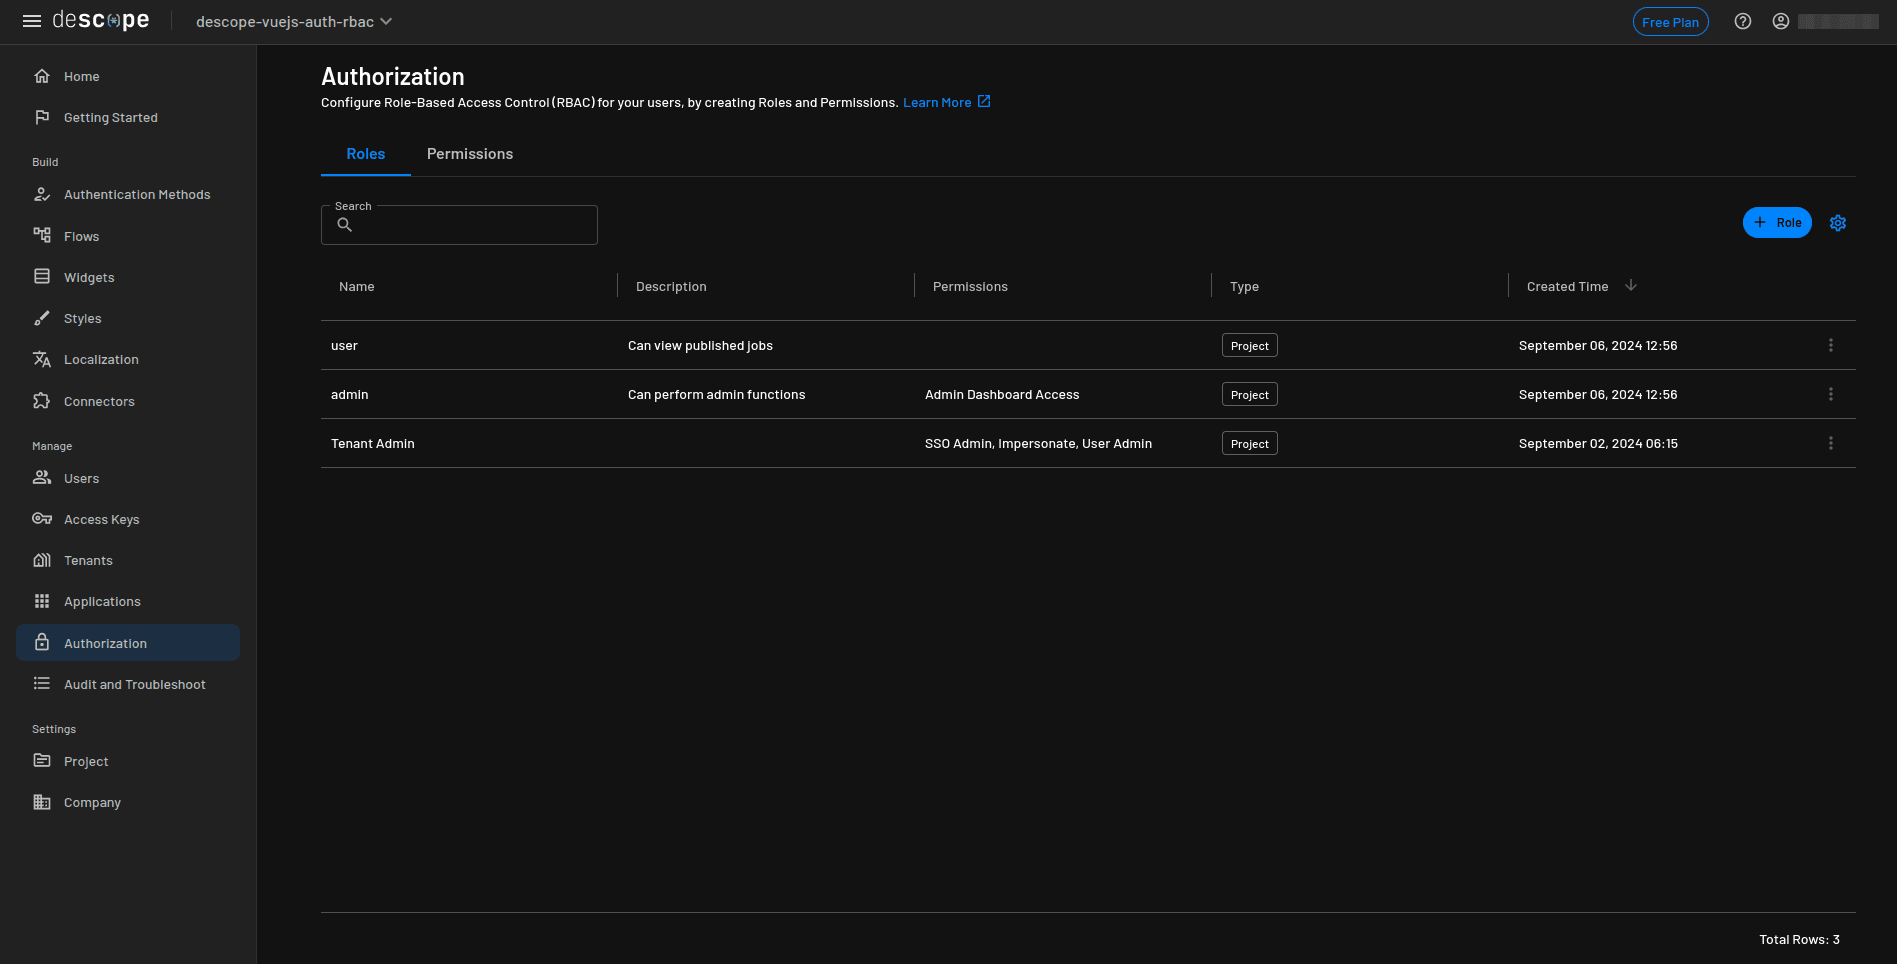
Your Authorization page should now look like this:
Now you need to protect the Admin Dashboard so only users with the admin role can access it.
In src/routes/index.js, the dashboard route includes a meta.requiresAdminDashboardAccessPermission property. This flag indicates that the route requires specific permissions. To enforce this rule, replace the navigation guard you created earlier with the following:
router.beforeEach(async (to, from, next) => {
 const isAuthenticated = await routeGuard();
 const permissions = isAuthenticated && getJwtPermissions()

 if (to.meta.requiresAuth && !isAuthenticated) {
     next({ name: "login" });
 } else if (to.fullPath.includes("login") && isAuthenticated) {
     next({ name: "home" });
 } else if (to.meta.requiresAdminDashboardAccessPermission && !permissions.includes("Admin Dashboard Access")) {
     next(from.path);
 } else {
     next();
 }
});
In addition to the earlier functionality, the updated code now retrieves the authenticated user’s role permissions using the getJwtPermissions() method from the Descope SDK. It adds a condition to check whether the user has the Admin Dashboard Access permission before allowing entry to the admin route.
This ensures that only authenticated users with the correct role can access the dashboard. Be sure to update the Descope imports in this file as well:
import { getJwtPermissions, routeGuard } from "@descope/vue-sdk";Next, open the src/views/JobsView.vue file. Right now, the page always displays a link to the admin dashboard. You’ll update it so the link only appears for users with the Admin Dashboard Access permission. To do this, add the following code to the script section to import the necessary Descope method and check the authenticated user’s permissions:
import { getJwtPermissions } from "@descope/vue-sdk";

const permissions = getJwtPermissions();
Lastly, replace the Router Link in the template so it appears only for users with the correct permission:
<RouterLink

 v-if="permissions?.includes('Admin Dashboard Access')"
 to="/admin"

 class="inline-block px-6 py-2 bg-blue-600 text-white font-semibold rounded-md shadow hover:bg-blue-500 transition duration-300 ease-in-out"
>
 Go to Admin Dashboard
</RouterLink>
With these changes, RBAC is fully configured. Regular users can view jobs, while only admins with the proper role can open the dashboard.
Testing the application
Before testing, make sure both servers are running. Start the Vue Vite dev server with npm run server and the mock API with npm run dev. Then open http://localhost:5173 in your browser.
On the home page, click View Available Jobs. Since you are not authenticated, you should be redirected to the login page.
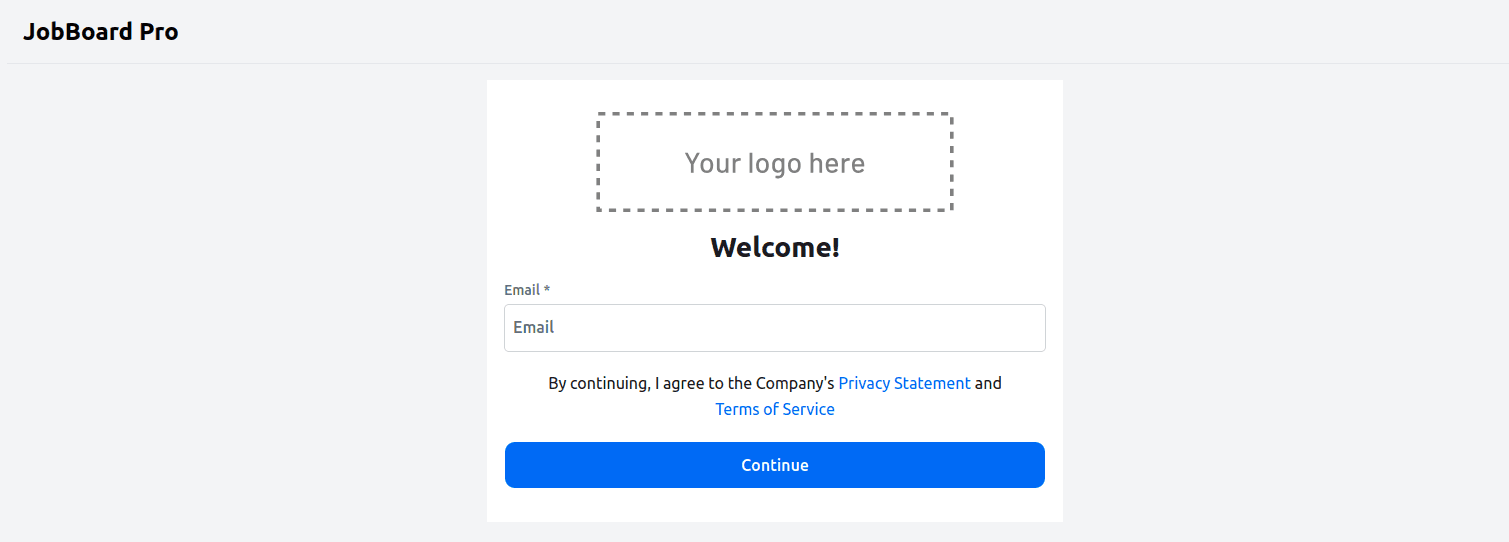
After you have provided your email address and verified using the OTP sent to your email address, you’ll be requested to provide additional information since you’re a new user:
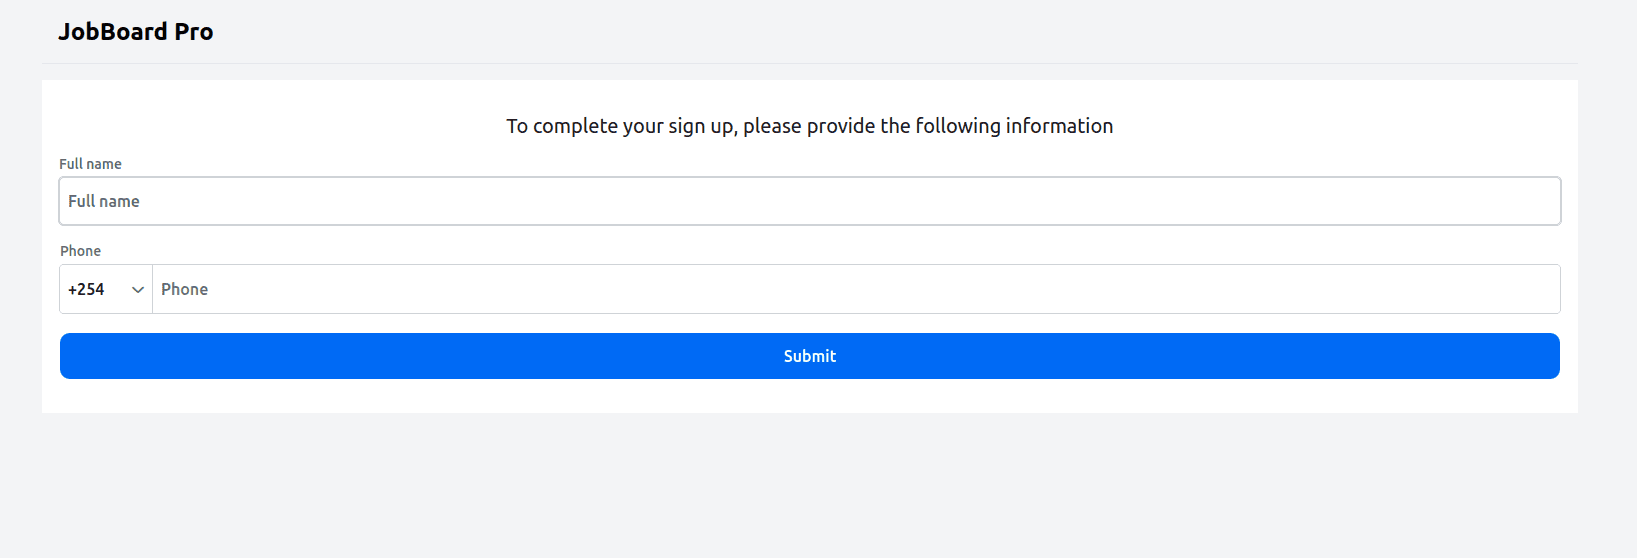
An OTP will be sent to the phone number you provide, and upon successful verification, you will be redirected to the Available Jobs page:
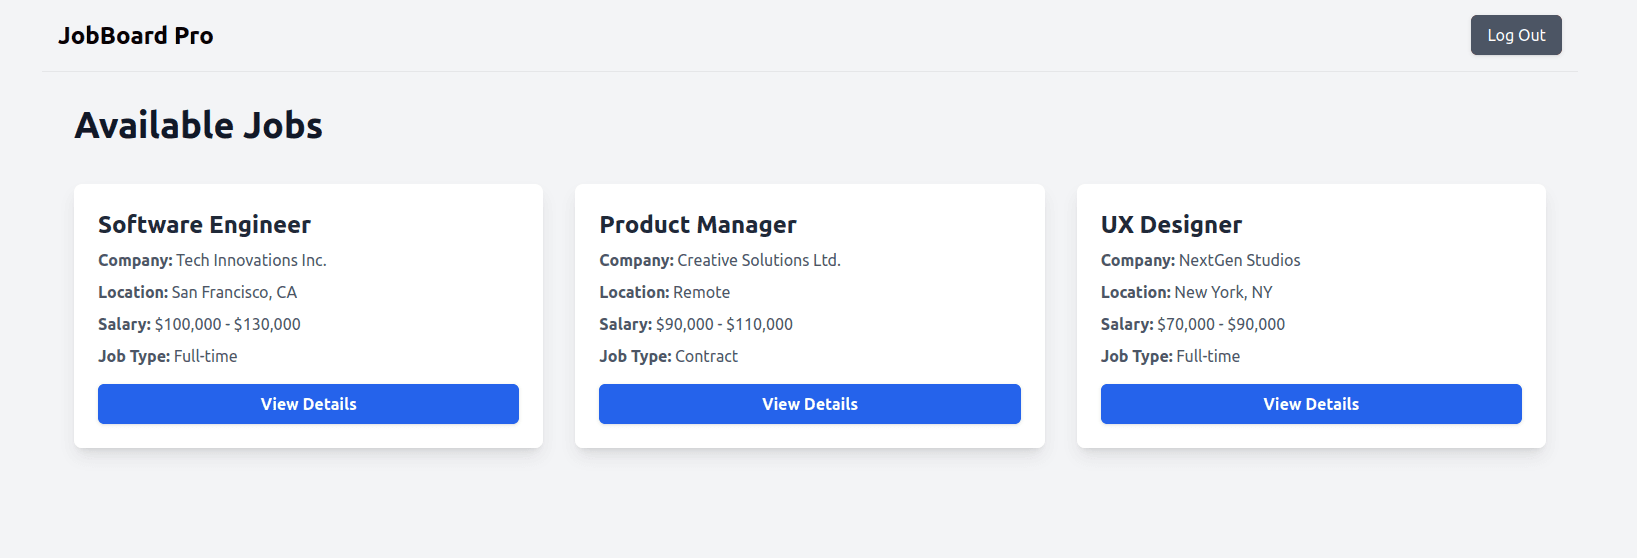
Since your account doesn’t have the admin role, the page won’t display the Go to Admin Dashboard button. If you manually enter http://localhost:5173/admin in the browser, you’ll be redirected back.
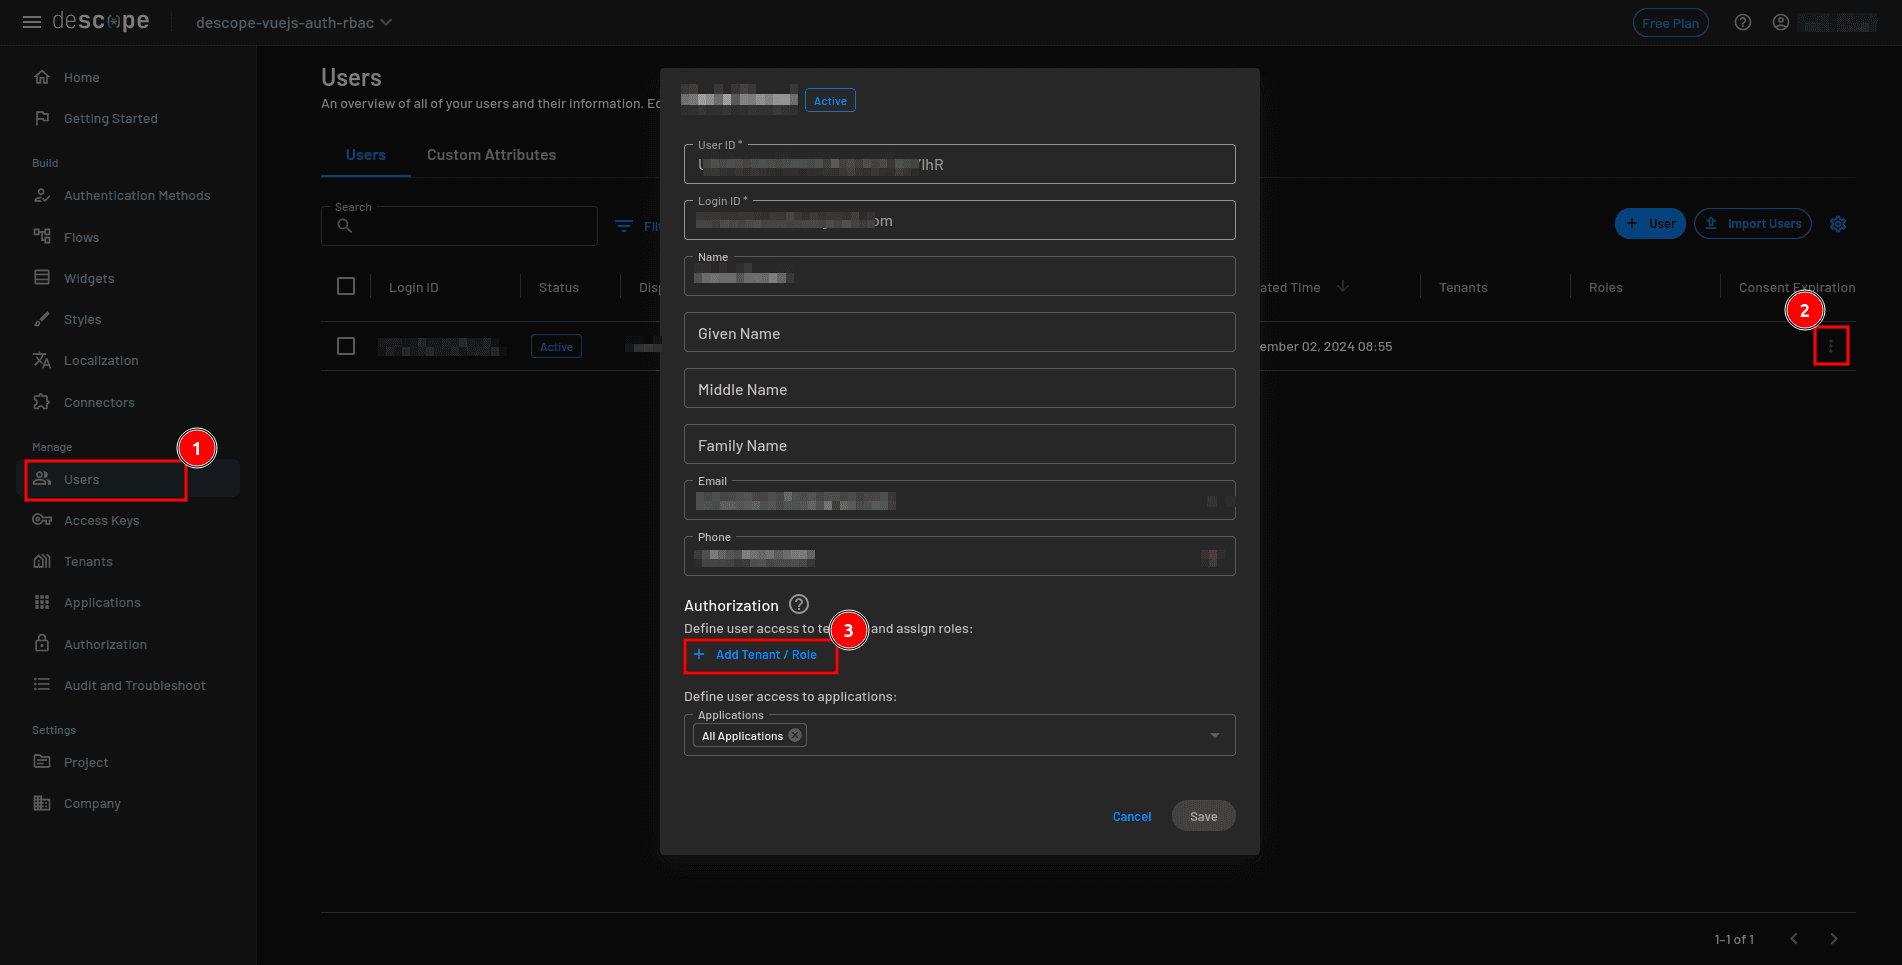
To test admin access, open the Descope console and go to Users in the sidebar. Find the user you just created, click the actions button to edit their details, and in the user details modal, select Add Tenant / Role. Assign the admin role you set up earlier to this user.
Return to the Vue application and refresh the Available Jobs page. Now that the user has the admin role, the Go to Admin Dashboard button will appear.
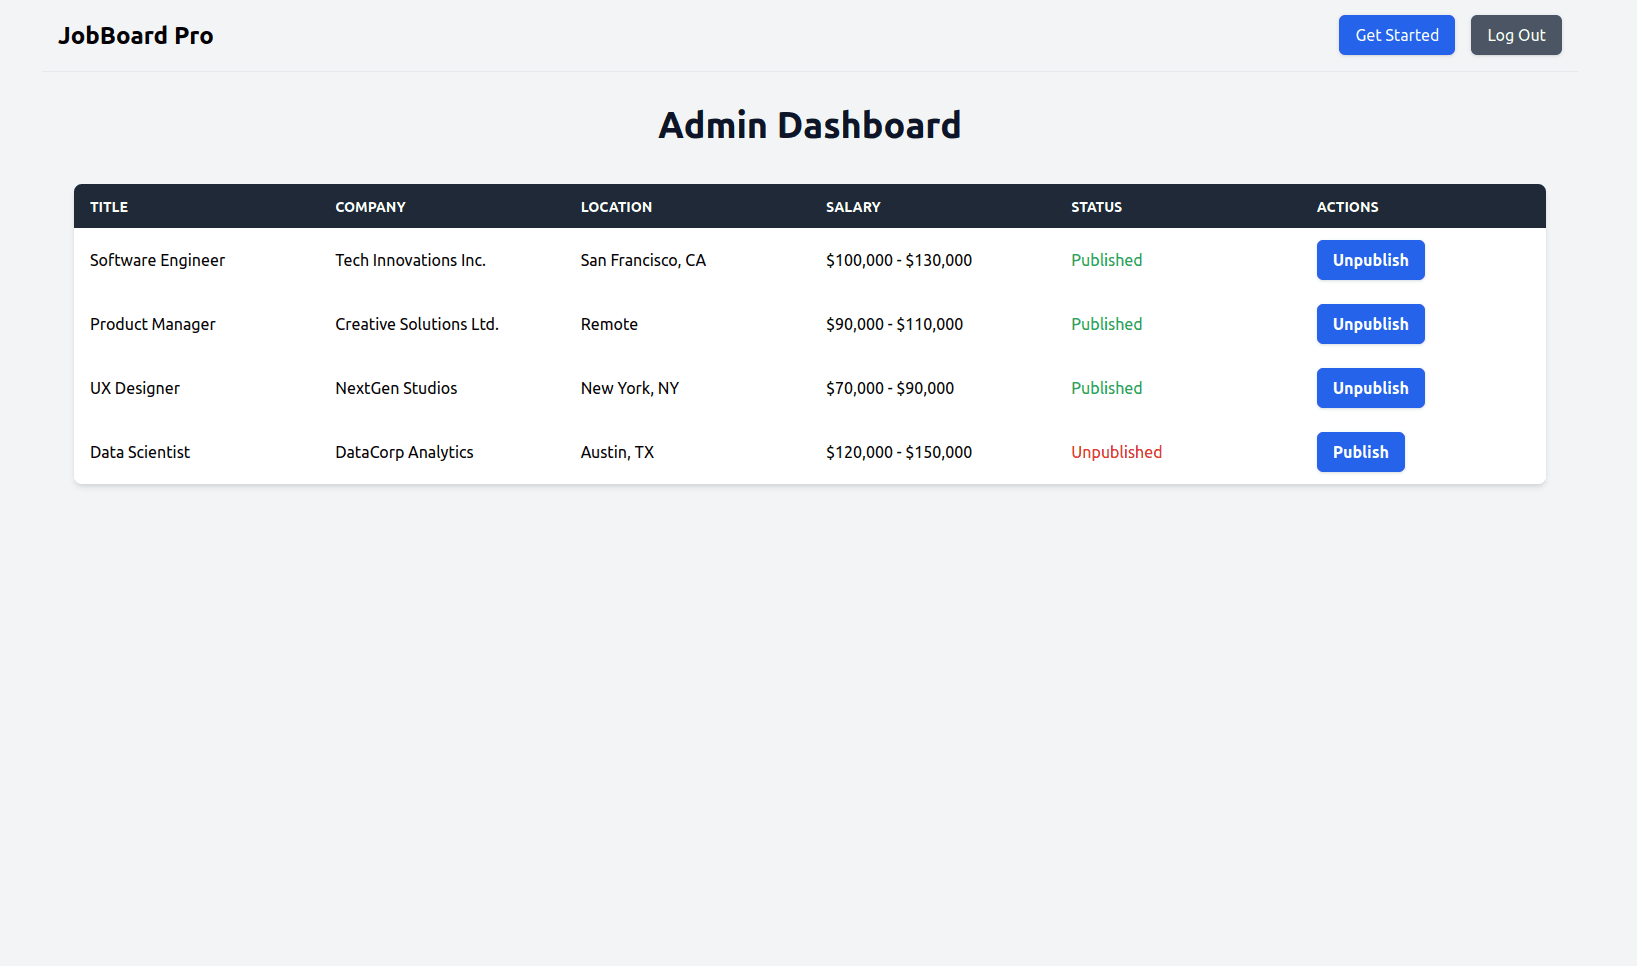
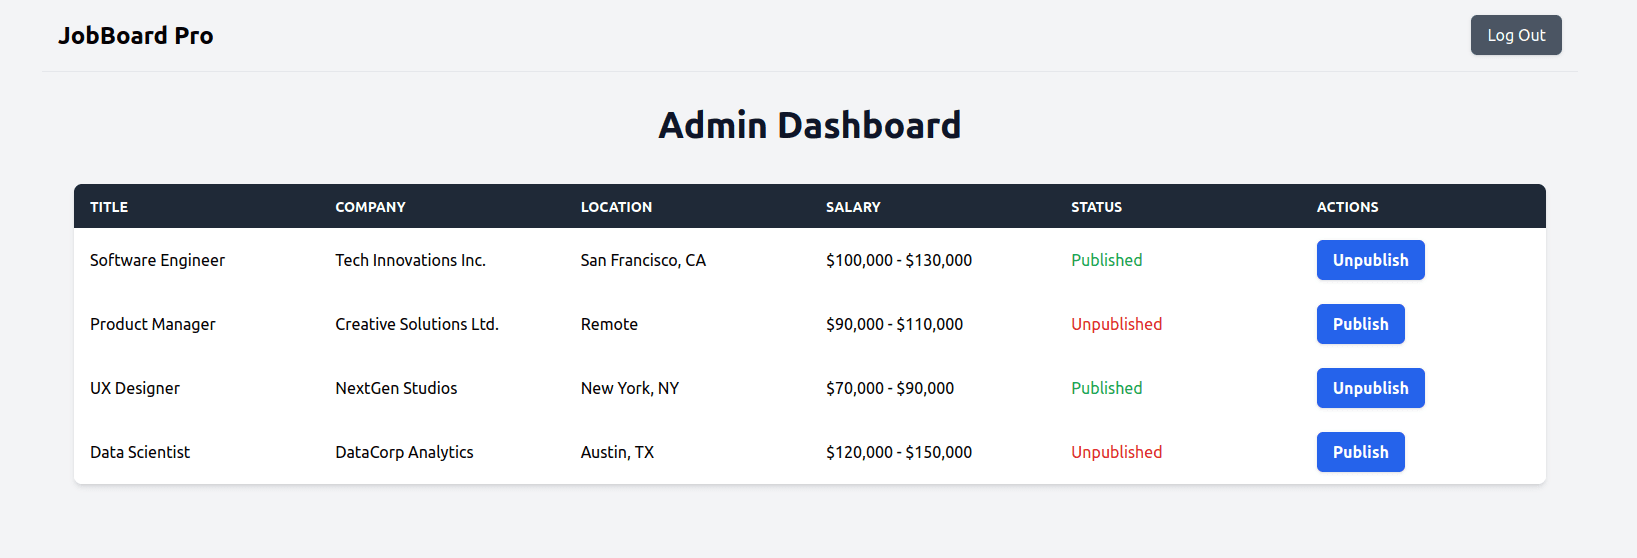
When you click the button, you’ll be redirected to the Admin Dashboard page where you can publish and unpublish jobs:
If both user and admin scenarios work as described, your Vue.js authentication and RBAC setup with Descope is working correctly.
You can access the full project code on GitHub.
Vue.js authentication made simple with Descope
Authentication in Vue.js doesn’t have to be complicated. With Descope, you can implement secure login, MFA, and RBAC without building everything from scratch. By using Descope’s SDKs and flow builder, you can focus on your app’s functionality while leaving session management, token validation, and role enforcement to a purpose-built platform.
Want to add authentication to your Vue.js app without the hassle? Sign up for a Free Forever Descope account to get started. If you’d like to dive deeper into authentication best practices or see how Descope fits into your stack, book time with our auth experts today.