
Table of Contents
Don't have the time to read the entire post? Our human writers will be sad, but we understand. Summarize the post with your preferred LLM here instead.
OpenAI's Custom GPTs offer a powerful way to create AI agents that can interact directly with your APIs through natural language conversations. Imagine you have a deployed FastAPI application that implements DevOps tools such as triggering CI/CD workflows, getting deployment logs, usage analytics, and other operational tasks.
While integrating your API with an LLM sounds like a perfect task for a Model Context Protocol (MCP) server, MCP servers can be complex to implement and maintain, often posing security challenges that necessitate external middleware. Even FastAPI MCP wrappers introduce routing changes, CORS policies, and deployment overhead that quickly becomes its own project.
With Descope Inbound Apps, you’re given a much simpler approach to establishing an OAuth compliant connection between your API and a custom GPT.
In this article, we’ll walk you through:
Securing your FastAPI backend with Descope JWT validation
Configuring a custom GPT to authenticate and interact with your protected APIs using scope-based authorization
Setting up your FastAPI application to act as a proxy for the Inbound App, so you maintain the authorization and the resource server under the same domain.
Also read: Descope MCP documentation
What you will build: a secure GPT assistant
By the end of this article, you will have a custom GPT that can securely interact with your prebuilt FastAPI endpoints through natural language conversations. The first time you submit a prompt in the current chat, you will be asked to authenticate and taken through the Descope inbound apps user consent flow.
Note that if you configure a custom domain for your Descope project, your Descope-powered authorization server would run on your own custom domain, eliminating the need for this proxy setup. However, for this example, we will implement the proxy approach to understand the OAuth flow mechanics and provide an immediate out-of-the-box solution.
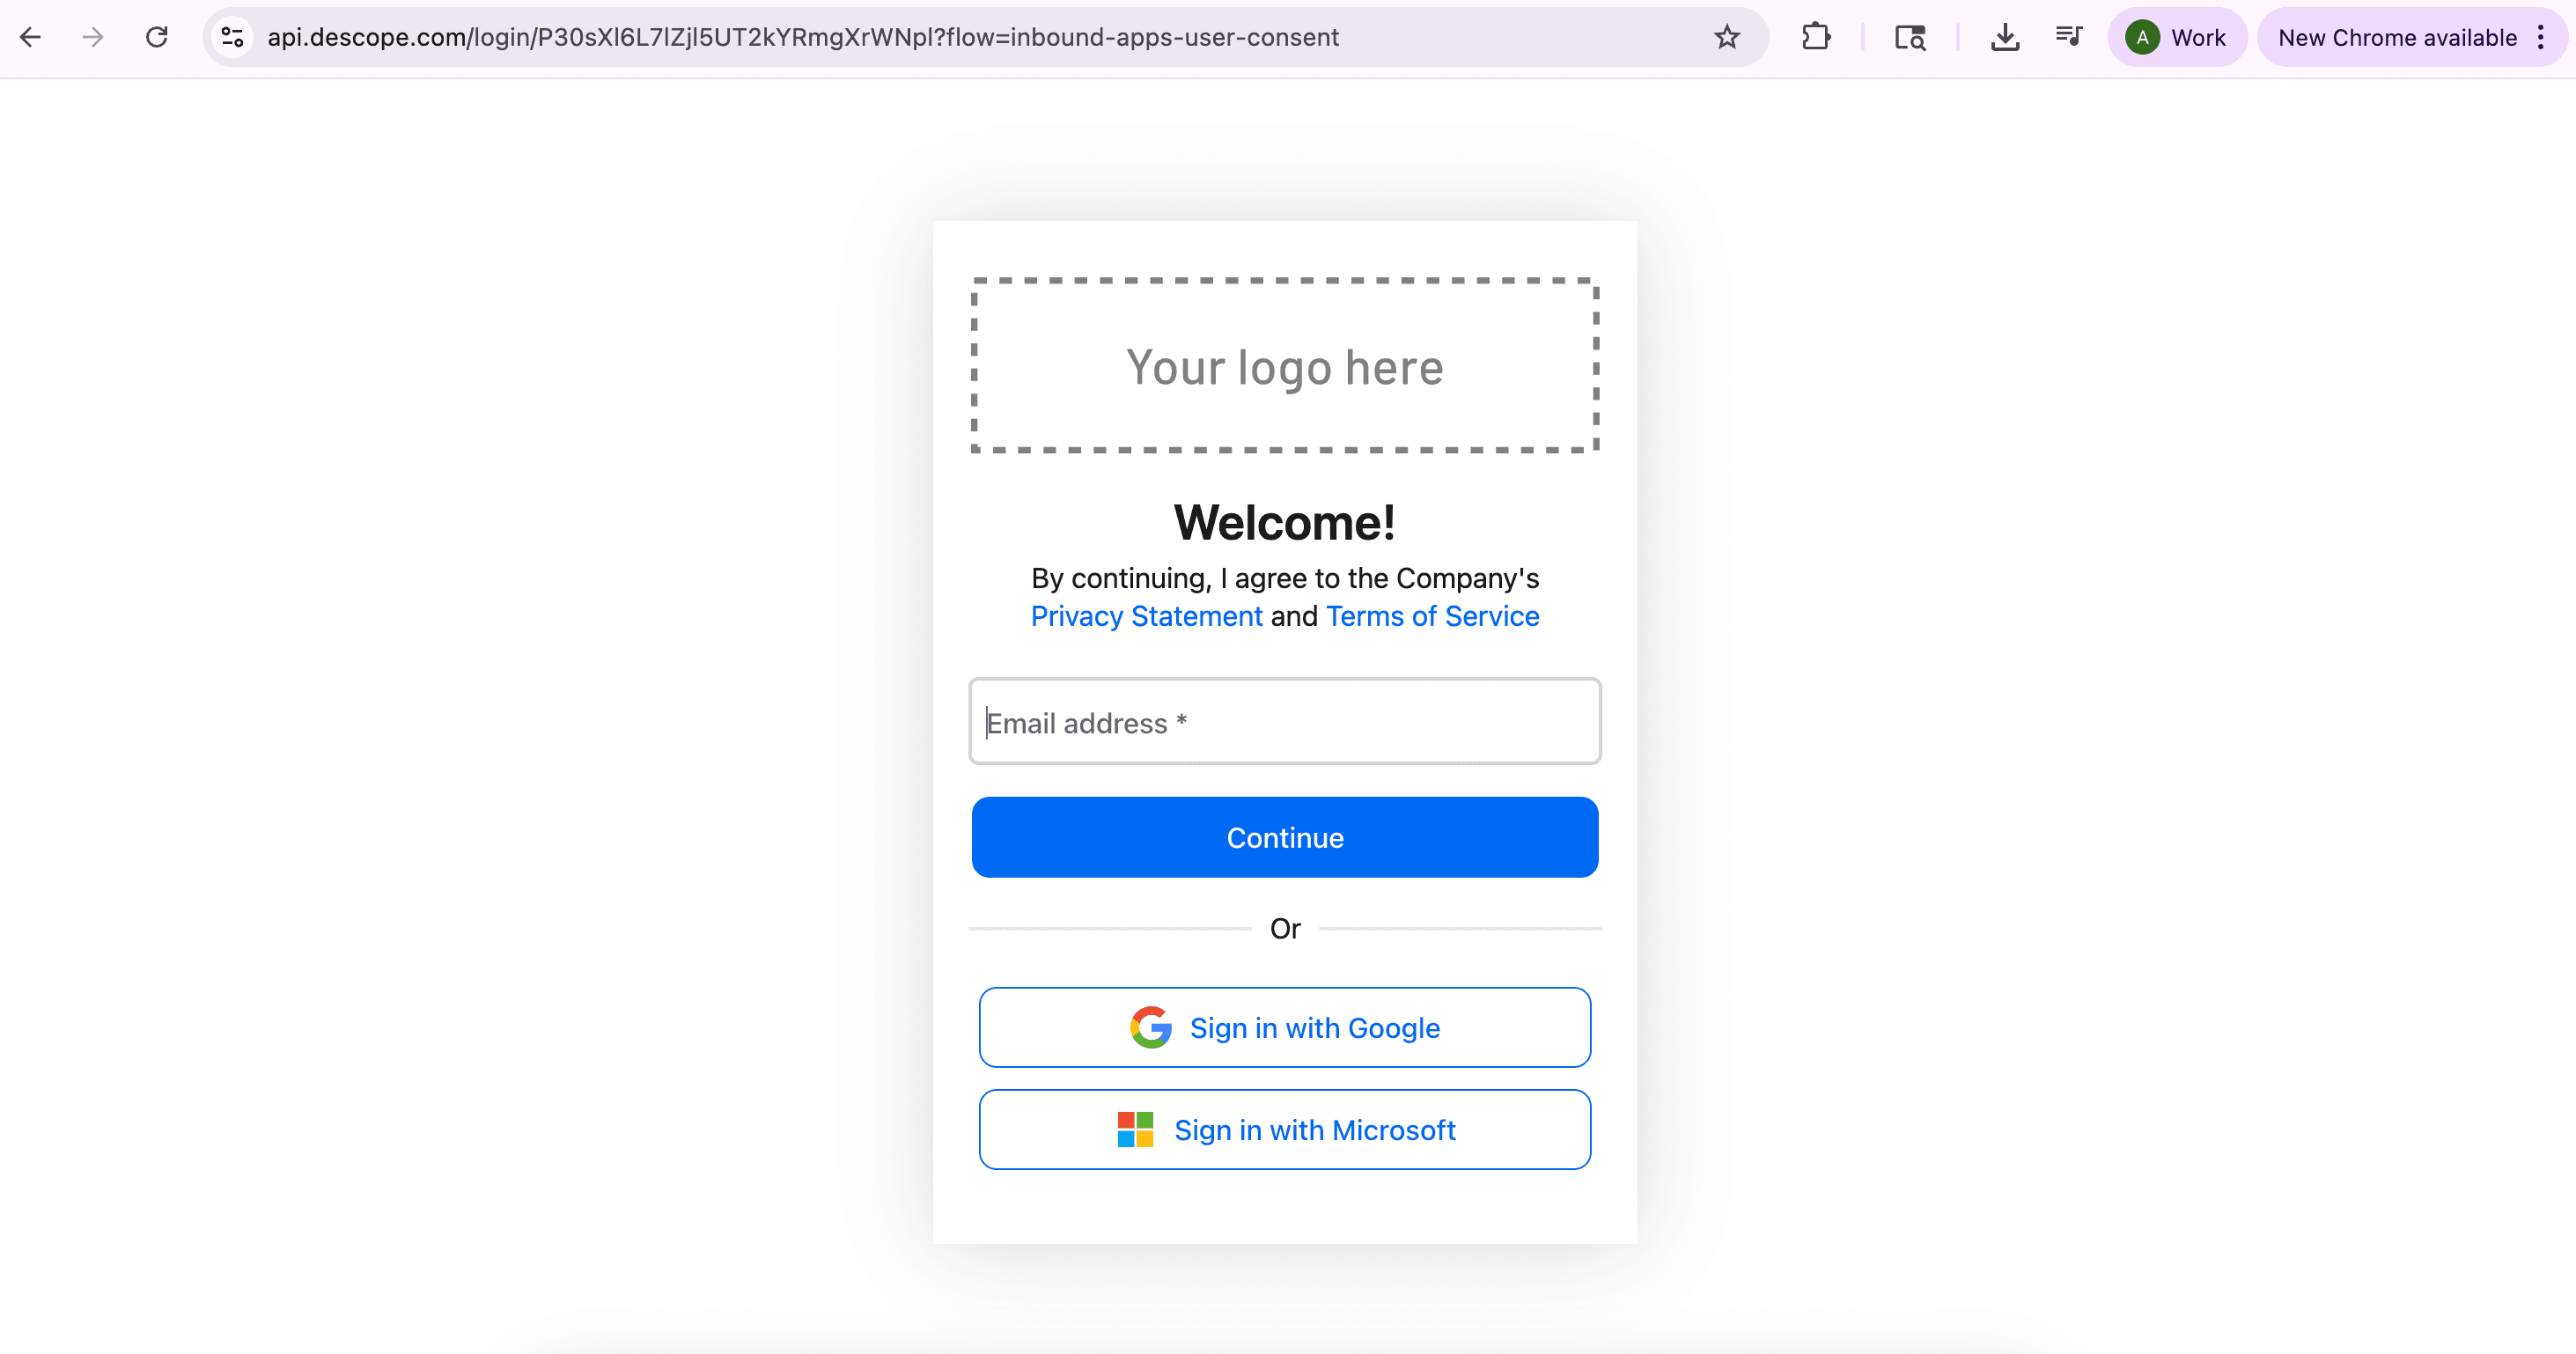
Once you are authenticated, you will be brought to the consent screen, which will display a list of scopes that you can consent to.
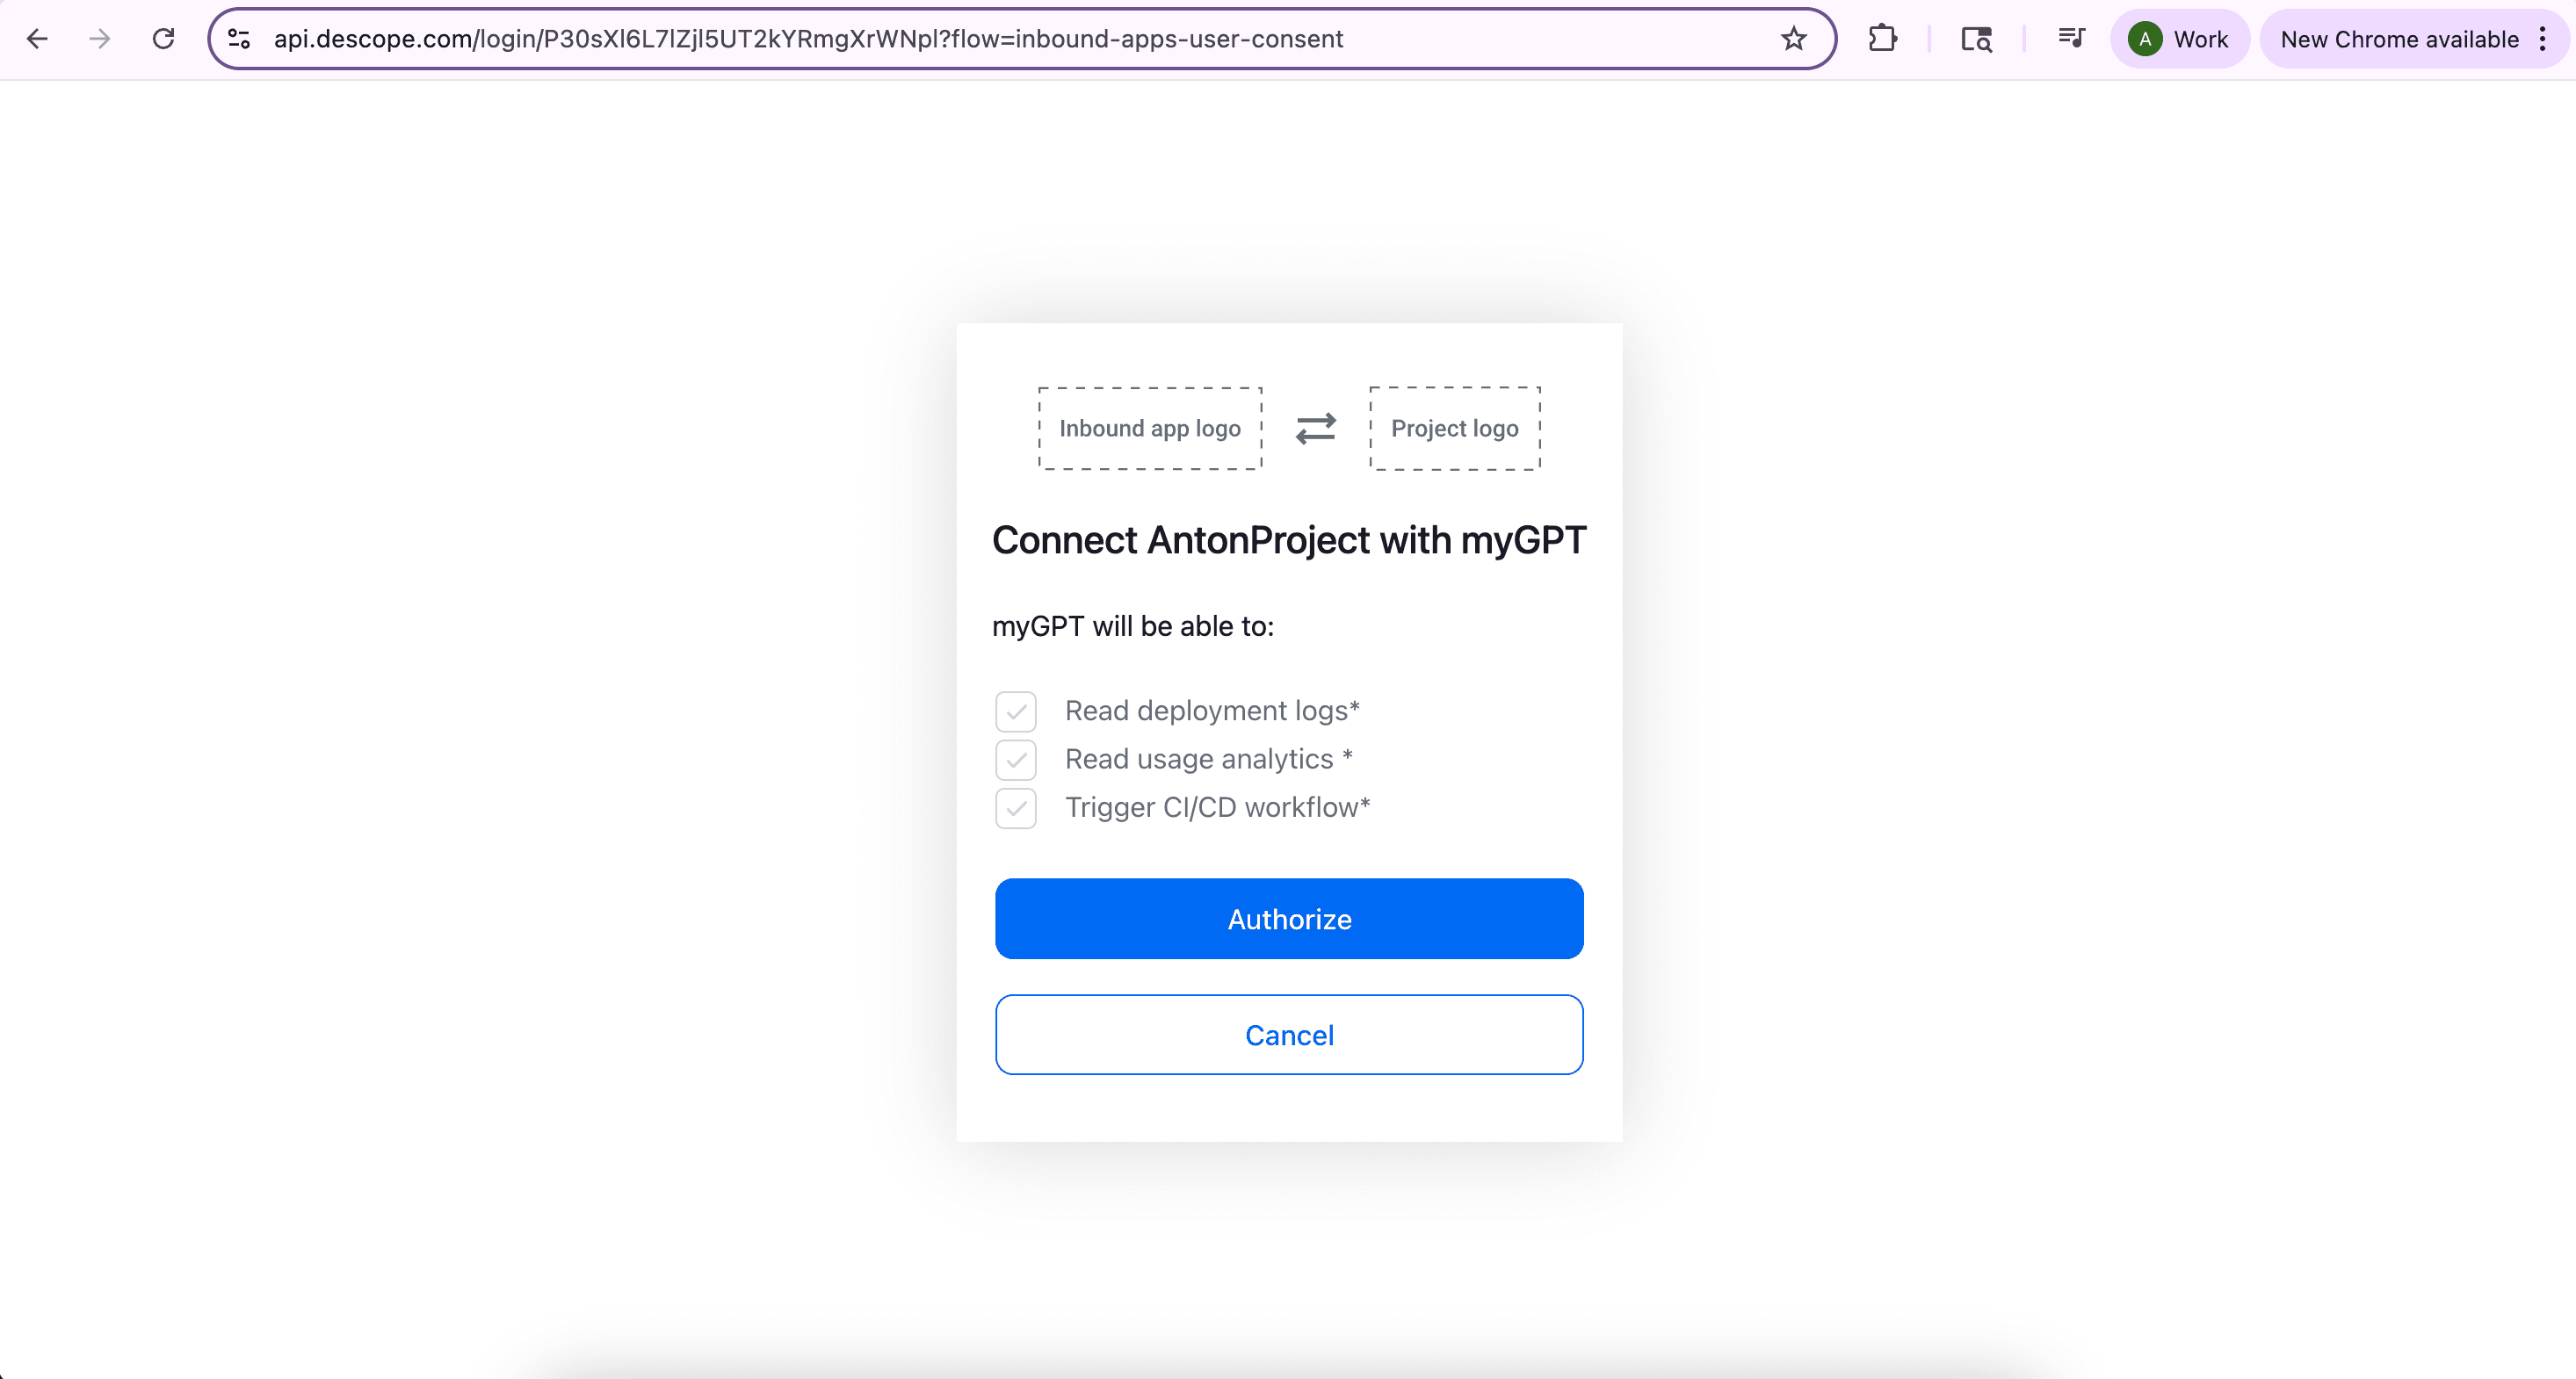
After you give consent, you will be seamlessly redirected back to your chat along with access and refresh tokens, which will be used when you call your API routes. The GPT will then ask for authorization to interface with the specific tool(s) which will be called to answer your prompt. Select Allow or Allow Always based on your personal preference.
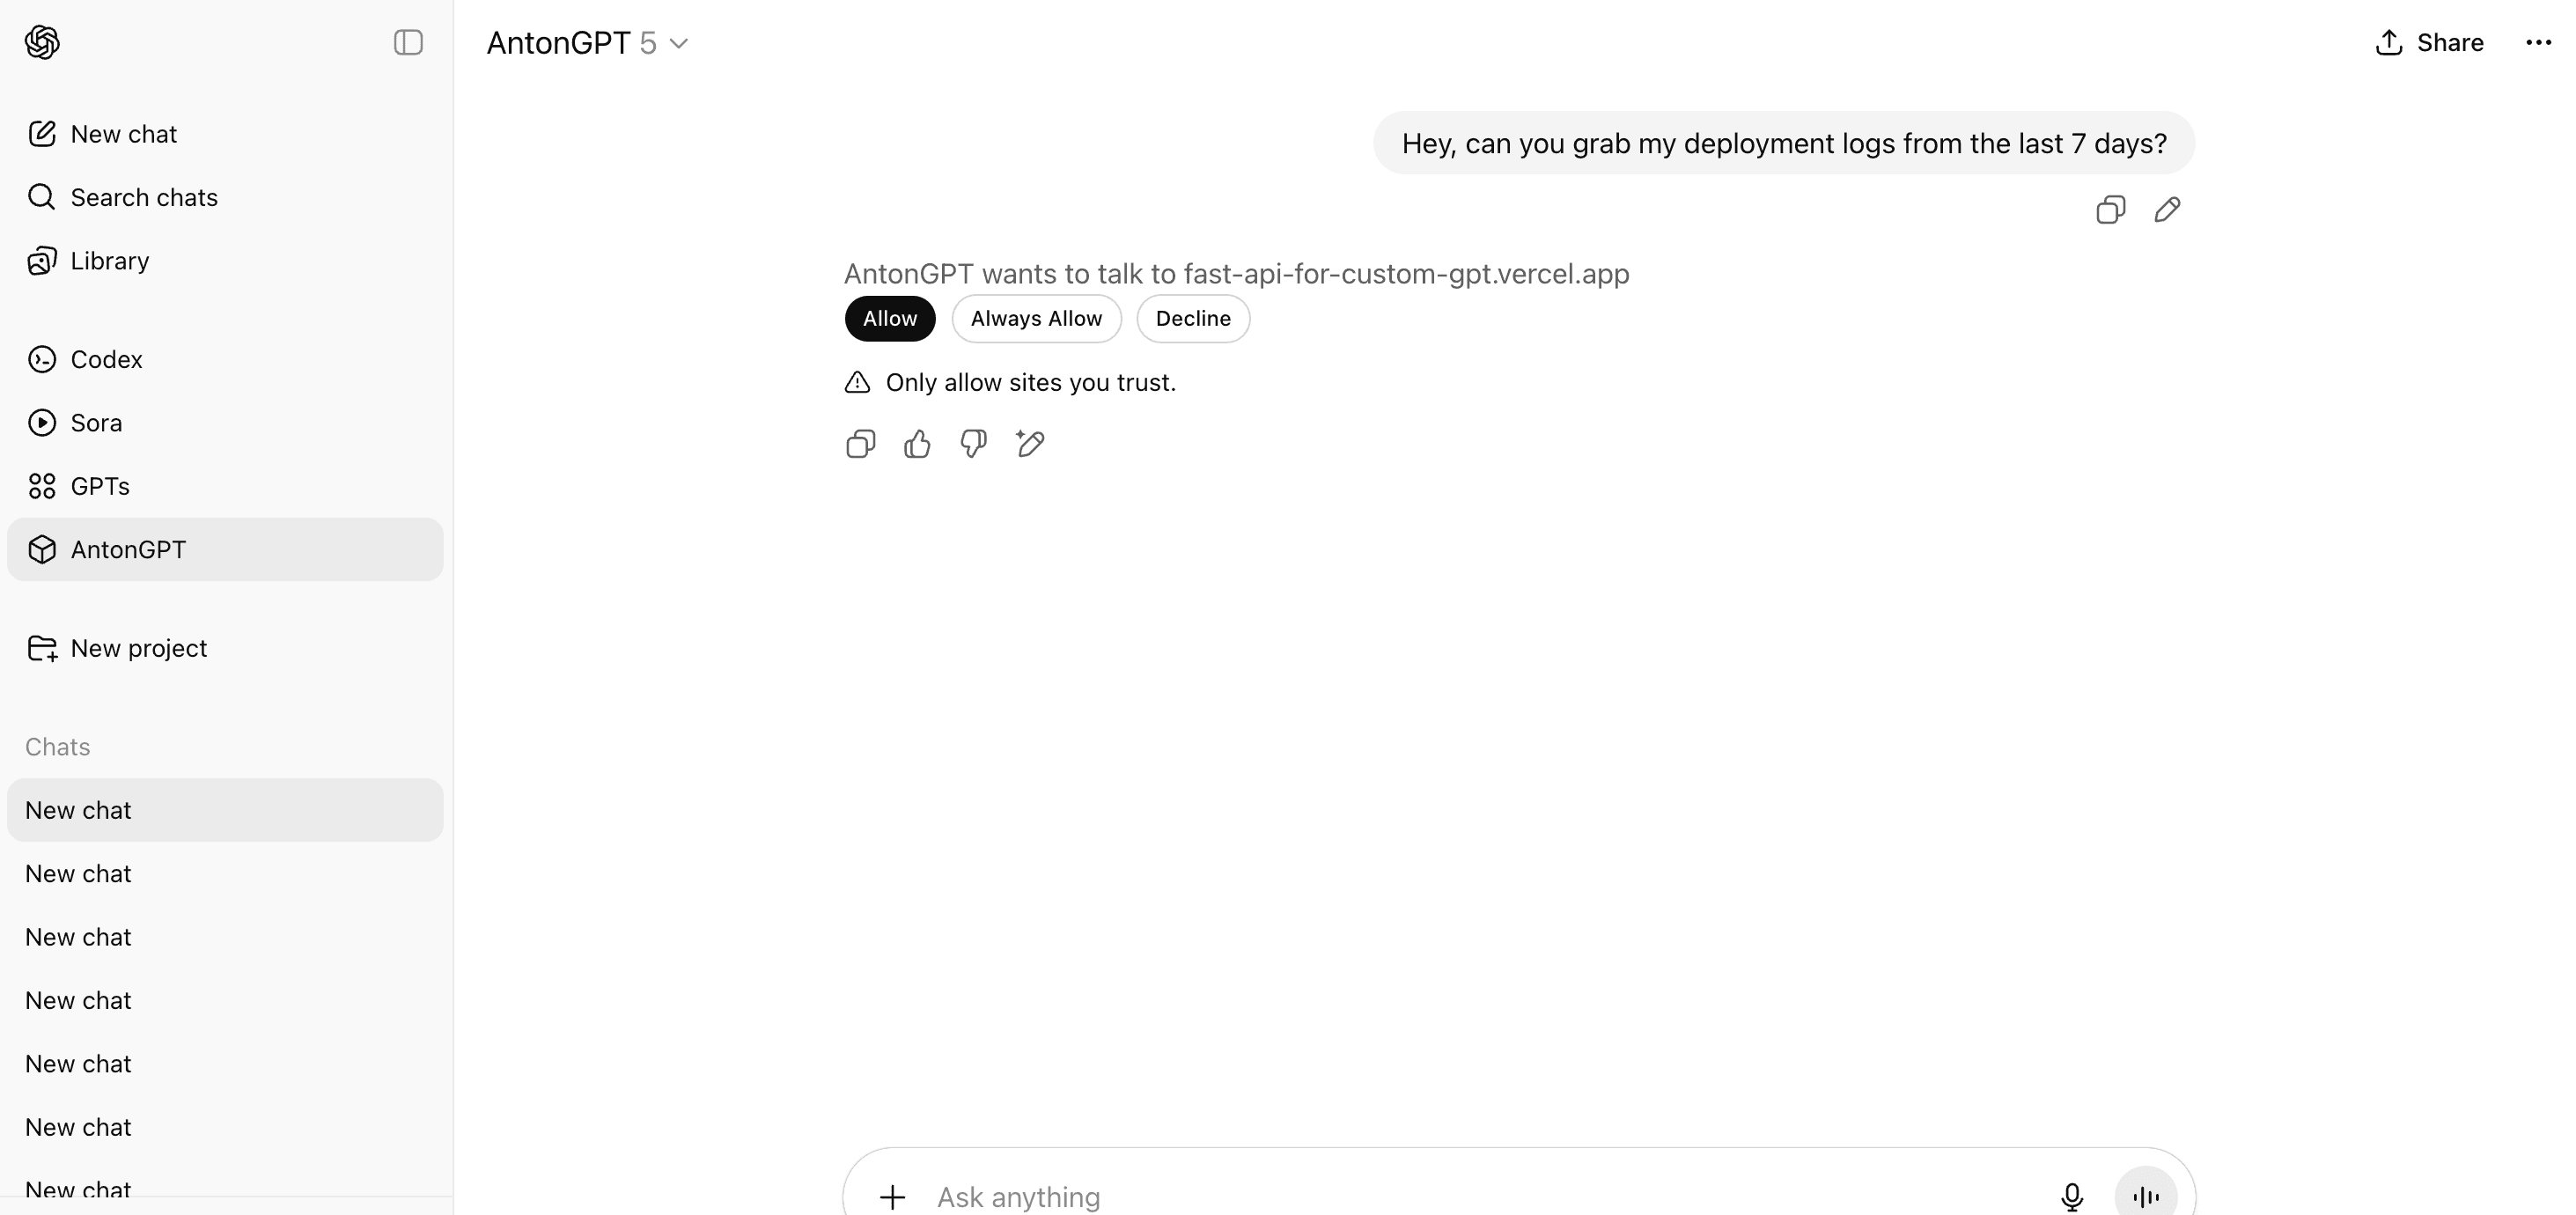
When you make a request, your custom GPT sends it directly to your API with the access and refresh tokens it has. Your backend server then performs the scope validation and responds accordingly: if the token is invalid or expired, you'll get a 401 Unauthorized error; if the token is valid but lacks the necessary scopes for that specific endpoint, you'll receive a 403 Forbidden error. This approach keeps all the authorization decisions on the server side. In either case, the GPT will explain in natural language which error occurred when trying to generate a response.
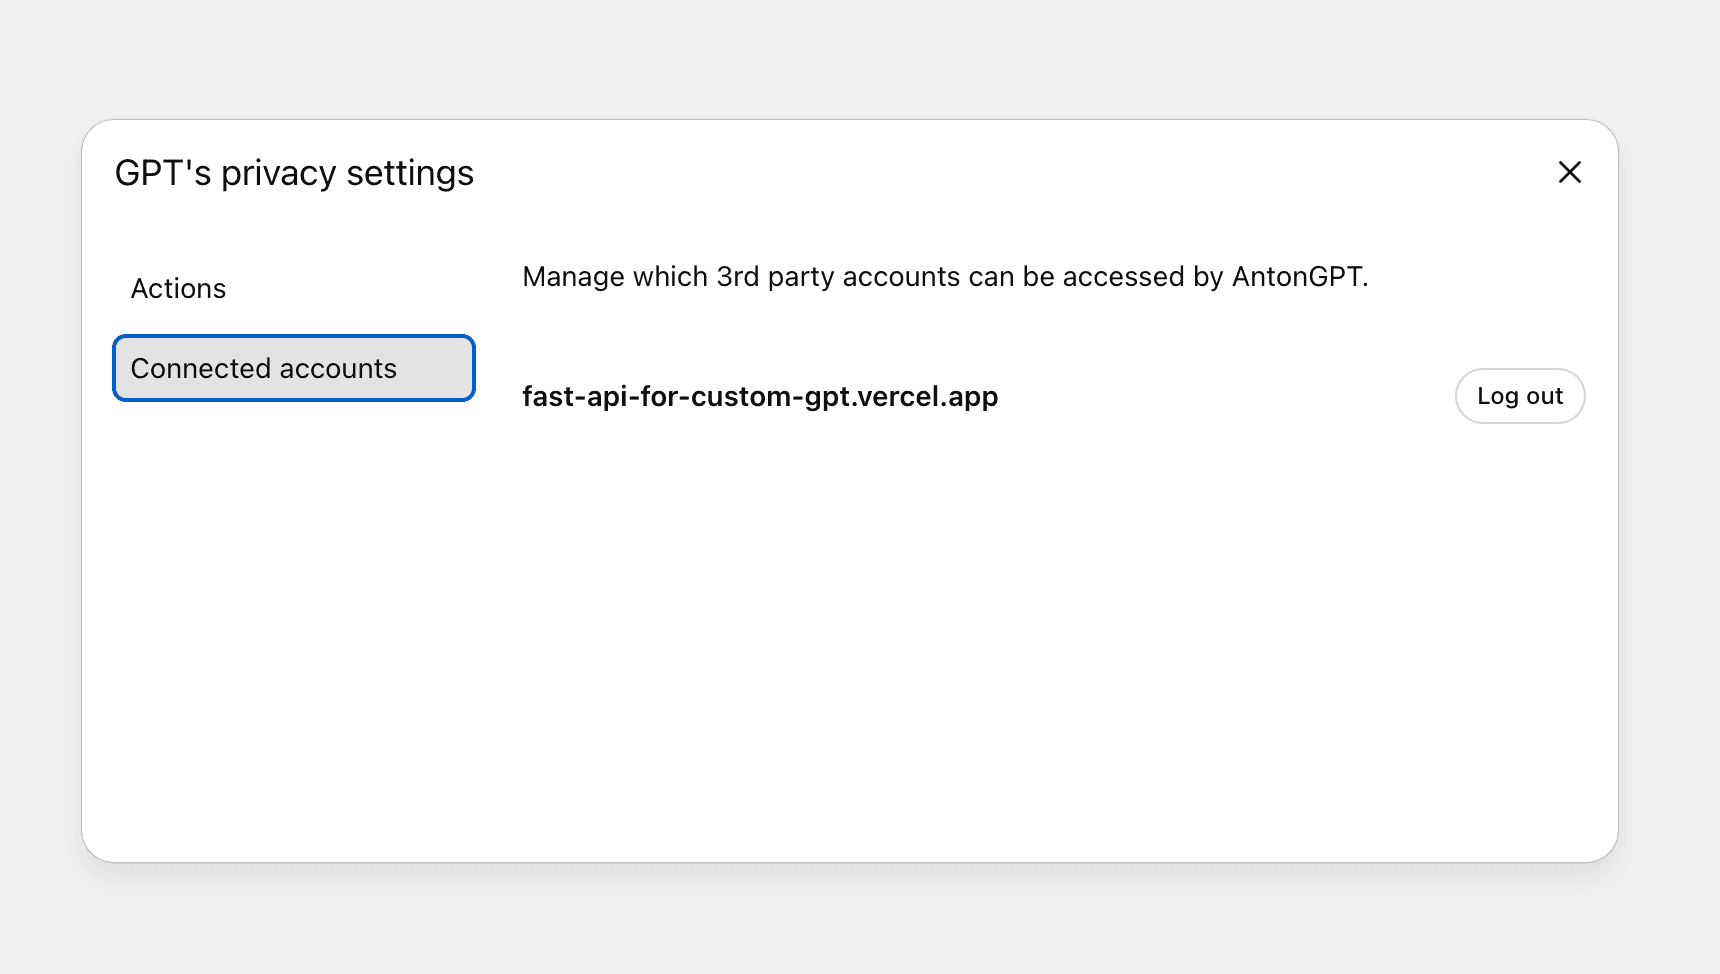
After you complete authentication and authorization, OpenAI will automatically manage your session. You can view and manually manage the connection and authorization status under Privacy Settings, which you can find in the drop-down menu next to the name of your GPT in the top left corner.
You can continue to submit prompts without reauthenticating until the authorization token issued to you by the Inbound App expires. The default session timeout is set to 10 minutes, but you can learn to adjust this later in the article.
Prerequisites
To complete the tutorial, you will need the following:
Python installed
A deployed FastAPI application; you can find a sample starter app here
ChatGPT Plus account
Setting up a Descope project
To create a new Descope project, sign up or sign in to the Descope console.
If you just signed up for a new account, a new Descope project will be automatically created for you and you will find yourself on the Getting Started page of that project.
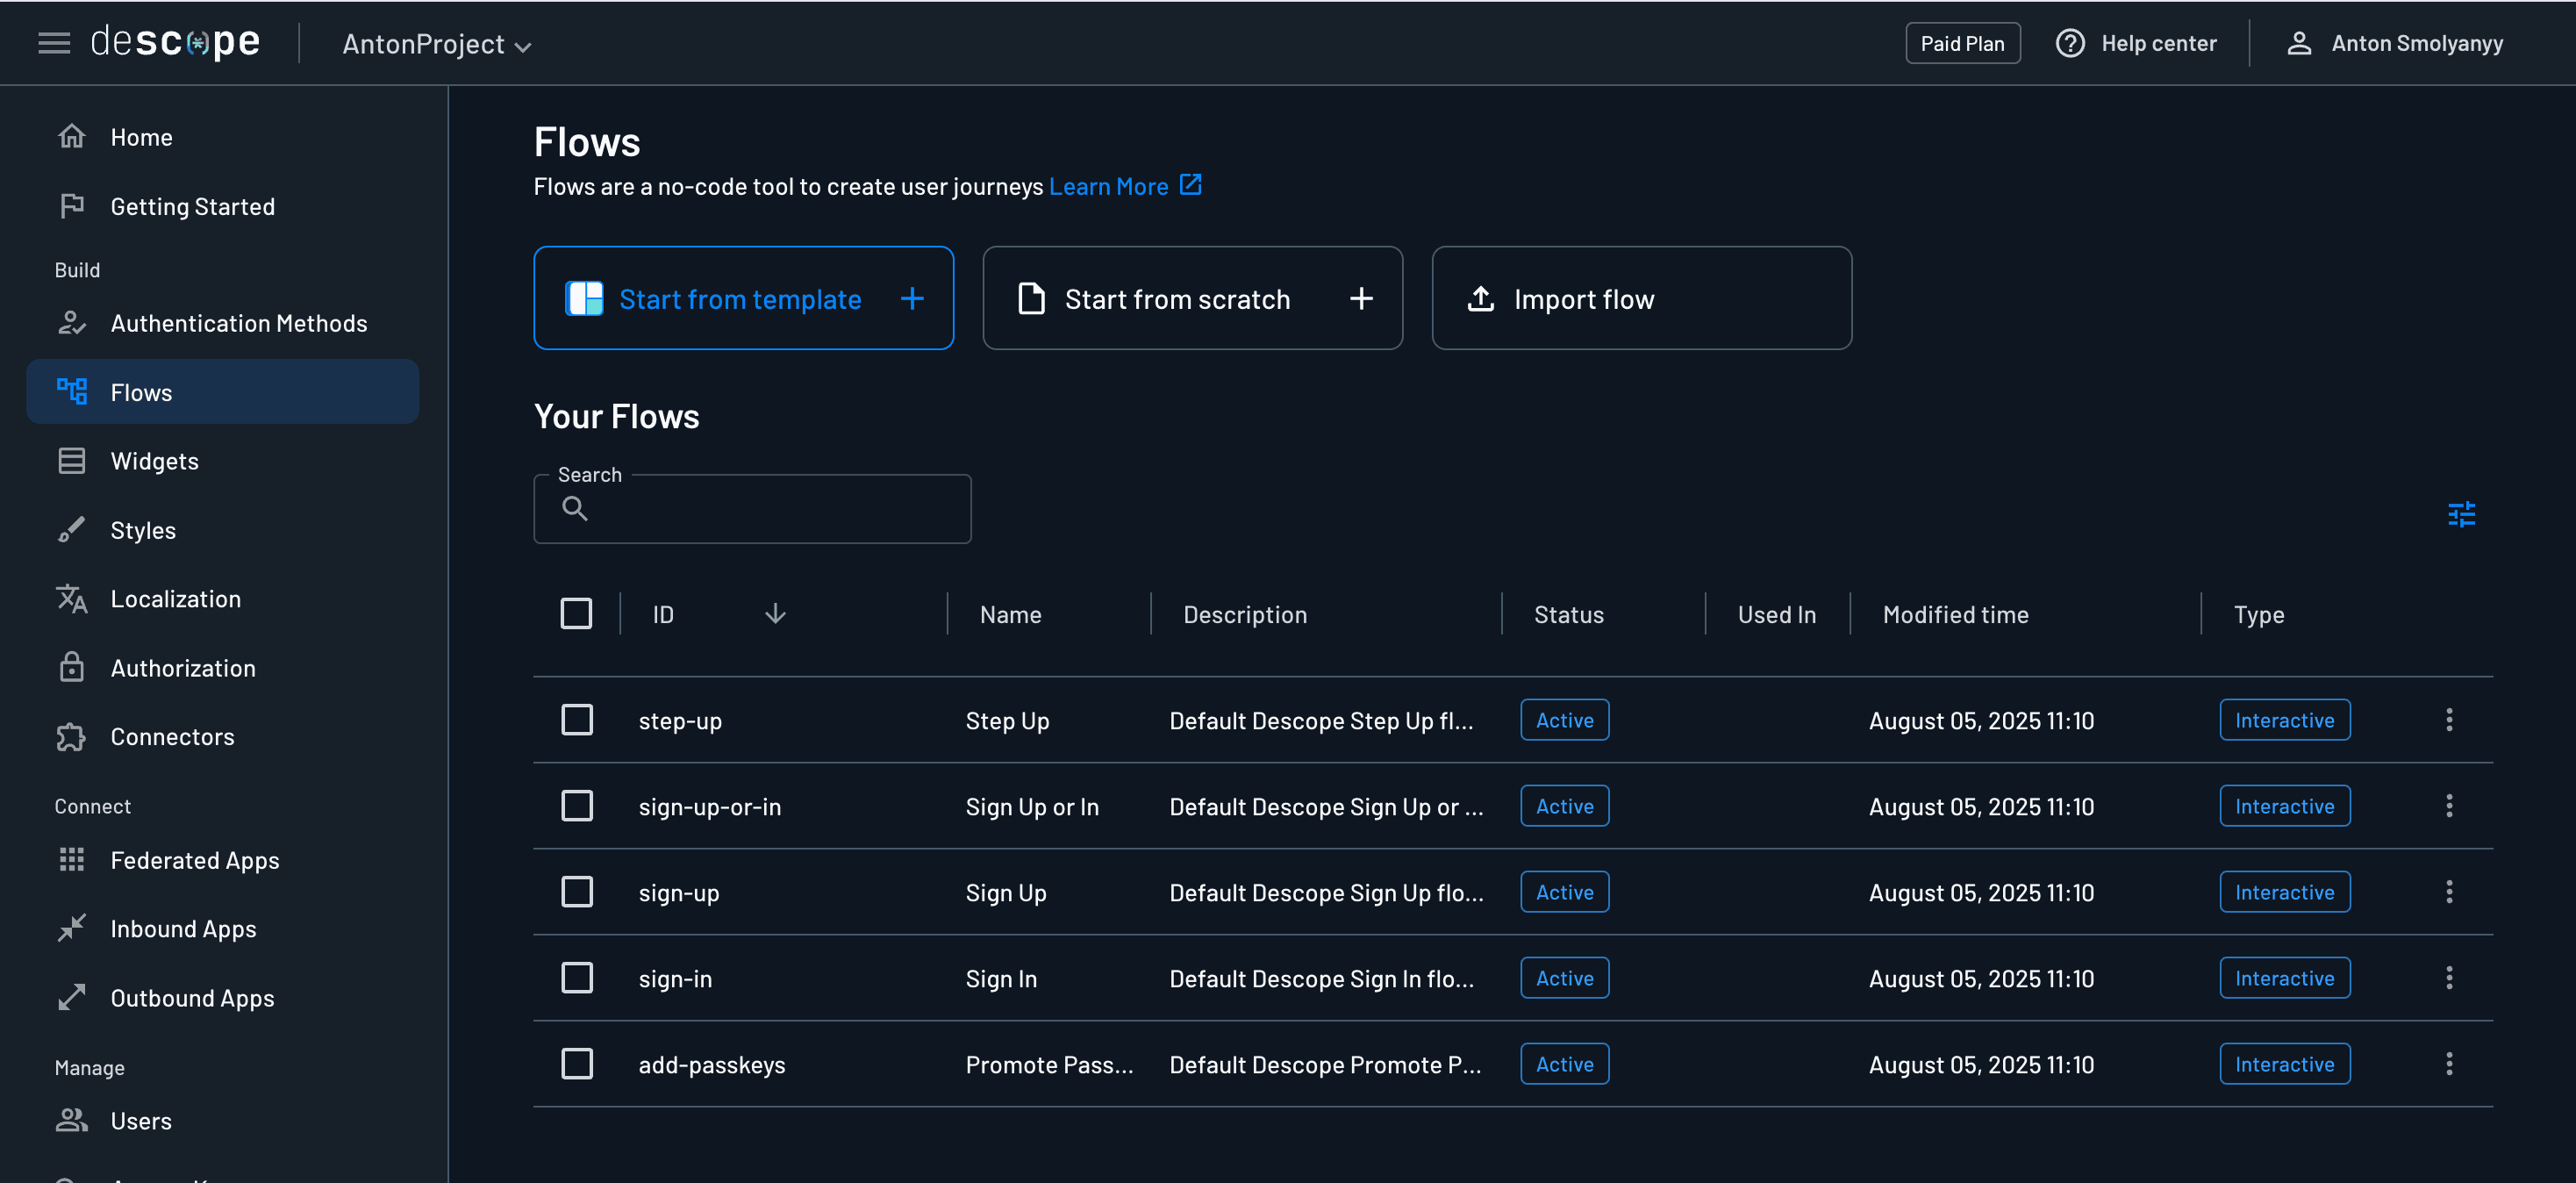
To create a new project, click on your project’s name in the top left corner of your Descope console, and select + Project from the dropdown. This is also where you can switch between projects. If you navigate to the Flows section, you will see that a handful of flows have automatically been created for you. Descope Flows are a no-code tool to build user authentication journeys. While you do not need to modify the default flows, you can choose to do so if you want to design a custom user journey.
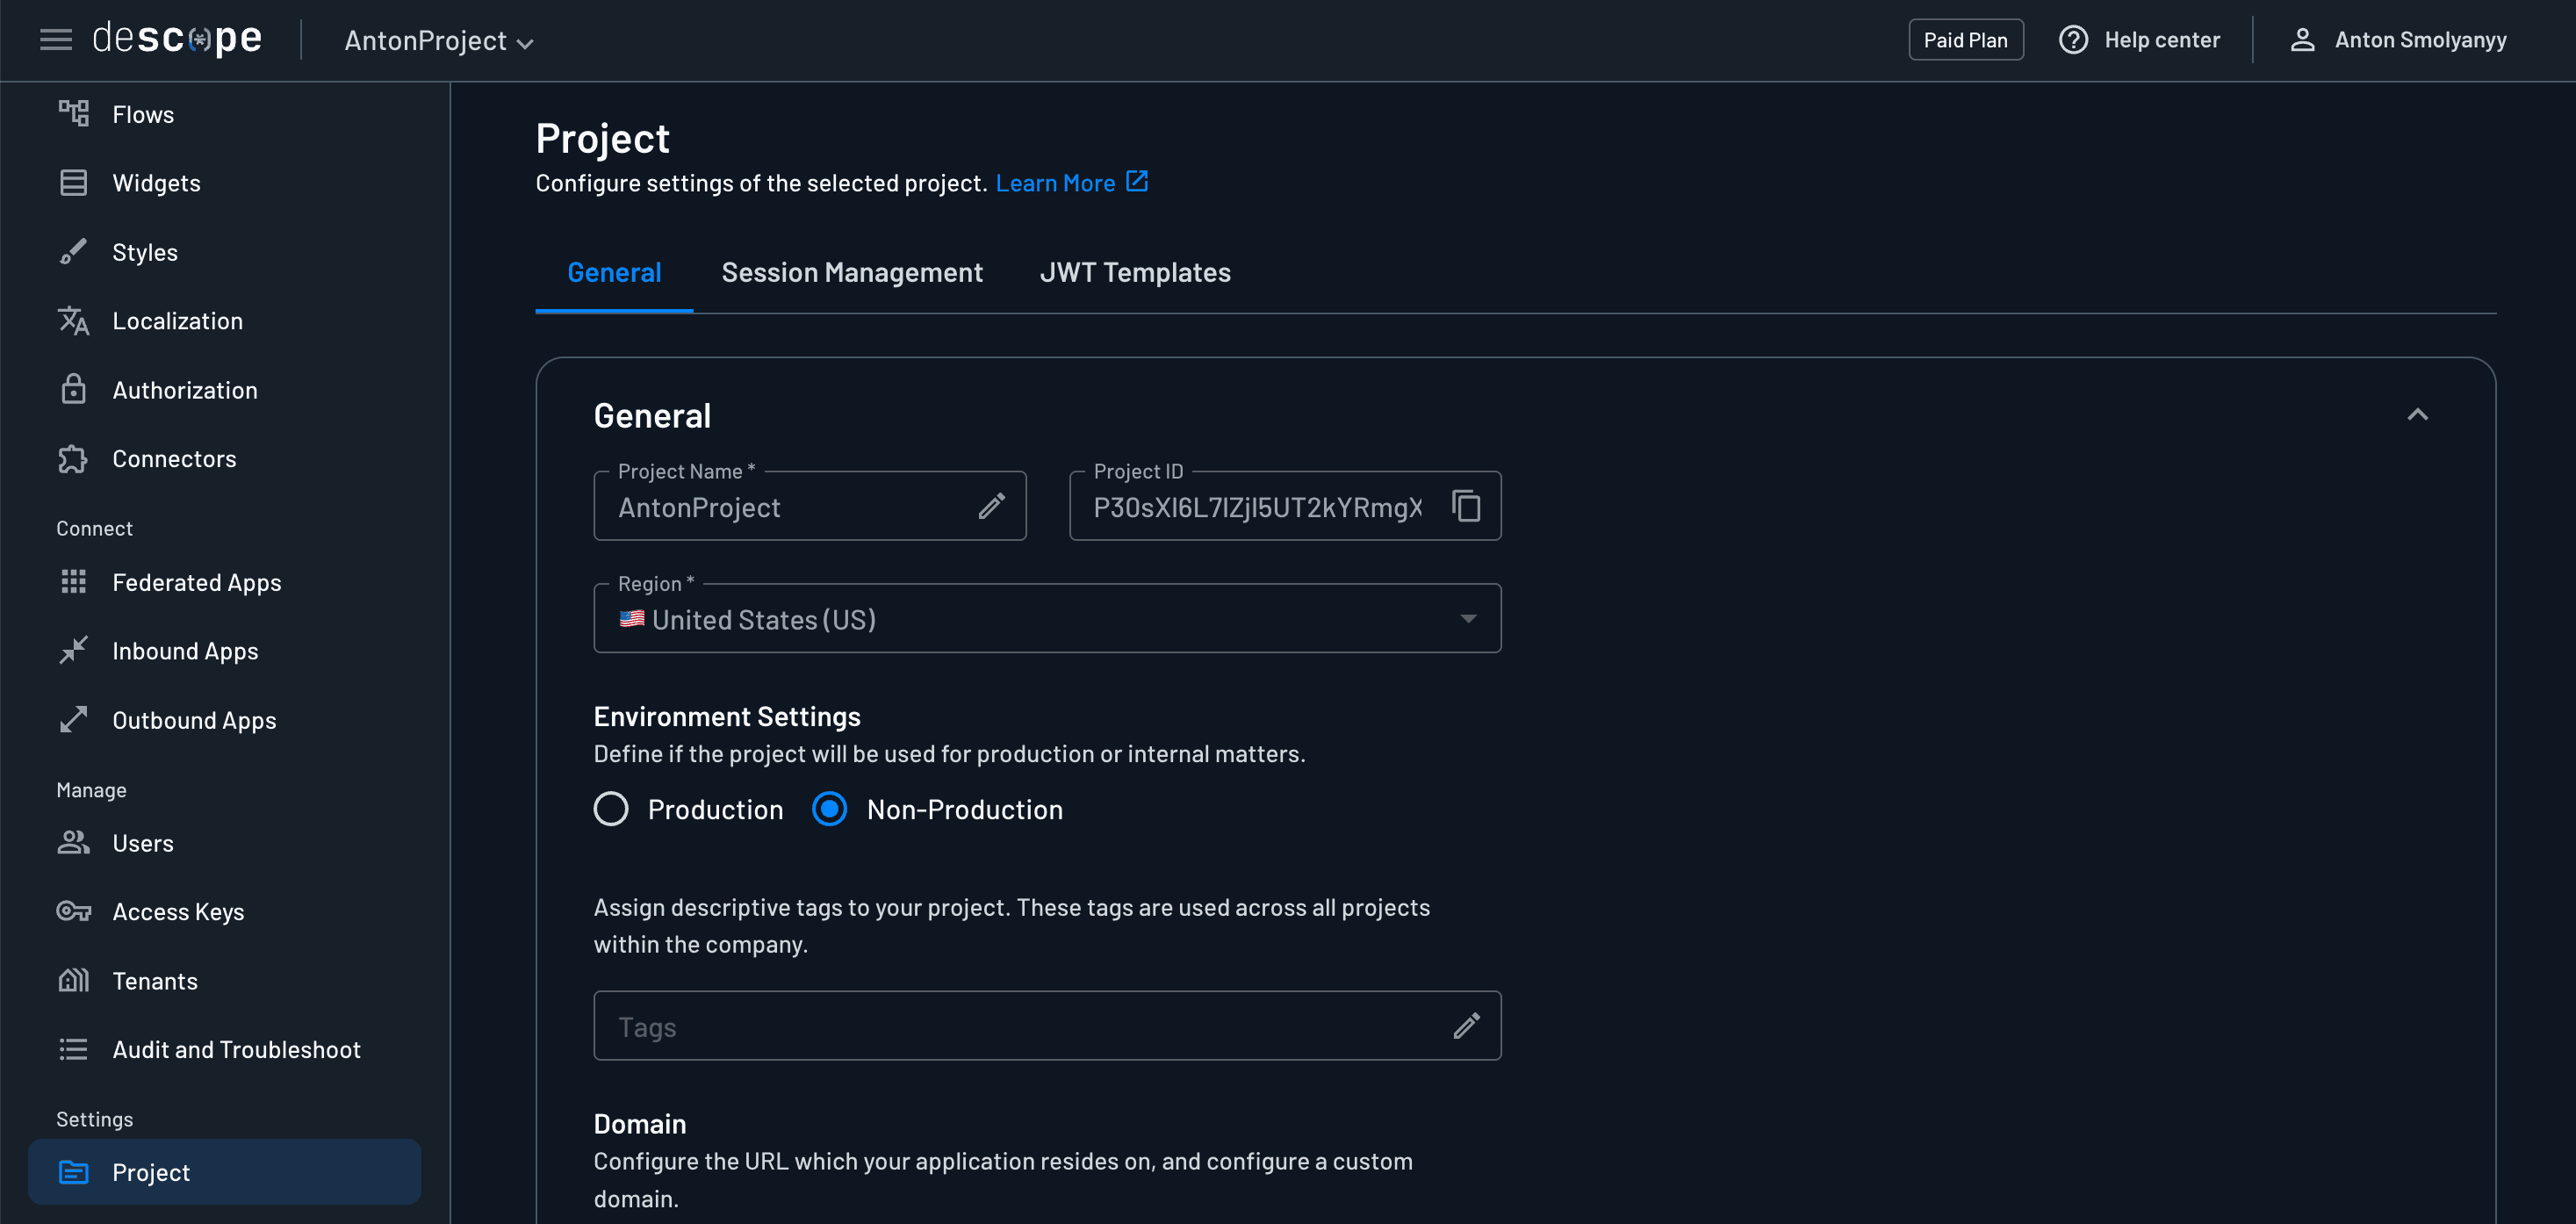
You can access your project ID at any time by navigating to the Project section of the Descope console. You can copy the project ID from the General tab.
Configuring your application environment
In the root folder of your FastAPI application’s project, create a .env file if you do not already have one, and add the following variables:
DESCOPE_PROJECT_ID=<Your Descope project ID>
DESCOPE_INBOUND_APP_CLIENT_ID=<Inbound App client ID>
DESCOPE_INBOUND_APP_CLIENT_SECRET=<Inbound App client secret>
DESCOPE_API_BASE_URL="https://api.descope.com" # or your custom domain if one is configured in your project settings
Specify your Descope project ID. If you do not know where to find it, reference the previous section of this article. You will fill in the Inbound App client ID and secret later in this article.
Securing your app through token validation
Descope implements its session and refresh tokens as JSON web tokens (JWT). After your Custom GPT obtains a token from your Inbound App through the OAuth flow, your FastAPI backend needs to validate and accept these scoped tokens for authentication and authorization.
The advantage of using this OAuth approach with Descope is that you get a complete consent flow and hosted login pages out of the box - no need to build your own authentication UI. You will implement a custom JWT authorizer into your FastAPI app that validates JWTs to make sure its signature is valid, it is not expired, and the audience and issuer claims match the expected resource server. Finally, the authorizer will enforce the scopes embedded in the token to control access to your API endpoints.
First, you will implement a simple exception handler. In your FastAPI application, create a new file and name it exceptions.py. Add these two exception definitions:
from fastapi import HTTPException, status

class UnauthenticatedException(HTTPException):
    def __init__(self):
        super().__init__(status_code=status.HTTP_401_UNAUTHORIZED, detail="Authentication
required")

class UnauthorizedException(HTTPException):
    def __init__(self, detail: str = "Not authorized"):
        super().__init__(status_code=status.HTTP_403_FORBIDDEN, detail=detail)
Now let’s implement the JWT authorizer. To validate the JWT, you will need to obtain a public key from the Descope JSON web key set (JWKS) endpoint. Your JWKS endpoint will look like this:
https://api.descope.com/<Your Descope Project ID>/.well-known/jwks.jsonCreate an auth.py file in your FastAPI app and add a TokenVerifier class. This class is used as a FastAPI dependency to validate incoming JWTs and, if requested by a route, enforce OAuth scopes.
At a high level, the TokenVerifier class extracts the bearer token from the authorization header, fetches the public key from your JWKS endpoint, and decodes and validates the JWT. It also uses the SecurityScopes library to validate and enforce the scopes embedded in the token:
from typing import Optional, List
import os
import jwt
from jwt import PyJWKClient
from fastapi import Depends
from fastapi.security import SecurityScopes, HTTPAuthorizationCredentials, HTTPBearer

from app.exceptions import UnauthenticatedException, UnauthorizedException

jwks_url = f"https://api.descope.com/{os.getenv('DESCOPE_PROJECT_ID')}/.well-known/jwks.json"

class TokenVerifier:
    def __init__(self):
        self.config = get_settings()
        self.jwks_client = PyJWKClient(jwks_url)
        self.allowed_algorithms = ["RS256"]

    async def __call__(
        self,
        security_scopes: SecurityScopes,
   	 # token injected by FastAPI Security, specified in the FastAPI route definition
 token: Optional[HTTPAuthorizationCredentials] = Depends(HTTPBearer())
    ):
        if token is None:
            raise UnauthenticatedException

        token = token.credentials

        key = self._get_signing_key(token)
        payload = self._decode_token(token, key)

        if security_scopes.scopes:
            self._enforce_scopes(payload, security_scopes.scopes)

        return payload

    def _get_signing_key(self, token: str):
        try:
            return self.jwks_client.get_signing_key_from_jwt(token).key
        except Exception as e:
            raise UnauthorizedException(f"Failed to fetch signing key: {str(e)}")

    # helper which calls jwt.decode()
    def _decode_token(self, token: str, key):
        try:
            project_id = os.getenv("DESCOPE_PROJECT_ID")
            issuer_candidates = [
                f'https://api.descope.com/v1/apps/{project_id}',
                project_id
            ]
            return jwt.decode(
                token,
                key,
                algorithms=self.allowed_algorithms,
                issuer=issuer_candidates,
                audience=project_id
            )
        except Exception as e:
            raise UnauthorizedException(f"Token decoding failed: {str(e)}")
To restrict access to specific API routes based on the scopes carried by the incoming JWT token, add one more method to the TokenVerifier class that checks the token’s scope claim. After successful validation, it reads the token’s scope claim, compares it to the route’s required scopes, and rejects the request if any are missing.
def _enforce_scopes(self, payload: dict, required_scopes: List[str]):
        scope_claim = payload.get("scope")
        if scope_claim is None:
            raise UnauthorizedException('Missing required claim: "scope"')

        scopes = scope_claim.split() if isinstance(scope_claim, str) else scope_claim
        missing = [scope for scope in required_scopes if scope not in scopes]

        if missing:
            raise UnauthorizedException(
                f'Missing required scopes: {", ".join(missing)}'
            )
Now let’s hook up our JWT authorizer to the main file where you define your APIs. You can protect your API routes with token validation and/or scoping, restricting specific routes to tokens which have specific scopes.
While scoping isn't mandatory for basic authentication, it's highly recommended when working with custom GPTs. This is because they handle 403 error responses fairly seamlessly, and they can gracefully inform users when they lack permissions. The scopes embedded in your access token will be set when creating your Descope Inbound App later in this article.
For more insights on implementing robust security controls in enterprise applications, check out our enterprise MCP security challenges blog.
You may already have route protection configured, but if you do not, set it up as follows:
import urllib.request
import os
from app.auth import TokenVerifier

# Set a custom User-Agent to avoid being blocked by security filters or rate limiters.
opener = urllib.request.build_opener()
opener.addheaders = [('User-agent', 'Mozilla/5.0 (DescopeFastAPISampleApp)')]
urllib.request.install_opener(opener)

auth = TokenVerifier()

@app.get("/api/private")
def private(auth_result: str = Security(auth)):
    # This API is now protected by our TokenVerifier object `auth`
    return auth_result

@app.get("/api/private-scoped/read")
def private_scoped(auth_result: str = Security(auth, scopes=['read:messages'])):
    """
    This is a protected route with scope-based access control.

    Access to this endpoint requires:
    - A valid access token (authentication), and
    - The presence of the `read:messages` scope in the token.
    """
    return auth_result
You should now have a working JWT authorizer implemented with your FastAPI app! For more detailed information on the functionality of this implementation, you can visit our Validating JWTs in FastAPI doc.
Configuring your FastAPI app to be an authorization server
Because the GPT requires the OAuth endpoints and the APIs to be hosted under the same domain name, you will use your FastAPI app as a proxy or middleware between the client application (Custom GPT) and the identity provider (Descope). If you are using a custom domain that's the same root domain as your FastAPI backend, you can skip this step.
You will expose three endpoints that your custom GPT will treat as its OAuth server:
GET /authorize – forwards the browser to Descope’s /authorize endpoint
GET /api/oauth/callback – receives the authorization response from Descope and transforms it into the format expected by the custom GPT, including proper state parameter preservation and error handling for a seamless user experience.
POST /token – forwards the GPT’s back-channel token exchange to Descope’s /token endpoint
Authorization endpoint
The /authorize endpoint acts as the first step in the OAuth authorization code flow. When you initiate authentication through your custom GPT, this endpoint receives the OAuth parameters including response_type, redirect_uri, scope, and state. The endpoint performs several critical functions to ensure a secure OAuth flow:
Validates the incoming request parameters to ensure OAuth compliance and prevents malformed or malicious requests.
Dynamically constructs the callback URL based on the request's host, providing flexibility for different deployment environments.
Transforms the request into Descope's expected format by adding the necessary client credentials and redirect URI.
Redirects you to Descope's authorization server, where you can authenticate and authorize the application.
This proxy architecture provides several key benefits: centralized control over the OAuth flow, enhanced security through request validation and sanitization, and the flexibility to add custom logging and error handling.
@app.get("/authorize")
async def authorize(
    request: Request,
    response_type: Optional[str] = None,
    redirect_uri: Optional[str] = None,
    scope: Optional[str] = None,
    state: Optional[str] = None
):
    """
    OAuth 2.0 Authorization Endpoint - Proxies to Descope

    This endpoint forwards OAuth authorization requests to Descope's Inbound Apps.
    """

    try:
        # Validate required parameters
        if not redirect_uri or not response_type:
            print(f"Missing required parameters")
            raise HTTPException(
                status_code=400
 	     )

        # Validate response_type
        if response_type != "code":
            print(f"Unsupported response_type: {response_type}")
            raise HTTPException(
                status_code=400
            )

        # Get client ID from environment or use the provided one
        descope_client_id = os.getenv("DESCOPE_INBOUND_APP_CLIENT_ID")

        if not descope_client_id:
            print("OAuth client credentials not configured")
            raise HTTPException(
                status_code=500,
            )

        # Get the base URL from the request
        base_url = str(request.base_url).rstrip('/')
        callback_url = f"{base_url}/api/oauth/callback"

        # Construct query parameters
        params = {
            "client_id": descope_client_id,
            "redirect_uri": callback_url,
            "response_type": "code",
            "scope": scope or "openid",
            "state": state or ""  # Just pass through the state parameter
        }

        # Build the full URL with query parameters
        query_string = "&".join([f"{k}={v}" for k, v in params.items()])
        full_url = f"https://api.descope.com/oauth2/v1/apps/authorize?{query_string}"

        print(f"Redirecting to Descope: {full_url}")

        # Redirect to Descope's authorization endpoint
        return RedirectResponse(url=full_url)

    except HTTPException:
        raise
    except Exception as error:
        print(f"Authorization endpoint error: {error}")
        raise HTTPException(
            status_code=500
        )
Token exchange endpoint
The /token endpoint performs the OAuth 2.0 token exchange process, handling the conversion of authorization codes into access tokens. When your custom GPT sends a token exchange request, this endpoint manages the complete flow from validation to token retrieval. The endpoint handles several key operations during the token exchange:
Parses the incoming request body containing the authorization code, client credentials, and grant type from your custom GPT.
Validates all required parameters including the grant type and client credentials to ensure the request meets OAuth 2.0 standards.
Dynamically constructs the redirect URI to match the original authorization request, maintaining consistency across the flow.
Forwards the validated request to Descope's token server with proper client credentials and authorization code, acting as a trusted intermediary.
This centralized architecture enables detailed request/response logging for debugging, allows for custom validation and transformation of the OAuth flow, and maintains full compatibility with standard OAuth implementations while giving you complete control over the token exchange process.
@app.post("/token")
async def token(
    request: Request
):
    """
    OAuth 2.0 Token Endpoint - Proxies to Descope

    This endpoint forwards token exchange requests to Descope's Inbound Apps.
    """
    print("Token exchange request received")

    try:
        # Parse the request body based on content type
        content_type = request.headers.get("content-type", "")
        print(f"Request content-type: {content_type}")

        if "application/json" in content_type:
            body = await request.json()
        elif "application/x-www-form-urlencoded" in content_type:
            form_data = await request.form()
            body = dict(form_data)
        else:
            # Try to parse as JSON first, then as form data
            try:
                body = await request.json()
            except:
                form_data = await request.form()
                body = dict(form_data)

        grant_type = body.get("grant_type")
        code = body.get("code")
        client_id = os.getenv("DESCOPE_INBOUND_APP_CLIENT_ID")
        client_secret = os.getenv("DESCOPE_INBOUND_APP_CLIENT_SECRET")

        # Validate required parameters
        if not grant_type or not code or len(client_id) == 0 or len(client_secret) == 0:
            raise HTTPException(
                status_code=400
            )

        # Only support authorization_code grant type
        if grant_type != "authorization_code":
            raise HTTPException(
                status_code=400
            )

        # Get the base URL from the request
        base_url = str(request.base_url).rstrip('/')
        callback_url = f"{base_url}/api/oauth/callback"

        # Forward the request to Descope's token endpoint
        token_request_body = {
            "grant_type": "authorization_code",
            "client_id": client_id,
            "client_secret": client_secret,
            "code": code,
            "redirect_uri": callback_url
        }

        descope_url = "https://api.descope.com/oauth2/v1/apps/token"

        async with httpx.AsyncClient() as client:
            print("Sending request to Descope token endpoint")
            response = await client.post(
                descope_url,
                data=token_request_body,
                headers={"Content-Type": "application/x-www-form-urlencoded"}
            )

            descope_data = response.json()

            # If Descope returned an error, log it
            if response.status_code >= 400:
                print(f"Descope token exchange failed: {descope_data}")

            # Return the response from Descope
            return descope_data

    except HTTPException:
        raise
    except Exception as error:
        print(f"Token endpoint error: {error}")
        raise HTTPException(
            status_code=500
        )
Callback endpoint
The /api/oauth/callback endpoint serves as the bridge in the OAuth 2.0 authorization code flow, receiving the authorization response from Descope and transforming it into the format expected by your custom GPT. When Descope redirects the user's browser back to this endpoint, it performs several critical operations:
Extracts the authorization code and state parameter from Descope's callback response.
Validates the received parameters and handles any OAuth errors returned by Descope during the authorization process.
Constructs a properly formatted redirect URL that includes the authorization code and preserved state parameter in the format your custom GPT expects.
Issues a 307 Temporary Redirect response to the user's browser, which automatically follows the redirect to your custom GPT's callback URL.
The 307 redirection mechanism is crucial because it preserves the HTTP method and request body while ensuring that your custom GPT receives the authorization data in exactly the format it needs to complete the token exchange.
@app.get("/api/oauth/callback")
async def oauth_callback(
    code: Optional[str] = None,
    state: Optional[str] = None,
    error: Optional[str] = None,
    error_description: Optional[str] = None
):
    """
    OAuth 2.0 Callback Endpoint

    Handles the callback from Descope and redirects back to Custom GPT.
    """

    try:
        # Handle errors from Descope
        if error:
            raise HTTPException(
                status_code=400,
                detail={
                    "error": error,
                    "error_description": error_description
                }
            )

        if not code:
            raise HTTPException(
                status_code=400,
                detail={
                    "error": "invalid_request",
                    "error_description": "No authorization code received"
                }
            )

        # Custom GPT callback URL - obtained after creating your GPT
        custom_gpt_callback = "<Your GPT callback URL>"

        # Build redirect URL back to Custom GPT
        redirect_url = f"{custom_gpt_callback}?code={code}"
        if state:
            redirect_url += f"&state={state}"

        return RedirectResponse(url=redirect_url)

    except HTTPException:
        raise
    except Exception as error:
        raise HTTPException(
            status_code=500,
            detail={
                "error": "server_error",
                "error_description": "Internal server error"
            }
        )
Setting up an Inbound App
Now we will set up the Descope part of this backend by creating an Inbound App. Inbound Apps enable you to turn your application into an identity provider (IdP).
The Inbound App will handle the OAuth flow, endpoints, and consent mechanisms for you, allowing you to easily manage authentication and define granular permission scopes at the user or tenant level. When you configure your custom GPT, it will use a scoped OAuth token generated by your Inbound App to access the APIs that it is authorized to access.
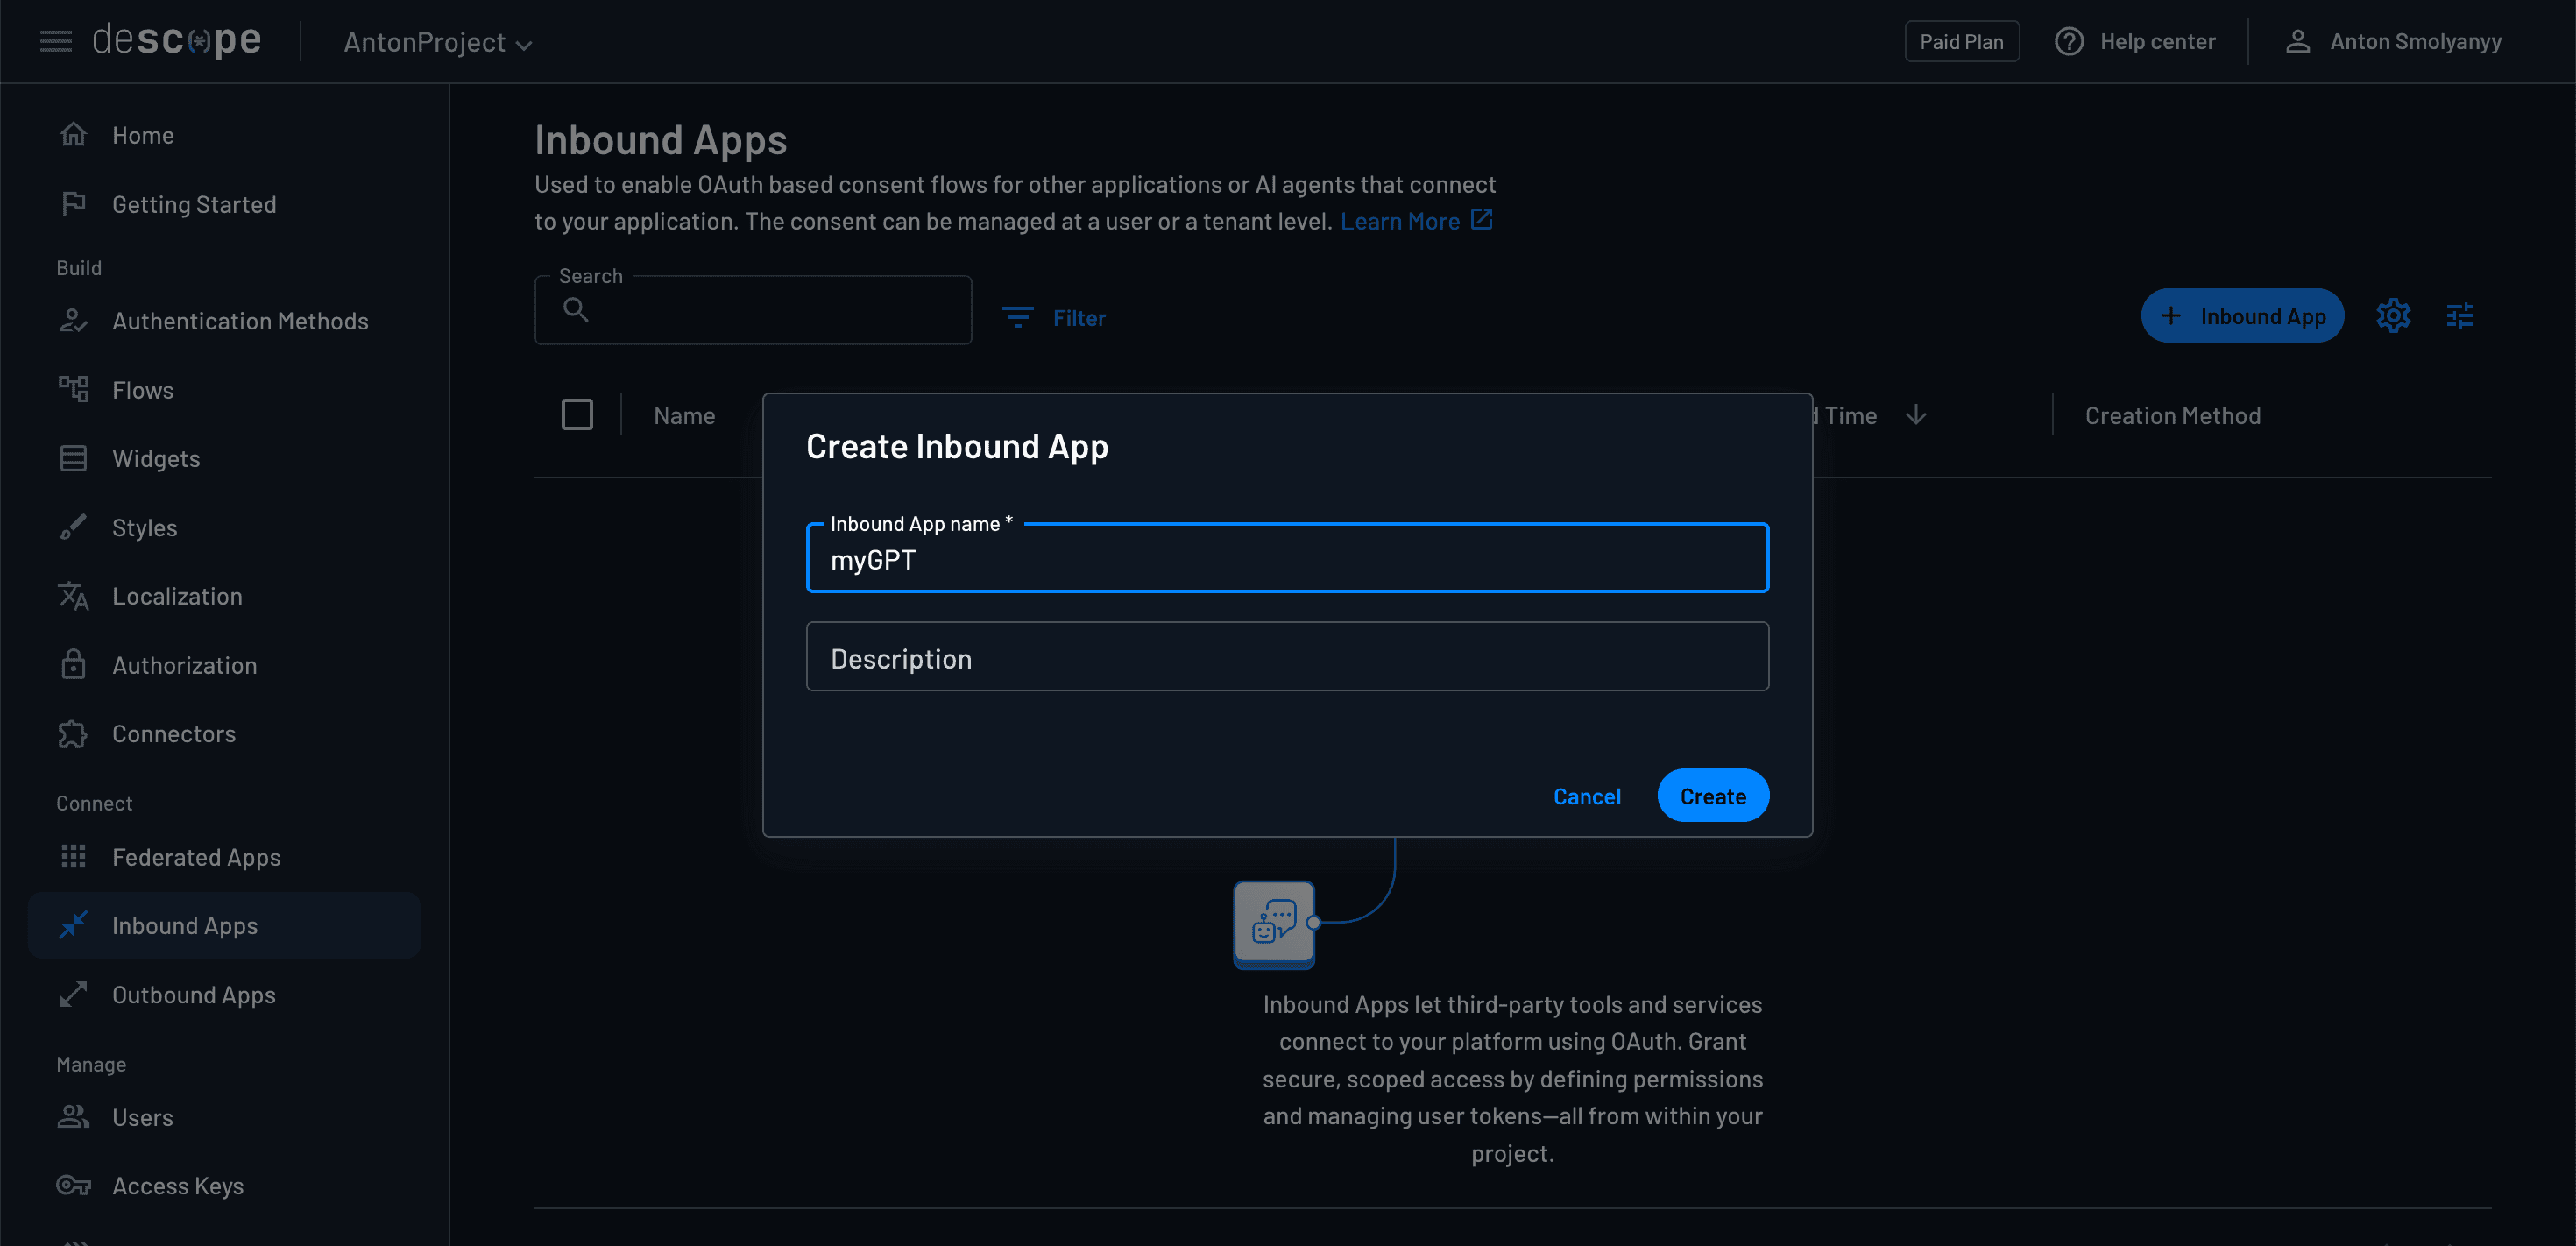
To create a new Descope Inbound App, navigate to the Inbound Apps page of your Descope console. Select the blue + Inbound App button on the right side of the screen, and give your new Inbound App a name and optional description.
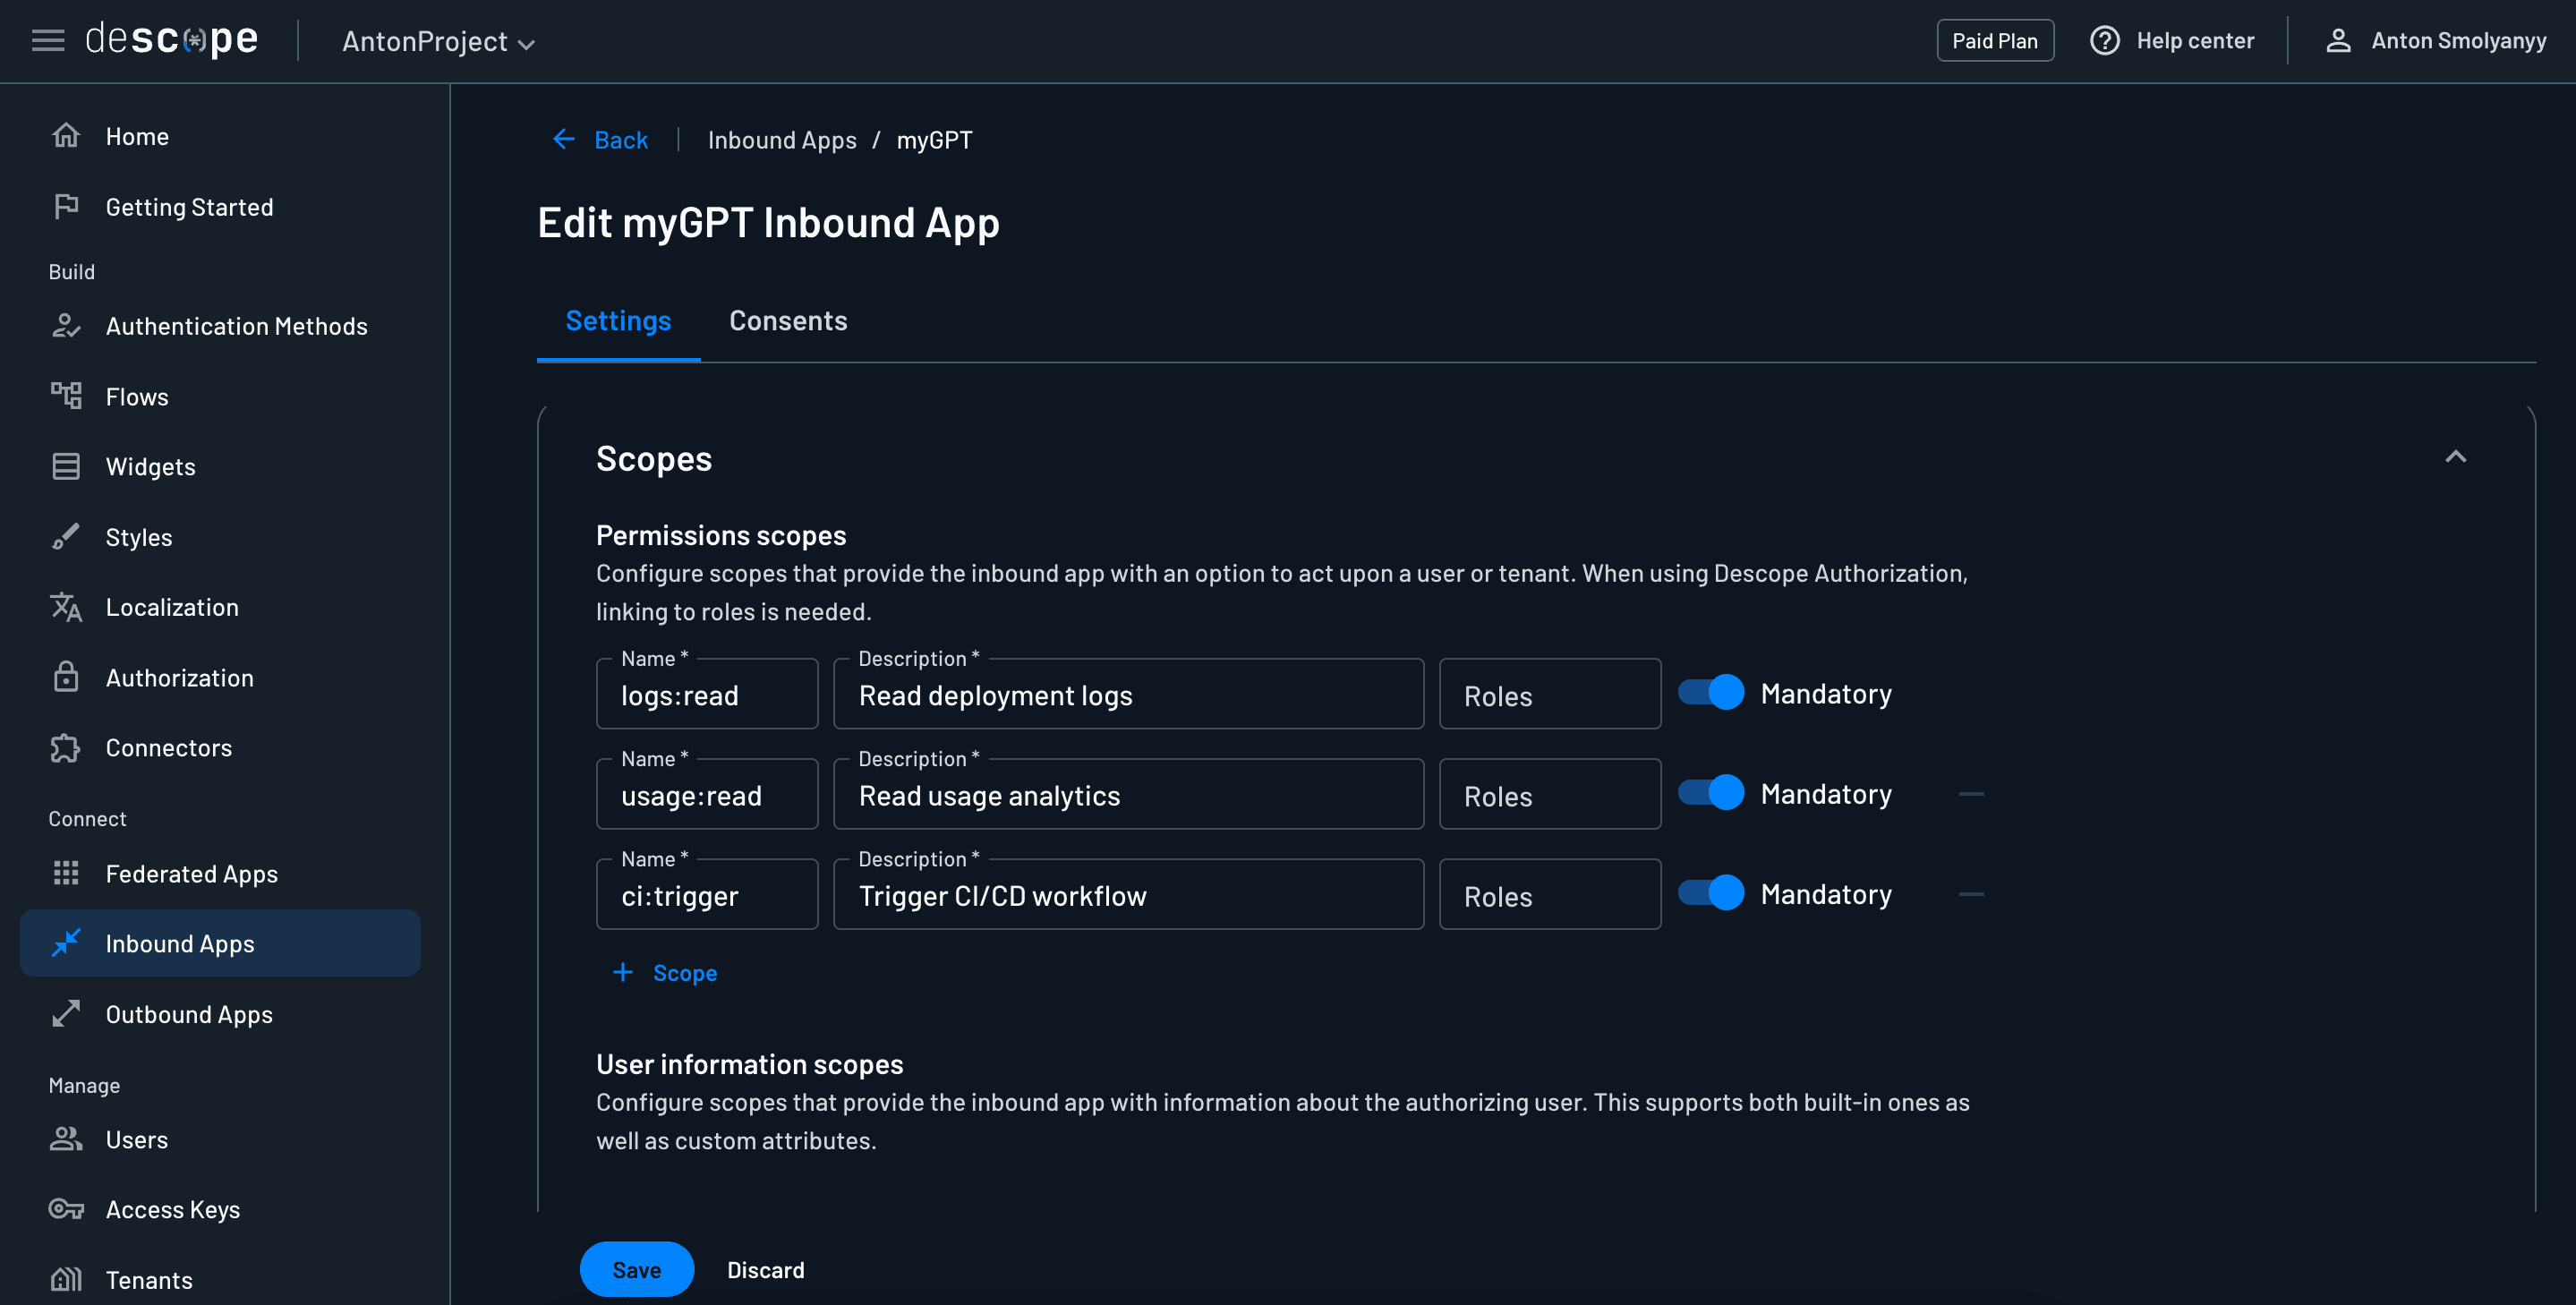
Scoping your Inbound App
After you create your Inbound App, you will be able to see all the settings and details. If you scroll down to the Scopes section, this is where you will define what scopes will be embedded in the JWT token provided to your application. The scope names you set here should exactly match the scopes that are required by the API routes that you wish to give your token access to.
Client ID and secret
Next, scroll down to the Connection Information section, and here you will see the configuration data needed to integrate your backend app with the Inbound App. For example, notice the Authorization URL and Token URL are the same URLs that we routed to in the /authorize and /token routes of our FastAPI app.
The most important values here are the Client ID and Client Secret. Copy and paste those values into your .env file for your DESCOPE_INBOUND_APP_CLIENT_ID and DESCOPE_INBOUND_APP_CLIENT_SECRET variables, respectively.
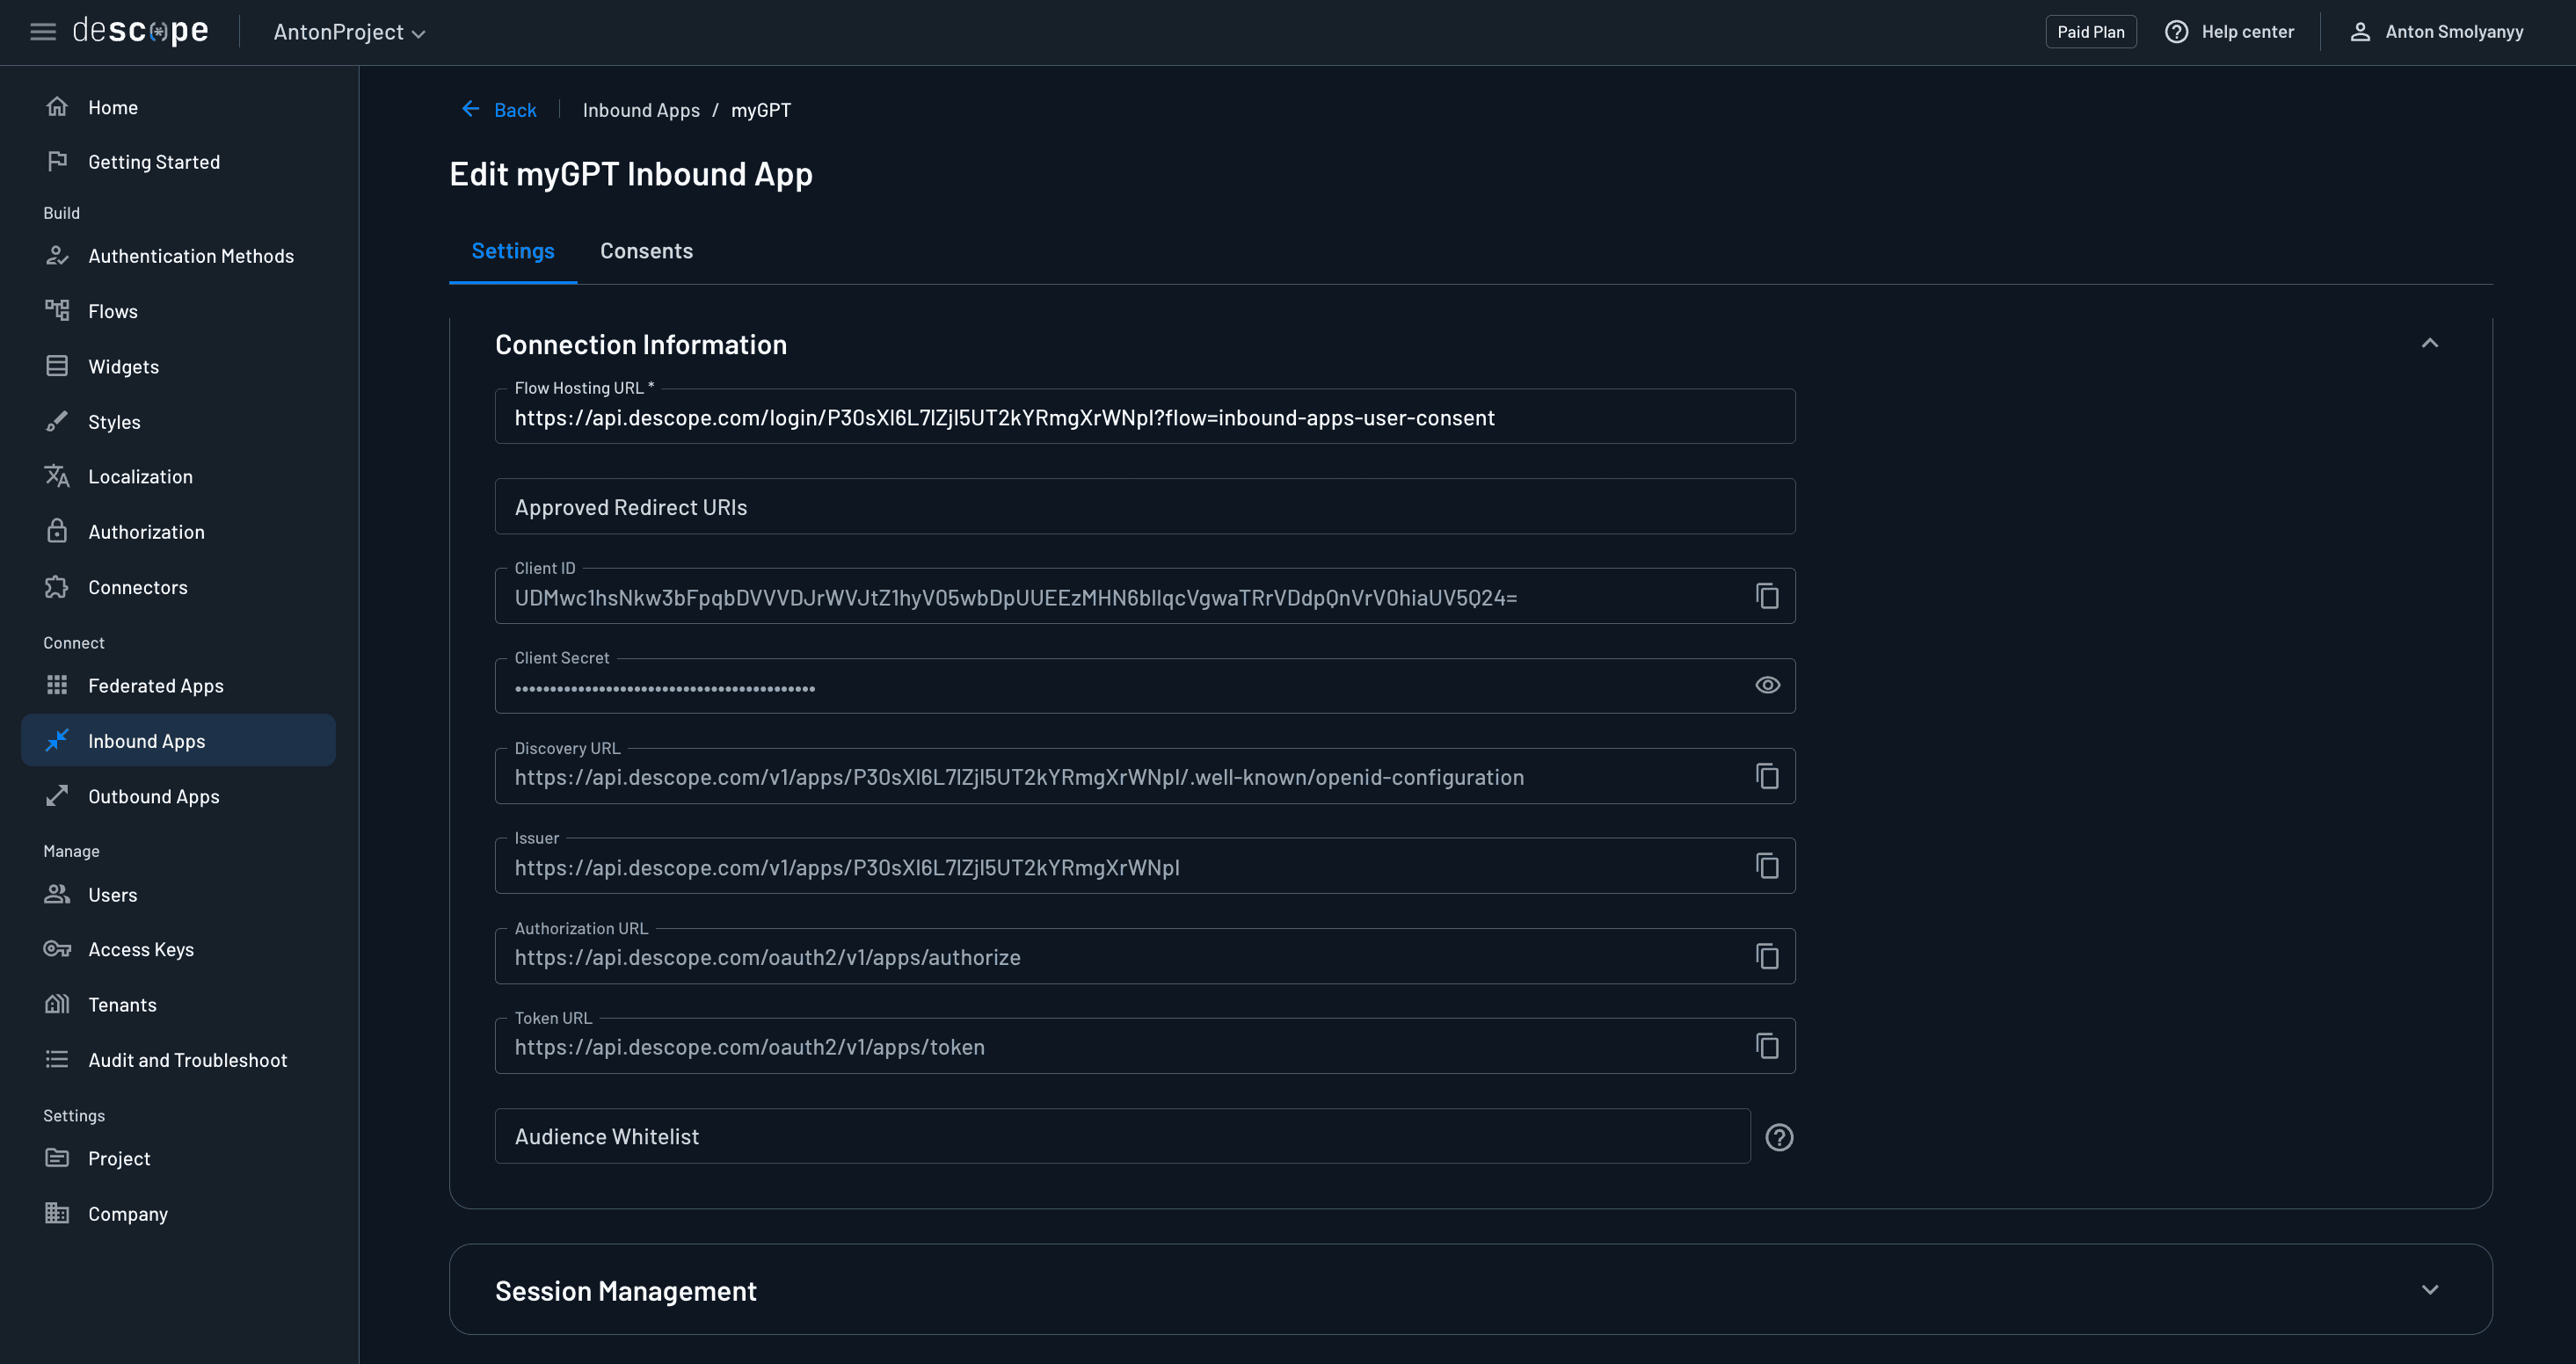
User consent flow
Notice also the Flow Hosting URL. This URL points to the exact Descope flow that will be used to define the authentication and consent user journey. If you navigate over to the Flows section of the Descope console, you will see that once you created your first Inbound App, Inbound App consent flows were also automatically created for you. The default user consent flow was the one demonstrated at the beginning of this article.
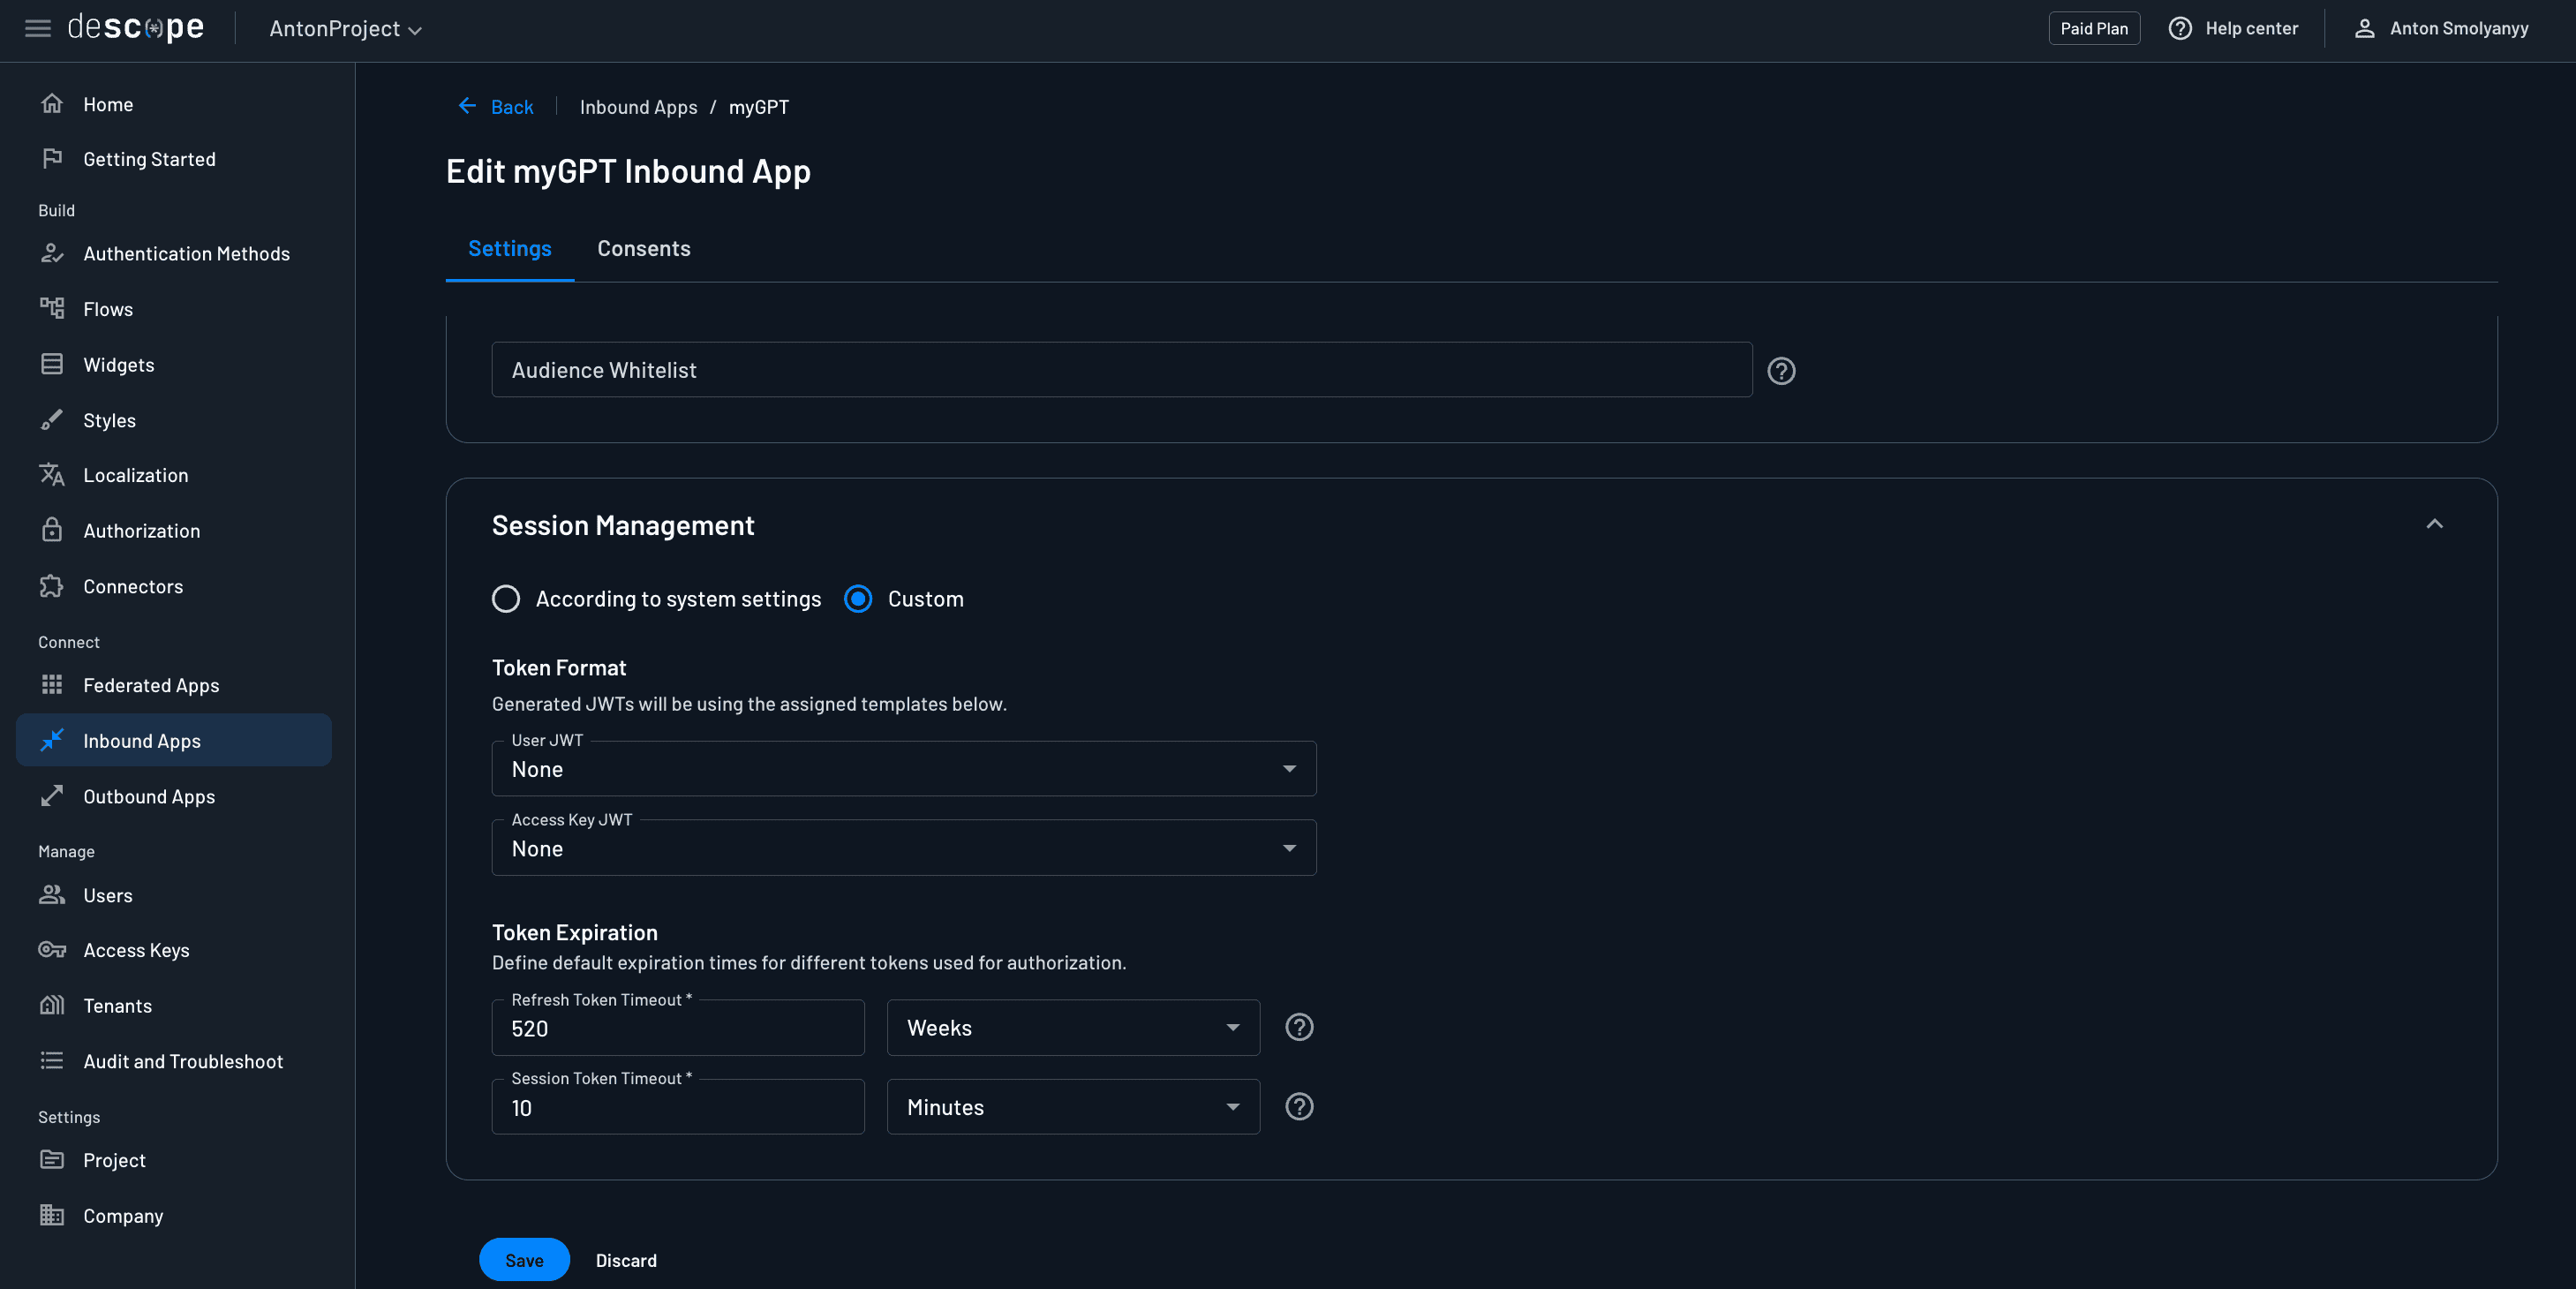
Custom session token expiration
By default, the session token issued by your Inbound App will expire 10 minutes after the time of issuance. If you want to adjust this, scroll down to the last section of the Inbound App settings, called Session Management. Select the Custom option, and then modify the Session Token Timeout.
Your Inbound App is now fully configured and ready to use!
Configuring your custom GPT
GPTs enable you to create a tailored version of ChatGPT based on custom instructions, actions, or context. For this article, we are going to be configuring a GPT which will act as your personal DevOps assistant. We will essentially be building an AI agent, but one that knows how to interact with your specific APIs.
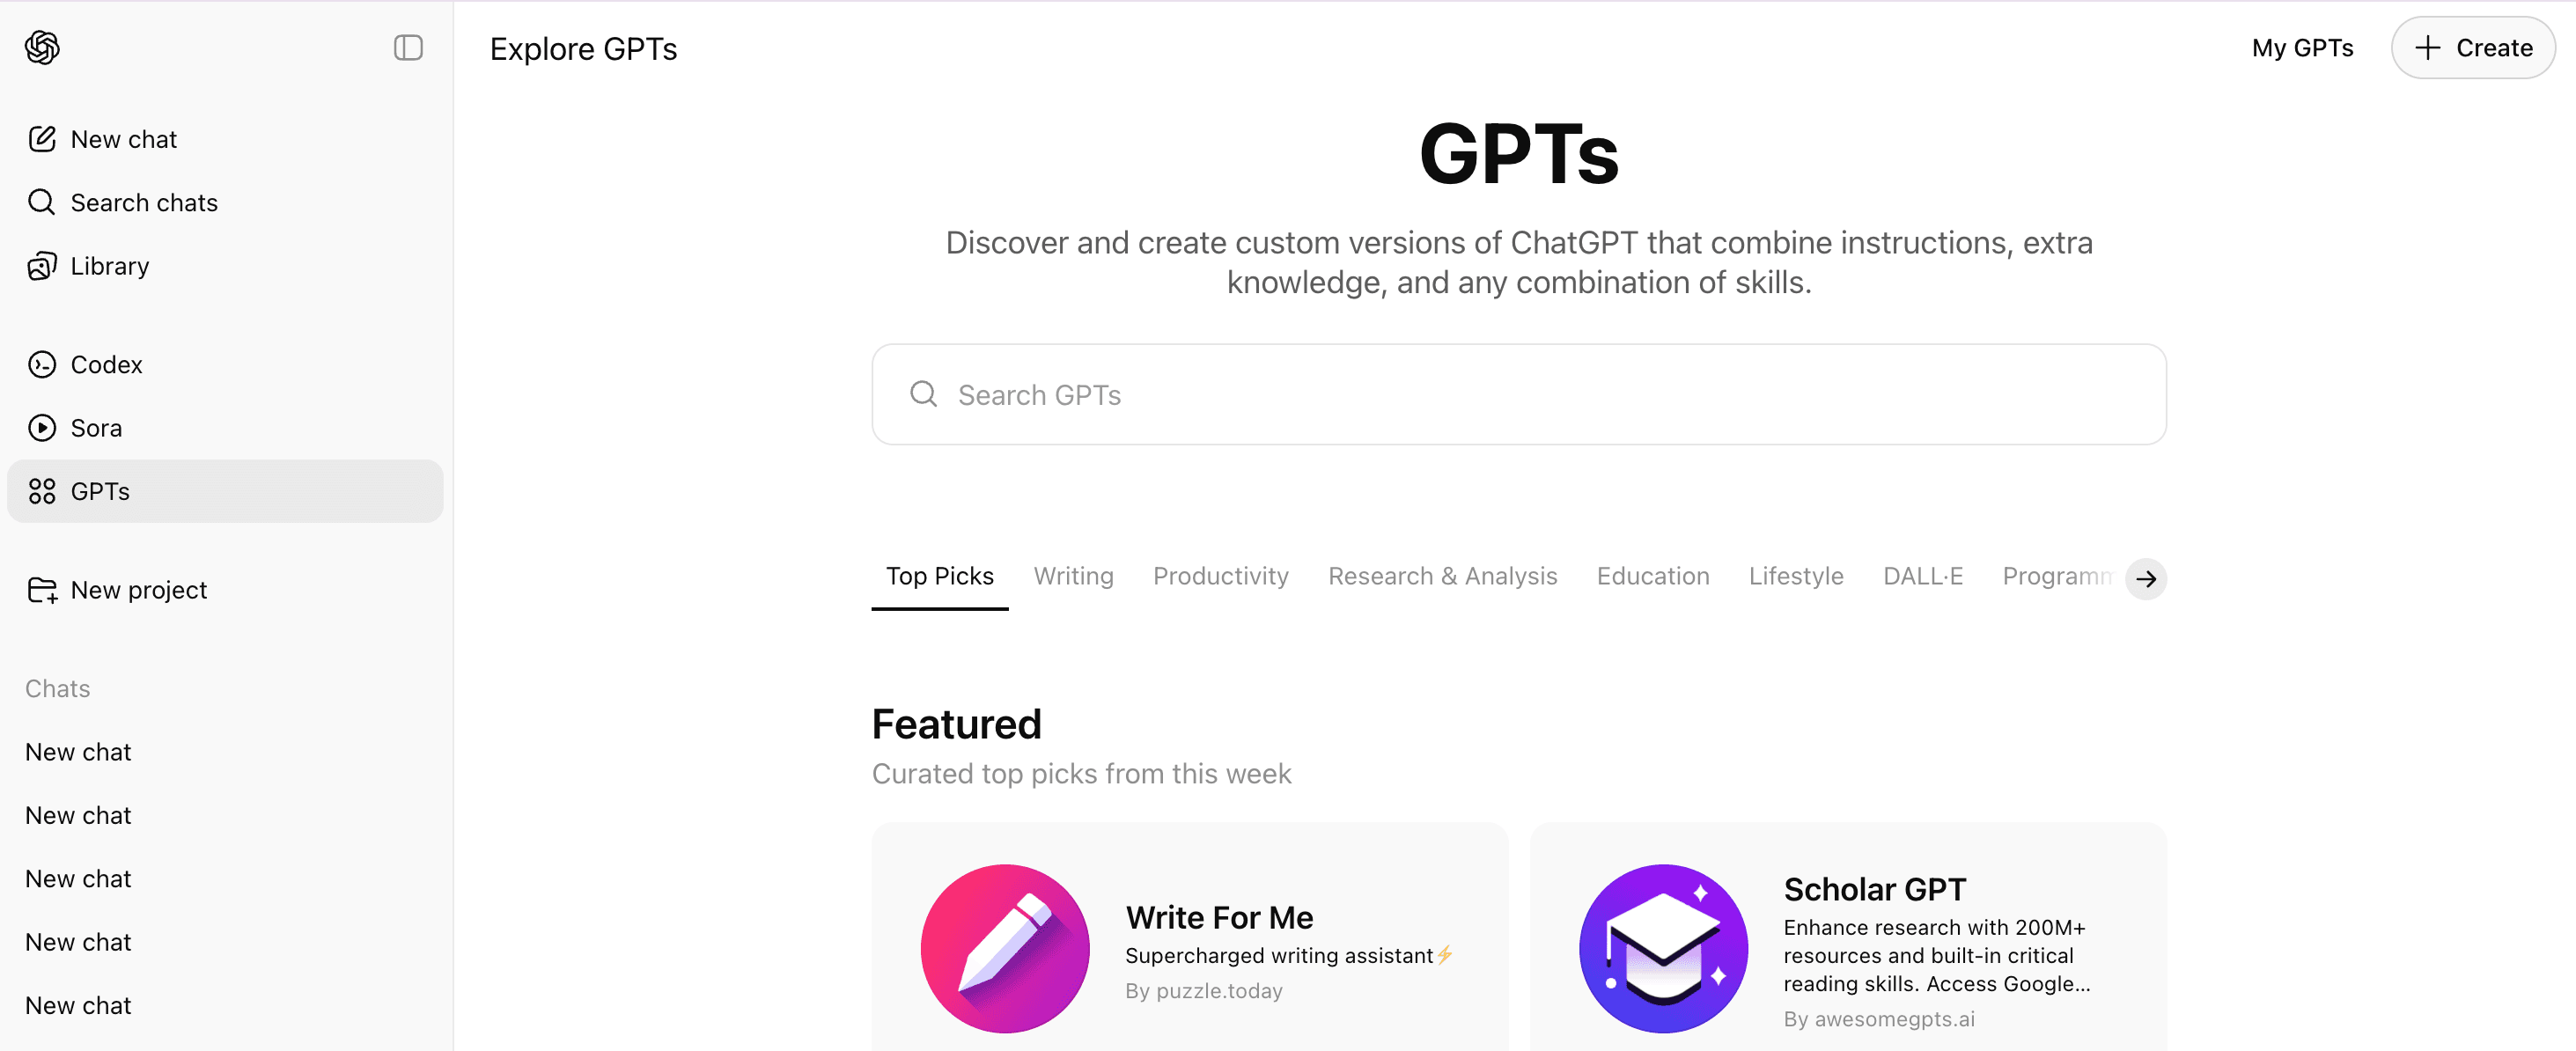
To create a new GPT, open the ChatGPT homepage and select the GPTs tab in the left sidebar. This will bring you to the homepage of existing publicly available GPTs. Select the + Create button in the upper right corner.
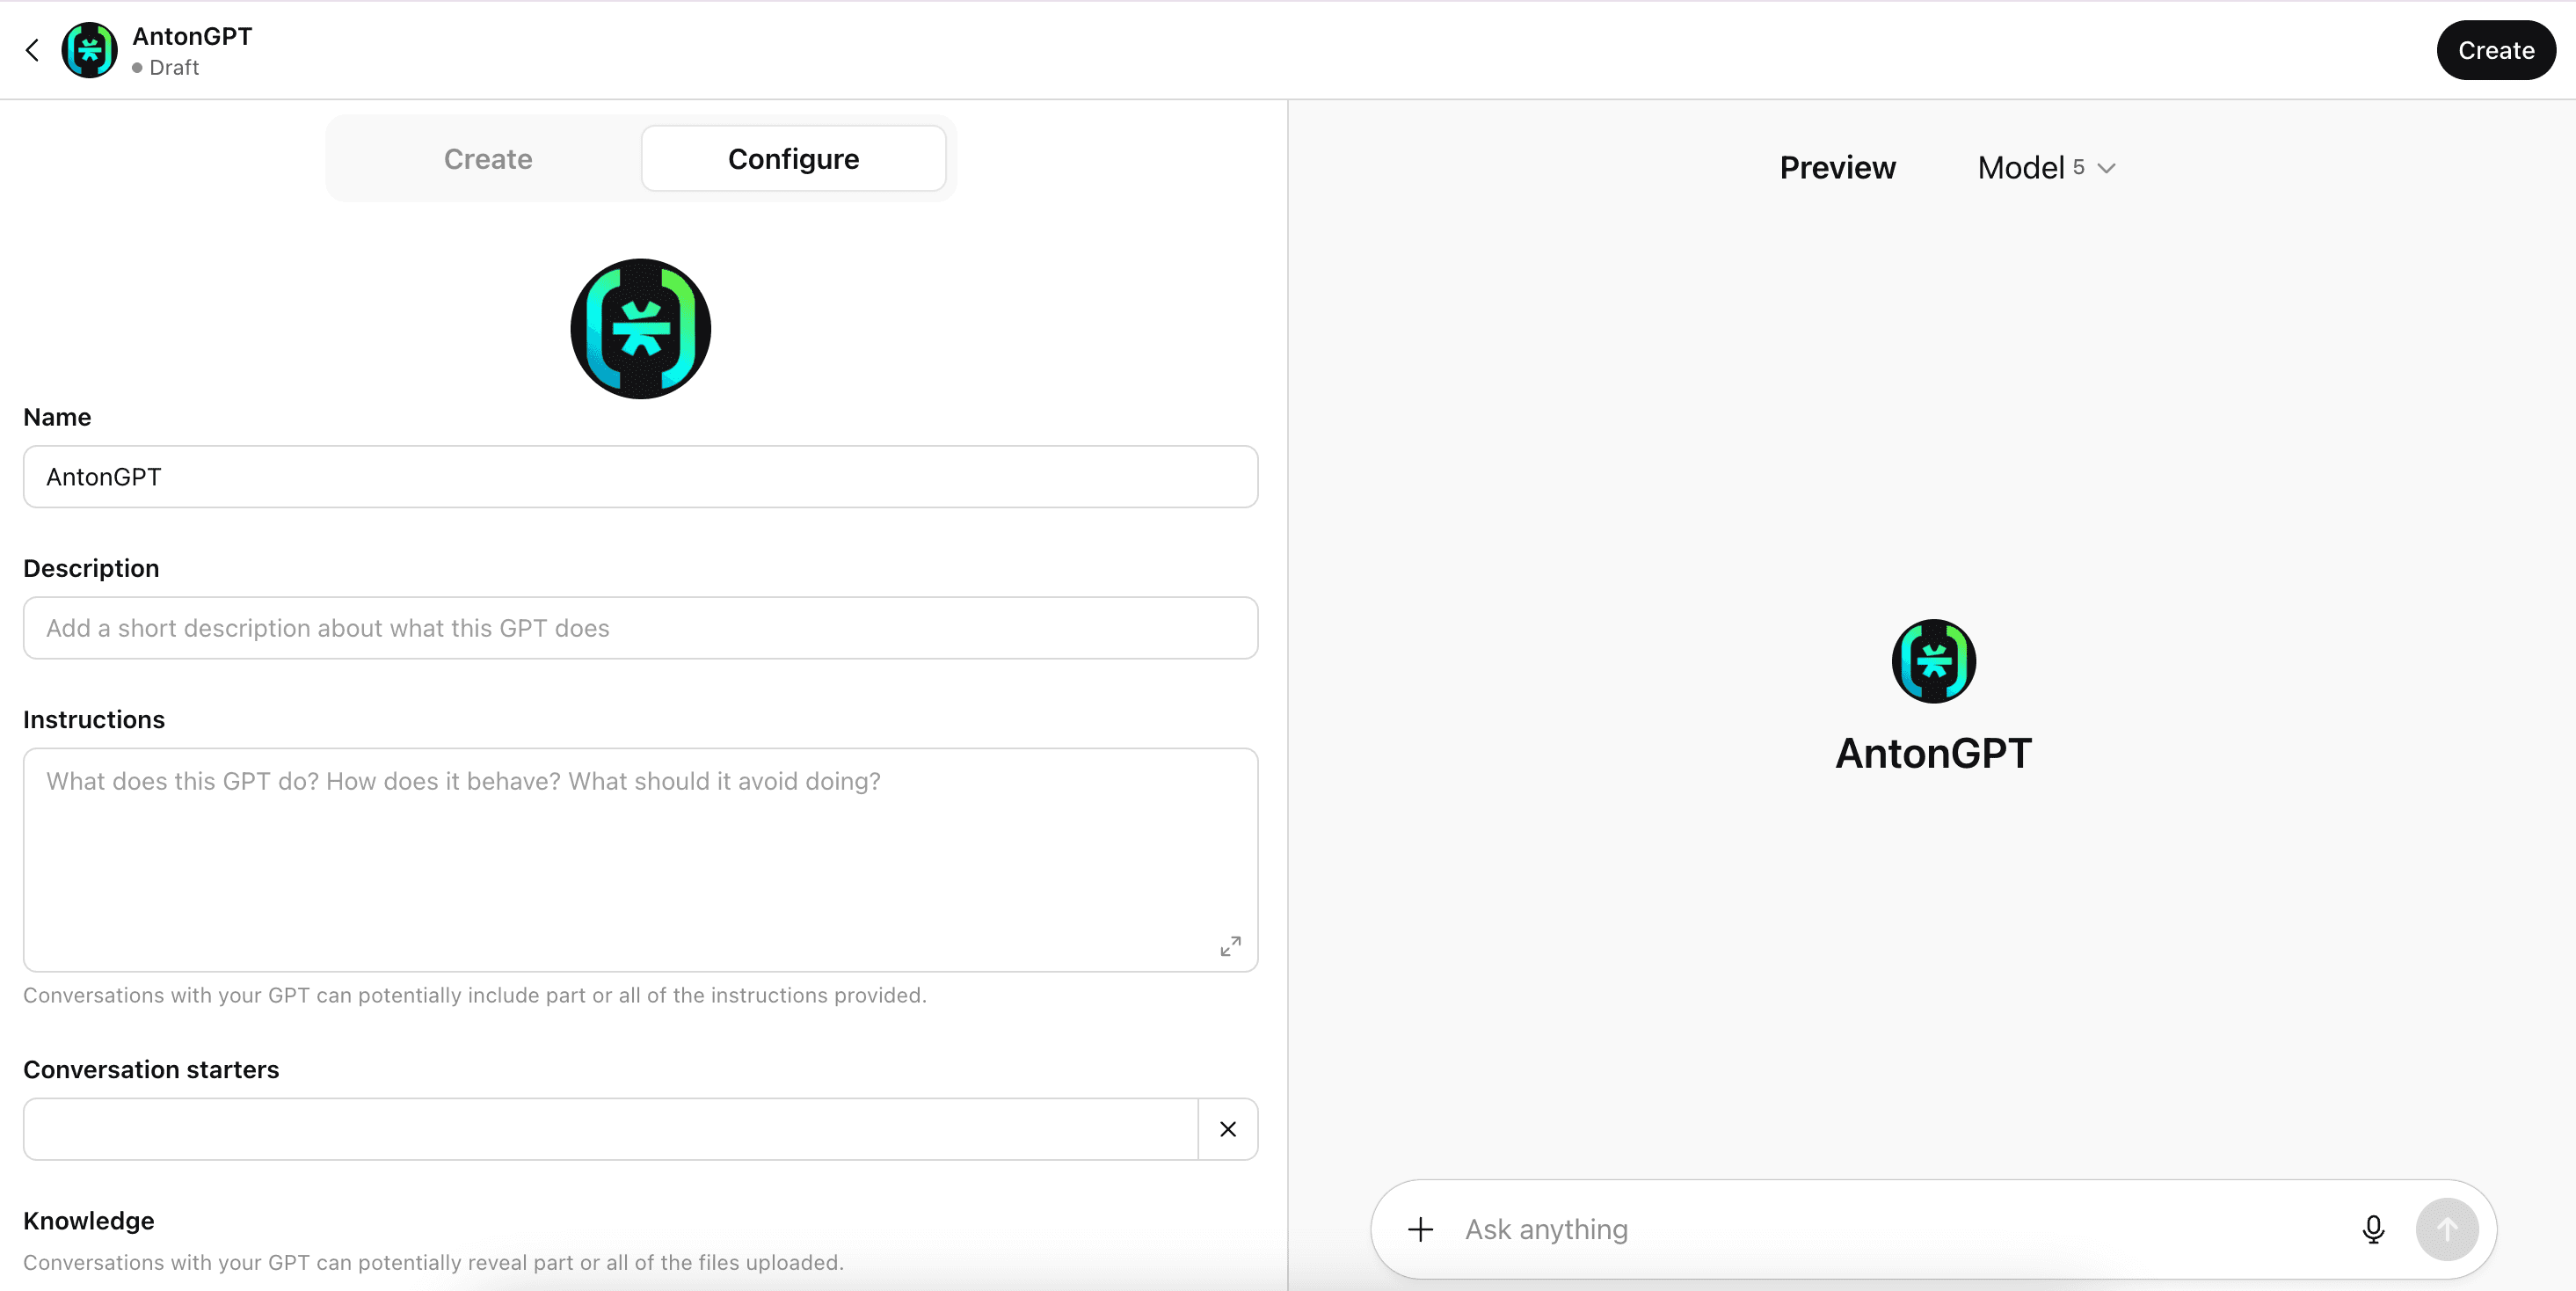
Select the Configure tab on your GPT. Enter a name for your GPT, and optionally provide an icon, description, instructions, prompt starters, and knowledge (extra context) on this page.
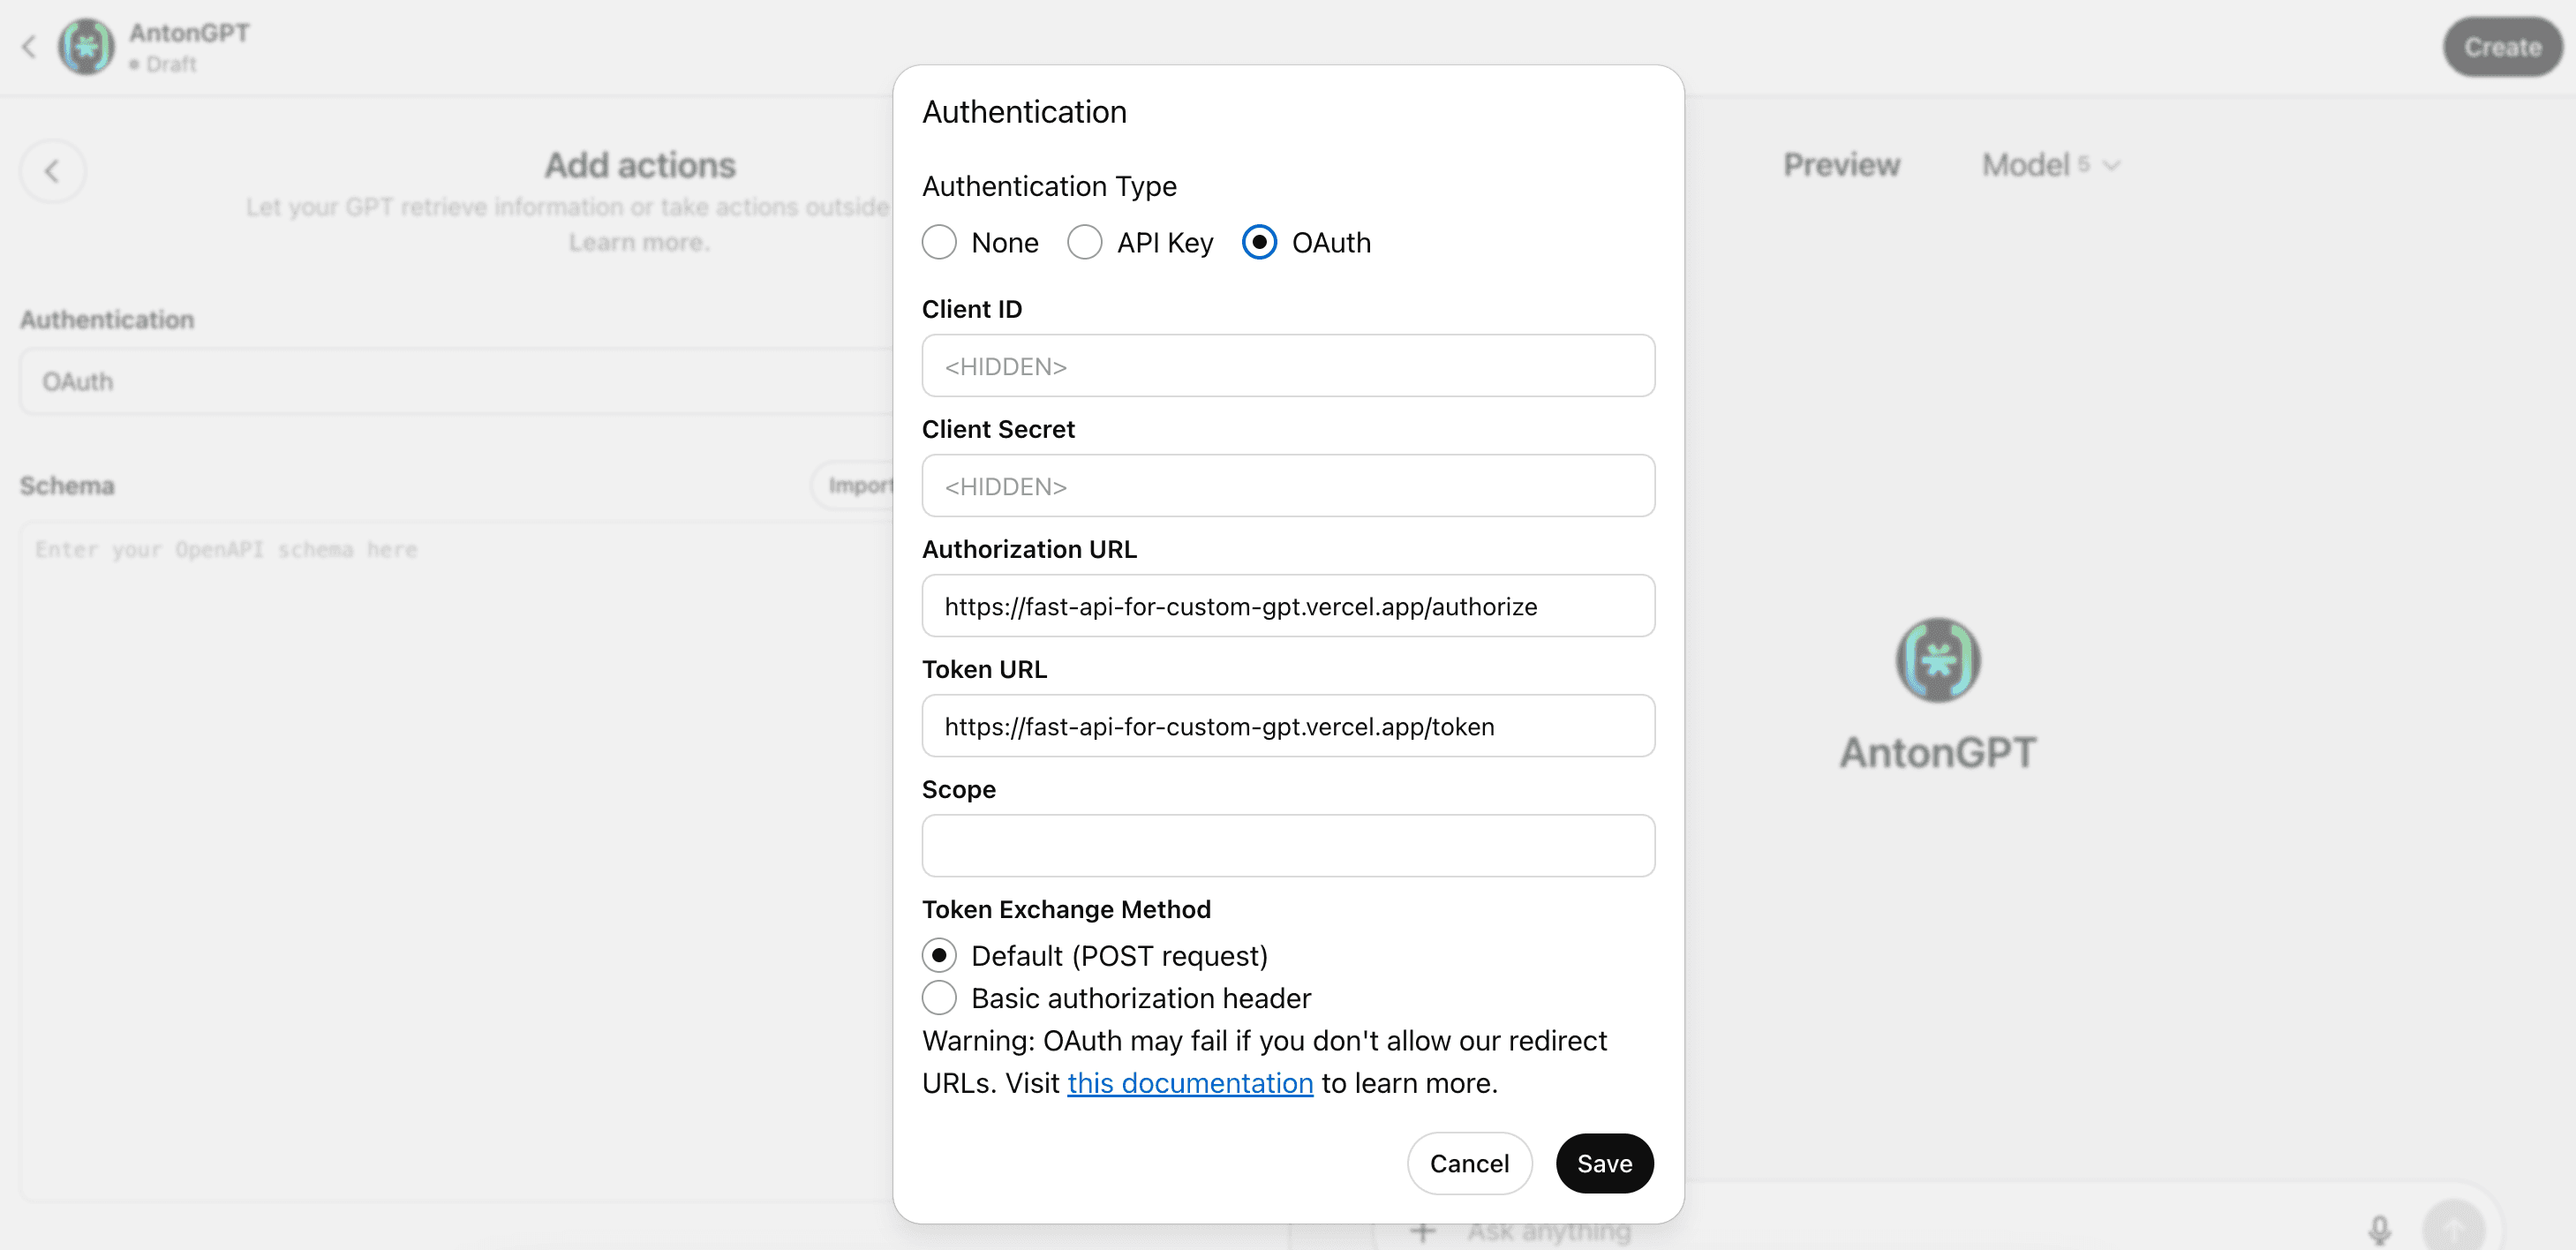
Configuring OAuth for your GPT
Scroll all the way down to the bottom of the Configure page, and under Actions, select the Create new action button. This action will be the mechanism through which your GPT will interface with your application. Once on the action definition page, click on the Authentication dropdown menu and select OAuth as your authentication type. This will open up a new window, where you will configure the OAuth connection between this GPT and your API.
You will need to specify the following:
Authorization URL: this is your API route that handles the initial call to the Descope authorize endpoint (e.g. app/authorize).
Token URL: this is the API route that handles the code and token exchange at the Descope token endpoint (e.g. app/token).
Token Exchange Method: Make sure Default (POST request) is selected.
Leave the Client ID, Client Secret, and Scope fields blank. Your backend application will take care of these parts. Click Save once you have filled out the appropriate fields.
Creating an OpenAPI spec
Once you have configured the OAuth credentials, you will need to provide an OpenAPI 3.1.0 spec in the textbox titled Schema. An OpenAPI spec is a document written in a machine readable format like YAML or JSON that describes your API endpoints and how to call them with the appropriate parameters, request/response formats, authentication methods, and other relevant information.
For an example of an OpenAPI spec in either a JSON or YAML format, visit this Descope sample app. FastAPI easily generates a JSON file for you, simply enter the URL where your application is hosted followed by /openapi.json. If you utilize this option, you will have to add a `servers` object, where you will tell the GPT the URL where it can find your API server.
"servers": [
    {
      "url": "https://<Your base URL>"
    }
]
To complete the process of creating your GPT, click the black Create button in the top right corner. You will then have the option of keeping your GPT private, or sharing it with others. This is up to your personal preference, but sharing it will require you to add a privacy policy.
After you create your GPT, navigate to GPTs > My GPTs then click the pencil icon on your GPT and scroll down to the same place where you created your action earlier. Now you should see an action with your base URL listed, and under it you will see a Callback URL. Copy this callback URL and paste it into the custom_gpt_callback variable in the /api/oauth/callback route.
GPTs with Descope
Now you can securely interact with your FastAPI routes through an LLM – all without having to spin up an MCP server. This approach provides a robust, secure, and maintainable way to connect custom GPTs to your protected APIs. By leveraging Descope's Inbound Apps and OAuth capabilities, you can create sophisticated AI agents without the complexity of MCP servers.
To explore Descope further, sign up for a free account, join our developer Slack community, or follow us on LinkedIn.