
Table of Contents
This tutorial was written by Kevin Kimani, a developer and technical writer. Connect with him on his website or X to see more of his work!
Ensuring your application is secure through resilient authentication and authorization mechanisms is crucial in the Next.js 14 development process. This helps to ensure that only authenticated users can access the protected resources of your application and that each user can access only the resources they are allowed to access.
In this guide, you'll learn how to implement Next.js 14 authentication and role-based access control (RBAC) using the App Router and Descope. Whether you're building a new application or enhancing an existing one, this guide will equip you with the skills to create secure login and access controls.
In this guide
Set up Descope authentication in Next.js 14
Implement magic link login flows
Add role-based authorization (RBAC)
Protect routes with middleware
Manage user sessions and tokens
Understanding Next.js 14 authentication and RBAC
Before implementing Next.js 14 authentication, let's clarify the core concepts you'll work with in this tutorial.
Authentication vs. authorization
Both authentication and authorization are integral to developing a secure Next.js 14 application, but they serve distinct purposes. Authentication is the process of verifying a user’s identity and is typically achieved through a set of login credentials, such as email and passwords, magic links, passkeys or other auth methods. Authorization determines whether the authenticated user is allowed to access specific resources or perform certain actions. This tutorial implements both using Next.js 14 with App Router.
Want to learn more about the basics? See our complete guide: Authentication vs. Authorization: What's the Difference?
RBAC in this tutorial
This tutorial uses role-based access control (RBAC) to manage who can do what in the blogging app:
Editor role: Can create and edit posts
Admin role: Can view and publish posts
Instead of assigning permissions to individual users, you'll assign them to roles. Then you’ll assign users to roles. This makes managing permissions scalable as your app grows. To learn more about RBAC concepts, benefits, and implementation strategies, see: What Is RBAC: Your Simple Guide
Next.js 14 and App Router
Next.js 14 supports both client-side rendering (CSR) and server-side rendering (SSR), each with different implications for authentication and authorization:
Client-side rendering (CSR): The client renders content after the initial page load. This can cause a brief flash of unauthorized content before auth state is verified. You can improve UX with loading indicators or skeleton screens during auth checks.
Server-side rendering (SSR): The server handles rendering before sending the content to the client. This approach prevents unauthorized content flashes since the server clocks the request until it verifies the auth state.
Comparing frameworks? See our comparison: Svelte vs Next.js
This tutorial uses SSR with App Router, Next.js 14's file-system-based routing solution, to implement authentication that verifies on the server before rendering.
Setting up Descope for Next.js 14 authentication
Descope simplifies adding Next.js 14 authentication and authorization by offering an intuitive SDK and visual flows to build authentication screens.
Descope Flows is a visual no-code interface to build screens and authentication flows for common user interactions with your application, such as login, sign-up, user invites, and multi-factor authentication (MFA). This feature abstracts away the implementation details of authentication methods, session management, and error handling, allowing you to focus on building the core features of your application rather than handling these complexities.
Using Descope eliminates the need to write authentication and authorization logic from scratch, saving valuable development time and reducing the risk of security vulnerabilities. Descope's infrastructure ensures your application's authentication and authorization mechanisms are secure, scalable, and easy to maintain.
The following sections explain how you can implement these features in a Next.js application using Descope. To follow along, you need the following:
Node.js v18 installed
Git CLI installed
Creating a Descope project
To demonstrate Next.js 14 authentication with RBAC, you'll build a simple blogging application using the editor and admin roles described above.
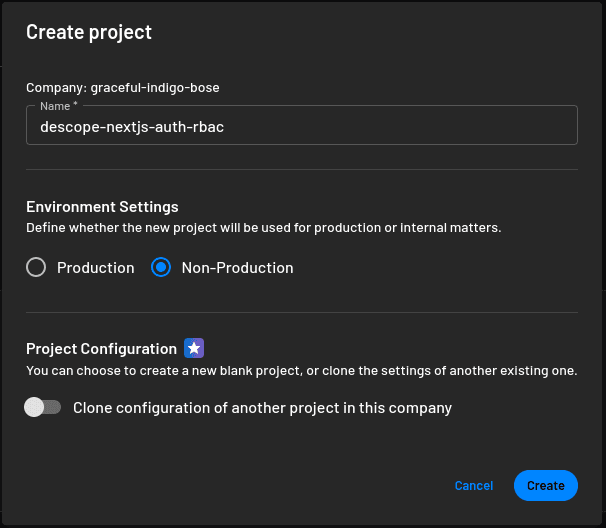
To begin, you’ll need to create a new project. On the Descope Console, create a new project with the name descope-nextjs-auth-rbac:
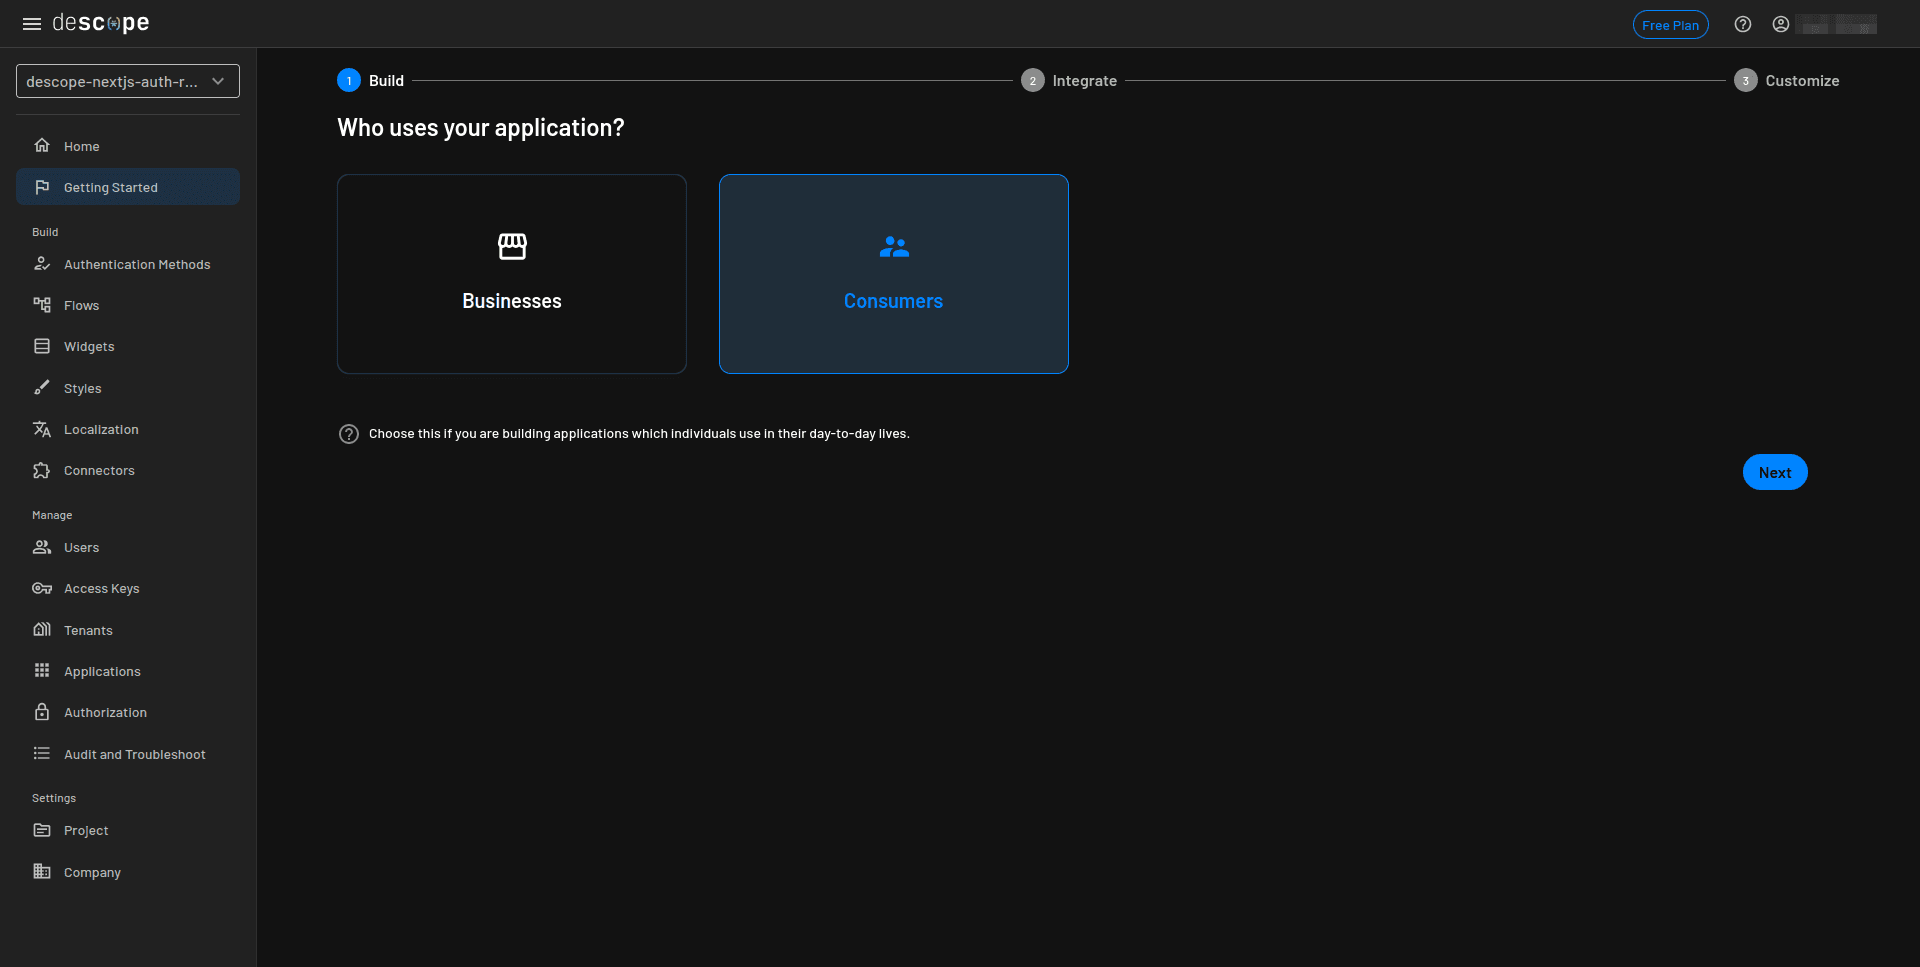
Navigate to the project setup. Select Consumers under Who uses your application? and then click Next:
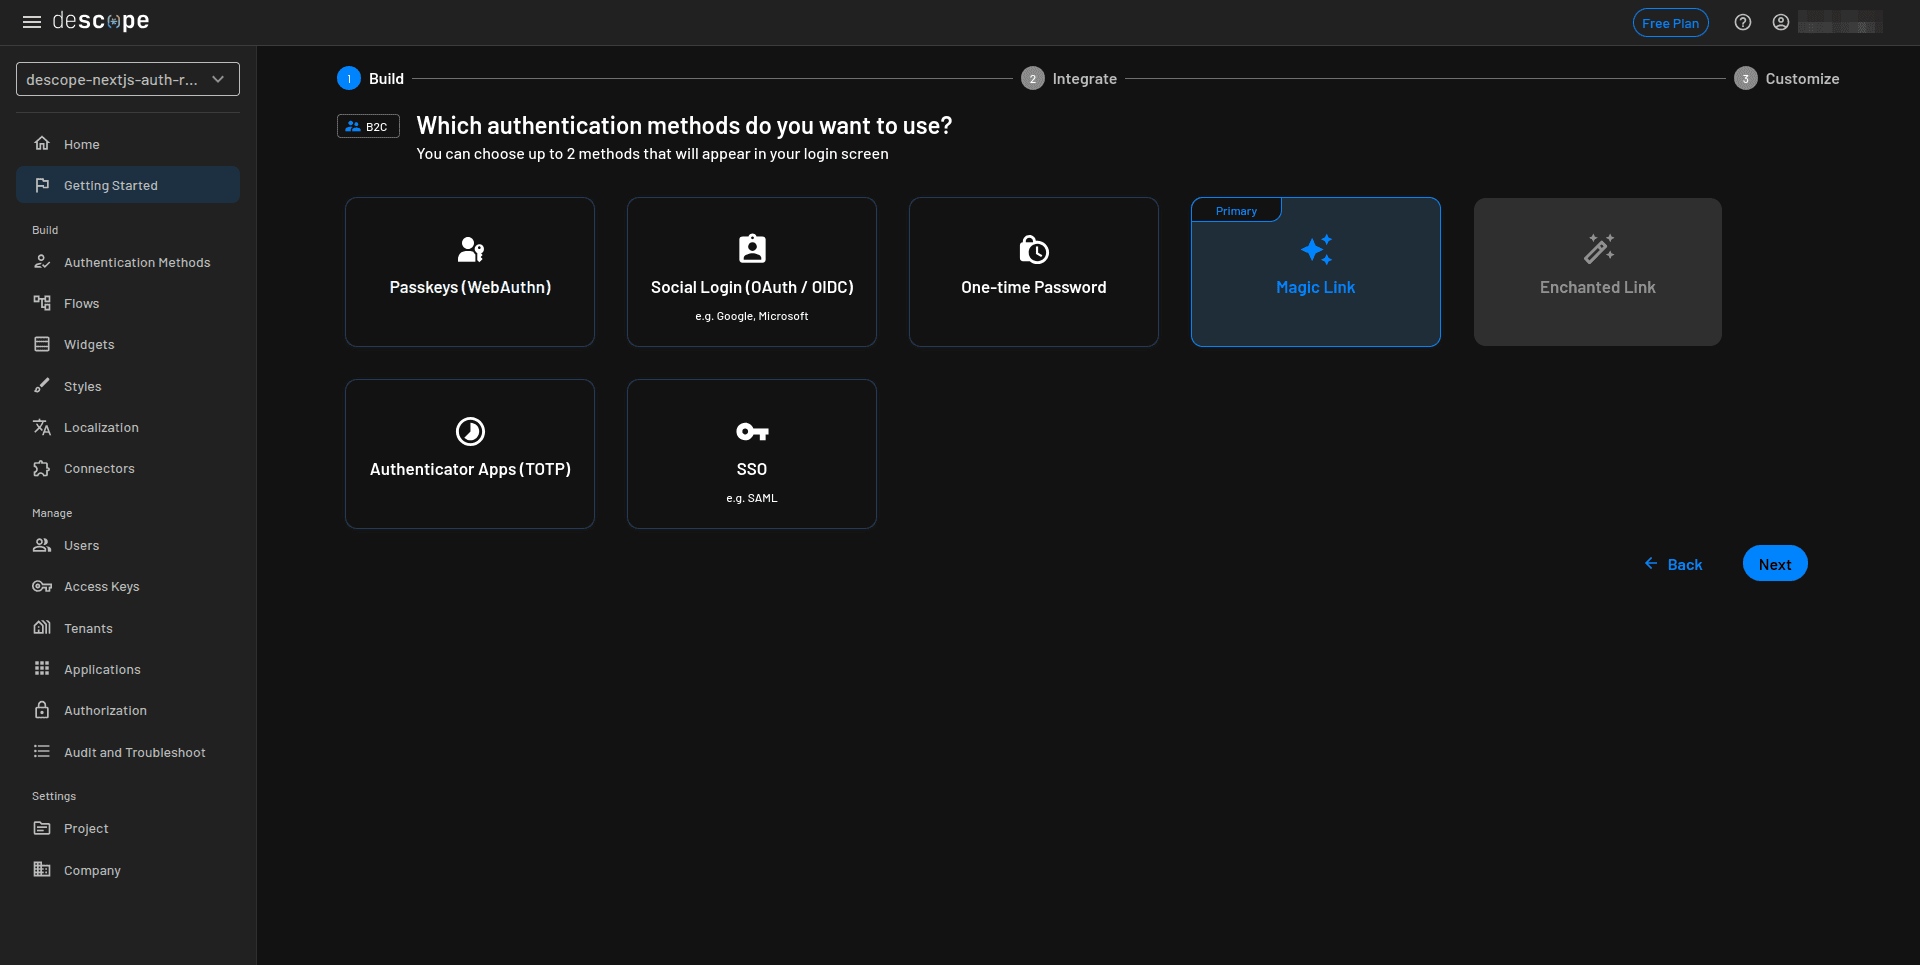
Select Magic Link for Which authentication methods do you want to use? and then click Next:
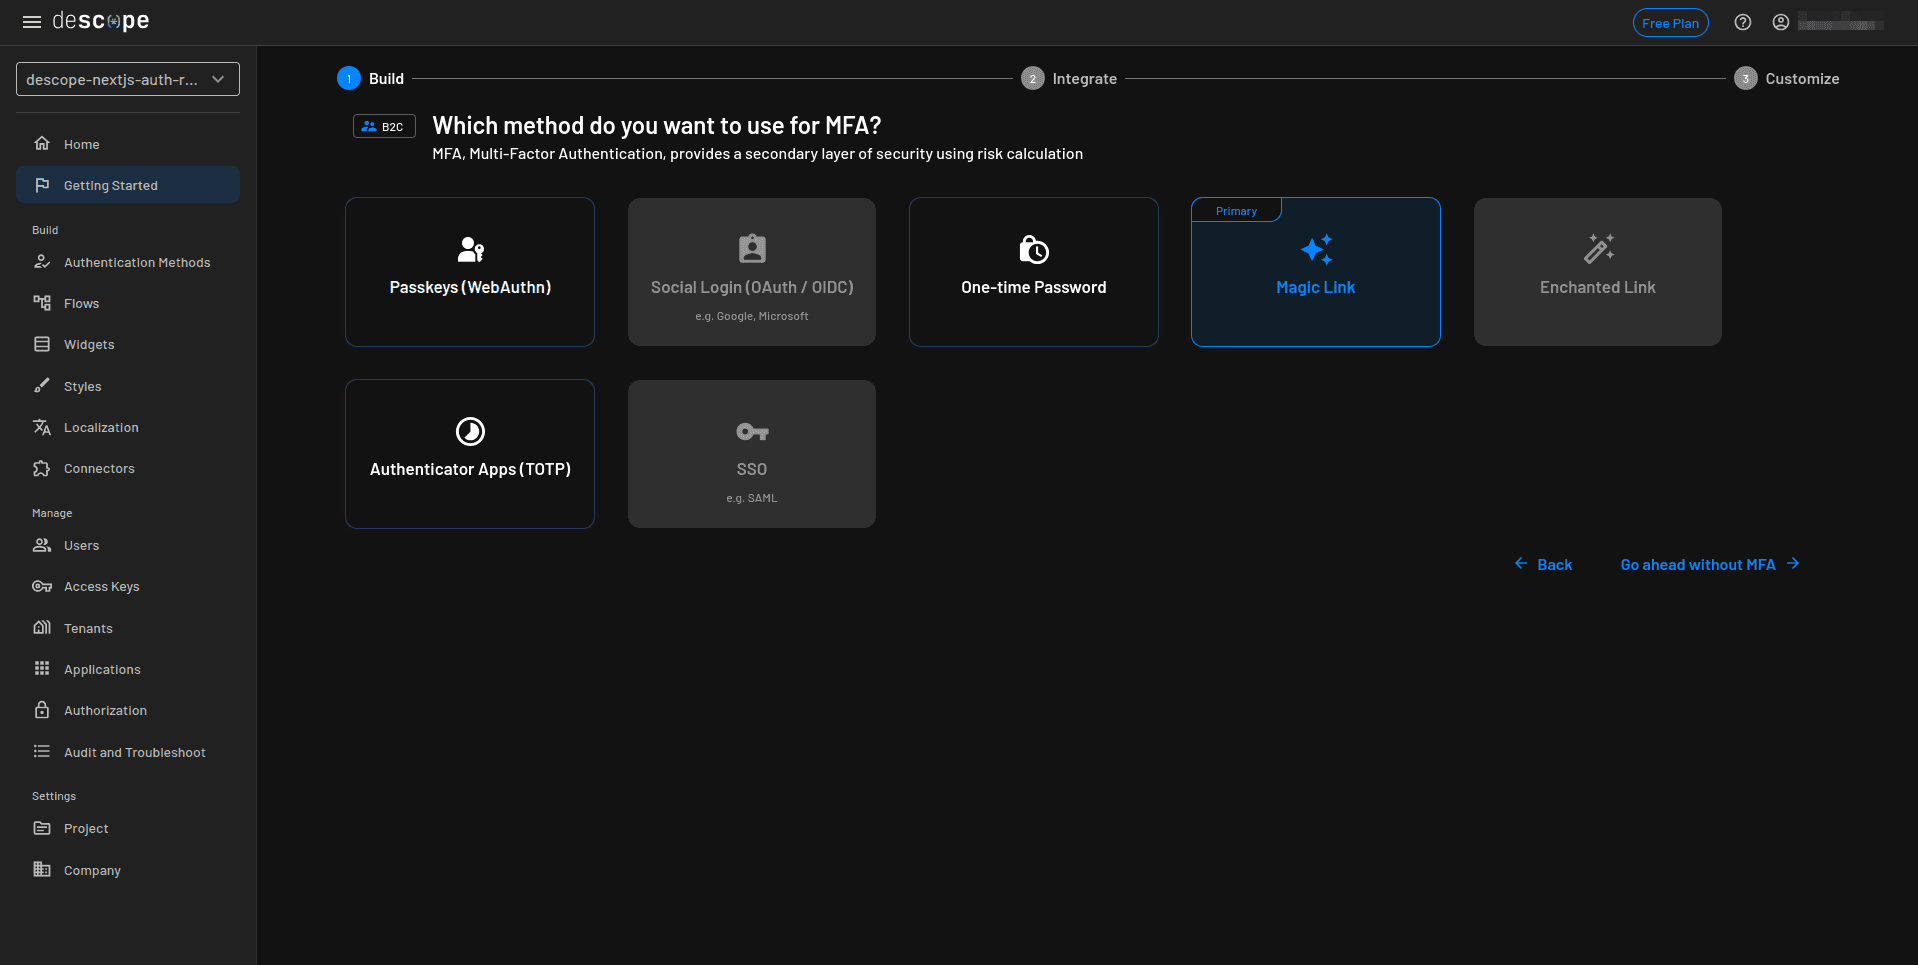
Skip the MFA method step and click Go ahead without MFA. You can always set this up later:
On the next page, you can view the flows generated for your project. Click Next to generate these flows:
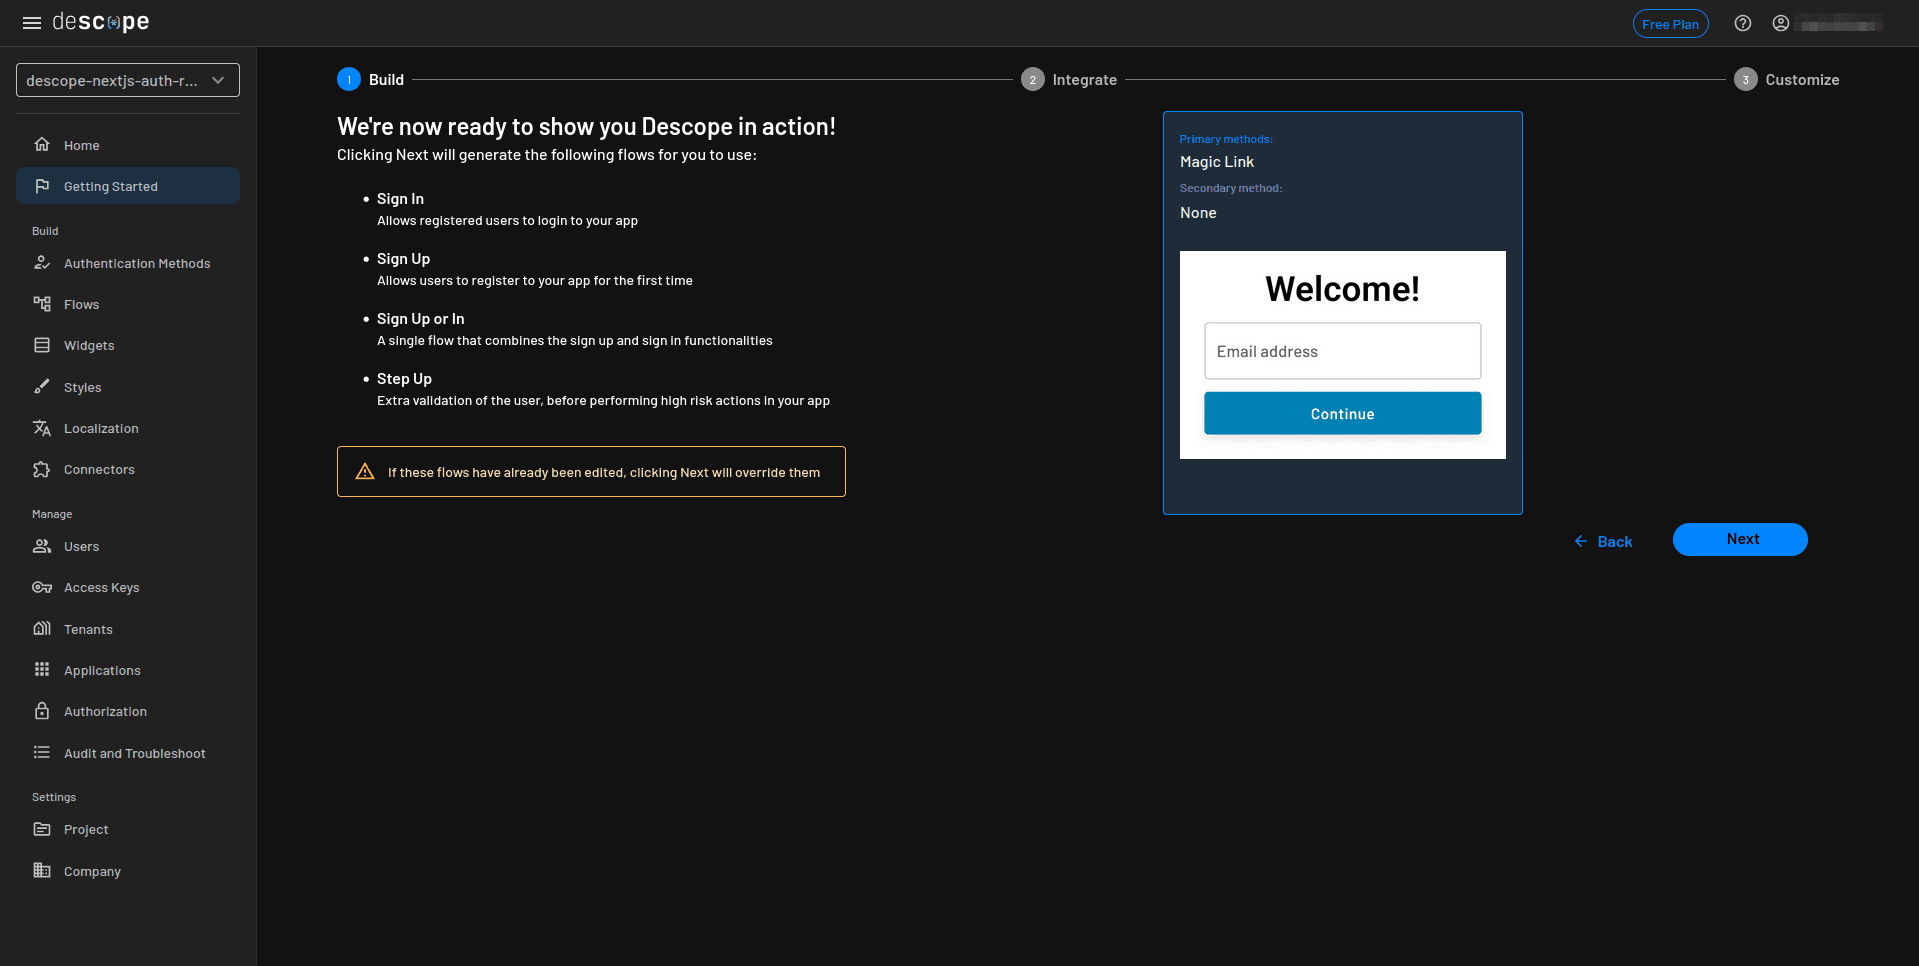
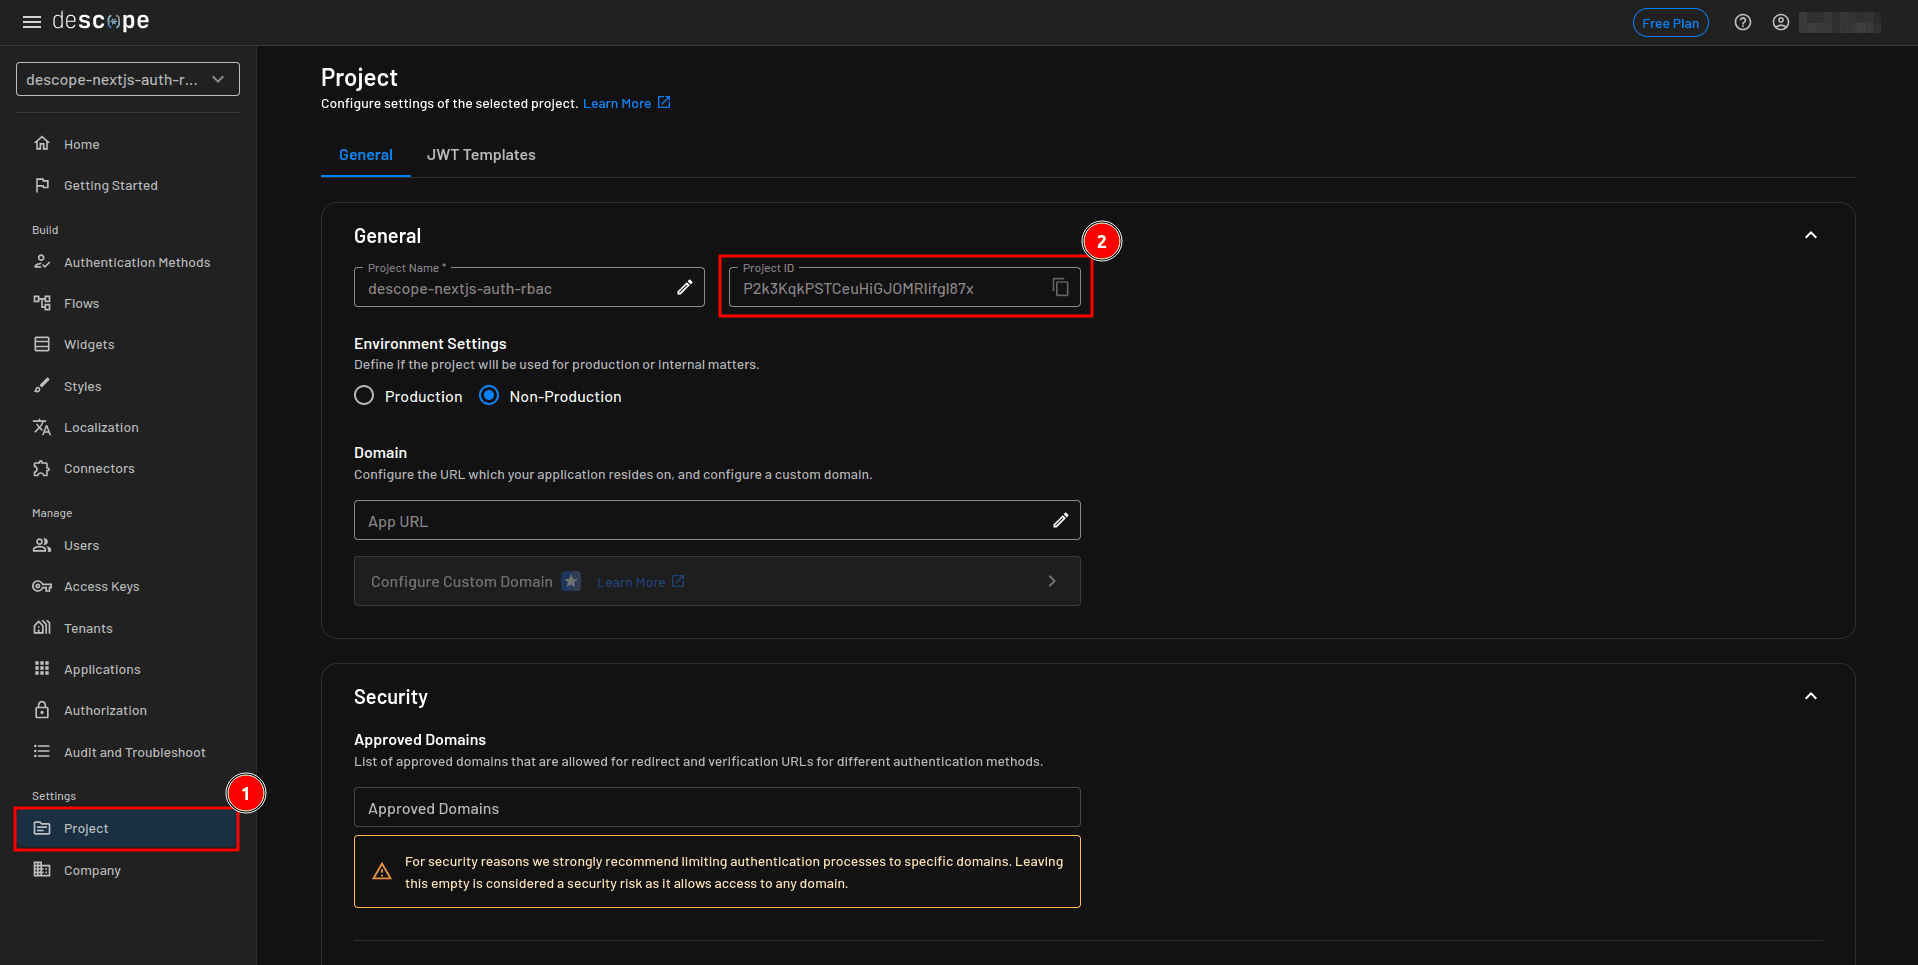
Once the flows are generated, select Project from the sidebar and take note of your project ID, which you’ll use in the next step:
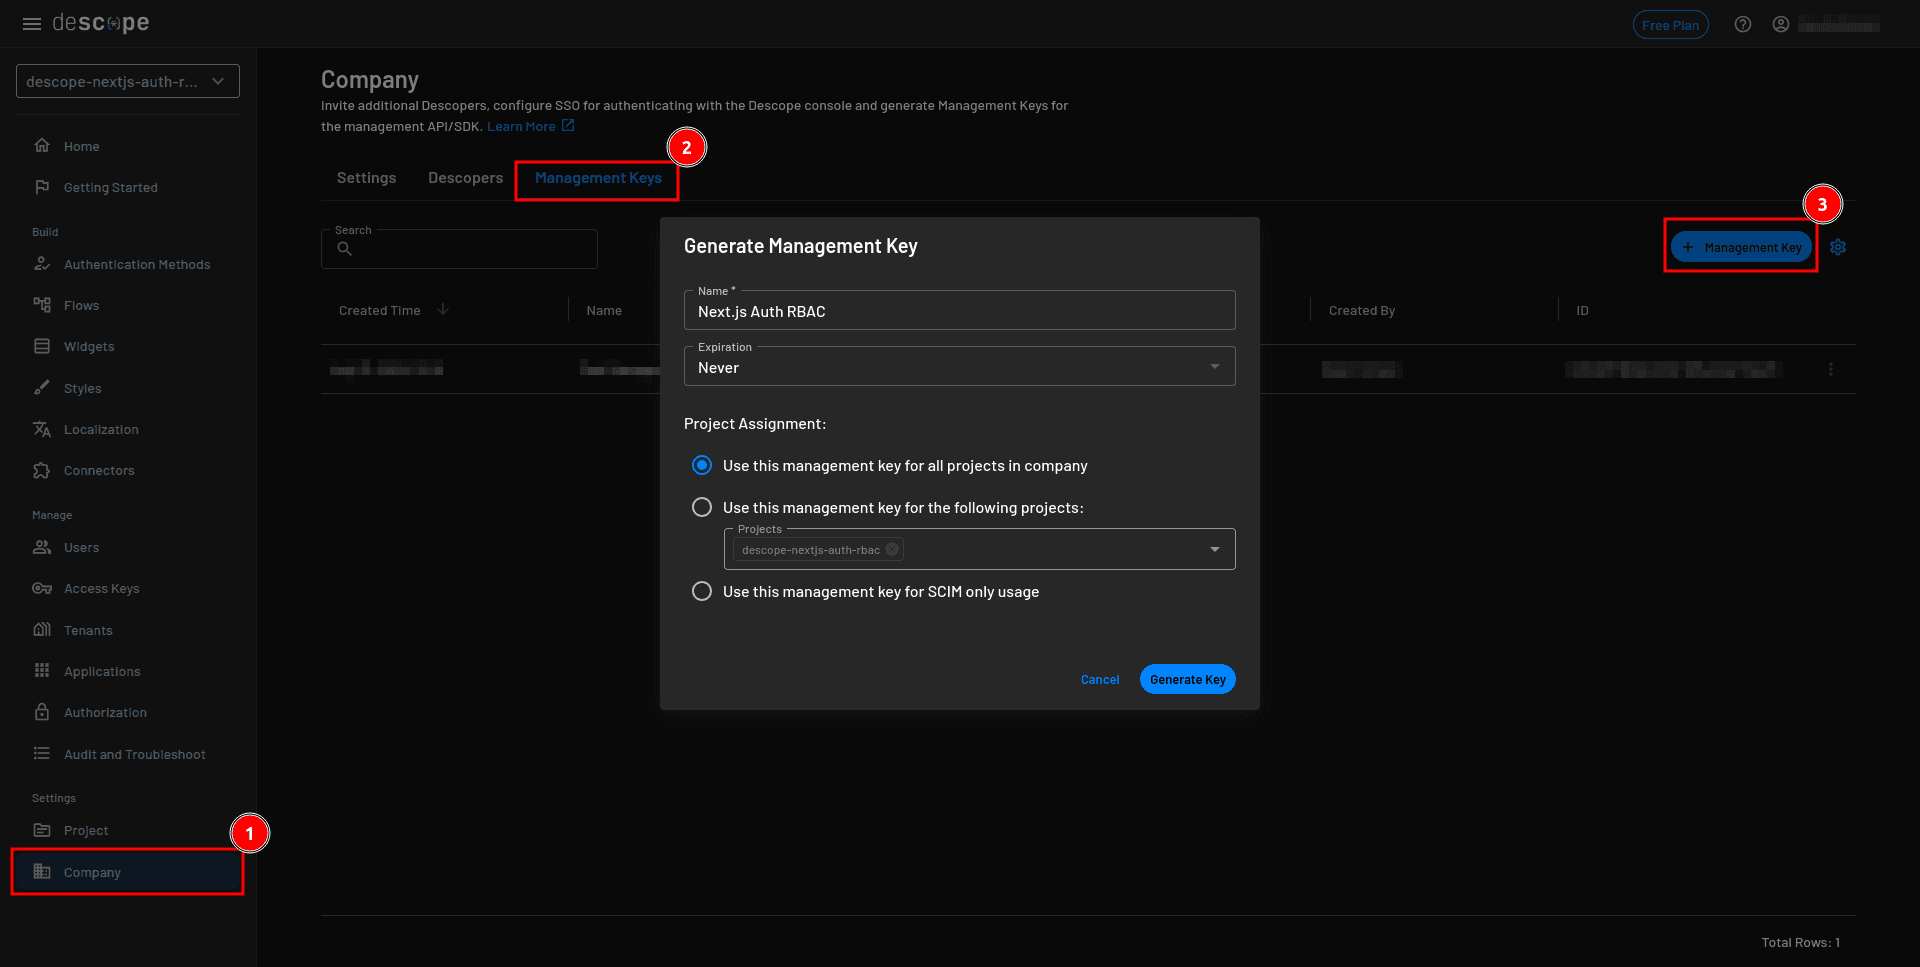
Next, you need to obtain a management key. Select Company from the sidebar, select the Management Keys tab on the Company page, and click the + Management Key button to create a new management key. Provide the key name and, under Project Assignment, select Use this management key for all the projects in the company. Click the Generate Key button and copy the value of your key:
Once you have the key, you can implement authentication for the Next.js application. You will come back to the console to set up the RBAC.
Exploring the starter template
This walkthrough uses a simple web app shell. To keep this guide focused on authentication and authorization, we've prepared a starter template for the blogging application. In this section, you'll clone and set up the template.
To clone the template to your local machine, execute the following command in the terminal:
git clone --single-branch -b starter-template https://github.com/kimanikevin254/descope-nextjs-auth-rbac.gitNavigate into the project directory and install all the dependencies:
cd descope-nextjs-auth-rbac && npm iCreate a .env project in the root folder and add the following content, which defines the location of the SQLite database:
DATABASE_URL="file:./dev.db"Run a Prisma migration for the models defined in the prisma/schema.prisma file:
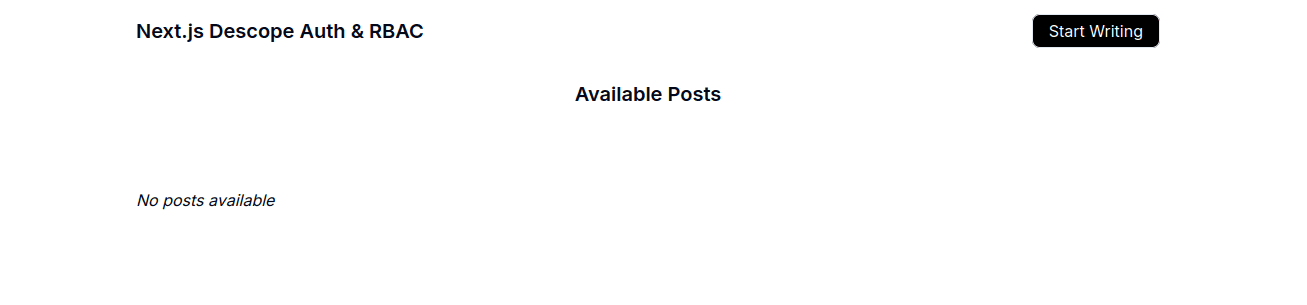
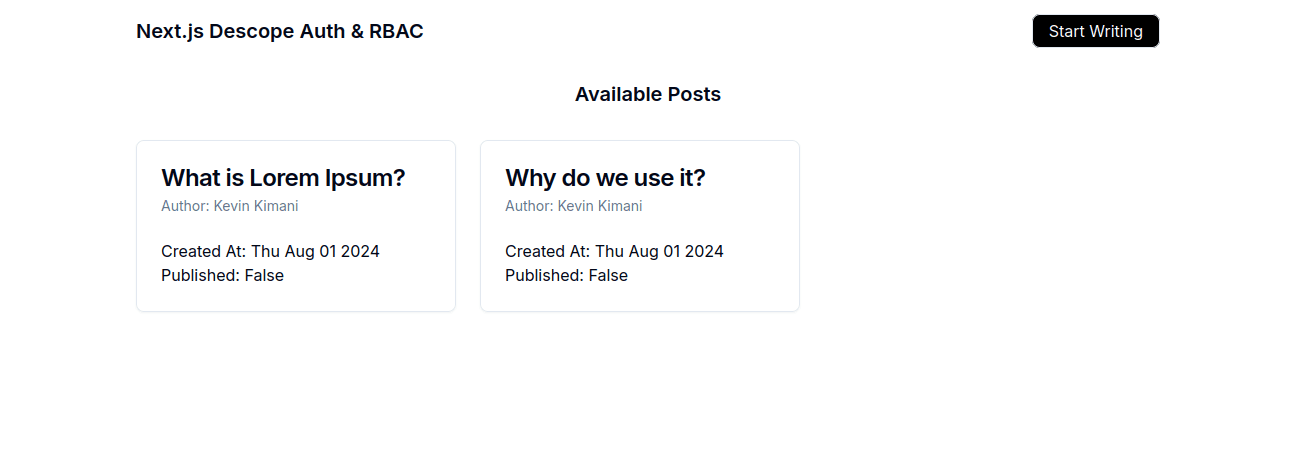
npx prisma migrate dev --name initRun the app with the command npm run dev and navigate to http://localhost:3000/ on your web browser. You should see a dashboard where the posts are displayed. At the moment, no posts are available:
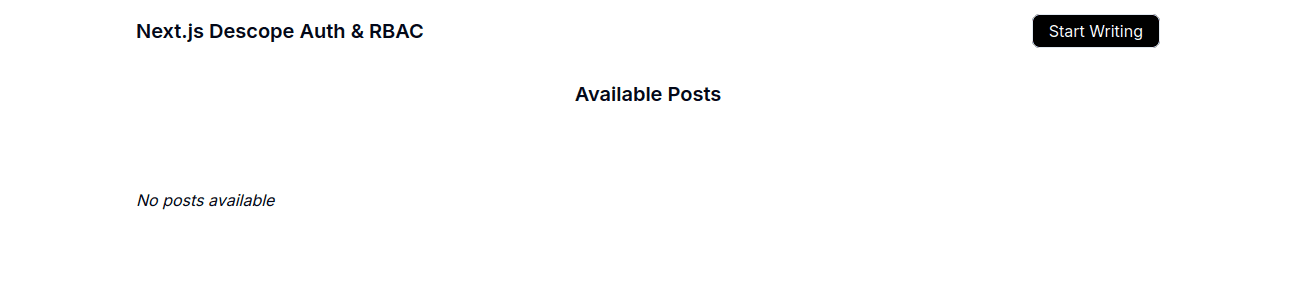
Users are able to write posts by clicking the Start Writing button, which directs them to the Write a Post page that has a rich text editor:
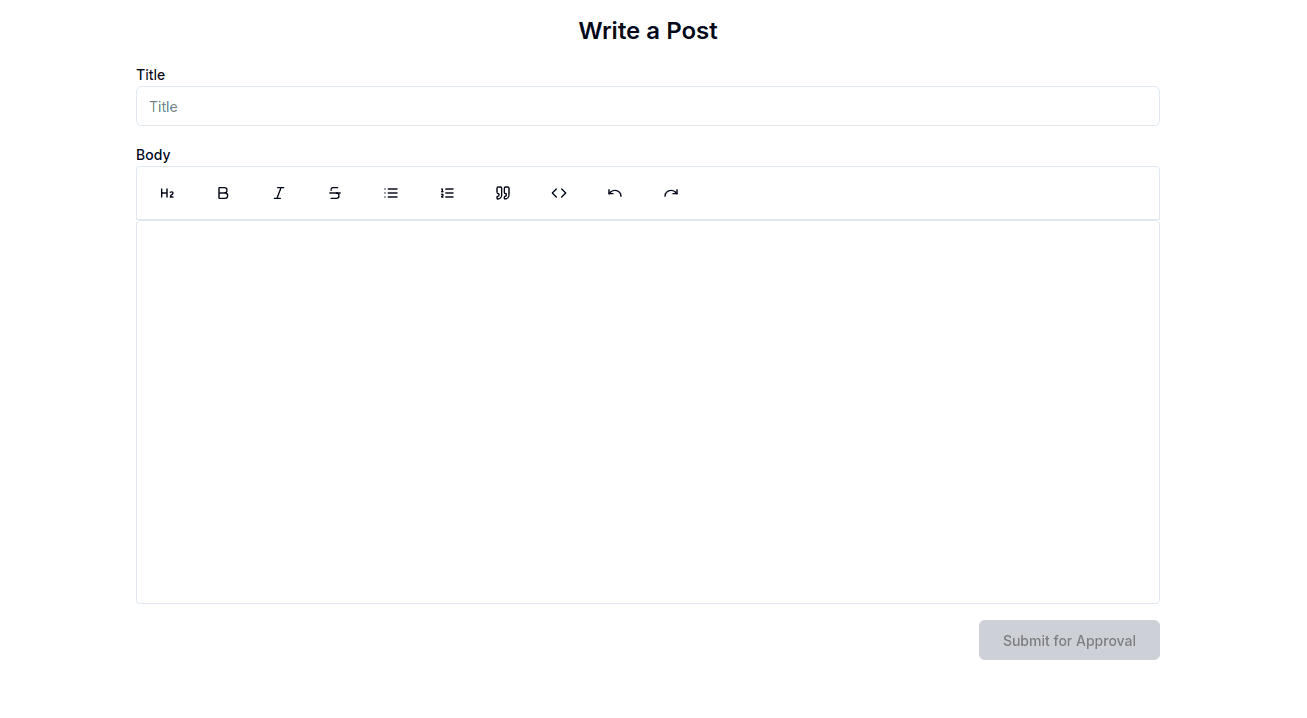
At this stage, the template is ready, but don’t create any posts until you have implemented authentication and authorization.
Adding authentication to Next.js 14
This section walks you through implementing authentication in your Next.js 14 application using Descope. You'll use code examples and screenshots to guide each step.
Key steps
Install the Descope Next.js SDK
Wrap your app with Descope authentication
Configure the “sign up or in” function
Protect routes with authentication middleware
Test the authentication flow
To get started, execute the following command in the terminal to install the Descope Next.js SDK, which you’ll use to implement authentication:
npm i @descope/nextjs-sdkOpen the app/layout.js file and replace the existing code with the following to wrap the whole application with the Descope Auth Provider:
import { Inter } from "next/font/google";
import "./globals.css";
import { AuthProvider } from "@descope/nextjs-sdk";

const inter = Inter({ subsets: ["latin"] });

export const metadata = {
   title: "Descope - Next.js Auth",
   description:
       "Demonstrating how to add auth & RBAC to Next.js 14 with Descope",
};

export default function RootLayout({ children }) {
   return (
       <AuthProvider projectId={process.env.DESCOPE_PROJECT_ID}>
           <html lang="en">
               <body
                   className={`${inter.className} max-w-screen-lg mx-auto py-4`}
               >
                   {children}
               </body>
           </html>
       </AuthProvider>
   );
}
You will set the value of
DESCOPE_PROJECT_IDin the.envfile later on.
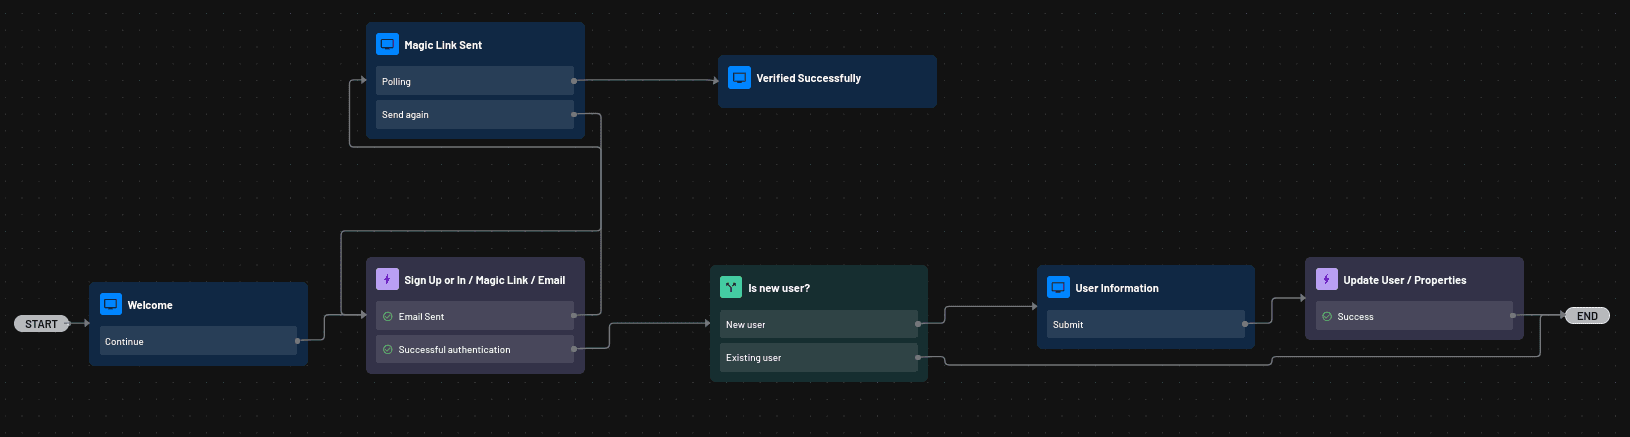
You can use the sign-up-or-in flow that you generated when configuring the project to allow the user to sign in to the application. The sign-up-or-in flow presents the user with a Welcome screen where they are prompted to provide their email address.
Once the user provides the email address and clicks the Continue button, a magic link is sent to the provided email address. Once the user clicks the magic link, Descope verifies the link, and the user is authenticated. The flow then checks if the user is new or returning. If the user is new, they are prompted to provide additional information(their name), and their details are updated.
Here’s a visual representation of the flow in practice:
Open the app/sign-in/page.js file and replace the existing code with the following:
"use client";

import { Descope } from "@descope/nextjs-sdk";
import axios from "axios";
import { useRouter } from "next/navigation";

export default function Page() {
   const router = useRouter();

   // Register user or redirect to home
   const handleEvent = async (event) => {
       try {
           if (event.detail.firstSeen !== true) {
               return router.replace("/");
           }

           // Register the user
           const { data } = await axios.post("/api/register", {
               descopeUserId: event.detail.user.userId,
               email: event.detail.user.email,
               name: event.detail.user.name,
           });

           if (data.error) {
               alert("Something went wrong");
           } else {
               return router.replace("/");
           }
       } catch (error) {
           console.log(error);
       }
   };
   return (
       <Descope
           flowId="sign-up-or-in"
           onSuccess={(e) => handleEvent(e)}
           onError={(e) => alert("Something went wrong. Please try again.")}
       />
   );
}
In the preceding code, once the user signs up or in successfully, the event data returned from this component is passed to the handleEvent function.
This function checks if the user is new by examining event.details.firstSeen. If the user is not new, they are redirected to the home screen. Otherwise, it sends a POST request to the /api/register endpoint with the user’s details to register the user. If the registration is successful, the user is redirected to the home page; otherwise, an error message is displayed.
The
/api/registerendpoint is defined in theapp/api/register/route.jsfiles, and it adds the user to the local database.
You also need to set up a middleware to enforce authentication for all the pages in this application. Create a file named middleware.js in the project root folder and add the following code:
import { authMiddleware } from "@descope/nextjs-sdk/server";

export default authMiddleware({
   projectId: process.env.DESCOPE_PROJECT_ID,
   redirectUrl: process.env.SIGN_IN_ROUTE,
});

export const config = {
   matcher: ["/((?!.+\\.[\\w]+$|_next).*)", "/", "/(api|trpc)(.*)"],
};
This code uses the authMiddleware function provided by the Descope Next.js SDK to protect all routes and redirect unauthenticated users to the sign-in page.
Update the .env file with the following:
DESCOPE_PROJECT_ID=<YOUR-PROJECT-ID>
DESCOPE_MANAGEMENT_KEY=<YOUR-MANAGEMENT-KEY>


SIGN_IN_ROUTE="/sign-in"
Make sure to replace the placeholder values with the values you obtained earlier.
The authentication for your Next.js application is now complete.
Before you test it, open the app/write/page.js file. In this file, notice that the savePost function requires the Descope user ID. You can retrieve this using the hooks provided by the Next.js SDK.
Add the following import statement to the file:
import { useUser } from "@descope/nextjs-sdk/client";Add the following statement that retrieves the user just before the savePost function:
const { user } = useUser();You can now test the authentication flow.
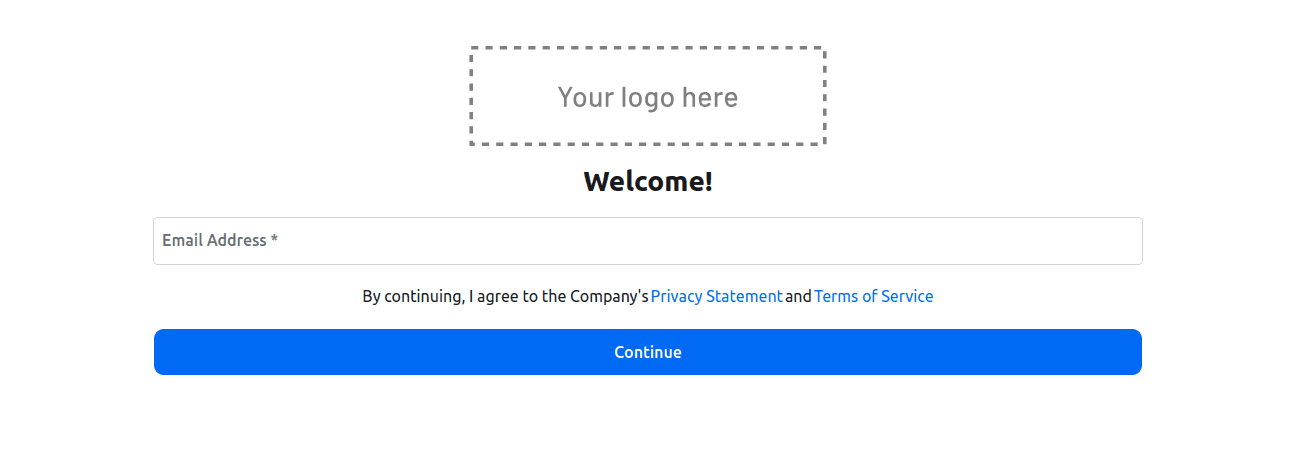
On your browser, navigate to http://localhost:3000. You are redirected to http://localhost:3000/sign-in since you have not signed in. It should look like this:
Provide your email address, click the link sent to your inbox, and provide your name since this is the first time you’re signing in. Then you are redirected to the home page:
This confirms that the authentication is working as expected.
Adding authorization to Next.js 14
Currently, anyone can log in to the application, create posts, submit them for approval, and approve the posts. For this example, you want to specify that editors can write posts and then submit them for approval, and admins can publish the posts.
Key steps
Create roles and assign permissions in Descope
Control UI visibility based on user roles
Validate roles in API routes
Configure session tokens for authorization
Test role-based permissions
Before you implement this functionality, click the Start Writing button and create a few posts to test the application with:
Go to the Descope Console, select Authorization from the sidebar, and click the + Role button. In the Add Role modal, provide “editor” as the name and “Can write posts and submit them for approval” as the description. Then click the Add button:

Repeat the process to create a role for the admin. Provide “admin” as the role and “Can toggle a post’s published status” as the description.
Assign the “editor” role to the user who is logged in to the application. In the Descope Console, select Users from the sidebar to edit the user details:
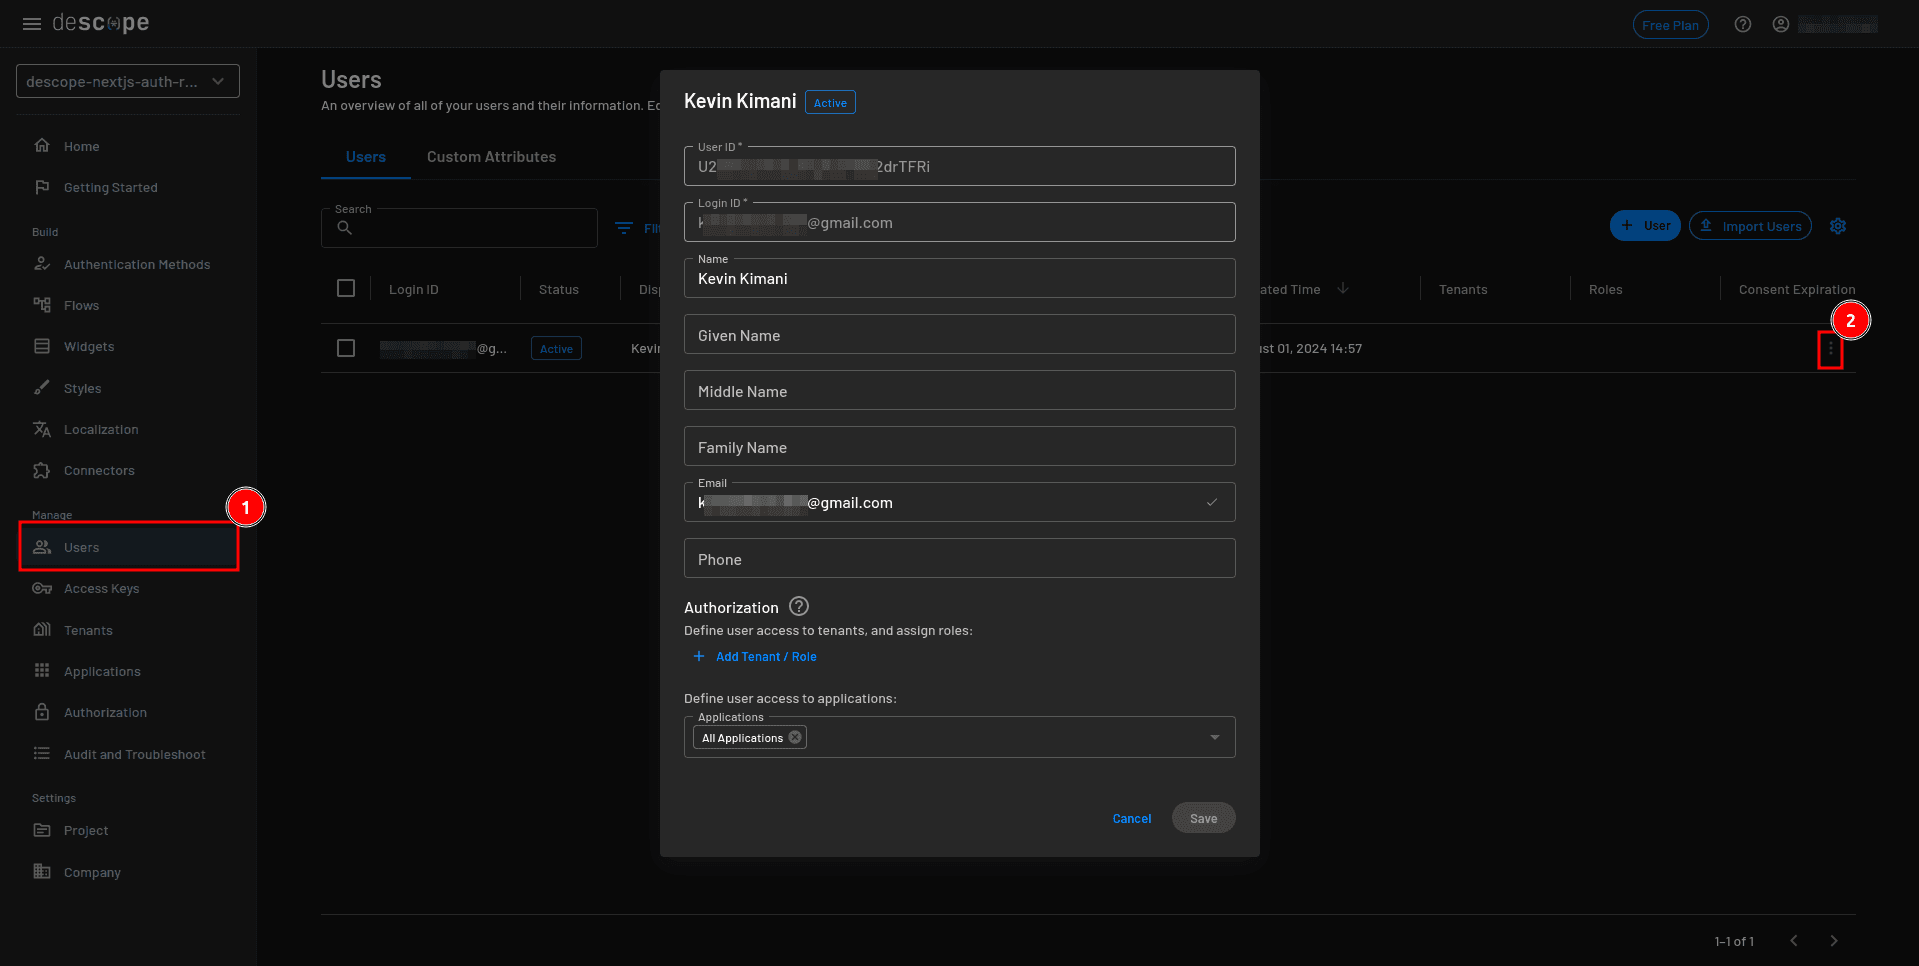
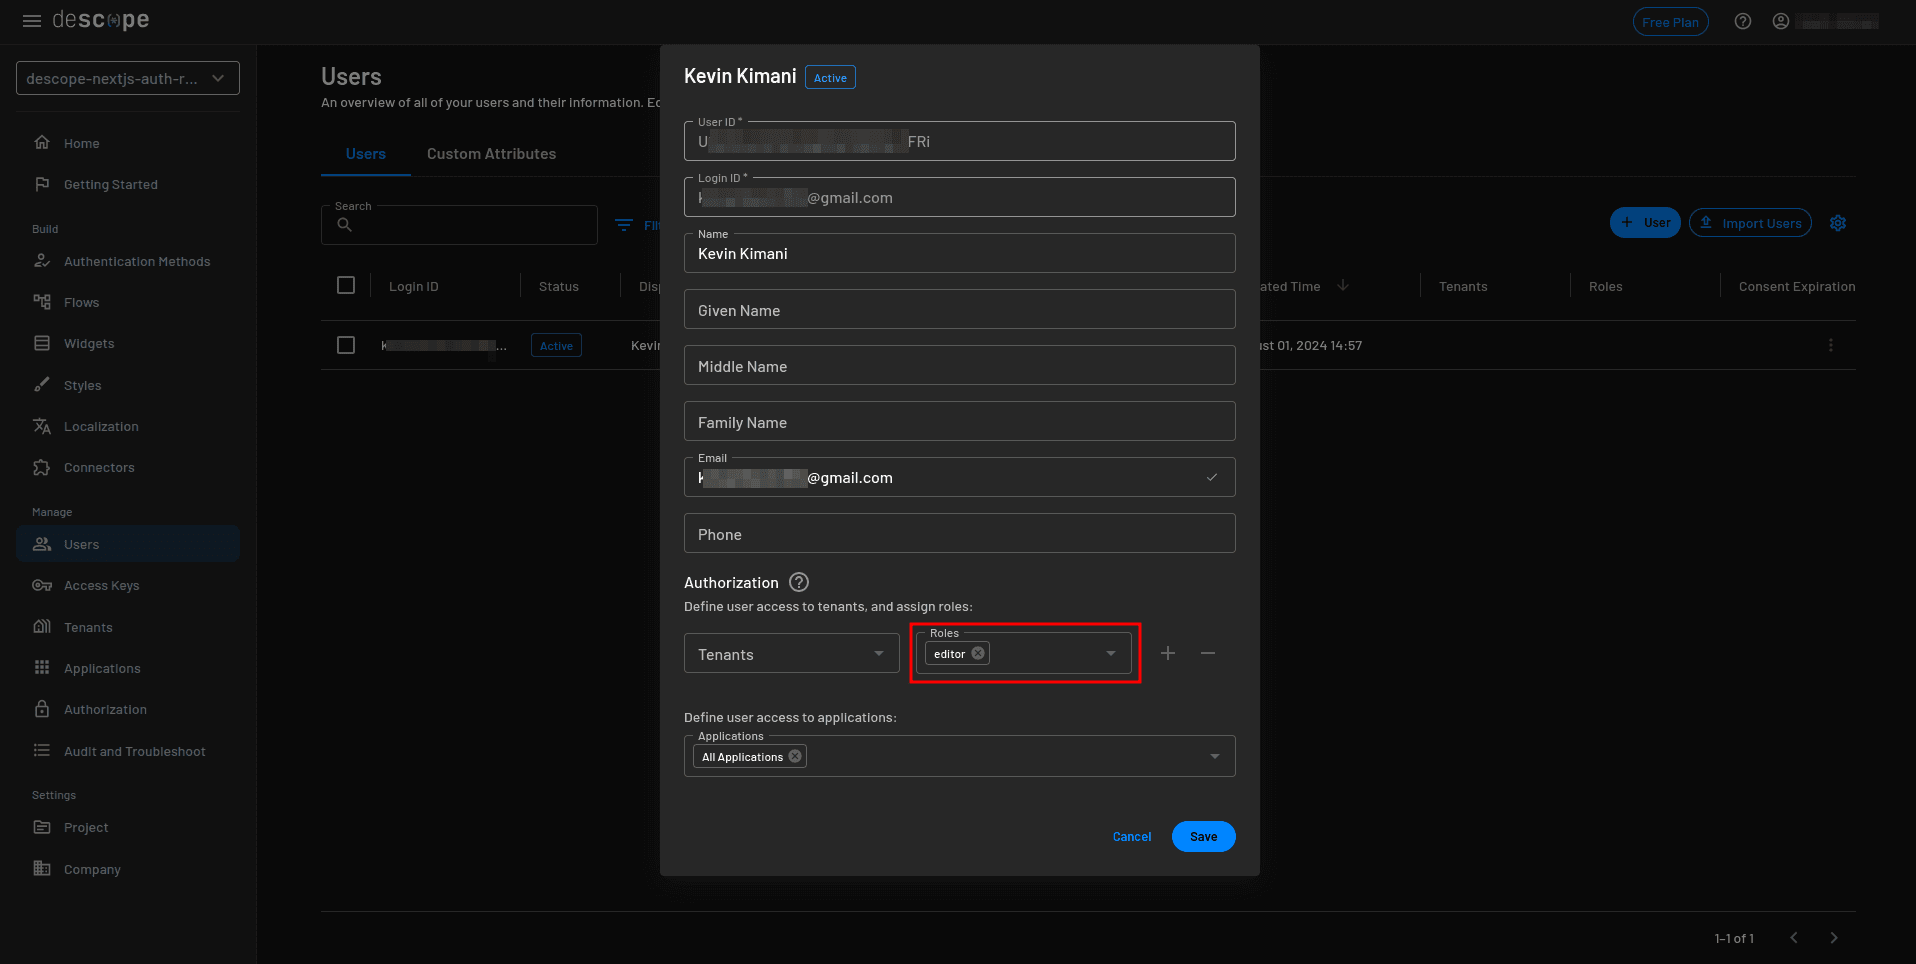
On the user details modal, select + Add Tenant / Role, assign the editor role, and click Save:
Open the app/page.js file and add the following import statement:
import { useUser } from "@descope/nextjs-sdk/client";Add the following code before the fetchPosts function.
const { user } = useUser();This hook allows you to retrieve the user’s details.
Locate the following lines of code in the same file:
<Link
   href={"/write"}
   className="px-4 py-1 border rounded-lg bg-black text-white"
>
   Start Writing
</Link>
Replace it with the following to display only the Start Writing button to editors:
{
   user?.roleNames?.includes("editor") && (
       <Link
           href={"/write"}
           className="px-4 py-1 border rounded-lg bg-black text-white"
       >
           Start Writing
       </Link>
   )
}
Open the app/posts/[postId]/page.js file and add the following lines of code in their respective locations (indicated by the comments):
import { useUser } from "@descope/nextjs-sdk/client"; // After the import statement

const { user } = useUser(); // Before the return statement
Locate the following lines of code:
<Button
   variant="default"
   className="px-6 mt-6"
   onClick={() => togglePublishedStatus()}
>
   {post.published ? "Unpublish" : "Publish"}
</Button>
Replace it with the following to specify that only admins can publish/unpublish a post:
{
   user?.roleNames?.includes("admin") && (
       <Button
           variant="default"
           className="px-6 mt-6"
           onClick={() => togglePublishedStatus()}
       >
           {post.published ? "Unpublish" : "Publish"}
       </Button>
   )
}
For additional security, you also validate these roles in the API router handlers. In the lib folder, create a new file named descope.js and add the following code:
import { createSdk } from "@descope/nextjs-sdk/server";

export const descopeSdk = createSdk({
   projectId: process.env.DESCOPE_PROJECT_ID,
   managementKey: process.env.DESCOPE_MANAGEMENT_KEY,
});
This code initializes a Descope client instance and exports it for use in other parts of the application.
Open the app/api/posts/create/route.js file and add the following code just after const data = await request.json():
// Make sure the user has the editor role
const userRoles = descopeSdk.getJwtRoles(data.sessionToken);

if (!userRoles?.includes("editor")) {
   throw new Error("User is not an editor");
}
This code ensures that the user has the editor role. If not, it throws an error.
Remember to add the following import statement:
import { descopeSdk } from "@/lib/descope";Open the app/api/posts/toggleStatus/route.js file and add the following code just after const data = await request.json() to throw an error if the user making the request does not have the admin role:
// Make sure the user has the admin role
const userRoles = descopeSdk.getJwtRoles(data.sessionToken);

if (!userRoles?.includes("admin")) {
   throw new Error("User is not an admin");
}
Remember to add the following import statement:
import { descopeSdk } from "@/lib/descope";With the route handlers verifying the user roles, you need to make sure that the session token is passed in the request body. Start by opening the app/write/page.js file and retrieving the session token using the useSession hook:
const { sessionToken } = useSession();Make sure the useSession hook is imported into the file:
import { useSession, useUser } from "@descope/nextjs-sdk/client";Add the retrieved session token to the body of the POST request in the savePost function:
const { data } = await axios.post("/api/posts/create", {
   title,
   content,
   descopeUserId: user?.userId,
   sessionToken,
});
Open the app/posts/[postId]/page.js file and retrieve the session token using the useSession hook:
const { sessionToken } = useSession();Make sure the hook is imported into the file:
import { useSession, useUser } from "@descope/nextjs-sdk/client";Replace the togglePublishedStatus function with the following code that ensures that the session token is passed to the route handlers:
const togglePublishedStatus = async () => {
   try {
       const { data } = await axios.put("/api/posts/toggleStatus", {
           postId: params.postId,
           sessionToken,
       });

       setPost(data.data);
   } catch (error) {
       alert("Something went wrong");
       console.log(error);
   }
};
Now, all the authorization checks are complete. You can test to see if everything is working as expected.
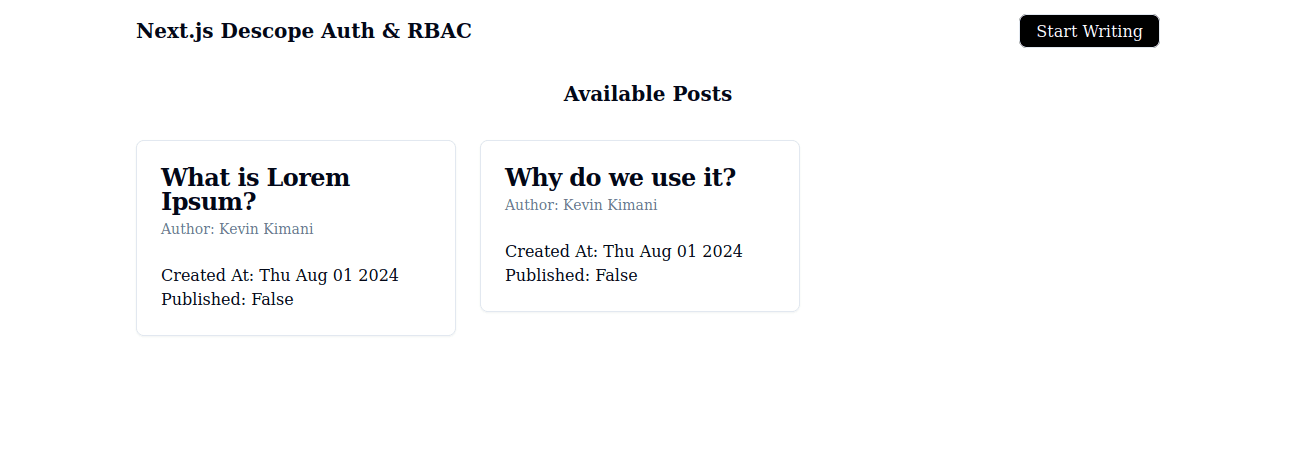
Navigate to http://localhost:3000/sign-in and log in to the application. Since you assigned the editor role to the user, you can see the Start Writing button:
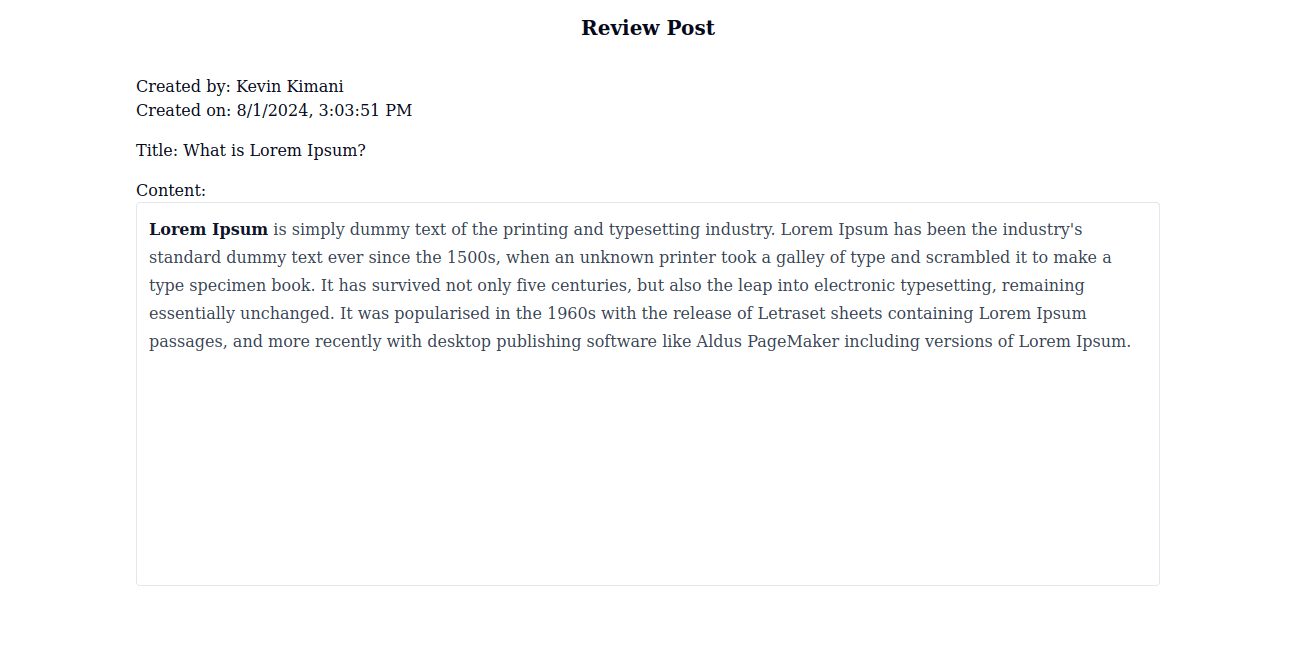
Click on a post to open the details page. However, you cannot see the Publish/Unpublish button since only admins are allowed to see it:
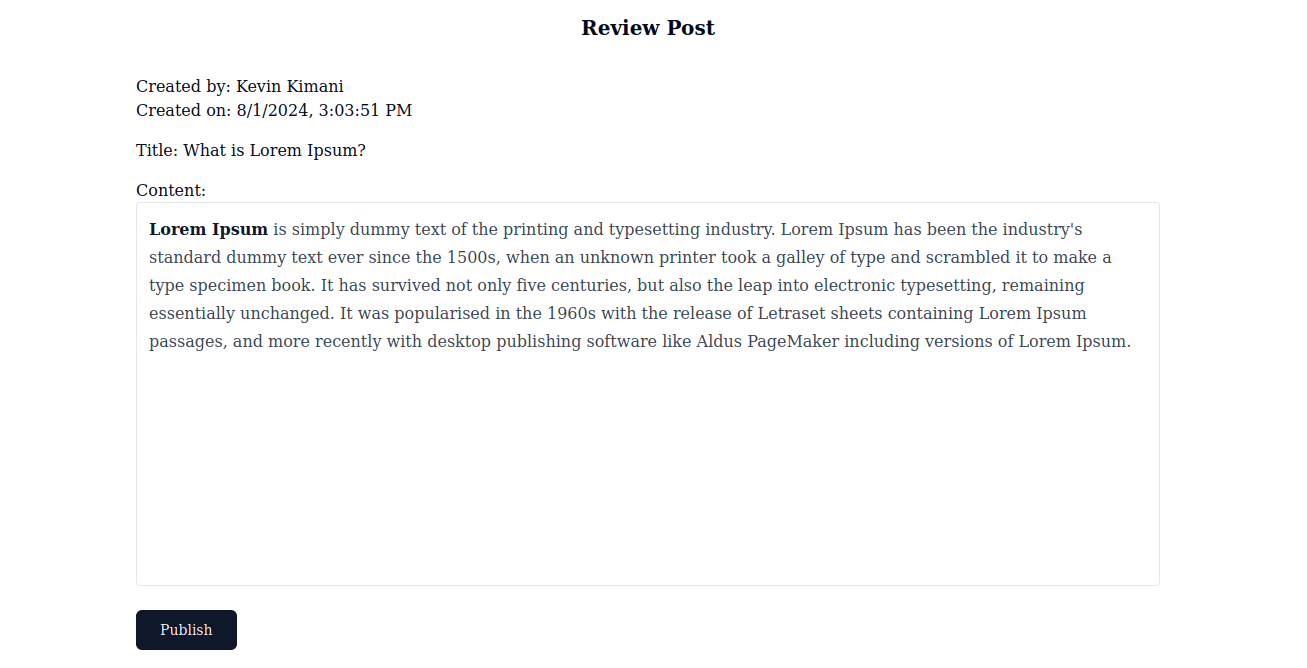
Now, go back to the Descope Console and assign the user the admin role.
Go back to the application and refresh the page. Since the user now has the admin role, they can see the button to Publish/Unpublish a post:
This confirms that the authorization flow is working as expected.
You can access the complete Next.js 14 authentication code on GitHub.
Next steps for Next.js 14 authentication
Your authentication system is production-ready. You can extend it by adding social logins, MFA, or additional roles—all without writing custom auth logic.
This flexibility is what makes Descope's CIAM platform powerful for production applications. Use no-code workflows to add authentication methods, configure authorization rules, and manage users at scale, so you can focus on your application's core features instead of authentication infrastructure.
Start building with a Free Forever account today. Have questions about implementing RBAC or Next.js authentication? Book time with our experts.