
Table of Contents
This tutorial was written by Vivek Maskara, a software development engineer at Remitly. You can check out his website or X account to connect and see more of his work!
The Kong Gateway is a lightweight, flexible, and fast cloud-native API gateway that lets you configure, manage, and route requests to your APIs. The gateway acts as a reverse proxy, running in front of RESTful APIs, and it can be customized using modules and plugins.
The Kong Gateway enables users to decentralize applications and easily transition to microservices with little overhead. It simplifies securing APIs with built-in authentication, rate limiting, and encryption while improving API health and visibility through load balancing, health checks, and comprehensive monitoring and analytics.
In this tutorial, you will learn about the Kong Gateway and API gateway authentication. You will also learn how to implement authentication in the Kong Gateway with Descope Flows.
API gateway authentication
An API gateway is a component that sits between clients and backend services, functioning as a reverse proxy. It accepts API calls, processes them, and aggregates responses from multiple services to handle client requests efficiently. It simplifies the integration of microservices by providing a single entry point for client requests, reducing the complexity of client interactions with multiple services. It also provides tools for monitoring API health and scalability, including logging, analytics, and real-time monitoring, allowing developers to track service performance and availability.
The Kong Gateway is a scalable platform that lets you manage, secure, and optimize API traffic. It offers load balancing, rate limiting, and authentication features, making API management easier. With its open source core and enterprise-level extensions, Kong enables seamless API integration and high performance for modern applications.
Authentication is a key feature of API gateways that helps secure the APIs. Handling user authentication at the gateway level centralizes the auth process and makes it easier to manage. It simplifies the implementation of security policies, reduces the risk of unauthorized access, and enhances overall API security.
In this tutorial, you build a sample app using an echo server hosted on a Kubernetes cluster. The cluster uses the Kong Gateway to manage API traffic and endpoints. You integrate Descope for authentication, which generates JSON Web Tokens (JWTs) that are compliant with the OpenID Connect (OIDC), and use Kong to verify and streamline user access. The architecture diagram shows the lifecycle of an API request:
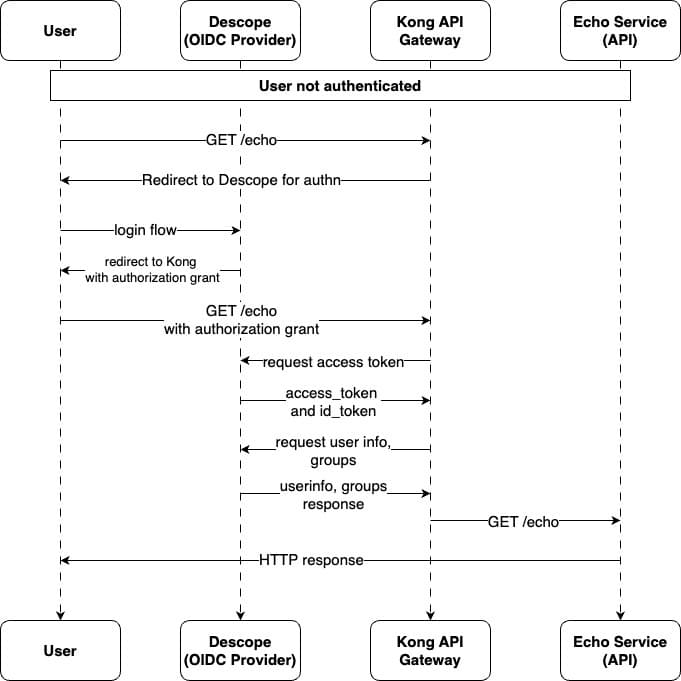
If the request is unauthenticated, the Kong Gateway redirects the user to Descope for authentication. Upon completing the login/sign-up flow and sending it to the Kong Gateway, the user receives an authorization grant. Next, the Kong Gateway requests access and ID tokens using the authorization grant before making the upstream call to the echo service. This setup ensures secure, centralized, and efficient management of API requests and user access within the cluster.
Prerequisites
Before starting, you need to prepare the following:
Install minikube on your development machine.
Sign up for a free Kong Konnect account.
Sign up for a free Descope account.
Set up an echo server
Begin by creating a new directory for your application and navigate into it:
mkdir kong-api-descope-authn
cd kong-api-descope-authn
As you saw in the architecture diagram earlier, you need to deploy a service that exposes REST APIs. For this tutorial, you can deploy a simple echo server that responds by returning the clients’ requests. Navigate to the root of the project and create a file named echo.kube.yaml with the following content:
apiVersion: v1
kind: Namespace
metadata:
  name: echoserver
---
apiVersion: apps/v1
kind: Deployment
metadata:
  name: echoserver
  namespace: echoserver
spec:
  replicas: 1
  selector:
    matchLabels:
      app: echoserver
  template:
    metadata:
      labels:
        app: echoserver
    spec:
      containers:
      - image: ealen/echo-server:latest
        imagePullPolicy: IfNotPresent
        name: echoserver
        ports:
        - containerPort: 80
        env:
        - name: PORT
          value: "80"
---
apiVersion: v1
kind: Service
metadata:
  name: echoserver
  namespace: echoserver
spec:
  ports:
    - port: 80
      targetPort: 80
      protocol: TCP
  type: ClusterIP
  selector:
    app: echoserver
---
apiVersion: networking.k8s.io/v1
kind: Ingress
metadata:
  name: echoserver
  namespace: echoserver
  annotations:
spec:
  ingressClassName: kong
  rules:
  - http:
      paths:
      - path: /echo
        pathType: Prefix
        backend:
          service:
            name: echoserver
            port:
              number: 80
The preceding code snippet creates the echoserver namespace in the Kubernetes cluster and deploys a single replica of the ealen/echo-server Docker container within that namespace. It exposes the container via a ClusterIP service and configures an ingress resource to route HTTP traffic to the service through the Kong Ingress Controller at the /echo path.
To deploy the server to your Kubernetes cluster, execute the following command in your project’s root:
kubectl apply -f echo.kube.yamlThe command above creates a new namespace containing a pod, deployment, service, and ingress. It returns an output, as shown below:
namespace/echoserver created
deployment.apps/echoserver created
service/echoserver created
ingress.networking.k8s.io/echoserver created
Notice that the echoserver ingress exposes an HTTP route /echo on port 80. In subsequent sections, you use this route via the Kong Gateway. Optionally, you can define more routes in the ingress.
Set up Kong Gateway
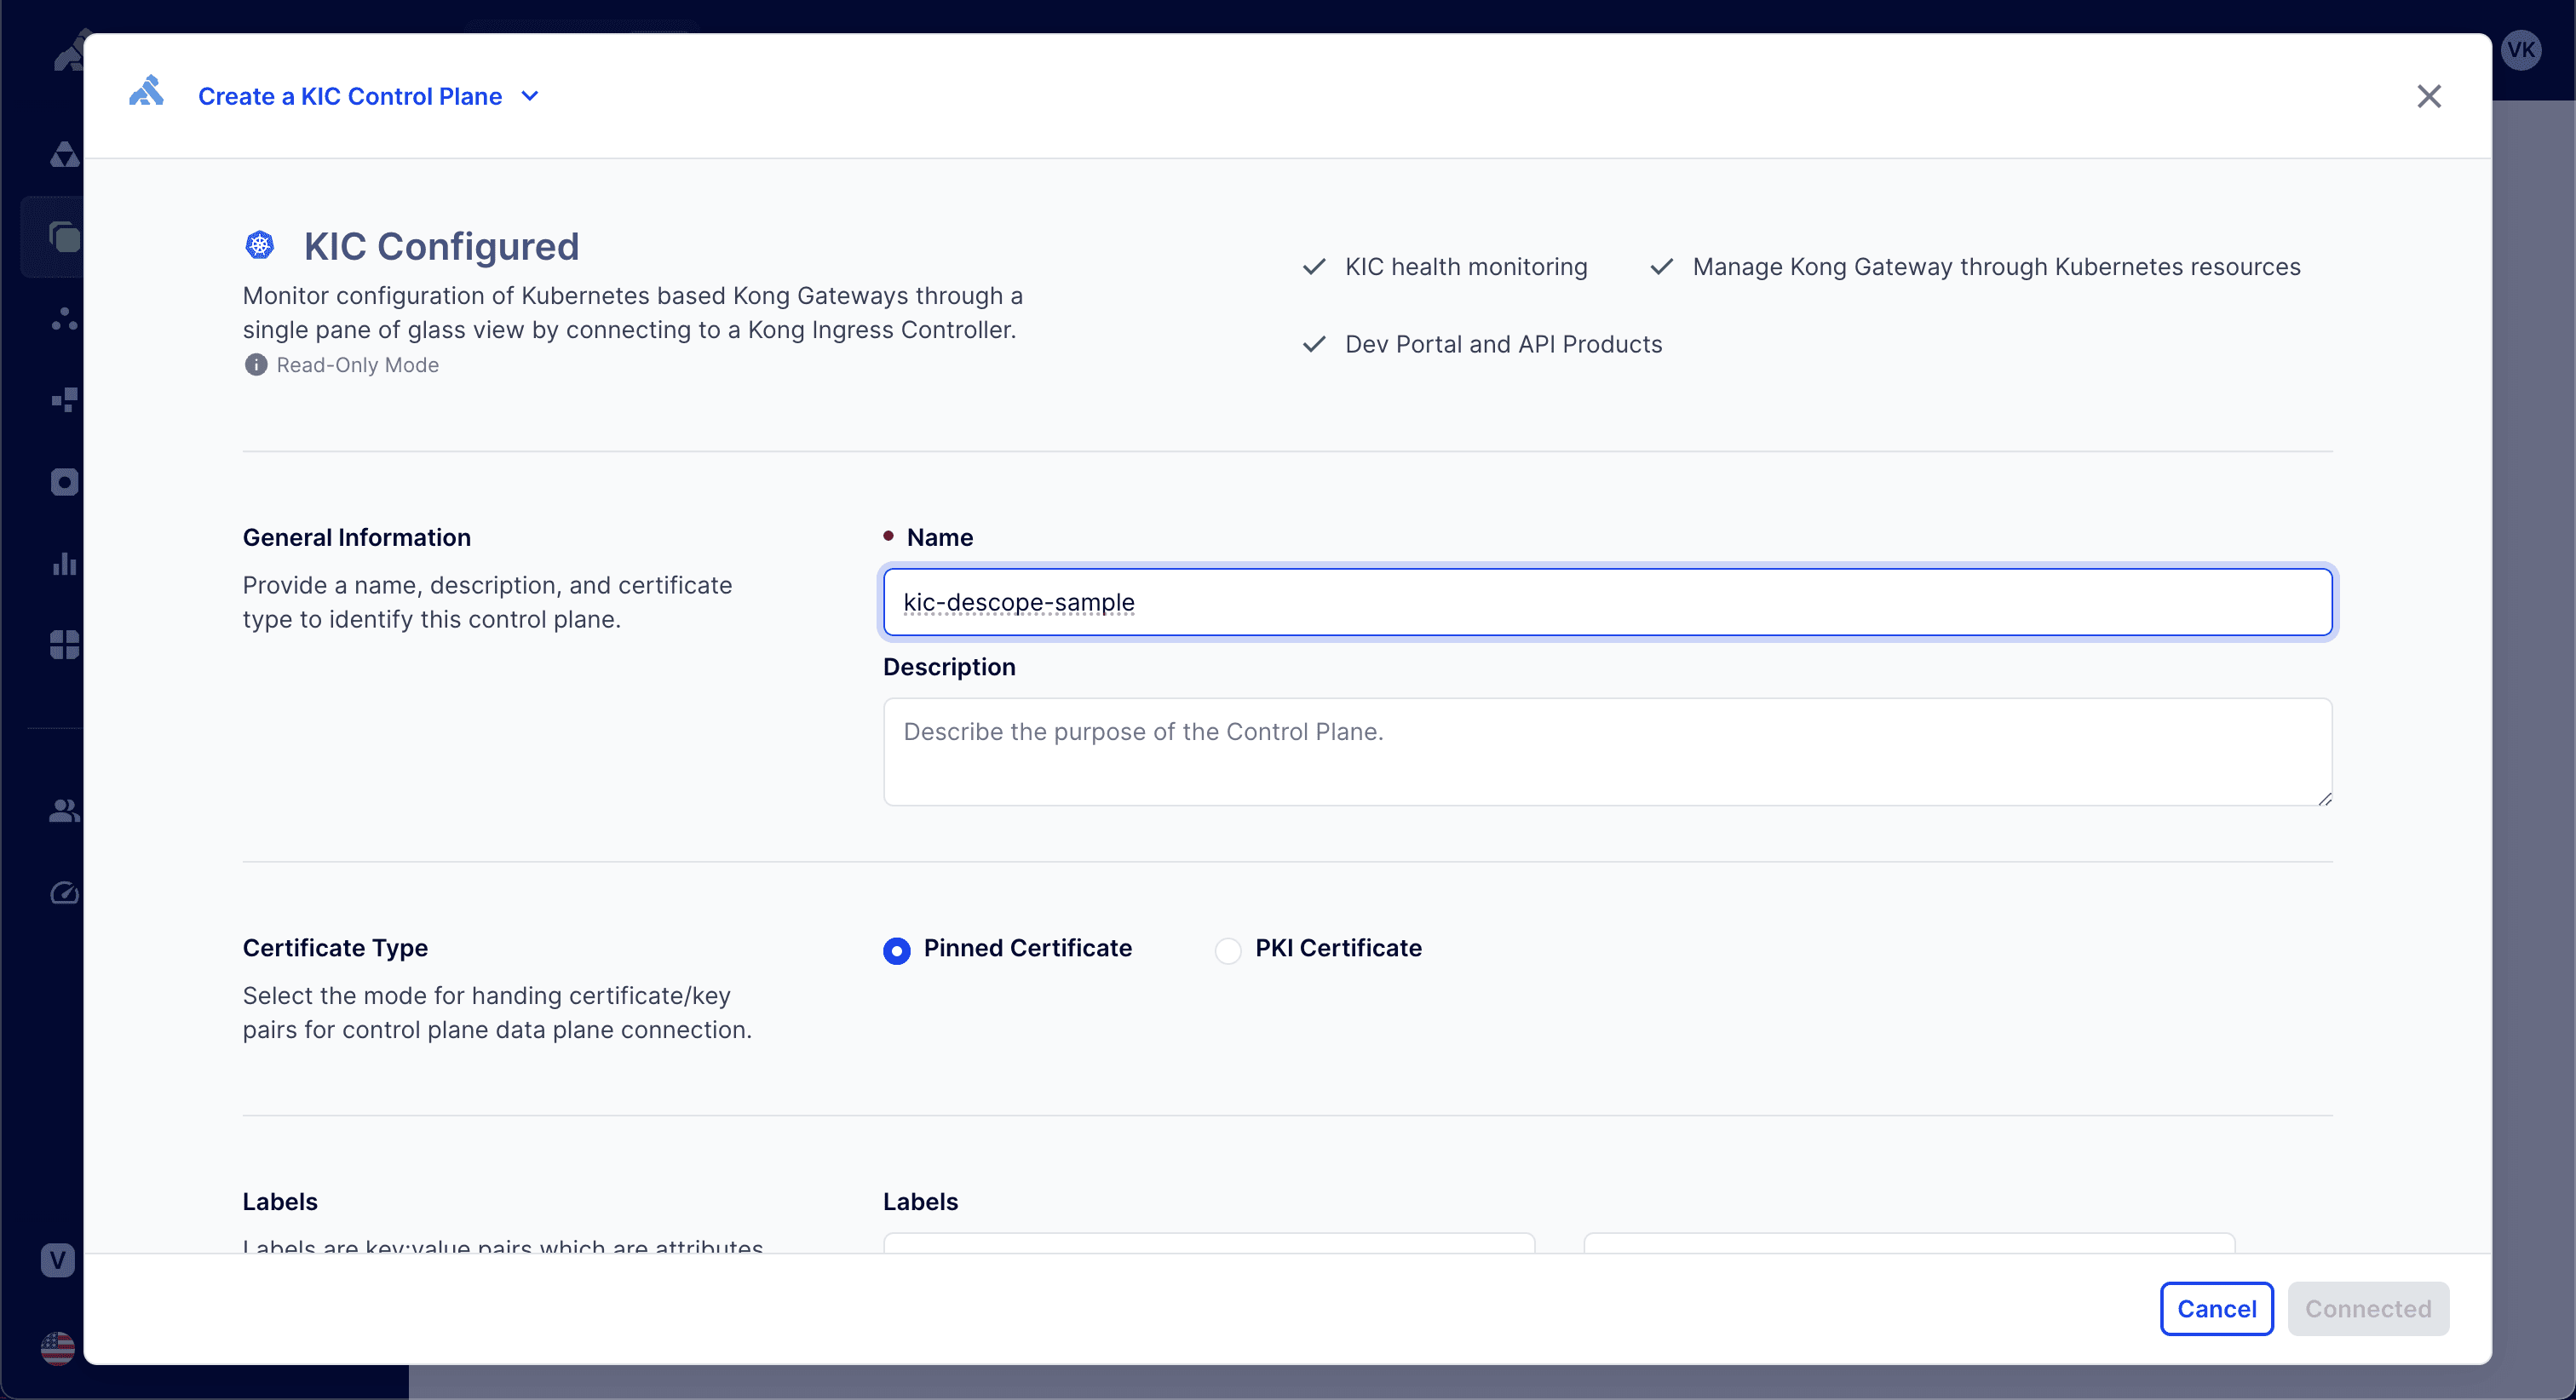
You need to set up the Kong Gateway in your Kubernetes cluster. The Kong OIDC plugin is available to premium or enterprise users. This tutorial uses Kong Konnect, which gives you access to premium features. Navigate to the Gateway Manager tab in the Kong Konnect portal, click the New Control Plane button, and choose Kong Ingress Controller (KIC) from the options menu. Provide a name for the KIC in the wizard that opens:
Next, click Generate Script to establish a connection to the KIC from your cluster. Follow the instructions from the generated script to install the Kong Gateway to your Kubernetes cluster. At the end of the wizard, you can verify whether the resources were deployed correctly using the following command:
kubectl get all --namespace kongThis outputs all the resources in the kong cluster, as shown here:
NAME                                   READY   STATUS             RESTARTS         AGE
pod/ingress-kong-75b85bc6dc-h28gr      1/2     Running            2 (3d13h ago)    3d13h
pod/kong-controller-545bc56656-k7m4h   0/1     Running            2 (2m7s ago)   13d
pod/kong-gateway-84cc686fb5-xs8qc      1/1     Running            1 (3d13h ago)    13d

NAME                                         TYPE           CLUSTER-IP       EXTERNAL-IP   PORT(S)                         AGE
service/kong-controller-validation-webhook   ClusterIP      10.107.222.116   <none>        443/TCP                         13d
service/kong-gateway-admin                   ClusterIP      None             <none>        8444/TCP                        13d
service/kong-gateway-manager                 NodePort       10.98.49.41      <none>        8002:30977/TCP,8445:32582/TCP   13d
service/kong-gateway-proxy                   LoadBalancer   10.111.95.63     127.0.0.1     80:30744/TCP,443:30724/TCP      13d
service/kong-proxy                           LoadBalancer   10.100.121.243   127.0.0.1     80:31590/TCP,443:32147/TCP      3d13h
service/kong-validation-webhook              ClusterIP      10.102.128.198   <none>        443/TCP                         3d13h

NAME                              READY   UP-TO-DATE   AVAILABLE   AGE
deployment.apps/ingress-kong      0/1     1            0           3d13h
deployment.apps/kong-controller   0/1     1            0           13d
deployment.apps/kong-gateway      1/1     1            1           13d

NAME                                         DESIRED   CURRENT   READY   AGE
replicaset.apps/ingress-kong-75b85bc6dc      1         1         0       3d13h
replicaset.apps/kong-controller-545bc56656   1         1         0       13d
replicaset.apps/kong-gateway-7b7ddccf49      0         0         0       6h25m
replicaset.apps/kong-gateway-84cc686fb5      1         1         1       13d
replicaset.apps/kong-gateway-c84c7c7ff       0         0         0       6h28m
replicaset.apps/kong-gateway-c9bcc4467       0         0         0       6h29m
Configure Descope
Descope provides authentication and user management services. It enables secure access to applications through various authentication methods, such as OIDC and Security Assertion Markup Language (SAML). Descope also offers features like multi-factor authentication (MFA), single sign-on (SSO), and role-based access control (RBAC) to ensure that only authorized users can access specific resources. It integrates with your existing infrastructure, streamlining the process of implementing and managing authentication and authorization for web and mobile applications.
Descope makes it easier to integrate authentication in your application using Descope Flows, a visual, no-code interface for building screens and authentication flows for common user interactions. These flows include various user authentication journeys such as login, sign-up, password reset, MFA, and step-up authentication.
In the following steps, you’ll define an OIDC flow with passkey authentication:
Import the OIDC flow
Start by logging in to your Descope account and creating a new project if you don’t already have one. The descope-sample-apps repo contains an example of an OIDC flow that uses a passkey authentication mechanism. Download the oidc_flow.json to your local device. Navigate to the Flows tab in the Descope portal and click Import to import the oidc-flow.json flow.
Once you import the OIDC flow, it displays a visual user journey:
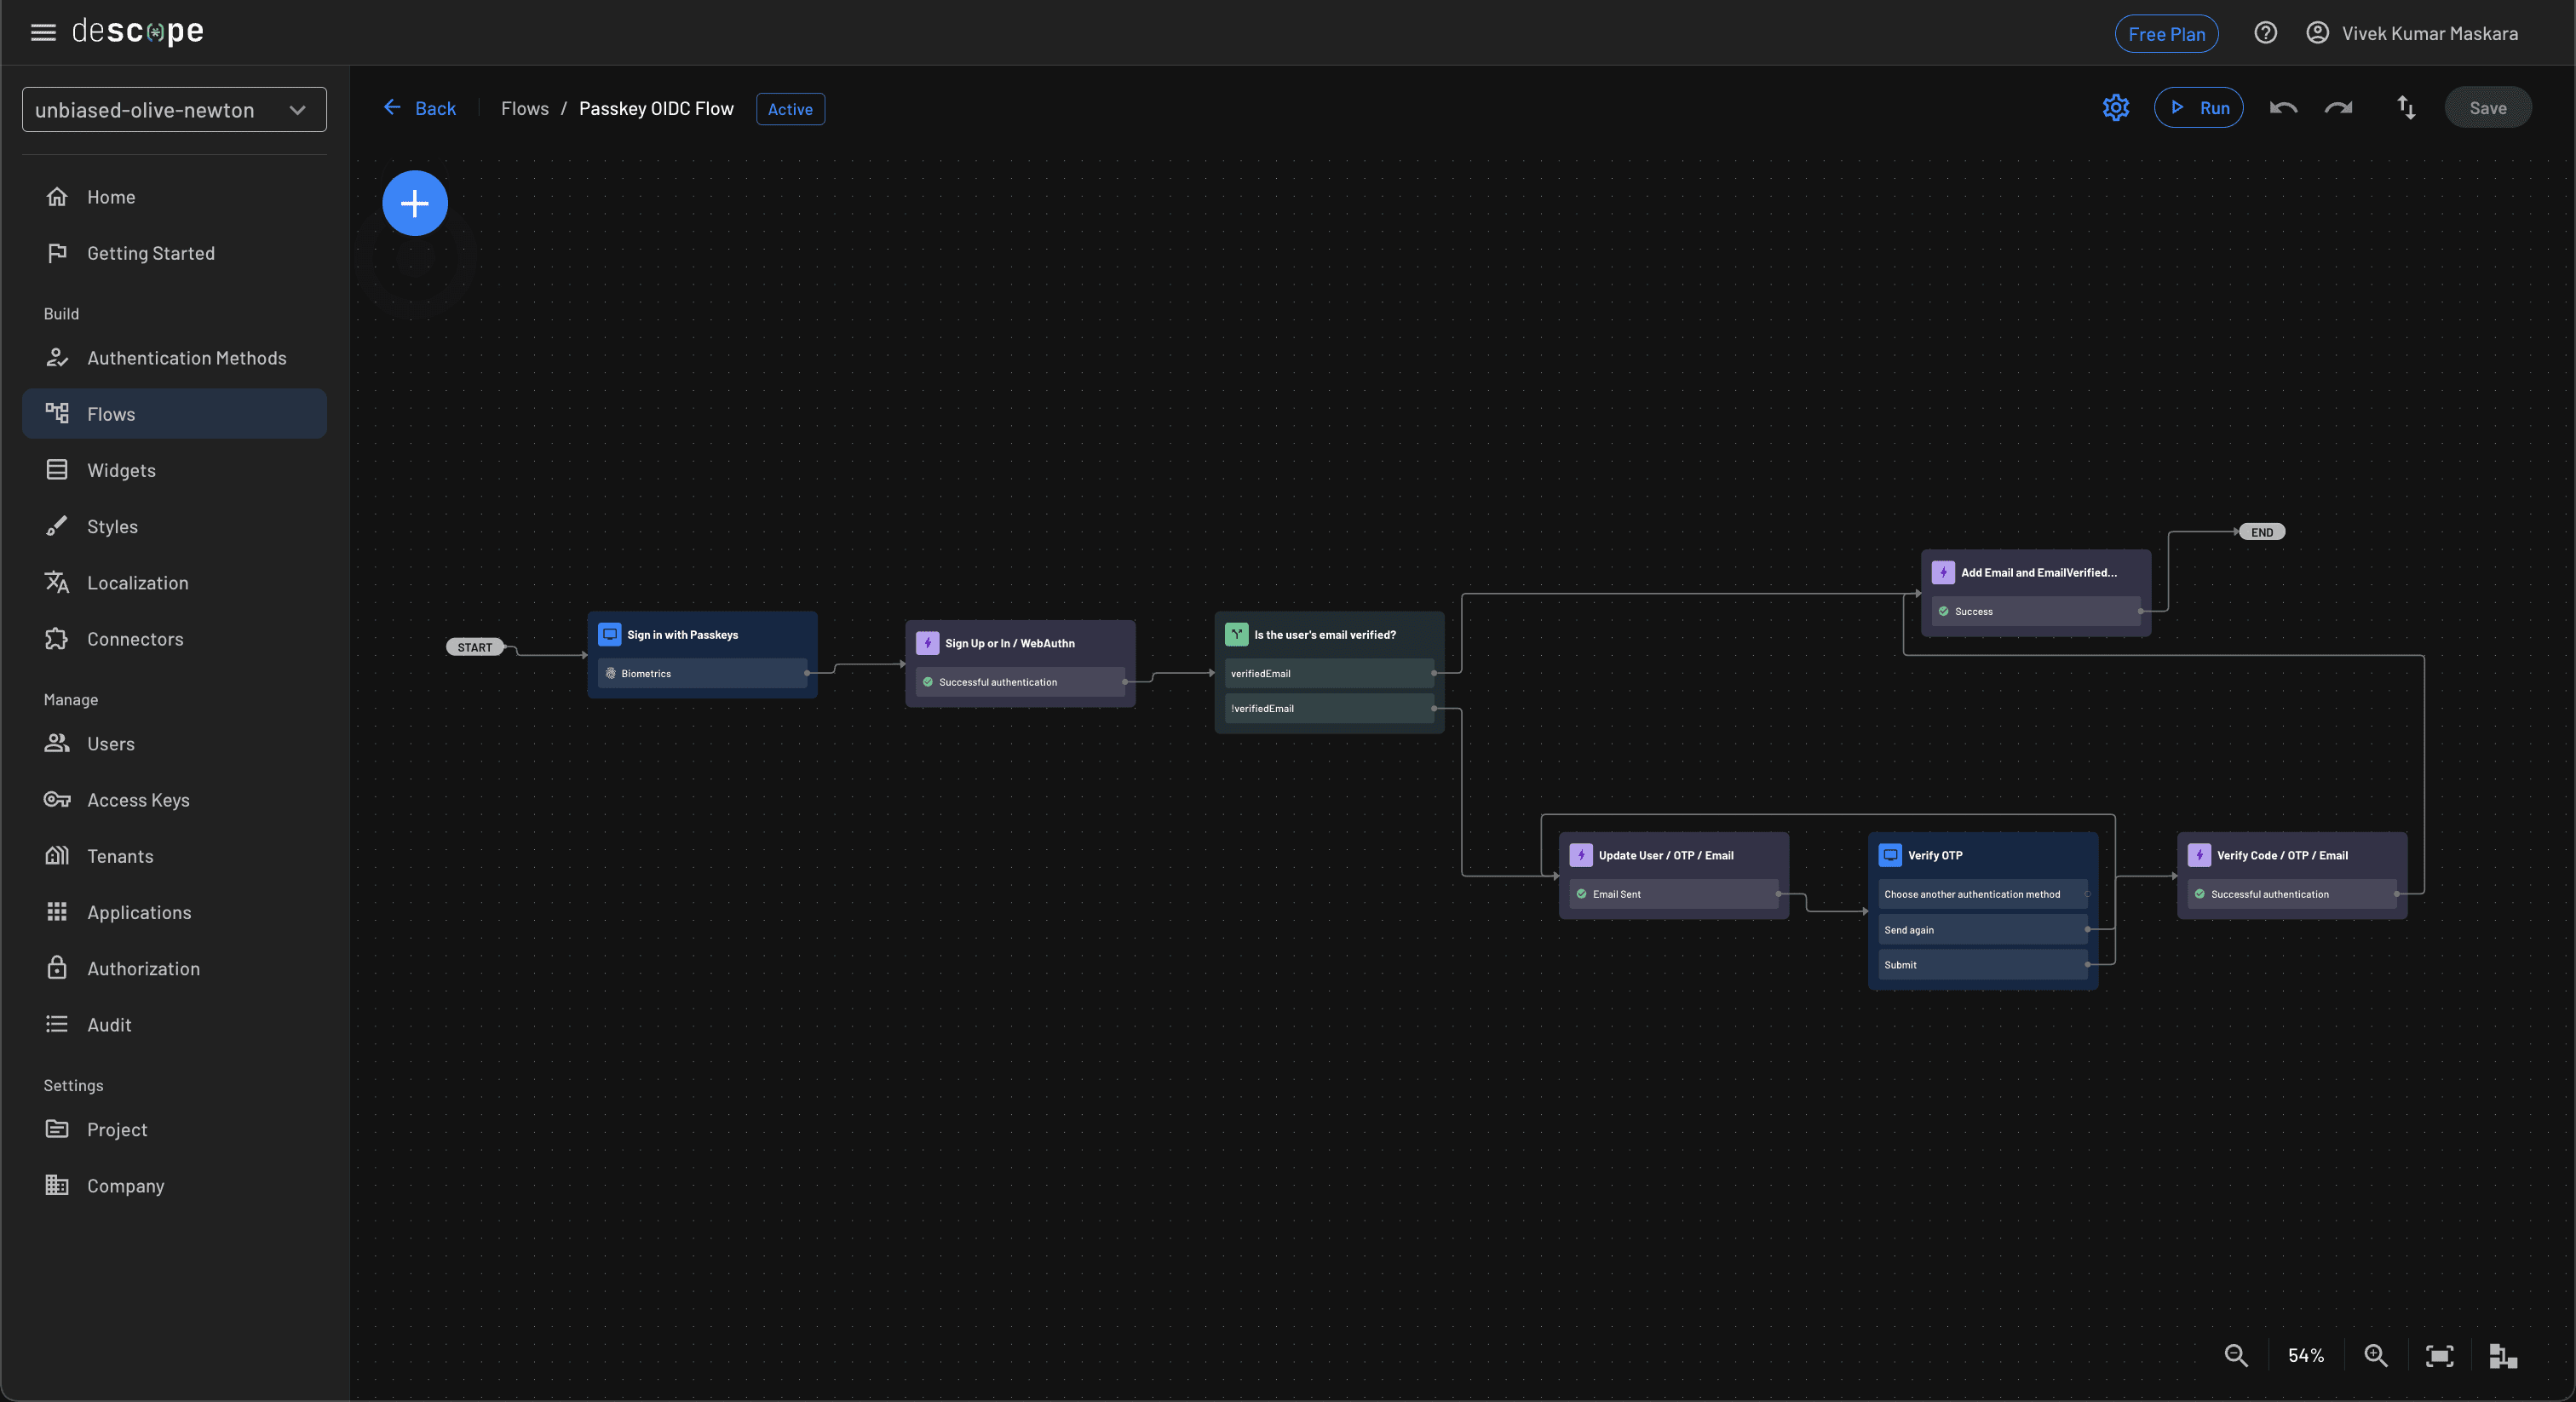
Optionally, you can customize the flow based on your application’s requirements using Descope’s visual flow editor.
Configure the OIDC application
Navigate to the Applications tab and click the OIDC default application to edit it. On the application details page, update the flow parameter in the Flow Hosting URL to oidc-flow. The updated Flow Hosting URL looks similar to this:
https://auth.descope.io/<project_id>?flow=oidc-flowCreate an access key
Access keys enable secure machine-to-machine authentication, allowing other services or devices to access your application securely. You'll need an access key for the Descope application while configuring the OIDC plugin in your Kubernetes cluster.
To create an access key, navigate to the Access Keys tab and click + Access Key. Enter a name for the access key and click Generate Key to generate a new key:
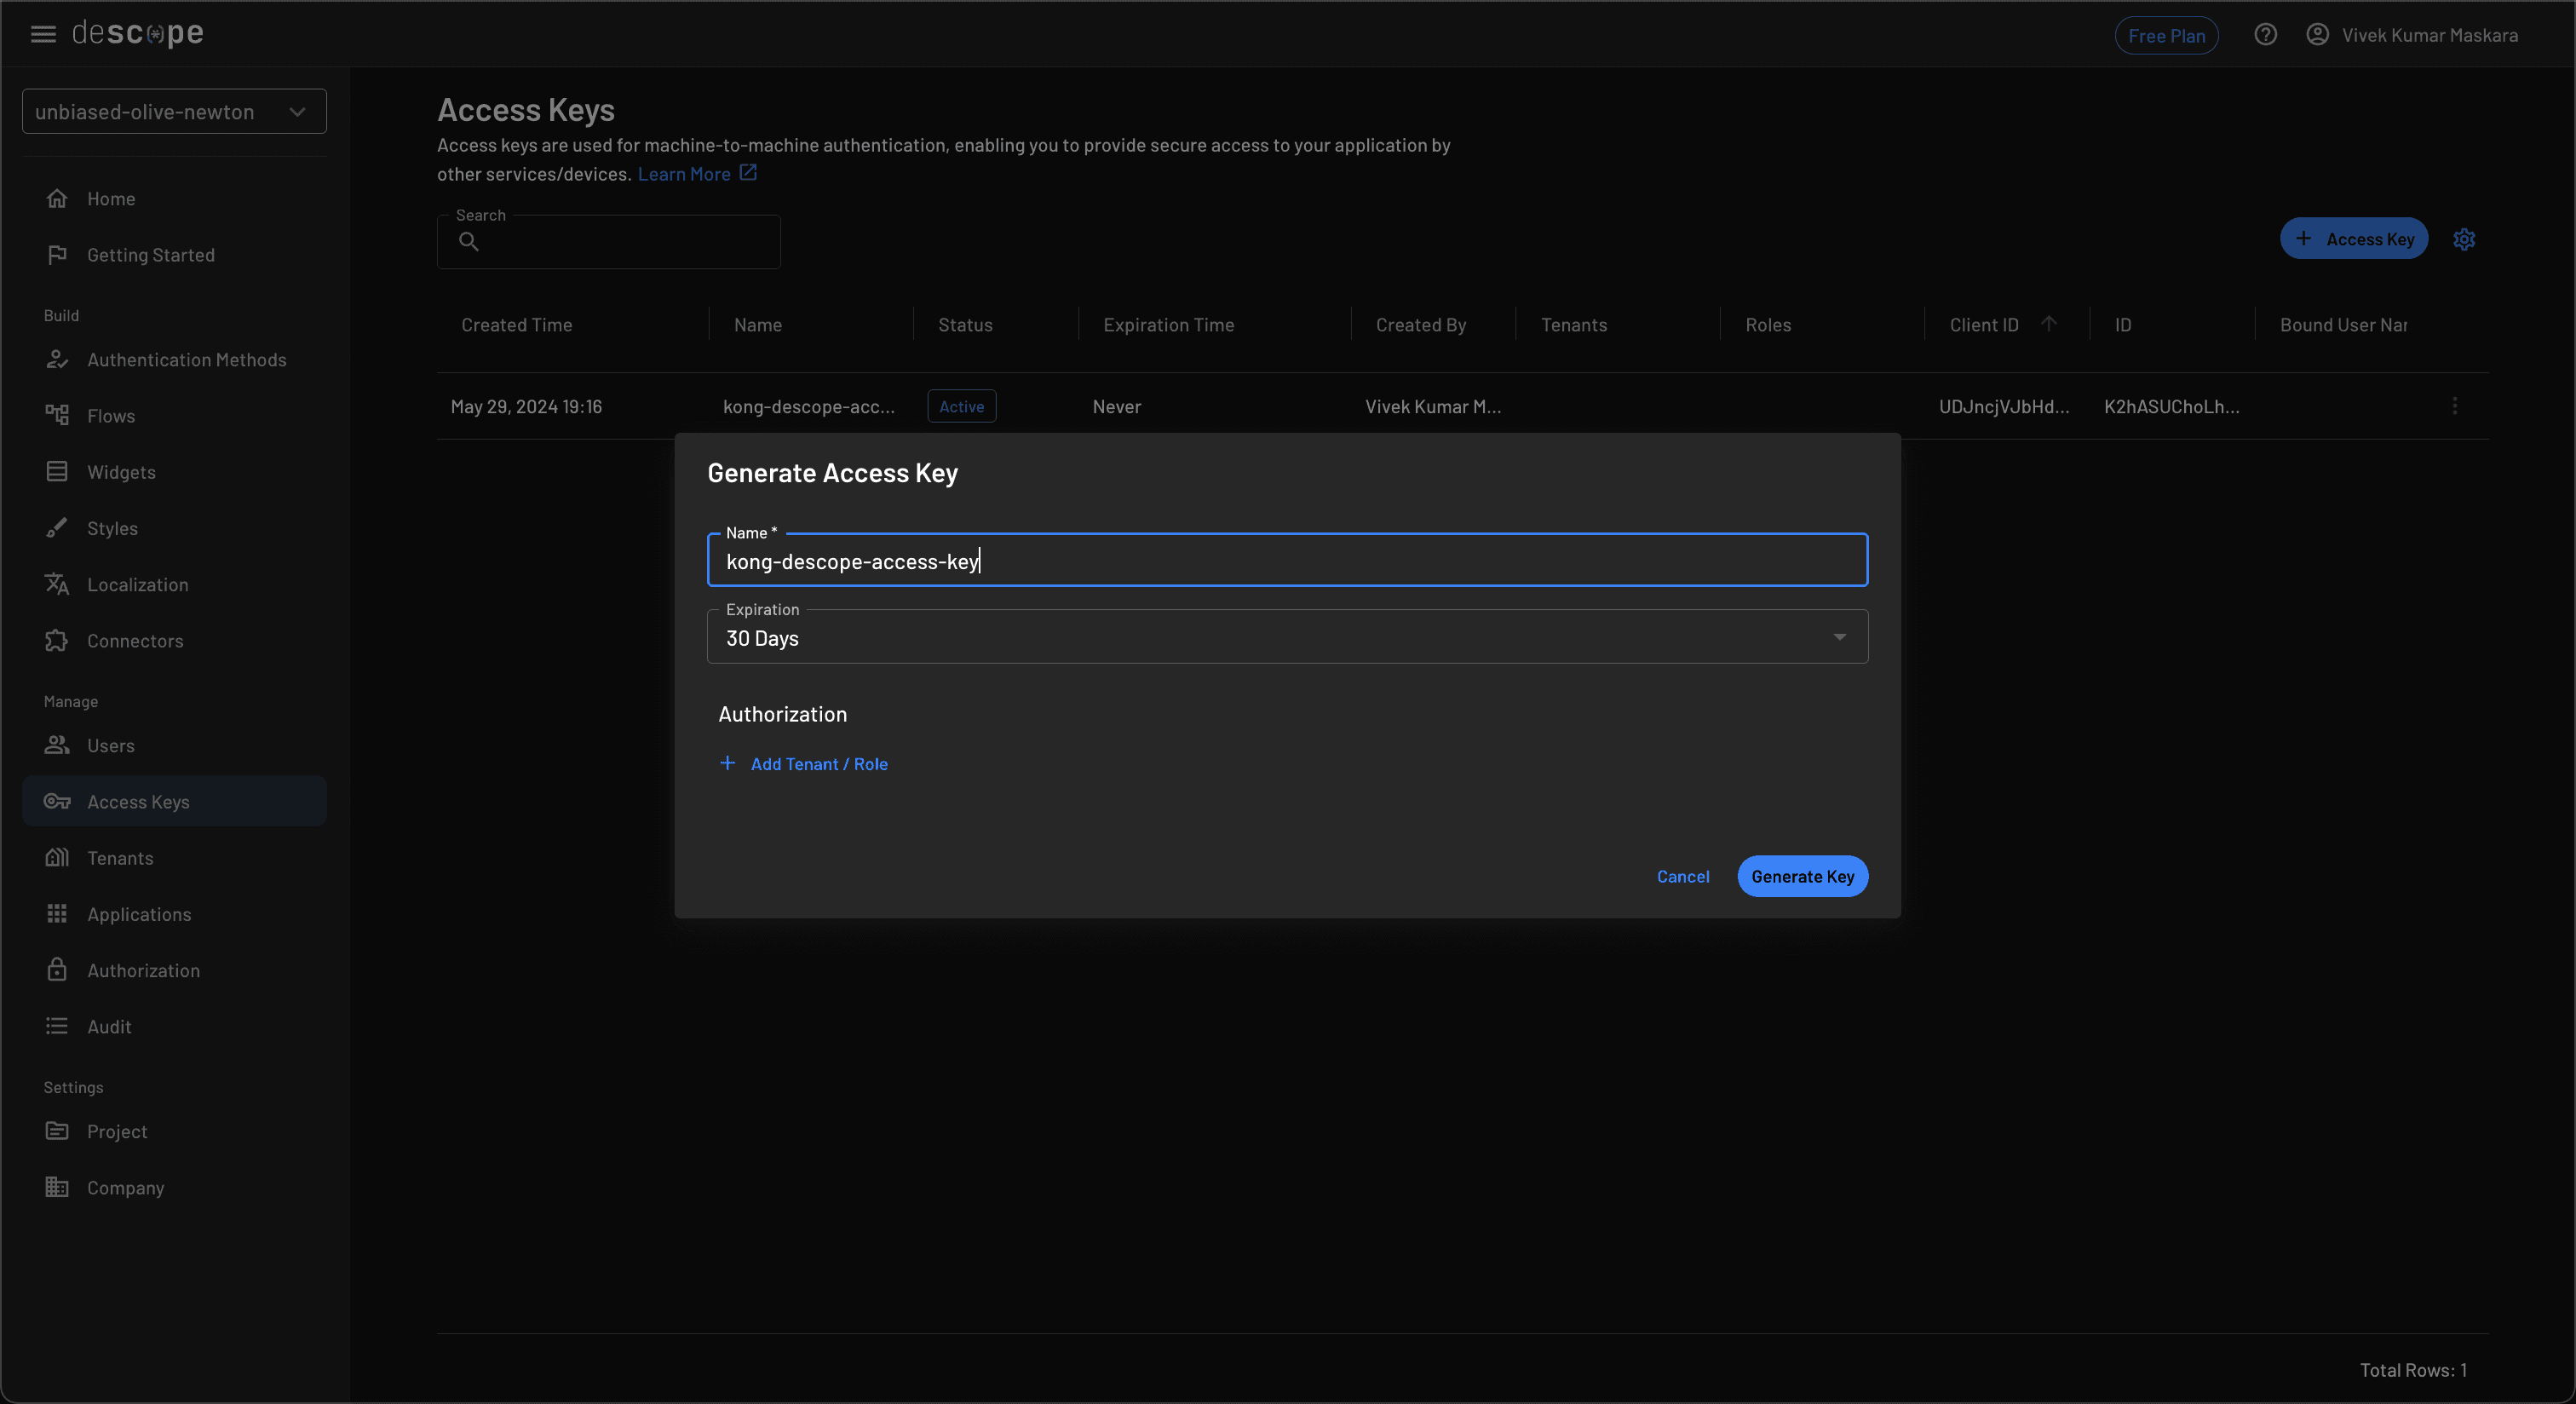
Make sure to copy the generated key before closing the modal as this won’t be displayed again on the Descope portal.
Add custom claims
To make Descope authentication work with the Kong Gateway, you need to add a custom azp (authorized party) claim to the JWT. The azp claim is used in JWTs to identify the client or entity authorized to use the access token. Follow these steps to add a custom claim:
Navigate to
Project > JWT Templatesin the Descope portal.Click
JWT Templateto create a new template and chooseDefault User JWTfrom the list.On the edit screen, add a custom claim with key
azpand valueproject.idas shown in the screenshot.

Set up the OIDC plugin in Kong
The Kong OIDC plugin integrates with OIDC providers to enable secure authentication and authorization for APIs. It manages user sessions, validates tokens, and handles token exchange, ensuring that only authenticated users can access protected resources. This plugin simplifies the implementation of OAuth 2.0 and OIDC standards, providing a robust security layer for API endpoints.
You can now add the Kong OIDC plugin to your Kubernetes cluster to use the Descope OIDC flow.
Create a kong-oidc-plugin.yaml file in the root of the project and add the following content:
apiVersion: configuration.konghq.com/v1
kind: KongPlugin
metadata:
  name: oidc-auth
config:
  issuer: <DESCOPE_ISSUER_URL>
  client_id:
  - <DESCOPE_CLIENT_ID>
  client_secret:
  - <DESCOPE_CLIENT_SECRET>
  redirect_uri:
  - http://127.0.0.1.nip.io/echo
  auth_methods:
  - authorization_code
  display_errors: true
  token_endpoint_auth_method: "client_secret_post"
  scopes:
  - openid
  - descope.custom_claims
  filters:
    - claim: groups
      match: .*
      value_from: claims
      type: access_token
plugin: openid-connect
Replace these placeholder values in the configuration file:
DESCOPE_ISSUER_URLwith the DescopeIssuerURL. This value can be found underApplications > OIDC default applicationin the Descope project portal.DESCOPE_CLIENT_IDwith the DescopeProject ID. This value is found underProject > Generalin the Descope project portal.DESCOPE_CLIENT_SECRETwith the access key you created in the previous step.
To create the plugin, execute the following command in your project’s root:
kubectl apply -f kong-oidc-plugin.yaml --namespace echoserverThe preceding command creates a new plugin in the echoserver namespace.
The Kong Ingress Controller uses annotations to add functionality to Kubernetes resources when no standardized configuration method is available. To annotate echoserver with the oidc-auth plugin, execute the following command:
kubectl patch ingress echoserver -p '{"metadata":{"annotations":{"konghq.com/plugins":"oidc-auth"}}}' --namespace echoserverThe preceding command creates a patch to annotate the echoserver ingress with the oidc-auth plugin. It outputs the following:
ingress.networking.k8s.io/echoserver patchedDemoing the app
Now that the Kubernetes cluster is configured with Kong and the OIDC plugin, you can test the setup.
Establish a tunnel
If you are running the Kubernetes cluster locally using minikube, you can execute the following command to create a tunnel that exposes the services on the localhost:
minikube tunnelThe output of the command above would be similar to the following:
✅  Tunnel successfully started

📌  NOTE: Please do not close this terminal as this process must stay alive for the tunnel to be accessible ...

❗  The service/ingress kong-gateway-proxy requires privileged ports to be exposed: [80 443]
🔑  sudo permission will be asked for it.
🏃  Starting tunnel for service kong-gateway-proxy.
❗  The service/ingress kong-proxy requires privileged ports to be exposed: [80 443]
🔑  sudo permission will be asked for it.
🏃  Starting tunnel for service kong-proxy.
❗  The service/ingress echoserver requires privileged ports to be exposed: [80 443]
🔑  sudo permission will be asked for it.
🏃  Starting tunnel for service echoserver.
Keep the tunnel running and open a new terminal window to verify whether an external IP address was assigned to your Kong services. Execute the following command to get the services:
kubectl get services --namespace kongIt should display that 127.0.0.1 is assigned as the external IP for the kong-gateway-proxy and kong-proxy services. Note that if the address is different from 127.0.0.1, you need to update the redirect URL and reapply the configuration:
--- OUTPUT TRIMMED ---
kong-gateway-proxy                   LoadBalancer   10.111.95.63     127.0.0.1     80:30744/TCP,443:30724/TCP      14d
kong-proxy                           LoadBalancer   10.100.121.243   127.0.0.1     80:31590/TCP,443:32147/TCP      4d11h
--- OUTPUT TRIMMED —
Test the echoserver
The echoserver API endpoints should be accessible only after OIDC authentication. If you hit the /echo endpoint, it should redirect you to Descope for authentication before processing the request. To test the echoserver /echo endpoint, open the following URL in a web browser:
http://127.0.0.1.nip.io/echoNotice that the URL uses the nip.io format, as it provides wildcard DNS for any IP address. When you hit the URL, you are redirected to the Descope login page, as shown in the screenshot:
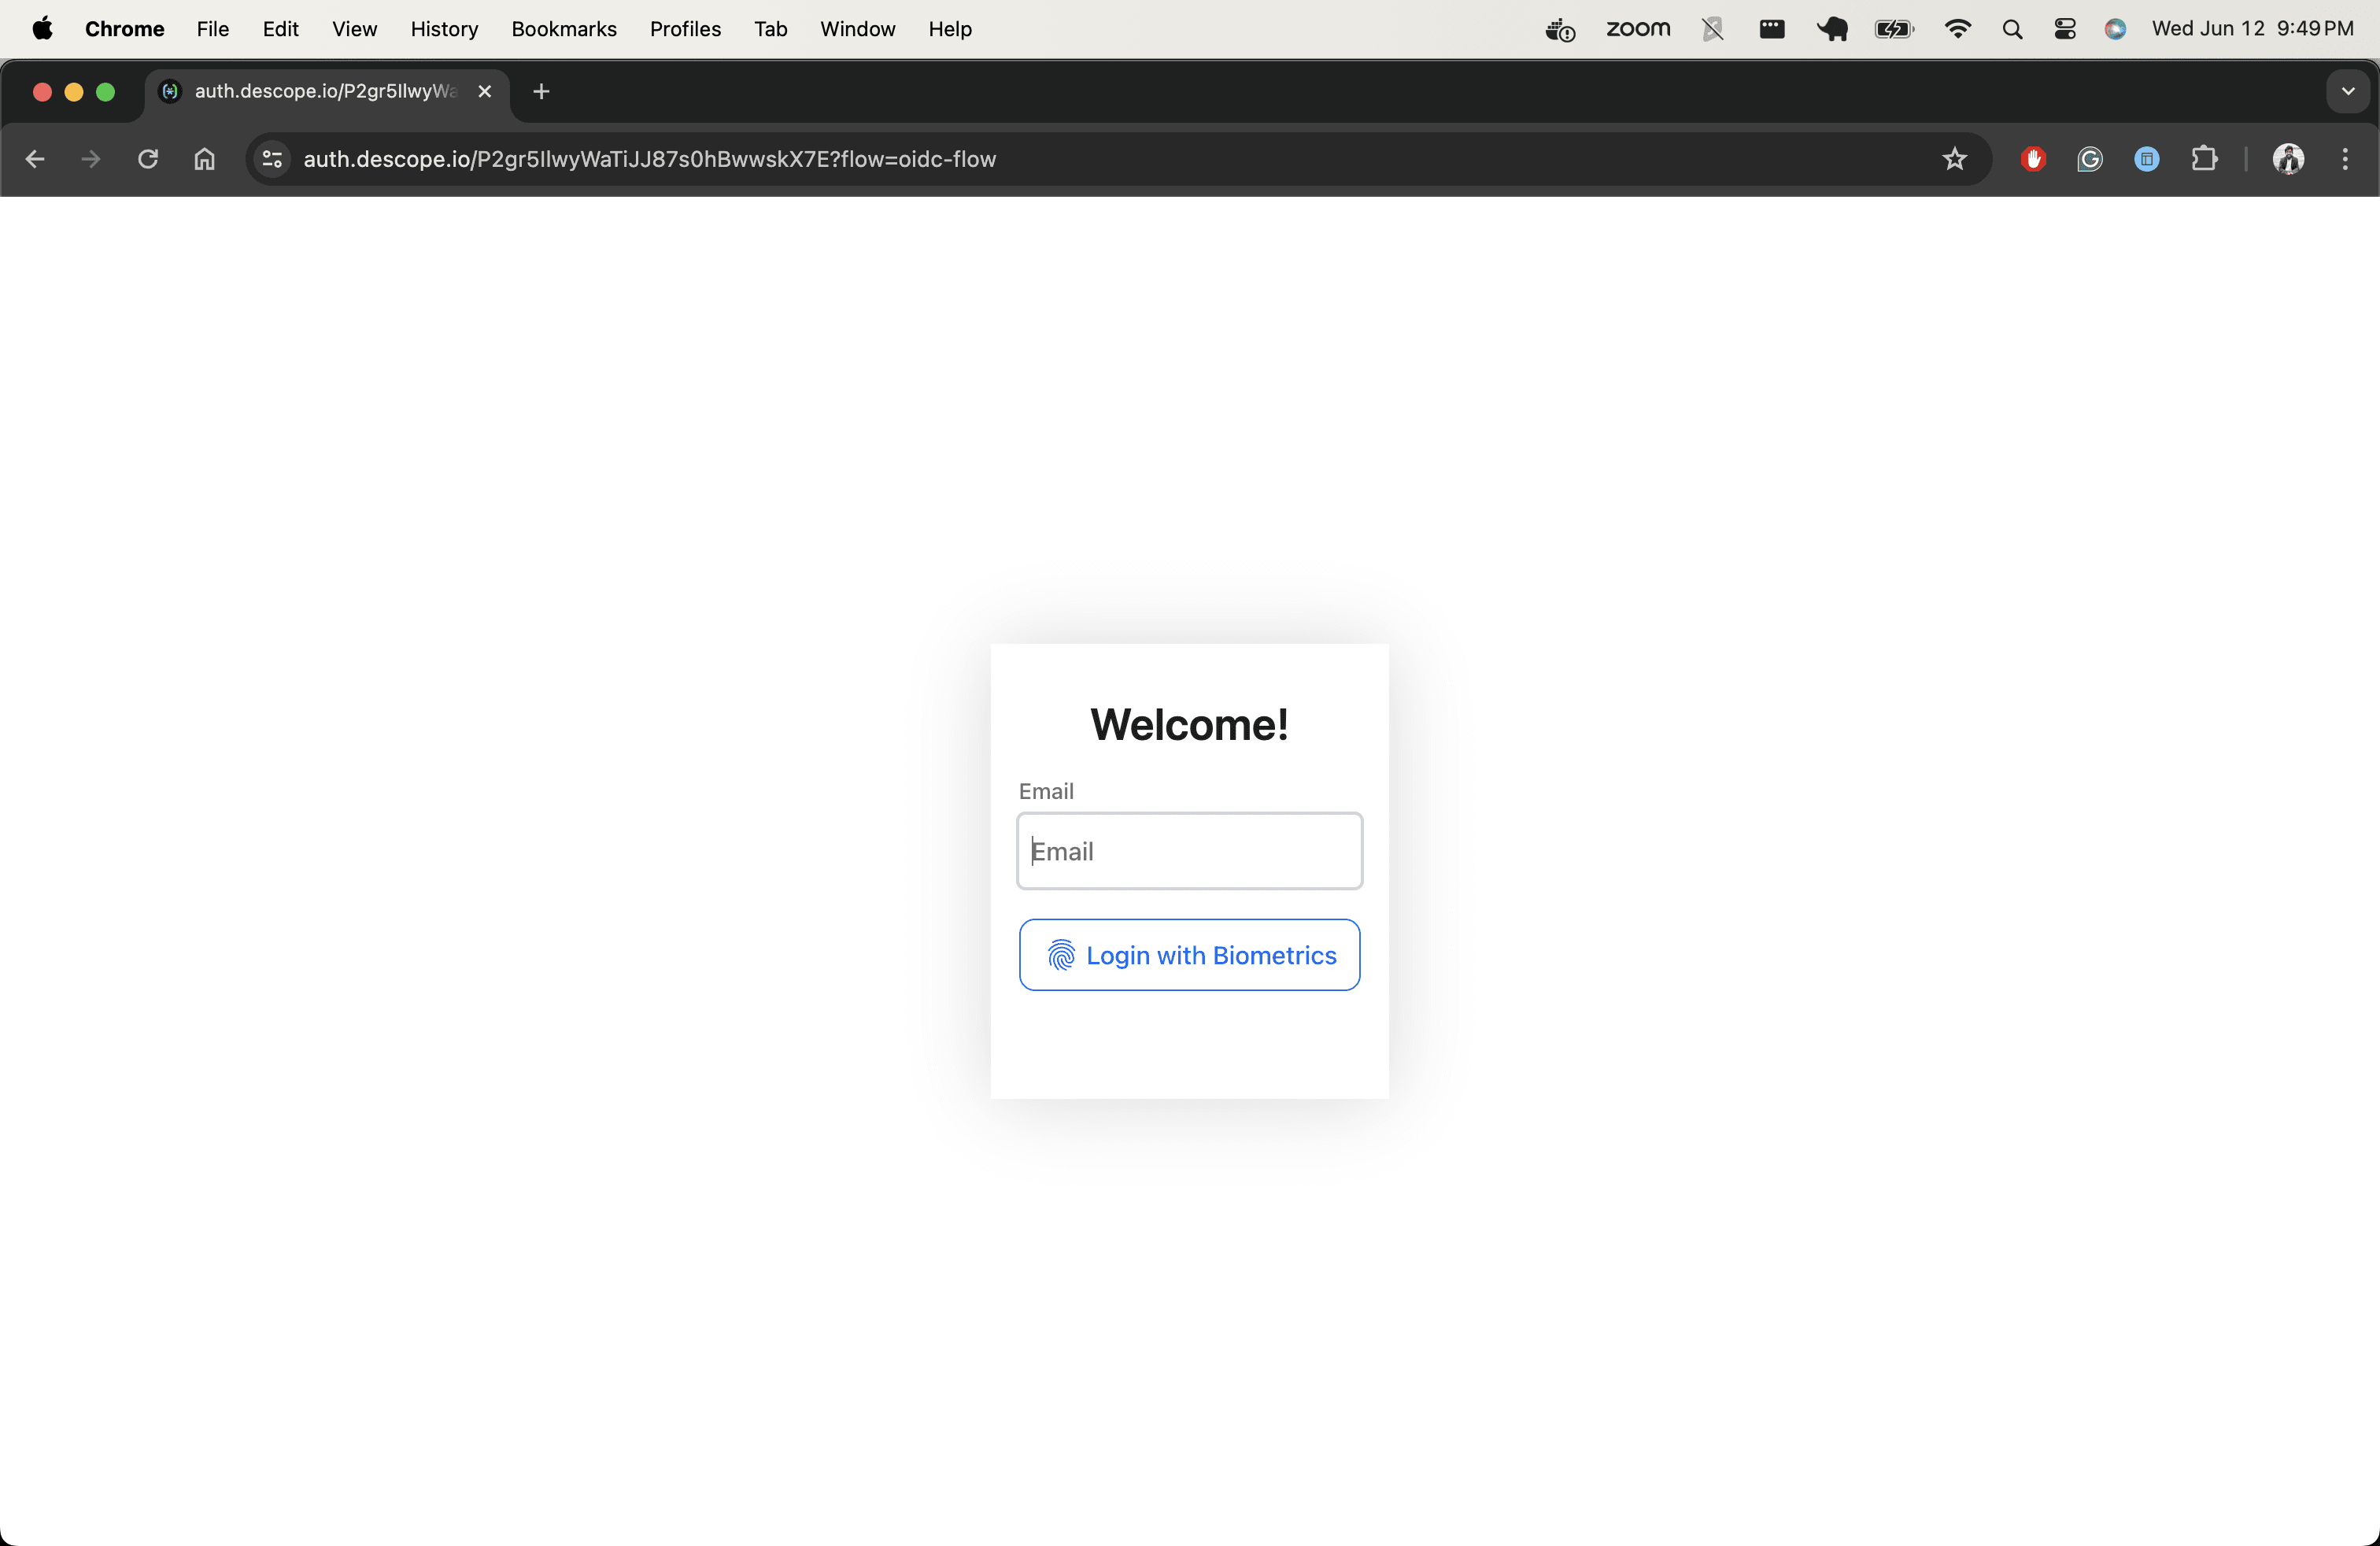
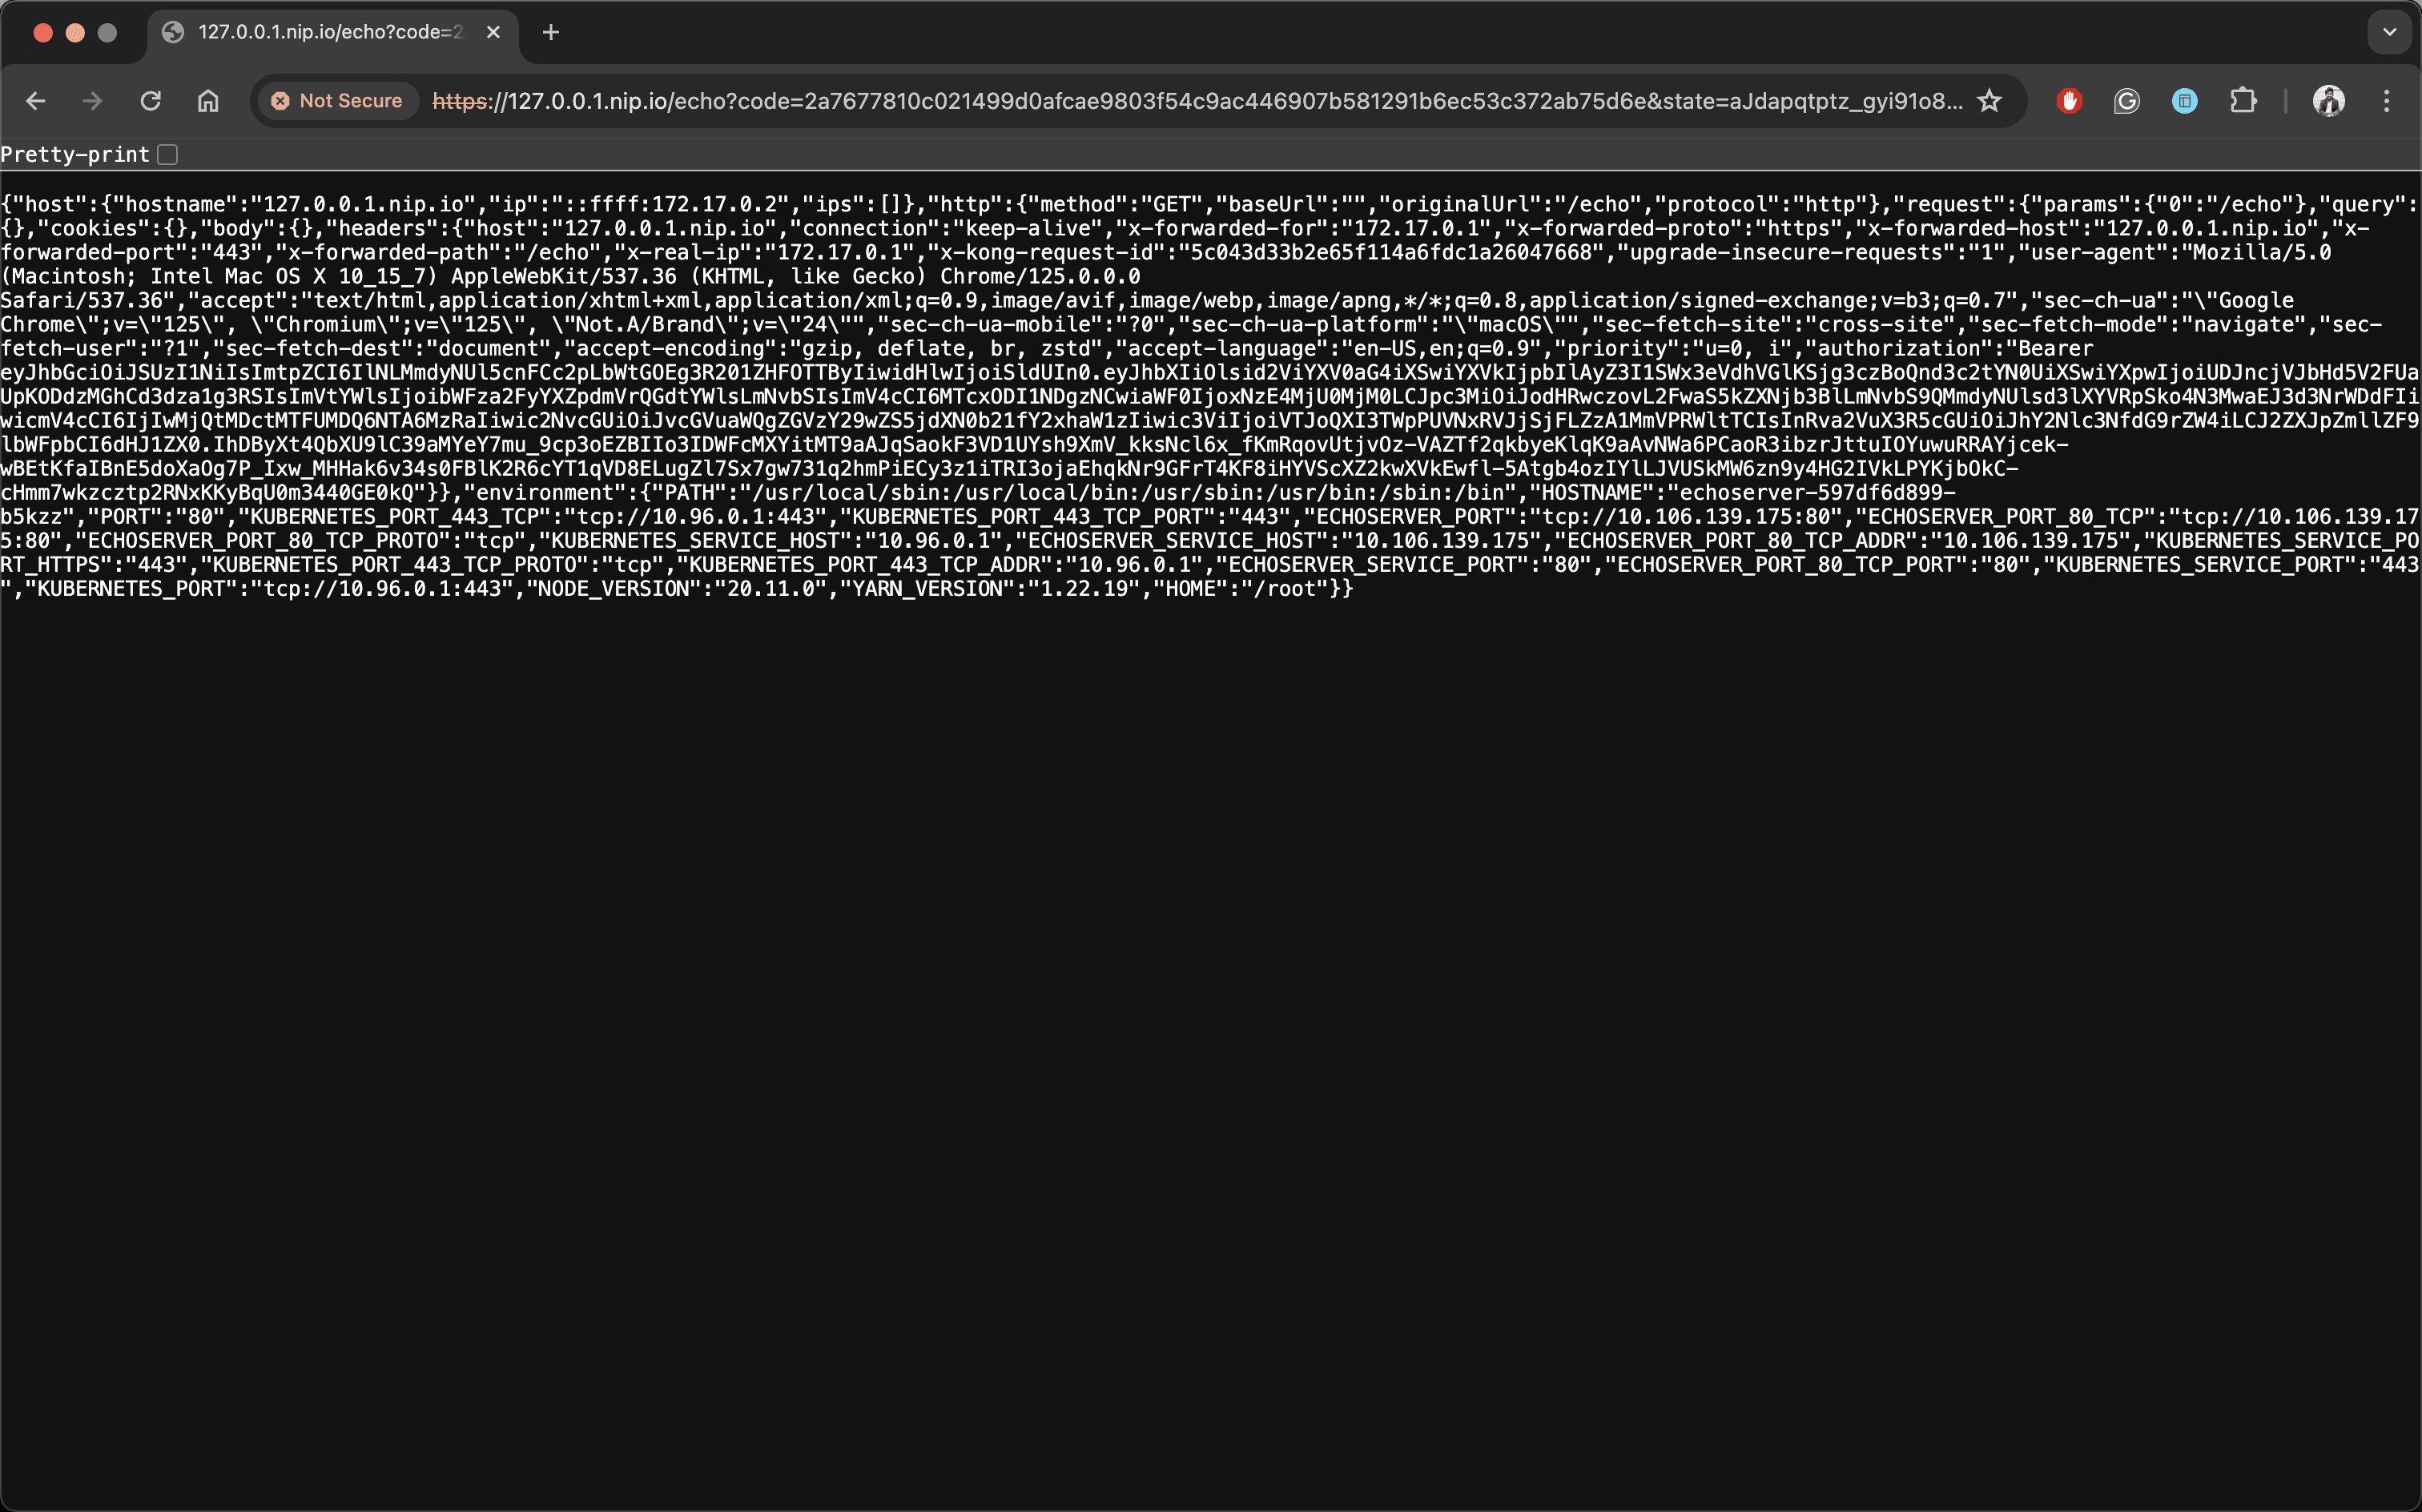
Enter your email ID to proceed with authentication. If a passkey doesn’t exist for the specified email ID, you are prompted to generate a passkey on your machine; otherwise, it proceeds with passkey verification and redirects you back to the /echo endpoint. Now that the /echo endpoint contains the authorization code grant, Kong uses it to exchange it with the access_token from the IDP (ie Descope). Finally, the web browser displays the response of the /echo API endpoint:
Conclusion
The Kong Gateway is a cloud-native solution that efficiently manages, secures, and routes API requests for decentralized applications. Integrating Descope authentication with Kong simplifies the authentication process by centralizing user verification and leveraging OIDC-compliant JWTs for secure, streamlined access management.
In this article, you learned how to implement authentication using the Kong Gateway and Descope flows. You can find this tutorial’s complete source code on GitHub.
Sign up for a free Forever Descope account and request a demo to learn more.