

Table of Contents
Don't have the time to read the entire post? Our human writers will be sad, but we understand. Summarize the post with your preferred LLM here instead.
If you’ve built a Next.js app using Supabase and want to modernize your authentication experience, adding passkeys with Descope is a great next step.
Passkeys offer a secure, passwordless login method that uses device biometrics, like Face ID, fingerprint scanners, or Yubikeys. Combined with Descope’s seamless authentication flows and Supabase, you can deliver a frictionless and secure login experience with minimal effort.
In this step-by-step tutorial, we'll show you how to quickly integrate Descope into your existing Supabase setup, allowing you to leverage powerful authentication flows and seamless passkey support.
You’ll learn how to:
Replace a Supabase Auth-based implementation with Descope
Generate Supabase-compatible JWTs from Descope session JWTs
Add passkeys to your authentication flow
Continue using Supabase’s Row Level Security (RLS) with minimal changes
Read more: Developer Guide: How to Implement Passkeys
Why use passkeys with Descope?
Supabase is an open-source alternative to Firebase, offering backend services such as authentication, real-time databases, and serverless functions. Built on Postgres, it provides a scalable and reliable foundation for modern applications.
While Supabase’s authentication options are robust, they don’t include passkeys by default. Additionally, adding passkeys to Supabase Auth typically requires complex manual setup. Descope offers simple passkey implementation powered by a drag & drop authentication flow editor.
Descope passkeys provide passwordless authentication leveraging built-in device biometrics (e.g., smartphones with facial and fingerprint scanners or YubiKeys). This offers two distinct advantages over traditional passwords:
Enhanced security: Passkeys remove the risk of phishing attacks, credential theft, and password reuse.
Smooth user experience: Users authenticate quickly with their device's biometrics—no credentials to remember or manage.
Let’s explore how Descope and Supabase work together to enhance security while keeping the developer experience seamless.
Integrating Descope passkeys into your Supabase app
The source code for this tutorial is available in the Descope + Supabase Next.js Sample App repository. Follow the README instructions to install the required dependencies.
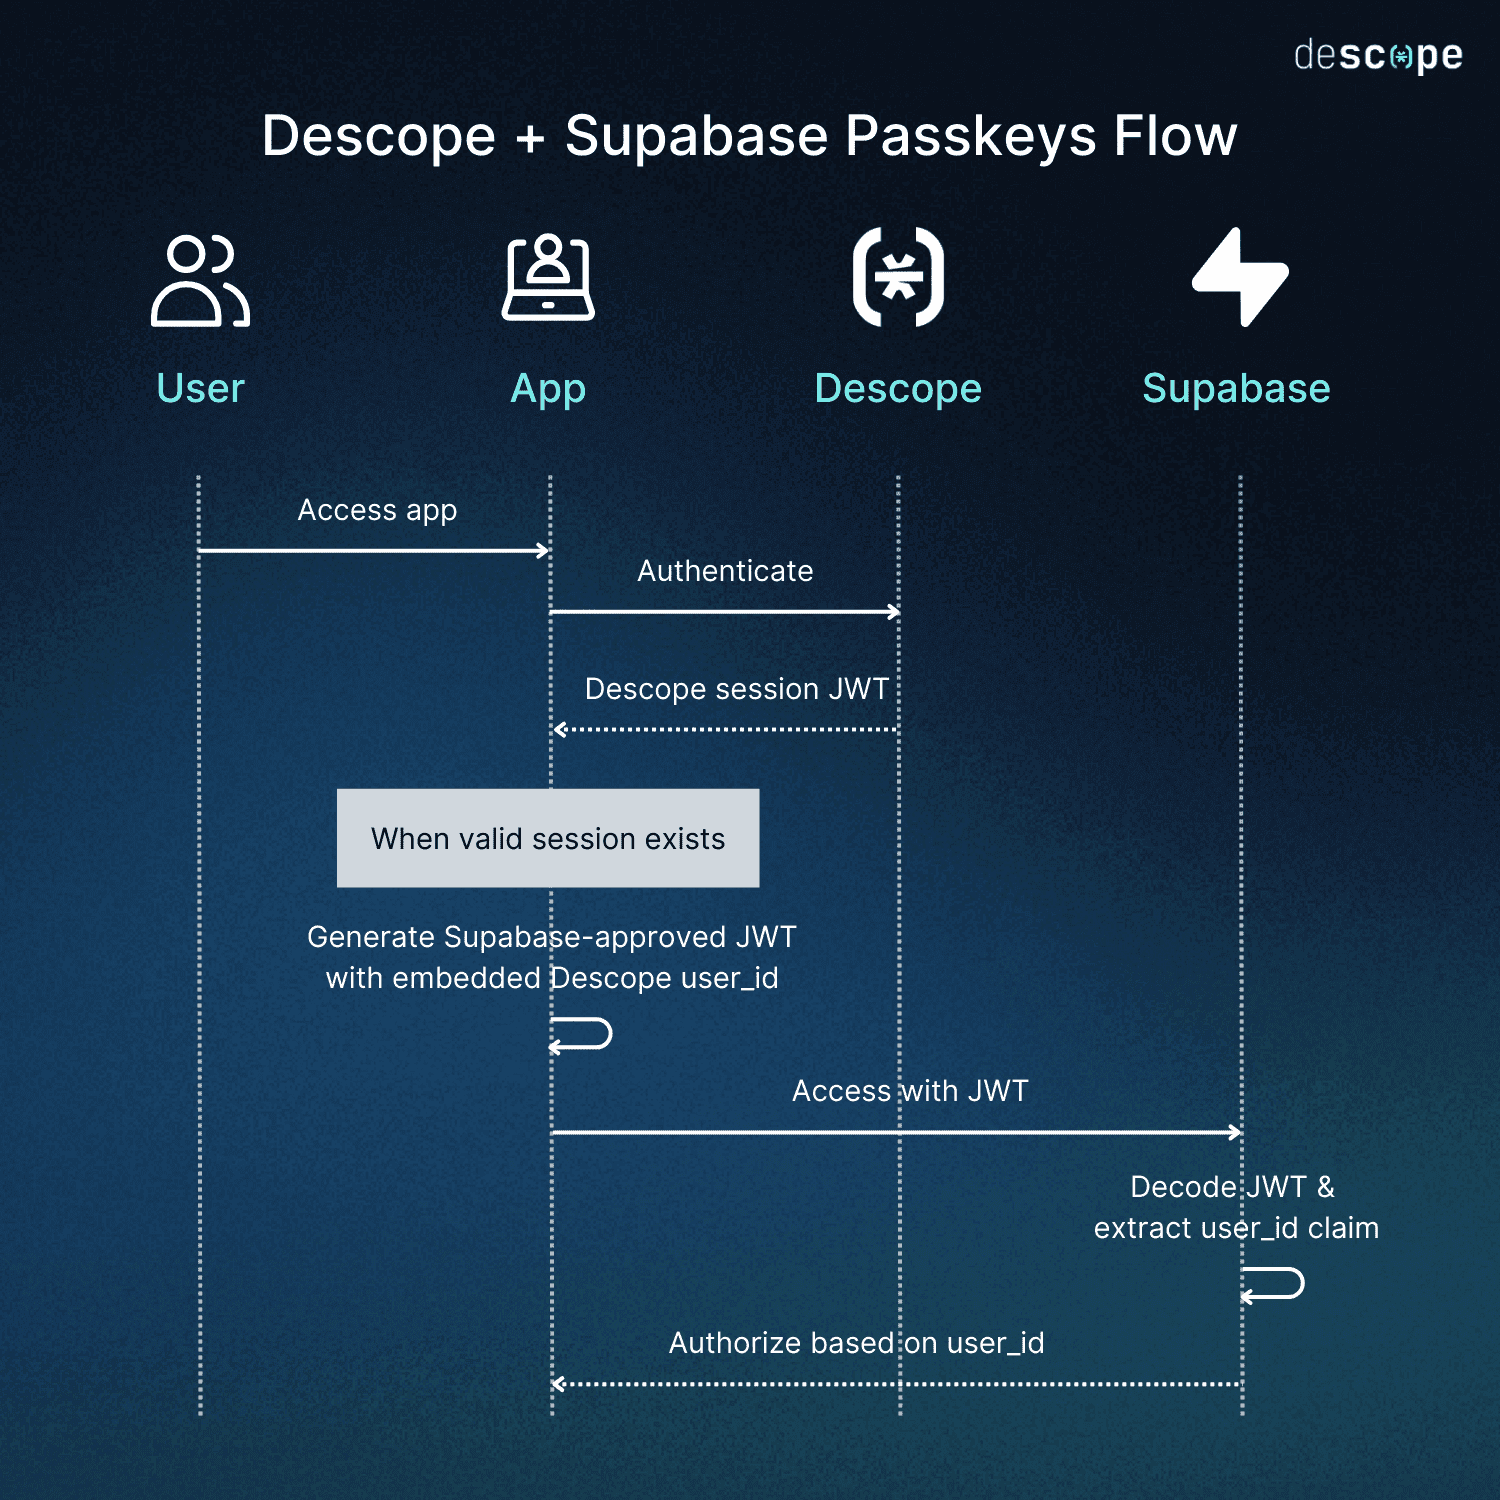
Here’s an overview of how the sample app operates:
The Descope Next.js SDK is used in the frontend to manage authentication and create a Descope session JWT.
The app generates a Supabase-approved JWT using
joseand the Supabase JWT secret, embedding the Descope user ID in the token.Supabase decodes the JWT, extracts the
user_id claim, and uses it to identify the user.The session is managed with Descope in the frontend, and the app creates a Supabase JWT only when a valid session exists.
Following this setup, we can leverage Descope-based user details to enforce access control in our application.
Step 1: Install the Descope Next.js SDK
First, add the Descope SDK to your existing project:
npm install @descope/nextjs-sdk
# or
yarn add @descope/nextjs-sdk
Next, create a .env.local file (if you haven’t already) and add your Descope project credentials:
NEXT_PUBLIC_DESCOPE_PROJECT_ID=<your-descope-project-id>
NEXT_PUBLIC_DESCOPE_FLOW_ID=<your-descope-flow-id>
You’ll find these values in the Descope Console under Project Settings.
Step 2: Replace your current auth with Descope
Now replace your existing login logic with the Descope Flow component from the SDK. This will handle all authentication (including passkeys) using your configured Descope Flow.
Here’s an example using pages/index.tsx:
// pages/index.tsx
import { Descope } from '@descope/nextjs-sdk';
import { useDescope, useSession } from '@descope/nextjs-sdk/client';
import TodoList from '@/components/TodoList';

export default function Home() {
  const { isAuthenticated } = useSession();
  const { logout } = useDescope();

  return (
    <>
      {!isAuthenticated ? (
        <Descope flowId={process.env.NEXT_PUBLIC_DESCOPE_FLOW_ID} />
      ) : (
        <>
          <TodoList />
          <button onClick={() => logout()}>Logout</button>
        </>
      )}
    </>
  );
}
At this point, your app now uses Descope to create authenticated sessions. However, Supabase expects a JWT signed with your project’s secret, so we’ll handle that next.
Step 3: Generate a Supabase-compatible JWT after Descope login
Once a user logs in with Descope, Supabase still requires a JWT that is signed with your Supabase project's secret. This token must include a valid sub claim, which Supabase uses to authorize database access—particularly when using Row Level Security (RLS).
To enable this integration, you will:
Extract the
user_idfrom the Descope session.Send it to a secure backend route that generates a Supabase-compatible JWT.
Initialize the Supabase client on the frontend with the returned token.
Create the /api/create-jwt.ts endpoint
This backend route accepts a Descope userId, signs it using your Supabase JWT secret, and returns a token Supabase can validate.
// pages/api/create-jwt.ts
import { SignJWT } from 'jose';

export default async function handler(req, res) {
  if (req.method === 'POST') {
    try {
      const { userId } = req.body;
      const supabaseSecret = process.env.SUPABASE_JWT_SECRET;

      const token = await new SignJWT({ sub: userId })
        .setProtectedHeader({ alg: 'HS256' })
        .sign(new TextEncoder().encode(supabaseSecret));

      res.status(200).json({ token });
    } catch (error) {
      console.error('JWT generation failed:', error);
      res.status(500).json({ error: 'JWT Generation Failed' });
    }
  } else {
    res.setHeader('Allow', ['POST']);
    res.status(405).end(`Method ${req.method} Not Allowed`);
  }
}
This ensures your Supabase database will be able to decode the JWT and apply access control logic based on the user's identity.
Initialize Supabase after Descope login
It is important to call the /api/create-jwt endpoint immediately after the Descope authentication flow completes. This is handled using the onSuccess callback of the Descope Flow component. After generating the Supabase-compatible JWT, the Supabase client is initialized and passed down as a prop to the TodoList component.
Here is the updated example in pages/index.tsx:
// pages/index.tsx
import { Descope } from '@descope/nextjs-sdk';
import { useDescope, useSession } from '@descope/nextjs-sdk/client';
import { useState } from 'react';
import { jwtDecode } from 'jwt-decode';
import { createSupabaseClient } from '@/lib/initSupabase';
import TodoList from '@/components/TodoList';
import { SupabaseClient } from '@supabase/supabase-js';
import { Database } from '@/lib/schema';

export default function Home() {
  const { isAuthenticated, sessionToken } = useSession();
  const { logout } = useDescope();

  const [supabase, setSupabase] = useState<SupabaseClient<Database> | null>(null);

  const handleLoginSuccess = async () => {
    if (!sessionToken) return;

    const decoded = jwtDecode<{ sub?: string }>(sessionToken);
    const userId = decoded?.sub;

    if (!userId) {
      console.error('Missing user ID in Descope session');
      return;
    }

    try {
      const res = await fetch('/api/create-jwt', {
        method: 'POST',
        headers: { 'Content-Type': 'application/json' },
        body: JSON.stringify({ userId }),
      });

      const { token } = await res.json();
      if (token) {
        const client = createSupabaseClient(token);
        setSupabase(client);
      }
    } catch (err) {
      console.error('Failed to generate Supabase JWT:', err);
    }
  };

  return (
    <>
      {!isAuthenticated ? (
        <Descope
          flowId={process.env.NEXT_PUBLIC_DESCOPE_FLOW_ID}
          onSuccess={handleLoginSuccess}
        />
      ) : (
        <>
          {/* The Supabase client is passed to the TodoList component here */}
          <TodoList supabase={supabase} />
          <button onClick={() => logout()}>Logout</button>
        </>
      )}
    </>
  );
}
This pattern ensures that the Supabase client is only initialized after successful authentication and is directly available to components like TodoList for securely interacting with the Supabase database using RLS policies.
Why is this flow important? Initializing Supabase immediately after the Descope login ensures that all authenticated Supabase queries are authorized using the correct JWT. This is especially important when enforcing Row Level Security policies, as Supabase uses the sub claim from the JWT to determine the user’s identity within the database.
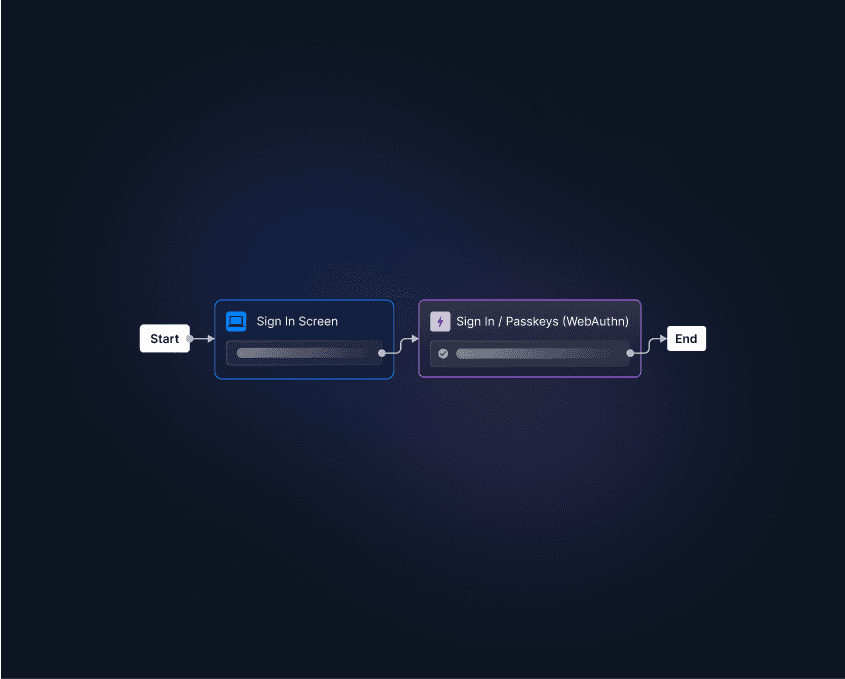
Step 4: Add passkeys to your flow
Here’s the exciting part—adding passkey support to your Descope login flow.
Go to the Descope Console > Flows.
Import the Passkeys flow template.
Drag the Passkey Login node into your existing flow as a login option.
Save and deploy the flow.
And that’s it—your app now supports secure, biometric-based login out of the box. Users can register passkeys for their devices and use them for seamless future logins.
Continue using Supabase Row Level Security (RLS)
One of Supabase’s biggest strengths is Row Level Security. When you switch to Descope for authentication, you’ll likely need to update your RLS policies and user_id types to match the Descope token format.
For example:
Descope
user_ids are usually strings (not UUIDs), so your Supabase schema and policies should reflect that.You may need to define a Postgres function to extract the
subclaim from your custom JWT.
Learn how to set up Supabase RLS and integrate Descope from scratch in our full Supabase + Descope guide.
Read more: Role-Based Access Control (RBAC) documentation.
Better UX and security without the DIY development
In this guide, we walked through how to modernize your existing Supabase application by integrating Descope for authentication. Integrating Descope passkeys into your Supabase workflow makes your user experience simpler, your app easier to maintain, and your security future-ready.
Descope offers a comprehensive, low / no-code CIAM solution that abstracts complicated coding into a visual editor. Rather than creating auth from scratch, Descope Flows make configuring complex identity processes drag & drop simple.
Sign up for a Descope Free Forever account to start upgrading your authentication and deliver a passwordless experience your users will love. You can also join our dev community, AuthTown, to connect with like-minded builders and discuss all things identity management.