
Table of Contents
Don't have the time to read the entire post? Our human writers will be sad, but we understand. Summarize the post with your preferred LLM here instead.
Your Android users expect passkeys and one-tap social sign-in. Delivering that on Firebase Auth usually means writing and maintaining more authentication code, and for social login, a clunky bounce out to the browser and back. On Android there's a better path, and it doesn't touch your Firebase backend at all.
Descope runs the whole authentication flow (passkeys, social login, and OTP) and hands your app a Firebase custom token the moment the user finishes. Pass it to signInWithCustomToken() and Firebase signs them in exactly as it always has: every Firestore rule still fires, your data never moves, and you never stand up an auth backend of your own.
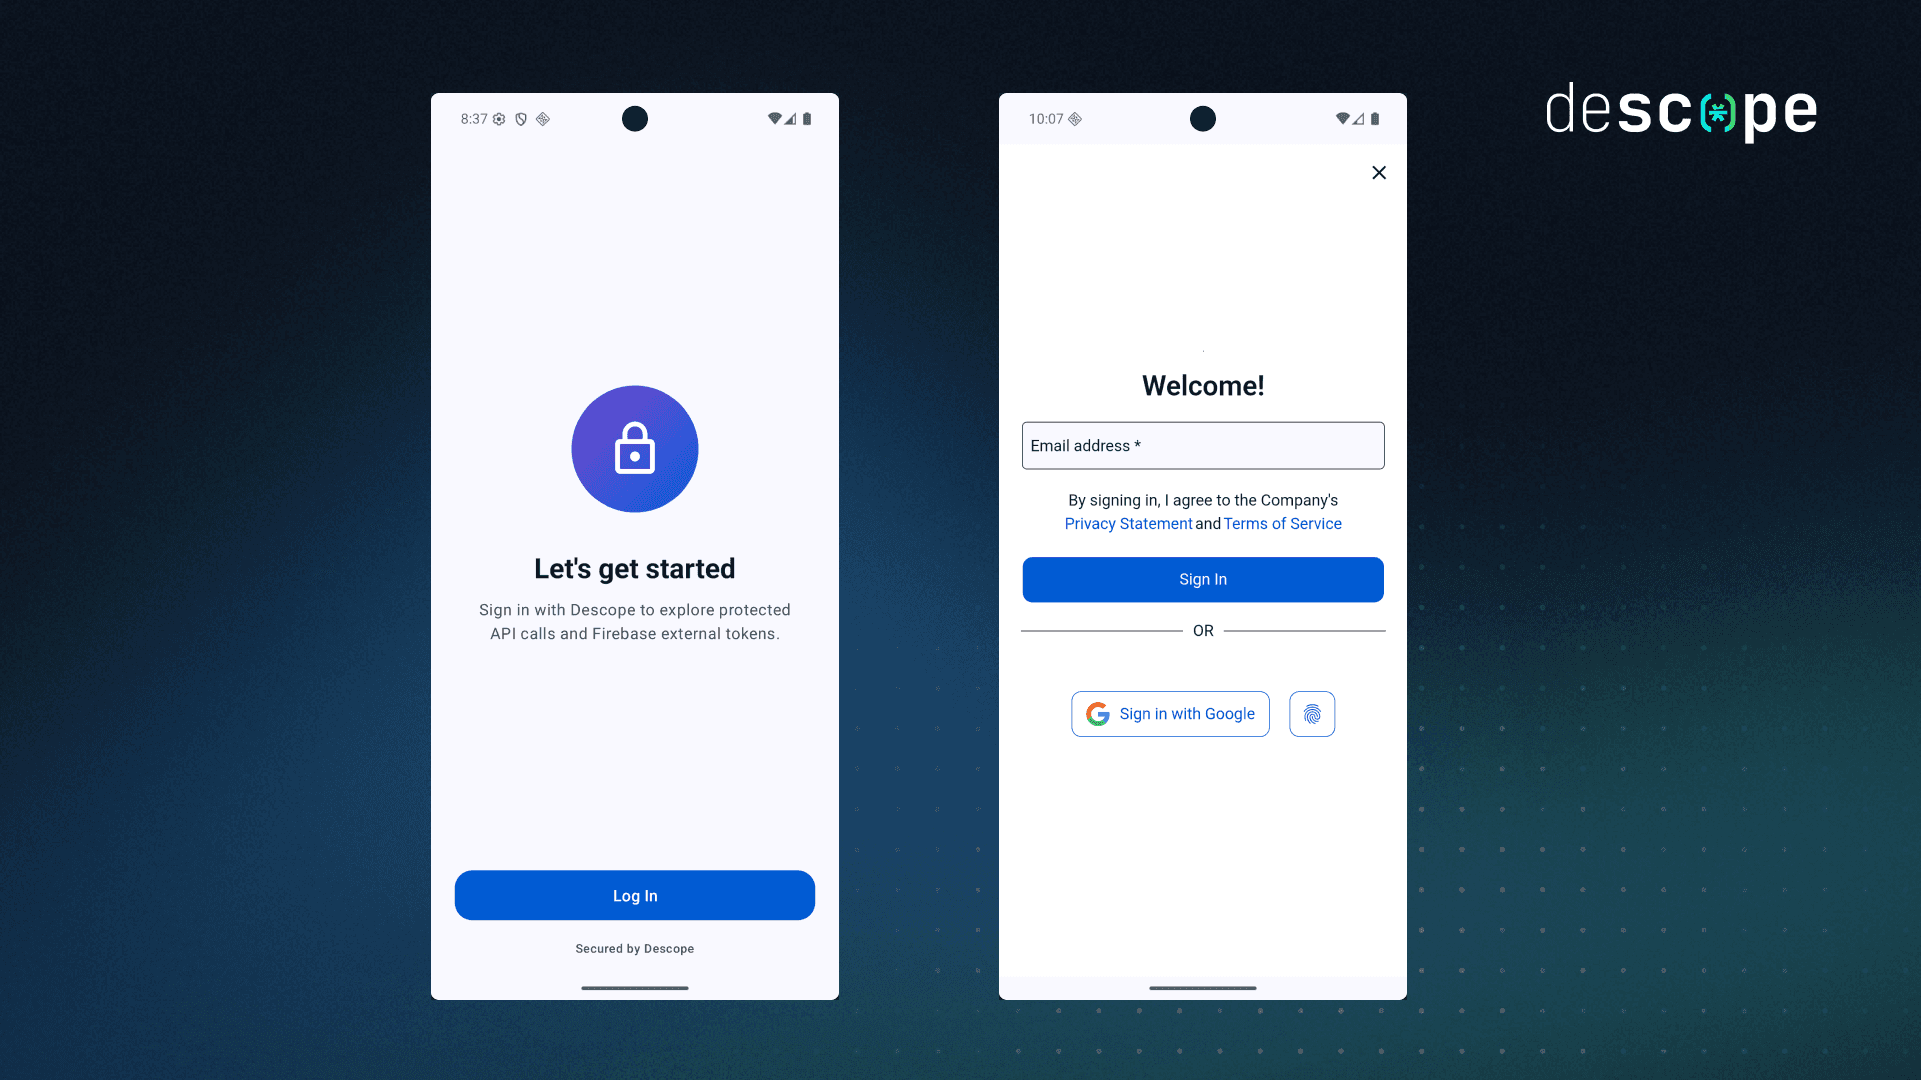
And it all happens through Descope's Native Flows, a seamless in-app authentication experience. The Kotlin SDK renders your flow in a native view and bridges WebAuthn to Android's Credential Manager, so passkeys and social login appear as the device's own system prompts instead of a web page. This guide wires it together in Kotlin, start to finish.
How the external token flow works
The mechanism is Descope's external tokens. You configure a Firebase token connector once in the Descope console. From then on, the token connector runs at the end of every login flow, mints a Firebase custom auth token for the authenticated user, and returns it inside the authentication response as externalToken (the field that carries the minted token). Your app reads that field and passes it straight to Firebase.
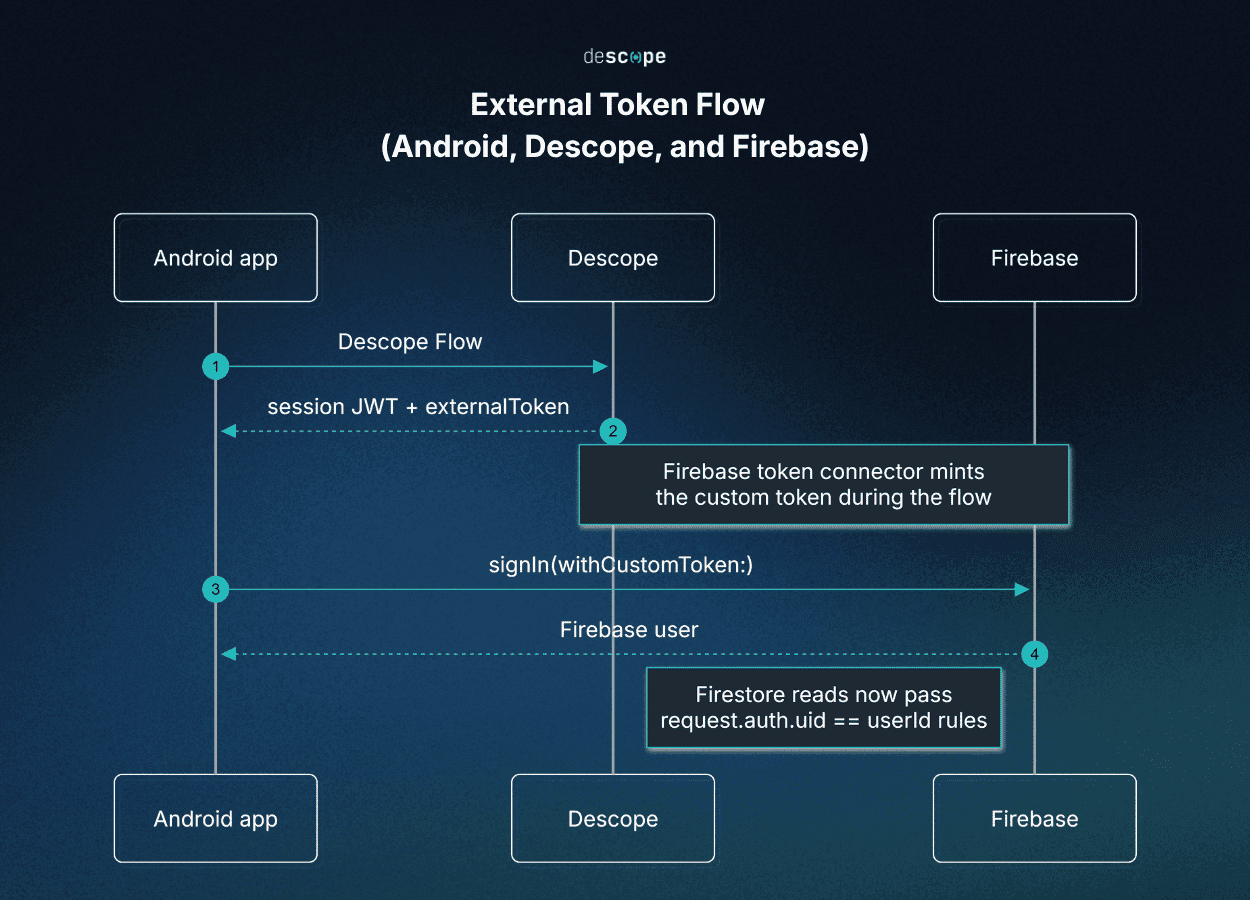
The payoff: the same user authenticates through a modern Descope flow, and your existing Firebase security rules keep authorizing them with zero backend changes.
Prerequisites
A Descope account and project (app.descope.com).
A Firebase project with Firestore enabled.
Android Studio with the Android SDK. This guide targets minSdk 28 (Android 9), which is also the minimum for passkeys.
Basic familiarity with Kotlin and the Android activity lifecycle.
Step 1: The Descope login flow
In the Descope console, the sign-up-or-in flow exists out of the box, so there is nothing to build for a basic setup. Your app runs it from a URL scoped to your project:
https://api.descope.com/login/<projectId>?flow=sign-up-or-inStep 2: Connect Firebase with a token connector
This is the step that removes the need for your own backend. Descope's token connector holds your Firebase service account credentials and mints custom tokens on your behalf.
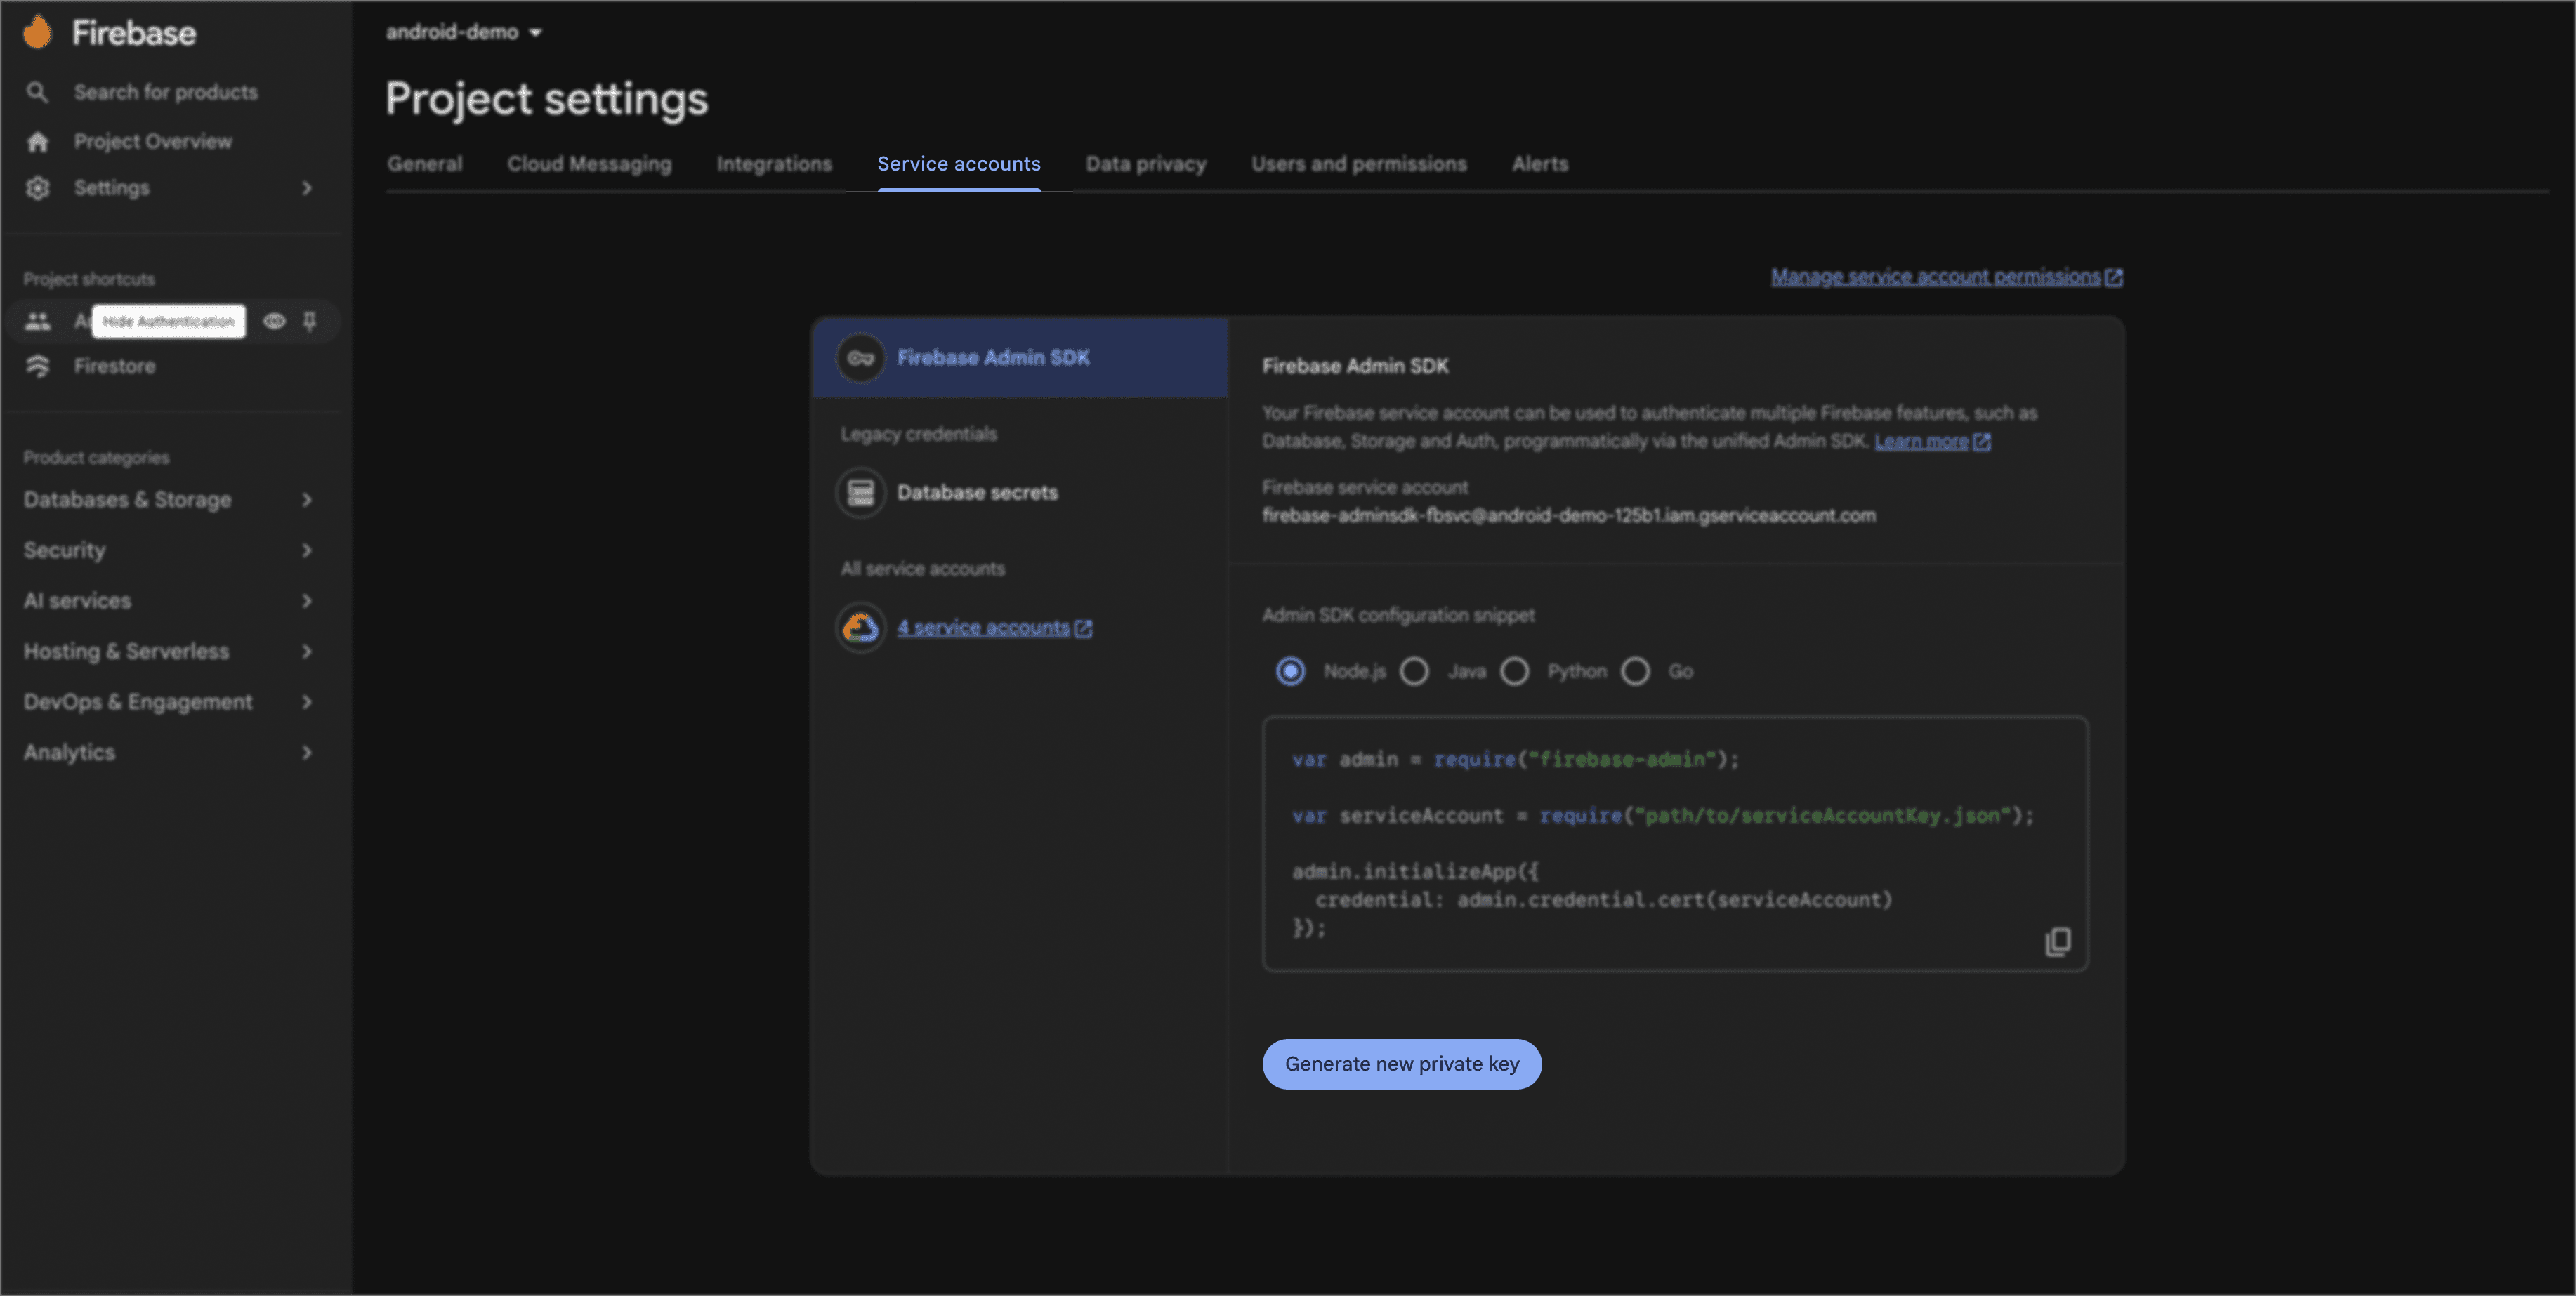
In the Firebase console, open Project settings > Service accounts > Generate new private key and download the service account JSON.
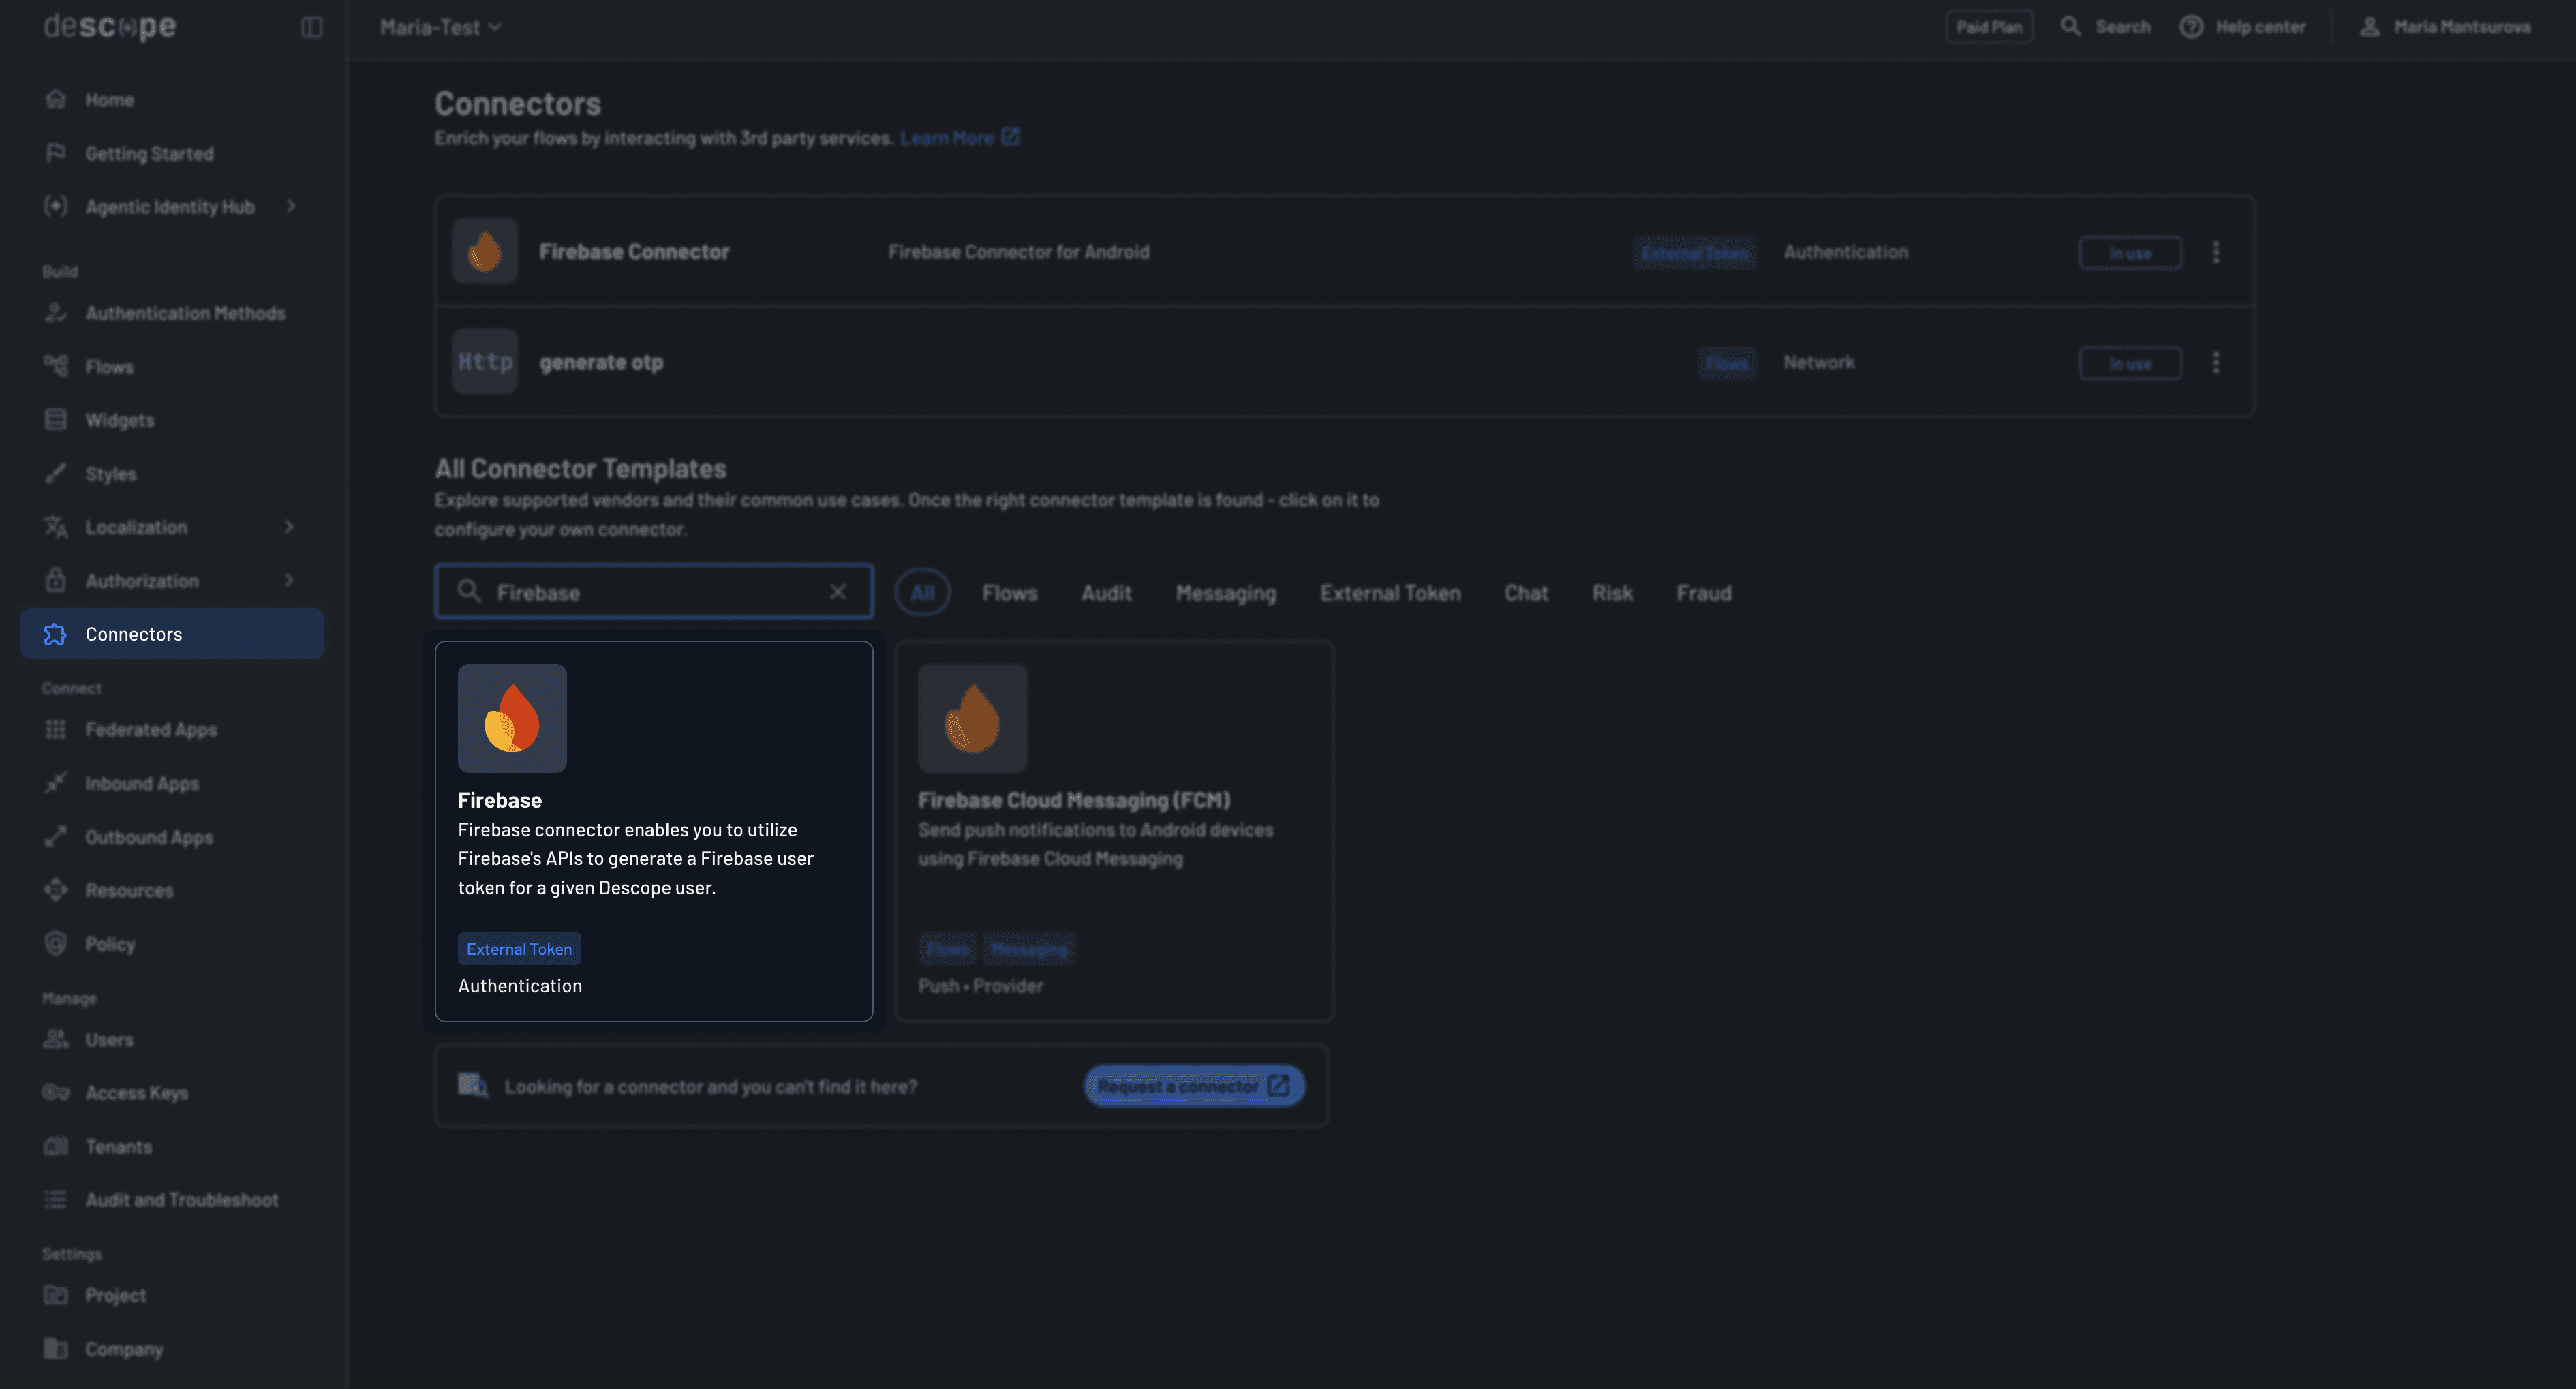
In the Descope console, go to Connectors, create a Firebase token connector, and paste in that service account JSON.
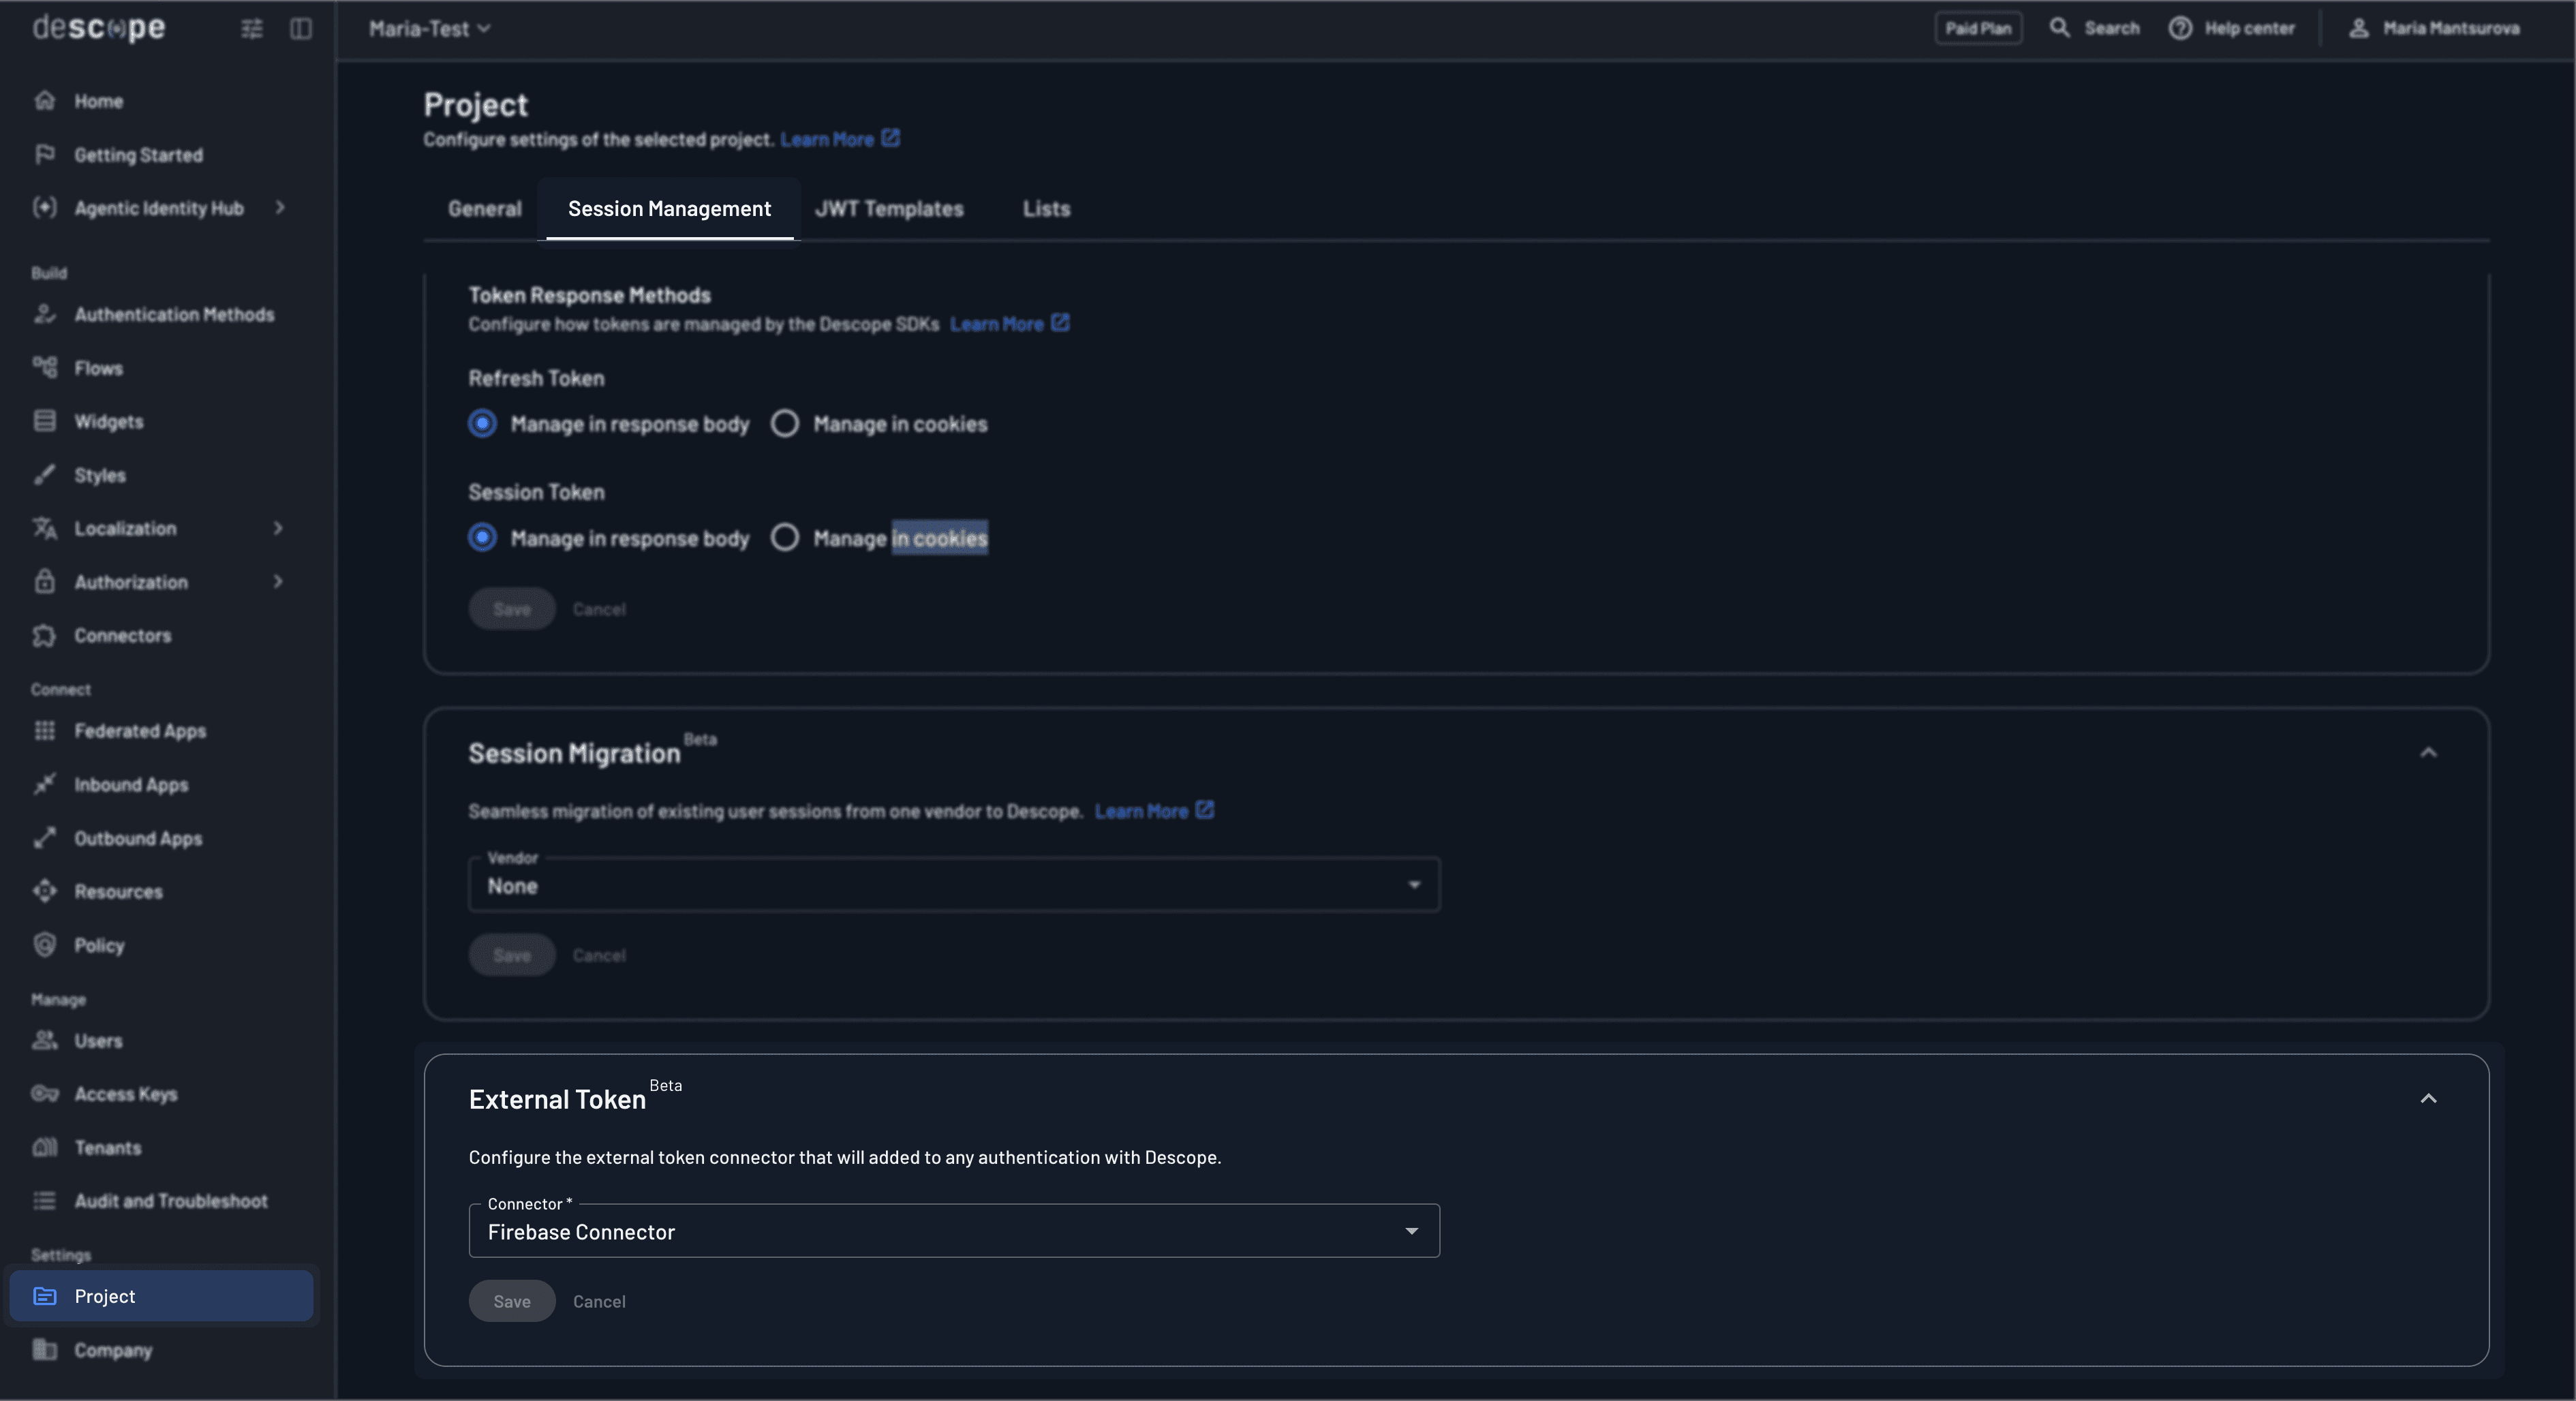
Turn on external token generation under Project Settings > Session Management and select the connector. This is the switch that makes every completed flow return a Firebase custom token.
Once enabled, every authentication response includes the minted token:
{ "sessionJwt": "...", "refreshJwt": "...", "externalToken": "<firebase custom token>", "...": "..." }Step 3: Add the SDKs to your app
Declare the Descope and Firebase dependencies. Using a Gradle version catalog (gradle/libs.versions.toml):
[versions]
descopeKotlin = "0.19.1"
firebaseBom = "34.15.0"

[libraries]
descope-kotlin = { module = "com.descope:descope-kotlin", version.ref = "descopeKotlin" }
firebase-bom = { module = "com.google.firebase:firebase-bom", version.ref = "firebaseBom" }
firebase-auth = { module = "com.google.firebase:firebase-auth" }
firebase-firestore = { module = "com.google.firebase:firebase-firestore" }
Then wire them into the app module (app/build.gradle.kts):
dependencies {
    implementation(libs.descope.kotlin)
    implementation(platform(libs.firebase.bom))
    implementation(libs.firebase.auth)
    implementation(libs.firebase.firestore)
}
Firebase also needs its own project config file. In the Firebase console, open Project settings > Your apps, register (or select) an Android app whose package name matches your applicationId and download its google-services.json. Put the file here:
app/google-services.json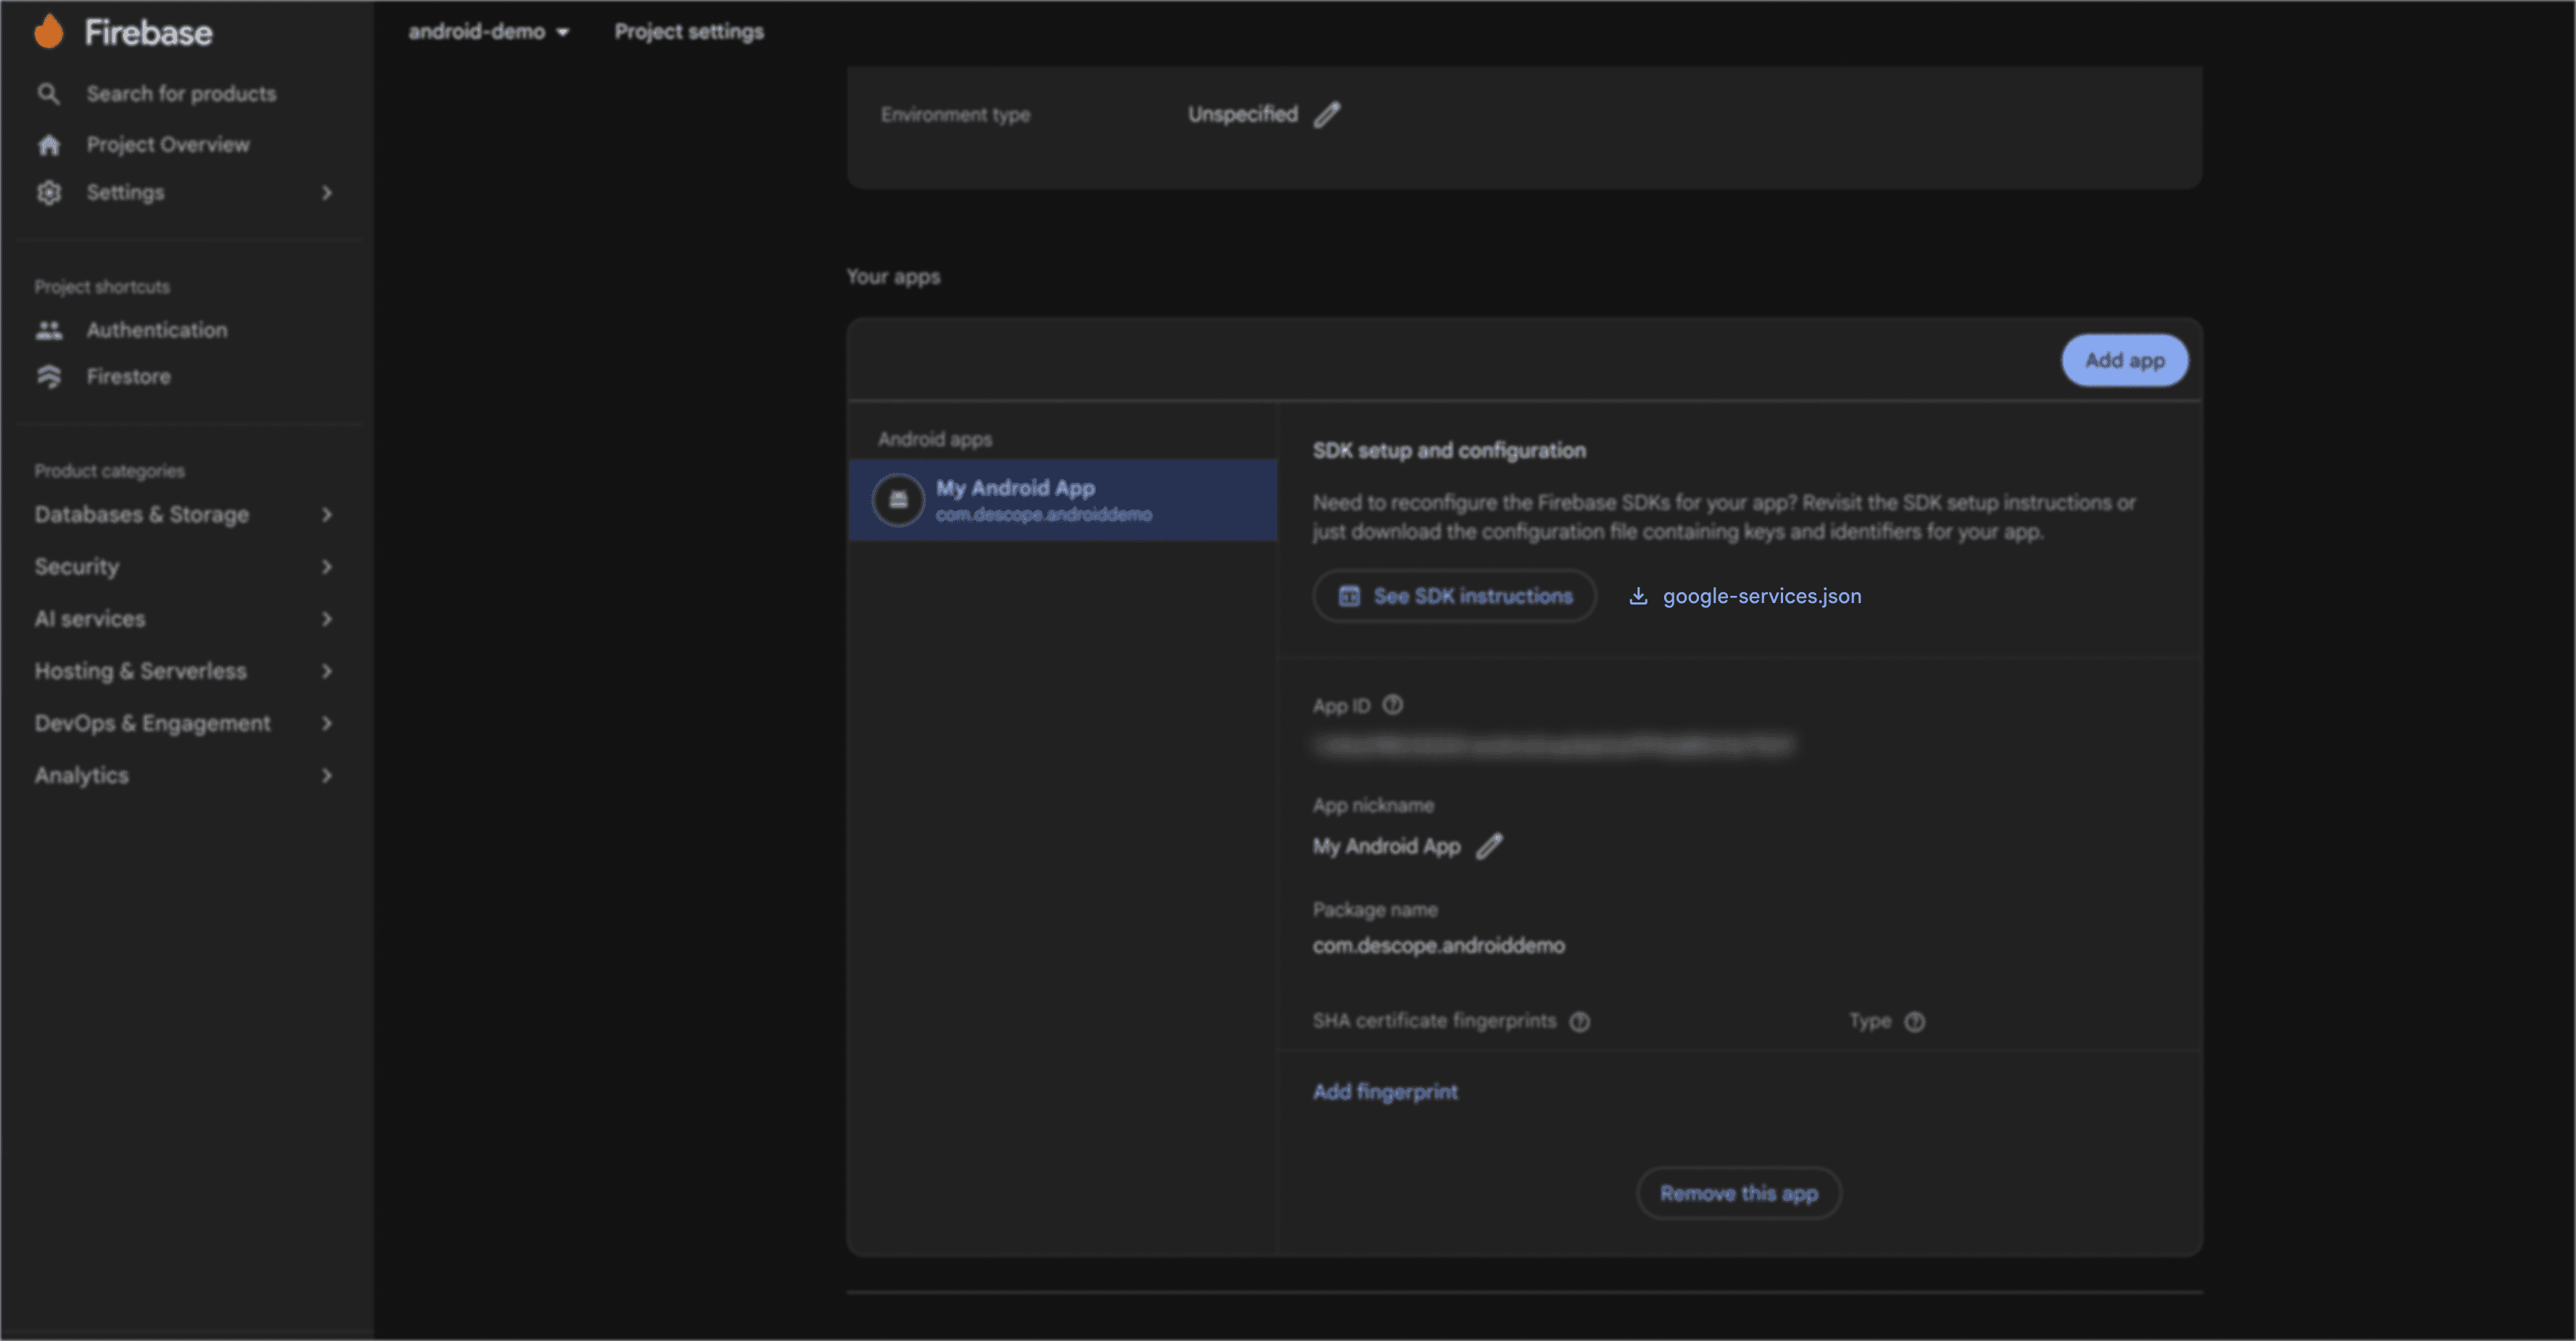
Then add the Google Services Gradle plugin, which reads that file during the build. Declare it once at the project root and apply it in the app module:
// build.gradle.kts (project root)
plugins {
    id("com.google.gms.google-services") version "4.5.0" apply false
}

// app/build.gradle.kts
plugins {
    id("com.android.application")
    id("com.google.gms.google-services")
}
At build time the plugin turns google-services.json into Android resources, so FirebaseApp initializes automatically at app startup with your project's keys. You don't call any Firebase setup code yourself.
Step 4: Initialize Descope
Initialize the SDK once, in your Application class, with your project ID:
const val descopeProjectId = "<your-project-id>"
class DemoApplication : Application() {
    override fun onCreate() {
        super.onCreate()
        Descope.setup(context = this, projectId = descopeProjectId)
    }
}
Step 5: Run the flow and capture the external token
Host the login flow in a DescopeFlowView. When the flow completes, its onSuccess callback delivers an AuthenticationResponse (the SDK's result object for a finished flow). Store the Descope session, then hold on to response.externalToken for the Firebase sign-in that follows.
class LoginActivity : AppCompatActivity(), DescopeFlowView.Listener {
    private lateinit var flowView: DescopeFlowView
    override fun onCreate(savedInstanceState: Bundle?) {
        super.onCreate(savedInstanceState)
        setContentView(R.layout.activity_login)
        flowView = findViewById(R.id.flow_view)
        flowView.listener = this
        val flowUrl = "https://api.descope.com/login/$descopeProjectId?flow=sign-up-or-in"
        val descopeFlow = DescopeFlow(Uri.parse(flowUrl))
        findViewById<View>(R.id.login_button).setOnClickListener {
            flowView.startFlow(descopeFlow)
        }
    }
    override fun onReady() {
        // Reveal the flow view once it has finished loading.
    }
    override fun onSuccess(response: AuthenticationResponse) {
        // Manage the Descope session so the SDK can refresh it automatically.
        Descope.sessionManager.manageSession(DescopeSession(response))
        // The Firebase custom token minted by the token connector during the flow.
        firebaseExternalToken = response.externalToken
        startActivity(Intent(this, MainActivity::class.java))
        finish()
    }
    override fun onError(exception: DescopeException) {
        Toast.makeText(this, "Something went wrong, please try again", Toast.LENGTH_LONG).show()
    }
}
The external token is short lived and does not need to be persisted, so keep it in memory and refresh it by logging in again when it is gone:
// The Firebase custom token from the flow. In memory only, valid for ~1 hour.
var firebaseExternalToken: String? = null
Step 6: Sign in to Firebase and read a protected resource
With the token in hand, Firebase sign-in is a single call. Once it succeeds, the Firebase user is authenticated with the Descope user's ID as the UID, and your security rules take it from there.
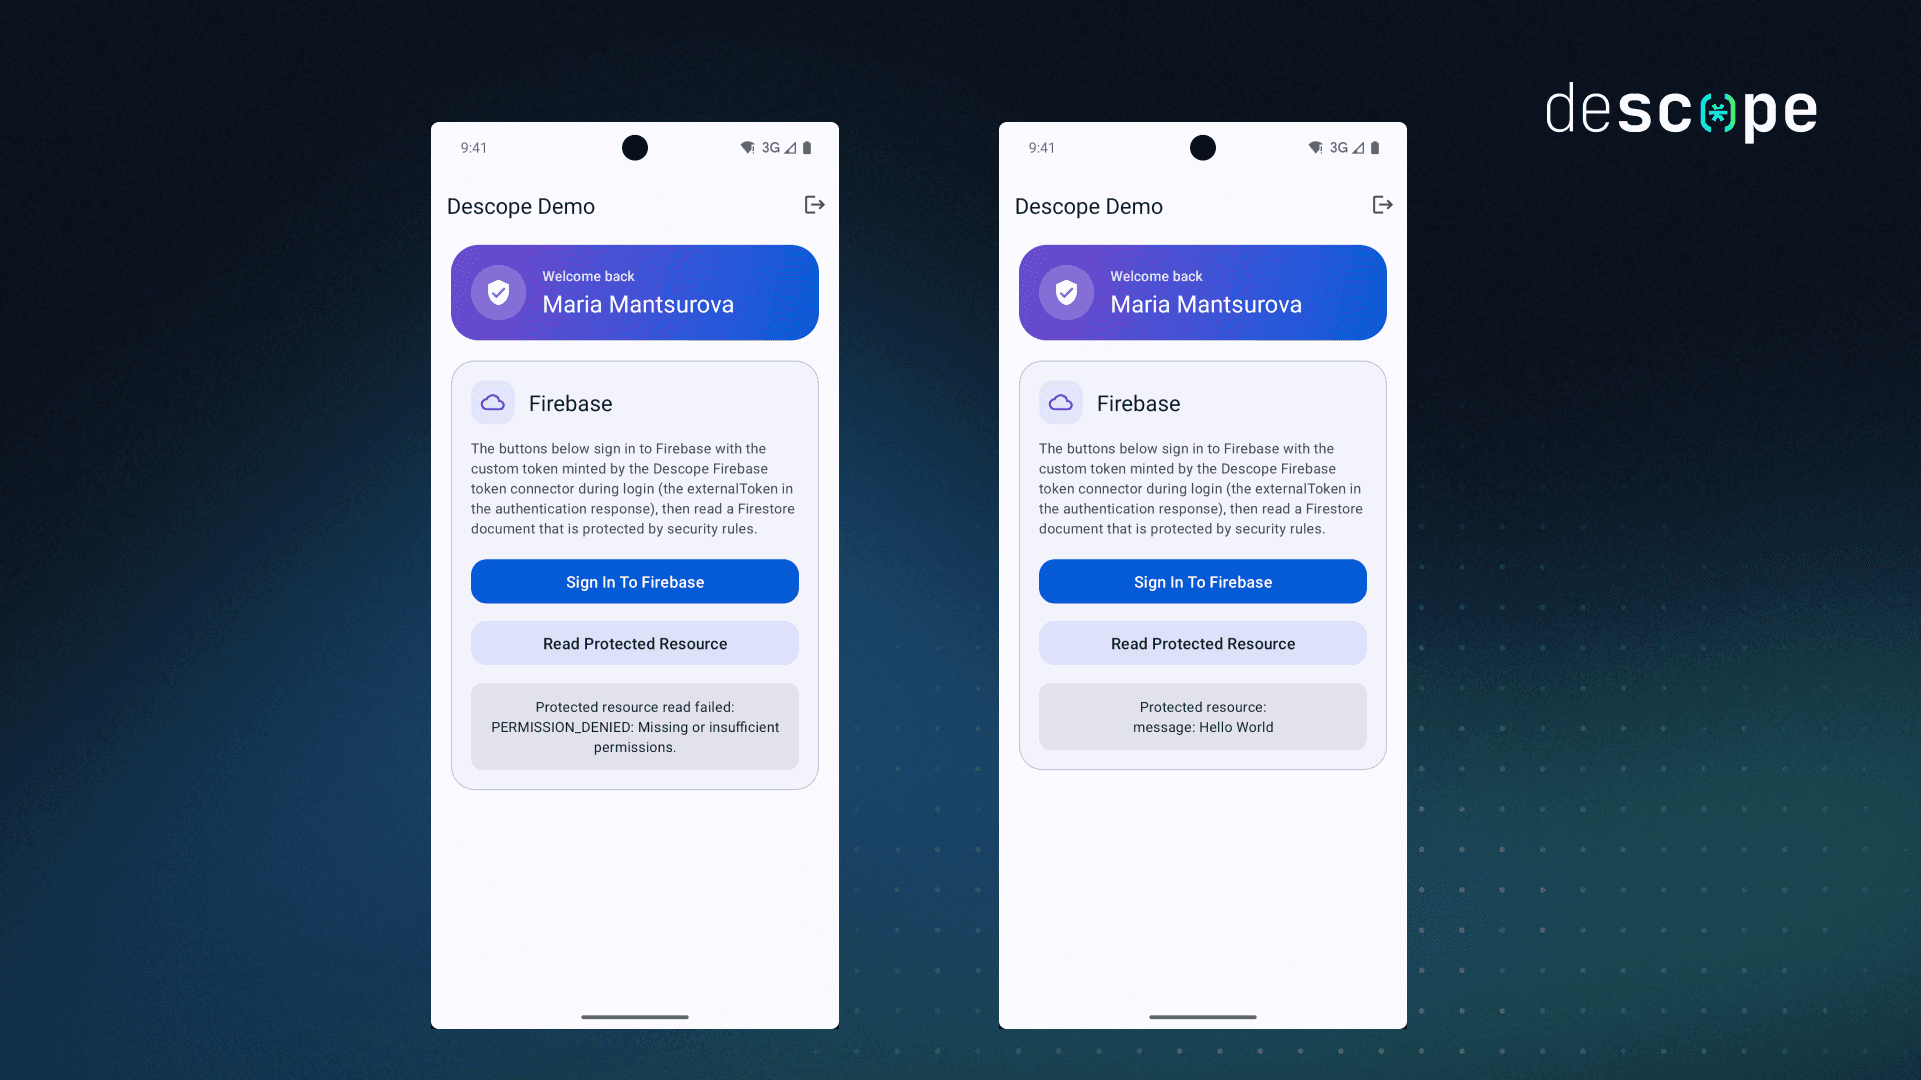
To test the integration, protect a document with a rule that requires an authenticated user, then read protected/demo before and after signing in:
rules_version = '2';
service cloud.firestore {
  match /databases/{database}/documents {
    match /protected/{doc} {
      allow read: if request.auth != null;
      allow write: if false;
    }
  }
}
Before Firebase sign-in the read fails with PERMISSION_DENIED; after it, the document data comes back.
It is a full Firebase session, not just Firestore
Firestore is only the example used here. signInWithCustomToken() creates a real Firebase Auth session, so the authenticated user works across every Firebase product that honors Firebase Auth, including Realtime Database rules, Cloud Storage rules, and callable Cloud Functions.
Try it yourself
You now have a modern login experience on Android while Firebase stays exactly as it was. The Descope flow authenticates the user, the Firebase token connector mints a custom token during that flow, and signInWithCustomToken() turns it into a Firebase session your existing security rules already understand. The same flow supports passkeys, social login, and OTP; the Android-specific setup for those methods lives in the mobile SDK docs.
Ready to build it? Sign up for a free Descope account, review the external token generation docs, and connect it to your own Firebase project.