
Table of Contents
Onboarding a new customer is one of the most critical moments in the B2B SaaS journey, but is often an operational headache. Each customer might require a unique set of configurations, like their own branding, Identity Provider configuration, user roles and permissions, and integrations with tools like Slack, HubSpot, or Salesforce. Manually handling all of this for each tenant doesn’t scale.
With Descope, you can design and automate self-service onboarding journeys that empower your customers to complete their own configuration—safely and securely. In this blog, we’ll walk through how Descope’s multi-tenancy and Flows capabilities let you build powerful self-serve onboarding workflows that are secure, branded, and built to scale.
What is multi-tenancy?
Multi-tenancy is a software architecture where a single instance of your application serves multiple customers—known as tenants. Each tenant has isolated data, users, configurations, and branding, even though they all share the same underlying infrastructure and codebase.
In a multi-tenant vs. single-tenant comparison, the key difference lies in how resources are managed and scaled:
In a single-tenant setup, each customer gets their own dedicated instance of the application, often including separate databases and services. While this provides strong isolation, it also leads to more operational overhead and higher infrastructure costs.
A multi-tenant setup is more efficient and scalable. Updates can be deployed across all tenants simultaneously, and infrastructure can be optimized and shared across customers—without compromising data isolation.
Descope supports multi-tenancy out of the box, allowing you to:
Create tenants programmatically or manually
Isolate users and roles by tenant
Apply tenant-specific styles and branding
Configure authentication (e.g., SSO) and integrations on a per-tenant basis
The problem with manual tenant onboarding
Traditional tenant onboarding is a developer-heavy process. After a new customer signs up, your team might need to:
Provision a tenant in your backend
Apply organization-specific branding
Set up SSO with the customer’s identity provider
Configure external integrations
Add users and assign roles
This often involves a mix of spreadsheets, emails, XML file exchanges, and ticket queues. As your customer base grows, this model simply doesn't scale. Delays frustrate customers eager to get started, and your team ends up spending more time on repeated setup tasks instead of focusing on core development.
The obvious solution? Let your customers do it themselves—with the right tools.
Enter Descope Flows
Descope Flows are visual, no-code workflows that let you design user authentication journeys without writing custom code. Each Flow is composed of modular steps that can be customized and connected to other systems through built-in connectors.
When combined with multi-tenancy, Flows let you design self-service onboarding paths that are personalized for each tenant—without hardcoding for every customer. You can:
Create and configure tenants programmatically
Pre-apply branding and theming
Invite Tenant Admins to complete their onboarding
Use no-code Flows to walk them through remaining setup steps
Let’s look at how to build a modular onboarding process that balances automation and flexibility.
Onboard B2B customers with Descope
Once a customer signs up or a deal is closed, your system can automatically provision the tenant using our Management SDK functions. Alternatively, if you would like to create the tenant manually, a support agent can create a new tenant within a flow, using the Create Tenant action or directly from the Descope Console.
At this stage, you can also pre-configure visual styles like primary/secondary colors, logos, and themes to make the experience more welcoming and personalized. Simply create a new styles file from the styles tab of the Descope Console and configure the styles according to your new customer’s brand.
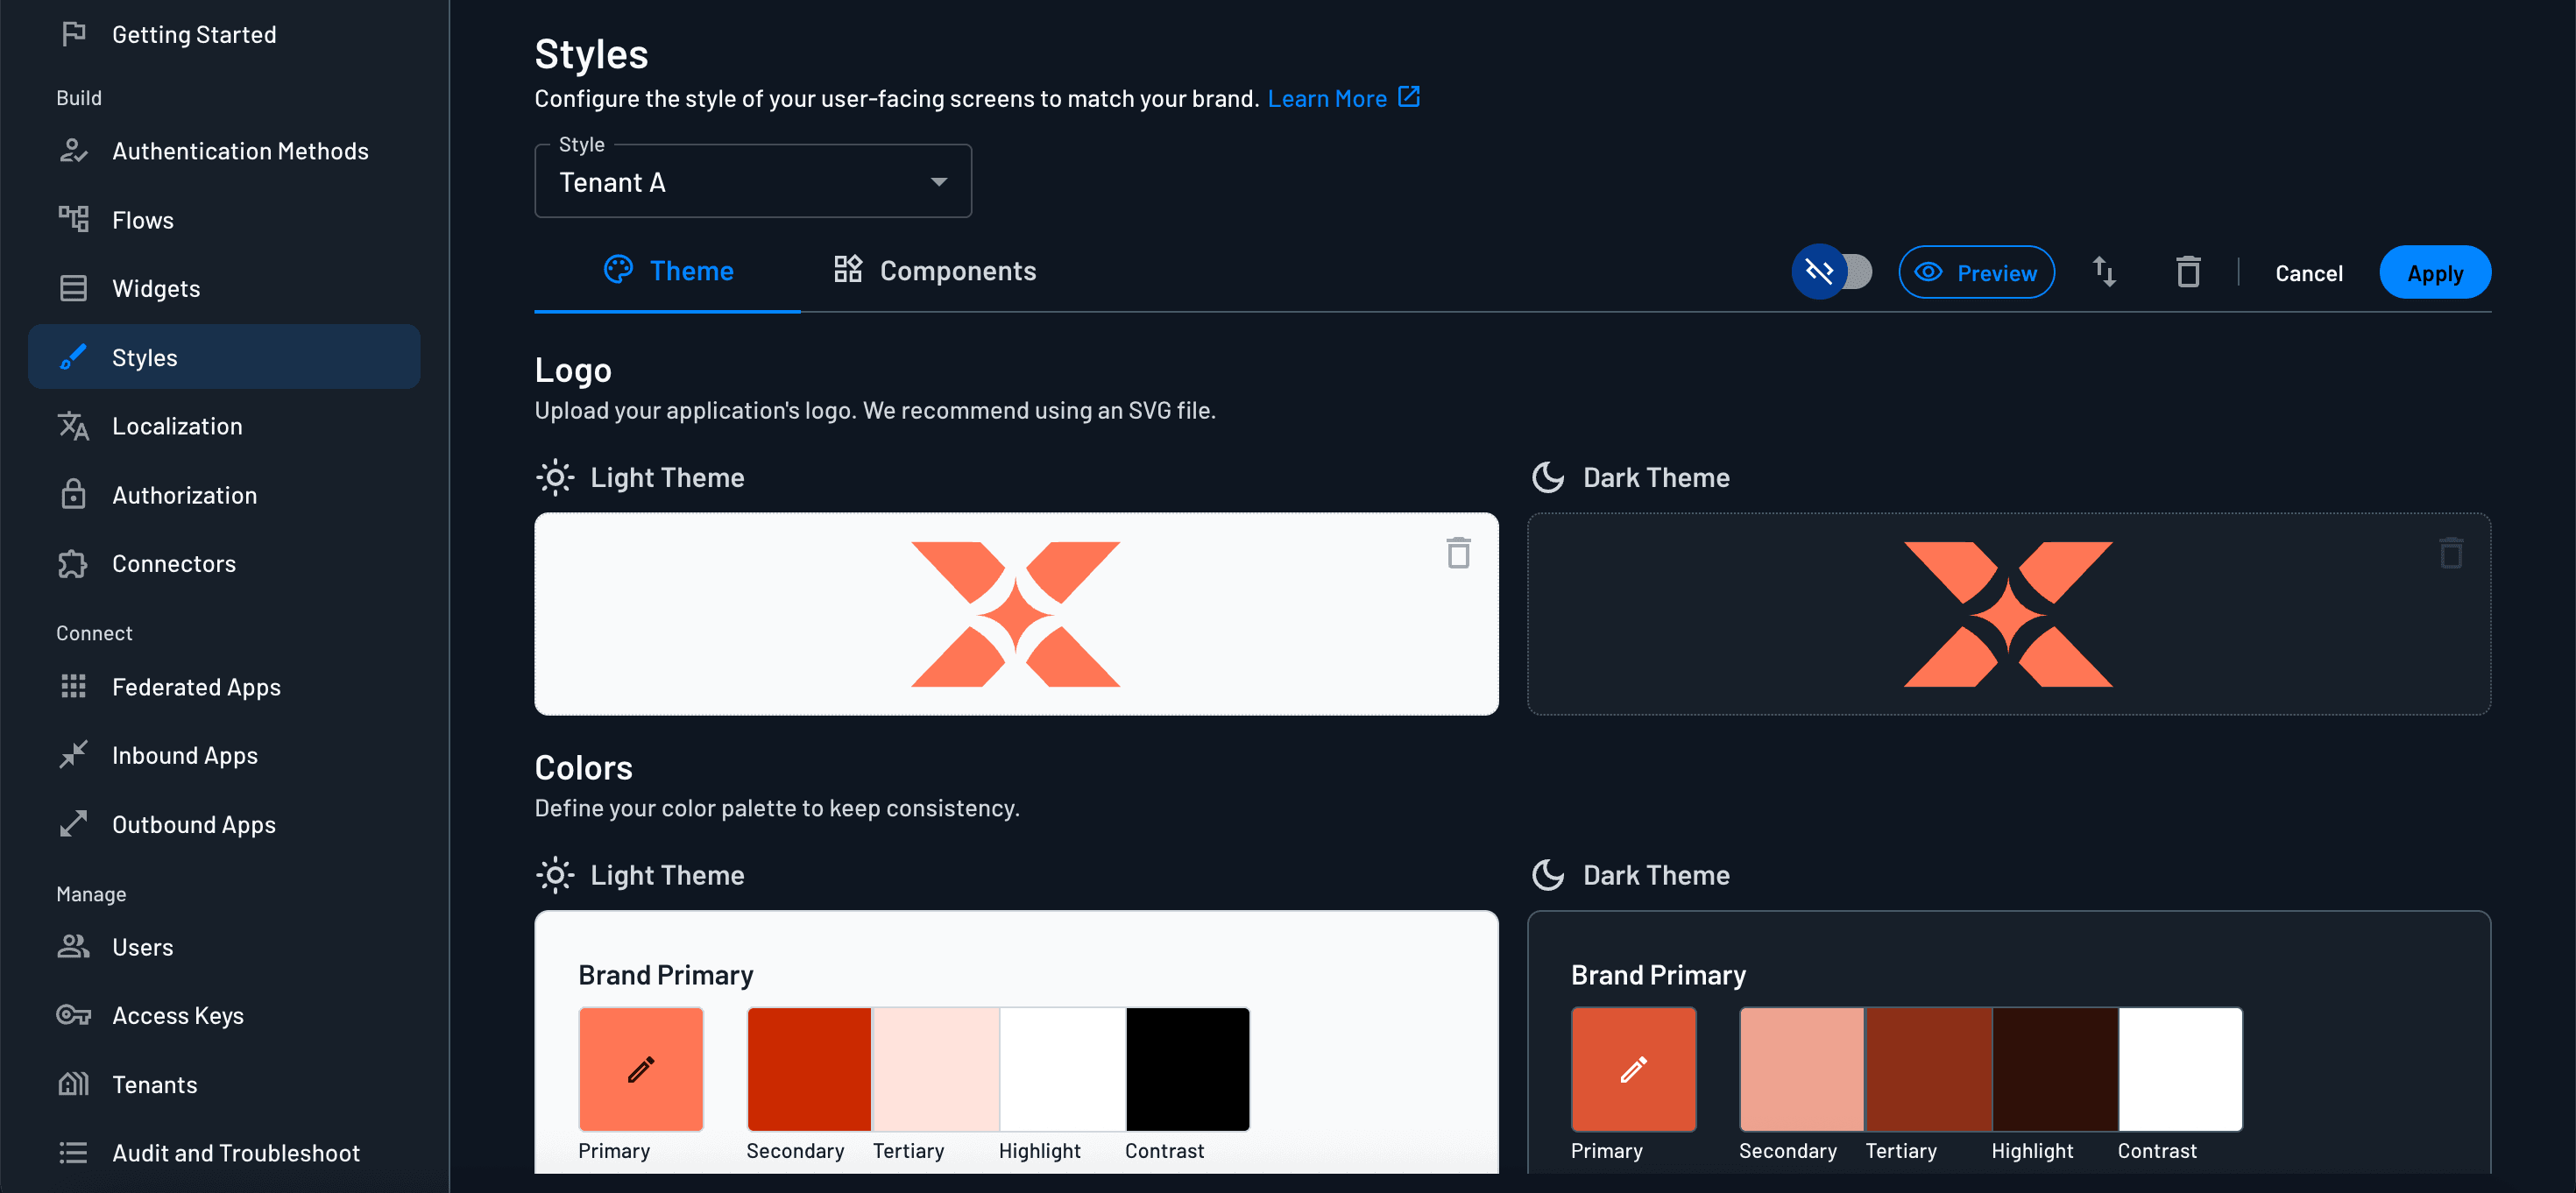
When you send a new customer their onboarding flow, you can pass on their specific Style ID to flow’s web component to make the flow appear in their branding.
const urlParams = new URLSearchParams(window.location.search);
const styleId = urlParams.get('styleId');
<Descope
  flowId="sign-up-or-in"
  styleId={styleId}
/>
Welcome the tenant admin to onboard
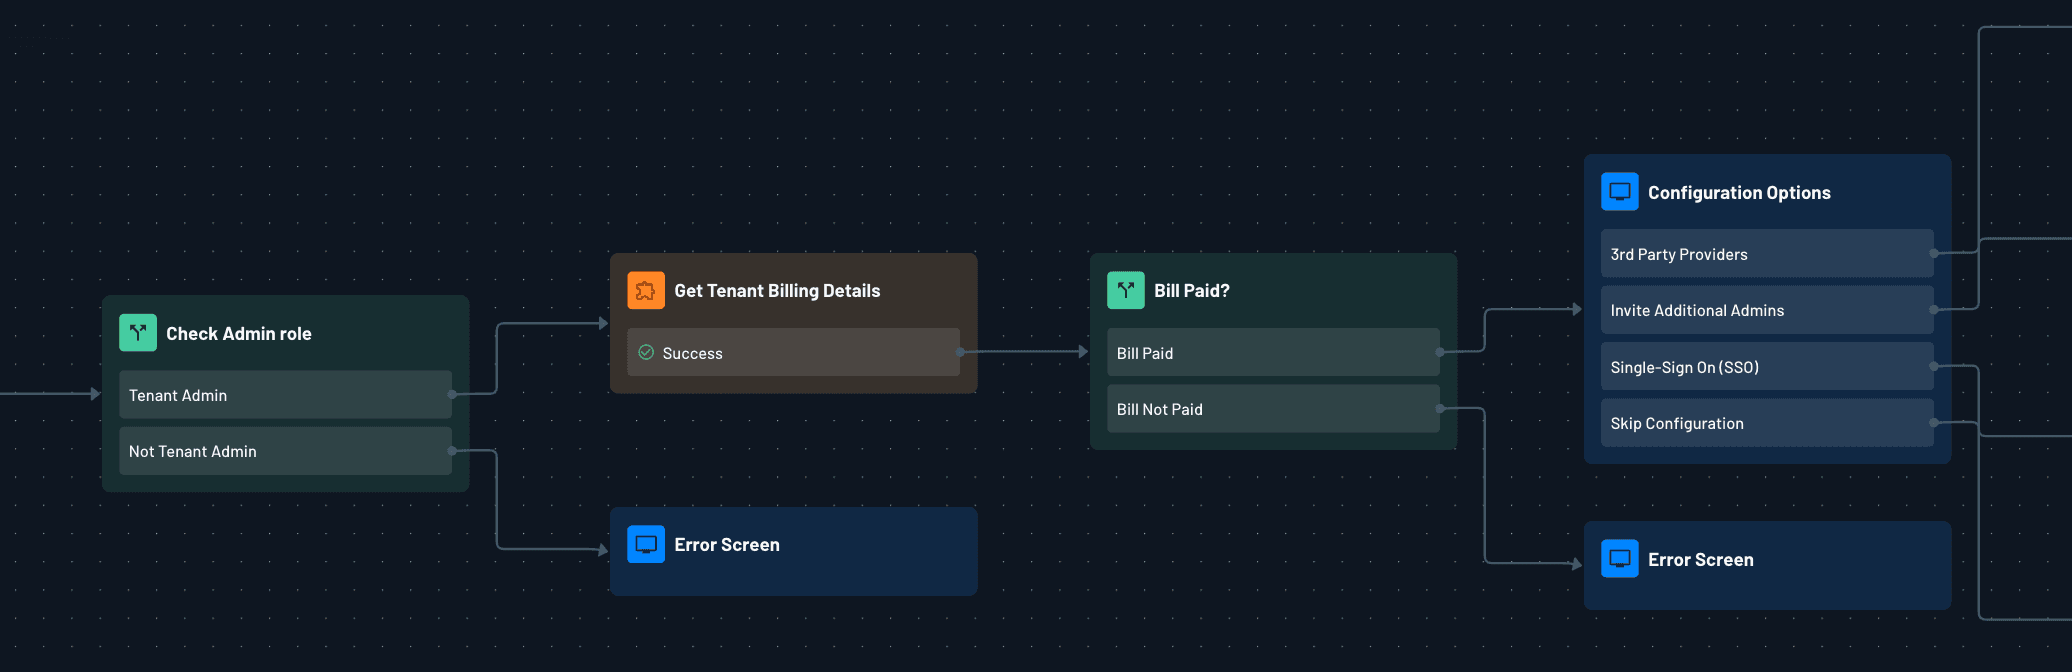
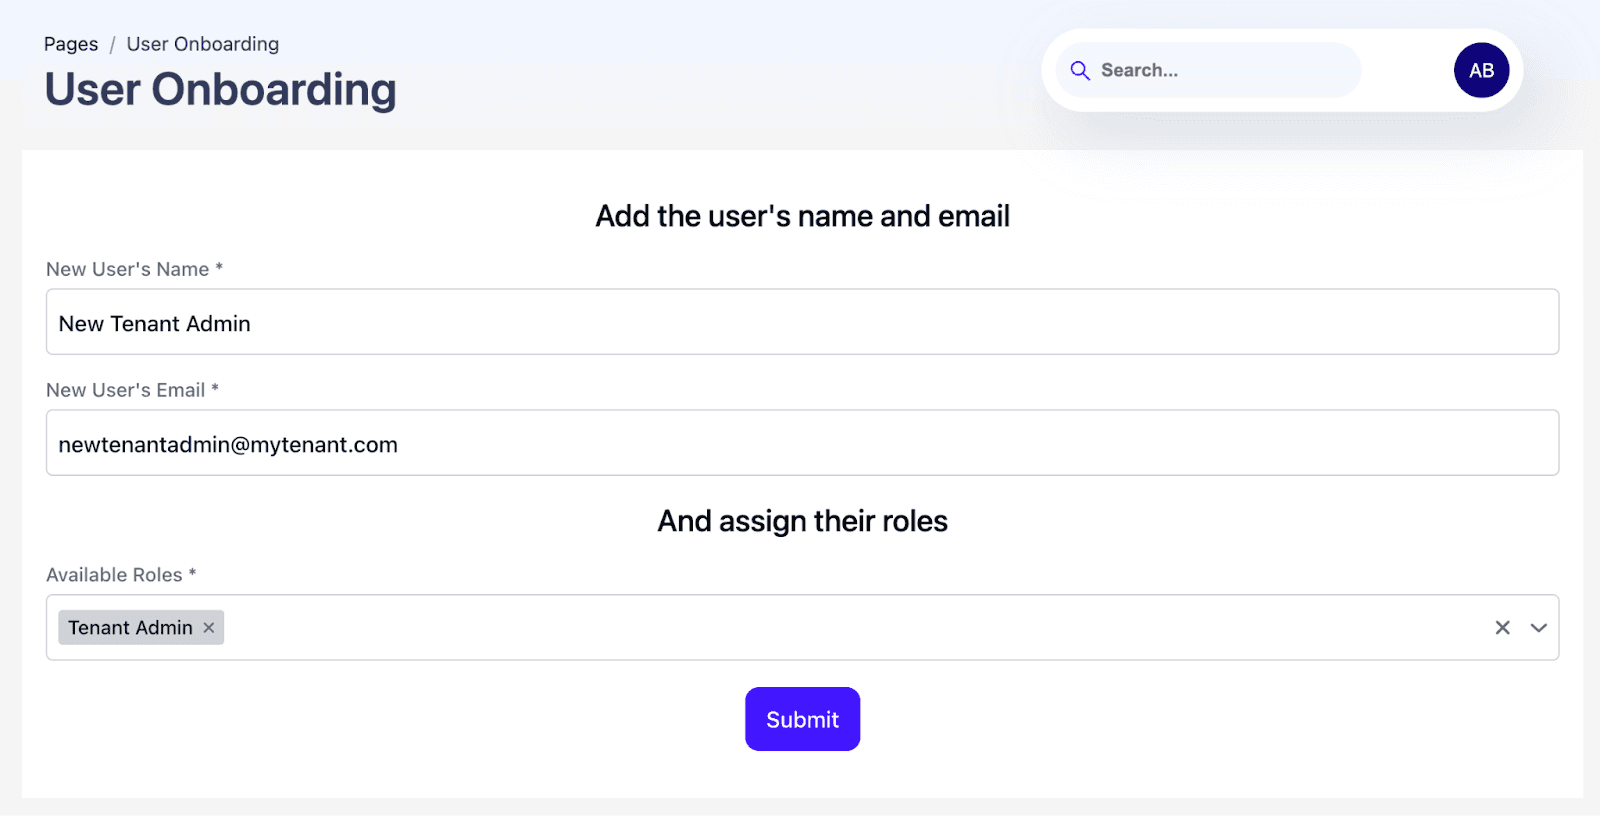
Next, send an invitation to the administrator of your customer. When you invite the new user, either programmatically, through Flows, or through the Descope Console, you can assign the user the “Tenant Admin” role.
You can pass a query parameter to the User Invitation Redirect URL to apply the correct style ID to the login and onboarding experience. This ensures the previously configured branding is applied immediately.
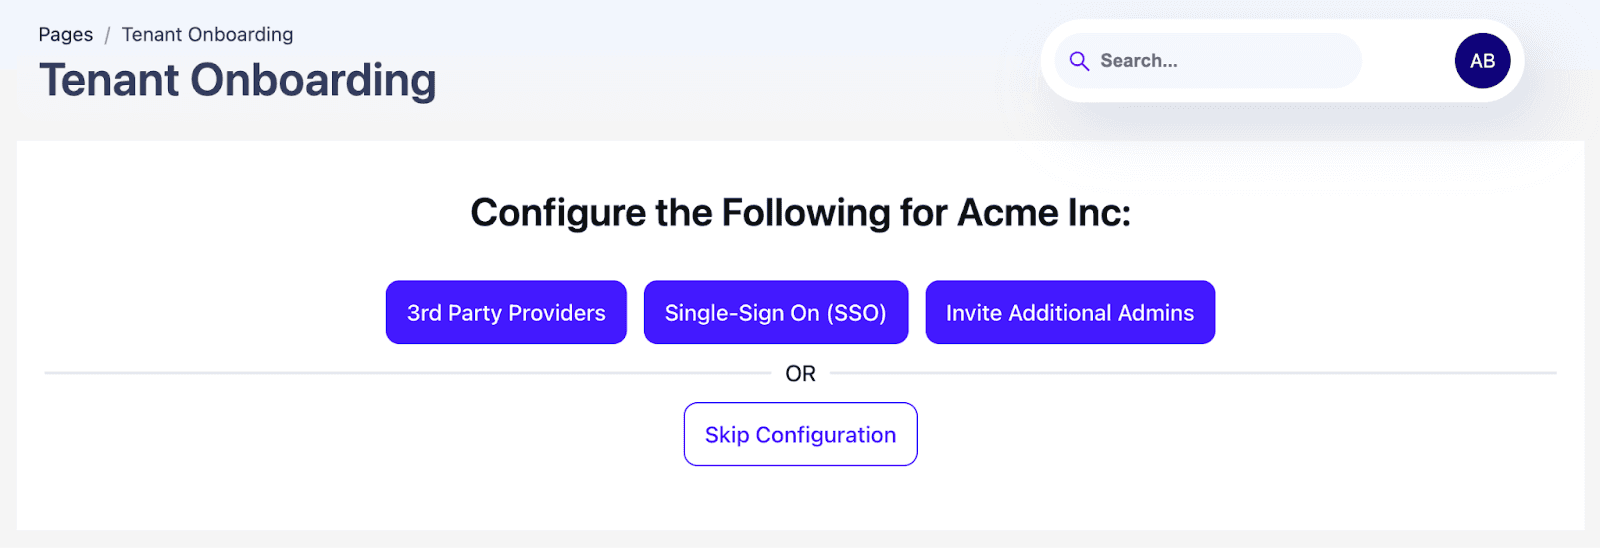
When the admin logs in via your hosted page (built with Descope Auth Hosting or embedded via SDK), they’ll be directed to a tailored onboarding flow to complete setup. With the tenant created and styles applied, your onboarding flow can offer steps to help the admin configure the rest of their environment.
Let’s dive into some of the flow logic you can include to make the self-service onboarding as holistic as possible. Each module below can be conditional or included in sequence:
Use case 1: Cross-platform onboarding orchestration
You can use progressive profiling within Flows to gradually collect user or tenant information over time, prompting for additional details only when needed, rather than overwhelming users with lengthy forms upfront. You can utilize custom attributes and connectors to keep track of steps that have been completed, and sync with external tools.
For example, you can use our Generic HTTP Connector within the onboarding flow to connect with your billing platform, check if the user has already provided their billing information, and prompt them to do so if they have not. You can also store things like the acceptance of terms of service agreements and license expiration dates as custom attributes within a flow, and block additional configuration or access until these parameters have been resolved.
You can keep track of which onboarding steps have been completed by sending custom audit events, or by using our Analytics connectors like Segment and Amplitude to track when a user completes a step or encounters an issue.
Once you’ve collected these onboarding details, you can also sync the data to your CRM using our Hubspot or Salesforce connectors, and send a “Welcome” email to your new customer using our messaging connectors.
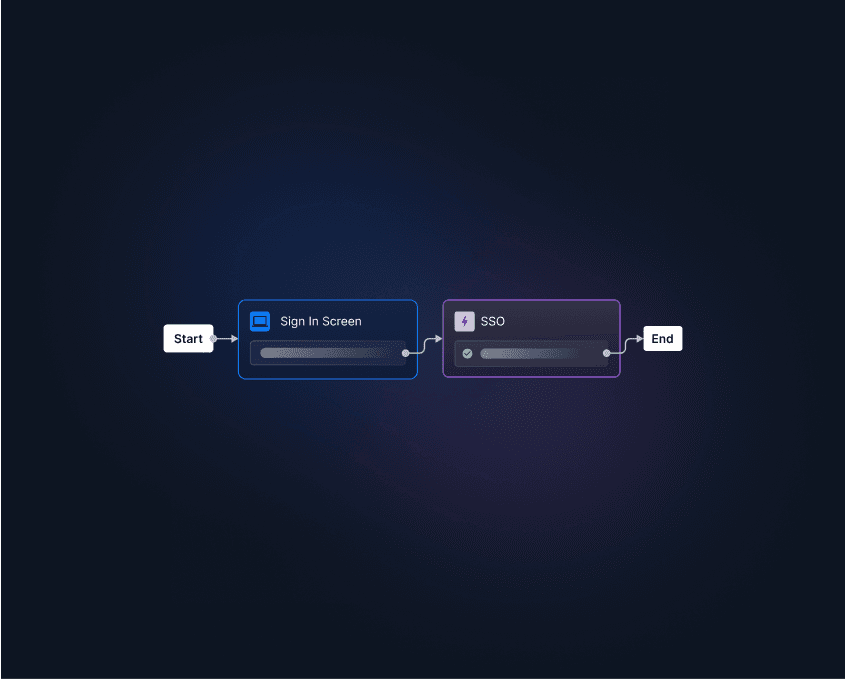
Use case 2: Configure self-service single sign-on (SSO)
Single sign-on (SSO) allows users to log in to your application using their existing identity provider (IdP), such as Okta, Microsoft Entra ID, or Google Workspace. This gives enterprise customers a seamless and secure authentication experience while enabling centralized access control.
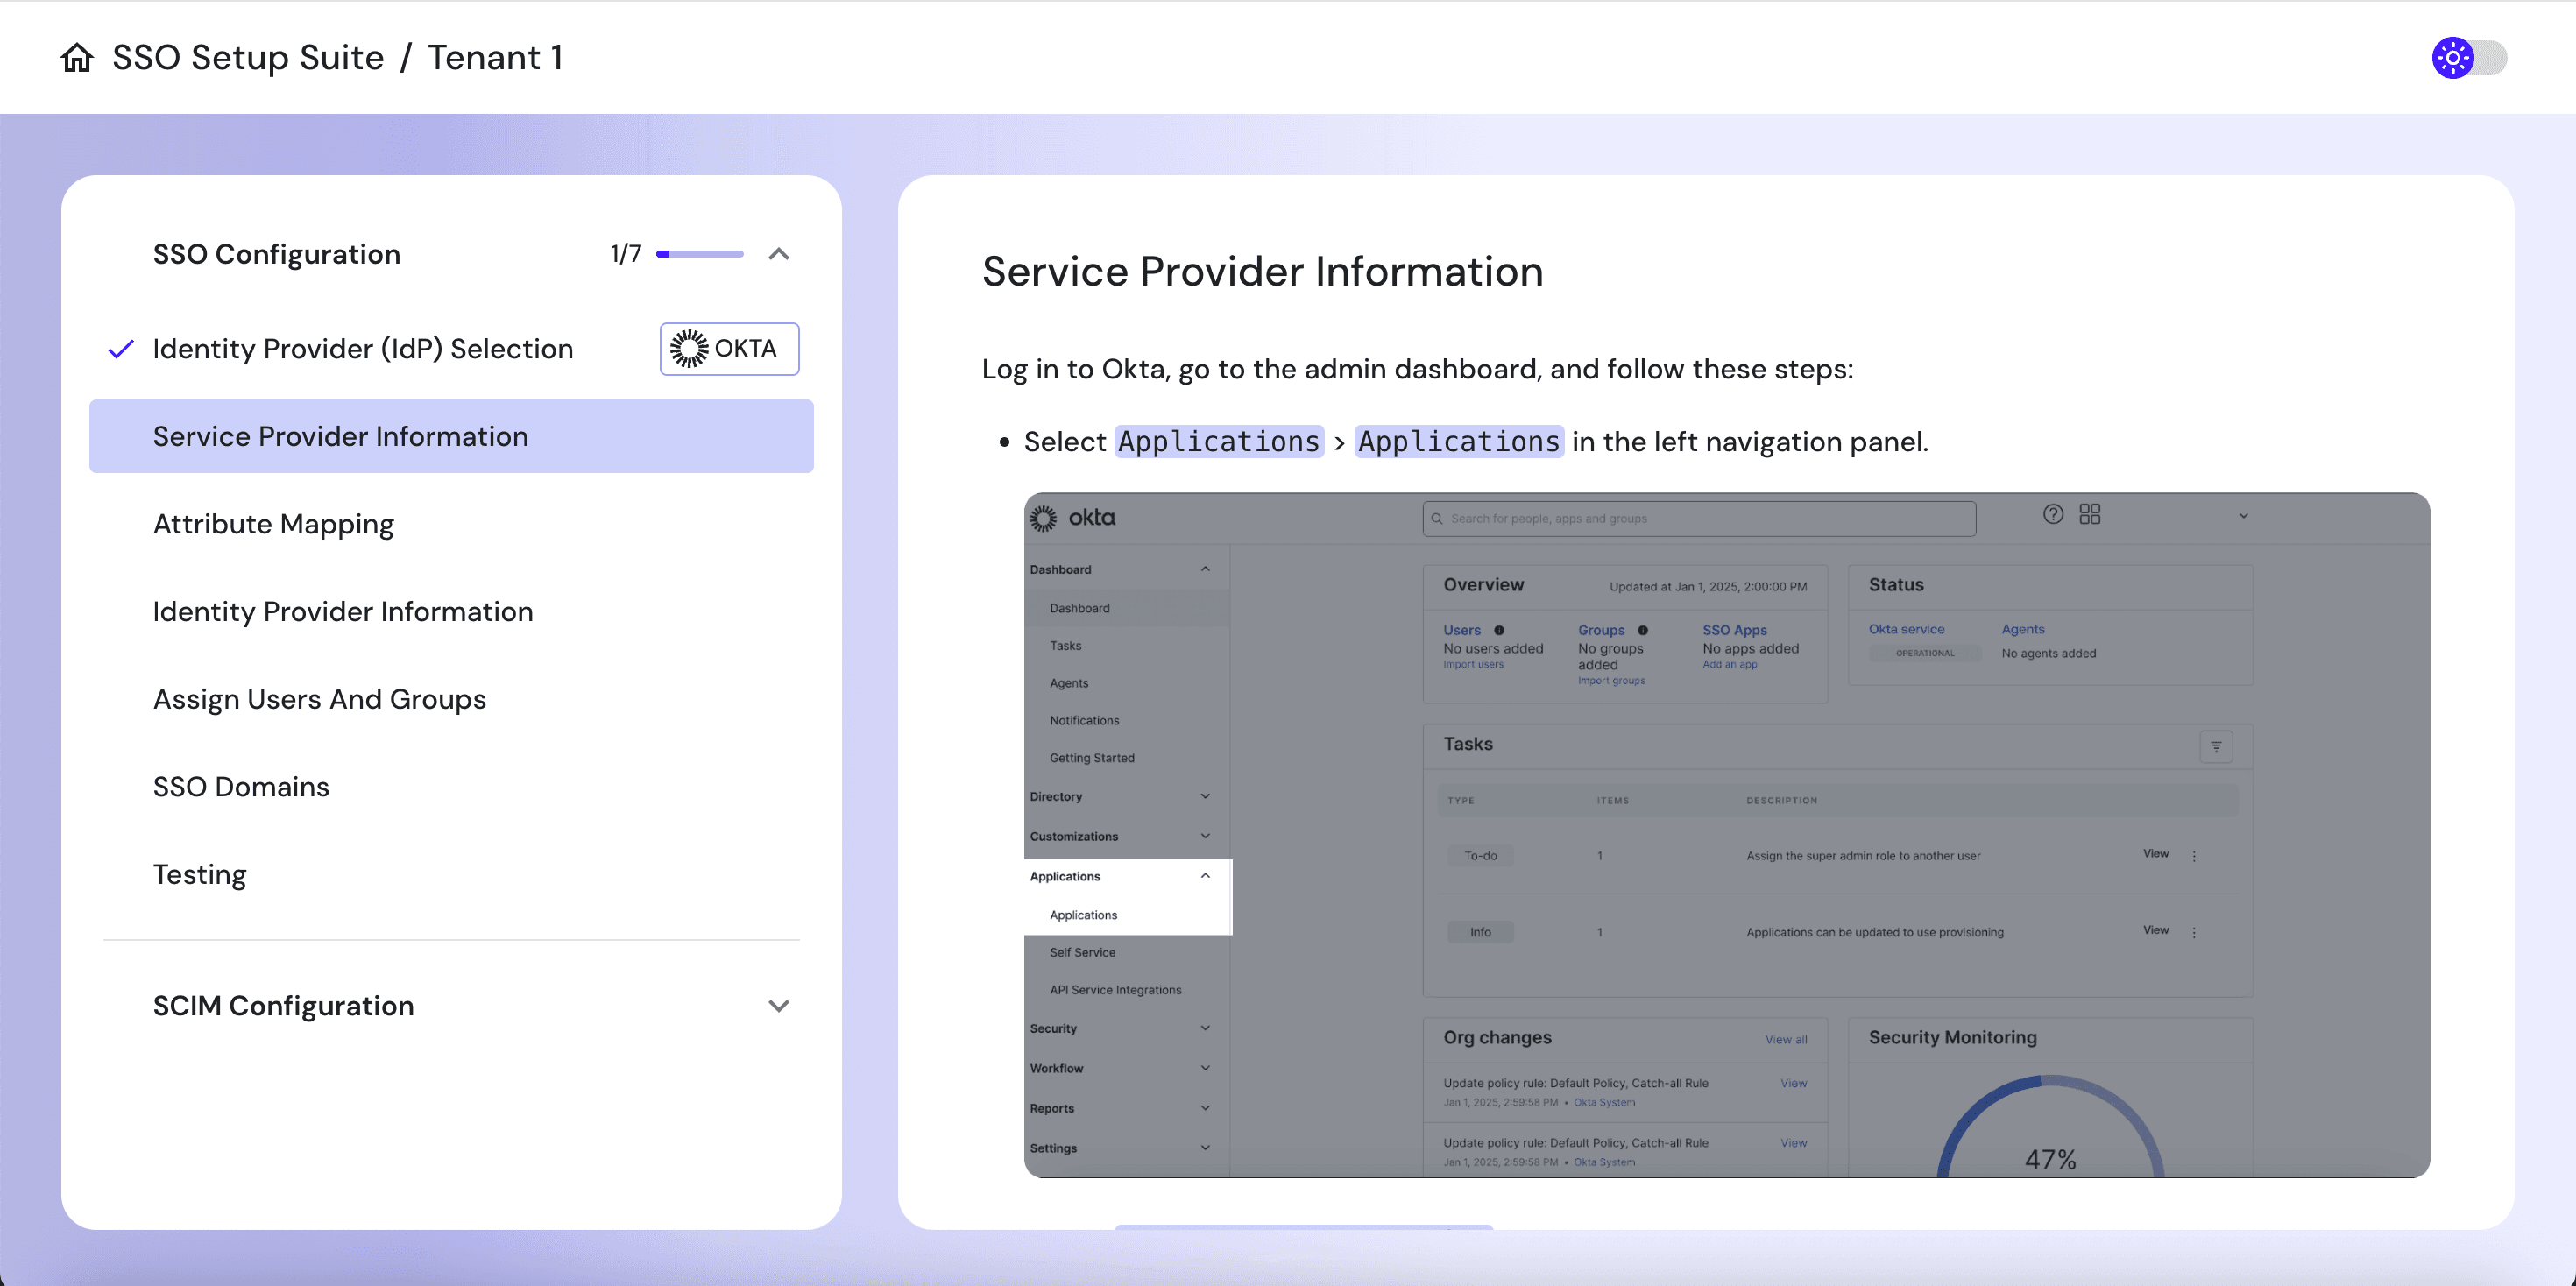
For tenants who want to use their own Identity Provider, trigger the Generate SSO Setup Suite Admin Link action. This generates a secure link that walks the admin through configuring SSO with their chosen IdP. The flow can display the link directly or email it to the admin so they can complete setup at their convenience.
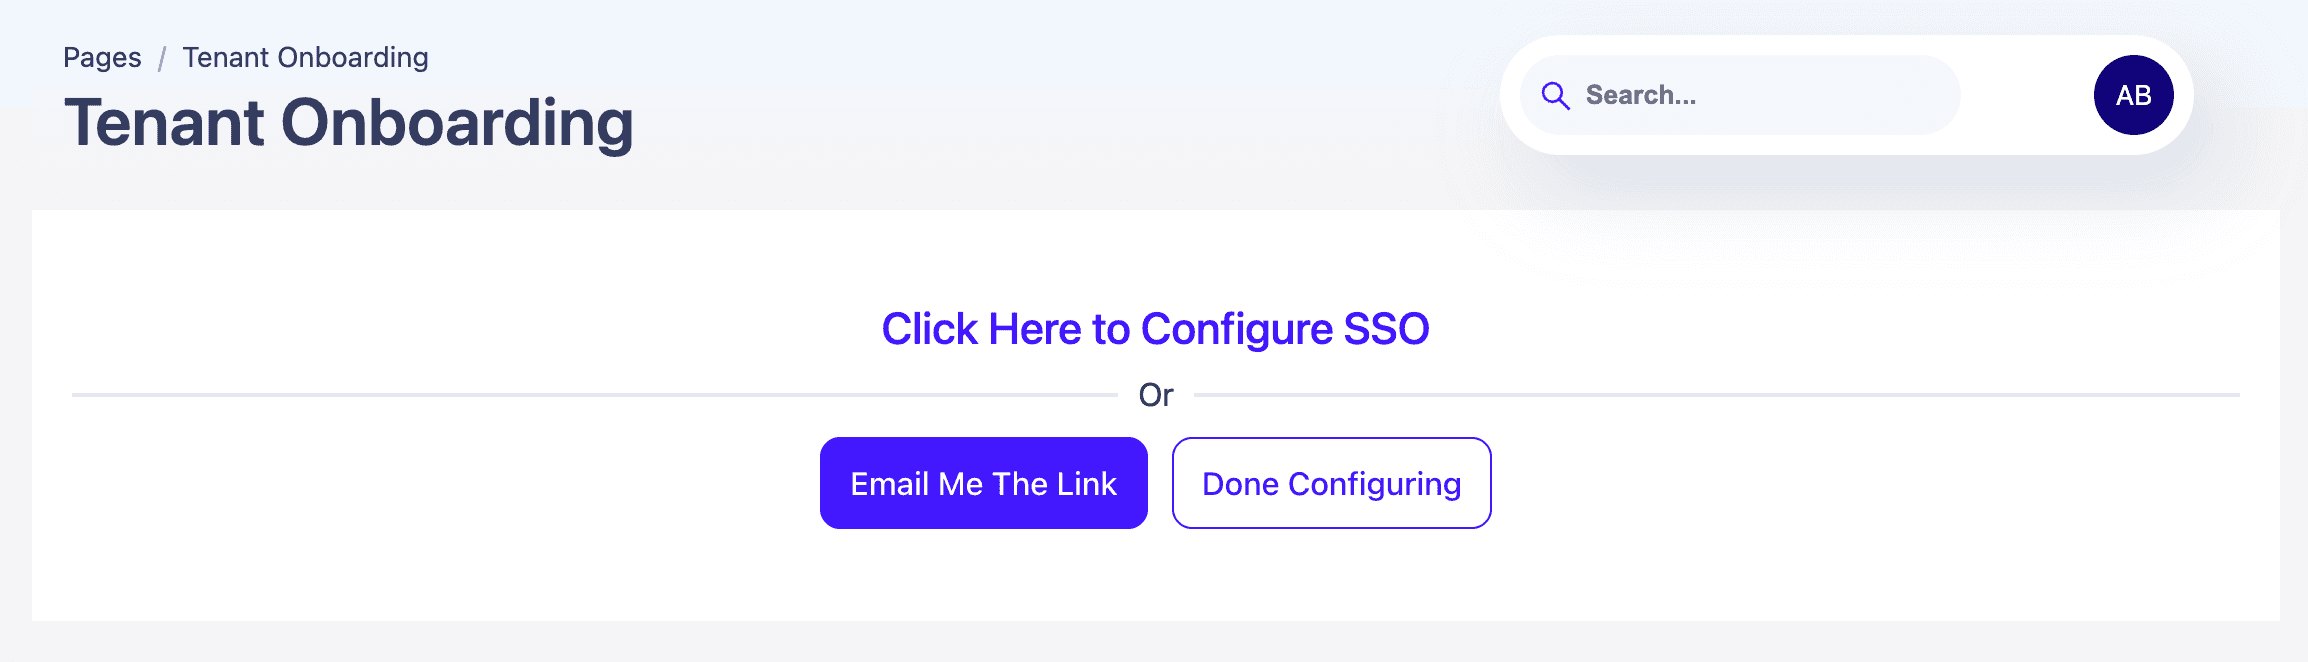
When the admin opens the link, they’re taken through a step-by-step, guided UI that helps them configure SSO for their organization. Descope validates the configuration and provides real-time feedback, ensuring the setup is completed correctly and securely—no XML file exchanges or developer intervention required.
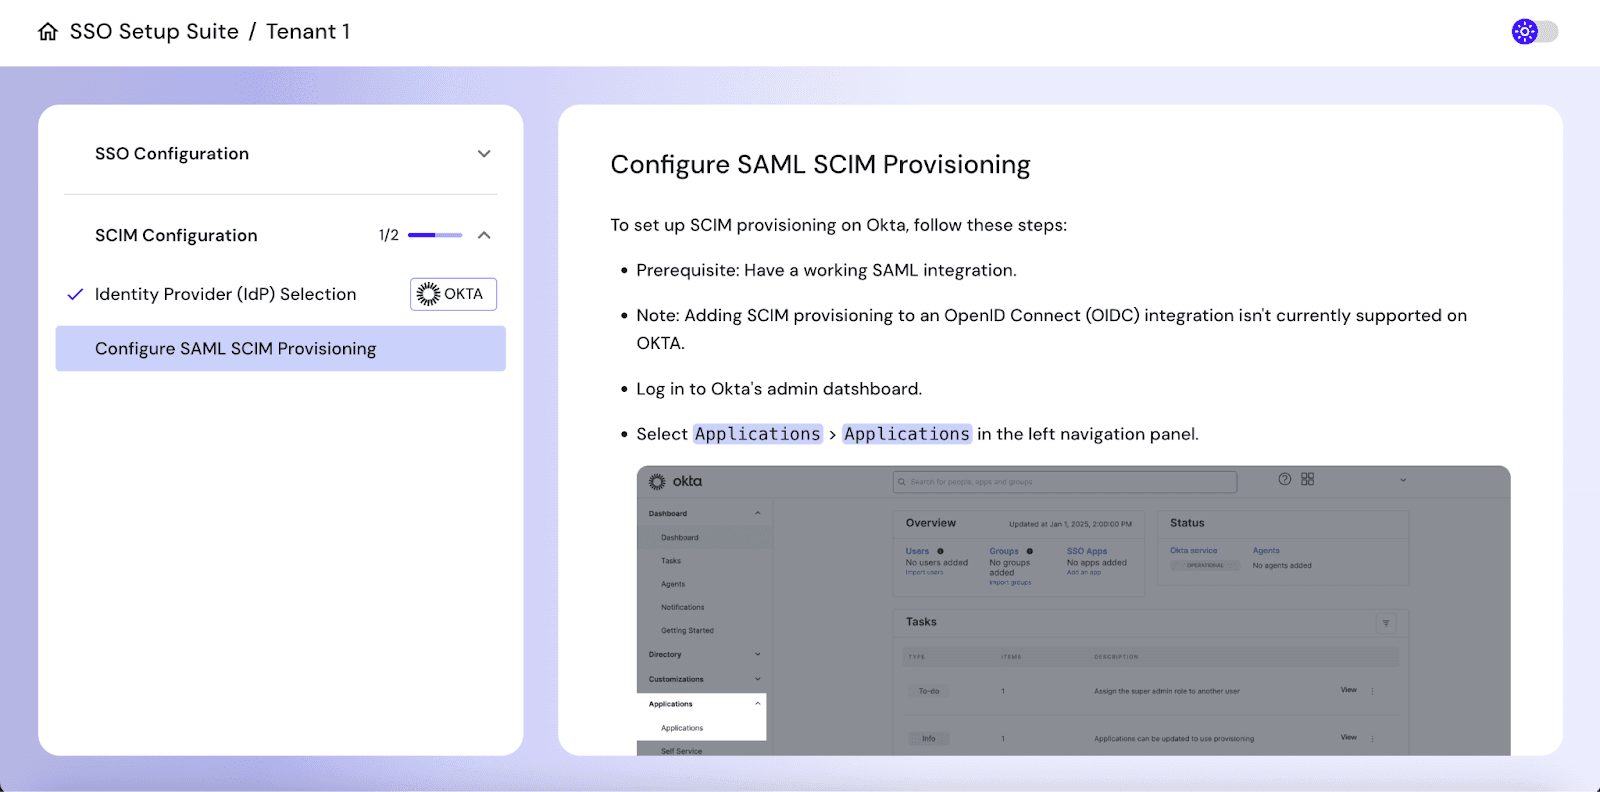
If the tenant also wants to enable SCIM provisioning, to automate the exchange of identity information between Descope and the customer’s IdP, the same Setup Suite allows them to set that up. These SCIM settings can be configured by the Tenant Admin directly, without needing to engage your support or development teams.
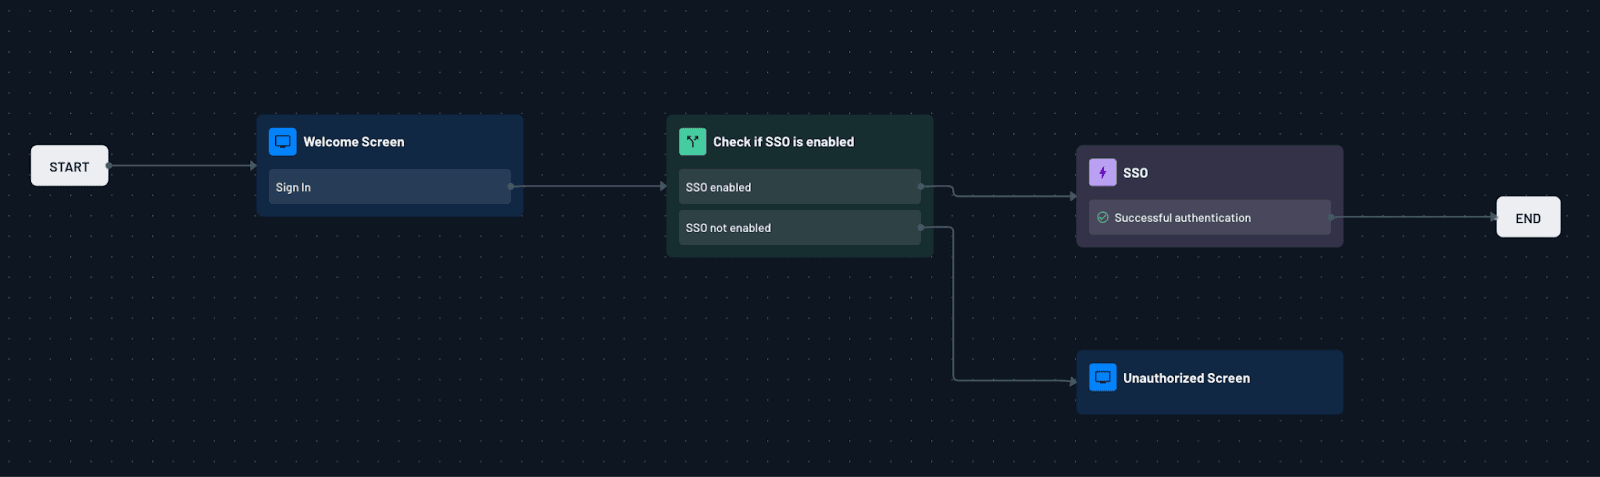
Once SSO and SCIM are configured, Descope makes it easy to route users to the appropriate login method. In your main authentication flow, you can check whether the ssoEnabled flag is set to true for a given tenant, based on the domain that the Tenant Admin provided in the SSO Setup Suite. If so, you can automatically trigger the SSO action, redirecting users to their organization’s IdP.
If SSO is not yet enabled, you can block access or route users through a default login experience—ensuring a secure and consistent authentication flow based on tenant configuration.
Use case 3: Connect outbound apps & capture consent
As part of onboarding, you might want the Tenant Admin to authorize your app to connect to third-party tools on their behalf. For example, your platform might need to sync contacts from a CRM like HubSpot, send messages through Slack, or log data to an analytics provider.
Descope Outbound Apps let your platform securely connect to third-party services on behalf of your customers. These connections are powered by OAuth, a protocol that allows one system to access data or perform actions in another—without needing to store user credentials. By collecting and managing these external provider tokens at the tenant level, you can enable third-party integrations while keeping consent and security centralized.
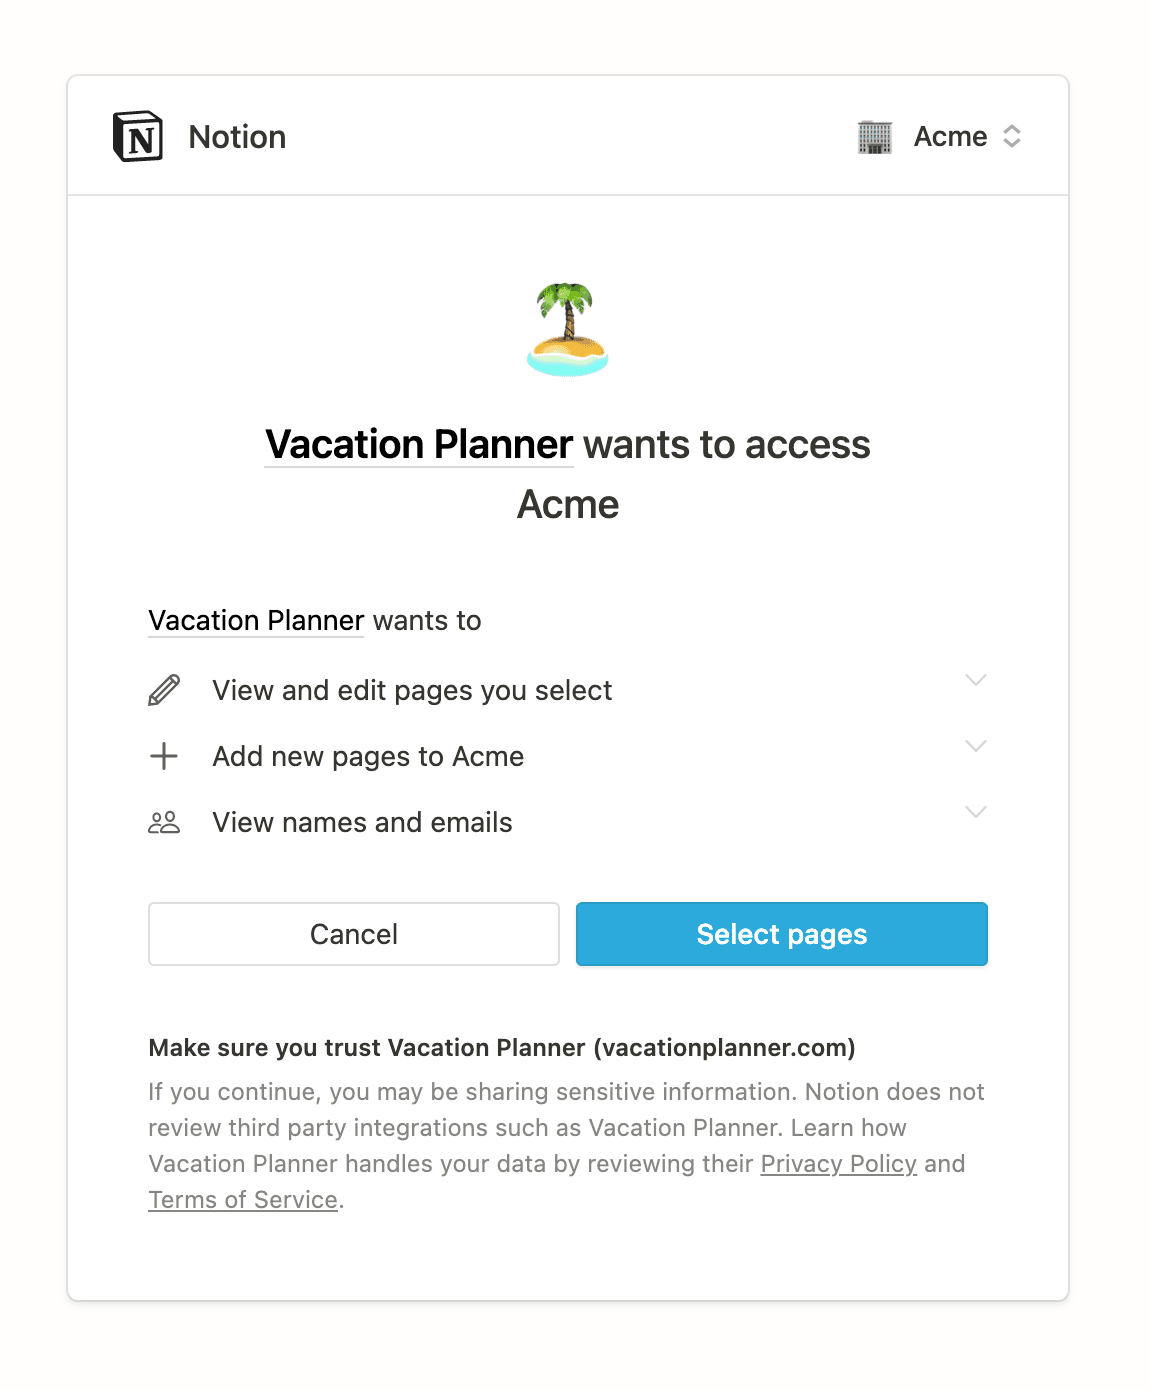
Within your onboarding flow, you can present the admin with a list of available integrations. When they select one, the flow initiates an OAuth consent process where they authorize your app to access the provider. Once consent is granted, Descope securely stores the access and refresh tokens associated with that tenant. The admin can even give consent for some of the scopes at a tenant level, and leave the rest of the scopes to be managed at the user level.
Later, when end users in the tenant interact with features that depend on these integrations, your app can use the stored tokens to perform actions on their behalf—without having to prompt every user for individual OAuth consent.
By including this step in onboarding, you set up these integrations early—streamlining user experience and reducing friction.
Use case 4: Invite additional admins
Tenant Admins often need to bring in colleagues to help manage users, settings, or integrations. Your onboarding flow can include a step for inviting additional Admins.
You can collect their email addresses, assign appropriate roles, and automatically send an invite link using the User / Invite flow action. This allows your customers to expand their team’s access immediately, without needing to call support.
Simplify B2B onboarding with Descope
Tenant onboarding shouldn’t be a drag—but it can be drag and drop.
With Descope’s multi-tenant architecture and Flows, you can build modular onboarding experiences that scale: from tenant creation and styling to SSO & SCIM configurations, third-party integrations, and multi-admin support.
Whether you're onboarding startups or large enterprises, Descope gives you the flexibility to automate the right steps at the right time—without hard-coding every edge case. Start designing a better onboarding journey today and empower your customers to get started, faster.
To explore Descope B2B CIAM capabilities for yourself, sign up for a free account. Have an upcoming B2B auth project? Book a demo with our team to learn more.