
Table of Contents
In the dynamic world of mobile app development, staying ahead of technological advancements is crucial. Enter Expo - a revolutionary framework transforming the way developers build native apps for Android and iOS.
In this blog, I will share how you can create seamless, secure authentication for your Expo mobile app with Descope. Let's explore how Descope can elevate Expo authentication and provide a frictionless onboarding experience for your mobile users.
Why Expo
In the dynamic world of mobile app development, staying ahead of technological advancements is crucial. Enter Expo - a revolutionary framework transforming the way developers build native apps for Android and iOS.
In this blog, I will share how you can create seamless, secure authentication for your Expo mobile app with Descope. Let's explore how Descope can elevate Expo authentication and provide a frictionless onboarding experience for your mobile users.
Why pair Expo with Descope?
While Expo efficiently streamlines OAuth implementation, Descope takes it a step further by letting you create personalized onboarding experiences and unifying identities across OAuth providers.
Integrating Descope with Expo offers a plethora of benefits:
Centralized identity store: Descope can store identities across IdPs to make user management straightforward and secure, a boon for developers juggling multiple user databases.
Customizable authentication experience: Descope Flows help you tailor your app’s authentication to meet specific needs. You can create user-facing screens for progressive profiling, decide when to prompt for MFA, add step-up controls for sensitive actions, and more.
Passwordless authentication: Embrace modern passwordless authentication methods like passkeys, magic links, and TOTP authenticator apps alongside OAuth social logins.
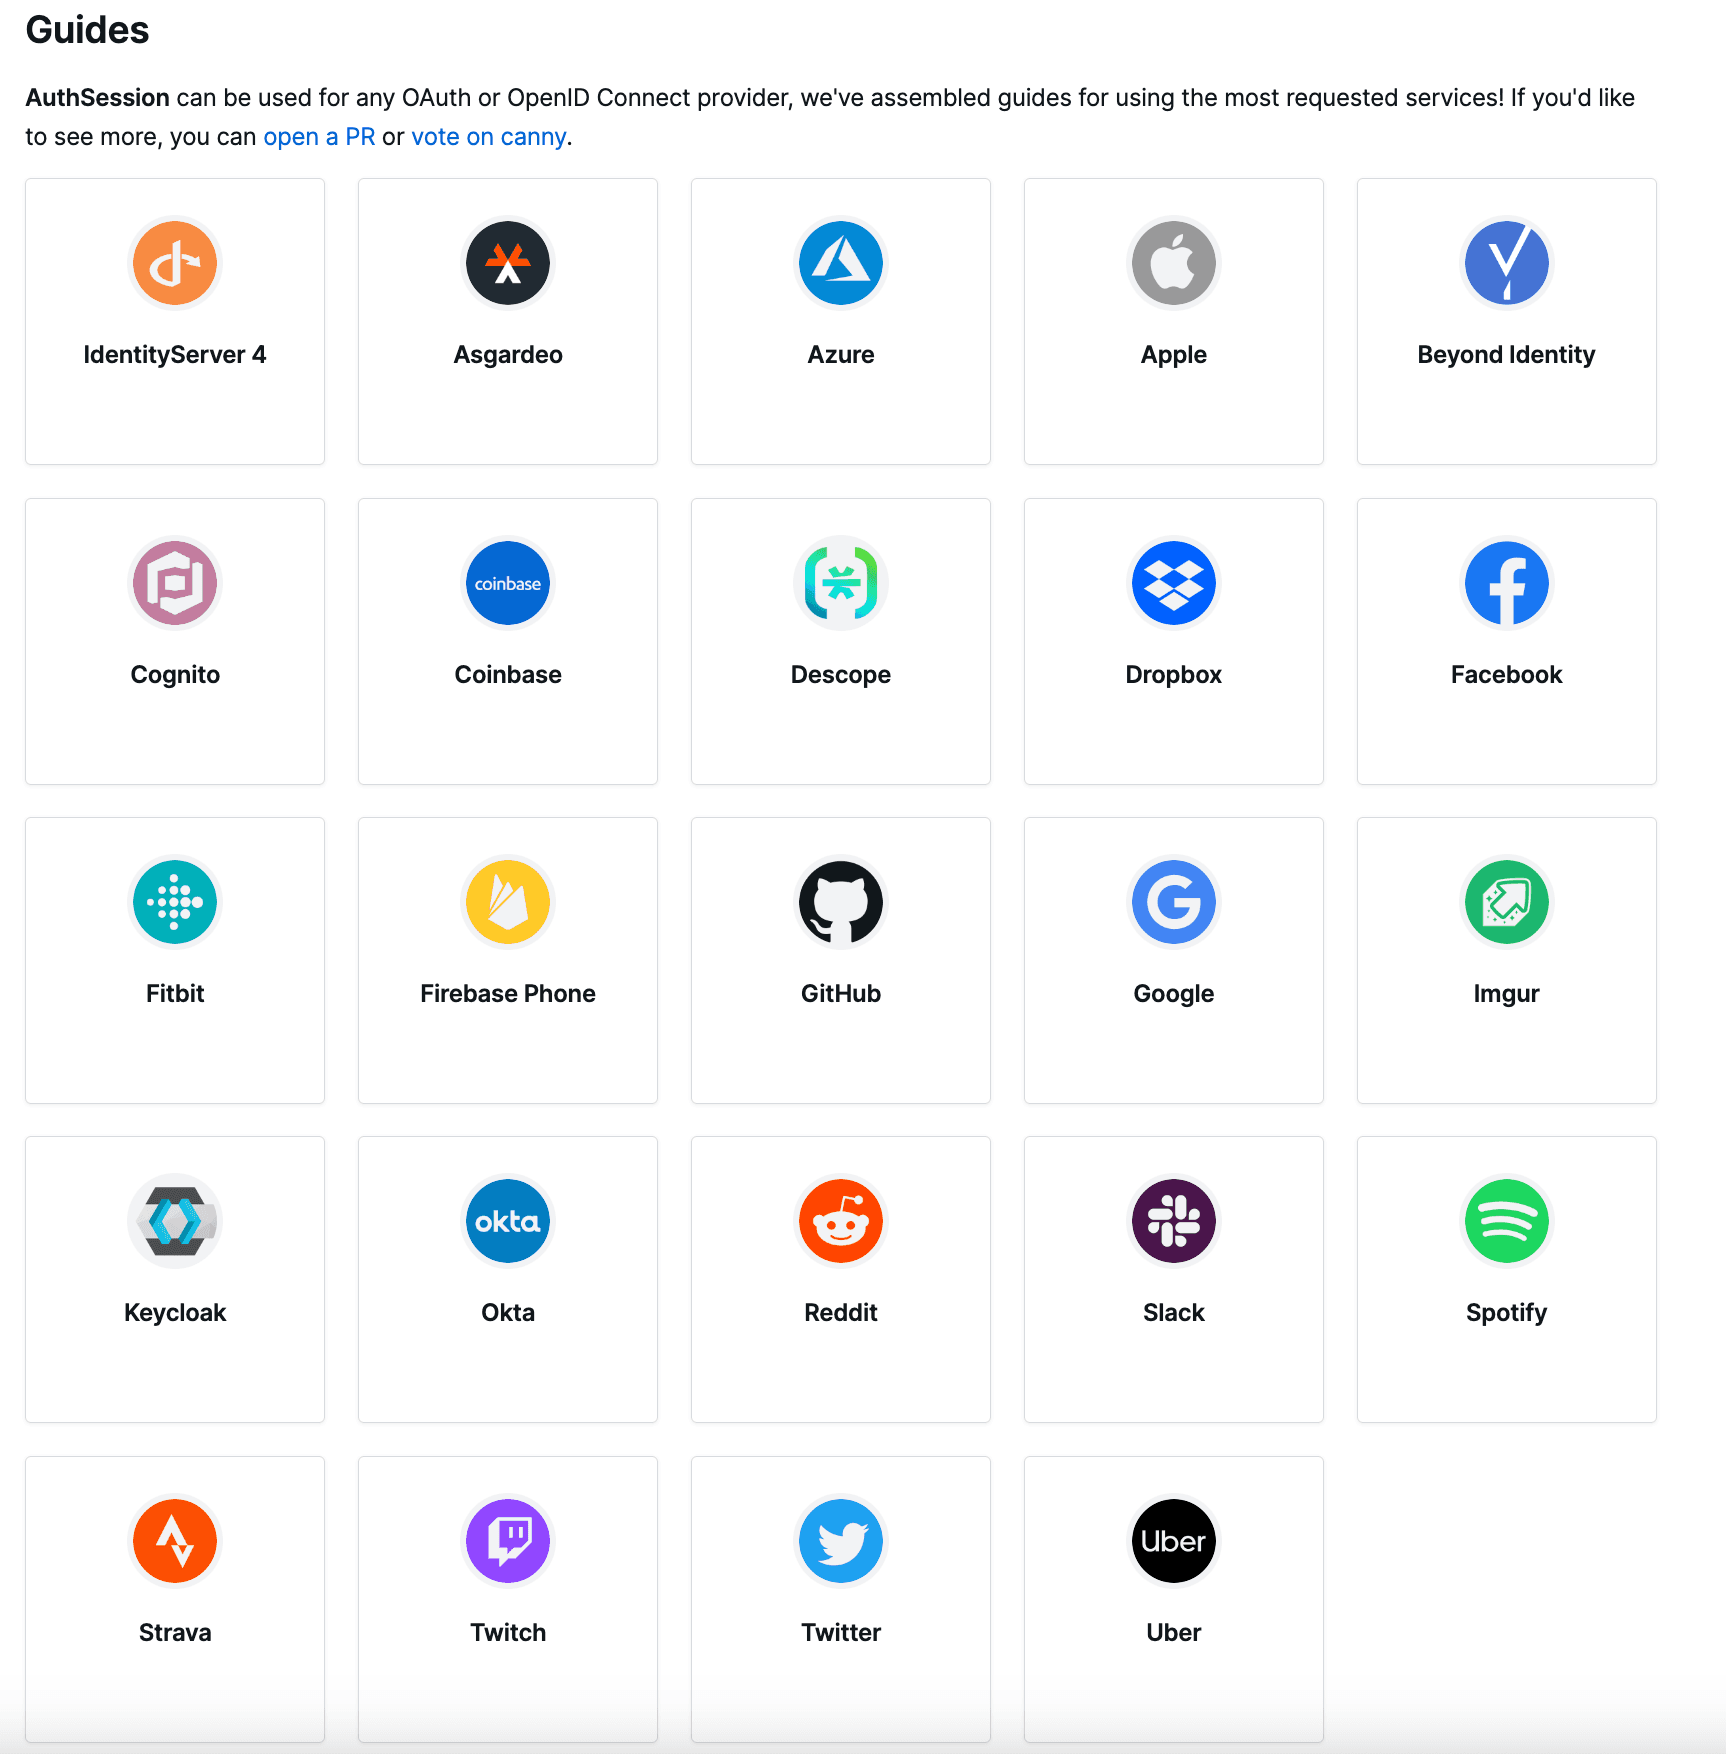
Versatility: Descope’s compatibility with any OpenID Connect (OIDC) provider adds an extra layer of flexibility, allowing developers to integrate various providers into a single, cohesive system.
The Descope capability that has probably helped customers the most is its ability to easily merge identities from various OAuth providers. This integration simplifies the developer’s task of managing multiple endpoint configurations, as these providers can be connected as Custom OAuth Providers in Descope.
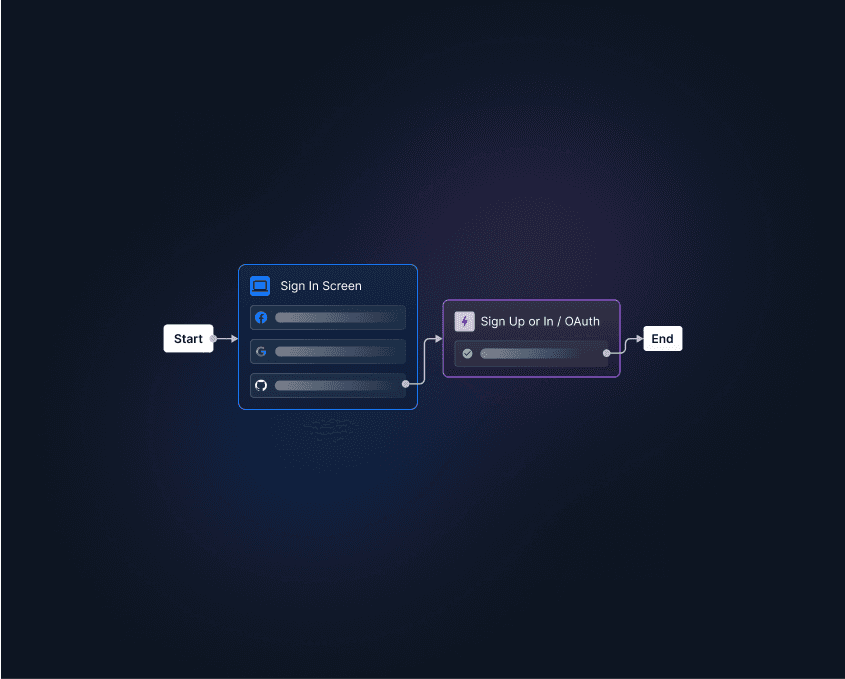
Once you’ve configured your desired OAuth providers in Descope, you can design a custom login experience for your mobile app users or connect to various other identity providers for SSO or company-level employee authentication – all without having to deploy or code any additional logic in your application.
The video below shows identity merging in action. You can see how easy logging in with Face ID is on an iPhone, and also how seamlessly the identities are merged. When the same user signs in with Google, their Google identifier is added to their user record!
Building Expo authentication with Descope
Now that you’ve been introduced to Expo and why Descope might be the right authentication solution for your Expo apps, we'll dive into the practical aspects of implementing Expo authentication with Descope.
Setup and configuration
As a note, instead of following along with the instructions below, you can also take a look at our sample app.
Initial installation:
First, ensure you have Expo CLI installed. If not, you can install it using
npm install -g expo-cli.Create a new Expo project using
npx create-expo-app YourProjectName, and navigate to your project directory.Install necessary packages such as
expo-web-browser, expo-auth-session, and others using npm or yarn. You can copy over the package.json into your own app from here as an example.
Configuring the App.js file:
Open your Expo project and navigate to the
App.jsfile.You can copy over the example code, which can be found on the Expo docs page.
Replace
<Descope Project ID>in the code with your actual Descope Project ID.
Setting up OIDC claims:
Within your Descope Project, you’ll need to include which specific custom claims to return to Expo in order to retrieve user information to display in your app.
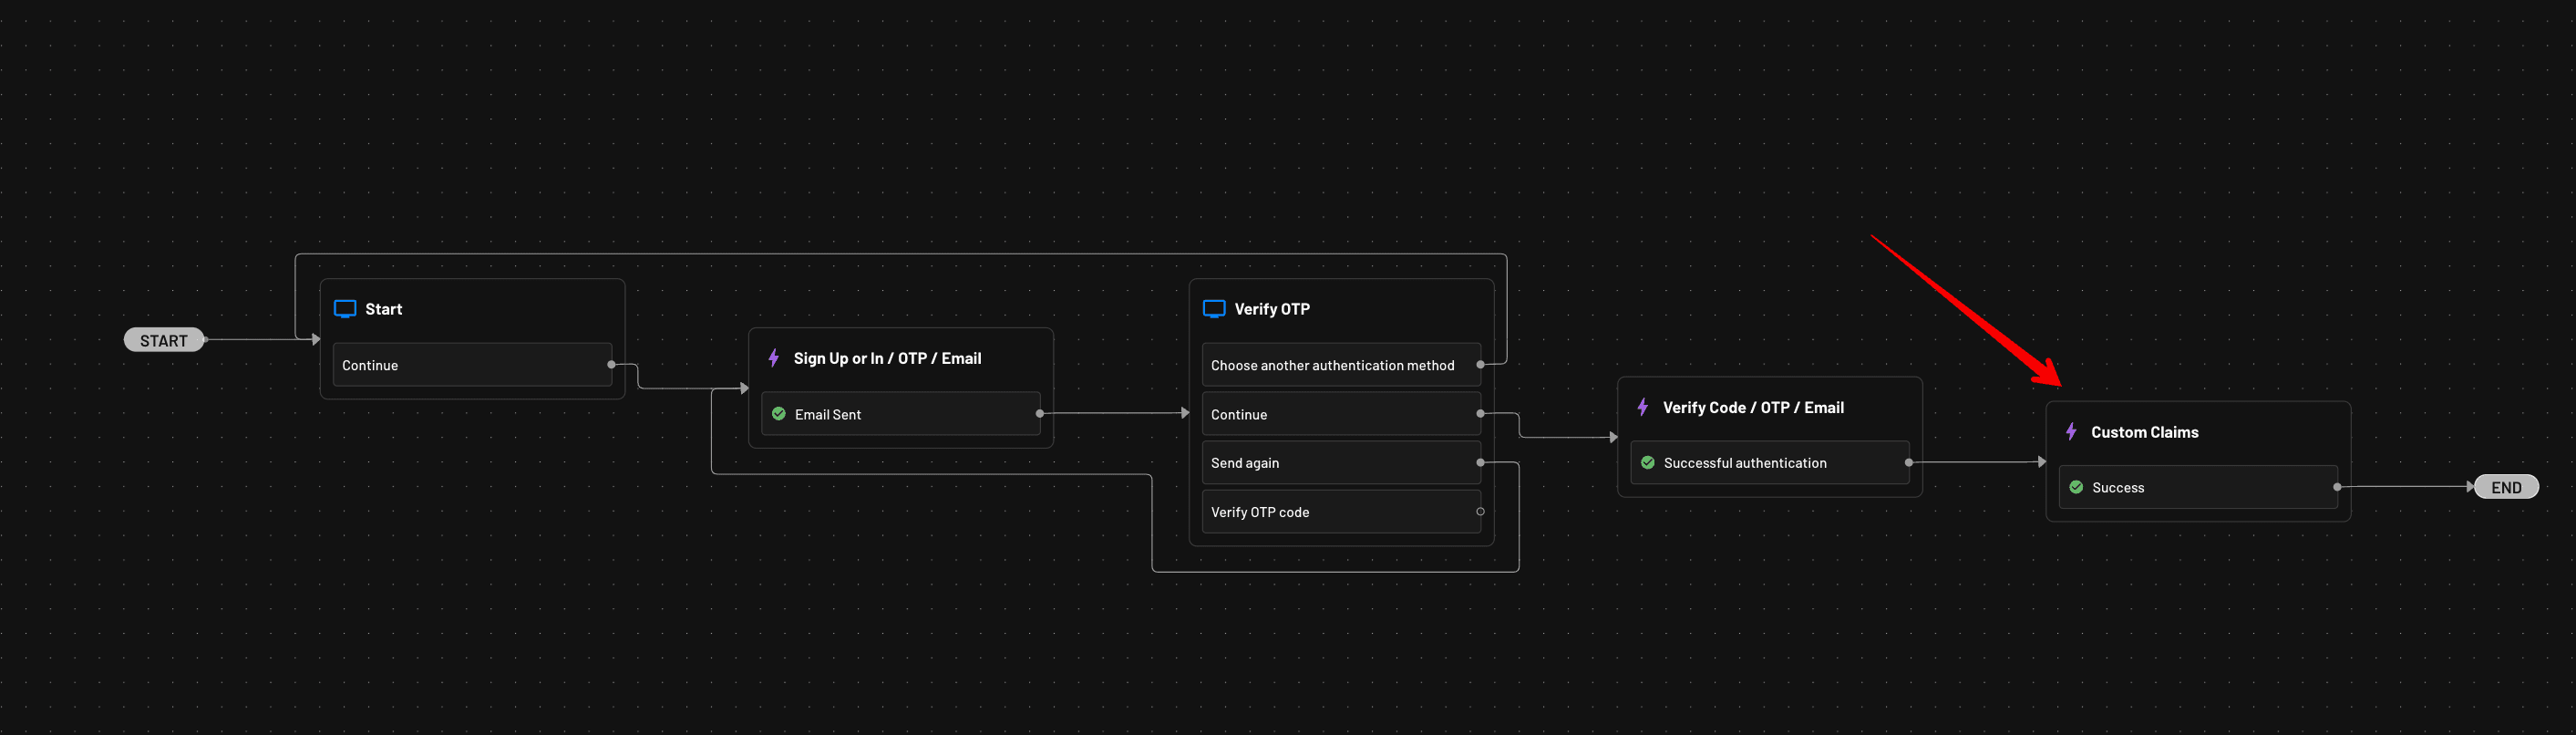
In your Descope Flow, you can add a
Custom Claimaction before the end to pass whatever claims you want to be able to access from UserInfo, as covered in the "Explaining the code" section below in this tutorial.For this example, we’ll add email to your flow like so:
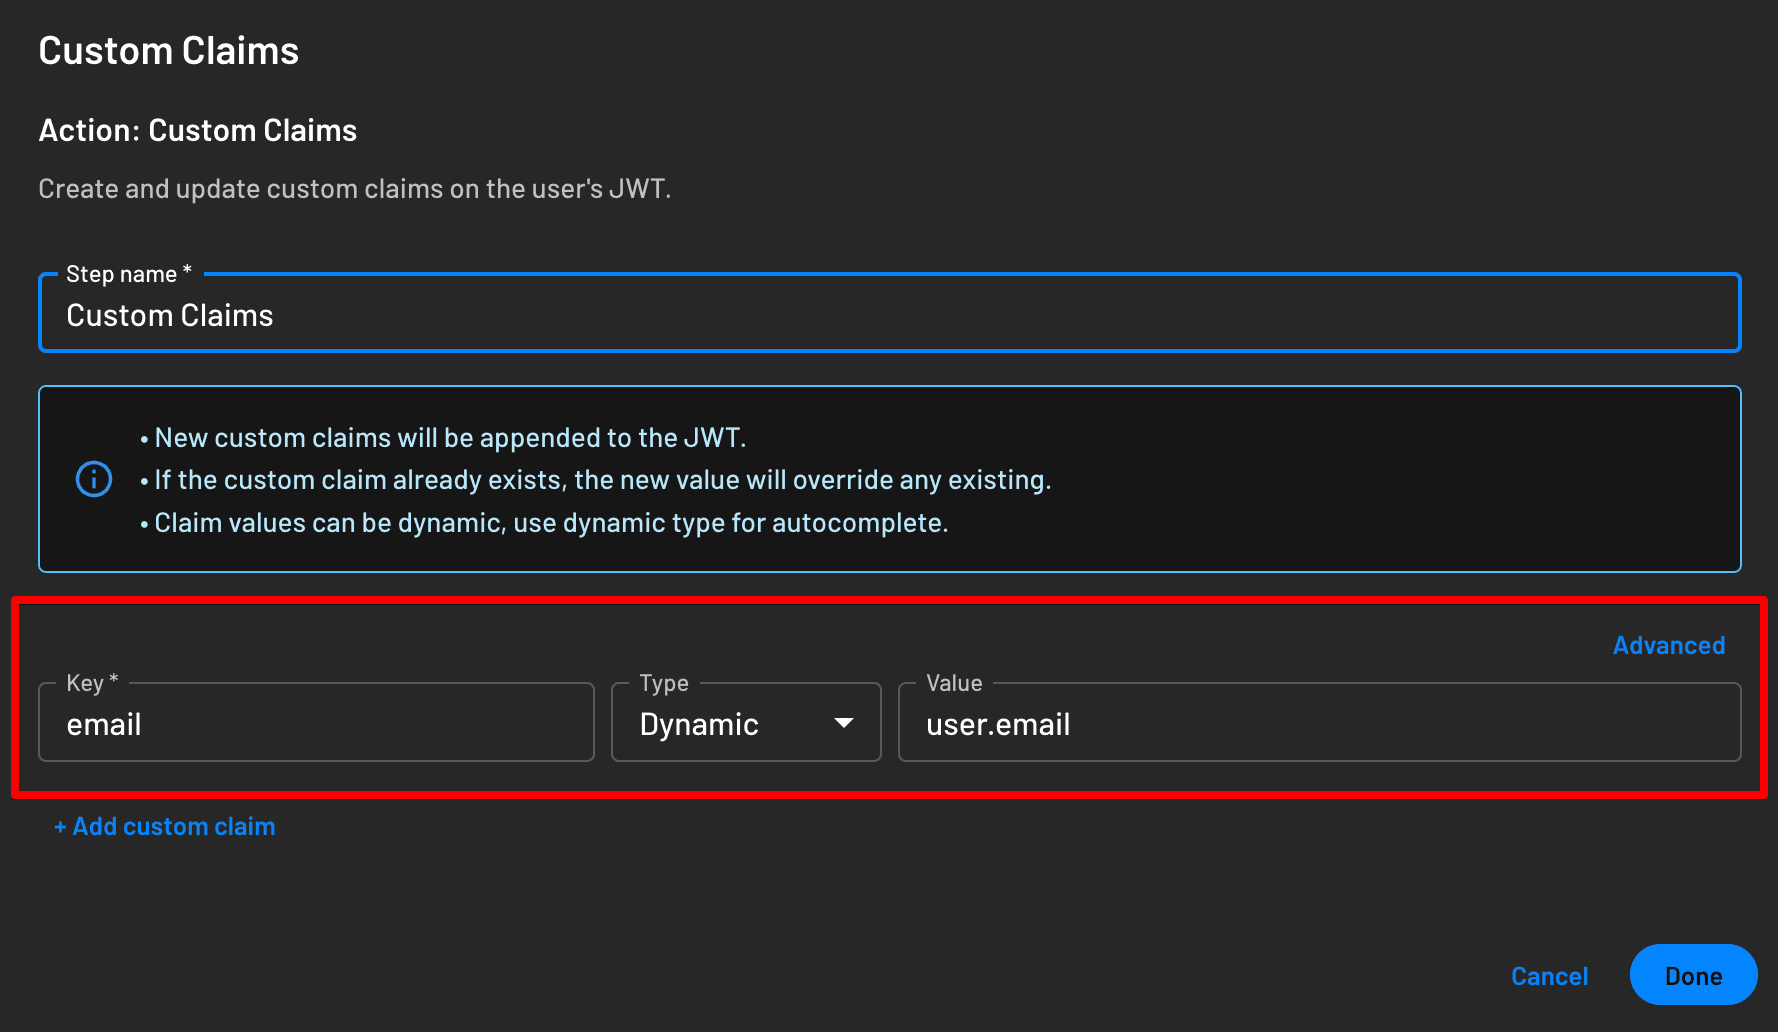
This is an example of what your flow should look like with the Custom Claims action added to it:
Once you’ve added email as a custom claim, you’re ready to run the application!
To run the app in your local environment, simply use npx expo start --localhost. You will then be able to test the login flow by pressing the login button. This will pull up a web view of the Descope Flow that’s been configured in your Descope Project, and allow you to sign in.
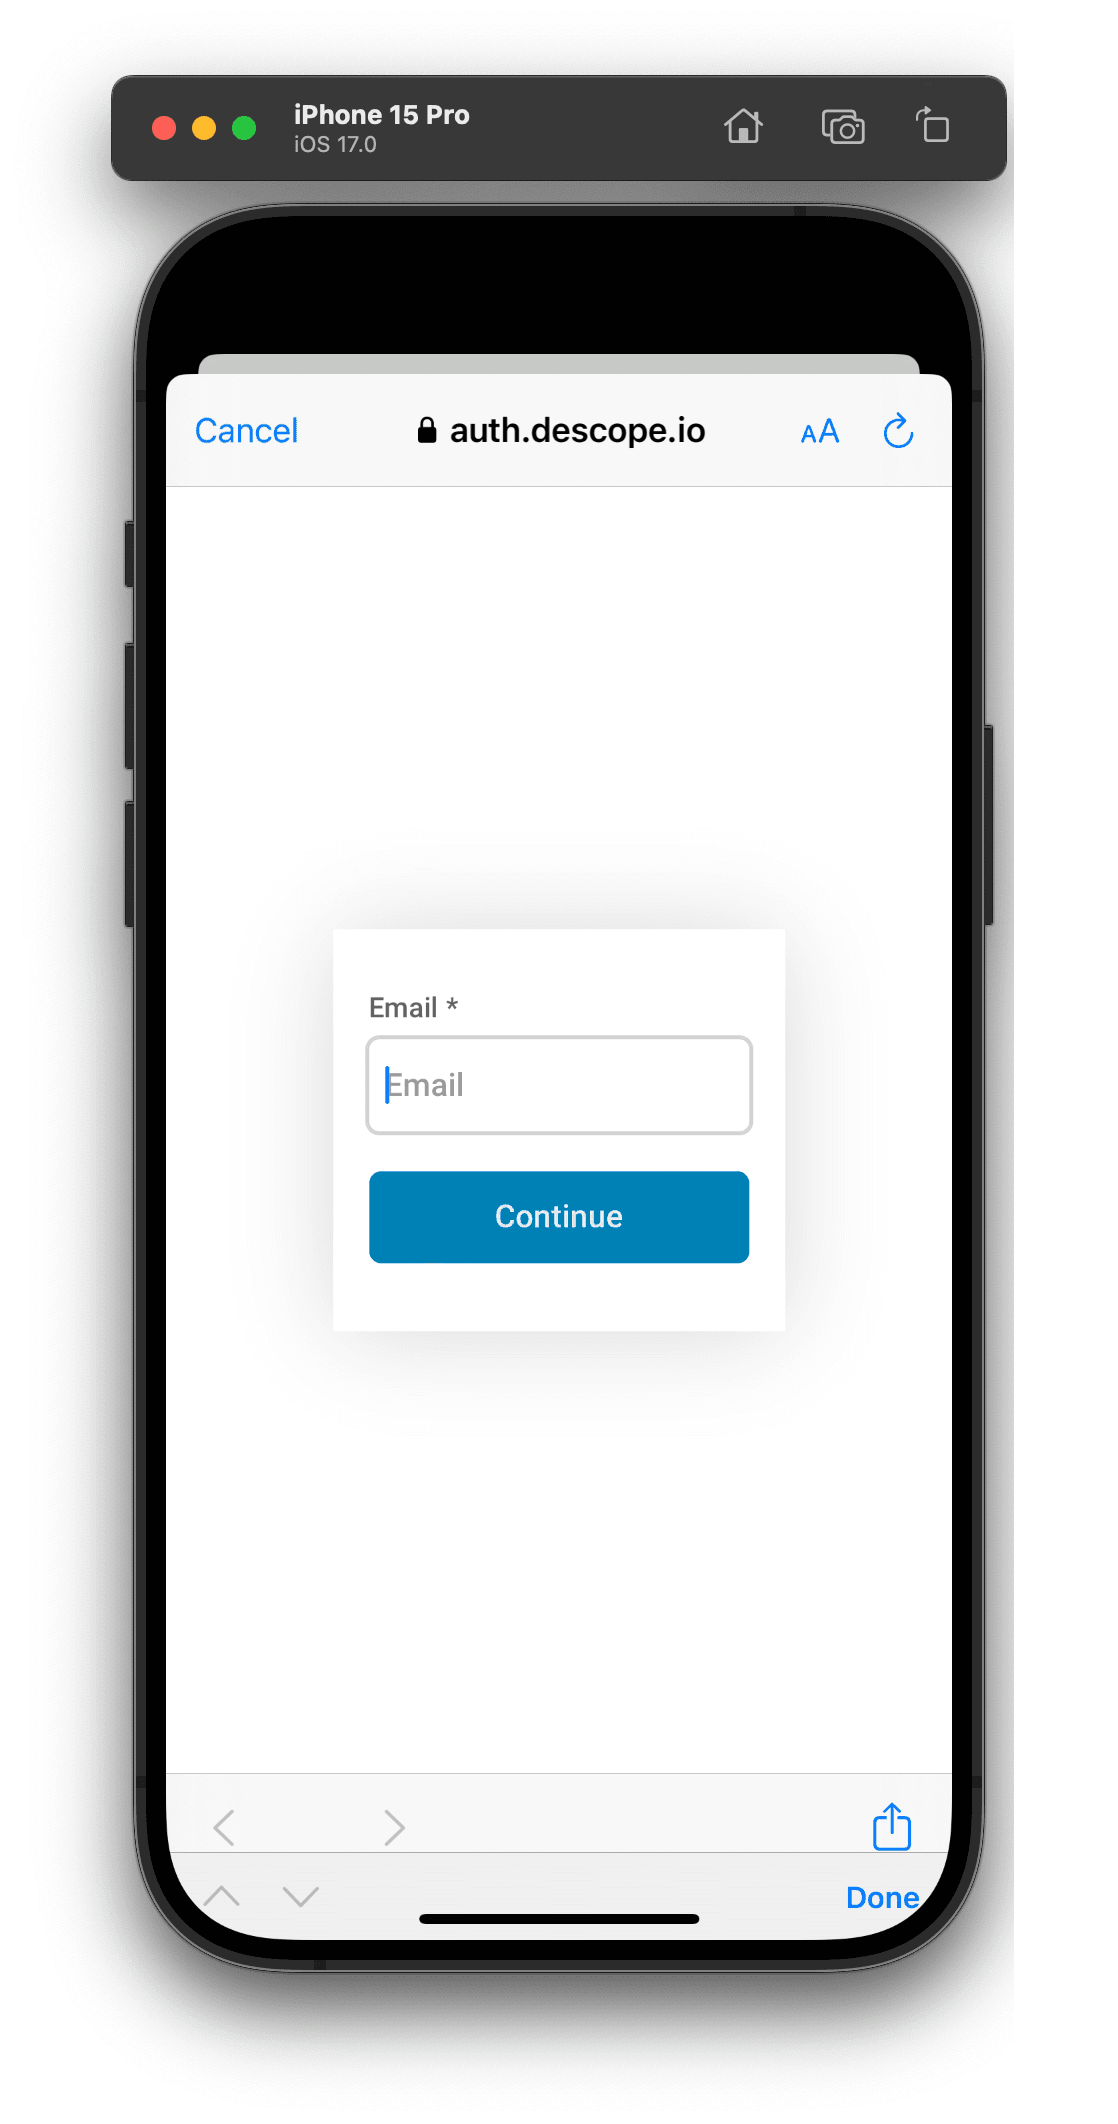
After successful login, the app should display the user's email and a logout button.
If you want to change the flow you’re using on your mobile application, you can do so by changing the flow hosting URL under IdP Applications -> OIDC Default Application (or other IdP application you’re using).
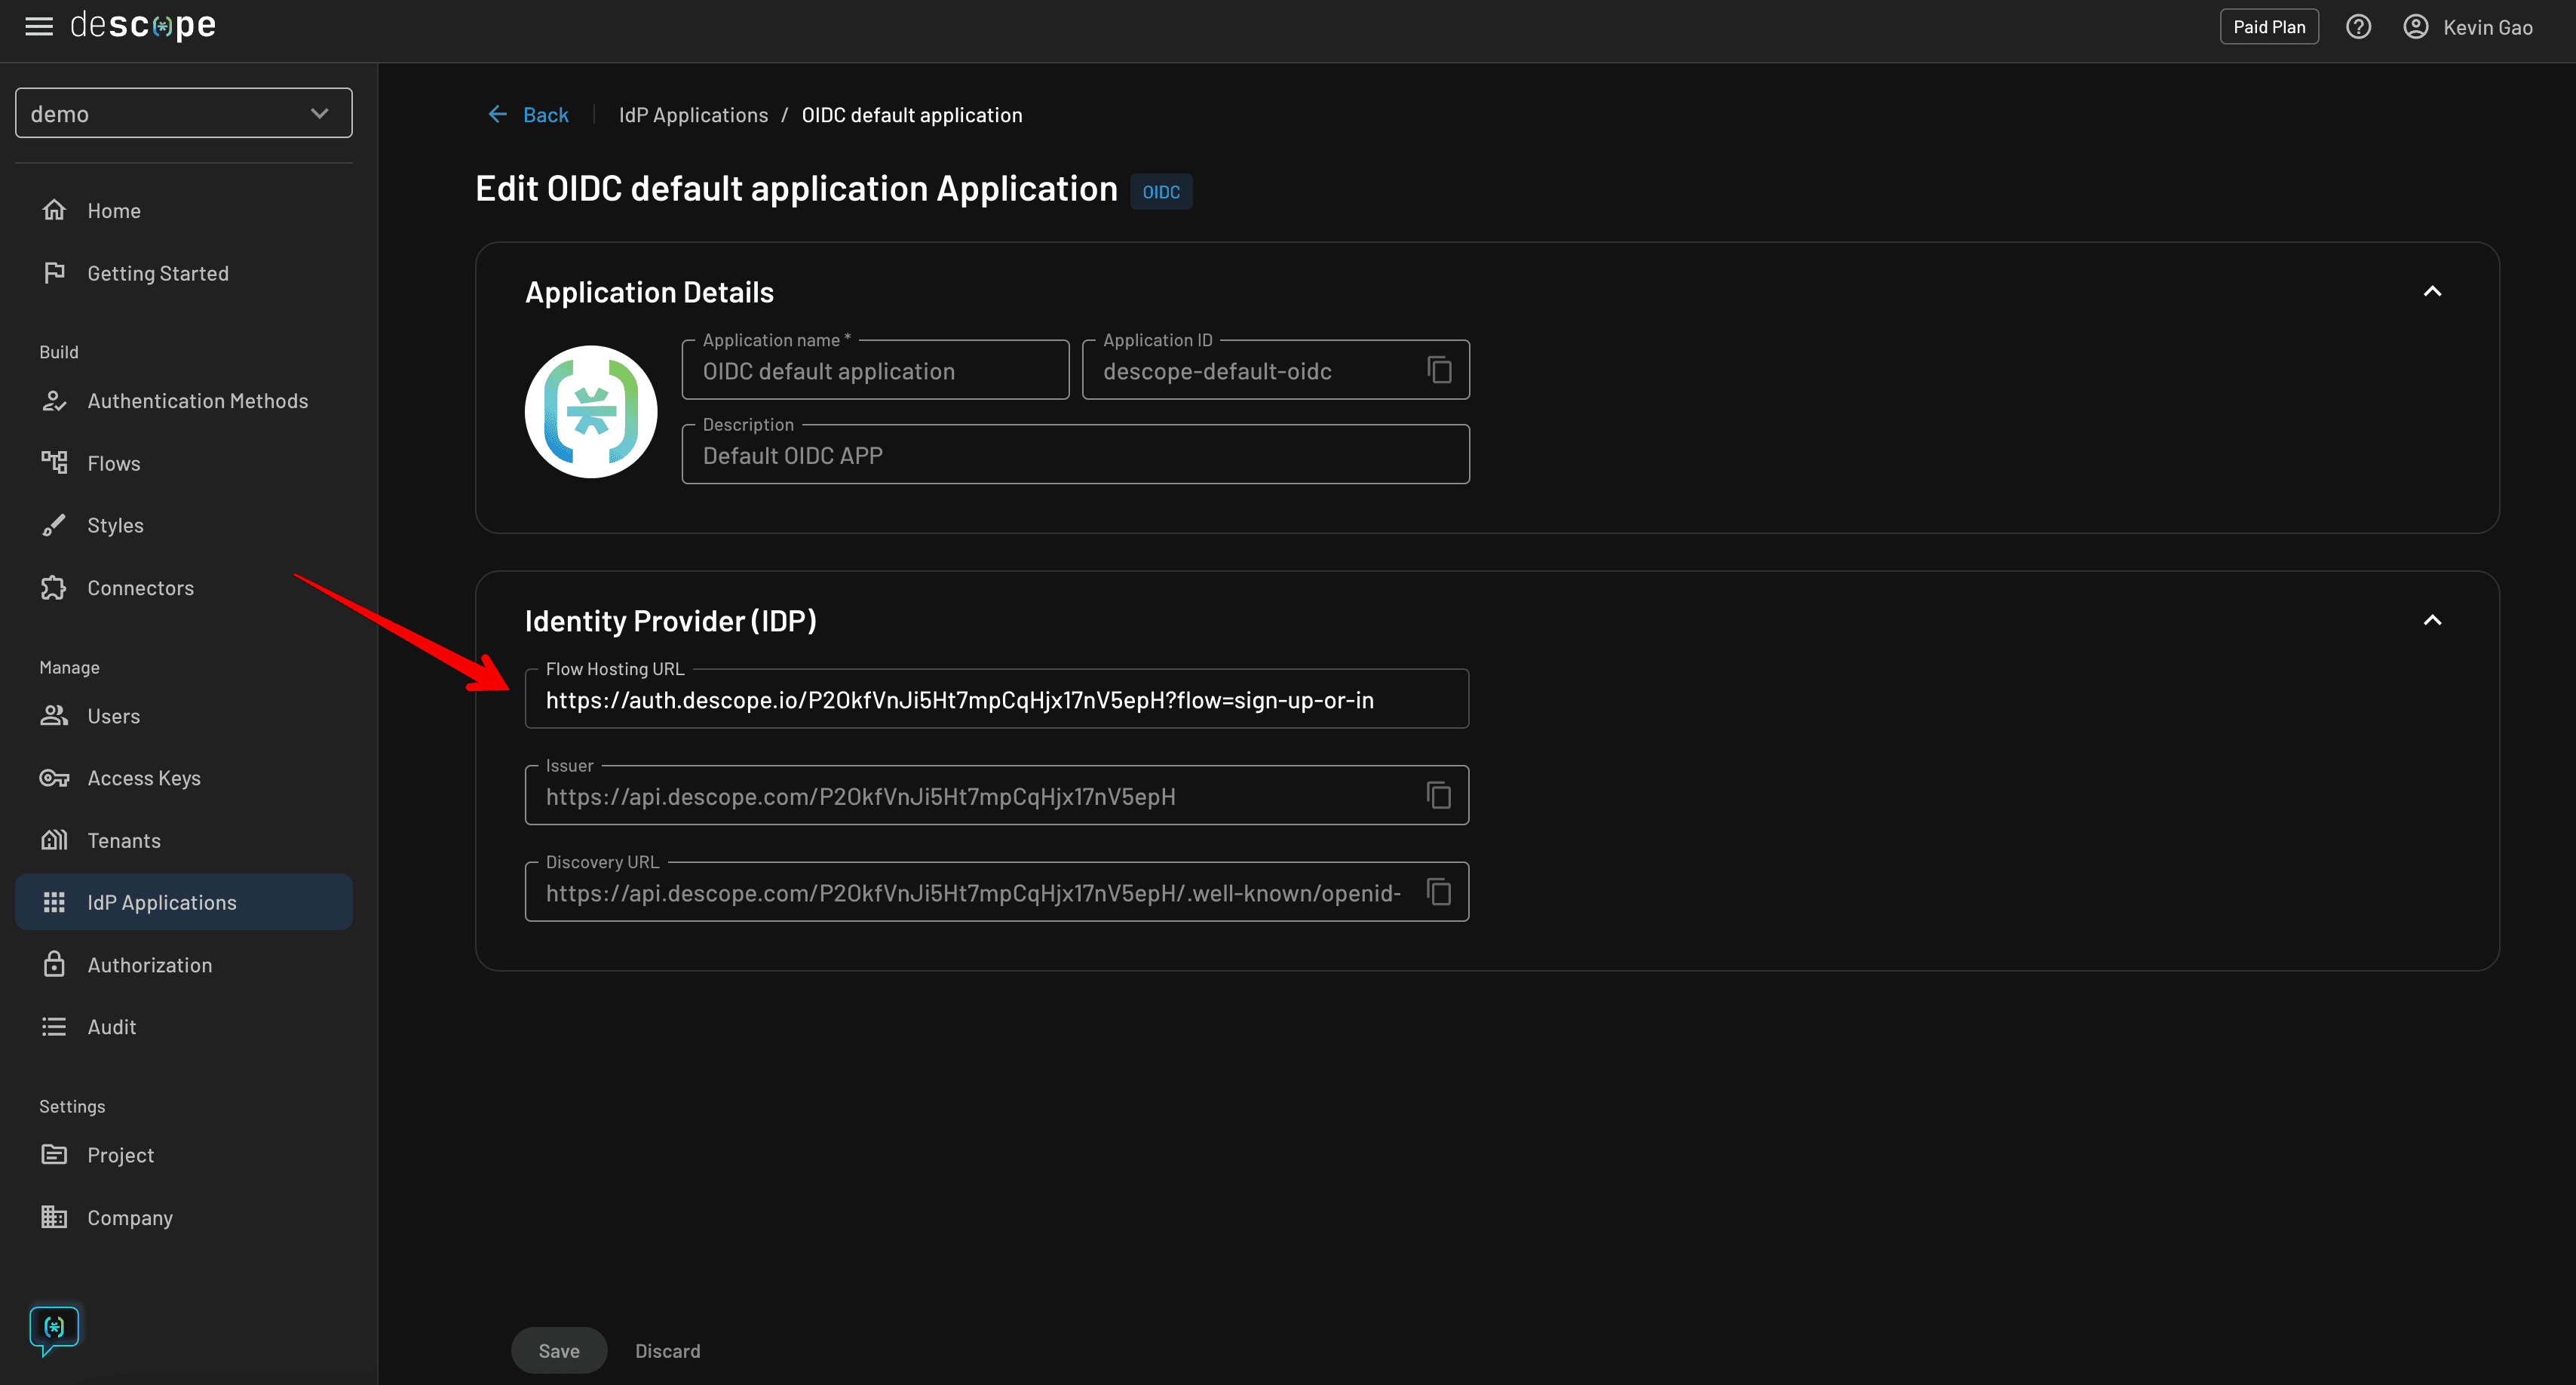
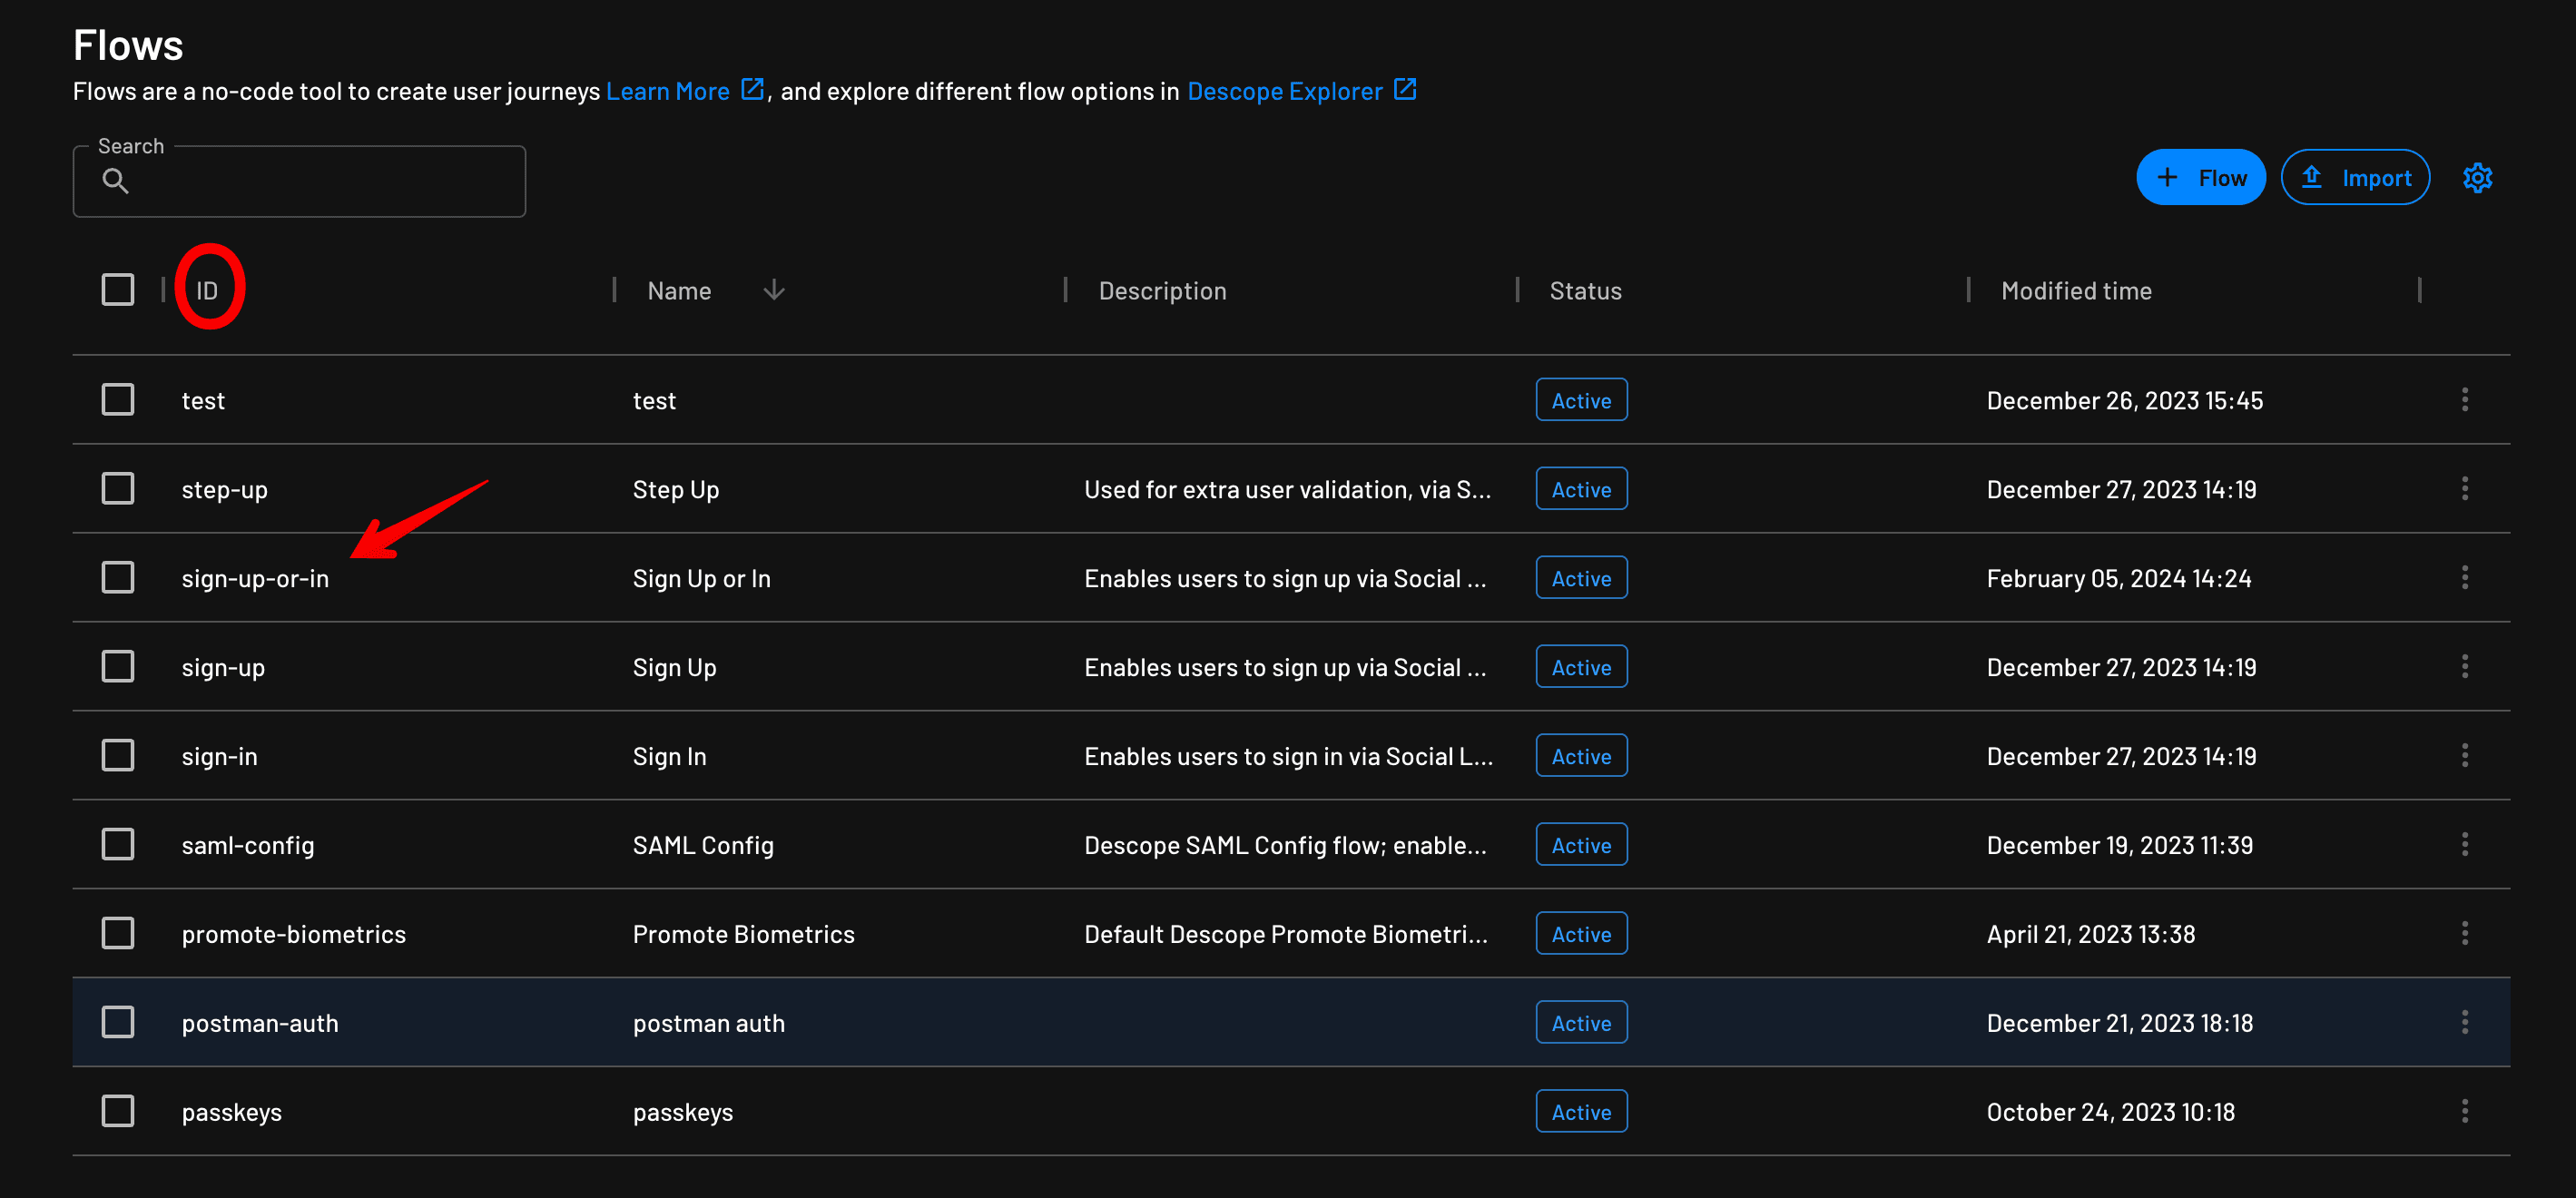
You simply have to change the query parameter (default is sign-up-or-in) to whatever flow ID you wish to use, which is found under Flows.
Detailed instructions on how to utilize the default OIDC application and flow hosting URL can also be found in our docs page.
This code is a great starting point for adding just about any authentication method to your mobile application. Let’s dig into the code a bit to try and understand what’s going on.
Explaining the code
As you can see, the example code has already implemented a function to handle the authentication response, including exchanging the OIDC code for tokens and error handling. However, you can change all these details as well as the OIDC scopes depending on your use case.
AuthSession configuration:
const descopeUrl = `https://api.descope.com/${descopeProjectId}`;
const discovery = AuthSession.useAutoDiscovery(descopeUrl);
This snippet sets up the Descope URL for your project and uses AuthSession for auto-discovery of authentication endpoints.
Handling authentication response:
React.useEffect(() => {
 if (response?.type === "success") {
 // Exchange the code for tokens
 } else if (response?.error) {
 // Handle error
 }
}, [response]);
Here, the useEffect hook listens for changes in the authentication response. If successful, it proceeds to exchange the code for tokens. If there's an error, it handles it accordingly.
Login and logout functions:
The login function triggers the authentication process using promptAsync().
The logout function revokes the tokens and resets the authentication state.
Conclusion
In this blog, you learned the benefits of pairing Expo with Descope for creating personalized and secure user authentication for your mobile apps. Descope’s ability to plug into almost any platform as an OIDC or SAML provider, coupled with its ease of integration with Expo, makes it an invaluable tool for any mobile app developer.
Sign up for a Free Forever account to get started with Descope. Have questions about our platform? Book time with our auth experts to learn more.