
Table of Contents
If you're a startup or company looking for a way to implement a waitlist with little to no code, full authentication, email verification, and a profile page, then you’re in the right place.
In this tutorial, we will be implementing a waitlist into an app with Descope Flows and Airtable. By the end of the tutorial, you will have a stunning waitlist form that will allow users to sign up / log in.
The spotlight of this tutorial will be Descope Connectors, a way to make requests to third-party services allowing you to handle the automatic updating and processing of users on a live waitlist. Once you approve the users in Airtable, they can be authenticated through the same form and redirected to a profile page.
Prerequisites
All the code for the tutorial will be in the GitHub Repository at waitlist-sample-app. Instructions on setting up Airtable and deploying to Vercel are all in the readme.
If you're a total beginner or getting started with Descope, feel free to follow along! Visit the Descope website to sign up for a Free Forever account. If you don’t have an Airtable account, sign up here.
The waitlist experience
When you're a startup not ready to open your app to the world, gaining initial users and traction is paramount. The easiest way to do this is to set up a waitlist! You can use this waitlist experience to get users to request access and wait for your approval.
The waitlist experience in this tutorial will start with a signup form. If the user isn't approved, they will be added to an Airtable waitlist. You will also get a notification that a user was added successfully.
When you approve the user on Airtable, you can also set up a notification to email the user that they have been approved. Once approved, the user can log in to your application through the same form.
Overview
NOTE: If you haven’t already, set up your Airtable and deploy to Vercel before continuing. All instructions can be found in the waitlist-sample-app repository.
For this tutorial, we will first set up our Descope project, Airtable, AND deploy our project to Vercel. Then after the setup and deploying our waitlist-sample-app repository, we will go over how to build our waitlist in Descope Flows.
If you're a visual learner, here's a video tutorial:
We will go through everything in great detail, so enjoy! 🙂
Setting up your Descope Project
Let’s set up our Descope project.
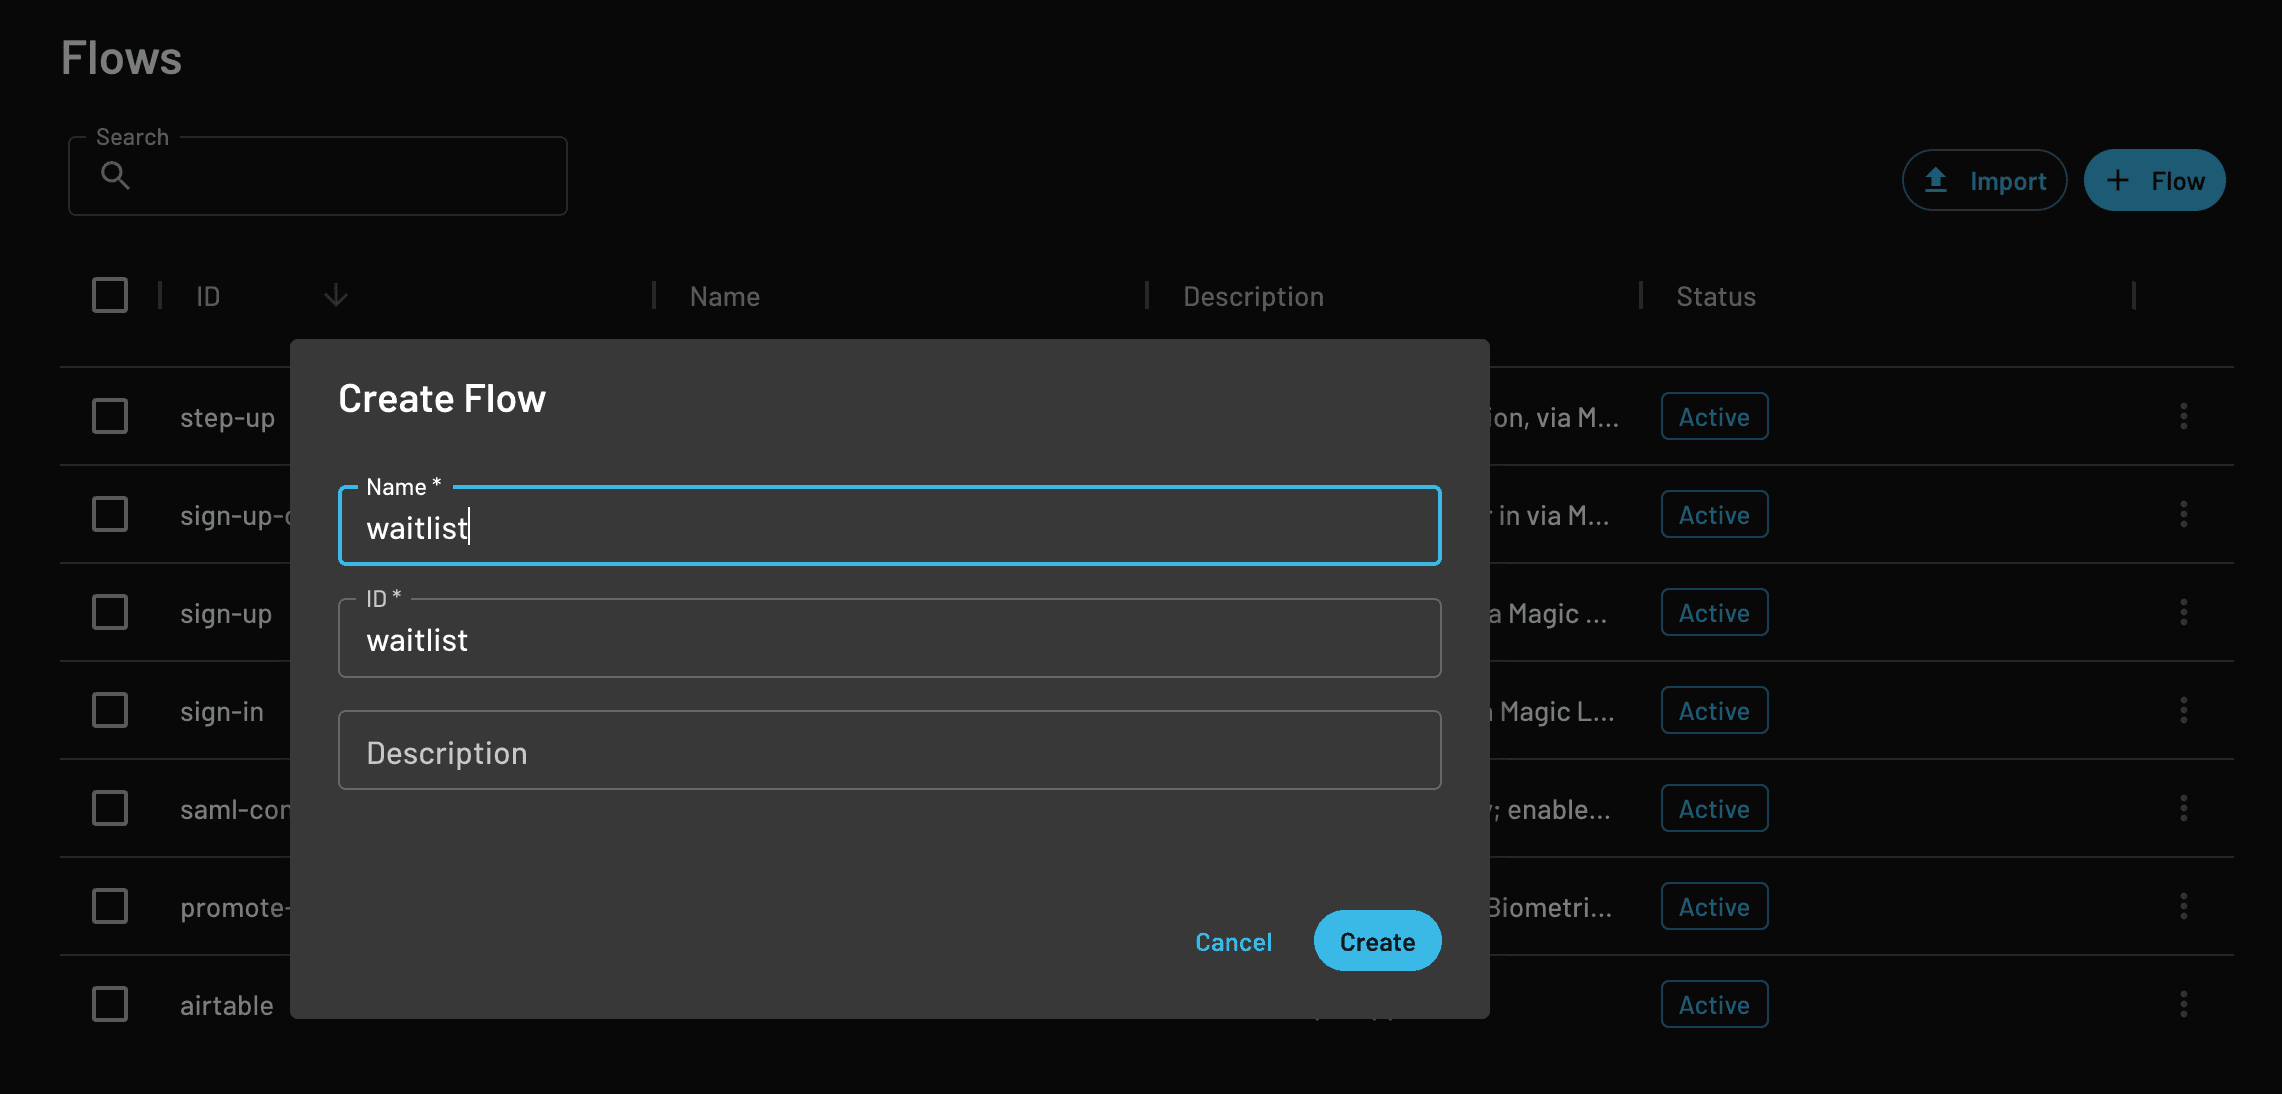
Log in to Descope and create a new Flow with the name “waitlist.” It must be named “waitlist” because in our code src/pages/Home.js, the Descope component has “waitlist” as the Descope Flow ID.
Your Project ID can be found at the bottom of the left navigation bar in “Project.”
Designing our Flow
Now that the setup is all done, let’s start building our Flow.
The easiest part about building our custom waitlist will be designing and building our Flow in Descope Flows. Nothing but drag and drop! With Connectors in the Flow, we can control when and where to make API requests without coding any functionality in our client.
Before we get building in Descope Flows, let’s map out the different steps and conditions:
Descope Screen Form (email field + button)
→ Sign Up or In / OTP / Email will verify and authenticate the email address. When successfully authenticated, we will move on to the next step.
→ Connector (will call API endpoint to check if the user is approved. Will return an “is_approved” object with true, “add,” or false value). What do the following return values mean?
True: the user is approved and exists in Airtable.
“add”: the user doesn’t exist in Airtable.
False: the user exists in Airtable but needs to be approved.
→ Condition (If statement that will check the connector response object true or false)
If true → End Flow
Else if “add” → Connector (will call API endpoint to add the user to airtable)
Awaiting Approval Screen with prompt telling the user to wait for approval
If false → Awaiting Approval Screen with prompt telling the user to wait for approval
The best part? With Descope Flows, we can build and customize entire screens, conditions, and requests without having to implement this ourselves in the code!
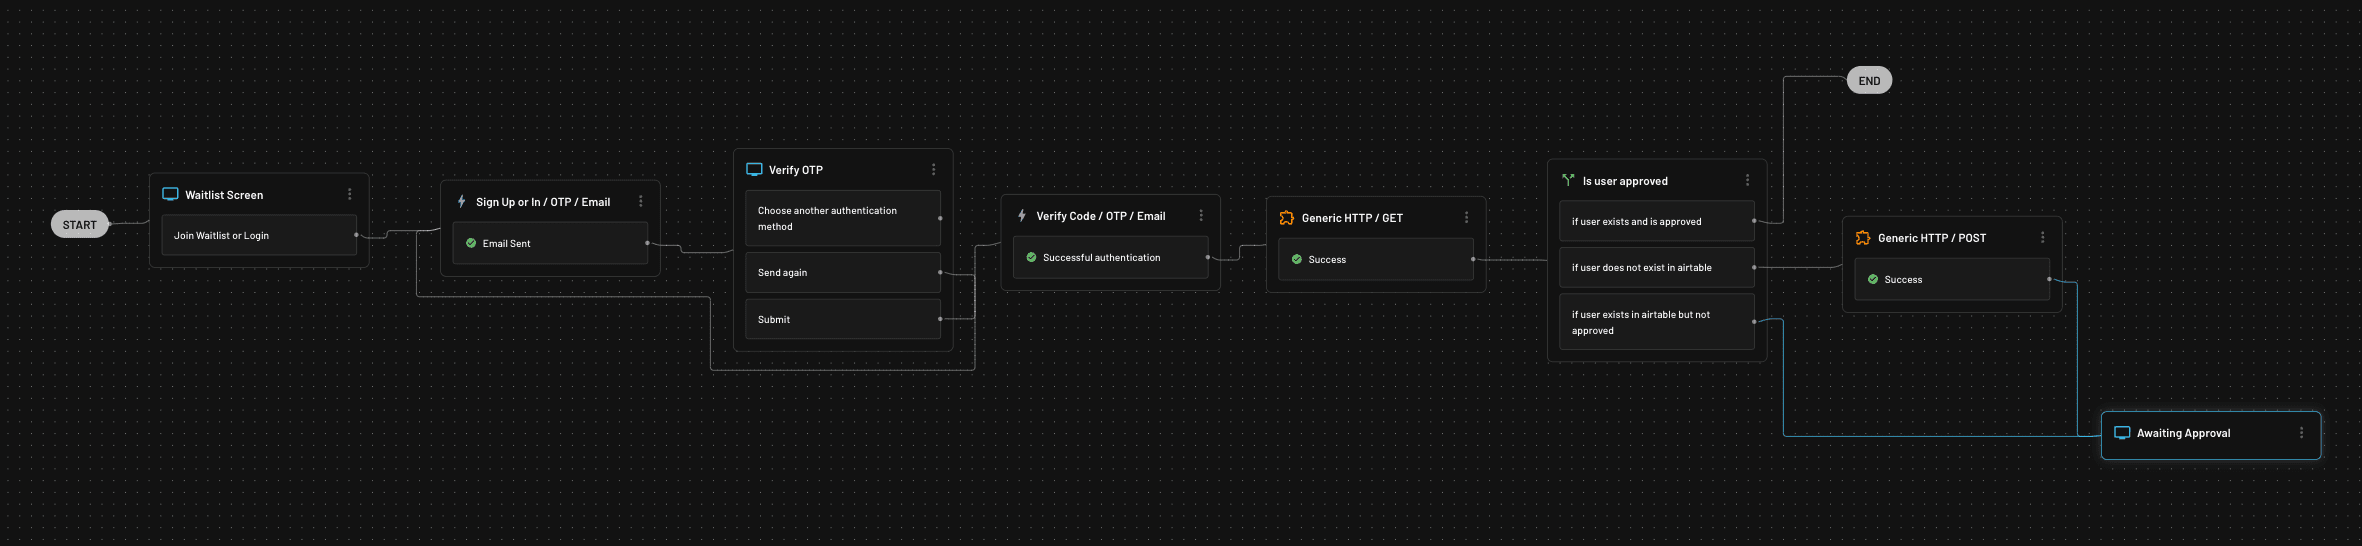
The final result of our Flow will look like the following:

Before we implement our Flow design, let's take a look at the API endpoints we’ve set up for our project.
API endpoints
In order to use Connectors with Flows, we’ll need to first build out the API endpoints. There will need to be two different endpoints: one to check if the user exists in Airtable, and another to add a user to the Airtable.
Navigate to the index.js file in the API folder where our serverless functions are and let’s break down what’s happening.
First, the imports:
const app = require('express')();

var Airtable = require('airtable');
var base = new Airtable({apiKey: process.env.PERSONAL_ACCESS_TOKEN}).base(process.env.AIRTABLE_BASE);

const PORT = 8000
app.set('port', (process.env.PORT || PORT));
Codeblock: Import statements and global vars in index.js
We initialize our express app and Airtable variables that use the Airtable web js API.
NOTE: The environment variables will draw from our environment variables in Vercel.
Now, going down the file we will see our two endpoints: check_user and add_user. Let’s first look at check_user and its helper function getAirtableByEmail.
async function getAirtableByEmail(email) {
    const data = base('Registration')
                .select({ filterByFormula: `email = "${email}"`})
                .firstPage()
                .then(records => {
                    if (records.length === 0) {
                        return null
                    }
                    return records
                })
                .catch( err => {
                    console.log(err)
                    return err;
                });

    return data
}


app.get('/api/check_user/:email', async (req, res) => {
    const userFormEmail = req.params.email
    console.log(userFormEmail)

    const data = await getAirtableByEmail(userFormEmail)
    console.log(data)

    if (!data) {
        return res.send({ is_approved: "add" })
    }

    const airtableEmail = data[0].fields.Email
    const airtableApproved = data[0].fields.Approved

    if (airtableEmail === userFormEmail && airtableApproved) {
        return res.send({ is_approved: true })
    }

    return res.send({ is_approved: false })
})
Codeblock: check_user endpoint and getAirtableByEmail helper function
The getAirtableByEmail helper function filters through our Registration base by email and checks if the email exists. If it exists, then it returns the record. Since the data returned is an array, we check if the length of the record is 0 and return null if that’s the case.
The check_user endpoint is a get request that takes in the email as a parameter. We get the record from our helper function and first check if the data is null. This means that we need to add the user. We return “true” when the record “email” matches the form “email” AND the user in the record is approved. We return “false” when the user exists in Airtable but isn’t approved.
app.post('/api/add_user/:email', (req, res) => {
    const userFormEmail = req.params.email

    base('Registration').create([
        {
            "fields": {
                "Email": userFormEmail,
                "Approved": false
            }
        }], (err, records) => {
            if (err) {
                console.error(err);
                return err;
            }
            return res.send({ is_approved: false })
        }
    );
})
Codeblock: add_user endpoint
The add_user endpoint is a post request to create a record in our Airtable with the email. We set our approved field to “false” and return “false” because we want to wait for the administrator to approve the user before allowing them to log in.
Now that we understand our endpoints let's build our Descope Flows.
Building in Descope Flows: Connectors
First, let’s start with Connectors, found in the “Connectors” tab on the left navigation of our Project.
NOTE: A Connector in Descope allows us to make different requests (GET, POST, PUT, DELETE) in our Flow.
Let’s create two Connectors for our check_user and add_user endpoints by selecting and creating a “Generic HTTP” Connector.
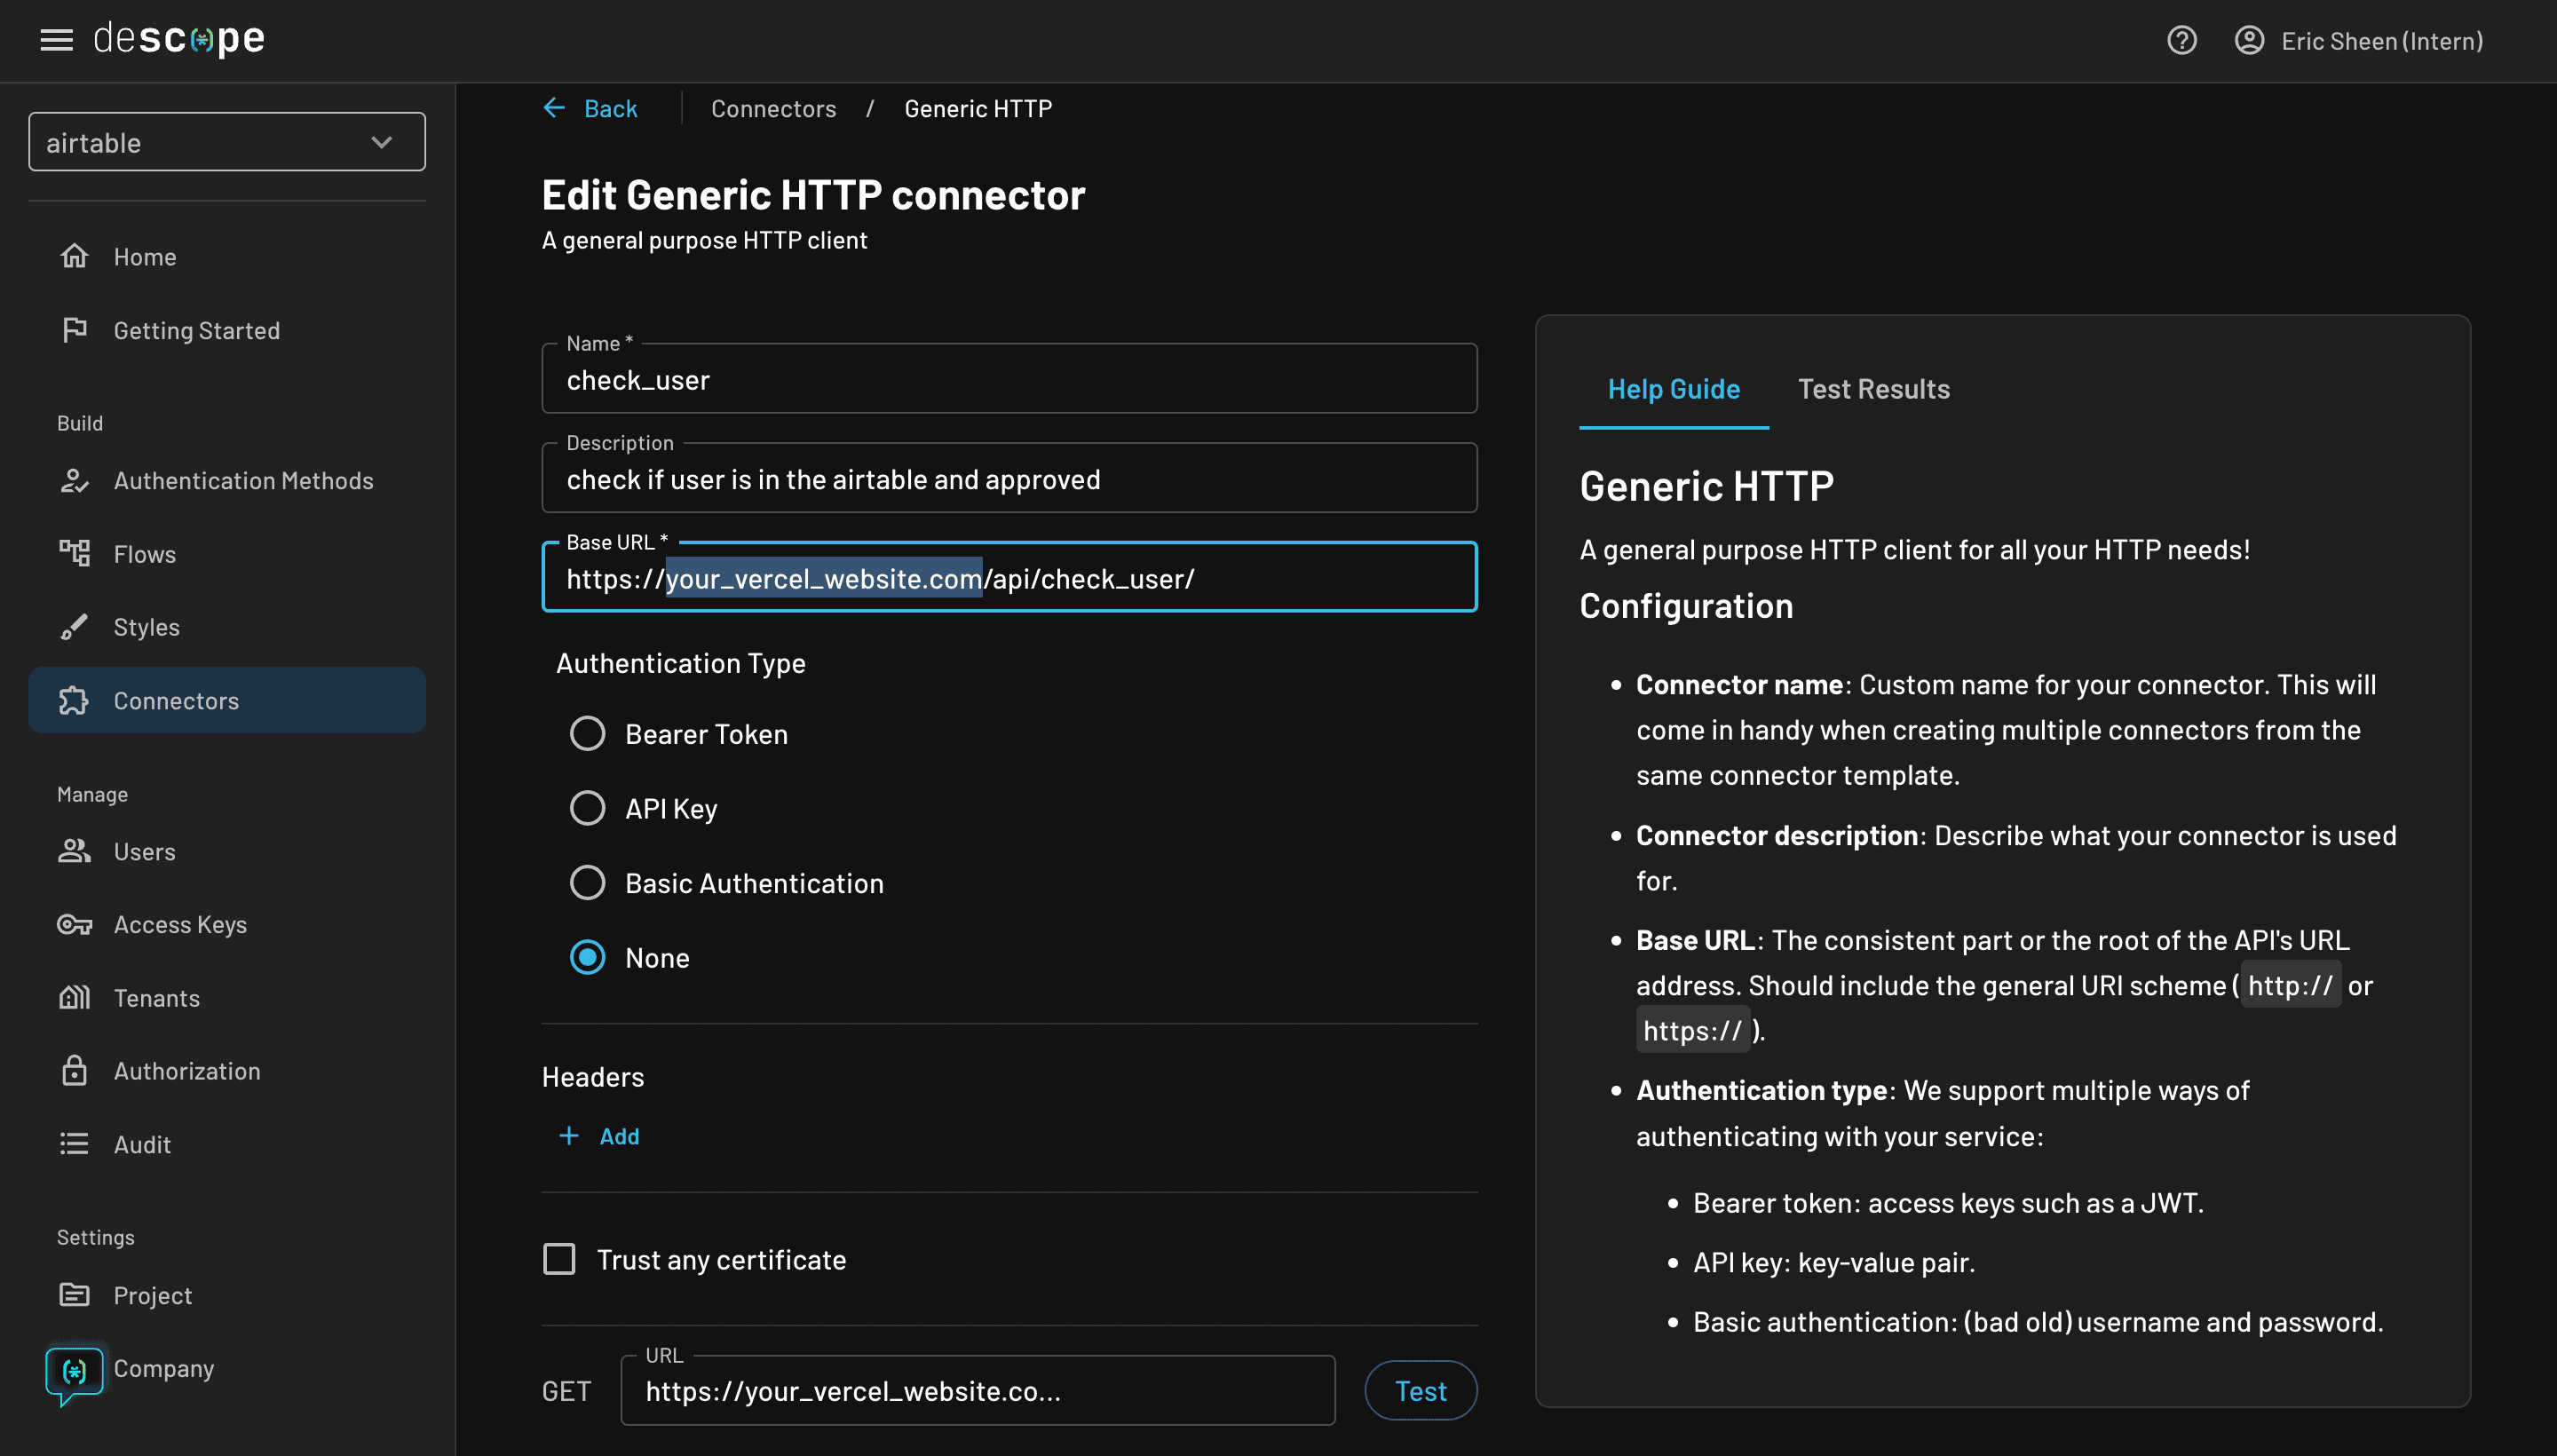
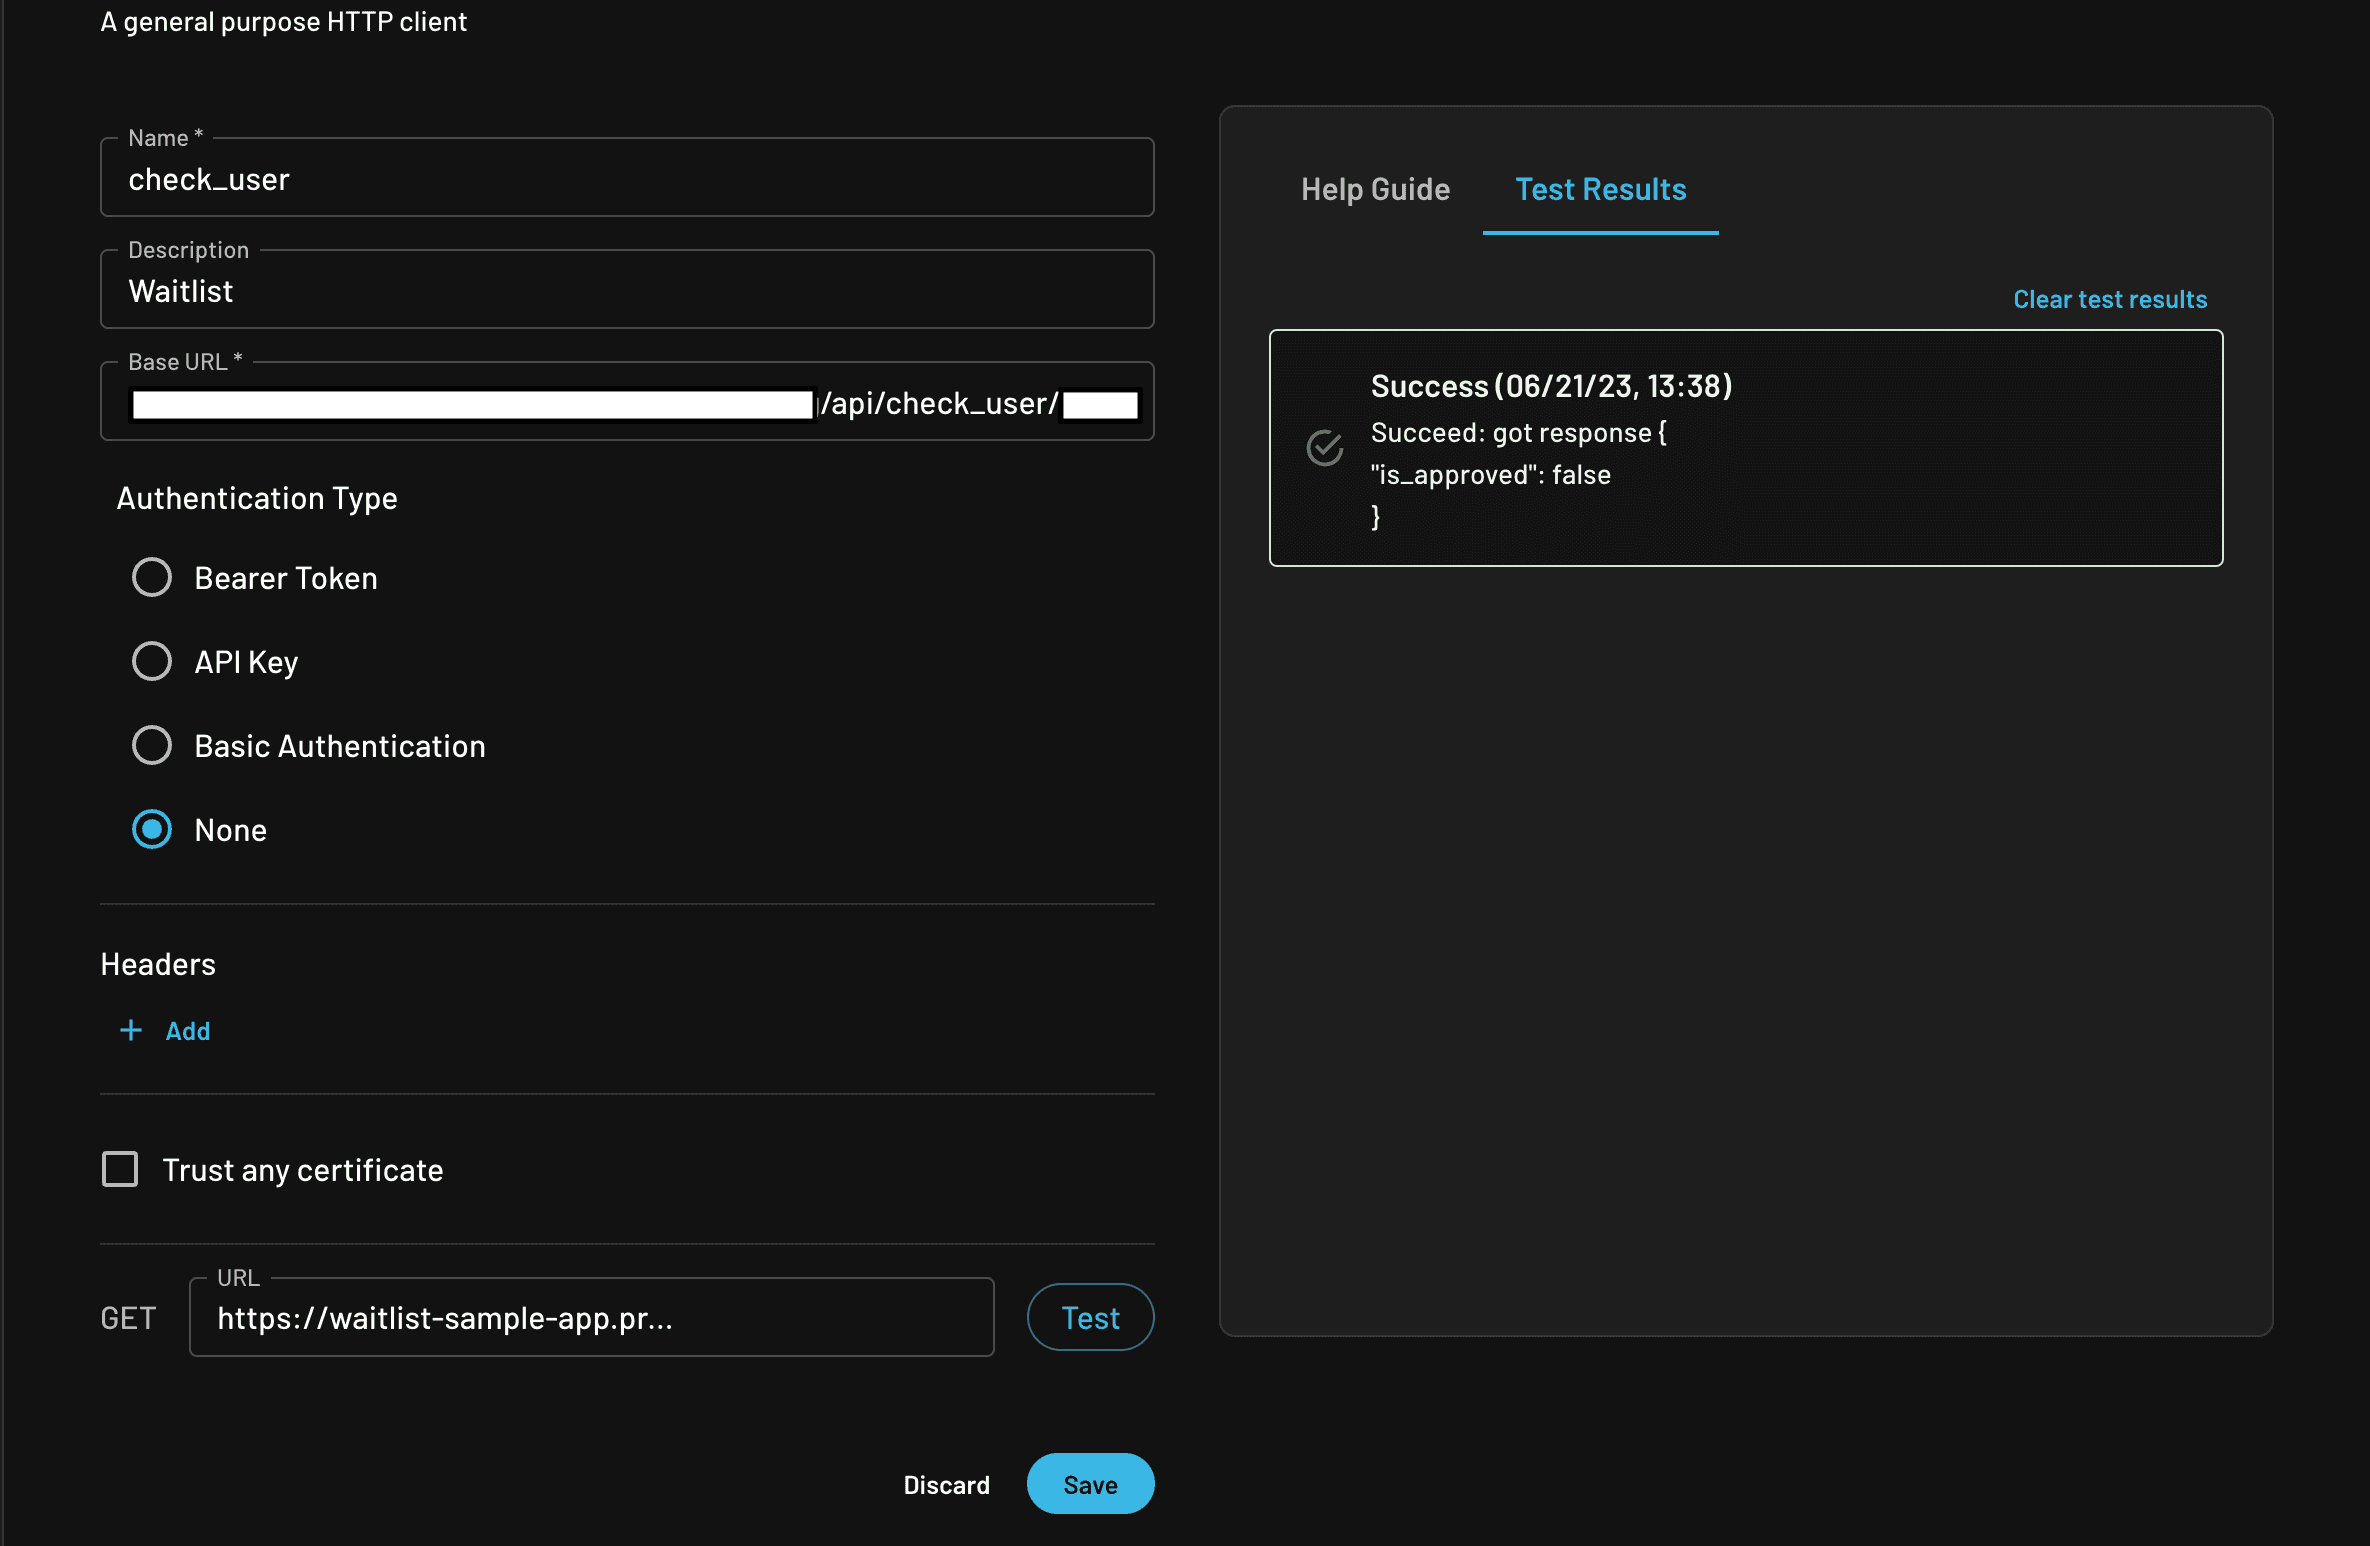
When creating a Connector, we can set a Name, Description, Base, URL, Authentication Type, Headers, and more.
For this example, we can set our information to the details shown in the screenshot above. The Base URL targets the URL endpoint which will be your deployed Vercel website (you can replace the highlighted part of the URL in the screenshot accordingly).
We can even test our endpoint by adding an email at the end of the URL and clicking the Test button to see the response beside it. Play around by adding an email to your Airtable and checking the approved checkbox.
We get a response back because when we call the URL endpoint, Vercel automatically recognizes the api/check_user/:email endpoint and executes the serverless function.
At the end of the Connector Base URL, I inputted my email and ran a test. My email is in the Airtable so we can see we get a response of is_approved false. This is helpful for debugging and testing the API.
Next is our add_user Connector.
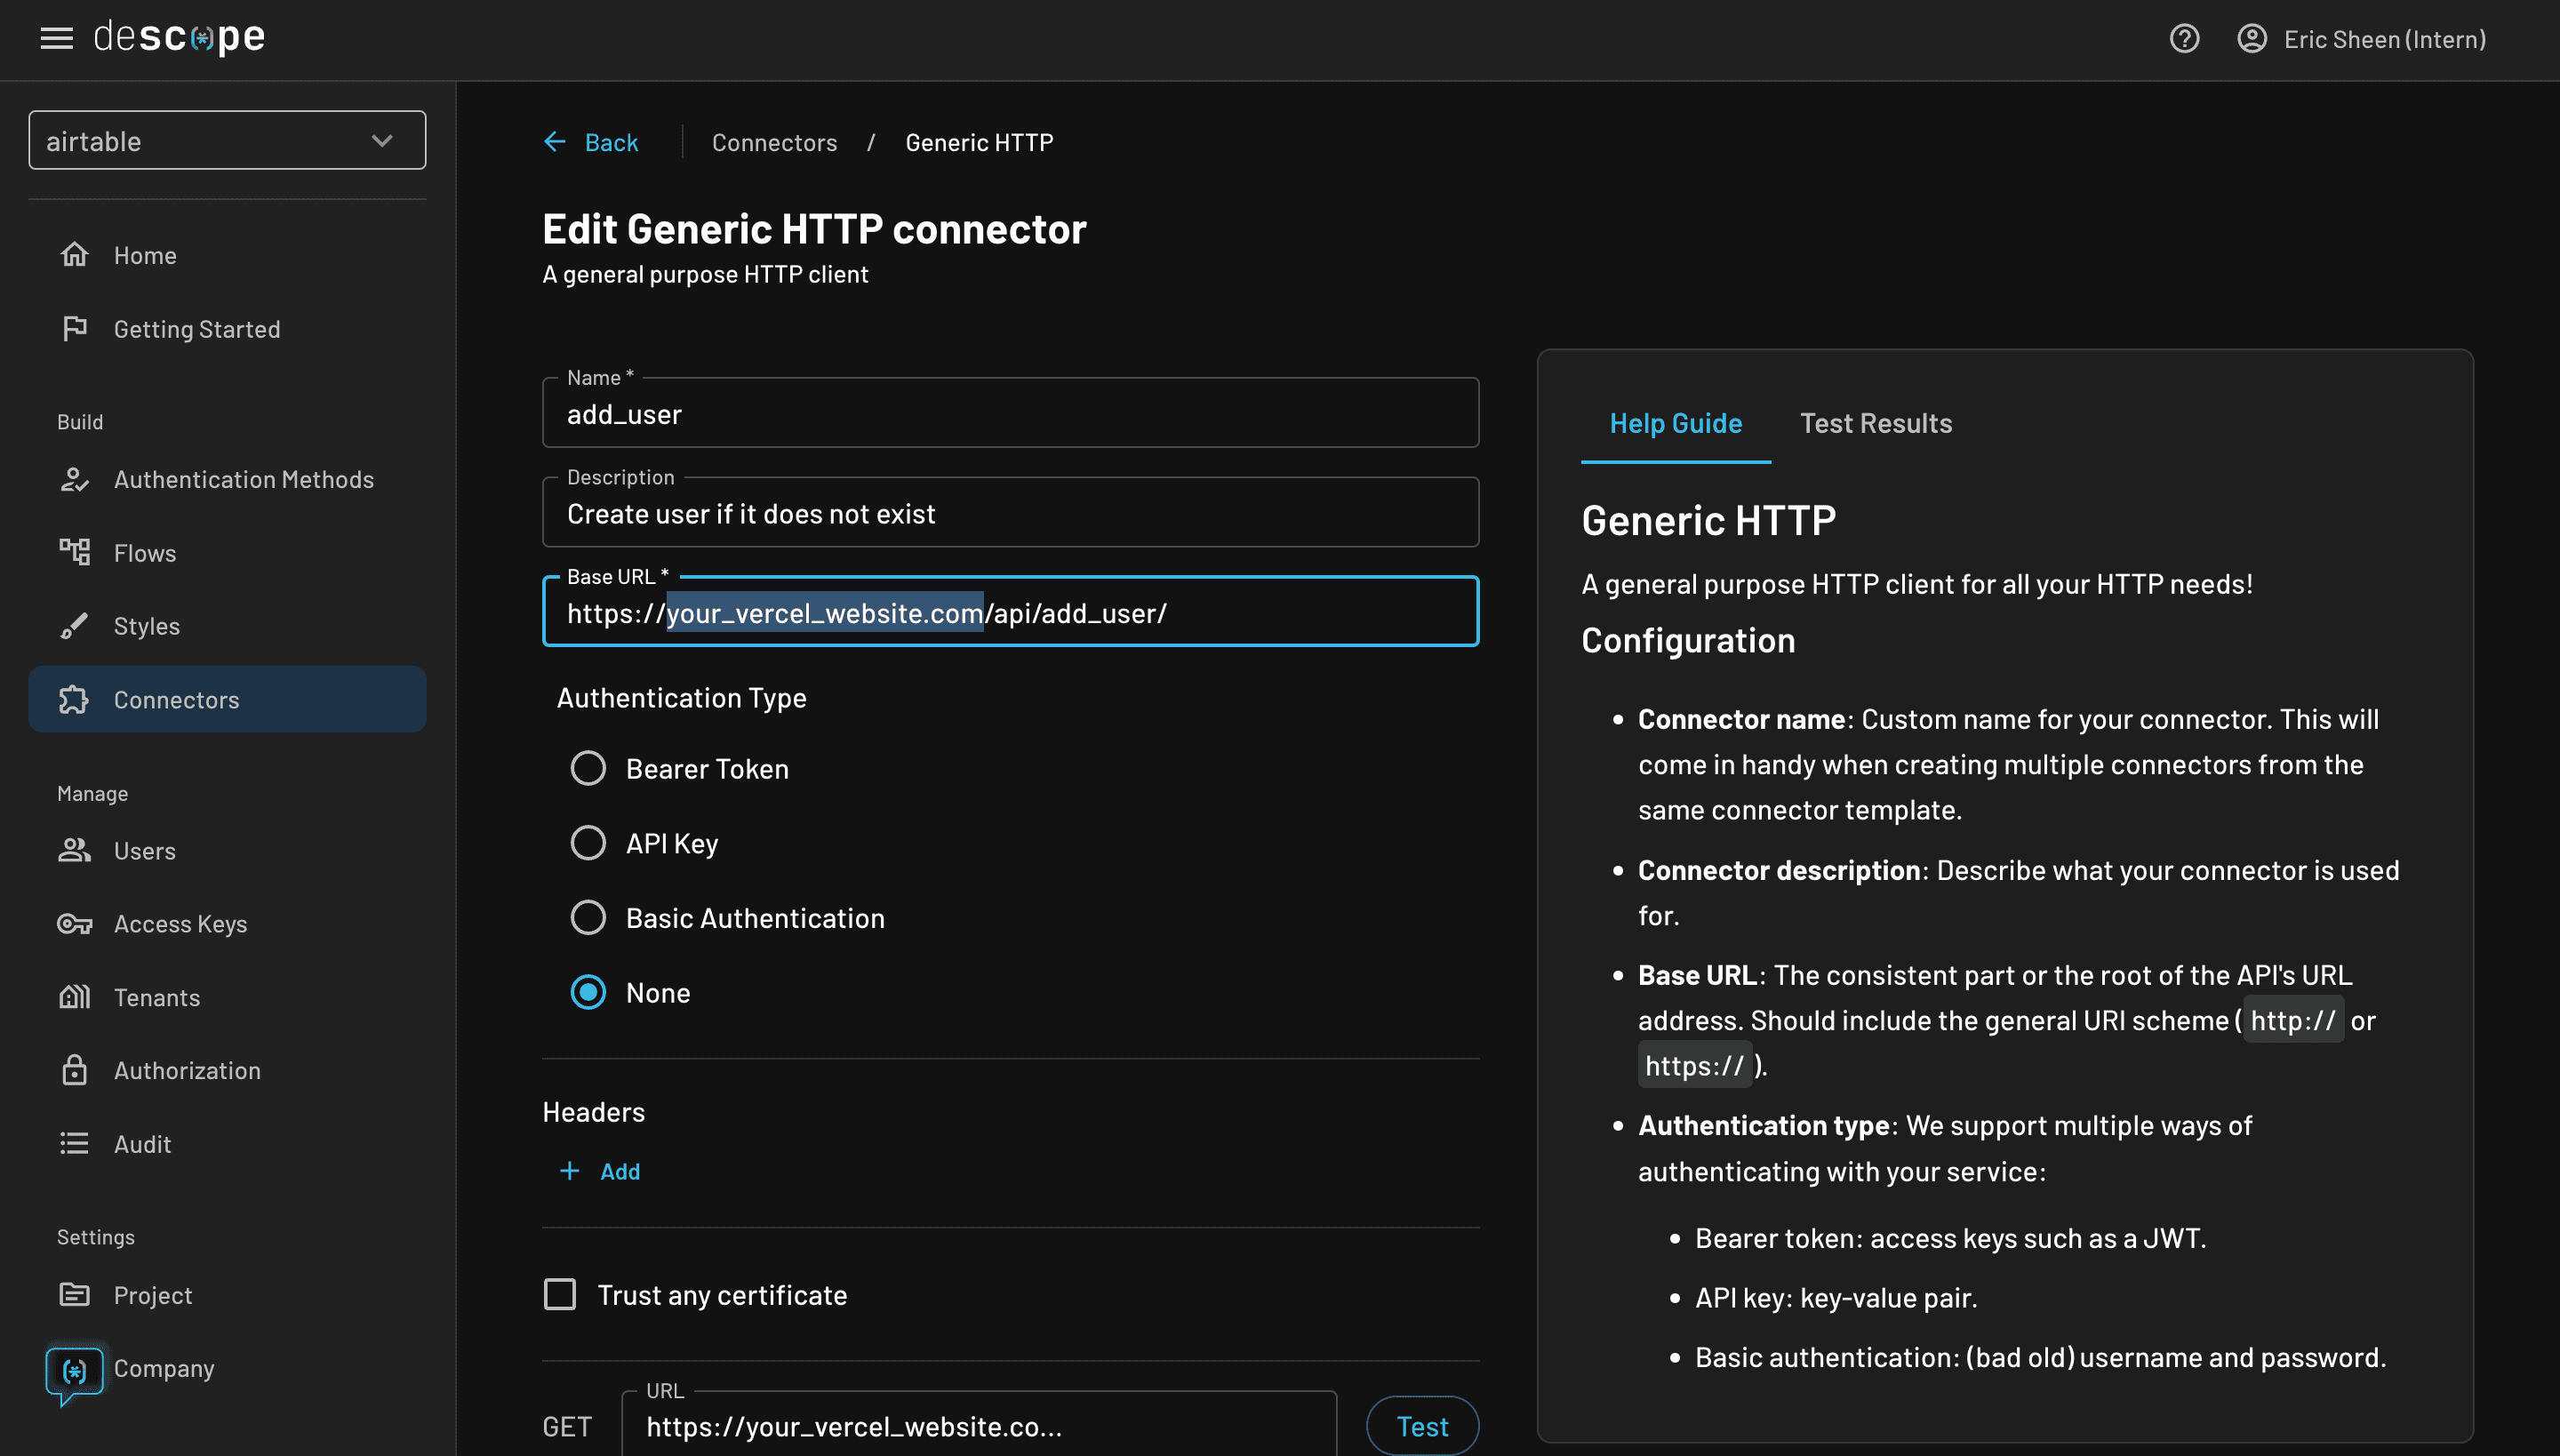
Above is our add_user endpoint. We can’t test this one because it’s a post request.
Connectors are great because we can now automate API calls by adding them to our Flow and methodically executing them. This saves a lot of development time!
Building in Descope Flows: Screen Form
Okay, now for the actual Descope Flows! We are going to implement exactly what we showed in the "Designing our Flow" section.
Create a new Flow called waitlist by clicking on the “+ Flow” button. Once created you will see a Start and End. You can move them around in the space and zoom in and out for a better view.
Let’s add our Screen Form.
Let’s add an Email field. In the left navigation menu, we can scroll down and see all the different components we can drag and drop to add. We can also modify the Label and Placeholder available in the right menu and select the Mandatory toggle because we want this field to be required for input.
Do the same thing for the button as well!
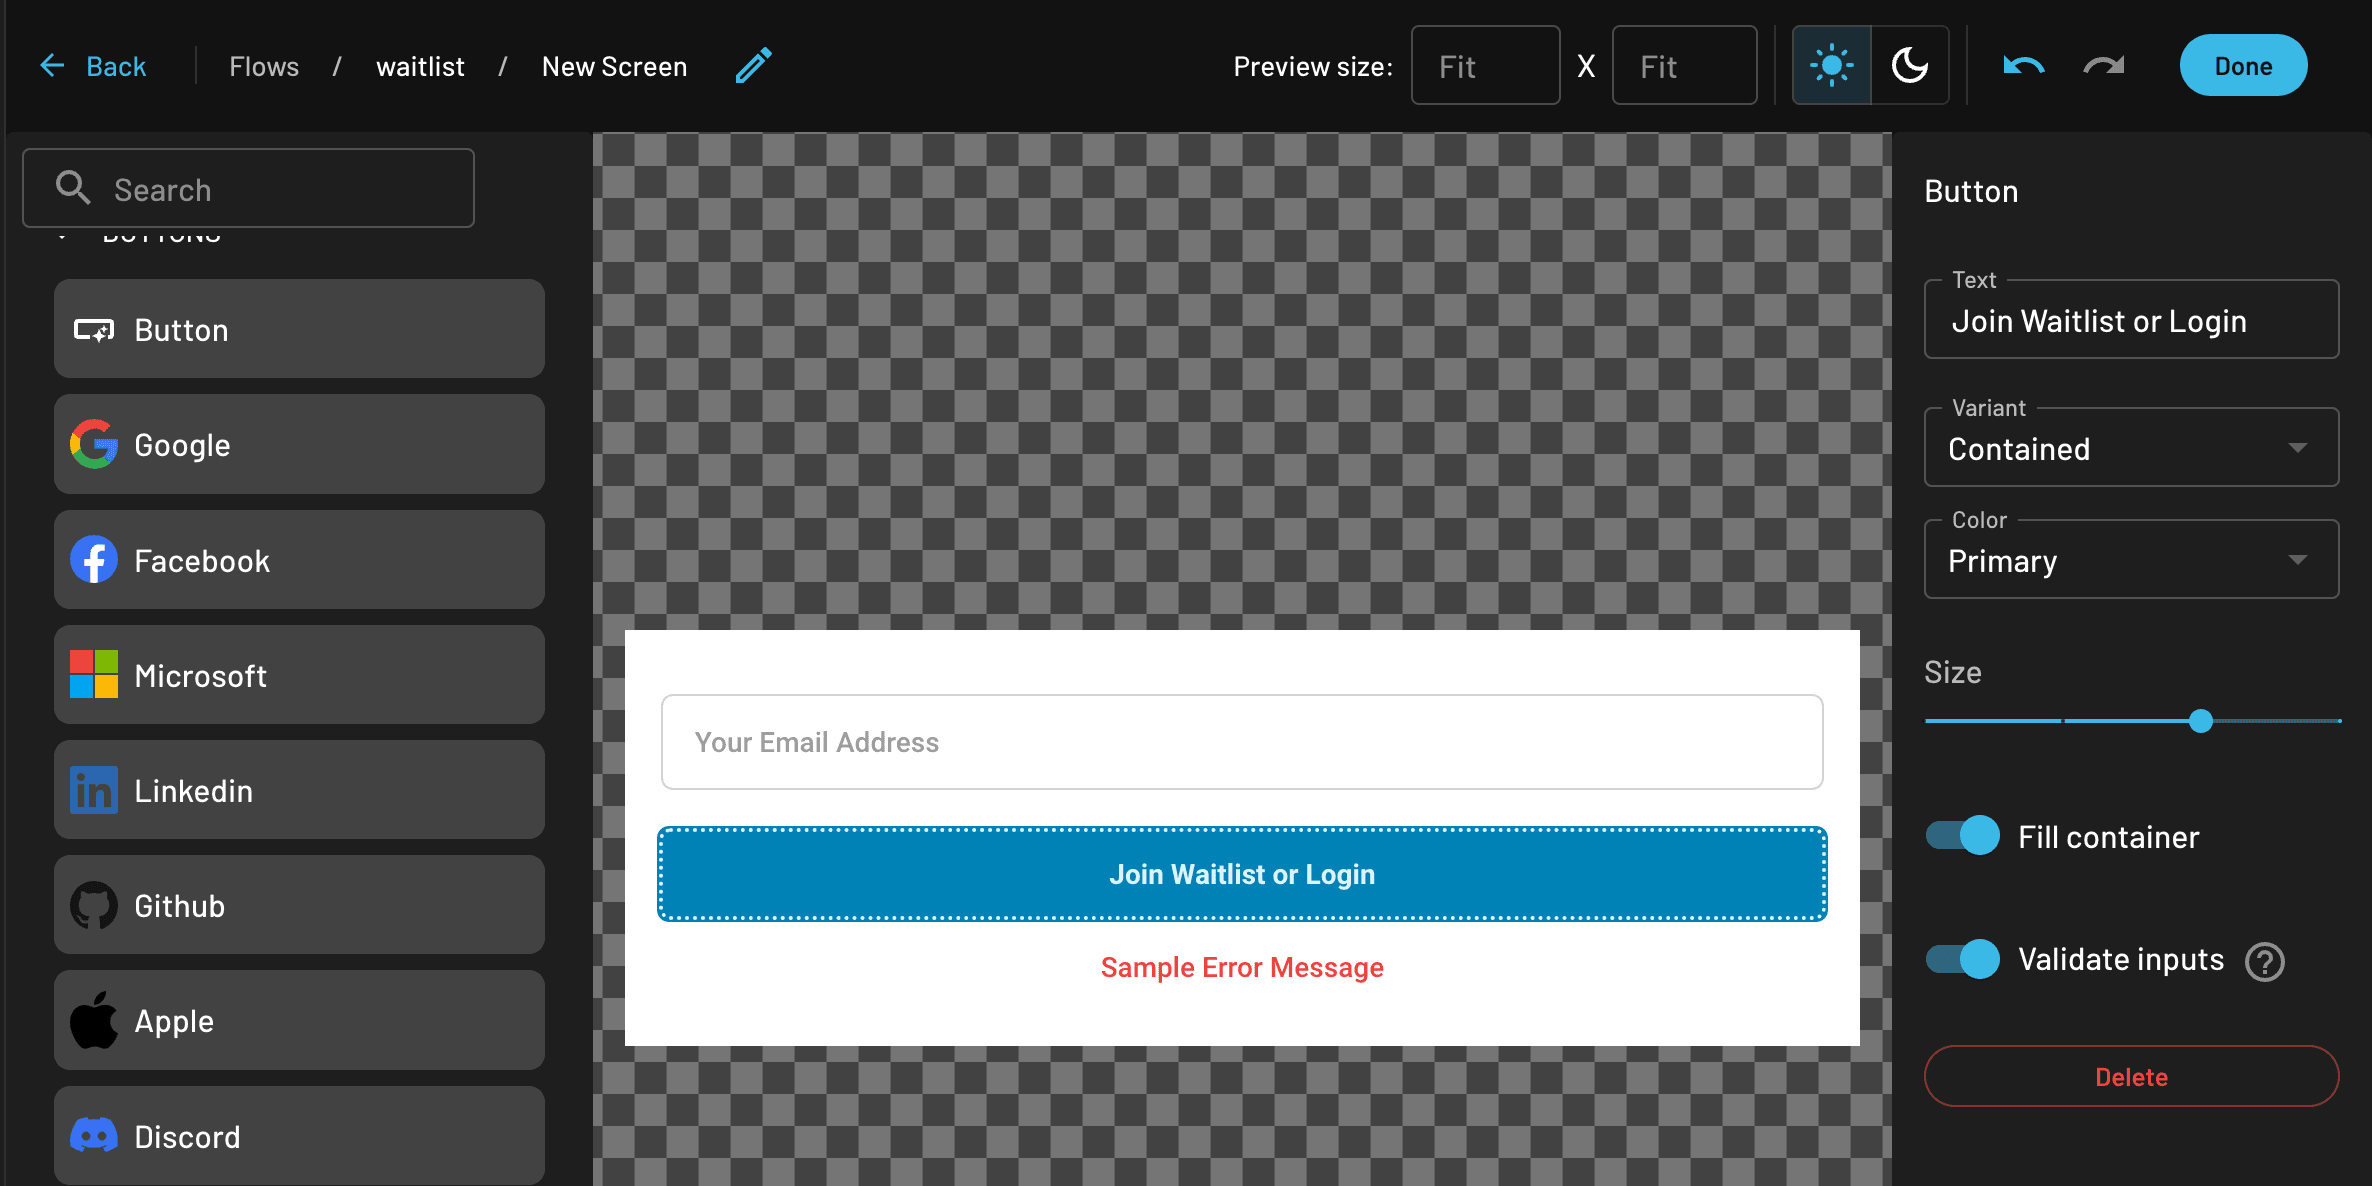
Before we click Done, be sure to change the name of the Screen for better organization and clarity. I named it “Waitlist Screen.”
Select Done to save. Then, connect the Start with the Waitlist Screen.
The next part of our design is adding our Sign Up or In to verify and authenticate the user’s email address.
Building in Descope Flows: Sign Up or In
If our user exists in our Airtable and is approved, we want to authenticate the user. We can accomplish this using one-time password authentication.
Add an Action and select the Sign Up or In / OTP / Email option.
Connect the Screen form → Sign Up or In / OTP / Email.
Now that the email is verified and the authentication is successful, the next step is to check if the user is in the Airtable and is approved.
Building in Descope Flows: check_user Connector
Let’s now integrate our check_user Connector.
Click on the big blue plus button again and select 3rd Party Actions → Generic HTTP / GET.
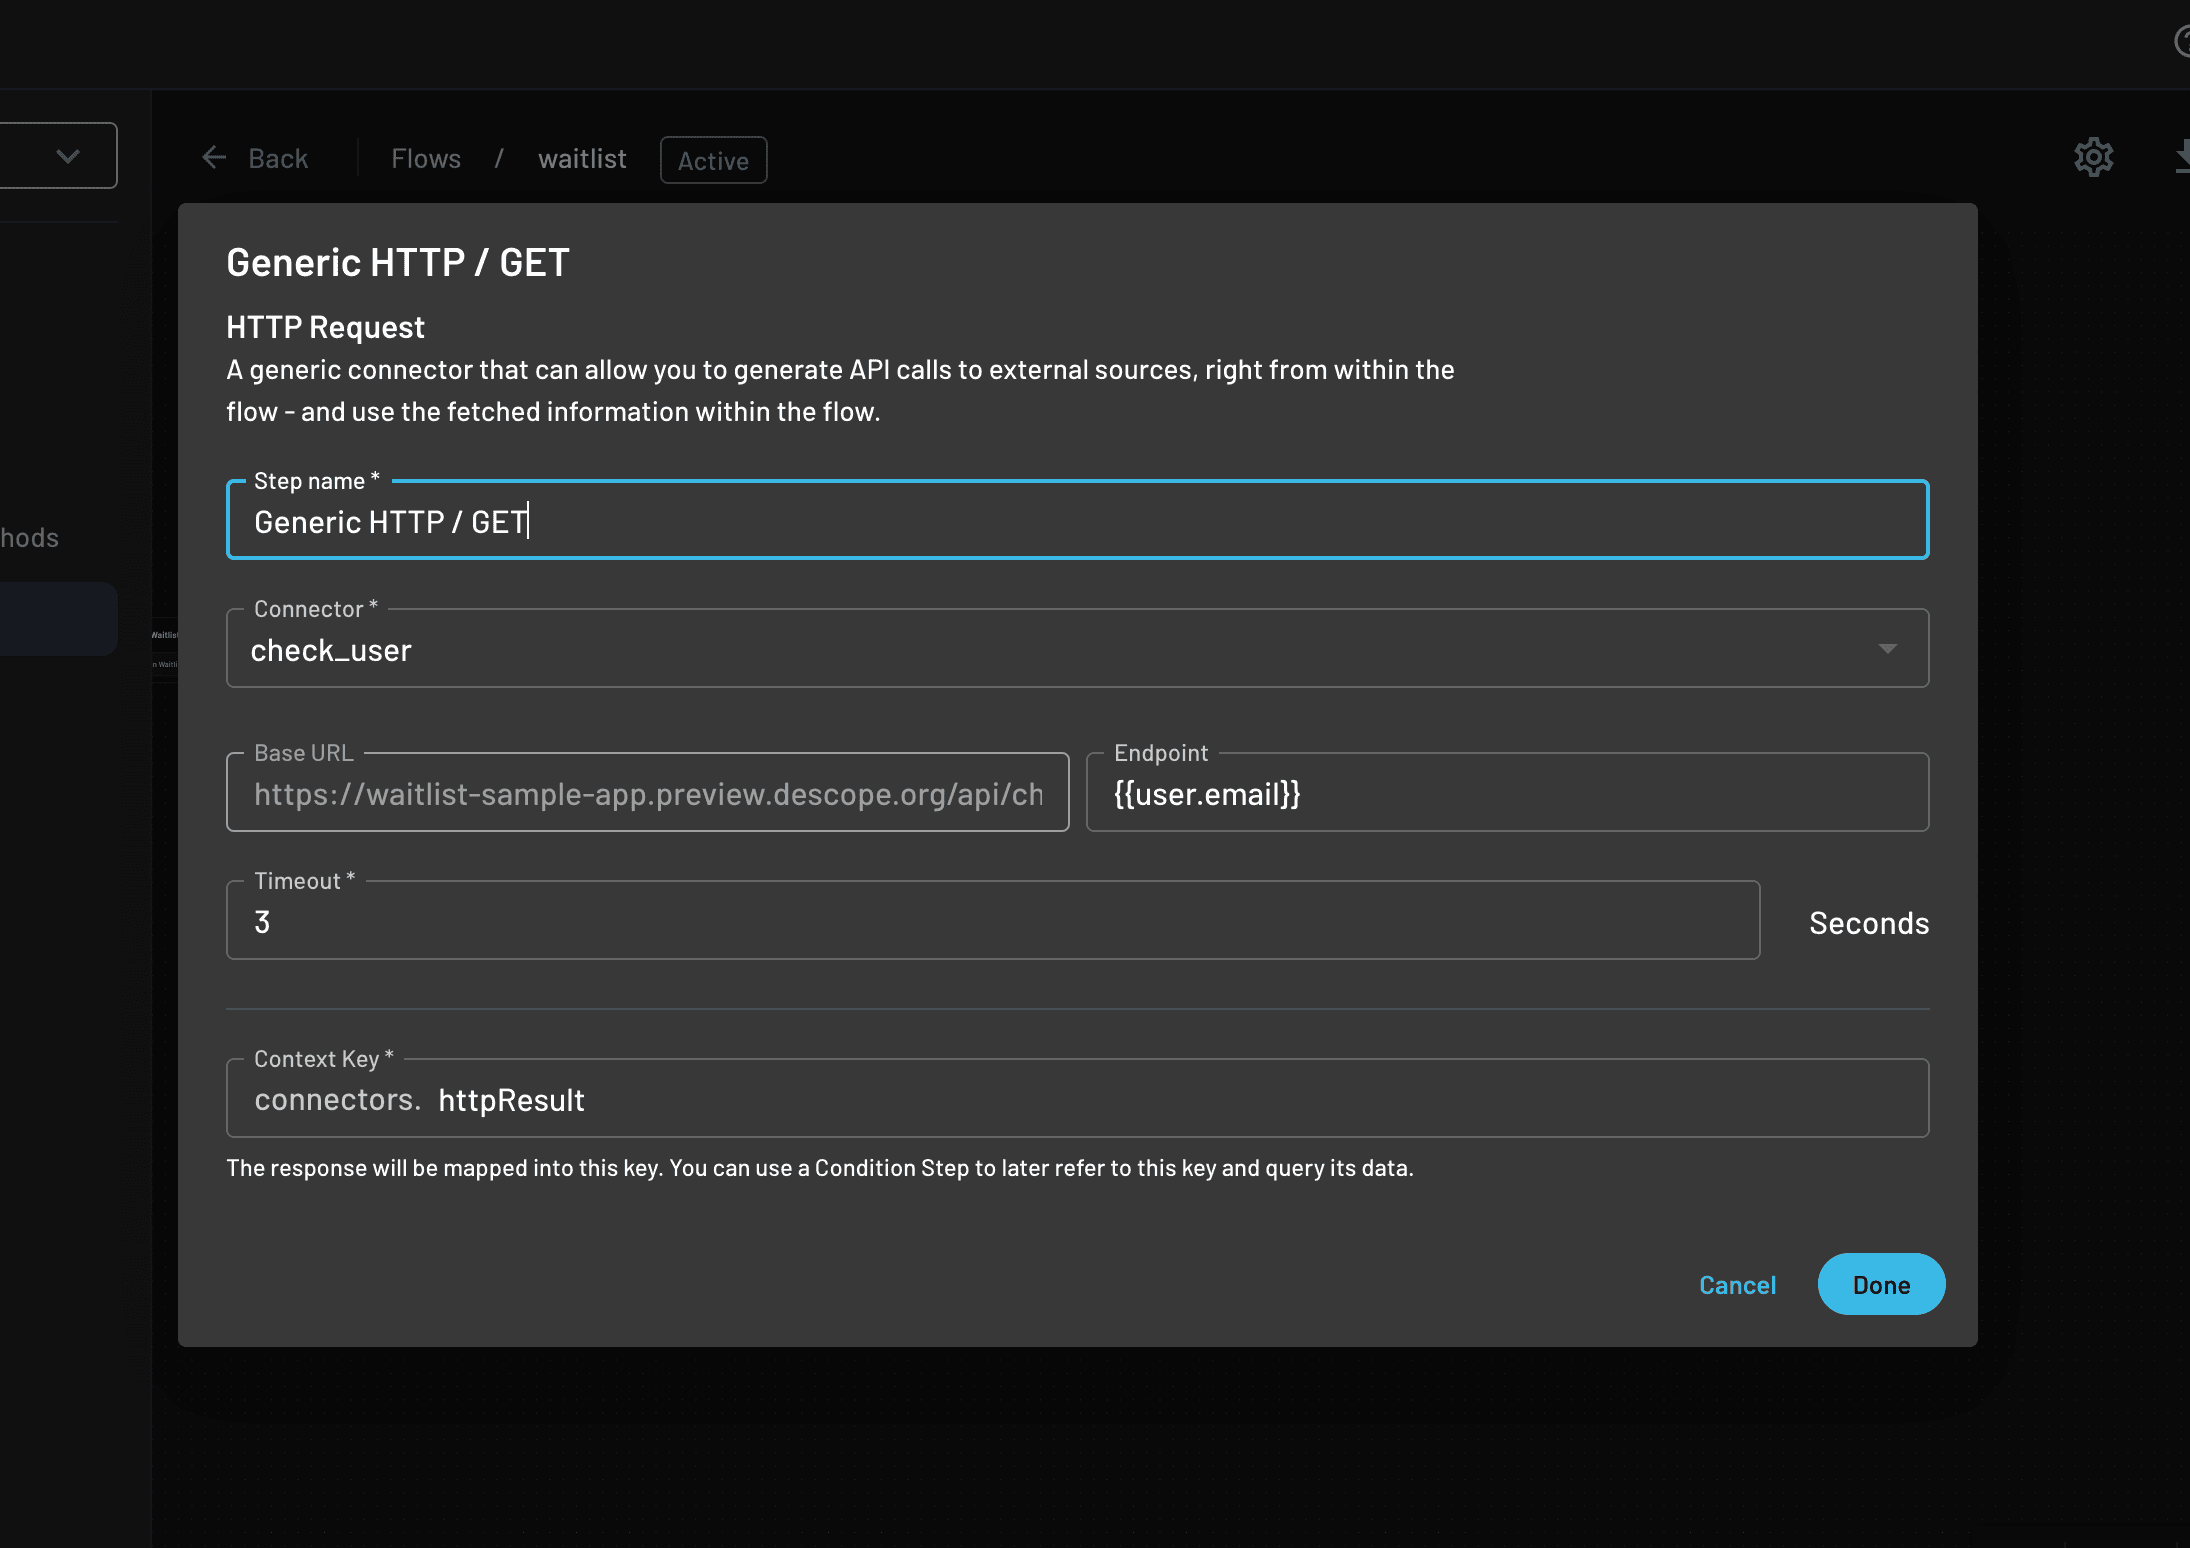
Let’s select our Connector in the Connector field and add the {{user.email}} in the Endpoint. This will get the value from the email field in our Screen Form.
Now, connect the Successful Authentication from the previous step to this Connector.
NOTE: the Context Key
connectors.httpResultat the bottom of the modal stores the response. We can use theconnectors.httpResultto query the data we get and we will demonstrate this in the next step of our design.
Our Flow so far should look like the following:

The next part of our design is the Condition.
Building in Descope Flows: Condition
Let’s add a condition which checks if the is_approved object that’s returned is true or false.
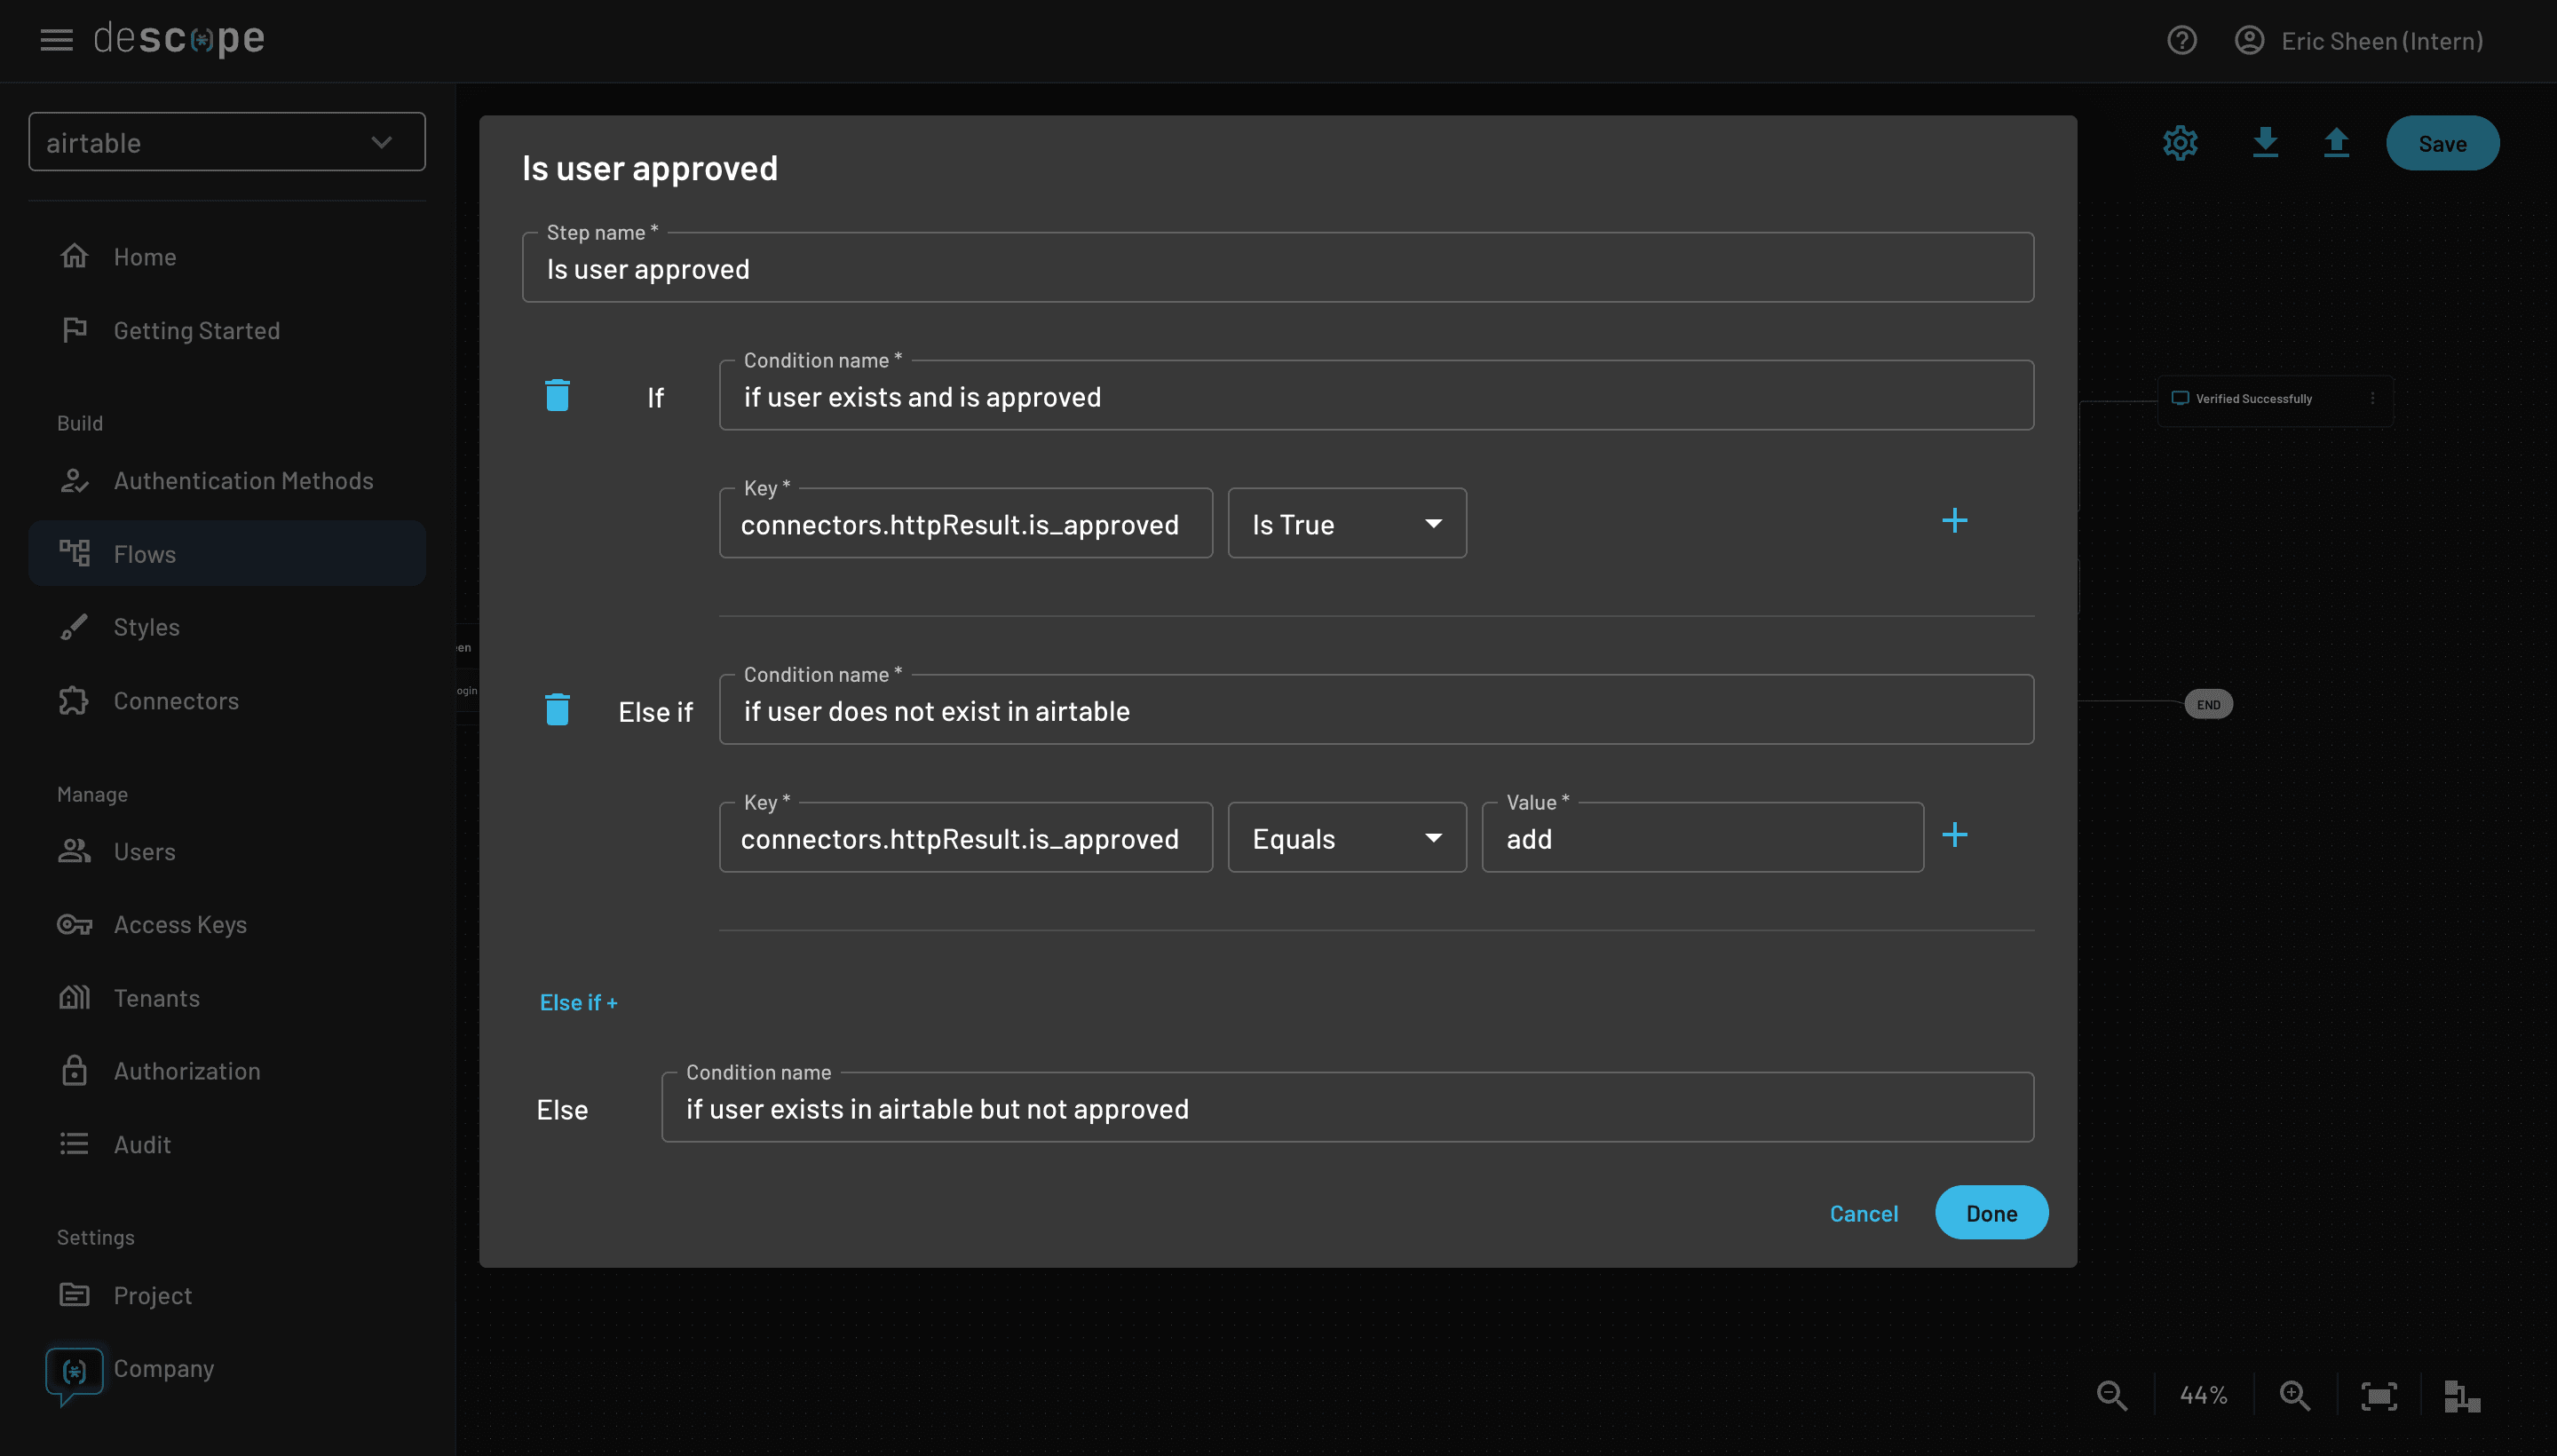
In our API endpoint, we saw that the is_approved object can return three different values: true, false, or “add.” We handle all three in the condition above.
Once done, connect our Connector to the condition block.
There’s now three different paths we can go depending on our condition. Let’s do the if-true part first.
If our user is approved, we can simply end the Flow. Connect the first if statement to the End.
Now for the else-if add condition. This step is identical to the
check_userstep, the only difference being that we select Generic HTTP / POST because our endpoint is a post request. After we connect our else-if statement to this Connector, there’s only one last condition left.

The else condition is to handle when the user exists in the Airtable but isn’t approved. We want to display an Awaiting Screen which is our last step!
Building in Descope Flows: Awaiting screen
Anytime our user is not approved or just added, we want to display a waiting screen to let the user know that they have to wait.
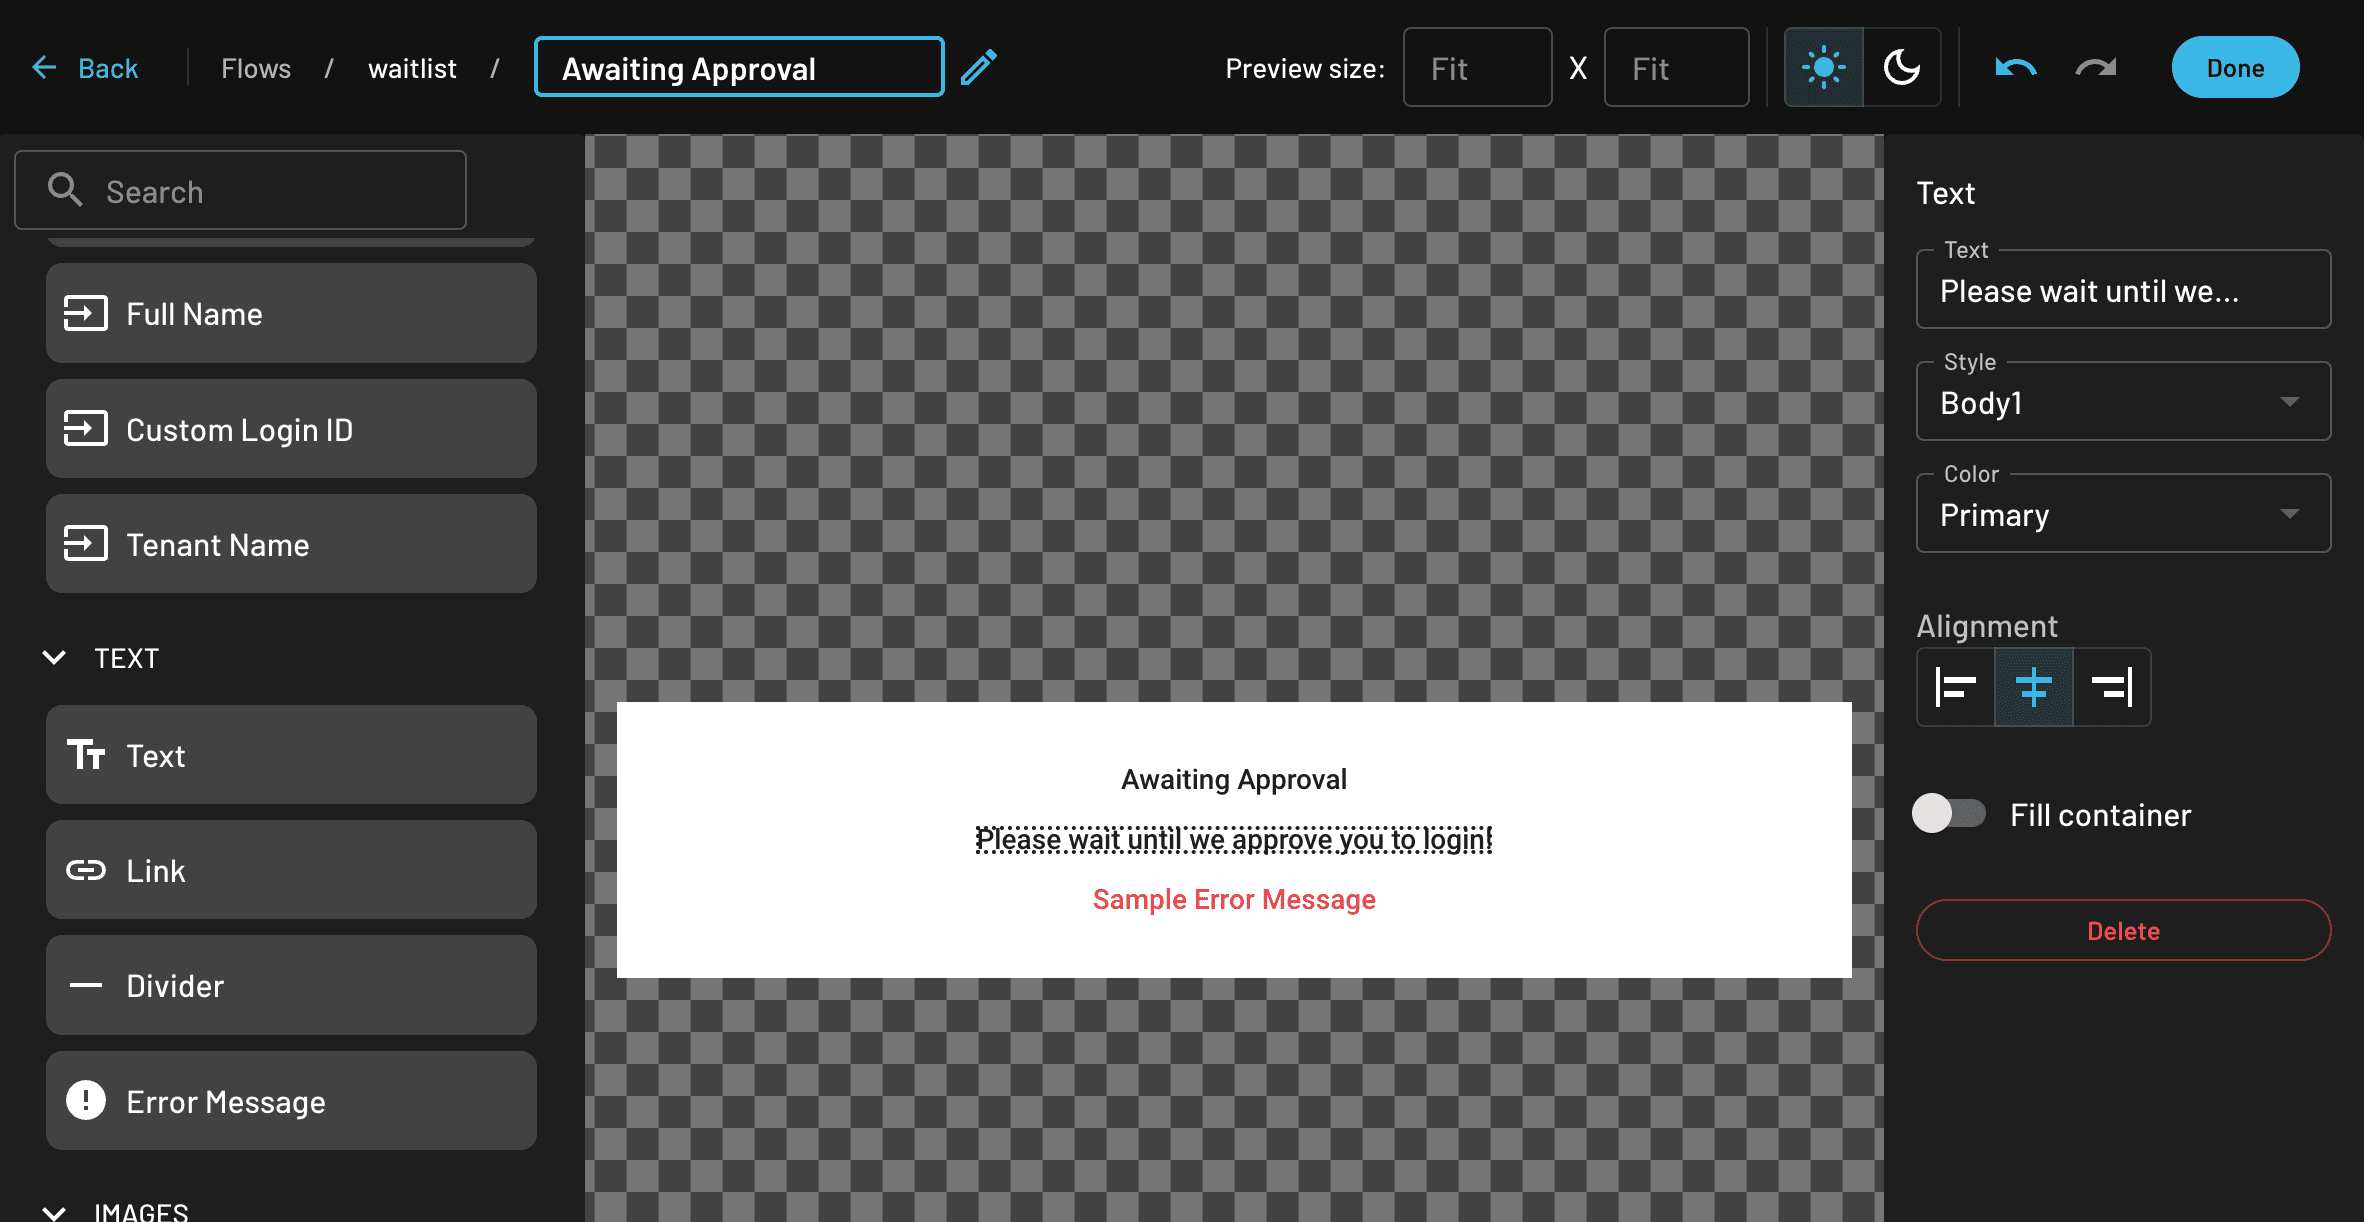
Once this is complete, make sure to connect the add_user connector and else condition to this Awaiting Approval Screen.
Our Flow is now complete!
Make sure to save your Flow before moving on. Let’s now use Airtable’s Automation functionality to add our email notifications.
Email Automation with Airtable
The final step is our email notifications. When a user is successfully added to Airtable:
Email the user that they’ve been added and waiting for approval.
Email admin that the user has been added to Airtable and waiting for approval.
Once Admin approves the user, email the user that they’ve been approved and are ready to log in.
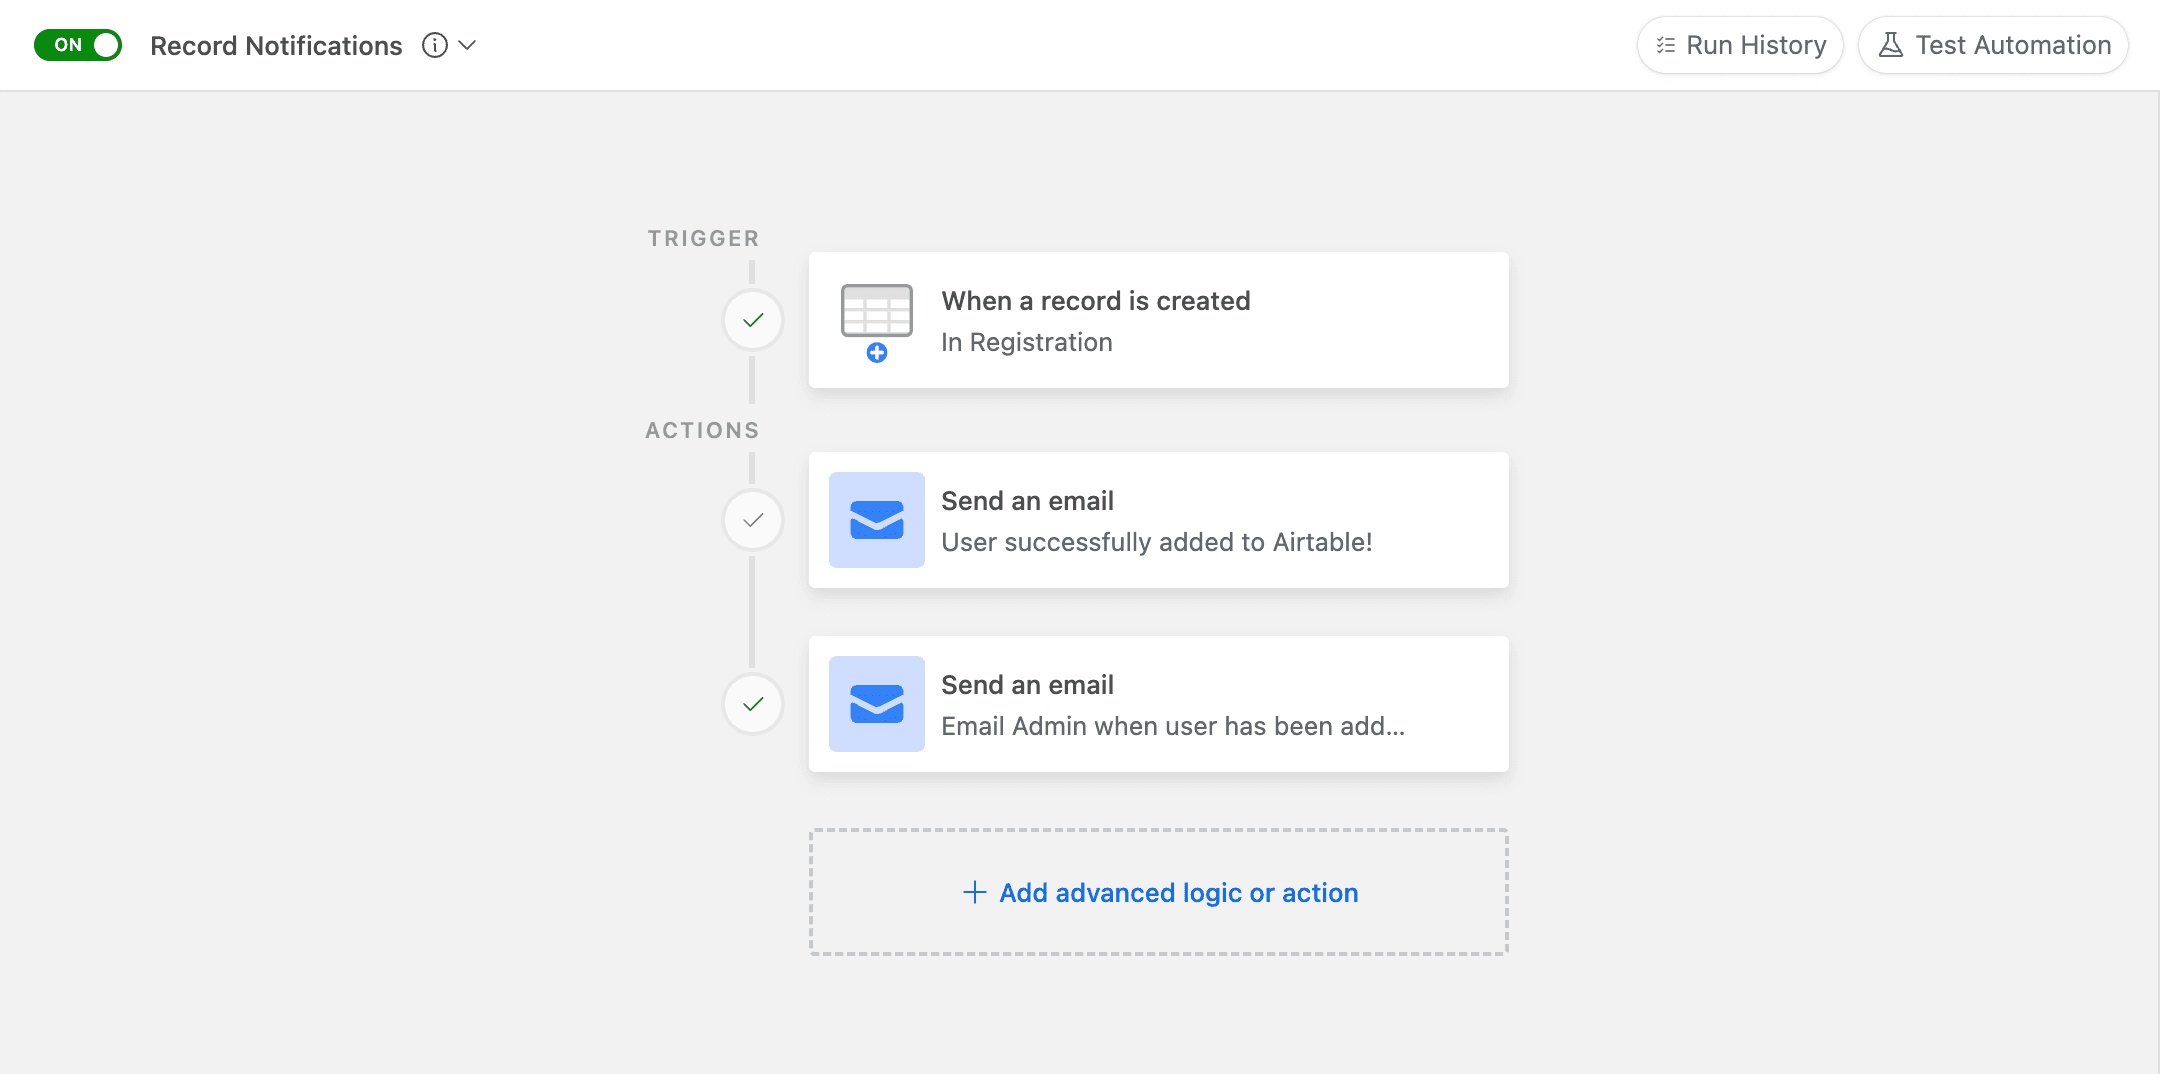
To start, make your way to your Airtable account, select Base, and go to Automation. You can create a trigger in Airtable which allows you to perform an action when something has changed. Select “When a record is created.”
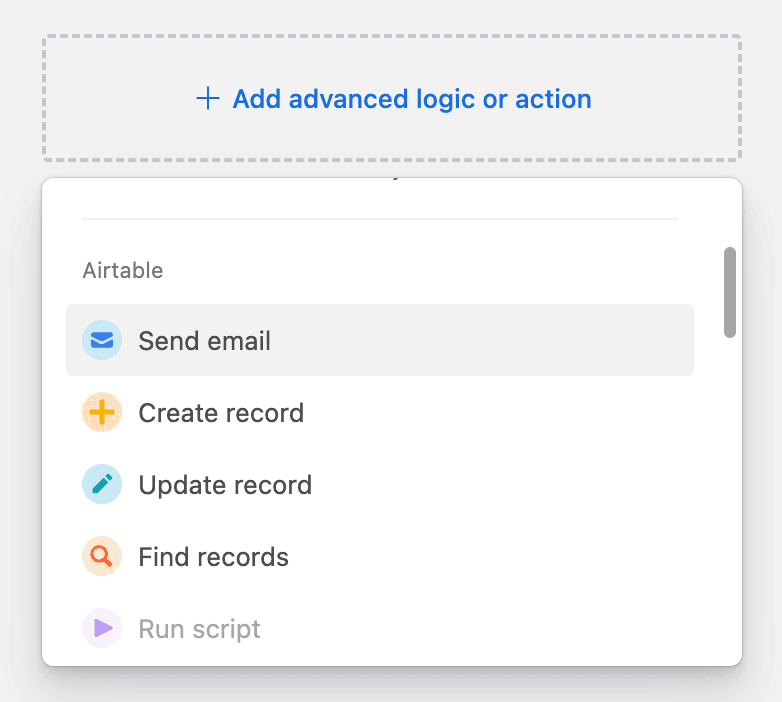
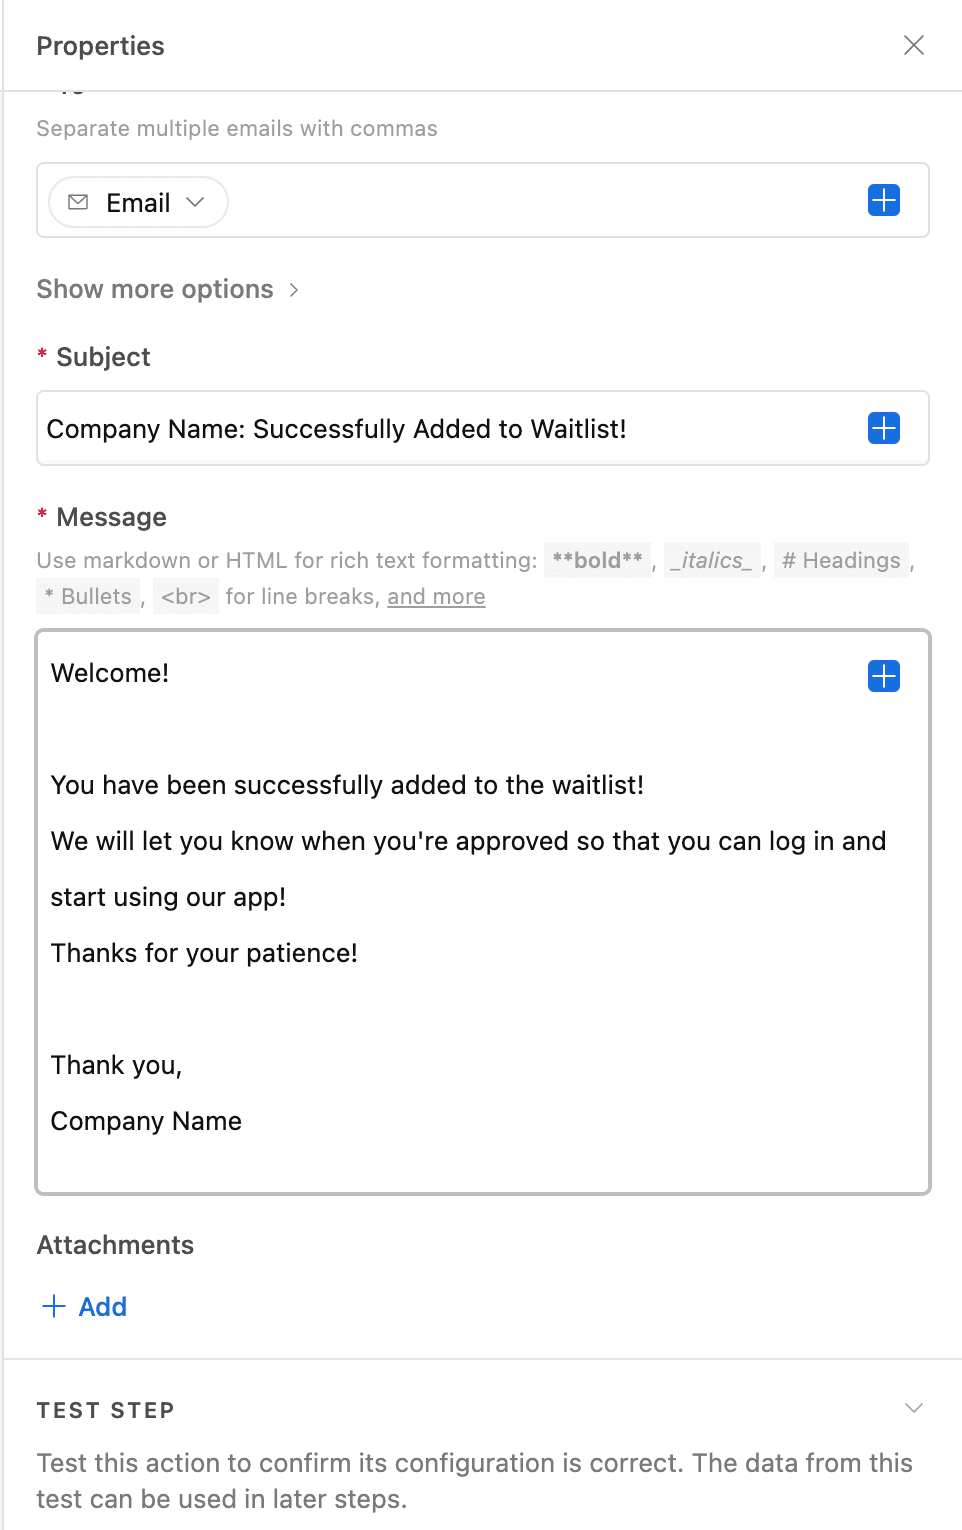
We can add different logic and actions to our trigger when a new record is created. Select “Send email.” Next, you can configure the email to send to, the subject line, and the body of the email.
Mine looks like this:
Now that we have a way to notify the user when they’ve been added, we can do the same for the admin.
The final result should look like the following:
Now let’s create a new Automation for when a user has been approved.
Click the “Create Automation” button on the bottom left navigation bar. For the trigger, select “When a record is updated,” because we want to check when the admin approves the user in our Airtable.
Your configuration should look like the following:
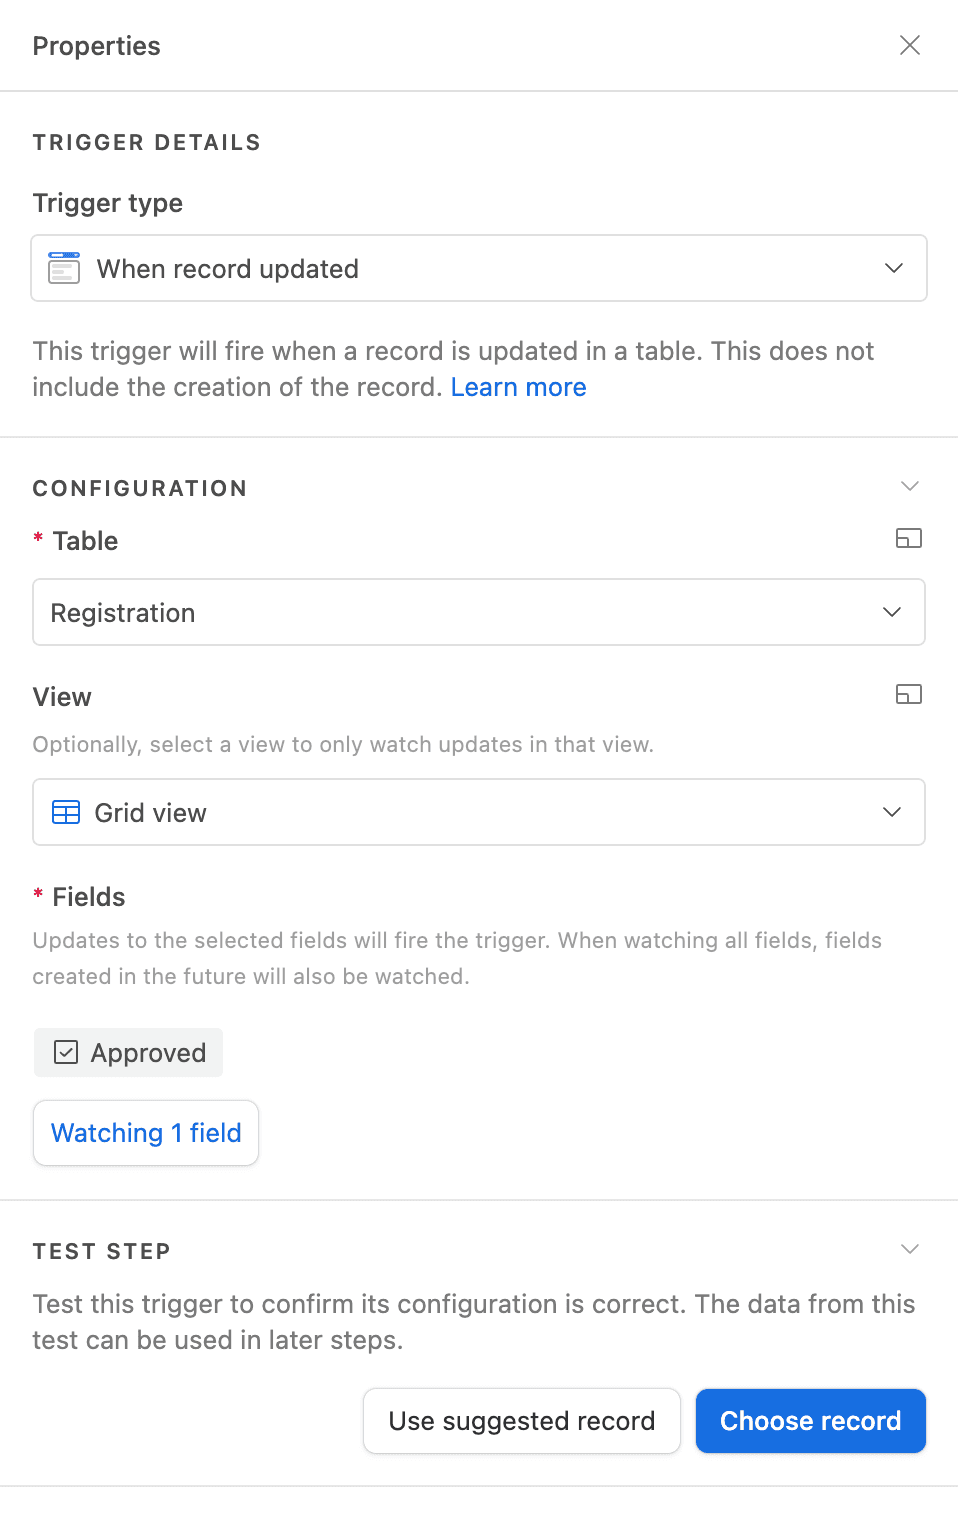
Select the Registration grid view table and select the Approved field to be checked for updates.
The next step will be to add an email action to email the user that they’ve been approved. We will leave that as an exercise for you to complete yourselves.
Once that’s done, you’ve completed all the Automations. Your Automation tab should look like the following:
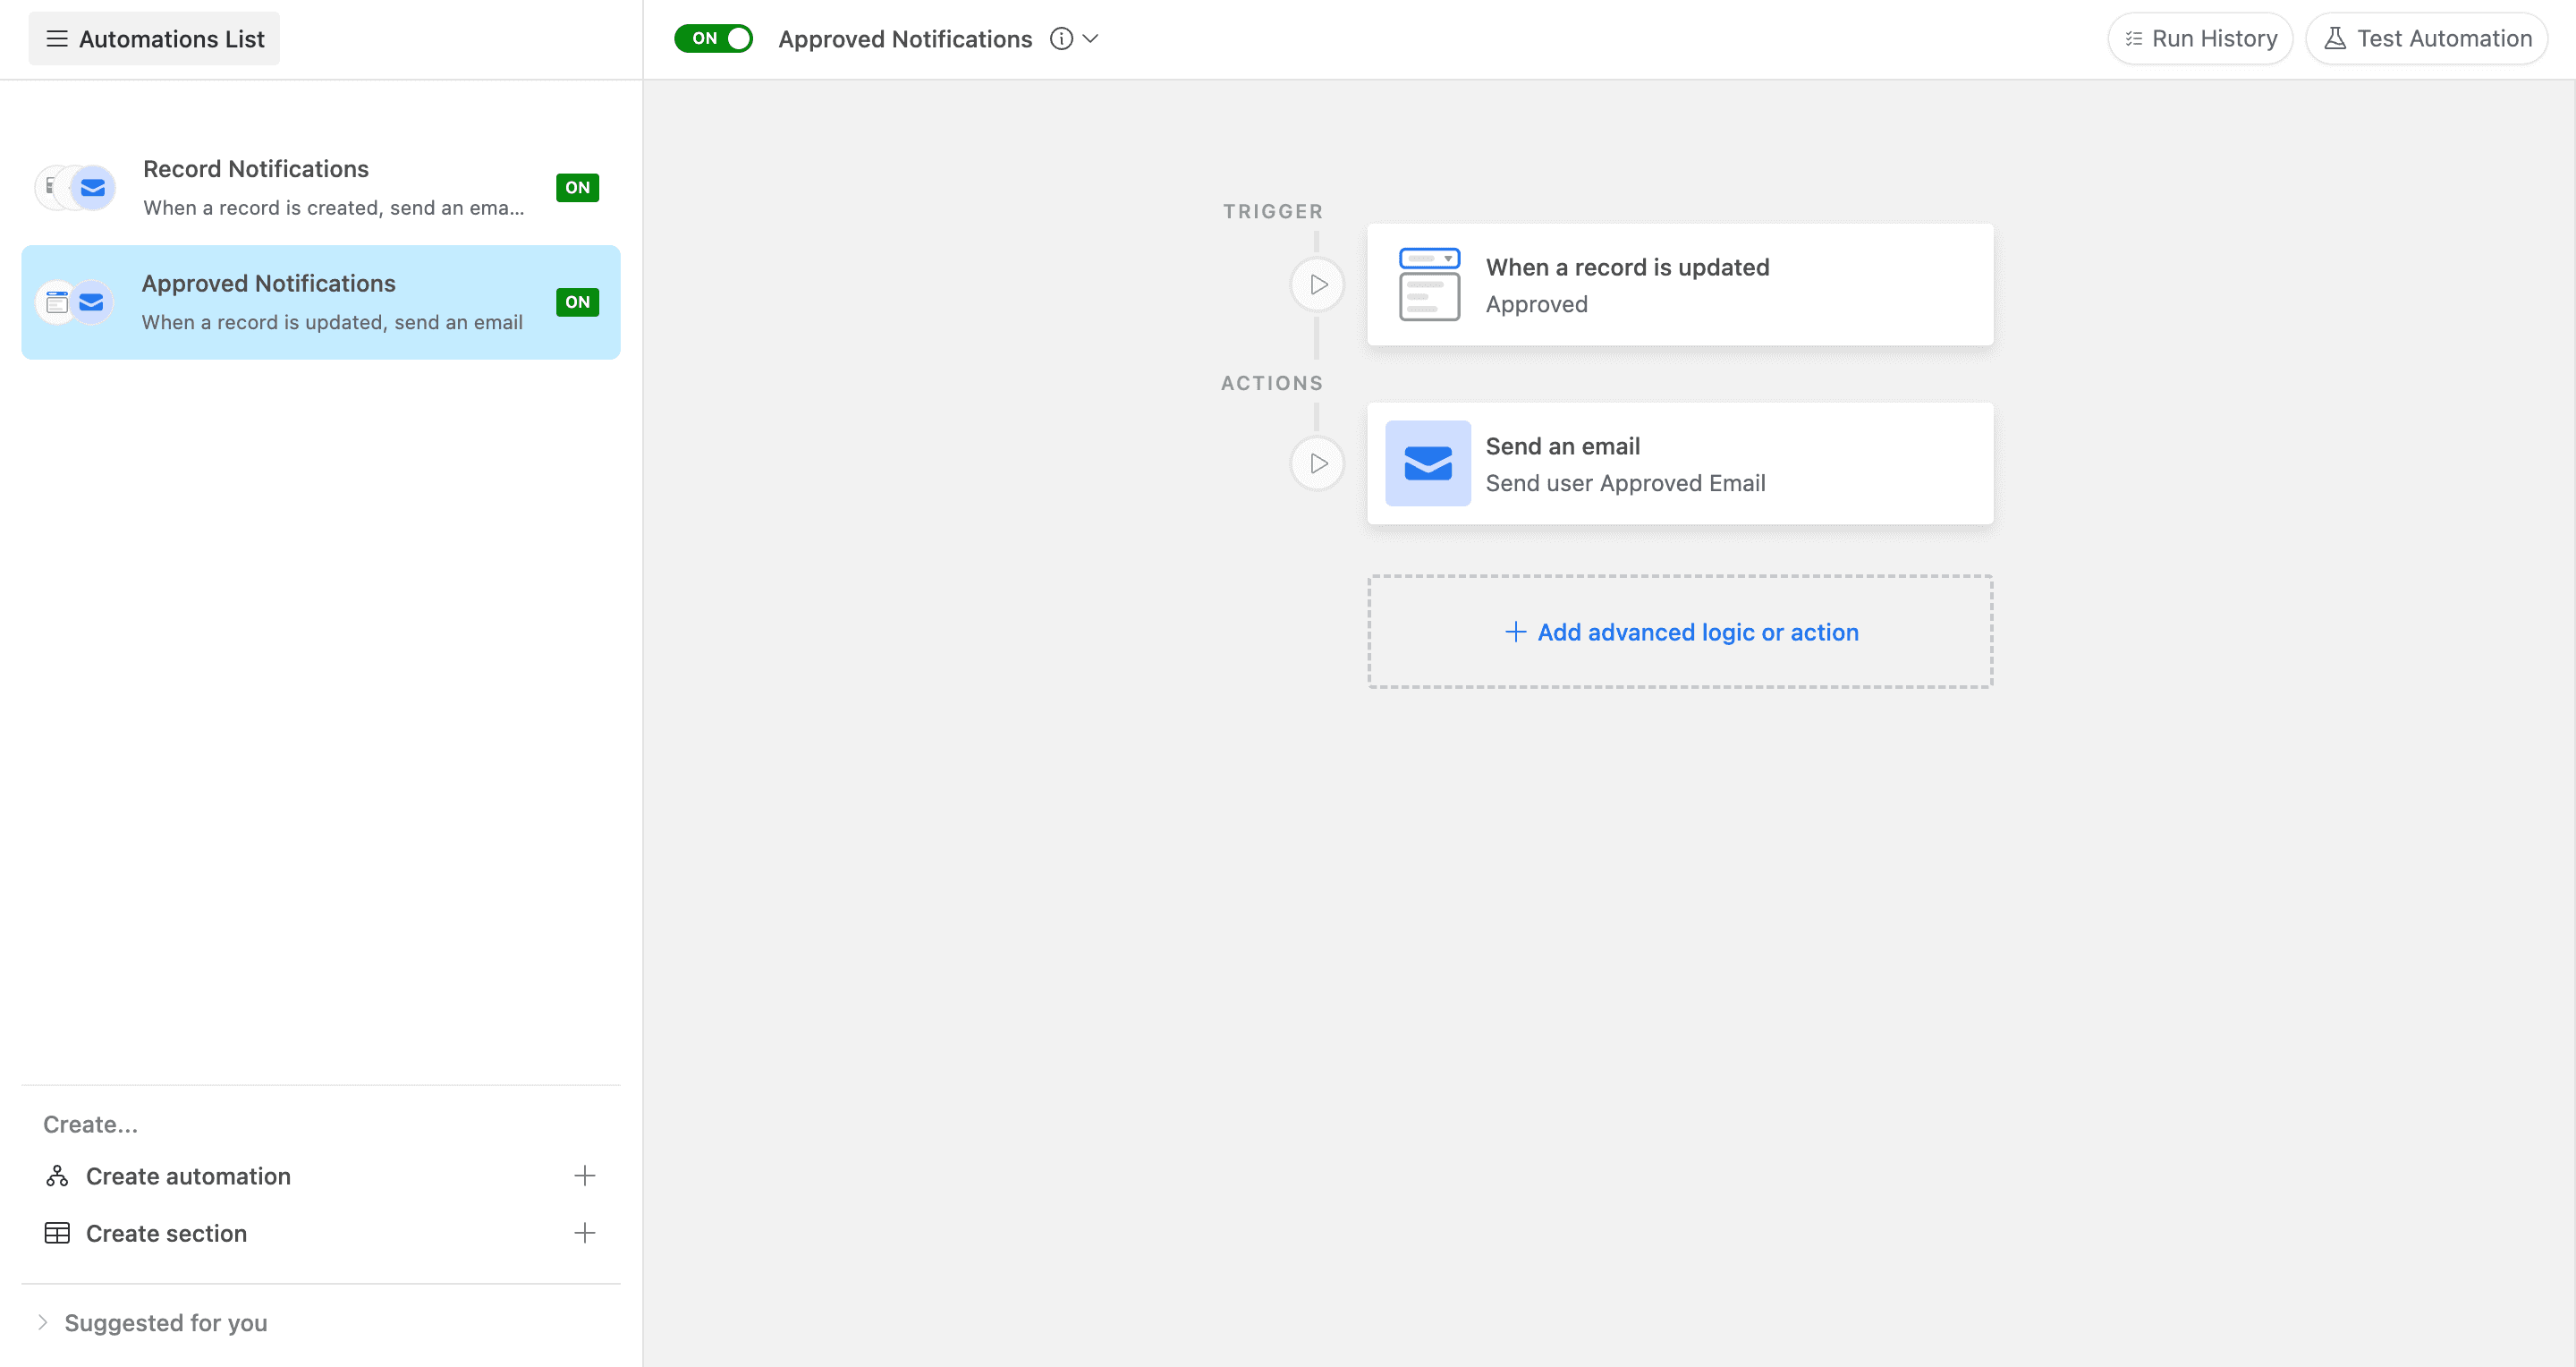
NOTE: Make sure to turn on your Automations.
Now for the demo!
Demo
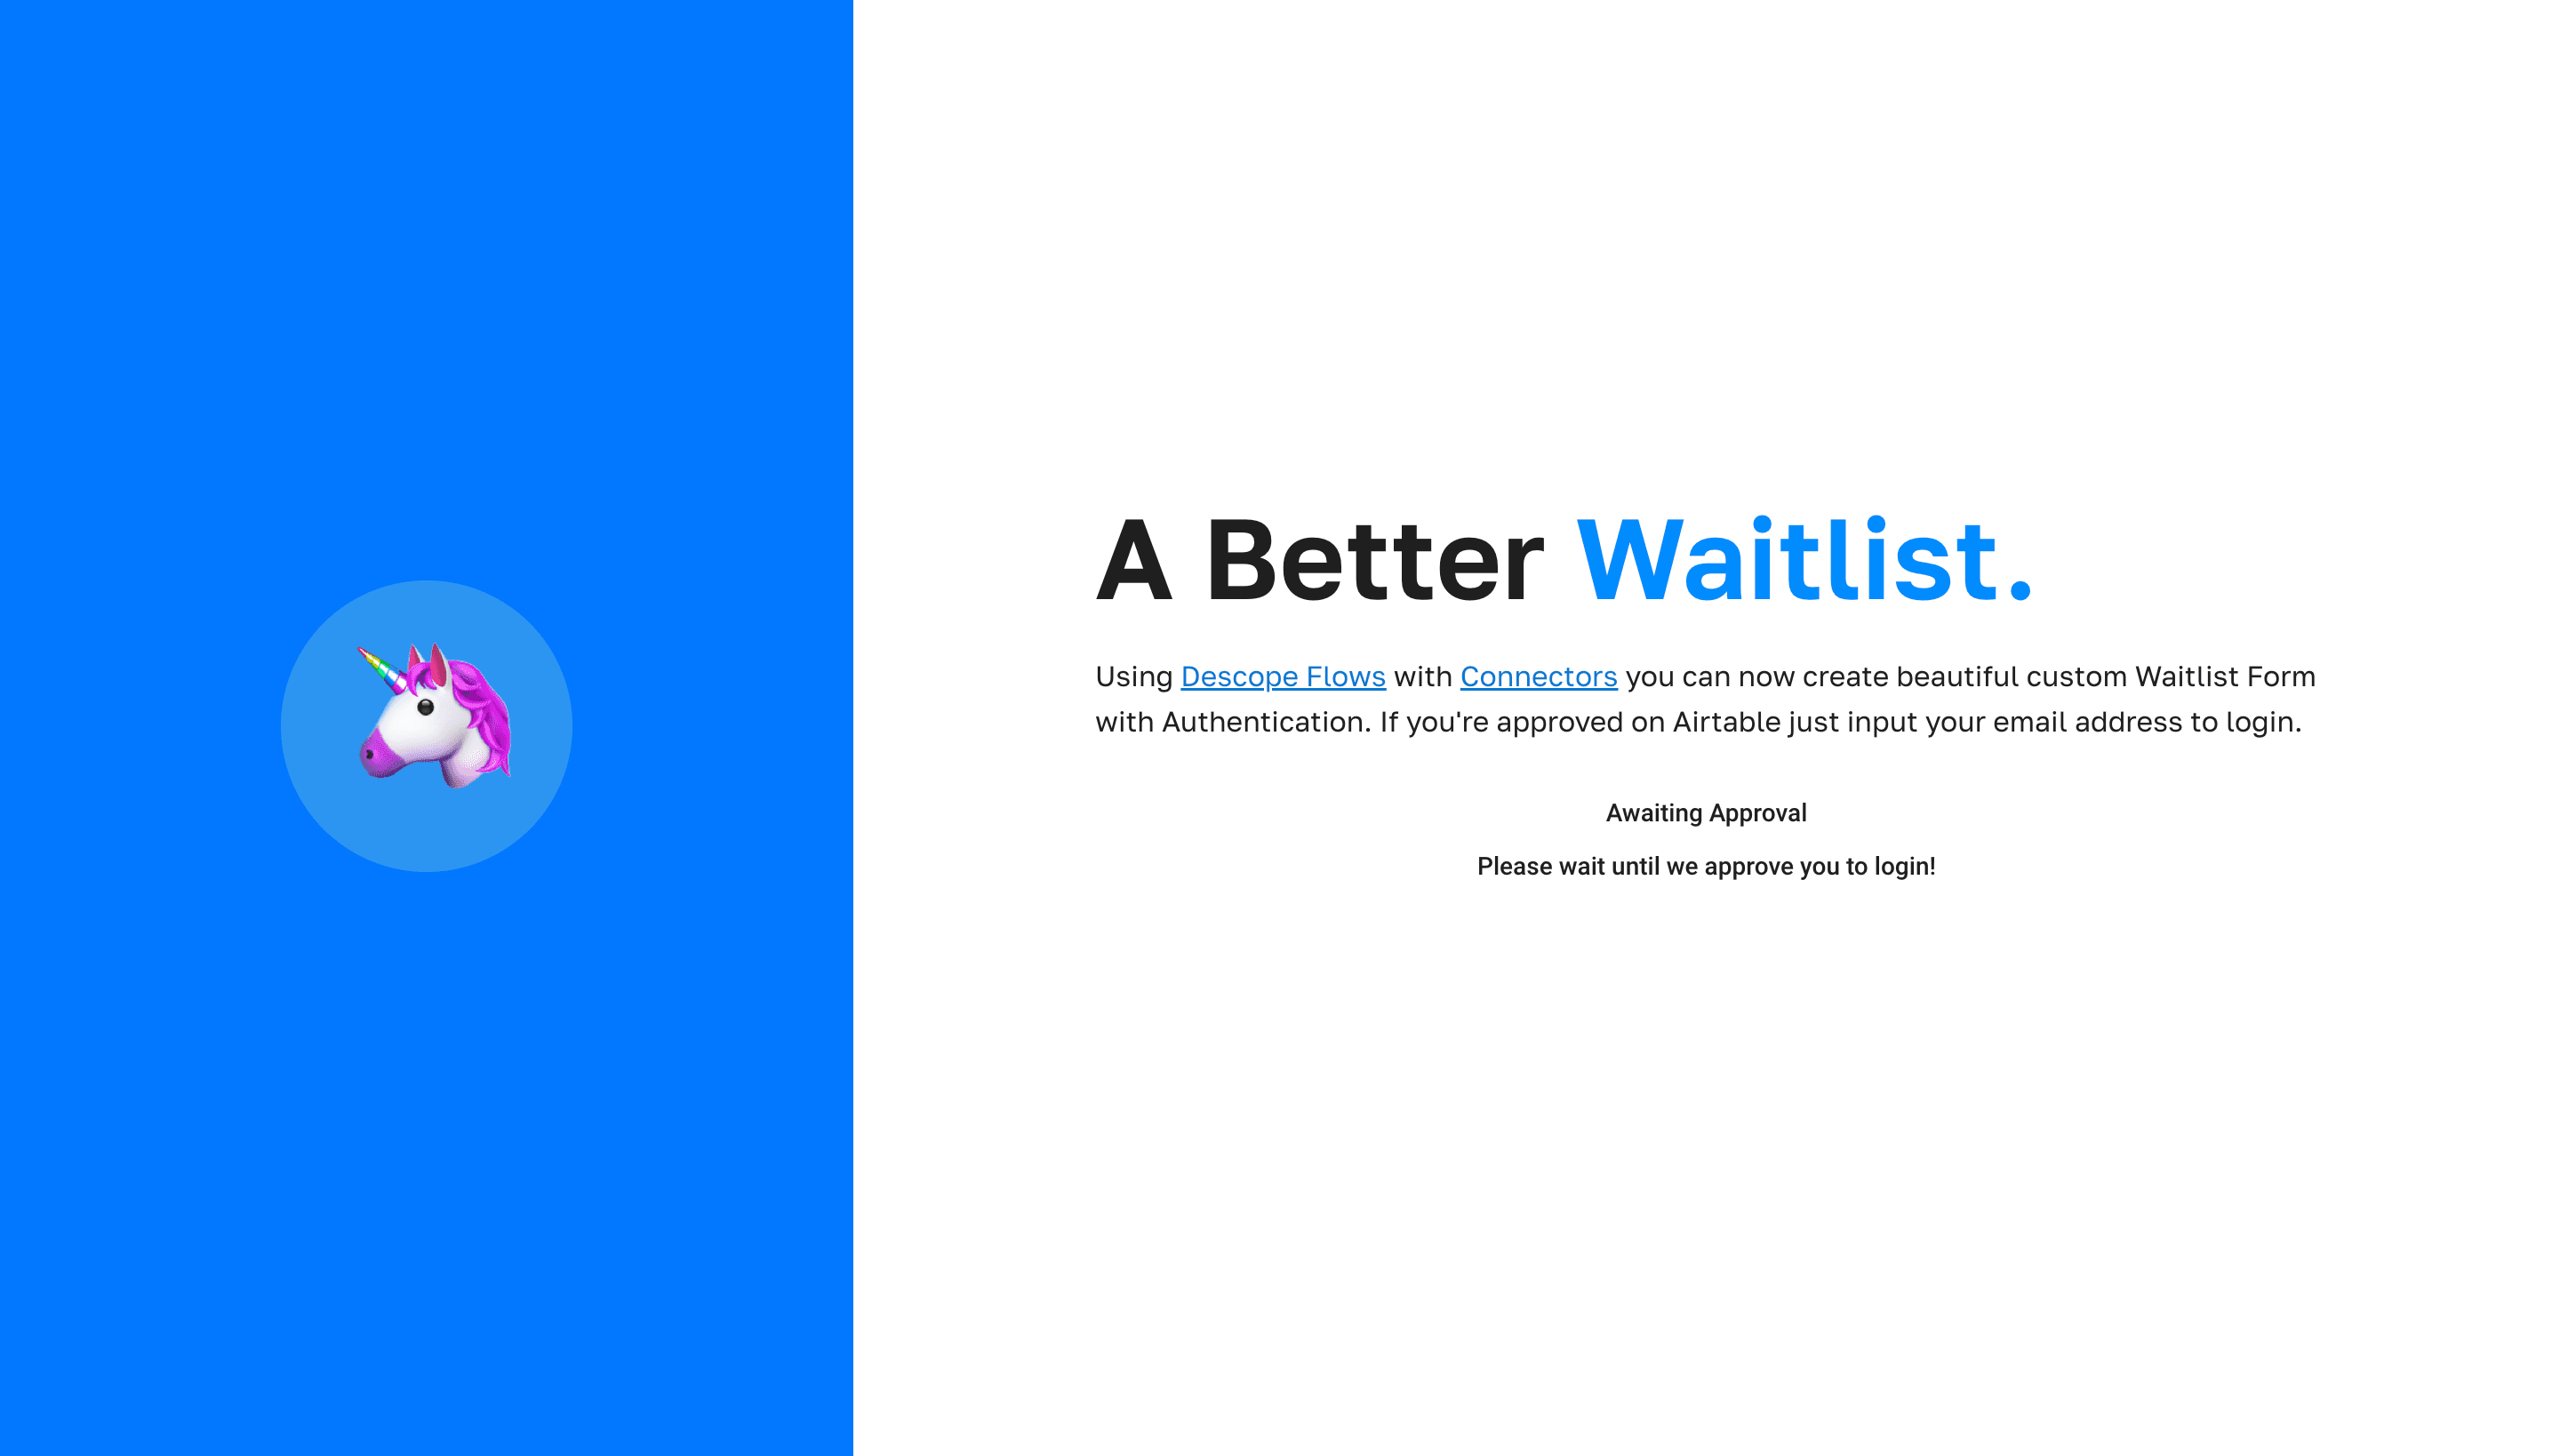
My home page for the waitlist flow looks something like this:
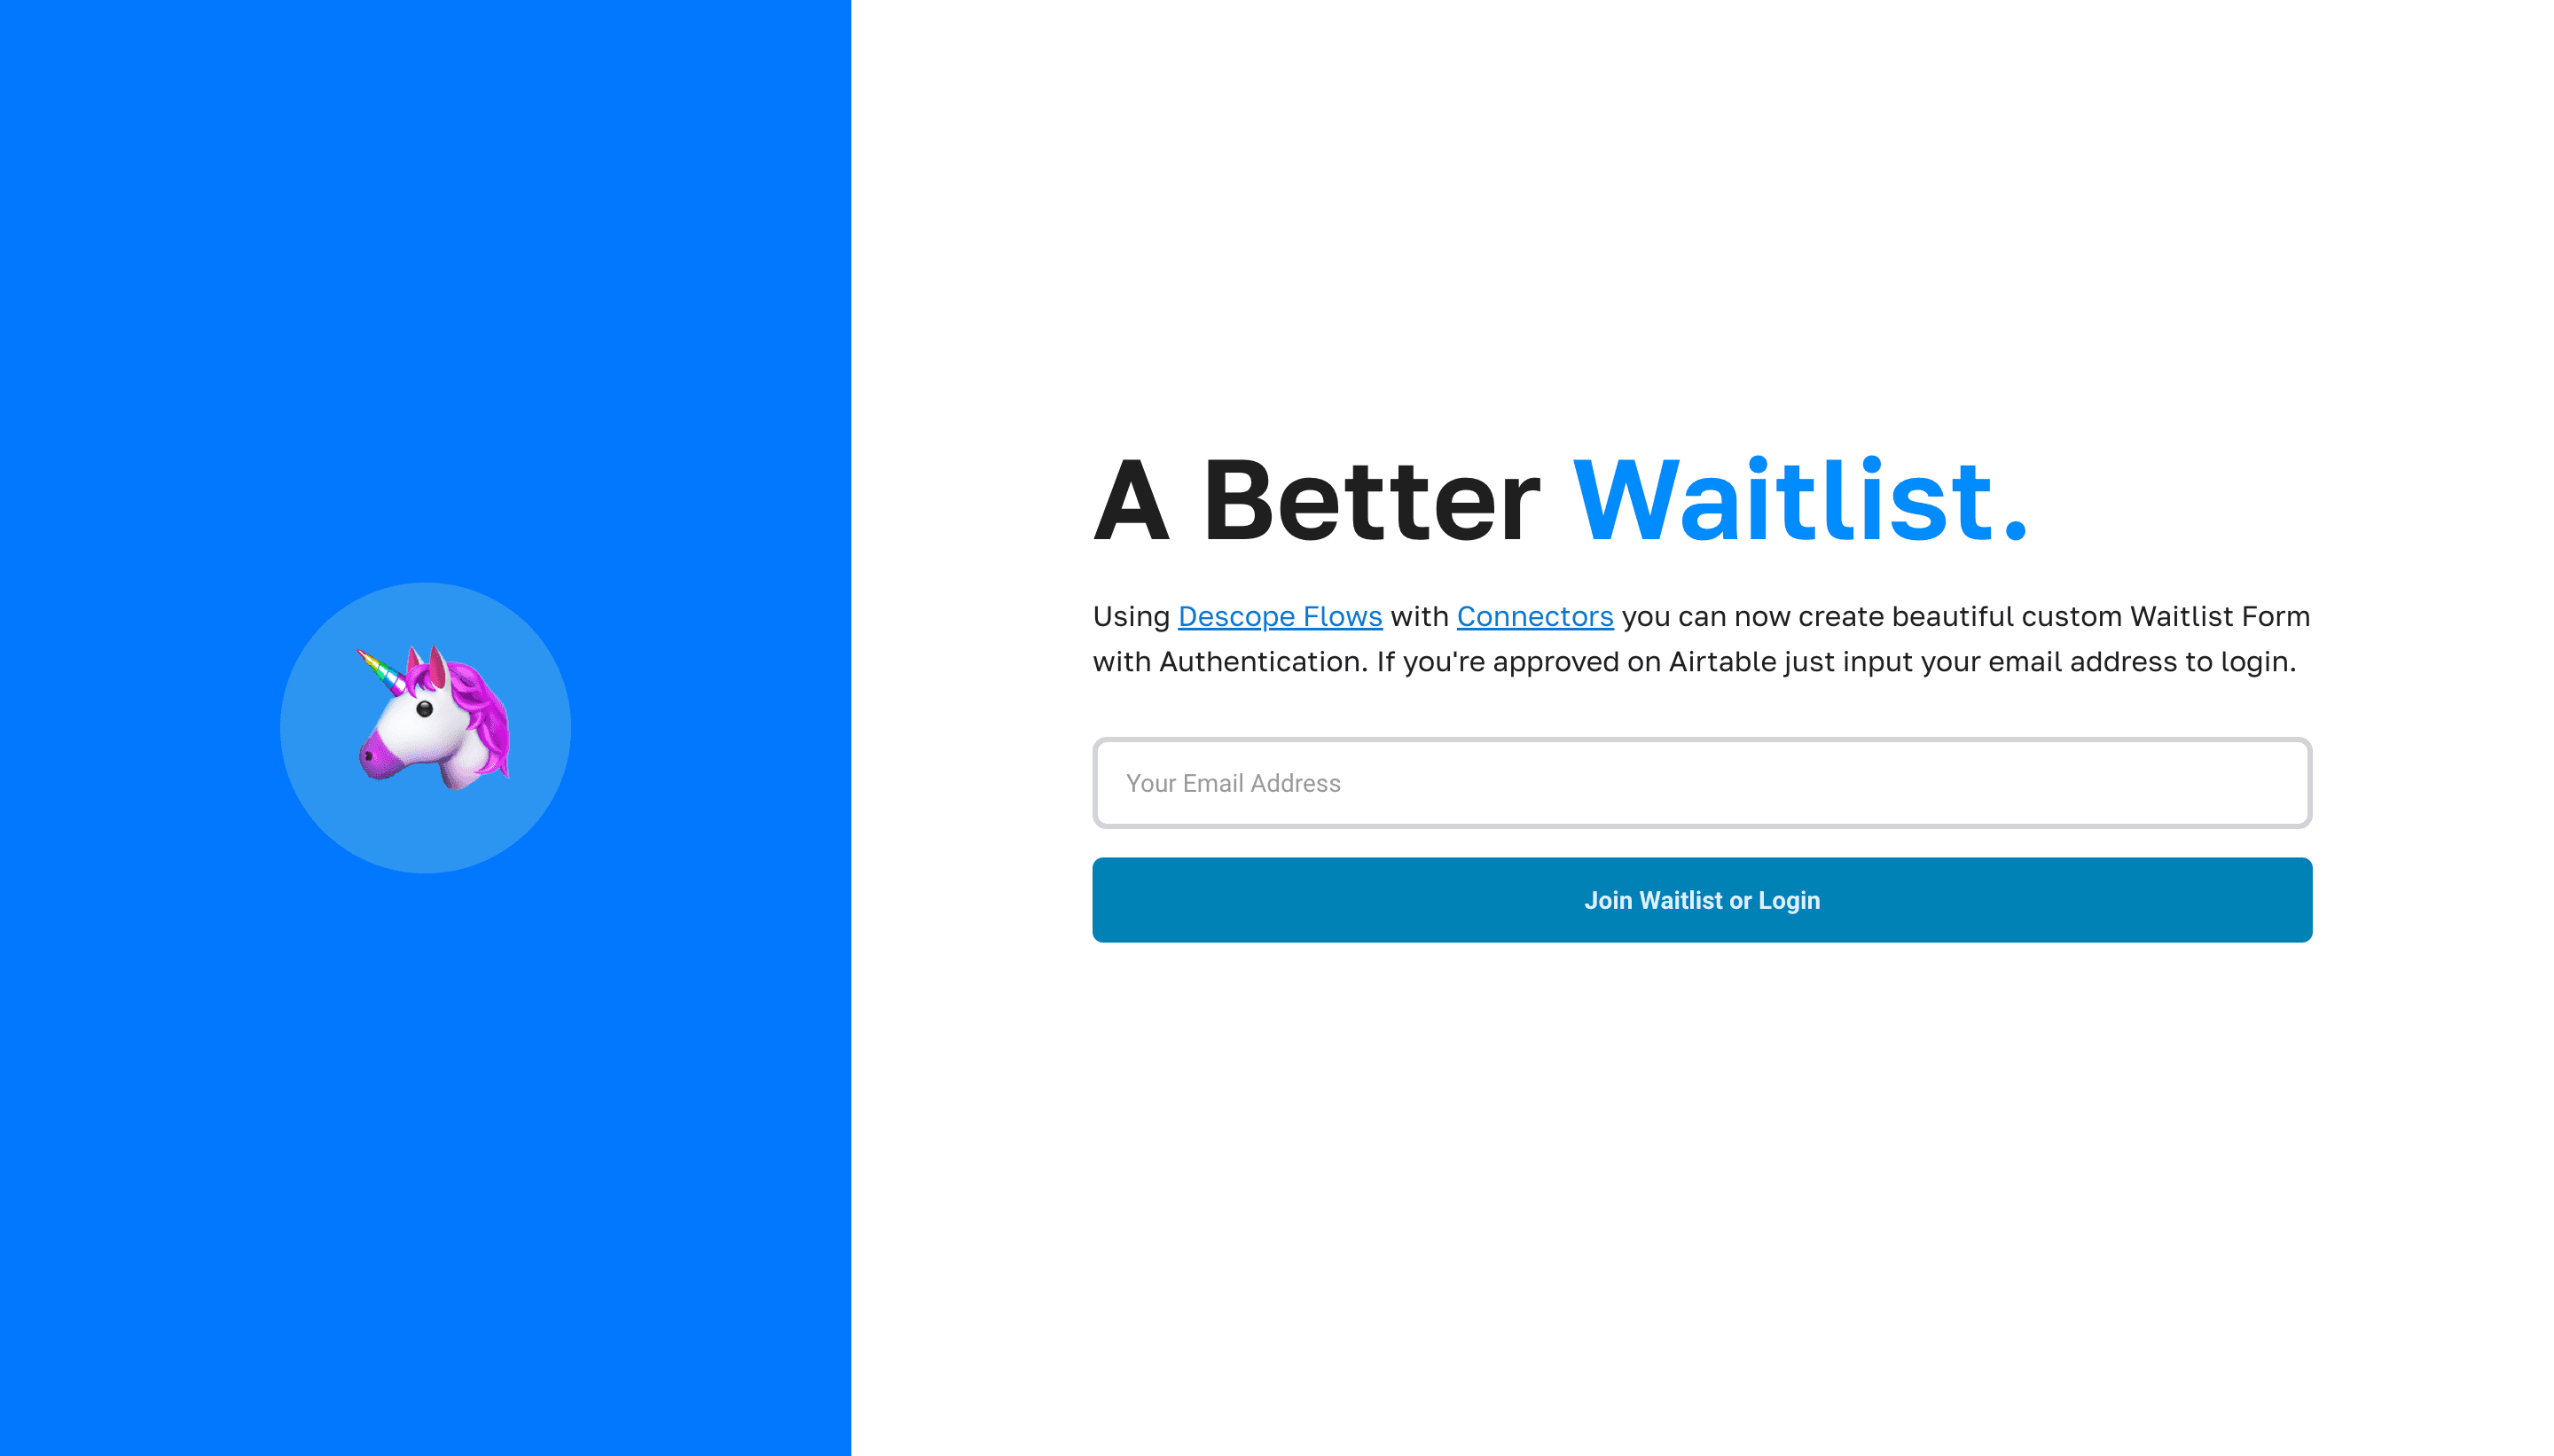
Upon submitting the form above with your email, you will receive a 6-digit code in your email. Once logged in, you should be able to see your Profile page.

The Profile page will only be accessible if you are authenticated and satisfy the condition is_approved is true. If not, you will see an "awaiting approval" message.
Make sure to check your emails for the code and approval. Thanks for being patient!
A better waitlist

The best waitlist of all time is complete! You have learned how to use Descope Flows to build an entire waitlist and have also discovered the unlimited potential of Connectors.
If you have any questions or want to start your Descope journey, sign up for our platform and join AuthTown, our open user community for developers to learn about authentication.