
Table of Contents
Don't have the time to read the entire post? Our human writers will be sad, but we understand. Summarize the post with your preferred LLM here instead.
This tutorial was written by Dimitrije Stamenic, a software developer passionate about sharing knowledge and helping other developers understand programming best practices. Connect with Dimitrije on X to see more of his work!
Godot is a powerful open source game engine that’s earned its reputation among indie developers and studios for good reason. It supports both 2D and 3D game development out of the box, with a dedicated 2D renderer (not just a 3D engine flattened into 2D), a scene-based architecture for rapid prototyping, and support for multiple programming languages, like GDScript, C#, or any other using GDExtension. It’s lightweight, has a small footprint, and gives you full access to the source code, so you can tweak the engine itself if needed.
As you develop your game, one critical aspect that should never be overlooked is user authentication and security. With players increasingly concerned about privacy and data security, it’s essential to implement robust authentication methods to protect both your players and your game.
Descope offers an intuitive, low-code solution to add authentication and multifactor authentication (MFA) to your game with minimal hassle and maximum flexibility. It also helps you streamline the login process while providing passwordless options, like enchanted links, social logins, and SMS-based MFA.
This tutorial explains how to implement Descope’s authentication and MFA in a Godot game. By the end of this article, you’ll be ready to securely onboard your players, boost security with MFA, and improve their overall experience.
Why are authentication and MFA important?
As a game developer, you’ve probably had to make decisions about how players log in and interact with your game. You’ve got a few options when it comes to user authentication:
Storefront auth (Steam, Epic, App Store): Great if you stay within their ecosystem, but limiting if you want cross-platform progression or external monetization. That said, you can configure platforms like Epic Games as OAuth providers and integrate them into your login flow. Even if you’re using Descope as your main Identity Provider (IdP), you can still let users authenticate via Epic while maintaining full control over identity across platforms. Unfortunately, Steam no longer supports OAuth.
Asset store plugins: Quick to set up but often require extra glue code, lack flexibility, and can raise security concerns if you’re handling credentials yourself.
DIY auth systems: Full control but high effort. You’re suddenly responsible for password security, session handling, MFA, recovery flows, and compliance risks.
Rather than maintaining your own auth stack, it’s often better to use a purpose-built identity provider like Descope. It handles login, MFA, token management, and user data security, which lets you focus on building your game, not an auth service.
Authentication isn’t just about security; it also unlocks features like syncing progress across devices, enabling custom matchmaking, or building player communities. With MFA baked in, you can also protect against account hijacking and give players peace of mind.
In the following sections, you’ll learn how to integrate a modern authentication flow into your Godot game using C#. You’ll start with a basic login using OpenID Connect (OIDC), then extend it to support MFA using Descope. This setup will allow you to authenticate users with email, social login, or passwordless magic links and add an extra layer of protection with MFA when needed.
Prerequisites
Before diving into integrating authentication and MFA into your Godot game, there are a few things you’ll need to have installed and set up:
The latest stable version of Godot Engine: This tutorial uses C# for scripting, so be sure to choose the .NET-supported build.
.NET SDK: To enable C# support in your Godot project.
Descope account: Sign up for a free Descope account if you haven’t already.
Some C# familiarity: You don’t need deep security knowledge, but being comfortable with C# in Godot will help you follow along more easily.
Once you’ve got Godot, Descope, and your editor set up, you’re ready to start building a more secure, more flexible login experience for your game.
Setting up Descope
Let’s first configure Descope. This step sets up your entire auth workflow—passwordless login, MFA, and social login with Discord—all with minimal code you have to write.
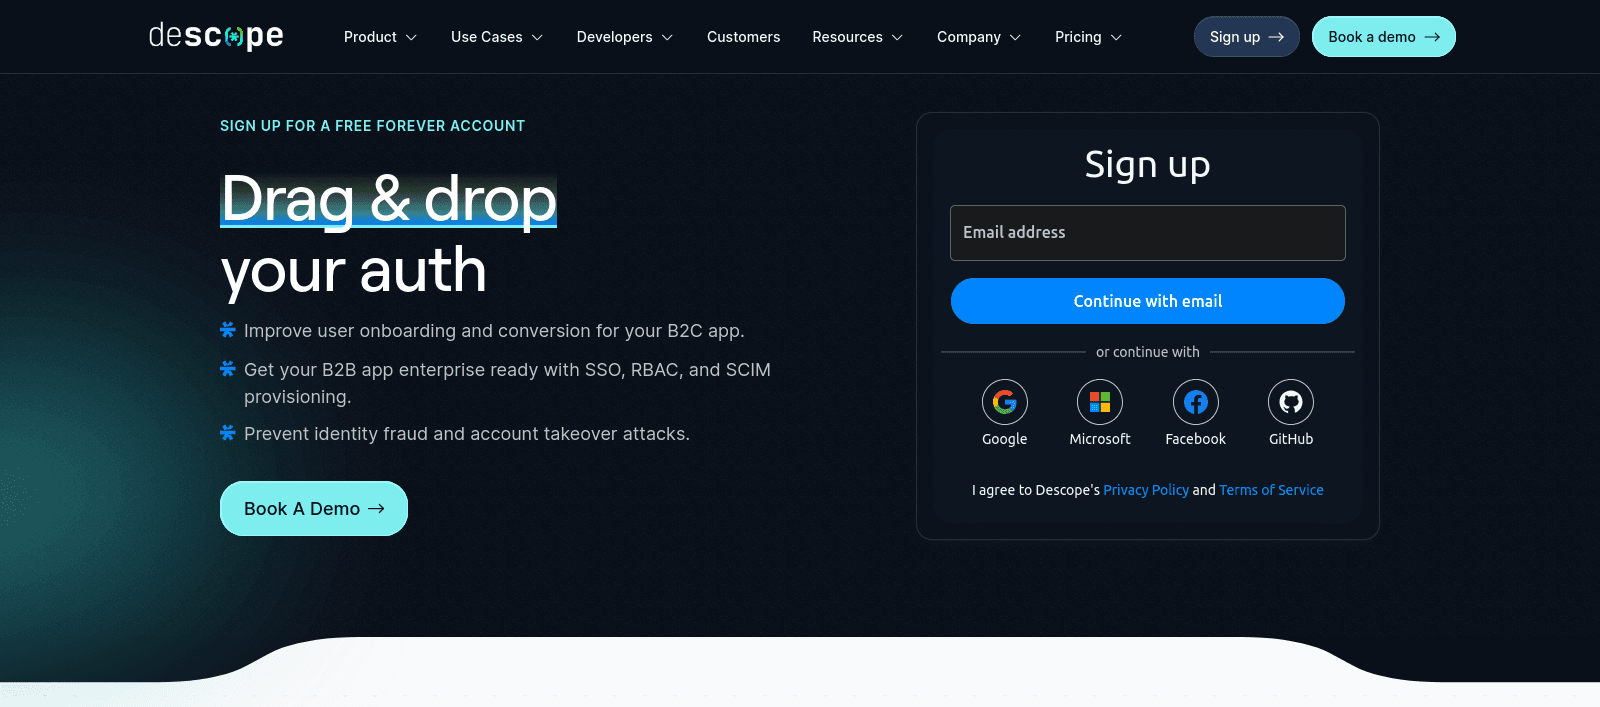
Create a free Descope account
Start by heading over to Descope’s sign-up page. You can register using your email, Google, GitHub, Microsoft account, or single sign-on (SSO).
Once you’ve signed up, you’ll be taken to the Descope console. This is your dashboard, where you manage all your authentication projects.
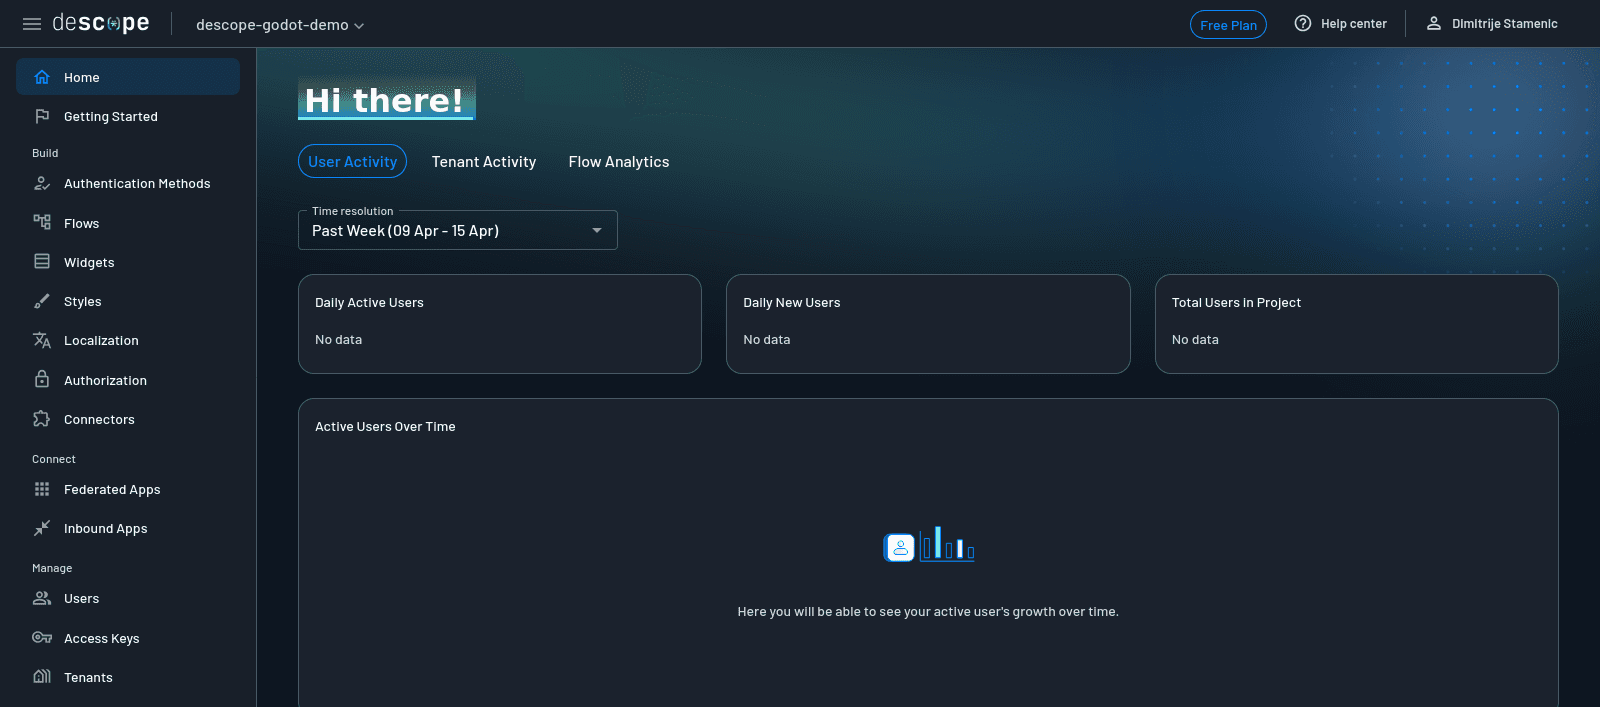
Create a new project
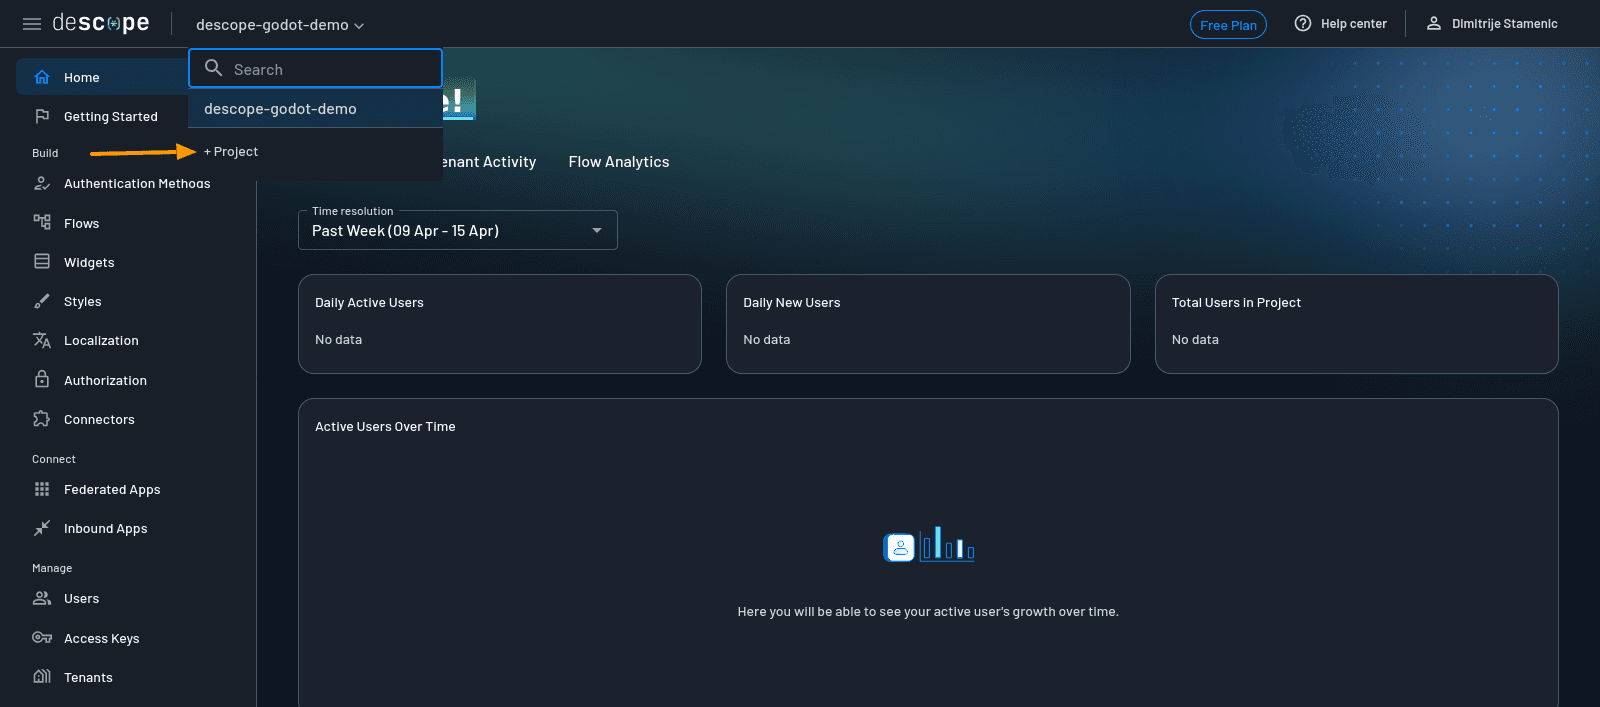
When you first log in, Descope prompts you to create a project. If you already have one, you can click your current project name on the top left and choose + Project to create a new project.
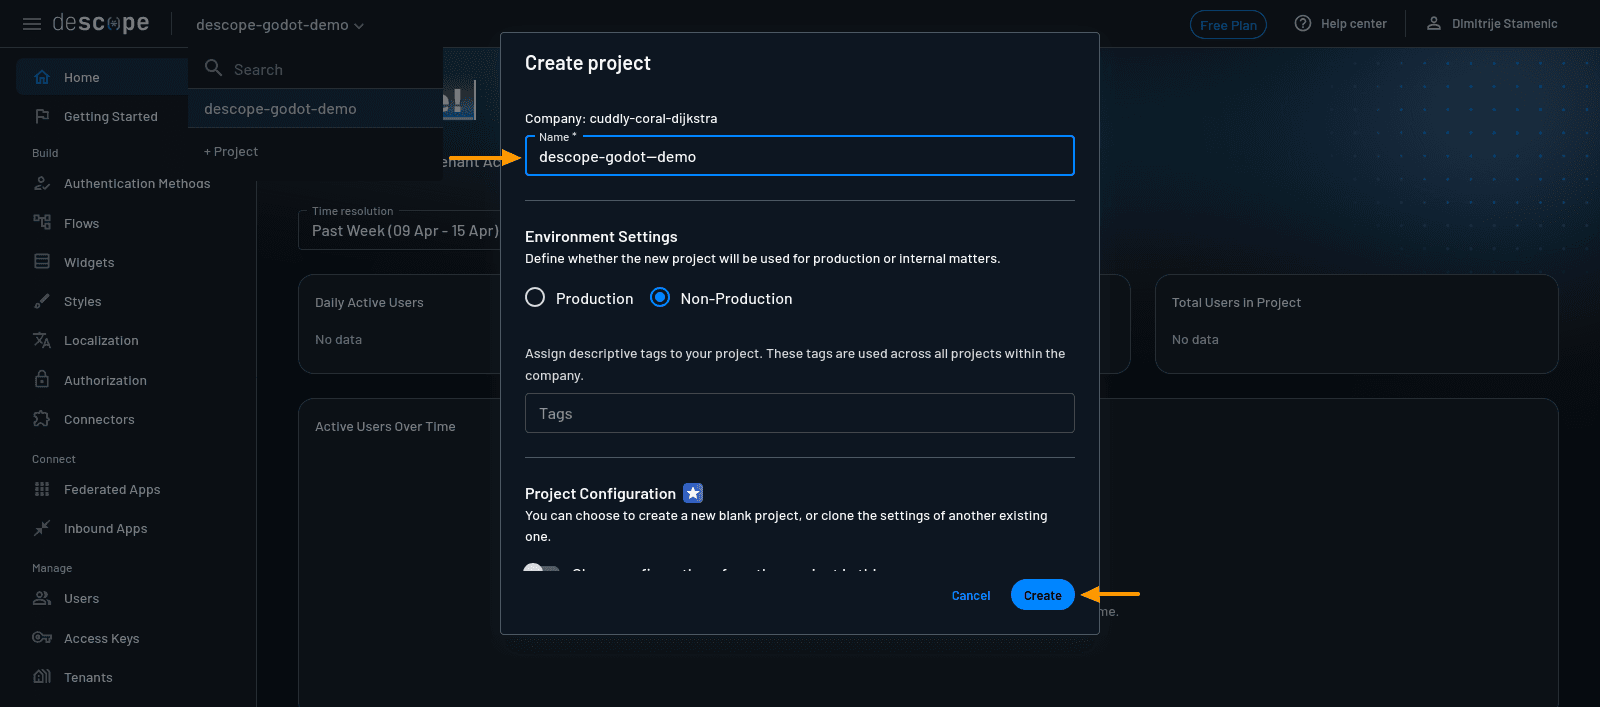
Projects are like workspaces. They keep all your authentication flows, user data, and integrations in one place. Name your project something like Descope-Godot-Demo and click Create.
Configure your authentication flow
Once your project is ready, you’ll land on the Getting Started tab. This is where Descope helps you set up a foundational authentication experience using a few guided steps.
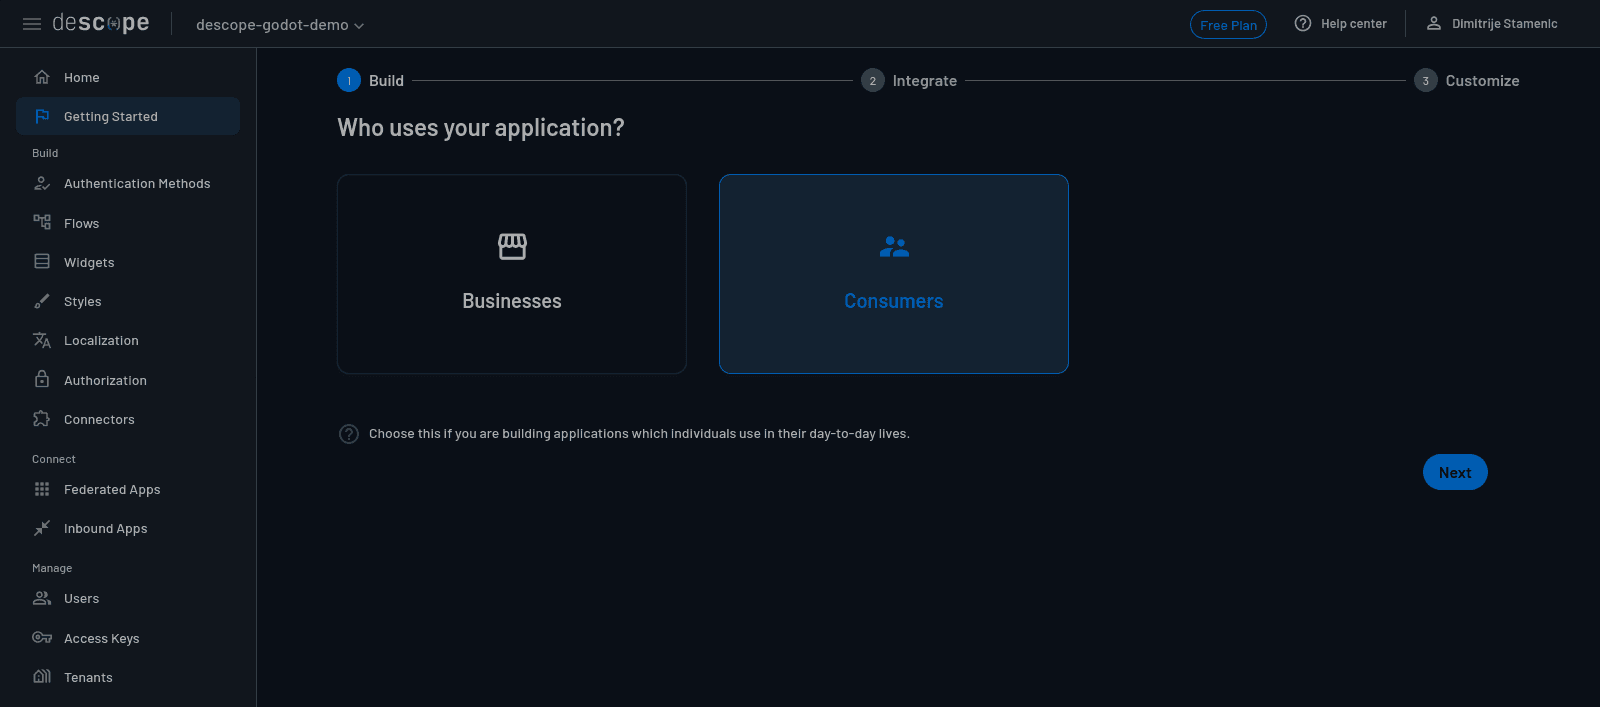
The first prompt asks who will be using your app. You’ll see two choices: Businesses and Consumers. Since we’re building for game players rather than internal employees, choose Consumers and click Next.
Here, you’ll be asked to select which authentication method your app should primarily use. You’ll see options like Magic Link, Enchanted Link, Social Login, and Passkeys.

For this tutorial, select Enchanted Link. This lets players log in securely through a link emailed to them, no password needed. Click Next to configure multifactor authentication.
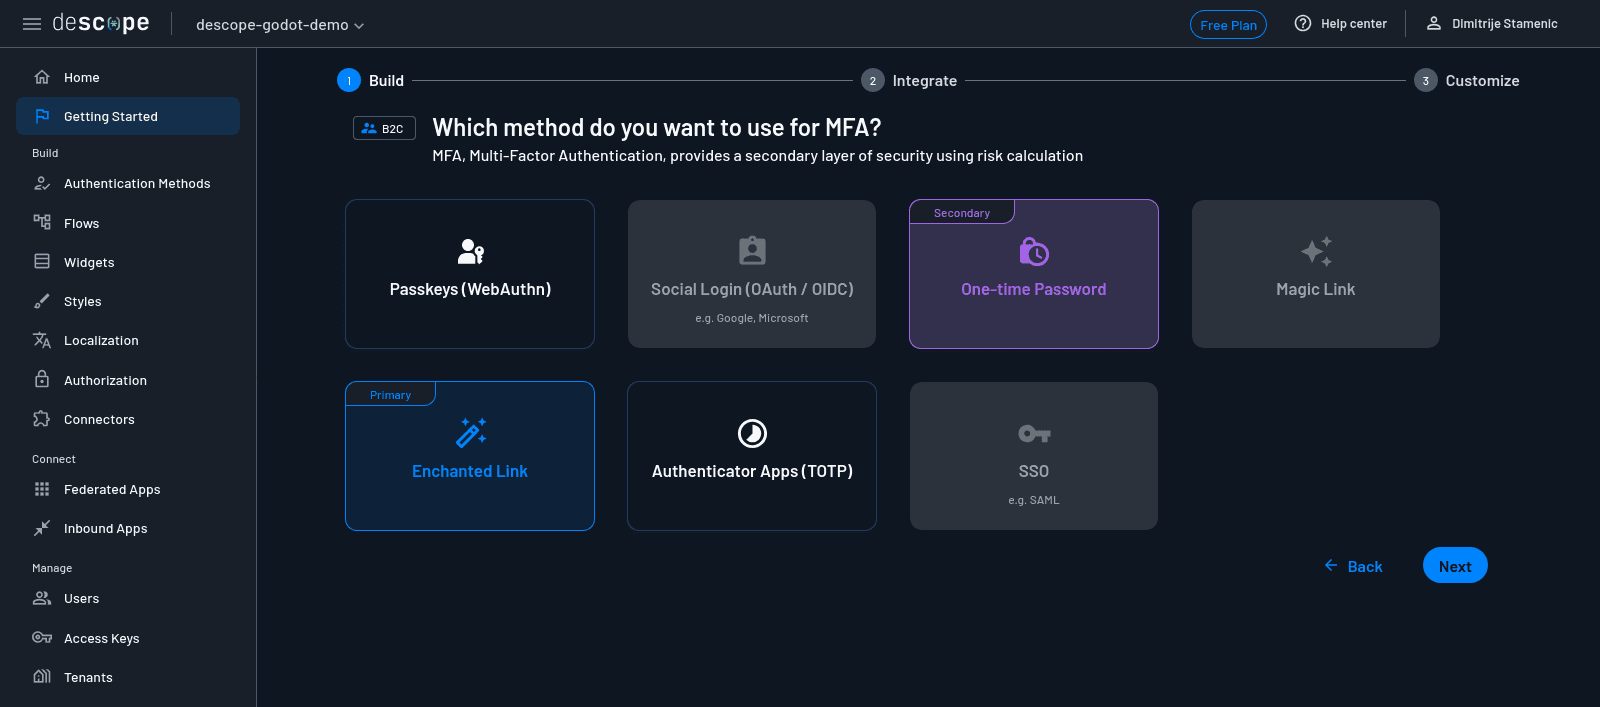
Descope will display a list of MFA options, including SMS OTP, email OTP, and authenticator apps. Choose One-Time Password (it’s the option that uses SMS), and click Next.
On the next screen, Descope recommends a prebuilt login screen layout that fits the choices you’ve made so far. You’ll see three options with different UI configurations.
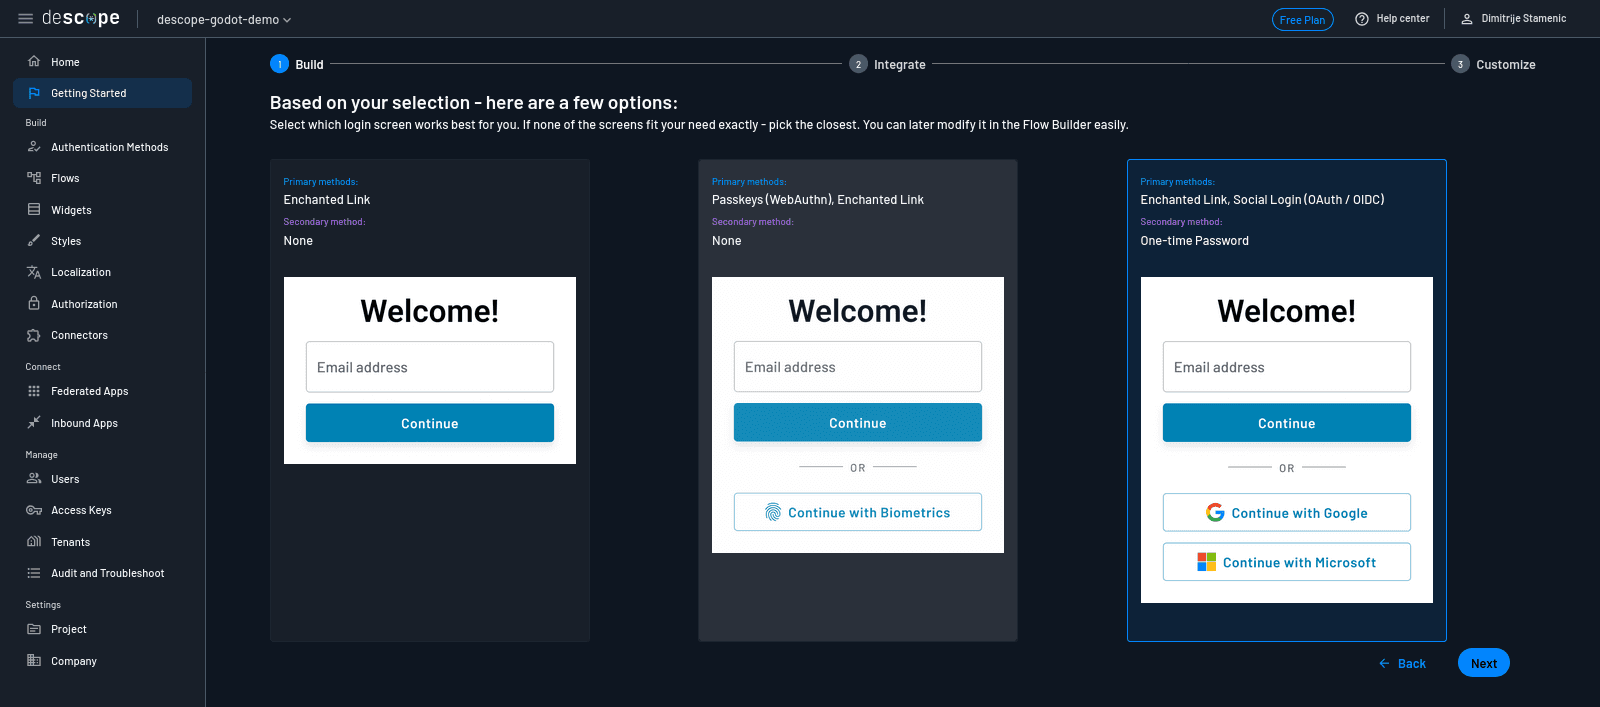
Choose the one with the primary methods set to Enchanted Link, Social Login (OAuth/OIDC)—yes, even though it includes Google and Apple for social login. You’ll swap those out for Discord shortly. Click Next to continue.
Descope will display a summary screen with all the authentication flows it has just generated for you. These include Sign in, Sign up, Sign up or in, and Step up (which is used for adding MFA later in a session if needed). Each of these comes with a visual flow and a ready-to-use login screen you’ll be able to modify or integrate right away.
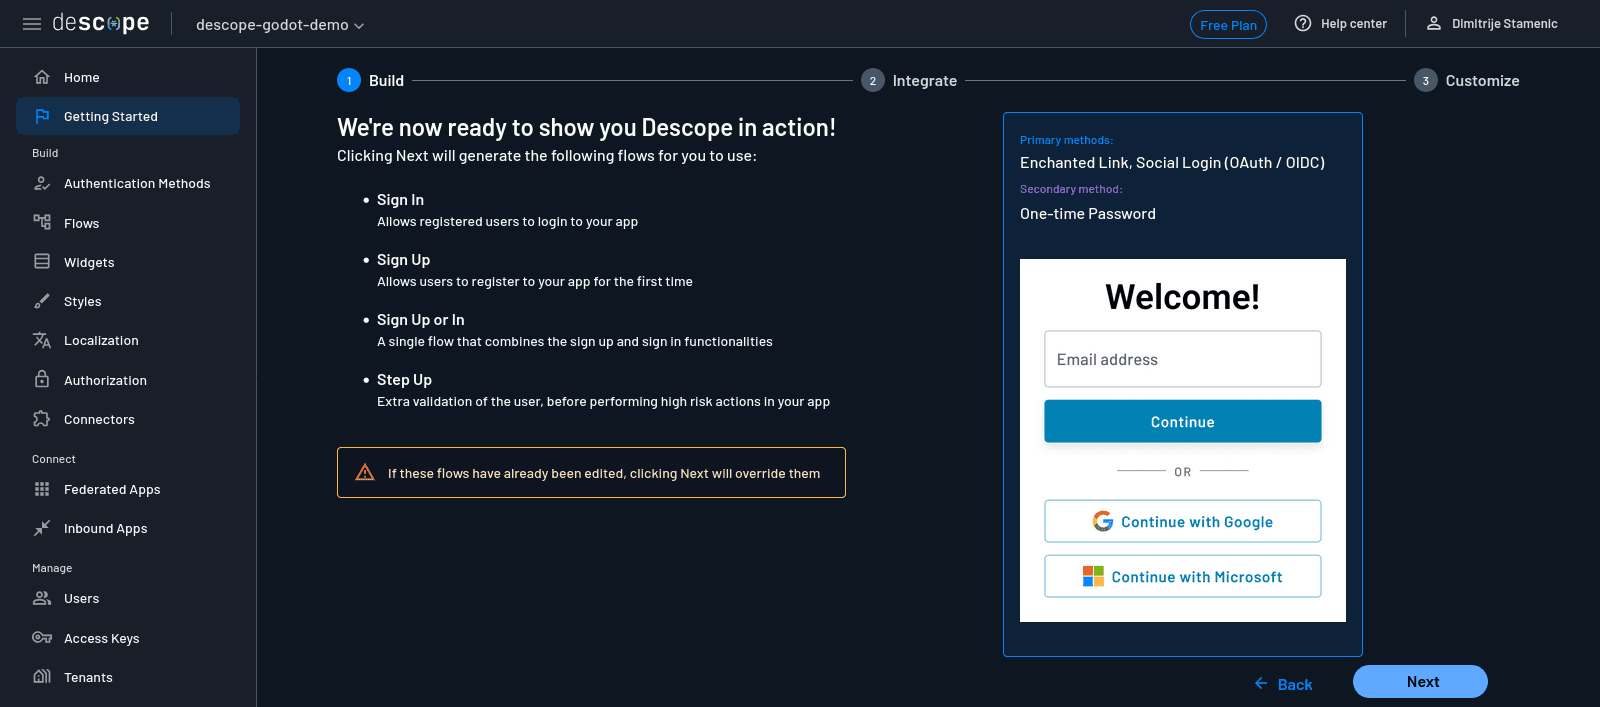
If you’re happy with how the login screen displays, click Next to finish the configuration.
Swap Google and Apple for Discord
Now that your flows are created, let’s replace the default social logins (Google and Apple) with Discord. Start by navigating to the Flows tab in the Descope console.
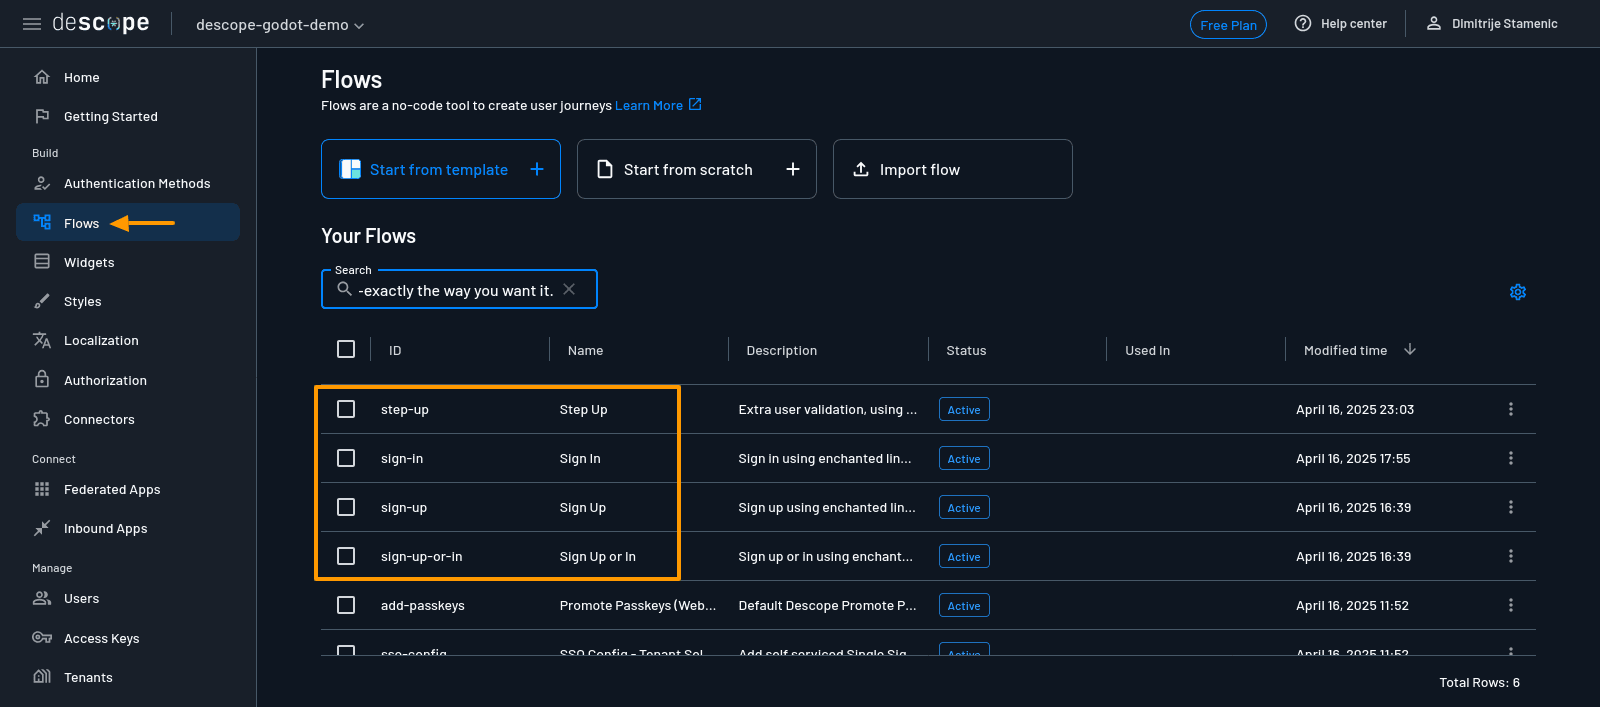
You’ll see all the flows that were generated for your project listed. Click on one (eg Sign in), and you’ll be taken to a visual-flow editor. It shows a diagram of the authentication steps the user will go through.
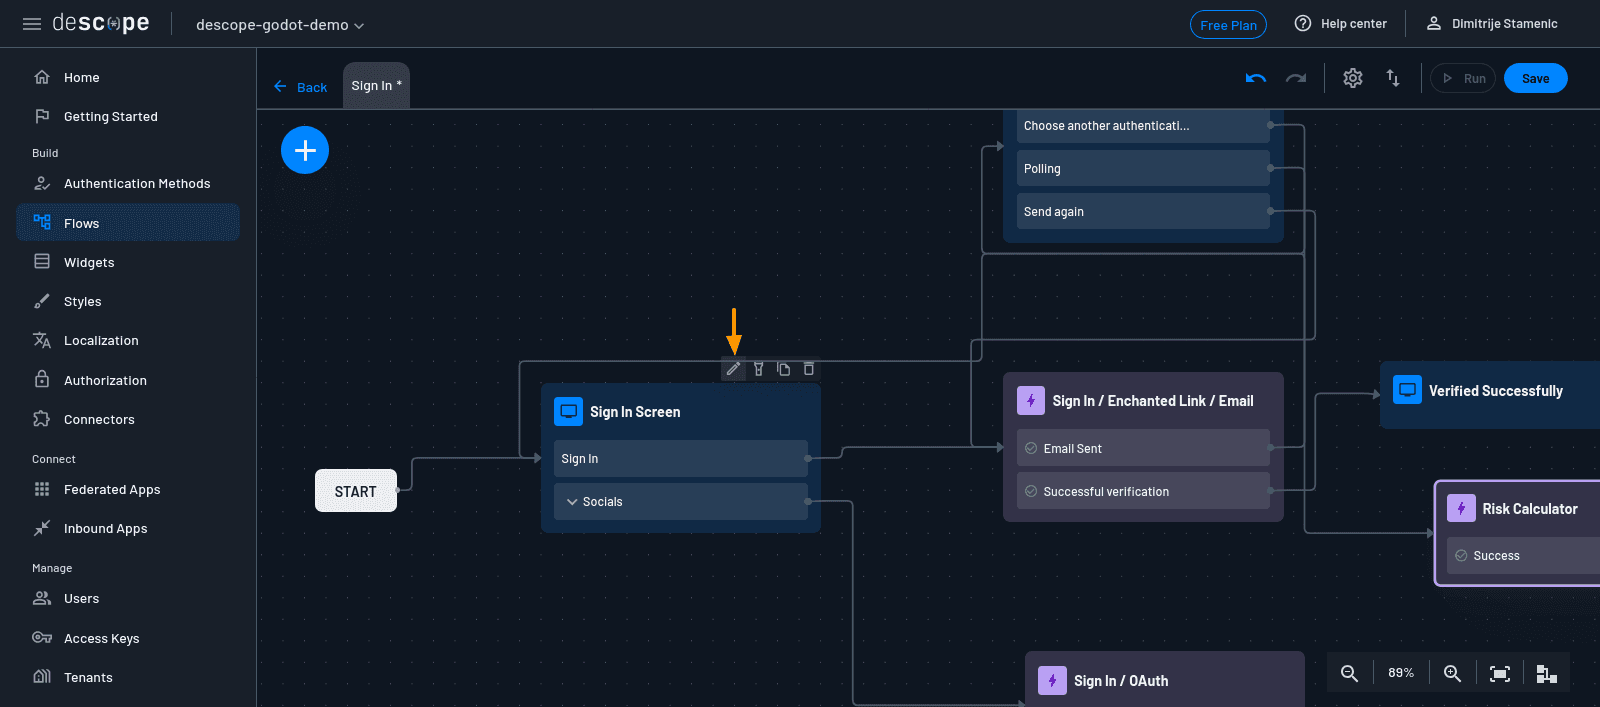
Look for the screen element in the diagram labeled Sign in Screen (for the Sign in flow). Click on it, then hit the Edit button in the top-right corner of the screen editor. This opens up a drag-and-drop UI where you can add or remove elements from the login screen.
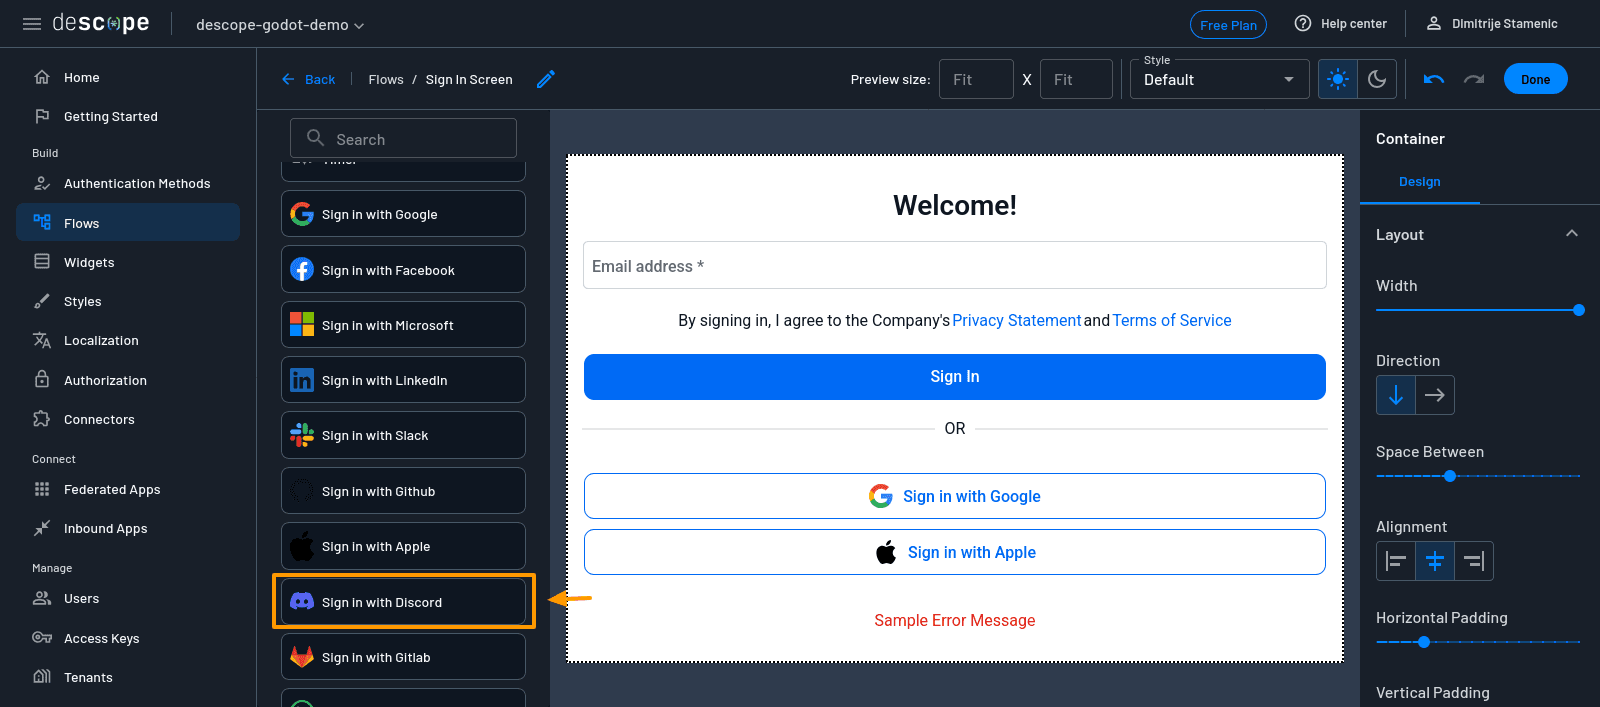
On the right-hand panel, scroll to find the Sign in with Discord widget. Drag it onto the screen canvas.
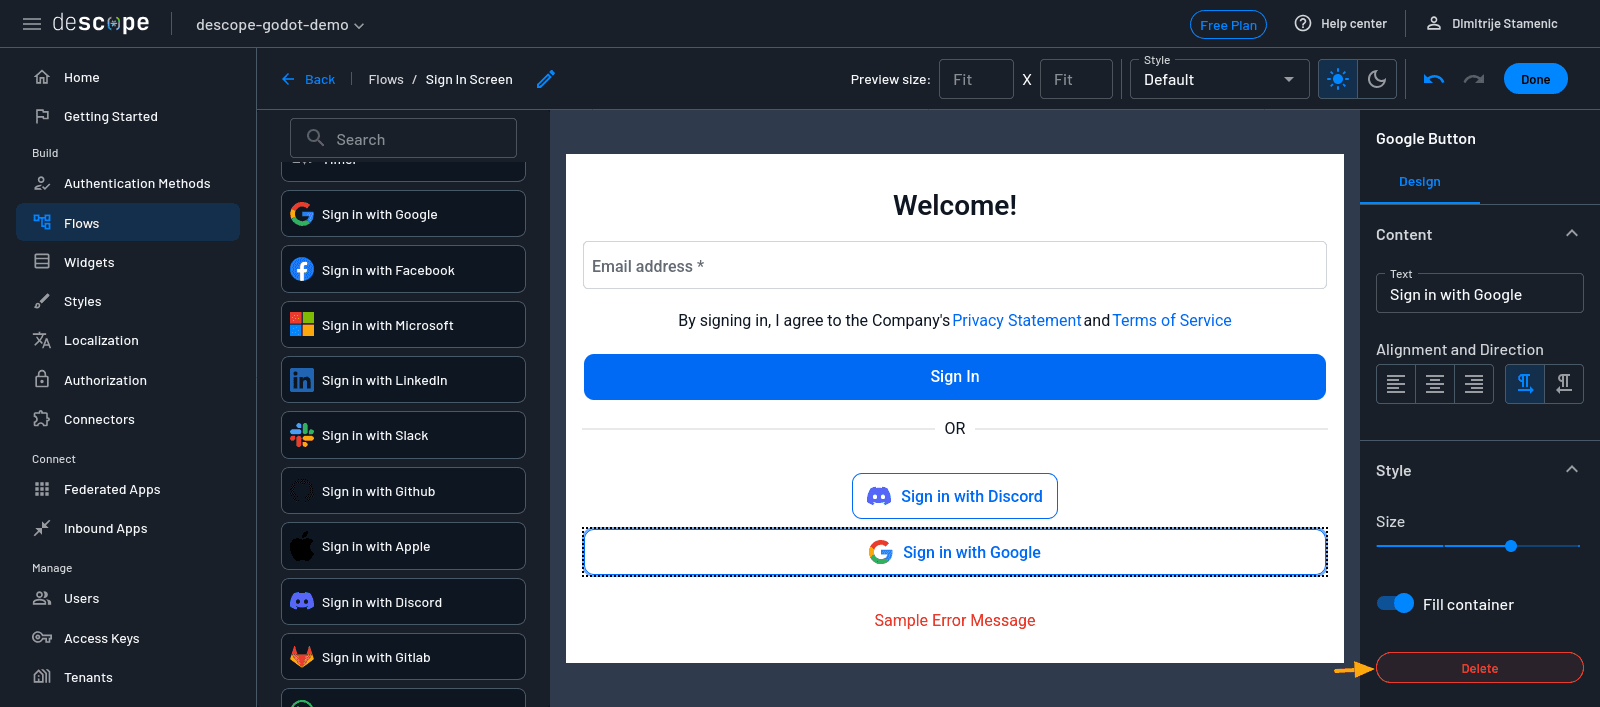
You’ll also notice the existing Google and Apple sign-in buttons. As you won’t be using these methods for this example, delete each one by clicking on it and selecting the Delete button in the bottom-right corner of the screen. When you’re happy with how the screen looks, click Done, then save the flow.
Repeat these steps—open the specified screen, add the Discord login widget, remove Google and Apple login options, and save the changes—for each of the following flows:
In the Sign up flow, find and edit the Sign up Screen.
In the Sign up or in flow, locate the Welcome Screen (you’ll be using this flow later in the article).
In the Step up flow, edit the Step up Screen.
Once you’ve updated all four, your authentication experience is now fully tailored with enchanted links, SMS OTP, and a Discord login.
Creating a game
Now that your authentication flow is ready in Descope, let’s build the Godot game that will use it. For this tutorial, you don’t need a full-fledged title, just a simple game where players can log in, view user info, and log out. This will help you focus on the Descope integration without getting distracted by game mechanics.
Here’s the GitHub repo where you can find the code used in this tutorial. If you already have a game you want to use, feel free to adapt the instructions. Otherwise, follow along and you’ll have something basic working in no time.
Set up a new Godot project
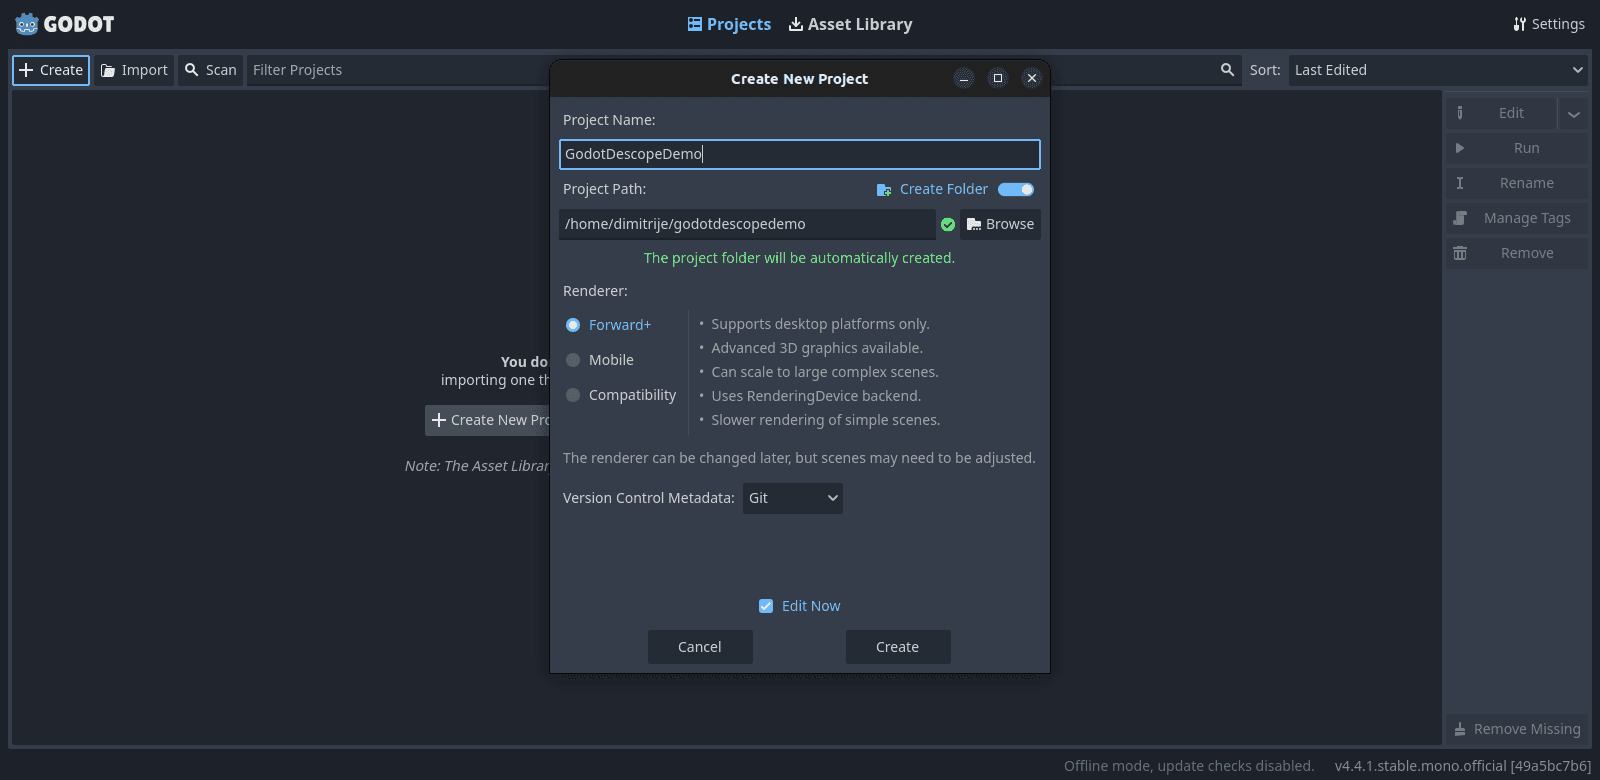
Open the Godot editor and create a new project. Choose a location on your machine, give it a name like GodotDescopeDemo, and click Create.
Once you’re in the editor, create a new scene and add a Control node as the root. This will be our simple UI container. Rename it to LoginScreen, and save the scene.
Design a basic UI
You can add a few elements to make a basic UI:
A
Labelfor the game title (GameTitle)A
Labelto display the logged-in user’s email or username (UserInfo)A
Buttonlabeled Log in (Login)A
Buttonlabeled Log out (Logout)

Feel free to customize the look and feel to match your game’s style. The important part is that players can trigger the login, see their status, and log out.
Wire up basic navigation with C#
Create a new C# script called LoginManager.cs and attach it to the root LoginScreen node by right-clicking the LoginScreen node and selecting the Attach Script option.
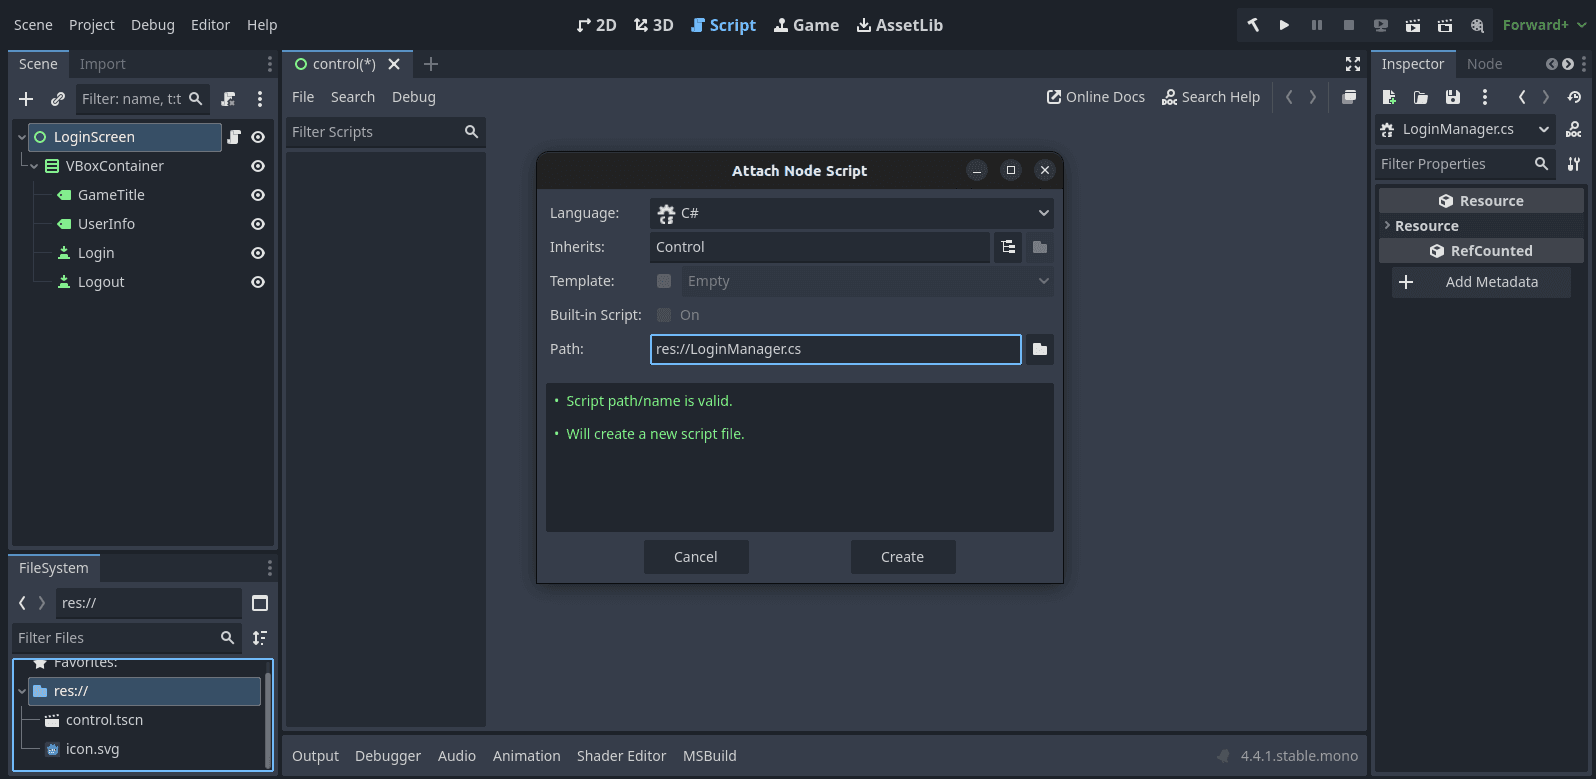
Give the script a name, select C# as the language of choice, and click Create. Here’s what you’ll do in this script:
Handle login and logout button presses
Store the access token from Descope once login succeeds
Fetch and display basic user info like email or name
You’ll use Descope’s OIDC support for this, which you’ll configure in the next section. For now, just set up button signal connections and placeholder methods:
using Godot;
using System;
using System.Net;
using System.Net.Http;
using System.Text;
using System.Text.Json;
using System.Web;
using System.Threading.Tasks;
using System.Collections;
using System.Collections.Generic;


public partial class LoginManager: Control
{
  [Export] private Button loginButton;
  [Export] private Button logoutButton;
  [Export] private Label userInfoLabel;


  public override void _Ready()
  {
  // Get references from the scene
    loginButton = GetNode<Button>("VBoxContainer/Login");
    logoutButton = GetNode<Button>("VBoxContainer/Logout");
    userInfoLabel = GetNode<Label>("VBoxContainer/UserInfo");

  // Connect button signals
    loginButton.Pressed += OnLoginPressed;
    logoutButton.Pressed += OnLogoutPressed;
  }


  private void OnLoginPressed()
  {
    // Print a message when a button is pressed
    GD.Print("Log in button pressed!");
  }

  private void OnLogoutPressed()
  {
    // Print a message when a button is pressed
    GD.Print("Log out button pressed!");
  }
}
Later, you’ll use the system browser to redirect to Descope’s login flow, then capture the token and return to the game with the user’s session in place.
Test the game loop
Before diving into the authentication integration, make sure your buttons work, the UI updates correctly, and your game runs without errors. You want a stable base before adding network calls or authentication logic.
Try running the game in the editor. Clicking Log in should currently just print the Log in button pressed! message in the console, but that’s okay. You’ll soon connect it to Descope and turn that button into the gateway to your authentication flow.
Authentication with Descope
Now that you have your Descope project set up and a basic Godot screen with login/logout buttons and a label to show user info, let’s implement user authentication using the OIDC protocol and Descope as your identity provider (IdP).
Prepare Descope configuration
Start by opening the Descope console and navigating to the Federated Apps tab.
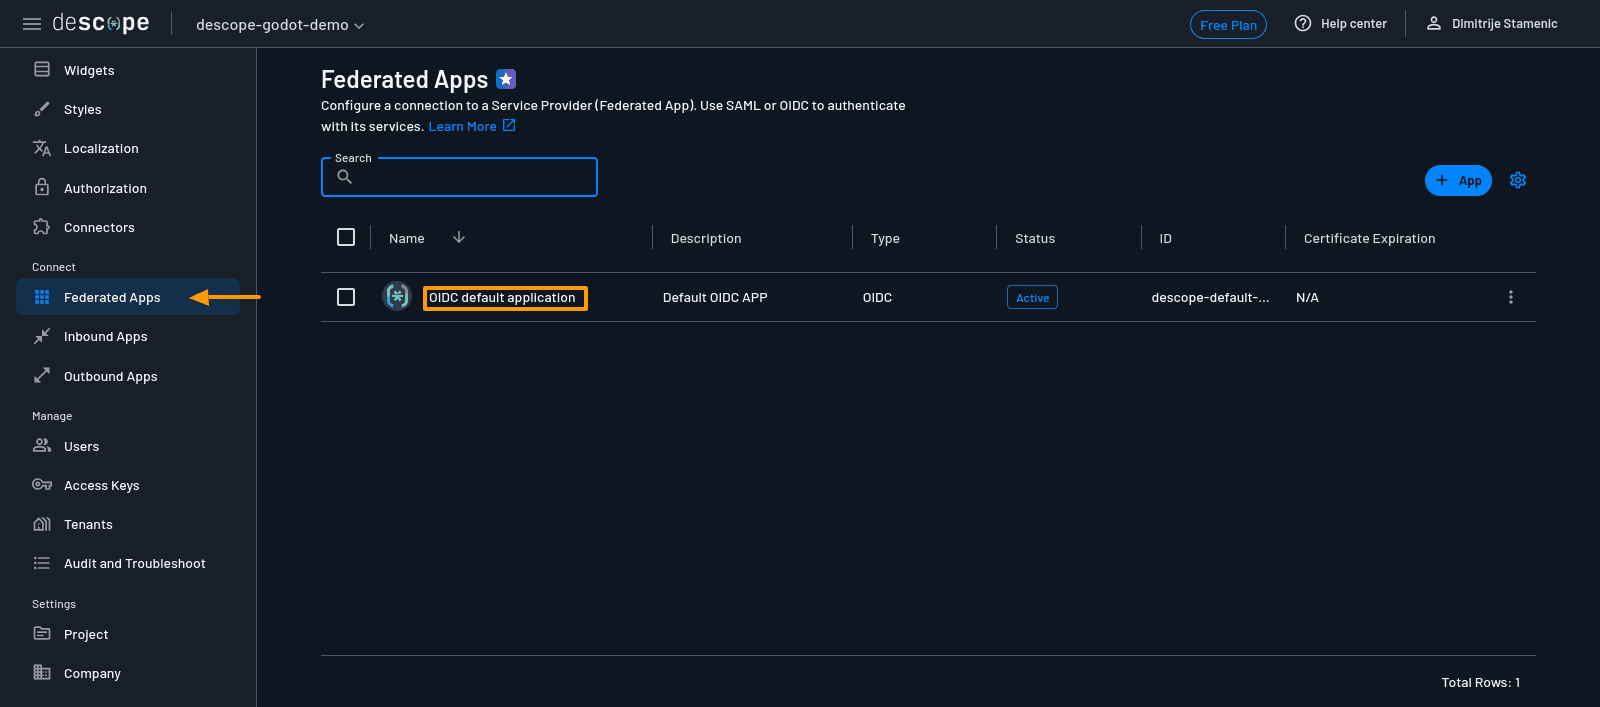
If you’re using the free plan, you won’t be able to create a new application, so select the existing one called OIDC default application.
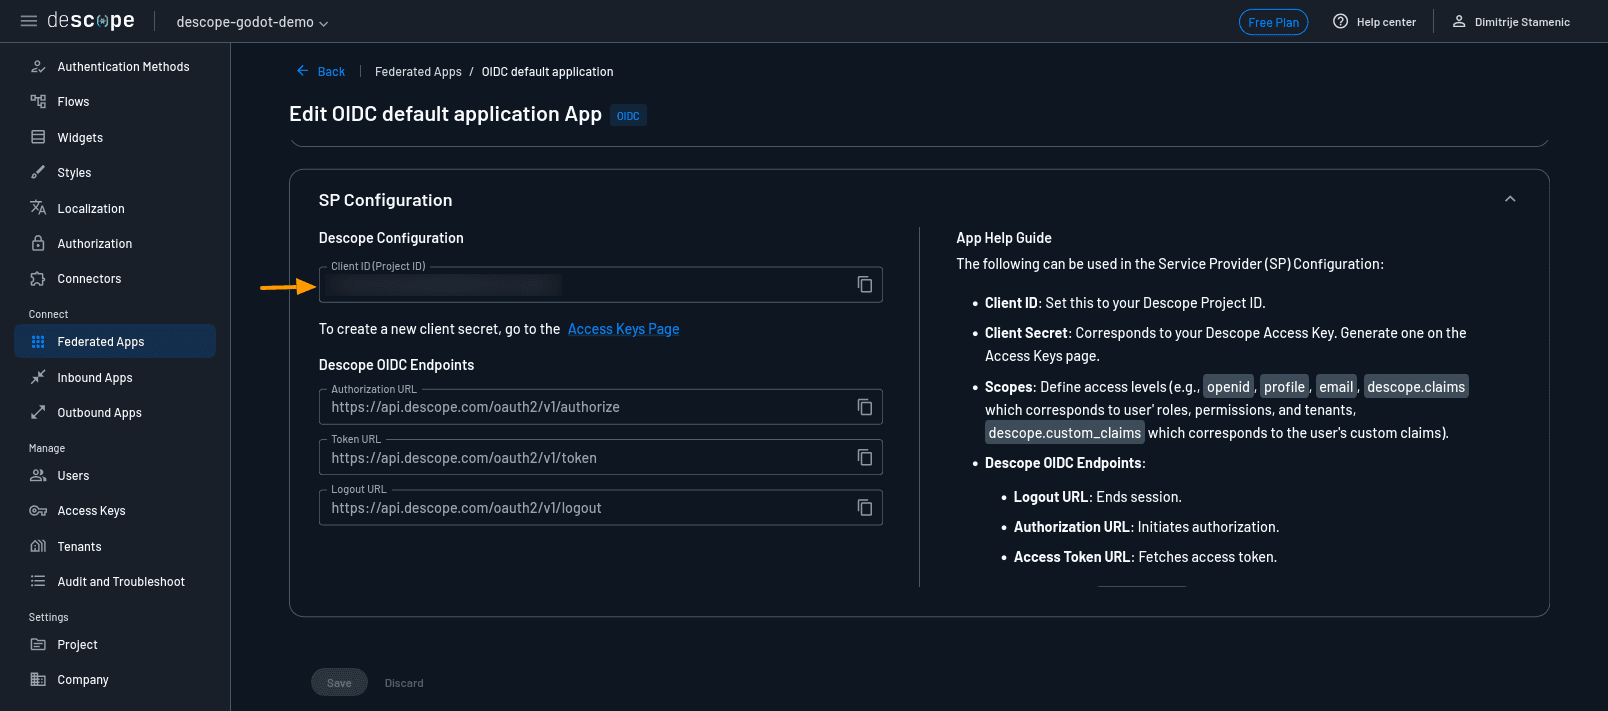
Under the SP Configuration section, take note of the following:
Client ID (also called Project ID)
Authorization Endpoint
Token Endpoint
Logout Endpoint
These values are critical for connecting your Godot client to Descope.
Add OIDC parameters to your script
In your Godot LoginManager.cs script, define the necessary parameters:
private string _clientId = "your-client-id-from-descope";


private string _redirectUri = "http://localhost:3000/callback";
private string _redirectLogoutUri = "http://localhost:3000/logout-callback";


private string _authUrl = "https://api.descope.com/oauth2/v1/authorize";
private string _tokenUrl = "https://api.descope.com/oauth2/v1/token";
private string _logoutUrl = "https://api.descope.com/oauth2/v1/logout";


private bool _isLoggedIn = false;


private string _id_token = "";
You’ll also need values for PKCE authentication. You can generate them manually using a PKCE generator, but here’s what we’ll use for this tutorial:
private string _codeVerifier = "N7QLWqAp2aYxDGRtqbXjbfusYLE97XAui-nnW9hOofI";
private string _codeChallenge = "KM6LN2hMVS5xeS3CHhoNuHtqtWD0-EIbkIq8u_KZl3U";
private string _state = "KM6LN2fFDS32duHtqtWD0-EIbkIq8u_KfG3U";
Redirect the user to log in (authorize request)
When the player clicks the Log in button, redirect them to Descope’s authorize endpoint with the necessary query parameters:
private async void OnLoginPressed()
{
    string authUrl = $"{_authUrl}?" +
                    $"client_id={_clientId}" +
                    $"&response_type=code" +
                    $"&scope=openid profile email" +
                    $"&redirect_uri={HttpUtility.UrlEncode(_redirectUri)}" +
                    $"&code_challenge={_codeChallenge}" +
                    $"&code_challenge_method=S256" +
                    $"&state={_state}";


    OS.ShellOpen(authUrl); // Opens the browser for login
    string code = await ListenForAuthCode(); // Wait for redirect and grab auth code
}
This will open the system browser, and after the user signs in, Descope will redirect to your local callback with an authorization code.
To capture the code in your game, use HttpListener:
private async Task<string> ListenForAuthCode()
{
    var listener = new HttpListener();
    listener.Prefixes.Add("http://localhost:3000/callback/");
    listener.Start();


    var context = await listener.GetContextAsync();
    string code = HttpUtility.ParseQueryString(context.Request.Url.Query).Get("code");


    byte[] responseBytes = Encoding.UTF8.GetBytes("Login successful. You can close this tab.");
    context.Response.OutputStream.Write(responseBytes, 0, responseBytes.Length);
    context.Response.Close();
    listener.Stop();


    return code;
}
Exchange the code for tokens
Once you receive the authorization code, you’ll exchange it for an access token and ID token using the token endpoint. To do so, define the ExchangeCodeForTokens() function:
private async Task<(string access_token, string id_token, string refresh_token)> ExchangeCodeForTokens(string code)
{
    var client = new System.Net.Http.HttpClient();


    // Define a dictionary to store token data into
    var tokenData = new Dictionary<string, string>
    {
        { "grant_type", "authorization_code" },
        { "code", code },
        { "redirect_uri", _redirectUri },
        { "client_id", _clientId },
        { "code_verifier", _codeVerifier }
    };


    // Get the response from the token endpoint
    var content = new FormUrlEncodedContent(tokenData);
    var response = await client.PostAsync(_tokenUrl, content);


    // Read the response as a string
    string json = await response.Content.ReadAsStringAsync();

    // Convert the response to JSON format
    var result = JsonDocument.Parse(json).RootElement;


    // The function returns a tuple containing three tokens (strings)
    return (
        result.GetProperty("access_token").GetString(),
        result.GetProperty("id_token").GetString(),
        result.TryGetProperty("refresh_token", out var refresh) ? refresh.GetString() : null
    );
}
Then call the function inside the OnLoginPressed() function and save the id_token to the global variable _id_token to be able to use it for logging out later:
var tokens = await ExchangeCodeForTokens(code);
GD.Print("Access Token: " + tokens.access_token);
GD.Print("ID Token: " + tokens.id_token);
_id_token = tokens.id_token;
Fetch and display user info
With the access token, you can now query Descope’s /userinfo endpoint to get the authenticated user’s profile:
private async Task<string> FetchUserProfile(string accessToken)
{
    var client = new System.Net.Http.HttpClient();
    client.DefaultRequestHeaders.Authorization = new System.Net.Http.Headers.AuthenticationHeaderValue("Bearer", accessToken);


    var response = await client.GetAsync("https://api.descope.com/oauth2/v1/userinfo");
    return await response.Content.ReadAsStringAsync();
}
Then parse and display the user data in your game:
var userInfoJson = System.Text.Json.JsonDocument.Parse(userInfo).RootElement;
userEmail = userInfoJson.GetProperty("email").GetString();
userName = userInfoJson.GetProperty("name").GetString();


userInfoLabel.SetText($"Logged in!\nUsername: {userName}\nEmail: {userEmail}");
_isLoggedIn = true;
UpdateUIBasedOnAuth();
Here, the UpdateUIBasedOnAuth() is used to update the UI based on whether the user is logged in or not:
private void UpdateUIBasedOnAuth()
{
    if (_isLoggedIn)
    {
        loginButton.Visible = false;
        logoutButton.Visible = true;


    }
    else
    {
        loginButton.Visible = true;
        logoutButton.Visible = false;
        userInfoLabel.SetText("User not logged in!");
    }
}
Logging out the user
When the player clicks the Log out button, redirect to the Descope logout endpoint:
private void OnLogoutPressed()
{
    // Add necessary parameters to the logout API endpoint URL
string logoutUrl = $"{_logoutUrl}?" +
            $"id_token_hint={_id_token}" +
            $"&post_logout_redirect_uri={HttpUtility.UrlEncode(_redirectLogoutUri)}";


    OS.ShellOpen(logoutUrl); // Open logout in browser
    ListenForLogout();      // Wait for confirmation
}
Just like with the login, listen for the logout redirect locally:
private async void ListenForLogout()
{
    // Create and start an HTTP listener for the same URL that's passed
           // as the `post_logout_redirect_uri` parameter to the Descope logout endpoint
    var listener = new HttpListener();
    listener.Prefixes.Add("http://localhost:3000/logout-callback/");
    listener.Start();


    // Wait for the listener to get a signal that the logout happened
    var context = await listener.GetContextAsync();


    // Send a simple logout message to show in the browser
    byte[] responseBytes = Encoding.UTF8.GetBytes("You have been logged out.");
    context.Response.OutputStream.Write(responseBytes, 0, responseBytes.Length);
    context.Response.Close();


    // Stop the listening
    listener.Stop();


    // Update the local state of the game
            // since the user is no longer logged in
    _isLoggedIn = false;


    // Refresh the UI
    UpdateUIBasedOnAuth();
}
Test the full flow
Now that everything’s in place, run your game and test the full login experience:

Click the Log in button in your game. This will open your default web browser and show the login form you previously created during the “Setting Up Descope” step:
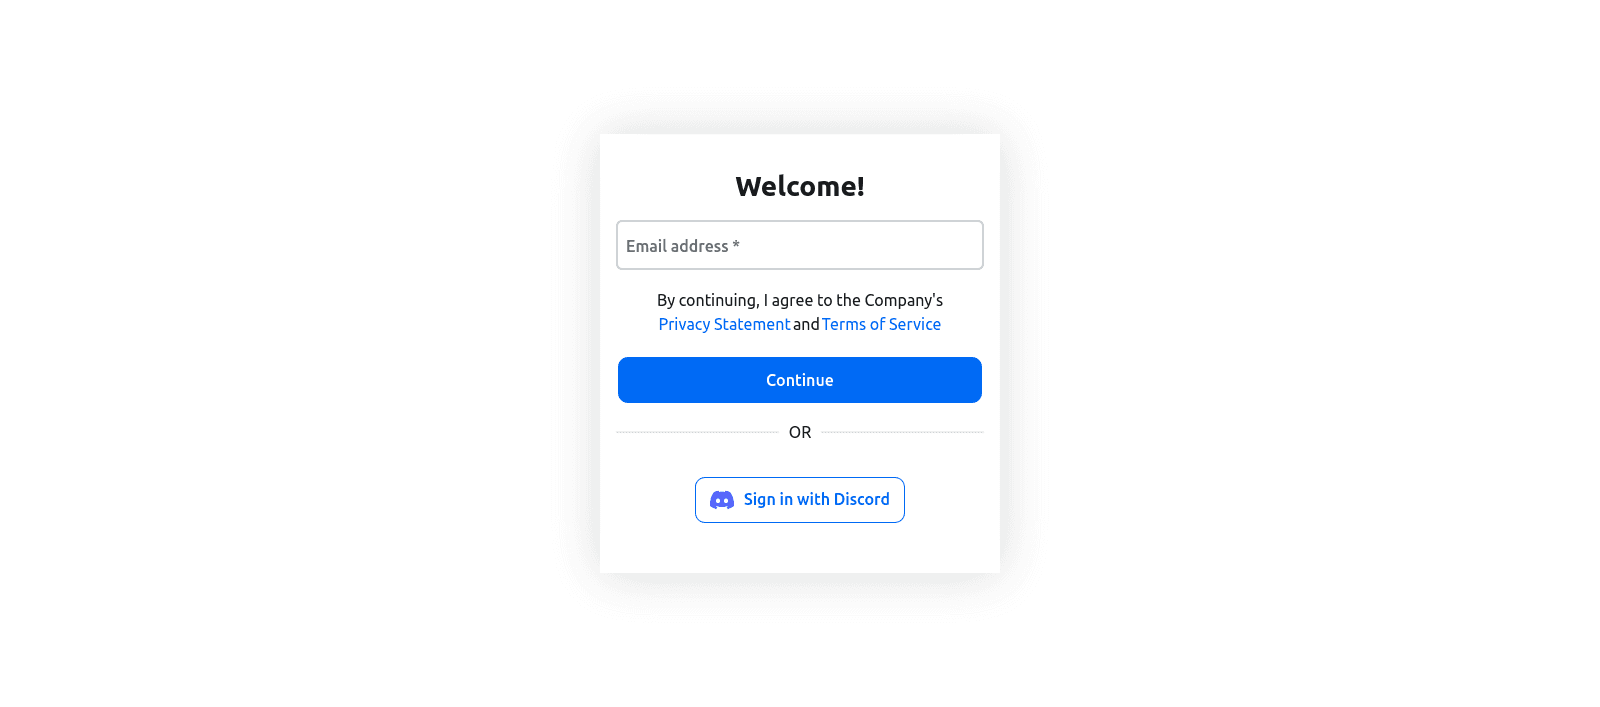
Let’s assume this is your first time logging into the game and you want to use your Discord account. Click on the Sign in with Discord button. This will redirect you to the official Discord login page, where you’ll be asked to authorize the use of your Discord account for authentication in the game:
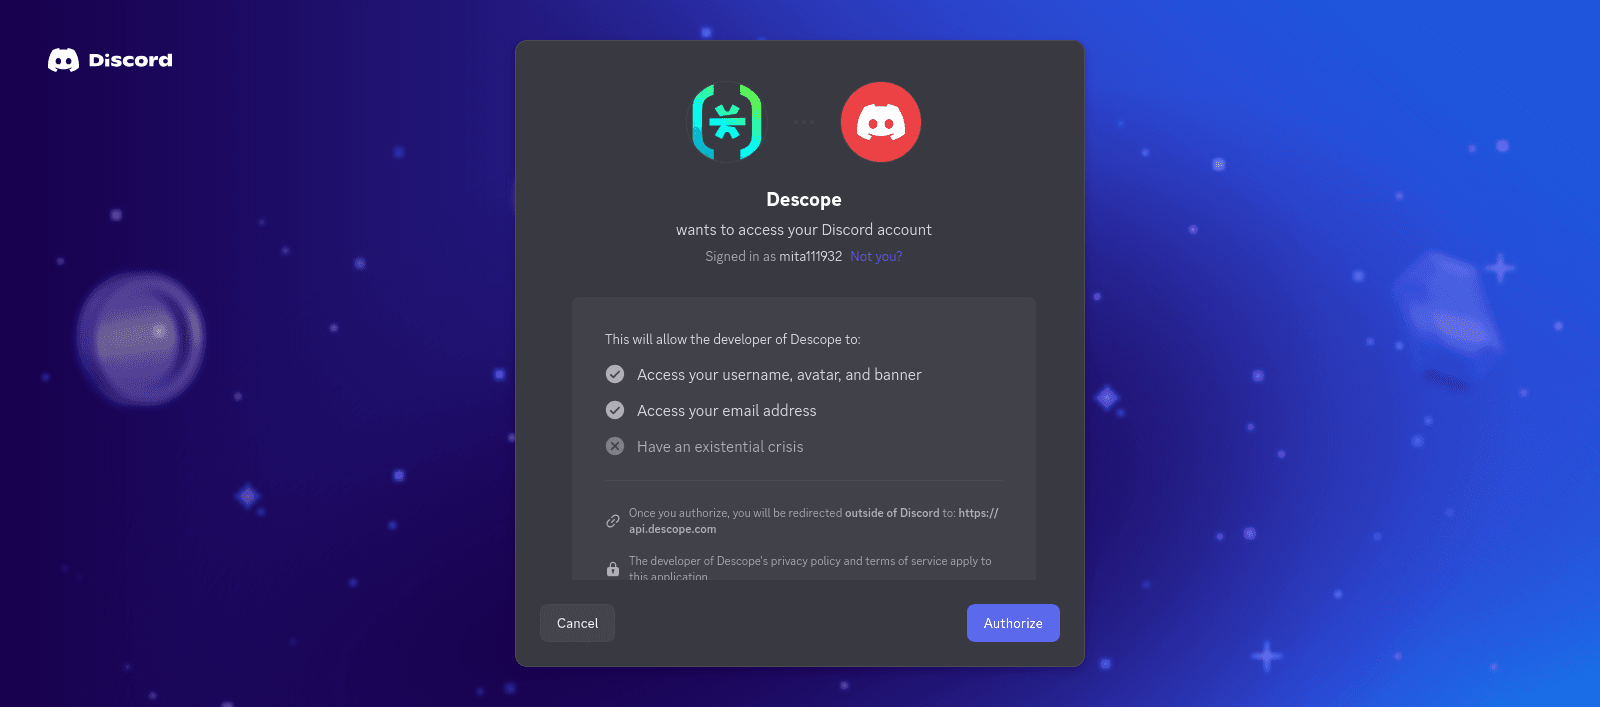
After you click Authorize, Descope will treat this as a sign-up since it’s your first time logging in. As part of your onboarding flow, Descope might require you to verify your identity using SMS-based OTP (One-Time Password). The next time you log in, this step will likely be skipped.
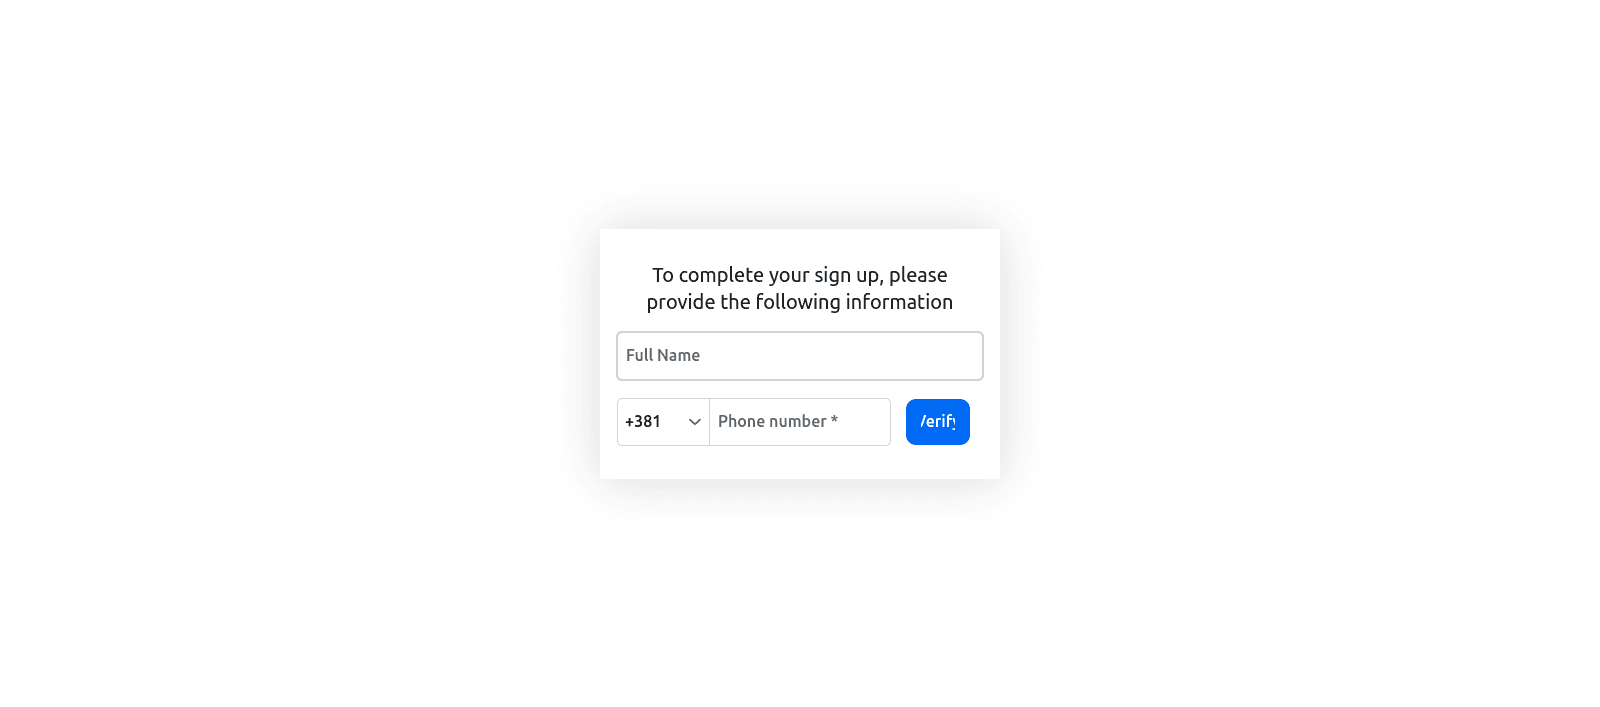
Enter your name and phone number, then click Verify. You’ll now be taken to a screen where you need to input the OTP code you received via SMS:
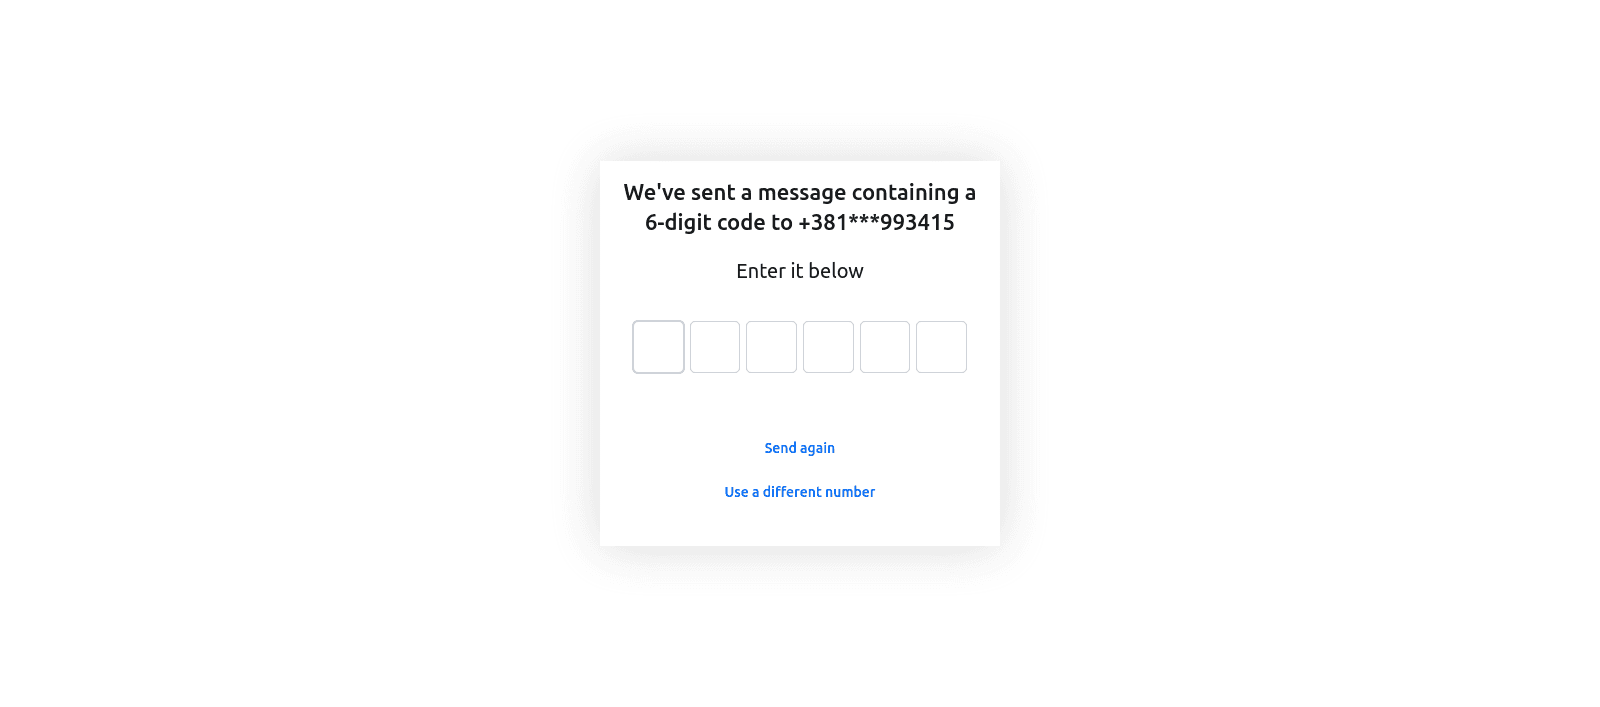
Once you enter the six-digit OTP, Descope may prompt you one last time to confirm your name:
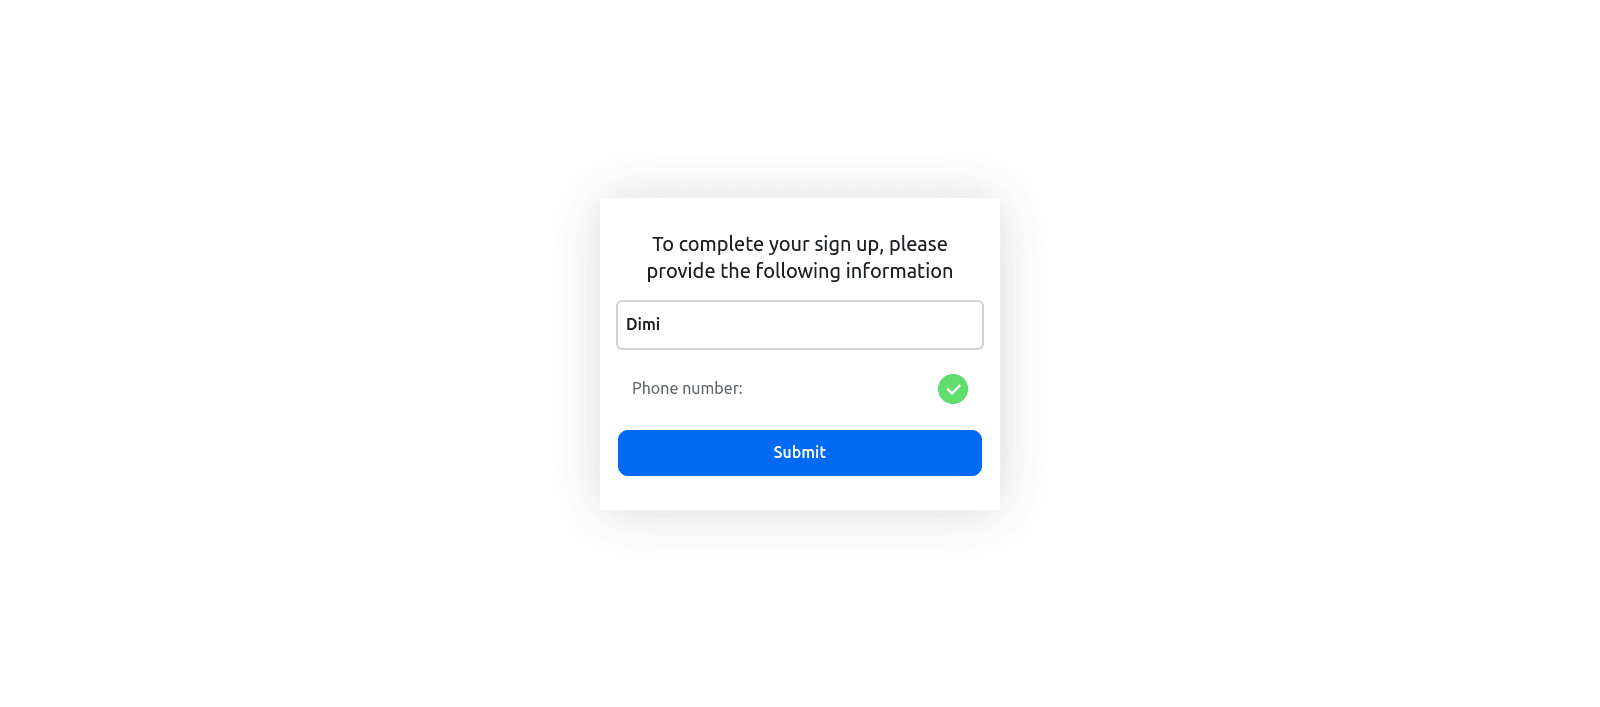
Click Submit, and you’ll be redirected to a confirmation page showing that you’ve successfully logged in:
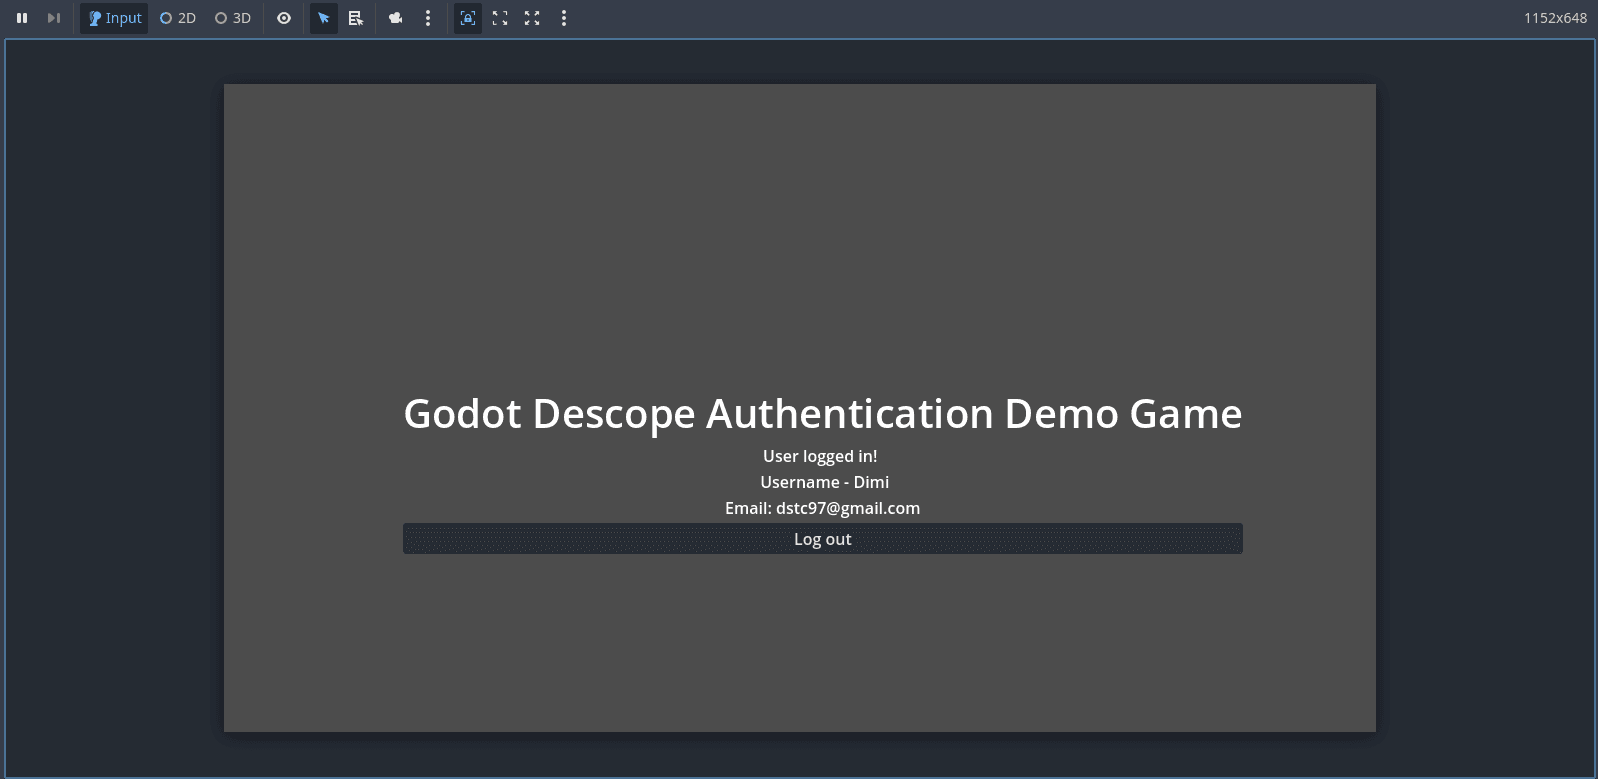
Now, return to the game. You’ll see that you are logged in, the user info will be displayed on the screen, and the Log in button will be replaced with a Log out button:
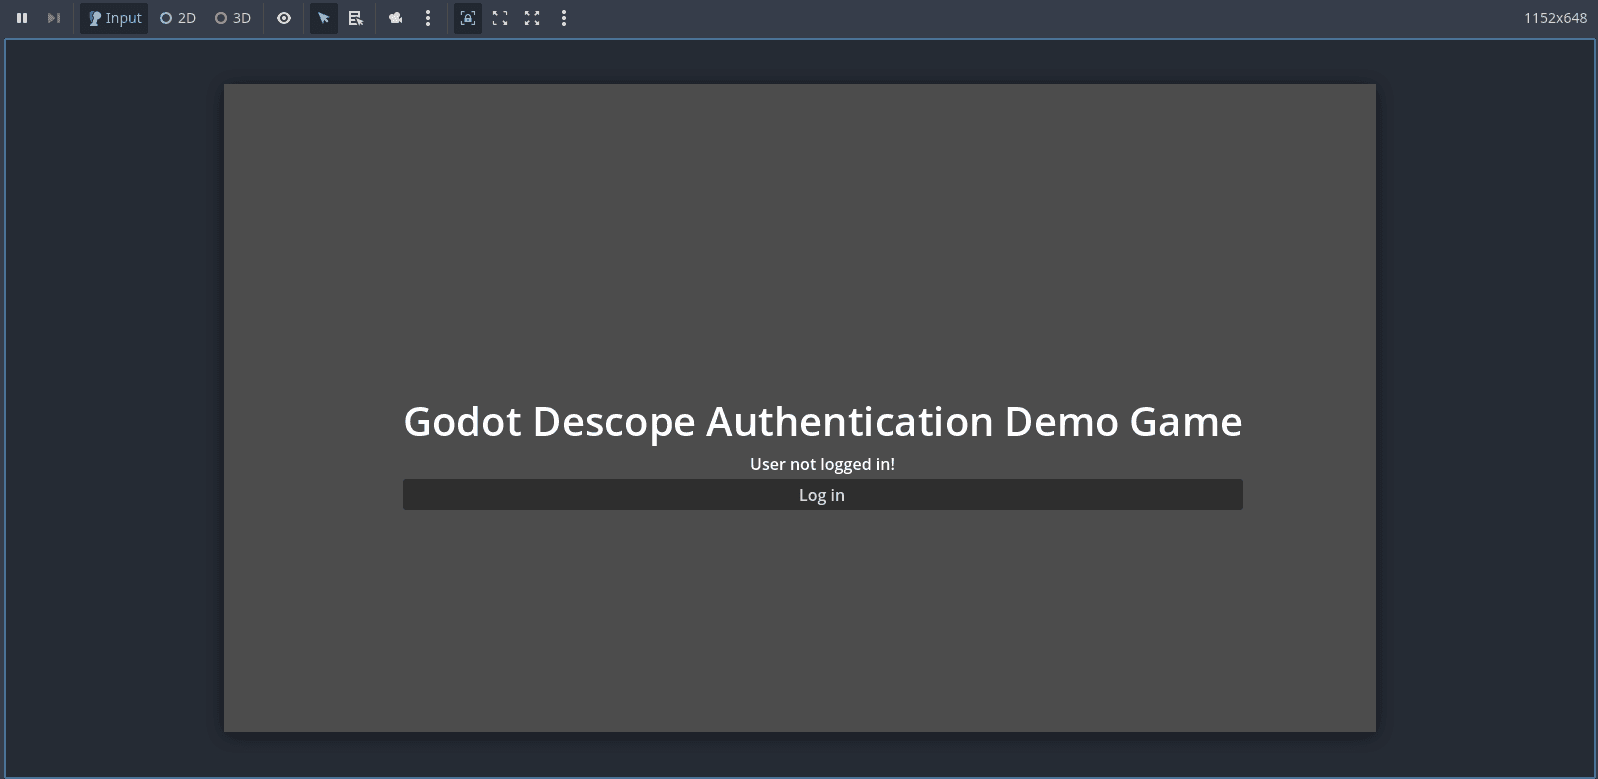
To log out of the game, simply click the Log out button. The application will call the appropriate Descope logout API, and you’ll be signed out. You’ll know it worked when the message User not logged in! appears again and the Log in button is visible once more.
If it all works, you’ve just implemented secure, passwordless authentication with MFA in a Godot game, and you did it without setting up your own auth backend.
Simplifying auth in game dev with Descope
Following this tutorial, you built a fully working authentication flow in your Godot game using Descope, complete with passwordless login, social authentication via Discord, and multifactor authentication using SMS OTP, all without setting up your own backend or managing credentials yourself.
One of the biggest advantages of this approach is how much complexity you’ve avoided. Descope handles the complex parts of authentication, so you can focus on gameplay. With a visual-flow editor and flexible integrations, you can easily add new login methods or security features without rewrites, making it a perfect fit even for game engines like Godot.
If you’re ready to dive deeper, perhaps to add role-based access control, localized login screens, or advanced fraud detection - Descope’s documentation is a great place to start. And if you haven’t already, you can sign up for a free Descope account and begin customizing your flows today.