
Table of Contents
This tutorial was written by Martina Caccamo, an iOS developer and digital artist based in Italy. Check out their X account to see more of their work!
Taking an app to market can come with its challenges. One of those is the responsibility that you have toward your users to secure the data they share with your platform. The safest way to store consumer data while also respecting their privacy is to use an authentication system that allows them to access their own information only once signed in.
Of course, it’s easier said than done. Creating an authentication system that is fully compliant with the current online security measures while also delivering a frictionless user experience can be an overwhelming task. Traditional password systems are no longer sufficient as they are widely acknowledged as outdated and insecure. Users now expect access to multiple authentication methods, such as logging in through their social media profiles.
For these reasons, many developers opt for the Descope authentication SDK to ensure a secure and seamless user experience when signing up and logging in. Descope handles the complexities of authentication, allowing developers to focus solely on developing their apps. It seamlessly integrates into apps, requiring minimal configuration and code, and it offers various authentication methods, such as passwords, authenticator apps, and magic links.
In this tutorial, you’ll integrate Descope authentication into a basic iOS application with the Swift SDK and explore role-based access control (RBAC).
Specifically, you’ll learn how to do the following:
Sign up a new user
Log in your user
Assign and manage roles
You can watch the video below if you're a visual learner. For a more step-by-step tutorial, keep on reading.
Set up Descope
To access the Descope services, you have to sign up for a free account. Click here to register for a free forever plan on Descope.
Once you have authenticated via email OTP or social login and entered a few other details, you should be redirected to your Descope console. At the top-left side of your screen, click your company name and then + Project to create a new project. A pop-up window will ask for your project details:
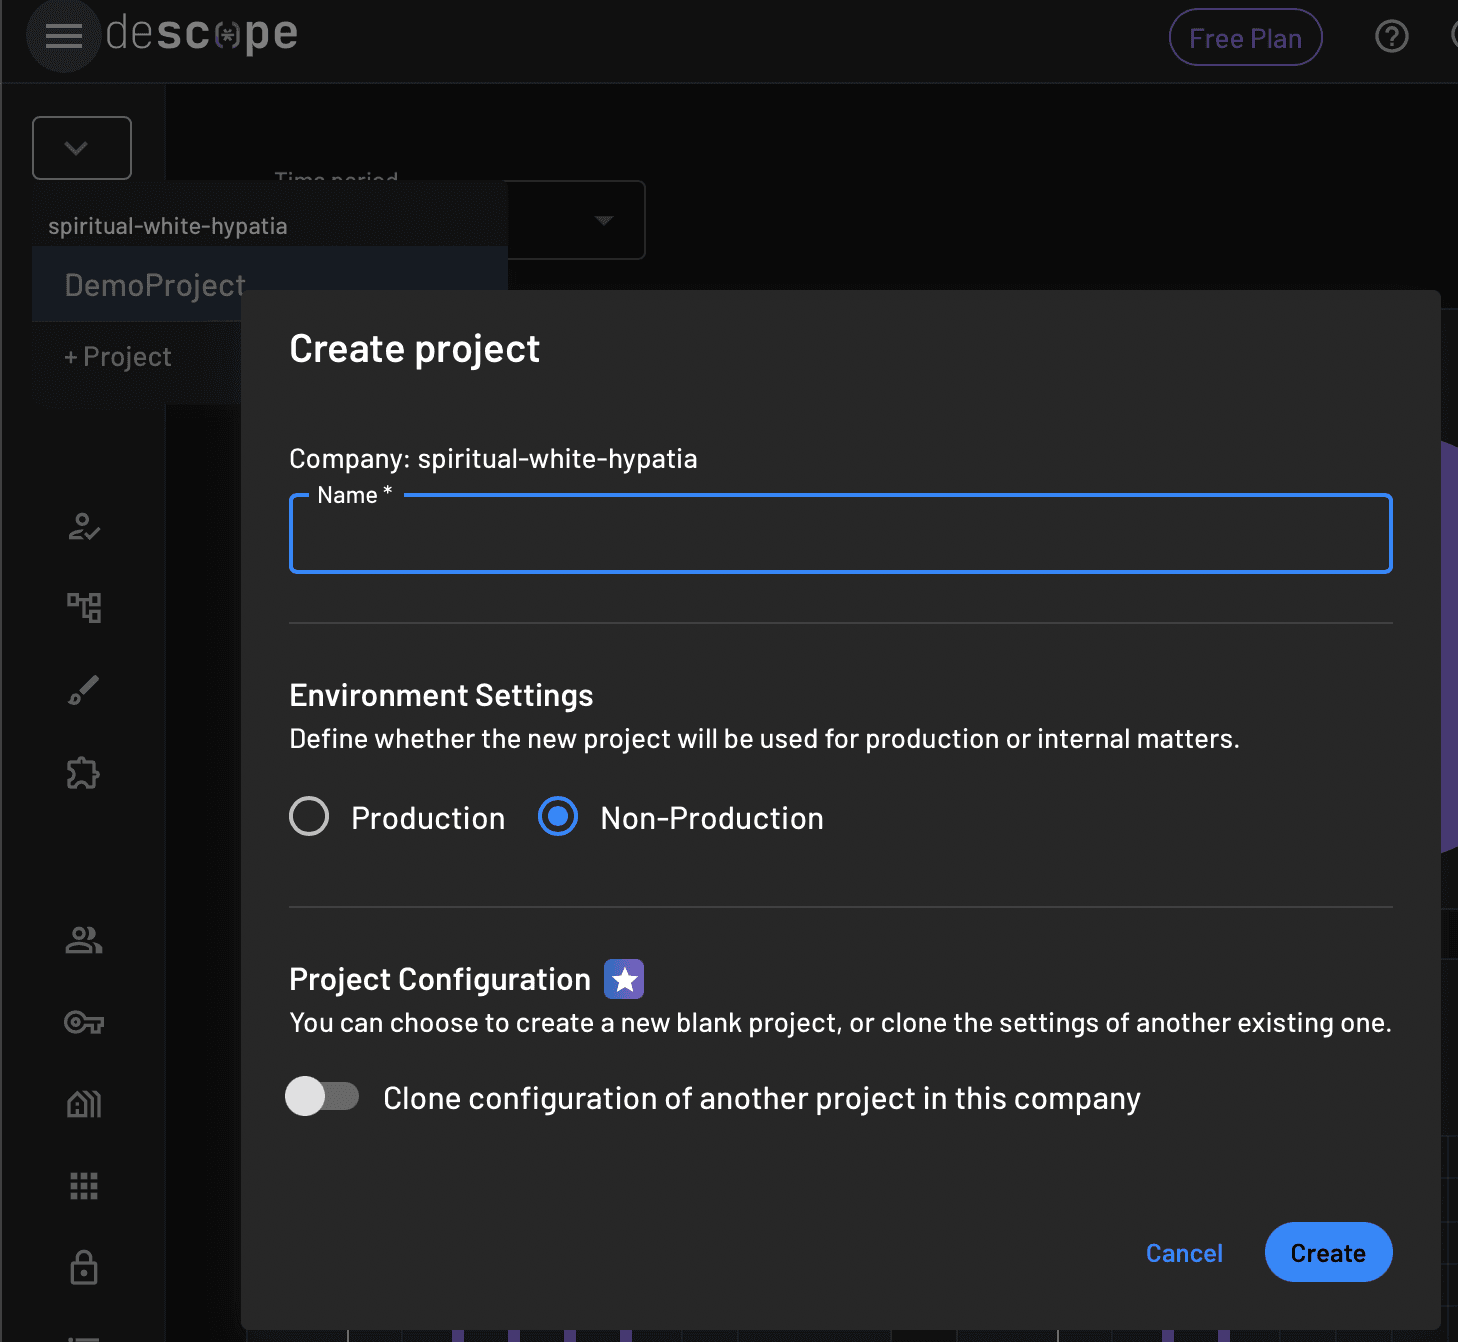
Insert the required information to create a new project named DemoProject with its environment settings set to Non-Production, then click Create.
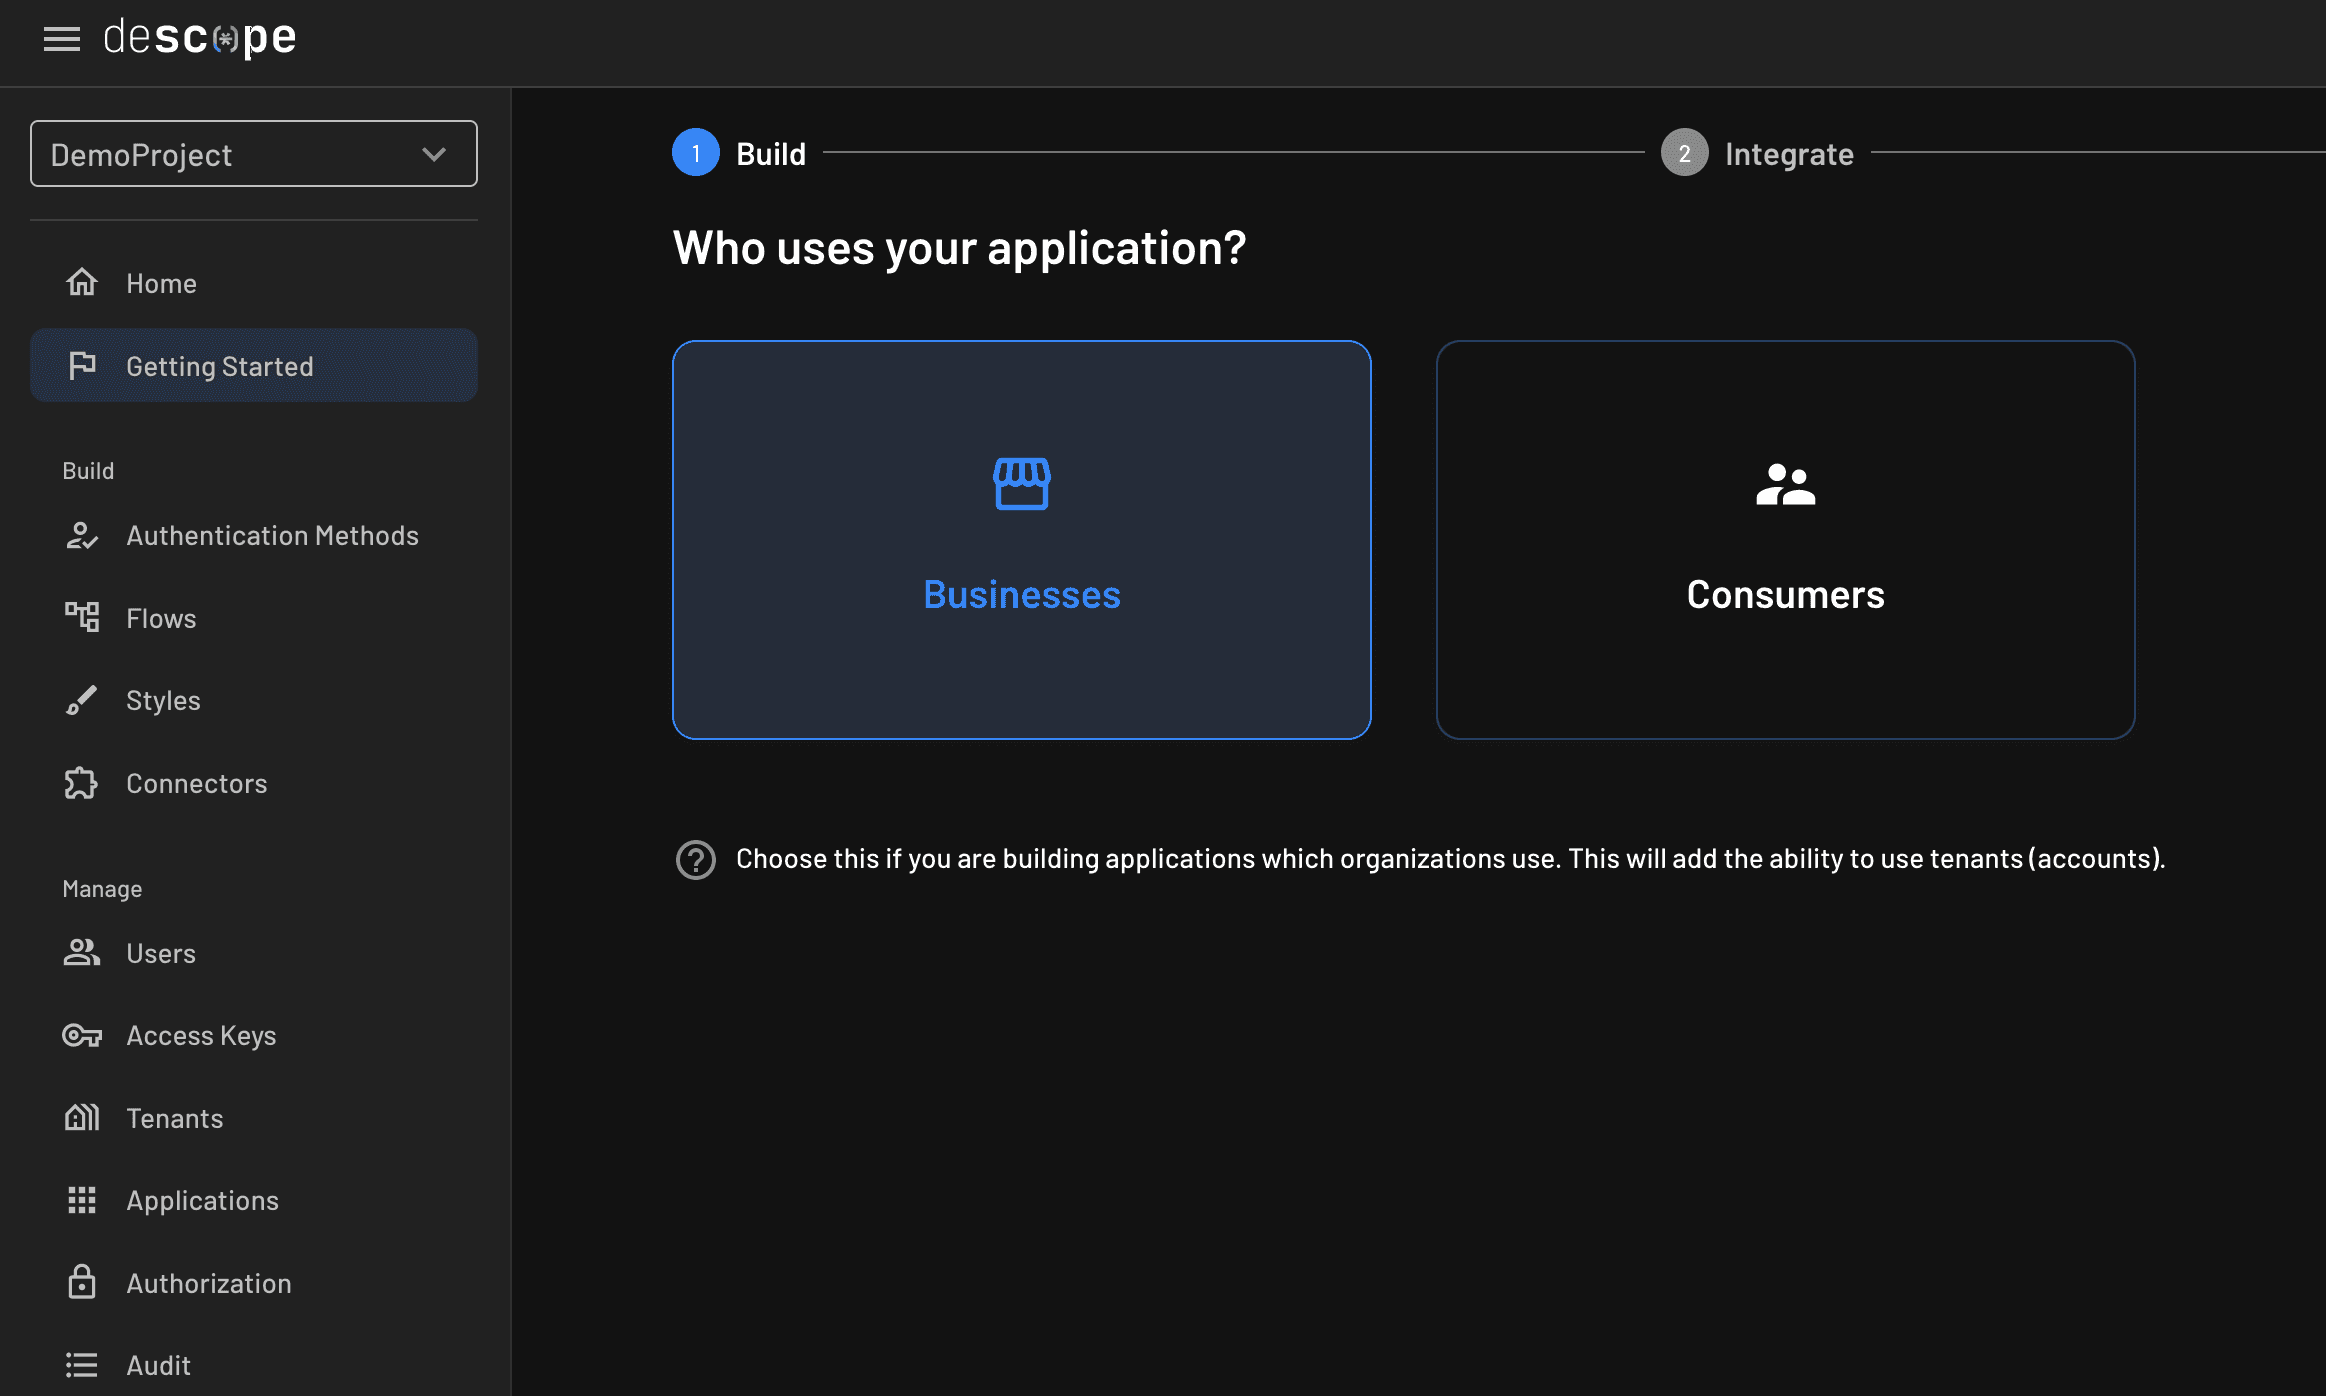
Select the type of users you expect for your app; in this case, Consumers:
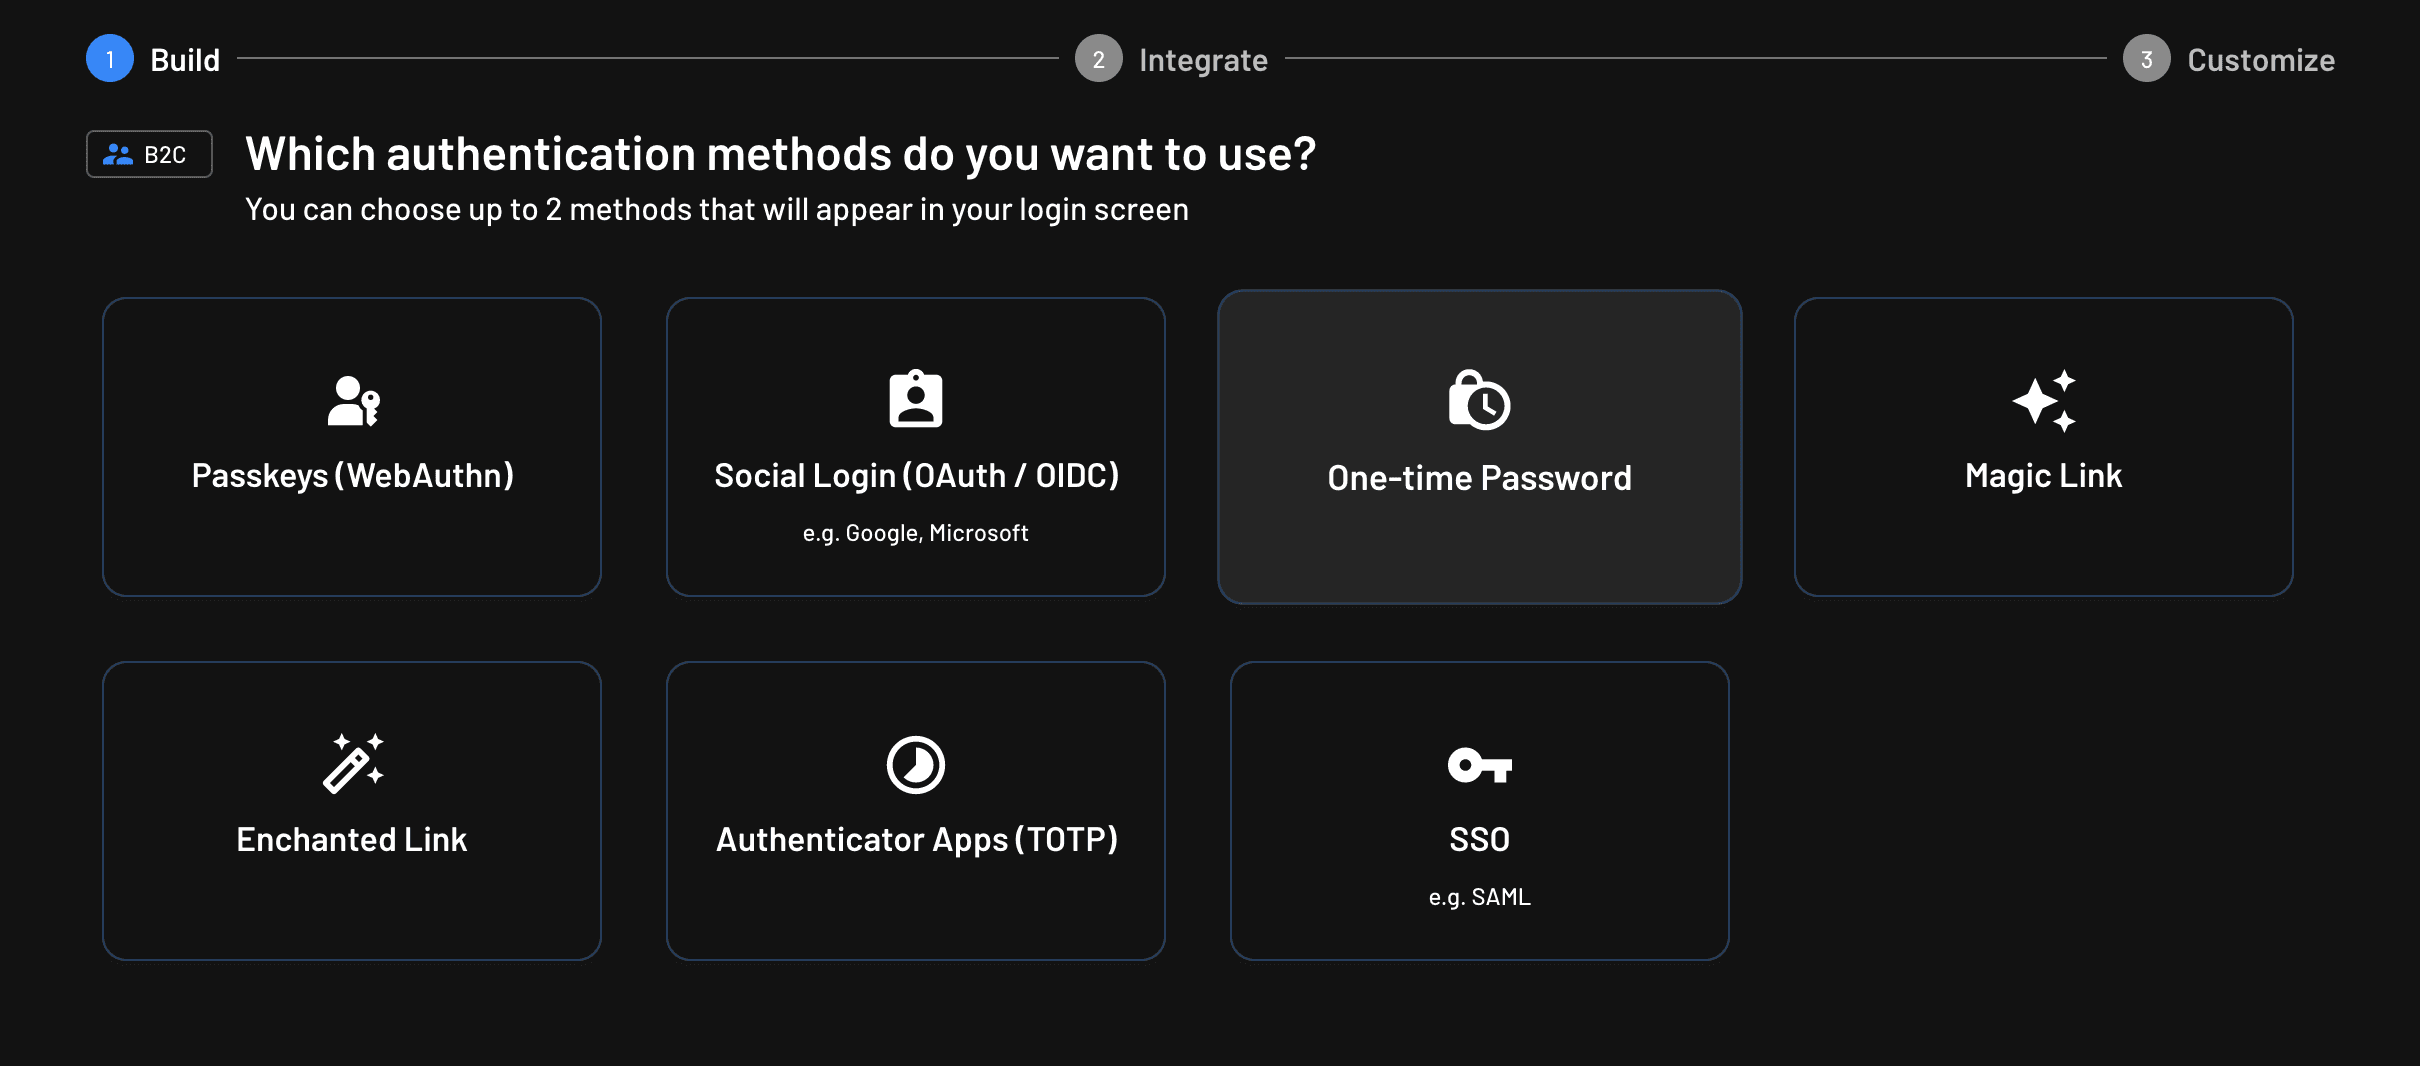
The next step is to choose a primary and a secondary authentication method. For this tutorial, you will choose One-time Password as your authentication method and no secondary method.
Click the One-time Password button, then Next, and Go ahead without MFA:
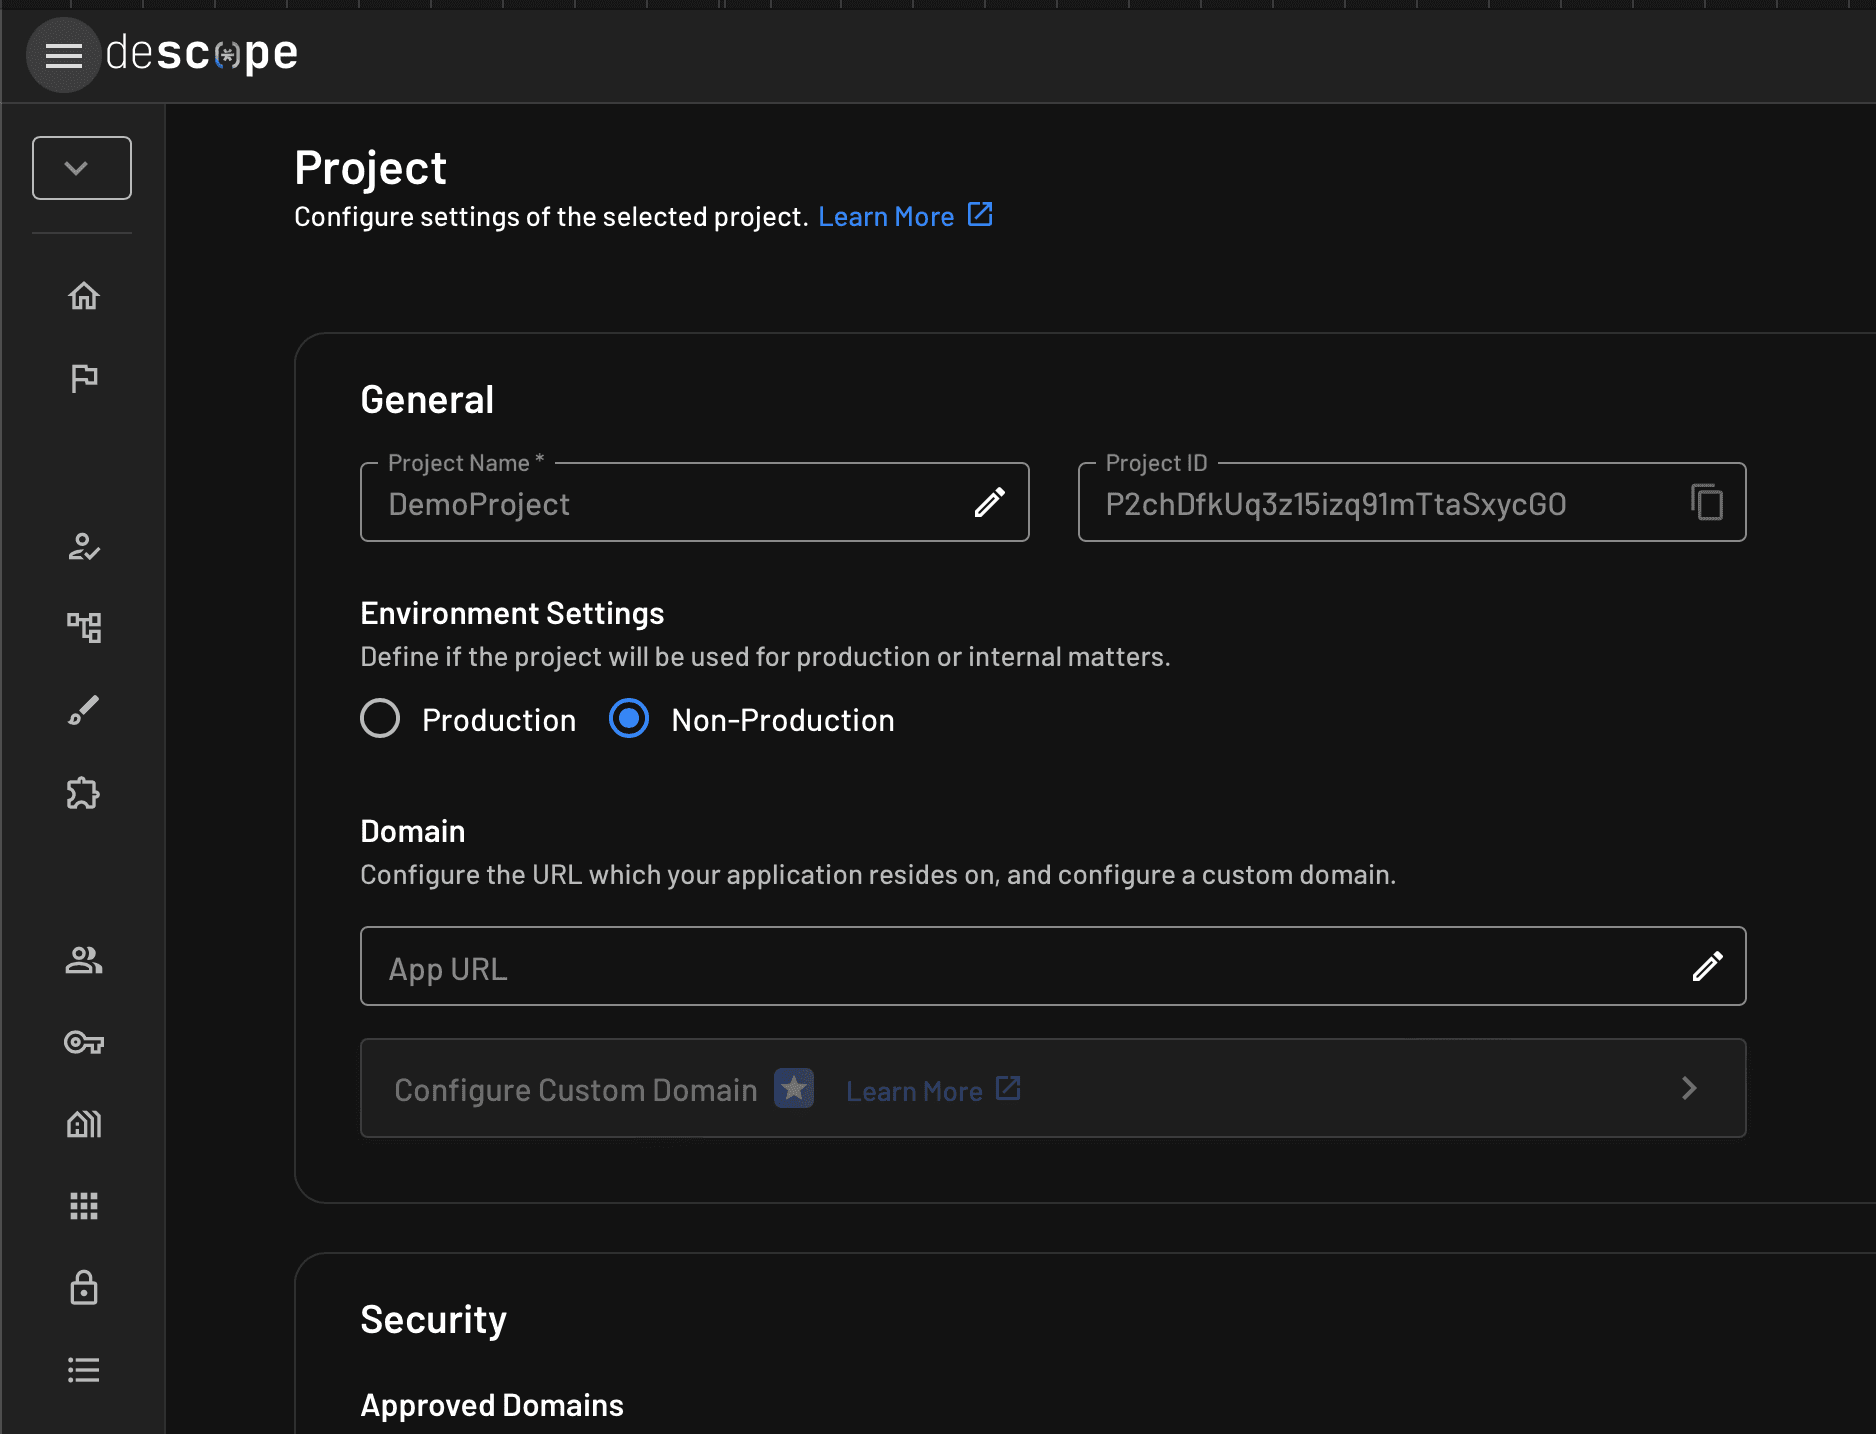
Open the Project tab using the left-side panel on the web page to open your project details. You should find your Project ID in the first section of the page. Copy it and save it somewhere on your computer:
Create a new Xcode project and add the Descope dependency
Now that you’ve successfully set up Descope, you need an iOS project to link its services to.
Open Xcode and create a new project. You can name it DescopeAuthenticationApp:
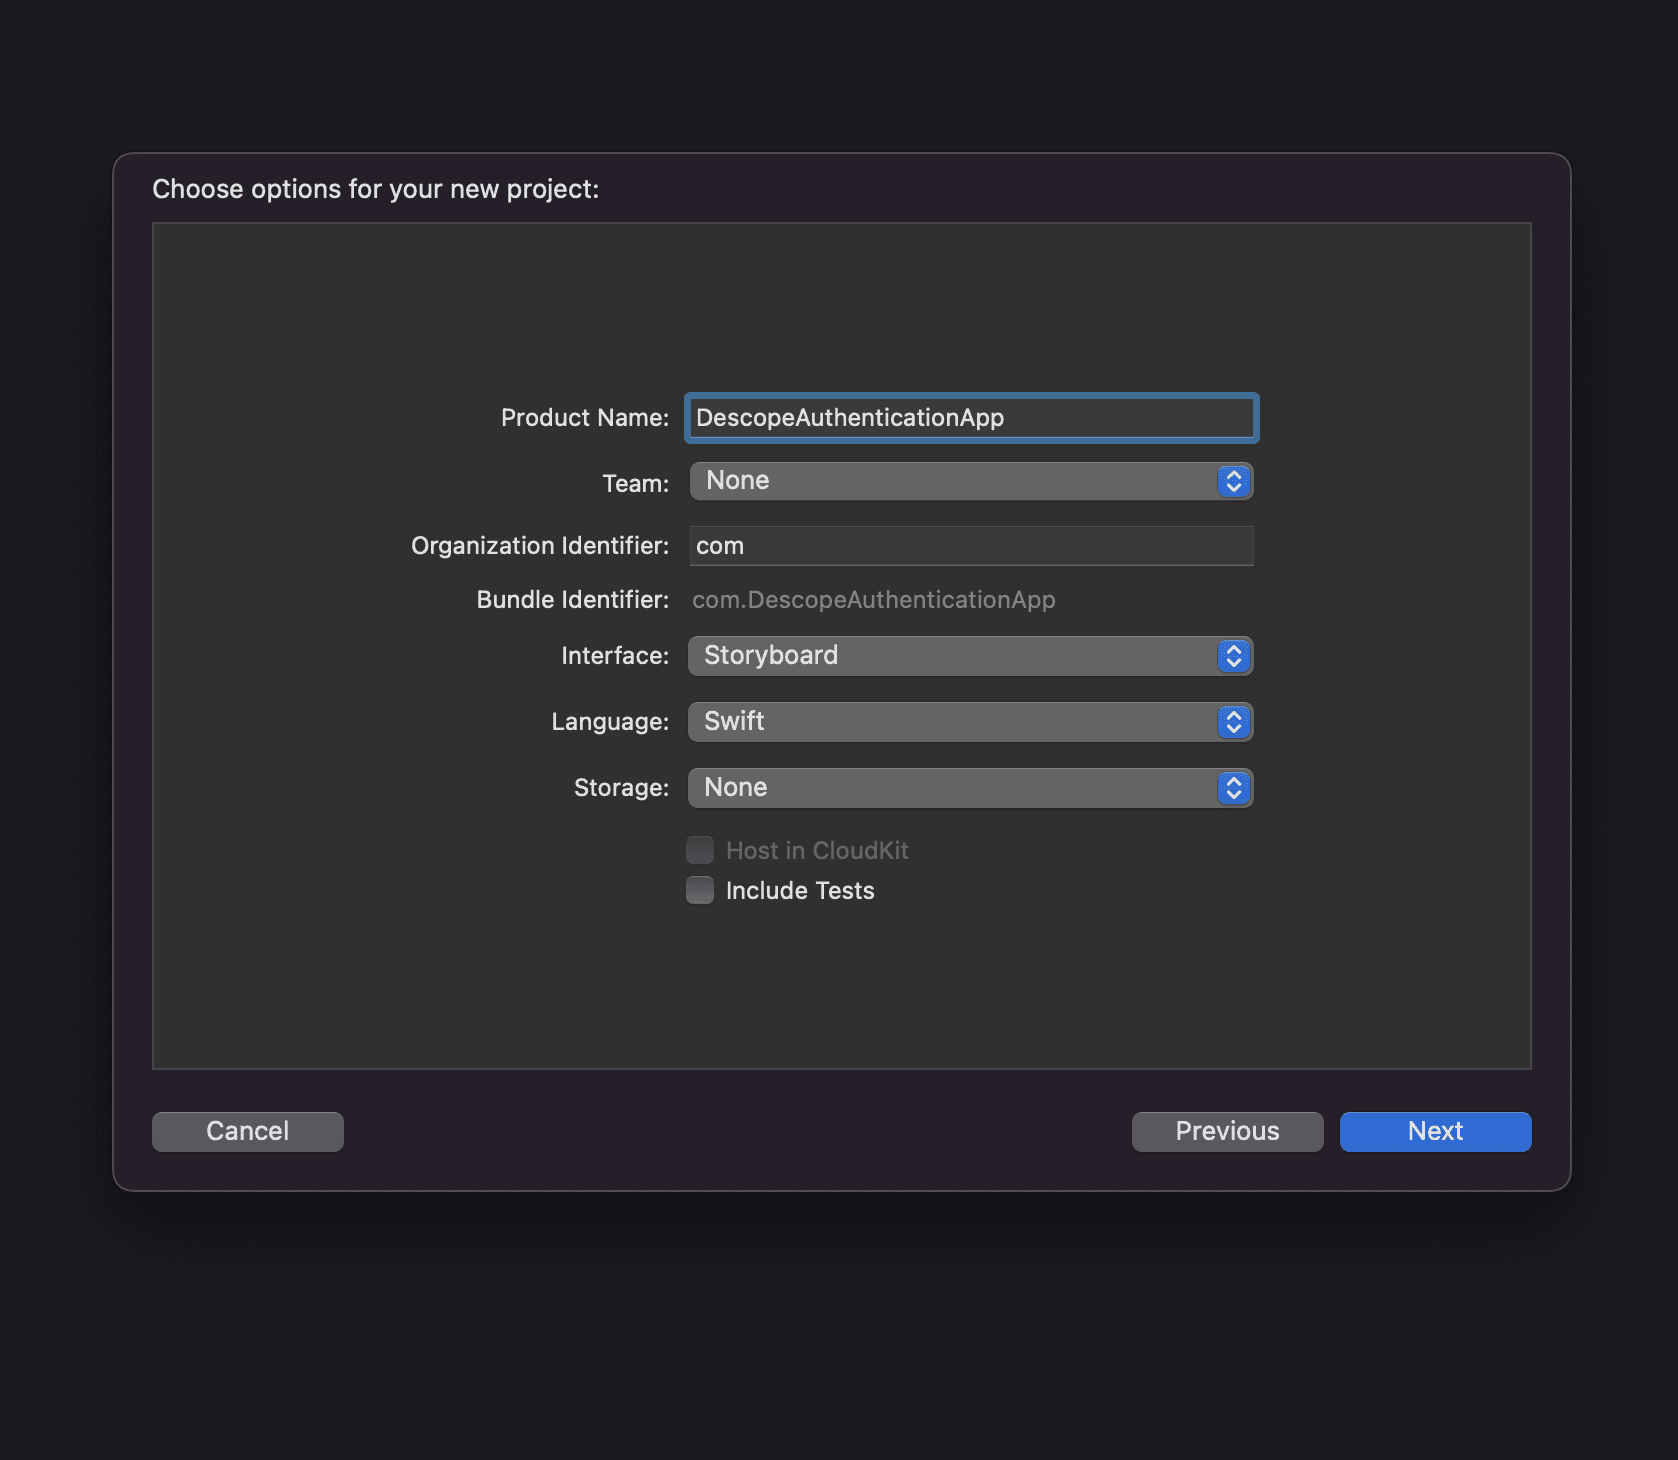
Click Next and open your new project.
To use the Descope library, you have to add the Descope package dependency to your project. Open File > Add Package Dependencies as shown in the following image:
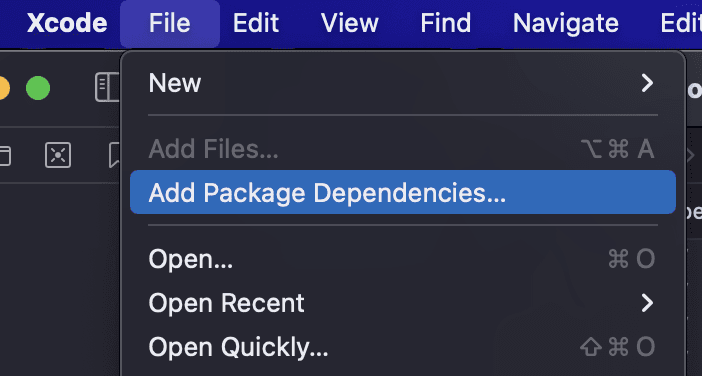
Copy-paste this link into the search field of the window that appears on your screen to download the Descope SDK and access it from your project: https://github.com/descope/swift-sdk.
Click Add Package and follow the instructions to make sure the installation is successful.
Once done, head over to your AppDelegate.swift file and add import DescopeKit to access the Descope library you have just installed. Then, in func application(_,didFinishLaunchingWithOptions:) -> Bool, insert the following line of code to configure your Descope project with your iOS app:
Descope.projectId = "<YOUR_PROJECT_ID>Replace <YOUR_PROJECT_ID> with the project ID that you saved earlier, and your Xcode project setup is complete.
Set up the backend app
Descope communicates with your frontend app using JSON Web Tokens (JWTs). This ensures the maximum level of safety for data transfer, authentication, and authorization as the only way to access the information therein is by validating the JWTs.
While JWT validation lowers the risk of any potential security threat, it also means that you need a backend app that performs the validation for you. For this tutorial, you can download this demo backend project on GitHub created for Xcode using Vapor.
The Descope JWT validation requires signing with your public key. To find it, you have two options:
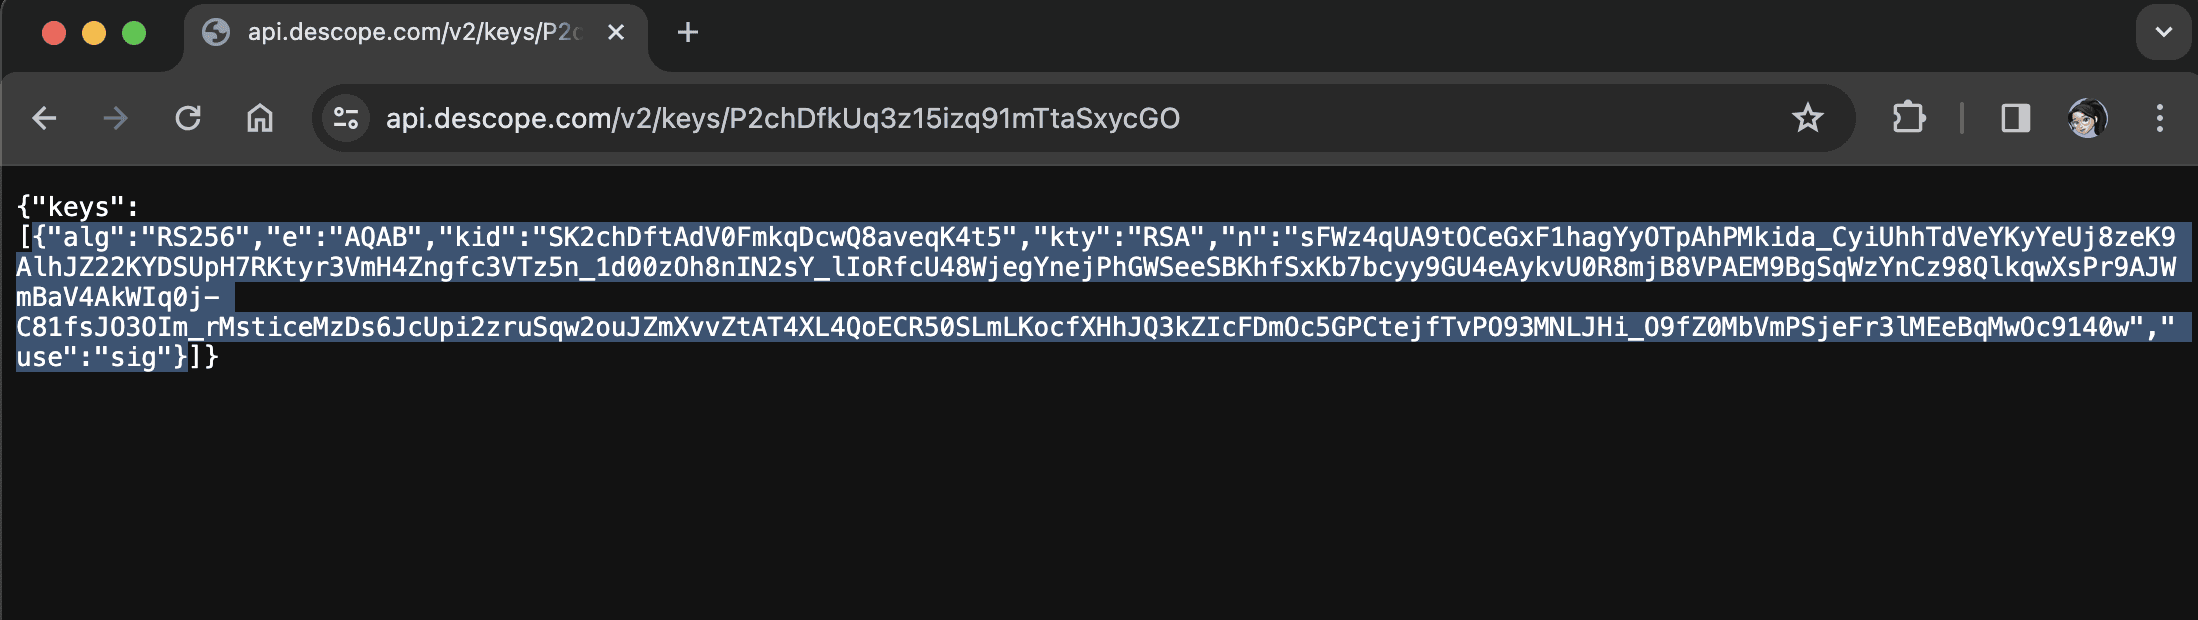
To retrieve your public key through the browser, copy-paste the following link in your browser and replace your_project_id with your actual project ID: https://api.descope.com/v2/keys/your_project_id. Click Enter and copy the content of the first object in the array keys:
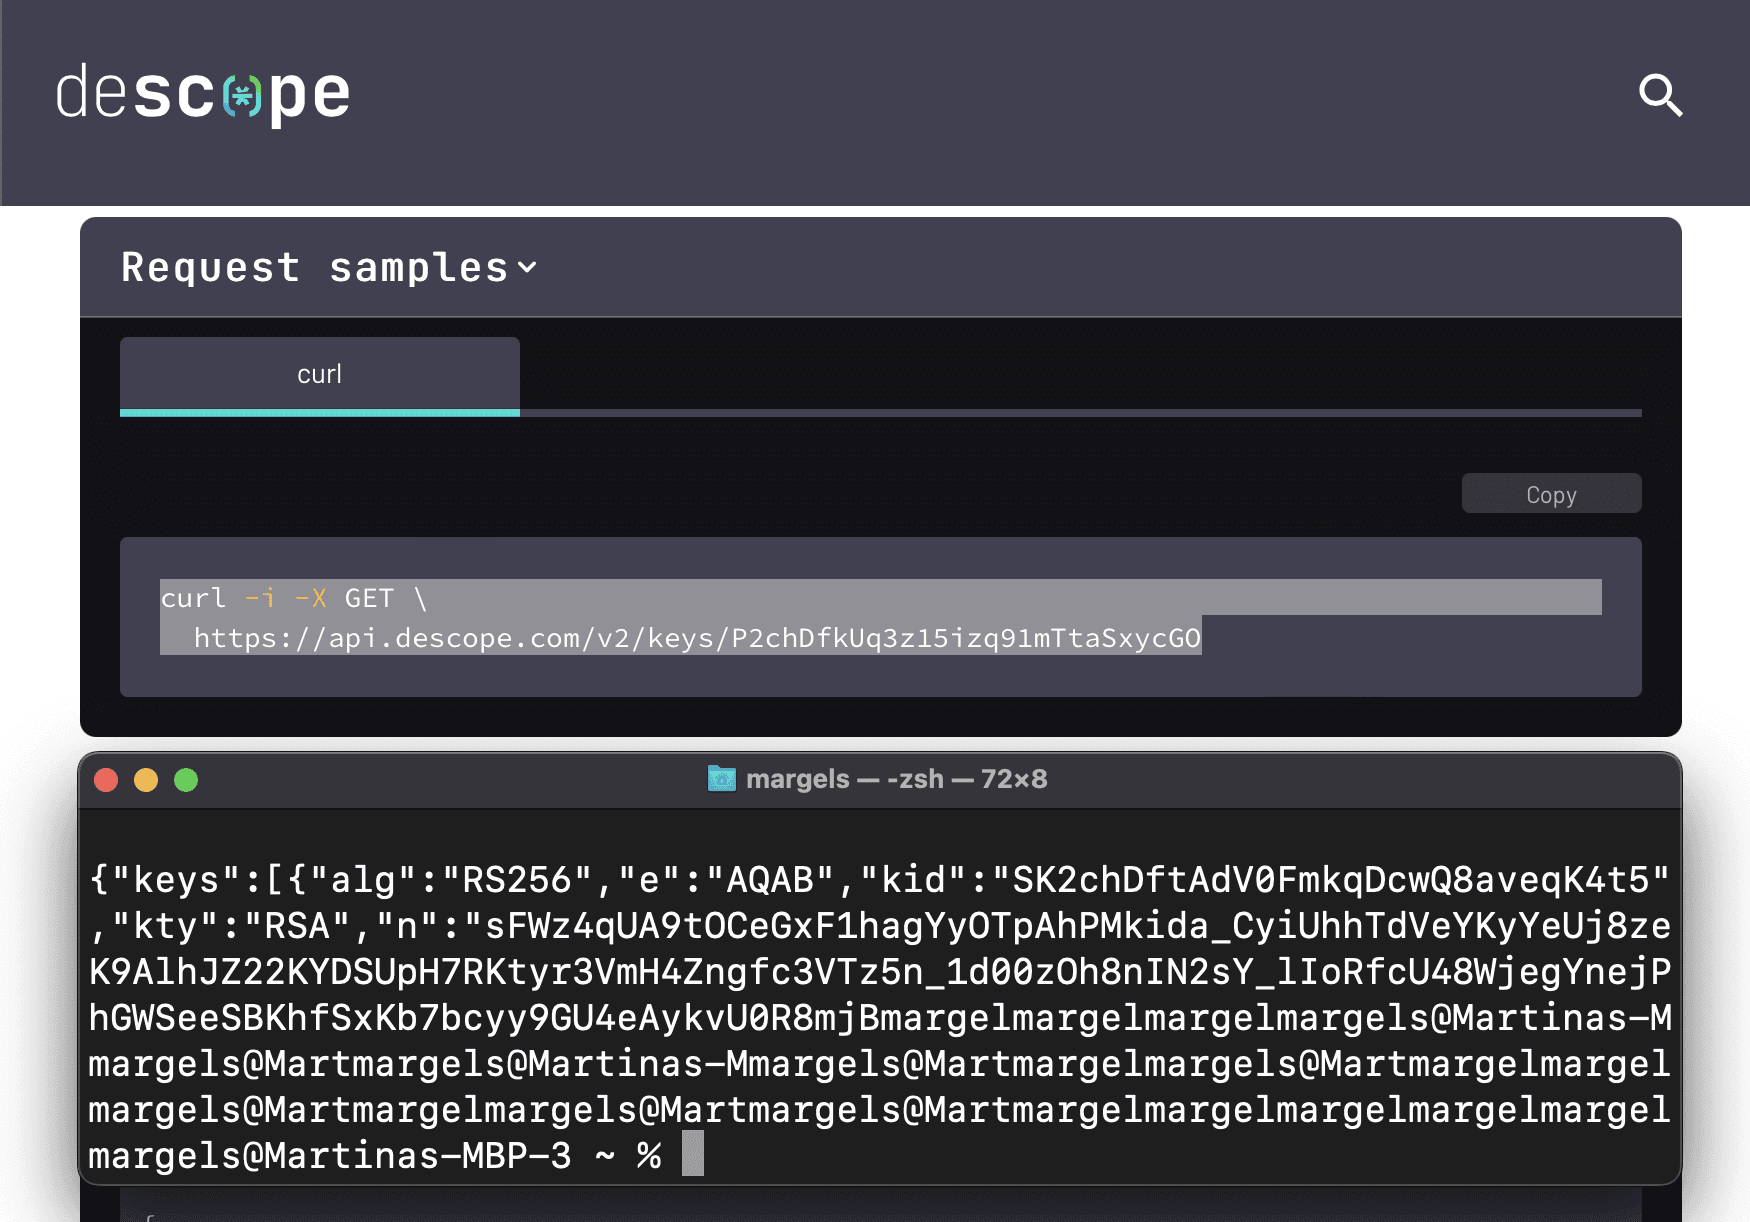
To retrieve your public key using a curl command, sign in to Descope, use this docs link, and copy-paste the curl command on your terminal. Click Enter and copy the content of the first object in the array keys:
At this point, whichever option you choose, you should have copied your public key to validate JWT. You now need to convert it to PEM format to be able to use it. You can use this website to convert the key.
Open the backend demo app and replace <YOUR_KEY> in your configure.swift file with the key you just retrieved.
Set up the UI
For this tutorial, you will have to sign up and log in using an email address you have access to for testing purposes. As you’re using OTP verification, you will also have to handle the UI for OTP insertion and validation using a text field and a button.
Go to your ViewController and use the following code to create the necessary UI objects:
 private lazy var containerStackView: UIStackView = {
        let sv = UIStackView()
        sv.translatesAutoresizingMaskIntoConstraints = false
        sv.axis = .vertical
        sv.distribution = .fill
        sv.spacing = 5
        return sv
    }()

    private lazy var signInOrUpStackView: UIStackView = {
        let sv = UIStackView()
        sv.translatesAutoresizingMaskIntoConstraints = false
        sv.axis = .vertical
        sv.distribution = .fill
        sv.spacing = 5
        return sv
    }()

    private lazy var emailTextField: UITextField = {
        let tf = UITextField()
        tf.translatesAutoresizingMaskIntoConstraints = false
        tf.borderStyle = .none
        tf.placeholder = "Insert your email address here..."
        tf.delegate = self
        return tf
    }()

    private lazy var emailTextFieldLine: UIView = {
        let v = UIView()
        v.translatesAutoresizingMaskIntoConstraints = false
        v.backgroundColor = .tertiaryLabel
        return v
    }()

    private lazy var signInOrUpButton: UIButton = {
        let b = UIButton()
        b.translatesAutoresizingMaskIntoConstraints = false
        b.backgroundColor = .clear
        b.setTitle("Sign in or up", for: .normal)
        b.setTitleColor(.systemGreen, for: .normal)
        b.titleLabel?.font = .systemFont(ofSize: 15, weight: .bold)
        b.alpha = 0.5
        b.isUserInteractionEnabled = false
        b.addTarget(self, action: #selector(didTapSignInOrUp), for: .touchUpInside)
        return b
    }()

    private lazy var otpStackView: UIStackView = {
        let sv = UIStackView()
        sv.translatesAutoresizingMaskIntoConstraints = false
        sv.axis = .vertical
        sv.distribution = .fill
        sv.spacing = 5
        return sv
    }()

    private lazy var otpTextField: UITextField = {
        let tf = UITextField()
        tf.translatesAutoresizingMaskIntoConstraints = false
        tf.borderStyle = .none
        tf.placeholder = "Insert OTP here..."
        tf.delegate = self
        return tf
    }()

    private lazy var otpTextFieldLine: UIView = {
        let v = UIView()
        v.translatesAutoresizingMaskIntoConstraints = false
        v.backgroundColor = .tertiaryLabel
        return v
    }()

    private lazy var continueButton: UIButton = {
        let b = UIButton()
        b.translatesAutoresizingMaskIntoConstraints = false
        b.backgroundColor = .clear
        b.setTitle("Continue", for: .normal)
        b.setTitleColor(.systemGreen, for: .normal)
        b.titleLabel?.font = .systemFont(ofSize: 15, weight: .bold)
        b.alpha = 0.5
        b.isUserInteractionEnabled = false
        b.addTarget(self, action: #selector(didTapContinue), for: .touchUpInside)
        return b
    }()
This adds the following to your UI:
Two
UITextFields, where the user inserts their email address and OTP.Two
UIViewsof height1that outline one text field each.Two
UIButtonthat the user can click when the email or the OTP is inserted and ready to be sent for validation.Two
UIStackViewsthat handle one view for each of the preceding objects: one for email insertion and one for OTP insertion, which are hidden or shown at the appropriate time.A
UIStackViewwith a.verticalaxis that contains every object, which is centered on the view.
Add an action for the continueButton and one for the signInOrUpButton:
 @objc private func didTapSignInOrUp() {
                // Sign up or in your user
    }

    @objc private func didTapContinue() {
        // Verify your user
    }
Now, create two methods to add these views to your ViewController and set its constraints:
private func setUpViews() {
        self.view.addSubview(containerStackView)

        containerStackView.addArrangedSubview(signInOrUpStackView)
        signInOrUpStackView.addArrangedSubview(emailTextField)
        signInOrUpStackView.addArrangedSubview(emailTextFieldLine)
        signInOrUpStackView.addArrangedSubview(signInOrUpButton)
        signInOrUpStackView.setCustomSpacing(15, after: emailTextFieldLine)

        containerStackView.addArrangedSubview(otpStackView)
        otpStackView.addArrangedSubview(otpTextField)
        otpStackView.addArrangedSubview(otpTextFieldLine)
        otpStackView.addArrangedSubview(continueButton)
        otpStackView.setCustomSpacing(15, after: otpTextFieldLine)

        otpStackView.isHidden = true
    }

    private func setUpConstraints() {
        NSLayoutConstraint.activate([

            containerStackView.centerYAnchor.constraint(equalTo: self.view.safeAreaLayoutGuide.centerYAnchor),
            containerStackView.centerXAnchor.constraint(equalTo: self.view.safeAreaLayoutGuide.centerXAnchor),
            containerStackView.leadingAnchor.constraint(equalTo: self.view.safeAreaLayoutGuide.leadingAnchor, constant: 50),
            self.view.safeAreaLayoutGuide.trailingAnchor.constraint(equalTo: containerStackView.trailingAnchor, constant: 50),
            emailTextFieldLine.heightAnchor.constraint(equalToConstant: 1),
            otpTextFieldLine.heightAnchor.constraint(equalToConstant: 1)

        ])
    }
You call these two methods in your viewDidLoad() function to perform them right after launch.
If you copy-pasted these lines of code into your project, you should encounter an error within your otpTextField; this is because ViewController does not conform to UITextFieldDelegate yet. You need to update your view controller’s protocols so it can track activity within your OTP insertion text field. In particular, you want to store the user’s OTP in a variable once they are done typing.
Add a variable named loginId and one named code, both containing an empty string, to your ViewController; this is where you store the user’s email address and their final OTP once the user presses Enter after they are done typing in the text field.
Copy-paste the following code to make your signInOrUpButton and continueButton unavailable for user interaction until the appropriate text is entered:
extension ViewController: UITextFieldDelegate {

    func textFieldDidEndEditing(_ textField: UITextField) {
        let isTextEmpty = textField.text == nil || textField.text == ""
        switch (textField, textField.text) {
        case (emailTextField, .some(let text)):
            self.loginId = text
            signInOrUpButton.alpha = isTextEmpty ? 0.5 : 1
            signInOrUpButton.isUserInteractionEnabled = isTextEmpty ? false : true
        case (otpTextField, .some(let text)):
            self.code = text
            continueButton.alpha = isTextEmpty ? 0.5 : 1
            continueButton.isUserInteractionEnabled = isTextEmpty ? false : true
        default:
            [signInOrUpButton, continueButton].forEach { $0.alpha = 0.5 }
            [signInOrUpButton, continueButton].forEach { $0.isUserInteractionEnabled = false }
        }
    }

    func textFieldShouldReturn(_ textField: UITextField) -> Bool {
        textField.resignFirstResponder()
    }
}
This code does the following:
Dismisses the keyboard once the user hits
Enter.Checks that there is text in the text field and that it is not an empty string.
Saves the user’s email in
loginIdand makes interaction available forsignInOrUpButtononly if an email was entered.Saves the user’s OTP in
codeand makes interaction available forcontinueButtononly if a code was entered.
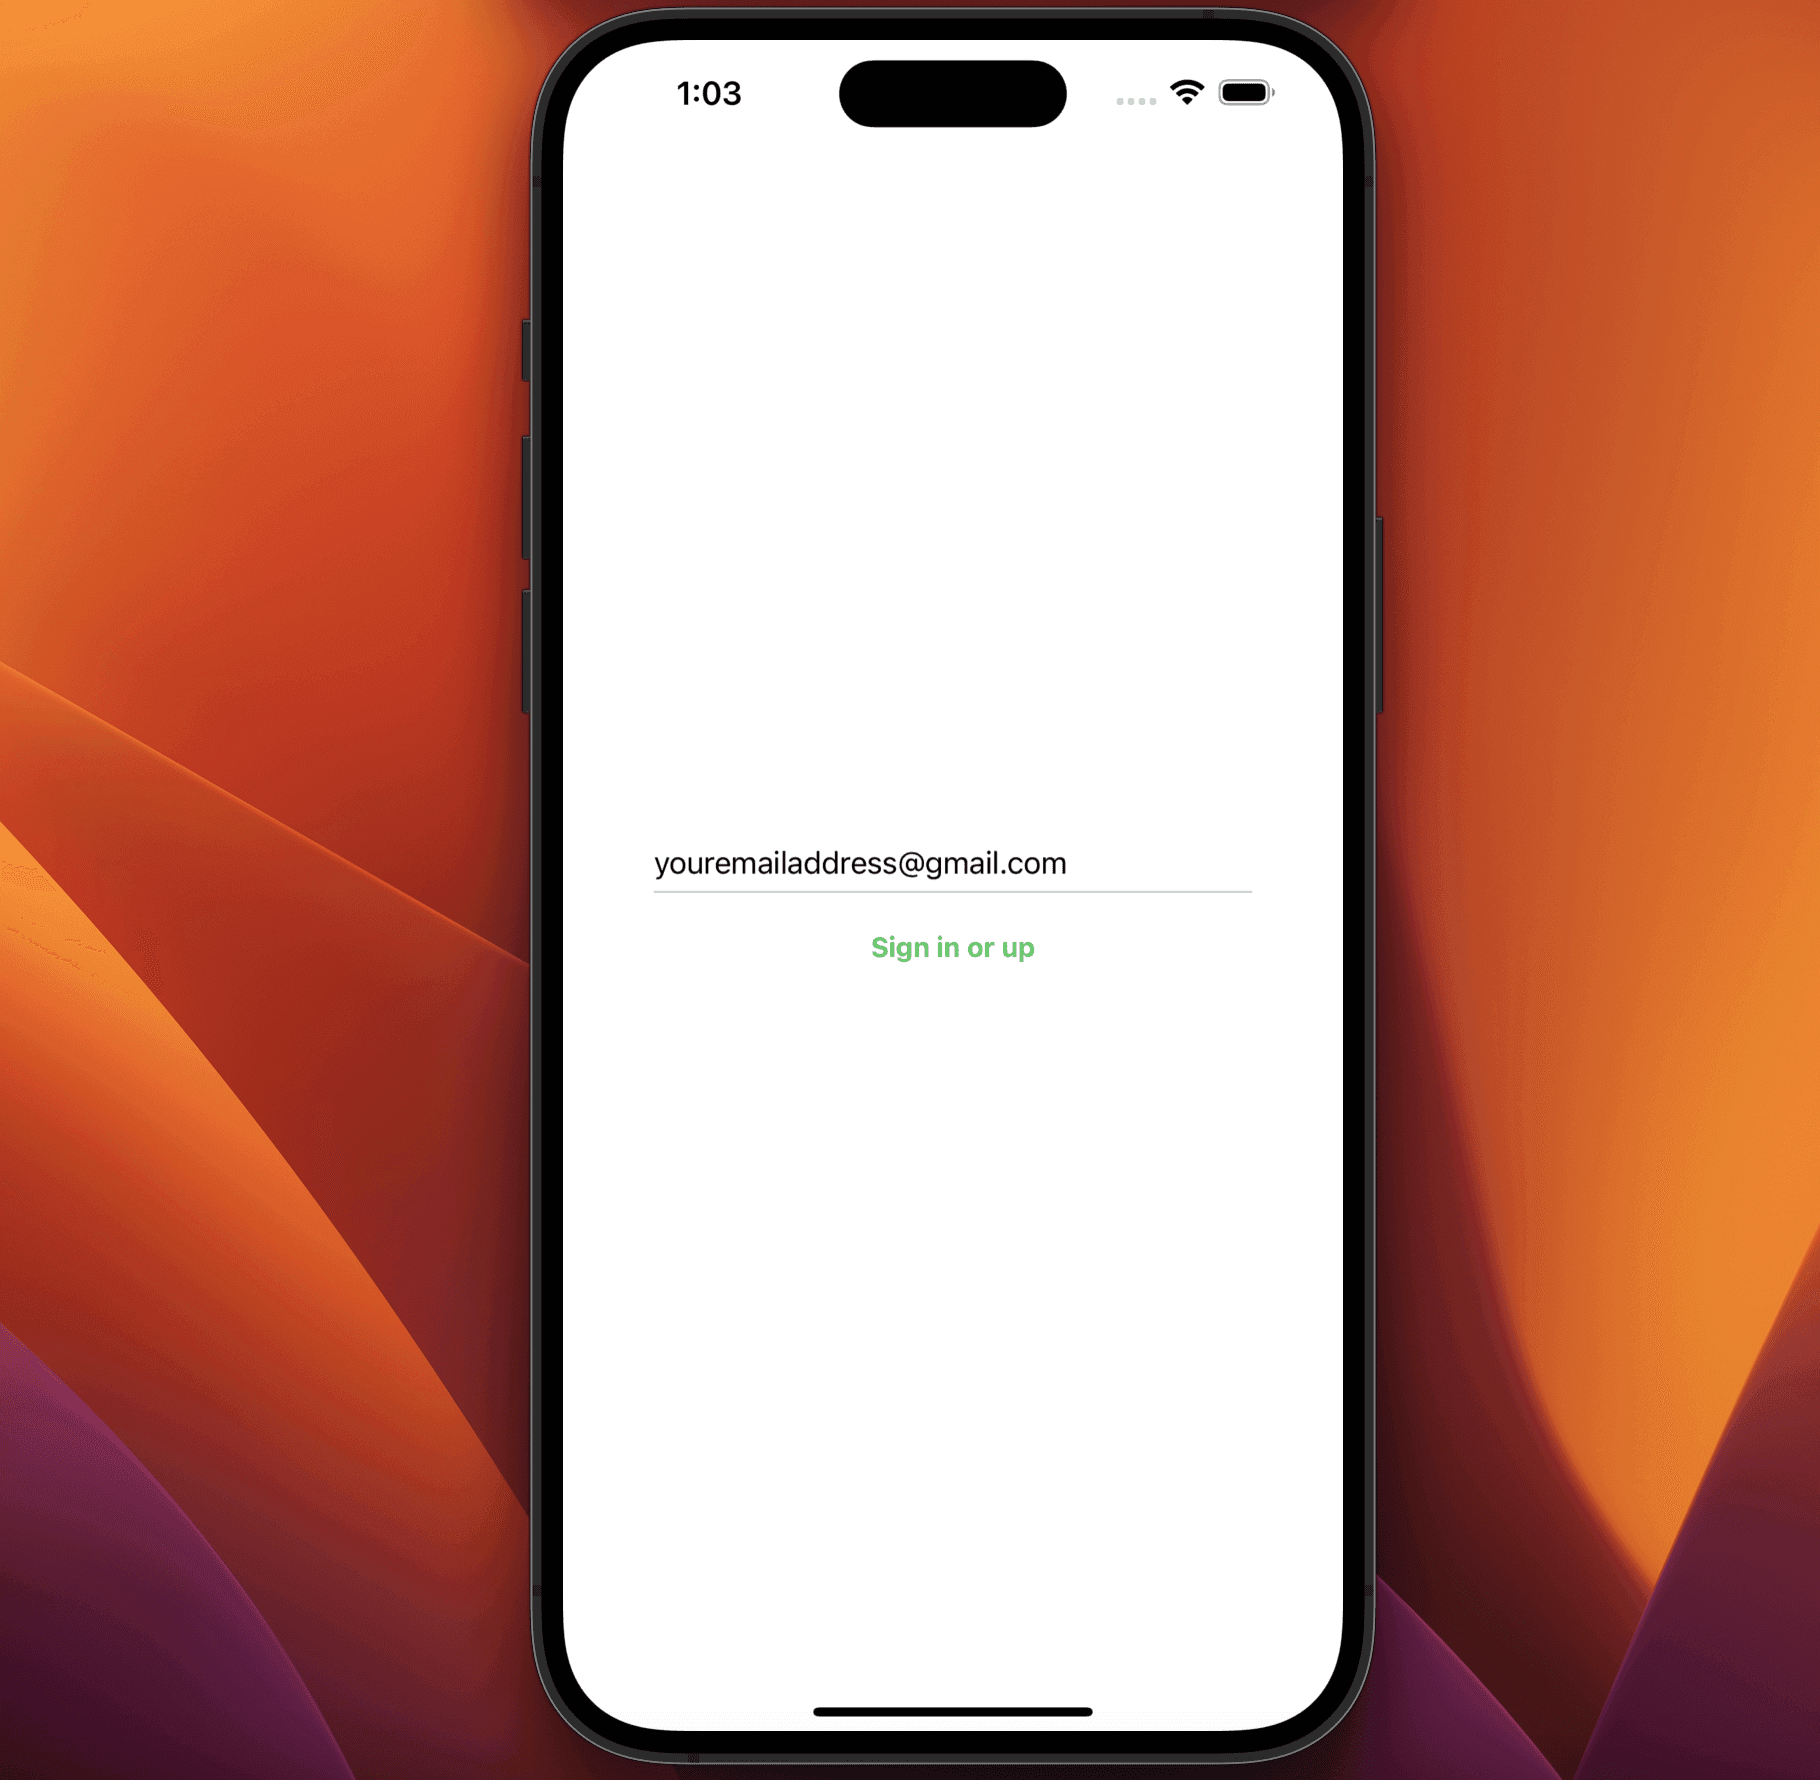
Build your app. Your final result should look similar to this:
Add Descope authentication
You can now start adding the Descope authentication functionalities to your project.
In your ViewController, import DescopeKit and AuthenticationServices to access its library. Create a constants named deliveryMethod to define the OTP delivery method:
let deliveryMethod: DeliveryMethod = .emailCreate a new method named signUpDemoUser() to sign up new users or sign in existing ones:
  private func signUpDemoUser() async {

        // Args:
        //    deliveryMethod: Delivery method to use to send OTP. Supported values include DeliveryMethod.email or DeliveryMethod.sms
        let deliveryMethod = self.deliveryMethod
        //    loginId: email or phone - becomes the loginId for the user from here on and also used for delivery
        let loginId = self.loginId
        //    user: Optional user object to populate new user information.
        var signInOptions: [SignInOptions] = [.customClaims(["name": "Test User"])]
        if let session = Descope.sessionManager.session {
            signInOptions.append(contentsOf: [
                .mfa(refreshJwt: session.refreshJwt),
                .stepup(refreshJwt: session.refreshJwt)
            ])
        }

        do {
            let string = try await Descope.otp.signUpOrIn(with: deliveryMethod, loginId: loginId, options: signInOptions)
                DispatchQueue.main.async {
                self.signInOrUpStackView.isHidden = true
                UIView.animate(withDuration: 1, delay: 0) {
                    self.otpStackView.isHidden = false
                }
            }
            print("Successfully initiated OTP Sign Up or In for \(string)")
        } catch {
            print("Failed to initiate OTP Sign Up or In with Error: \(error)")
        }

    }
In this function, you do the following:
Add extra user information using the object
SignInOptions, an array to which you add a JWT refresh token if there is an activeDescopeSession.Perform user sign-up or login with the Descope method
signUpOrIn(with:loginId:options:)using the two constants you created earlier and yourSignInOptionsarray object.Add a logic that hides the email text field and the sign-in or sign-up button to show the OTP text field and the continue button.
Replace // Sign up or in your user with Task { await signUpDemoUser() } inside your didTapSignInOrUp() method to perform this function right after the user has entered their email address.
Build your project to test this feature. If you did everything correctly, once you enter your email address and press Sign in or up, you should receive an email to the address you specified in your code. This email contains the OTP. This means that your user’s signing-up process has started correctly.
At this point, if you enter your OTP in the text field, nothing happens because there is no action inside your didTapContinue() method. To make the button functional, create a new method named verifyDemoUser() and add the following code to use the Descope function verify(with:loginId:code:) to verify the OTP inserted by your user:
private func verifyDemoUser() async {

        // Args:
        //    deliveryMethod: Delivery method to use to send OTP. Supported values include DeliveryMethod.email or DeliveryMethod.sms
        let deliveryMethod = self.deliveryMethod
        //   loginId (str): The loginId of the user being validated
        let loginId = self.loginId
        //   code (str): The authorization code enter by the end user during signup/signin
        let code = self.code

        do {
            let descopeSession = try await Descope.otp.verify(with: deliveryMethod, loginId: loginId, code: code)
            let jwt = descopeSession.sessionToken.jwt
            // TODO
        } catch DescopeError.wrongOTPCode {
            print("Failed to verify OTP Code: ")
            print("Wrong code entered")
        } catch {
            print("Failed to verify OTP Code: ")
            print(error)
        }
    }
Add Task { await verifyDemoUser() } to your didTapContinue() function to perform this verification method every time the user clicks the Continue button.
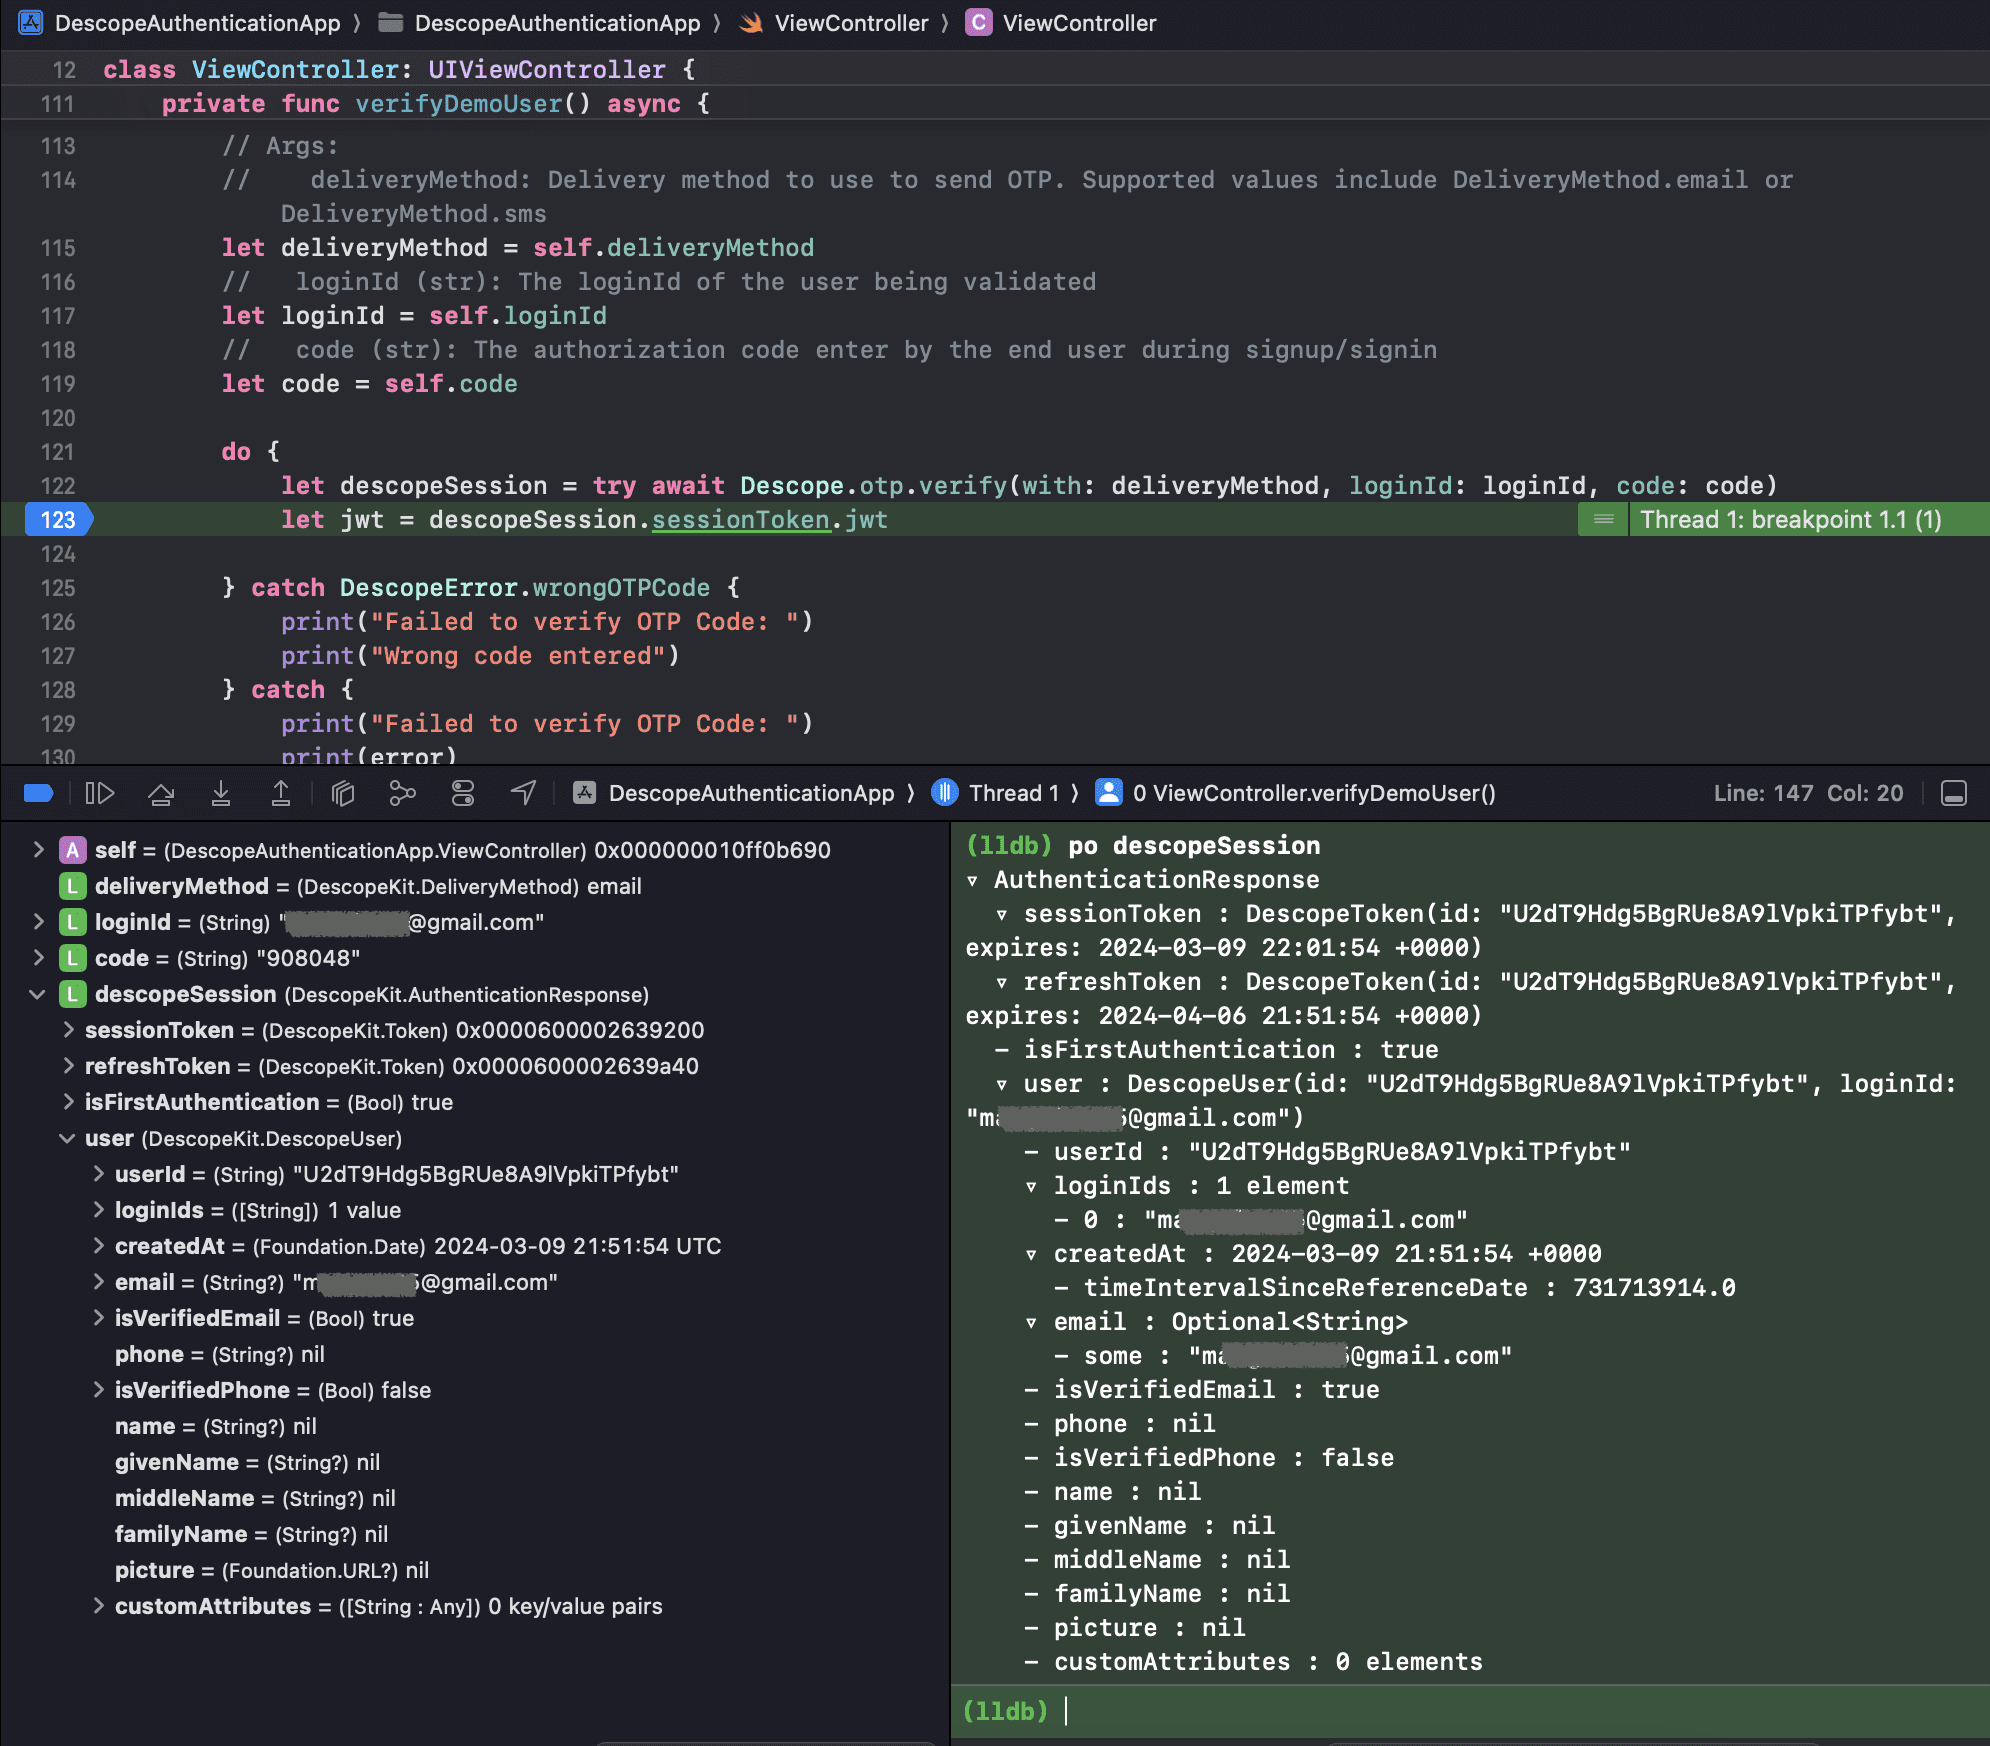
Add a breakpoint on let jwt = descopeSession.sessionToken.jwt and build your app again. This time, add your OTP and click Continue to perform verification.
Once you get to the breakpoint, use your console on Descope to see the information that’s returned:
Then head over to your Descope console, and you should see the new user in your list:
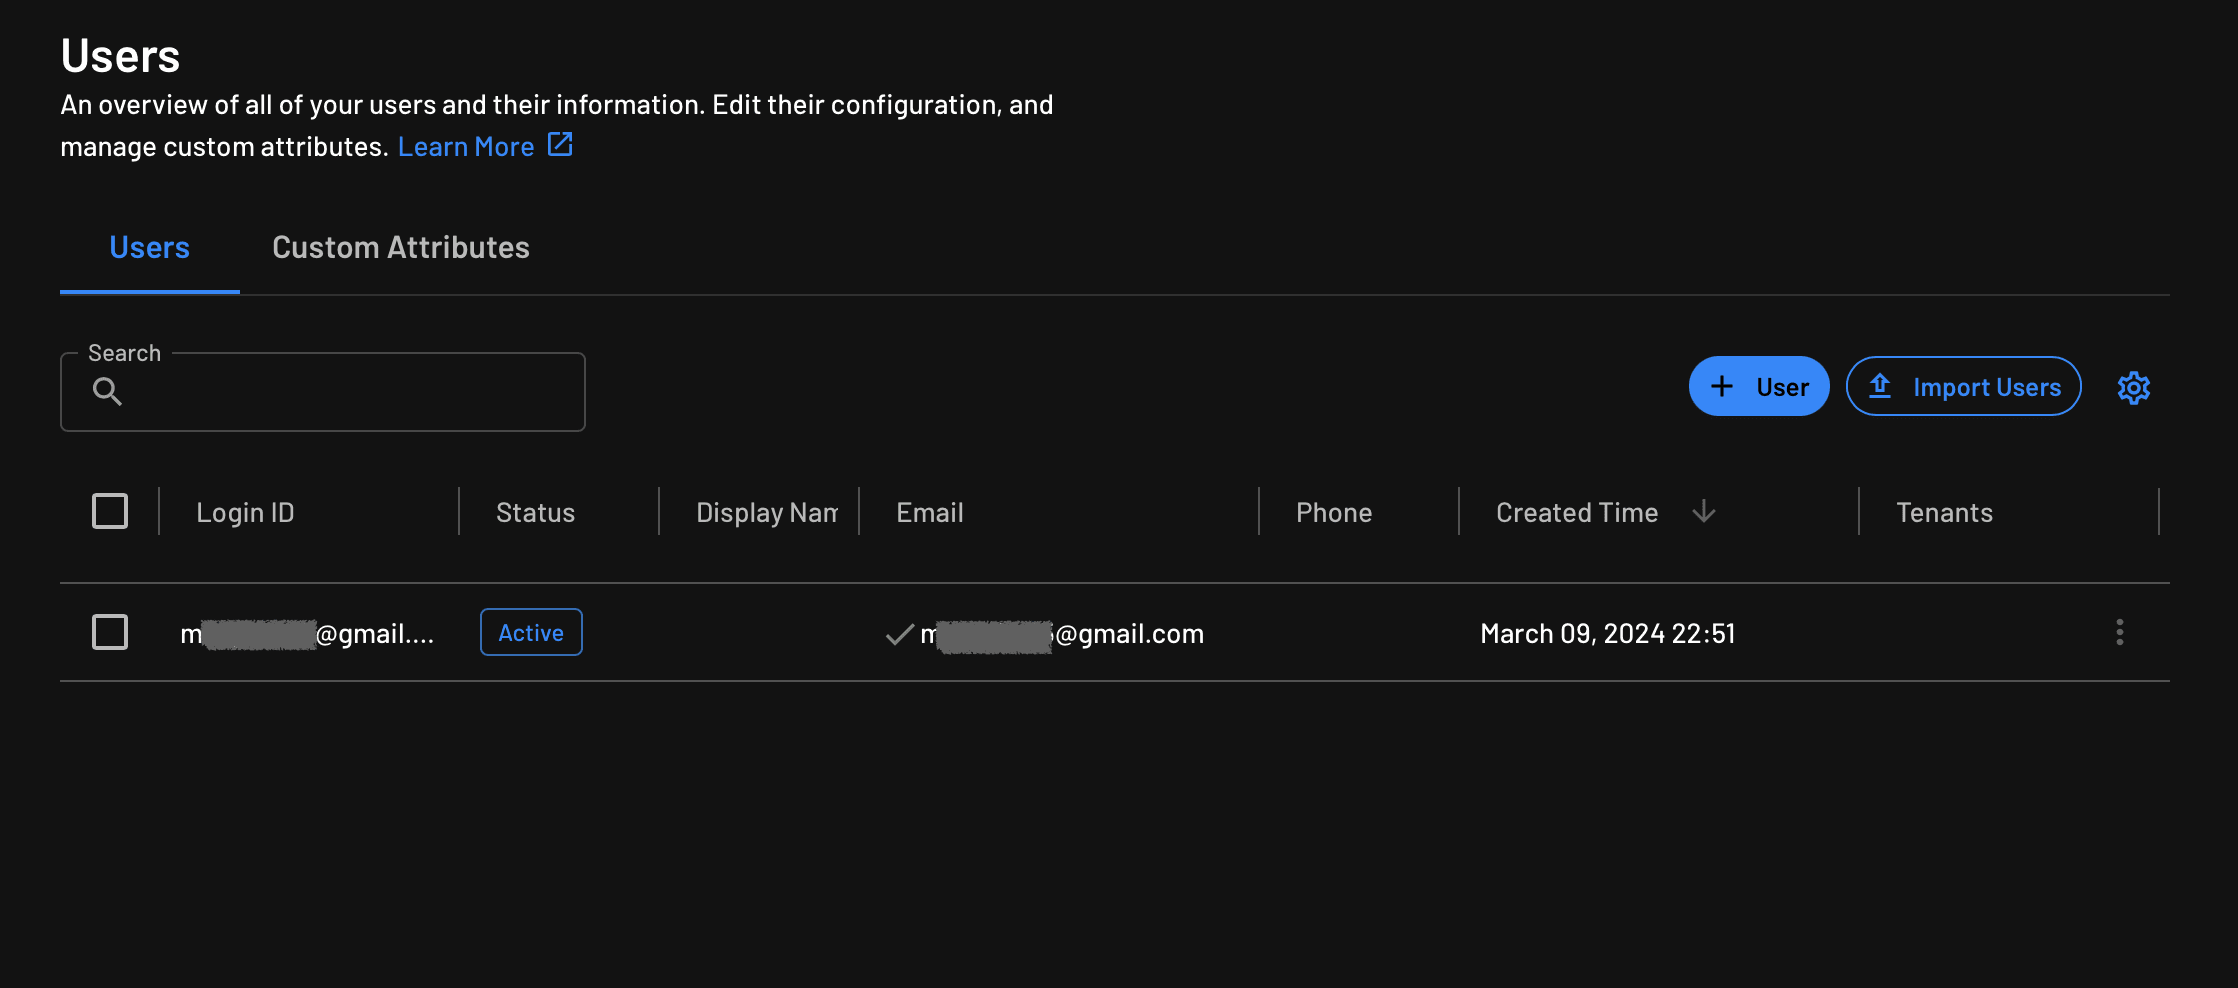
At this point, you have successfully signed your user up with Descope.
Read user data
Signing users up and logging them in isn’t much use if you can’t read their information. To receive your user’s information, Descope returns a JWT that you can transfer to your backend app to securely read its data.
Create a file named Constants and a homonymous class that you can use to store API-related methods. Inside that file, outside the Constants class, add a new model named UserInfoResponse that you can use to decode Descope’s response:
struct UserInfoResponse: Decodable {
    let sub: String?
    let roles: [String]?
    var amr: [String]?
    let permissions: [String]?
    let nsec: [String: String]?
}
Then, create a GET request method inside the Constants class where you pass an authorization header containing the JWT you received from Descope. You can add it inside a function with a completion handler, which you can then use to transfer the user information you just retrieved to your ViewController:
 let baseUrl = "<YOUR_BASE_URL>"
    let getUserInfo = "/get-Descope-User-Information"

    func getUserInformation(with token: String, completion: @escaping ((UserInfoResponse?) -> ()?)) {

        guard let url = URL(string: "\(baseUrl)\(getUserInfo)") else { return }

        var request = URLRequest(url: url)
        request.addValue("Bearer \(token)", forHTTPHeaderField: "Authorization")

        let task = URLSession.shared.dataTask(with: request) { data, response, error in

            if let error = error {
                print(error.localizedDescription)
                return
            }

            guard let httpResponse = response as? HTTPURLResponse,
                  (200...299).contains(httpResponse.statusCode)
            else {
                print("Invalid Response")
                return
            }

            guard let responseData = data else { return }

            let decoder = JSONDecoder()
            do {
                let userInfoResponse = try decoder.decode(UserInfoResponse.self, from: responseData)
                completion(userInfoResponse)
            } catch let error {
                print(error.localizedDescription)
            }
        }
        task.resume()
    }
Finally, in your Constants class, add an instance of itself using the line static let shared = Constants() to access it safely from your ViewController. Replace // TODO in your verifyDemoUser() method with the following code to transform your JWT into readable user information:
Constants.shared.getUserInformation(with: jwt) { userInfo in
print(userInfo)
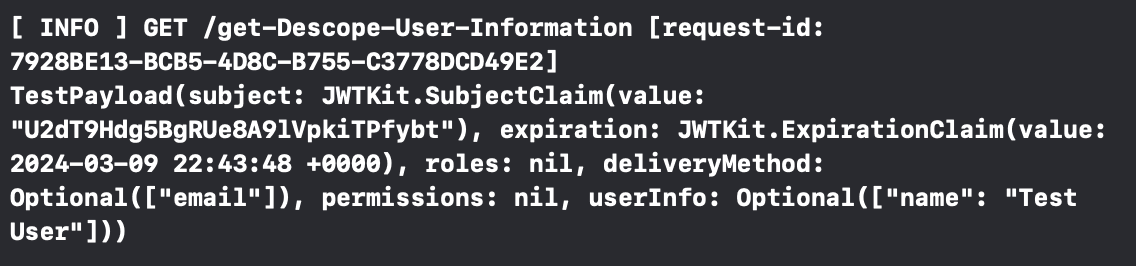
}Run both the backend app and the DescopeAuthenticationApp and log in with your new user. Your console should display something like this:
If you want to add new information to your user, for example, a phone number, you can add it as a new entry to your signInOptions dictionary:
 var signInOptions: [SignInOptions] = [.customClaims([
            "name": "Test User",
            "phone": "+1234567890"
        ])]
Alternatively, you can also add new information using the Descope console:
Add role-based access
In certain situations, it may be necessary to restrict access to specific features of your app based on user roles. If you wish to assign different permissions to certain users, Descope offers a permissions feature that is accessible through their console, allowing you to manage these scenarios effectively.
Open the Authorization tab from your side panel, then click Permissions > + Permission to create a new permission category and name it something convenient for your organization. In this tutorial, the name is simply Full Permissions:
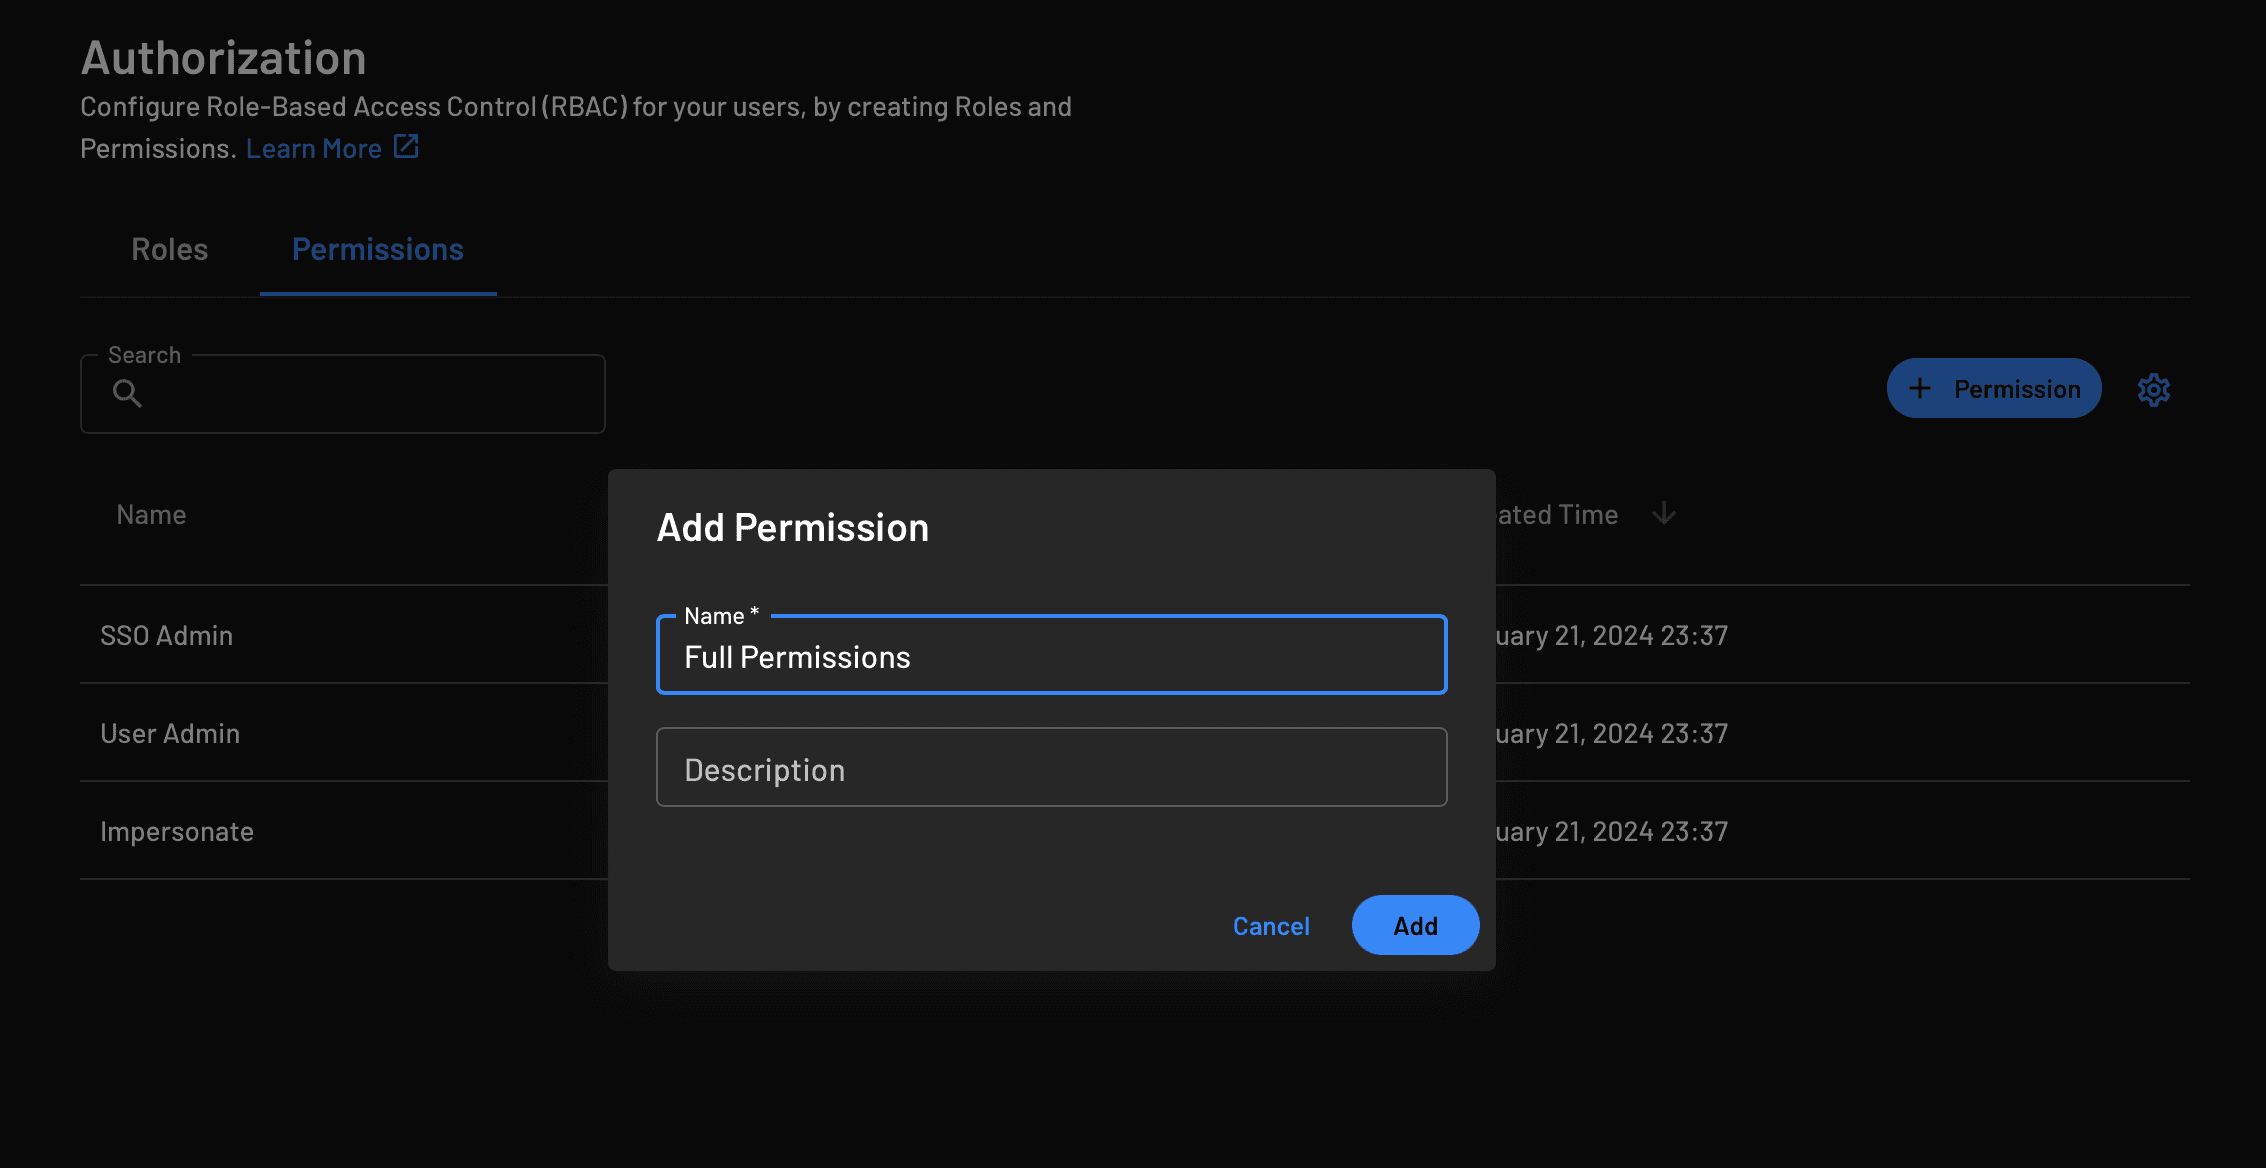
Click Add to add the permission you just created.
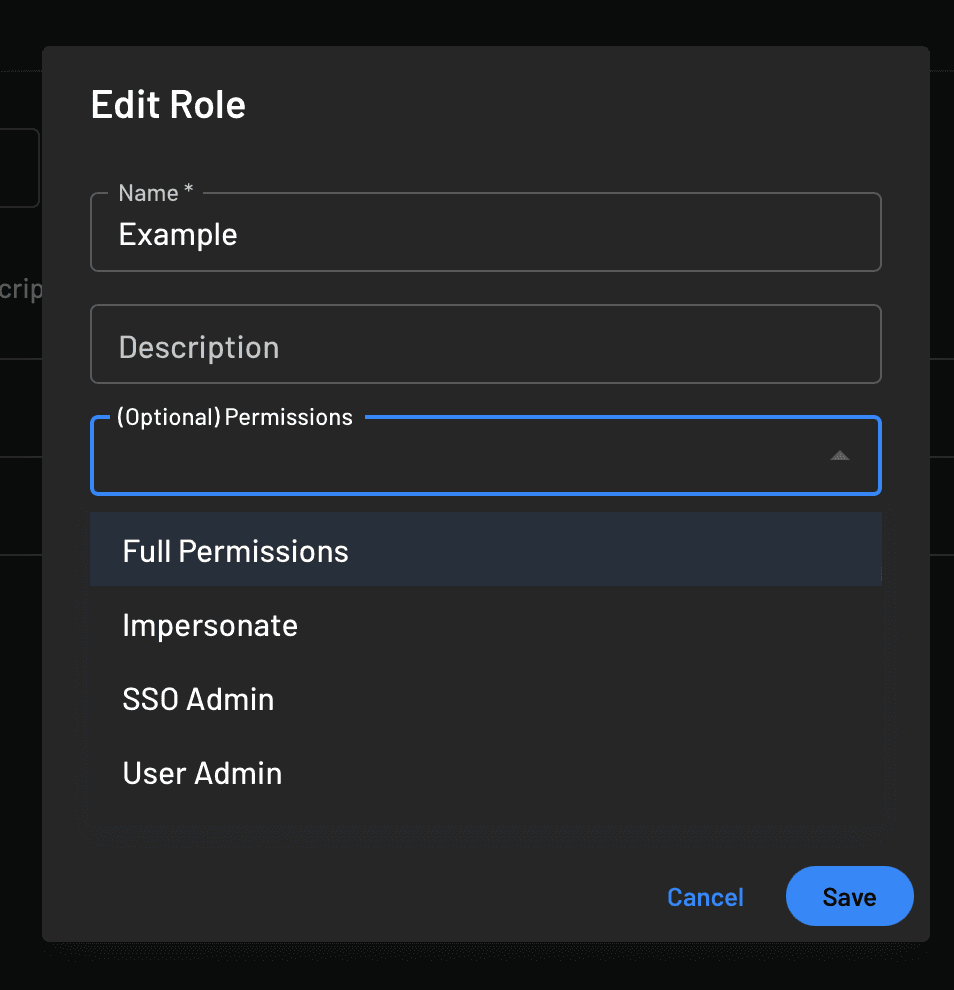
Navigate to Roles and do the same thing by adding a new role and its name, in this case, Example, and make sure to select the permissions you just created:
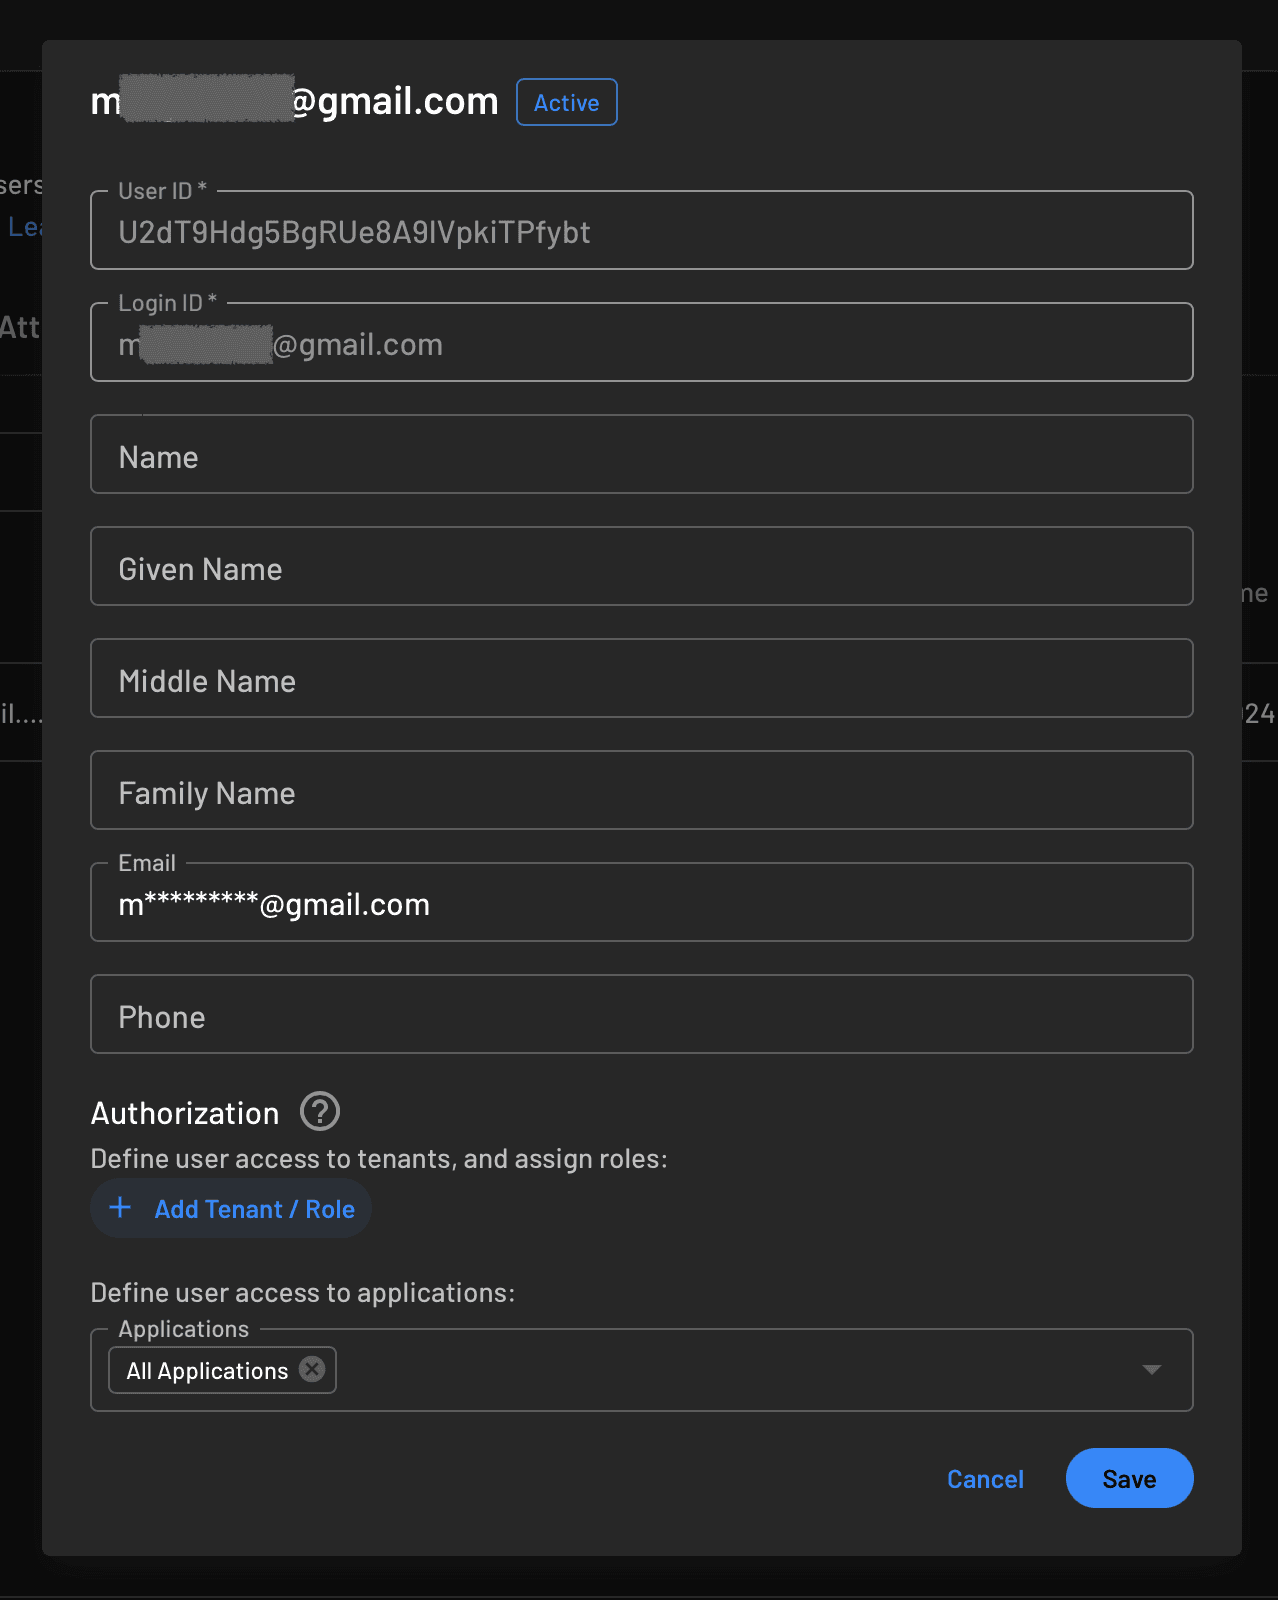
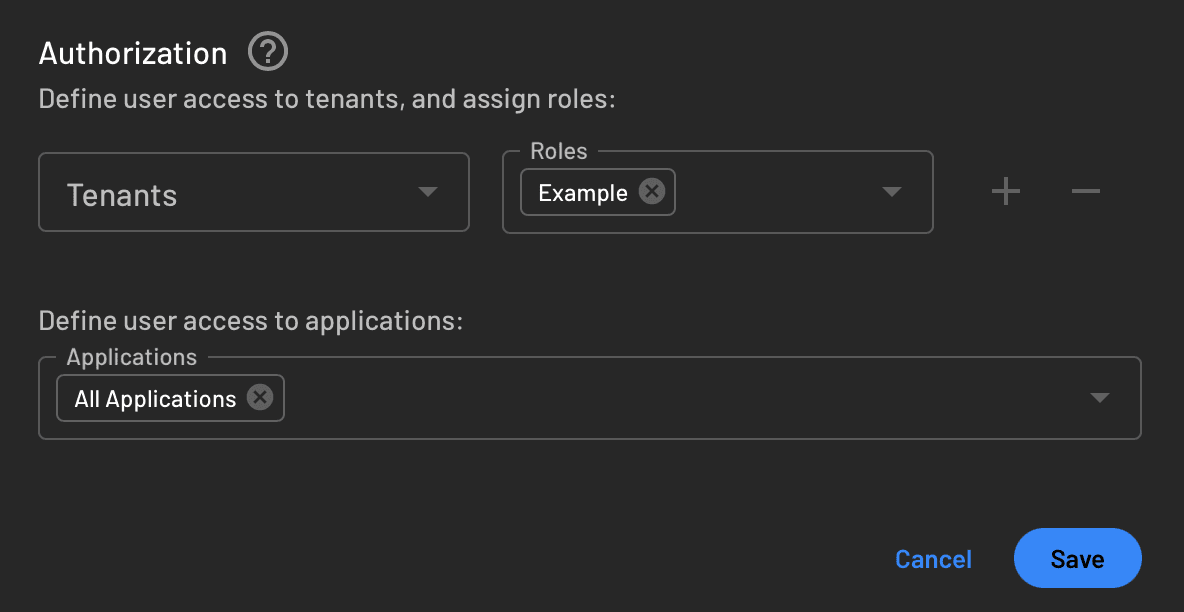
Open your Users panel and, on your demo user entry, click the three dots on the right to open a little options menu. Select Edit to open the user’s information recap window and assign them the new role you created:
For this tutorial, you add a simple method that displays an alert every time the role of the user logging in corresponds to the one you just created in your Descope console. You can add more logic to this as you see fit for your project to handle role-based permissions and access to your app.
Start with the alert display method:
private func showAlert(title: String, message: String) {
DispatchQueue.main.async {
let alert = UIAlertController(title: title, message: message, preferredStyle: .alert)
let okAction = UIAlertAction(title: "OK", style: .cancel)
alert.addAction(okAction)
self.present(alert, animated: true)
}
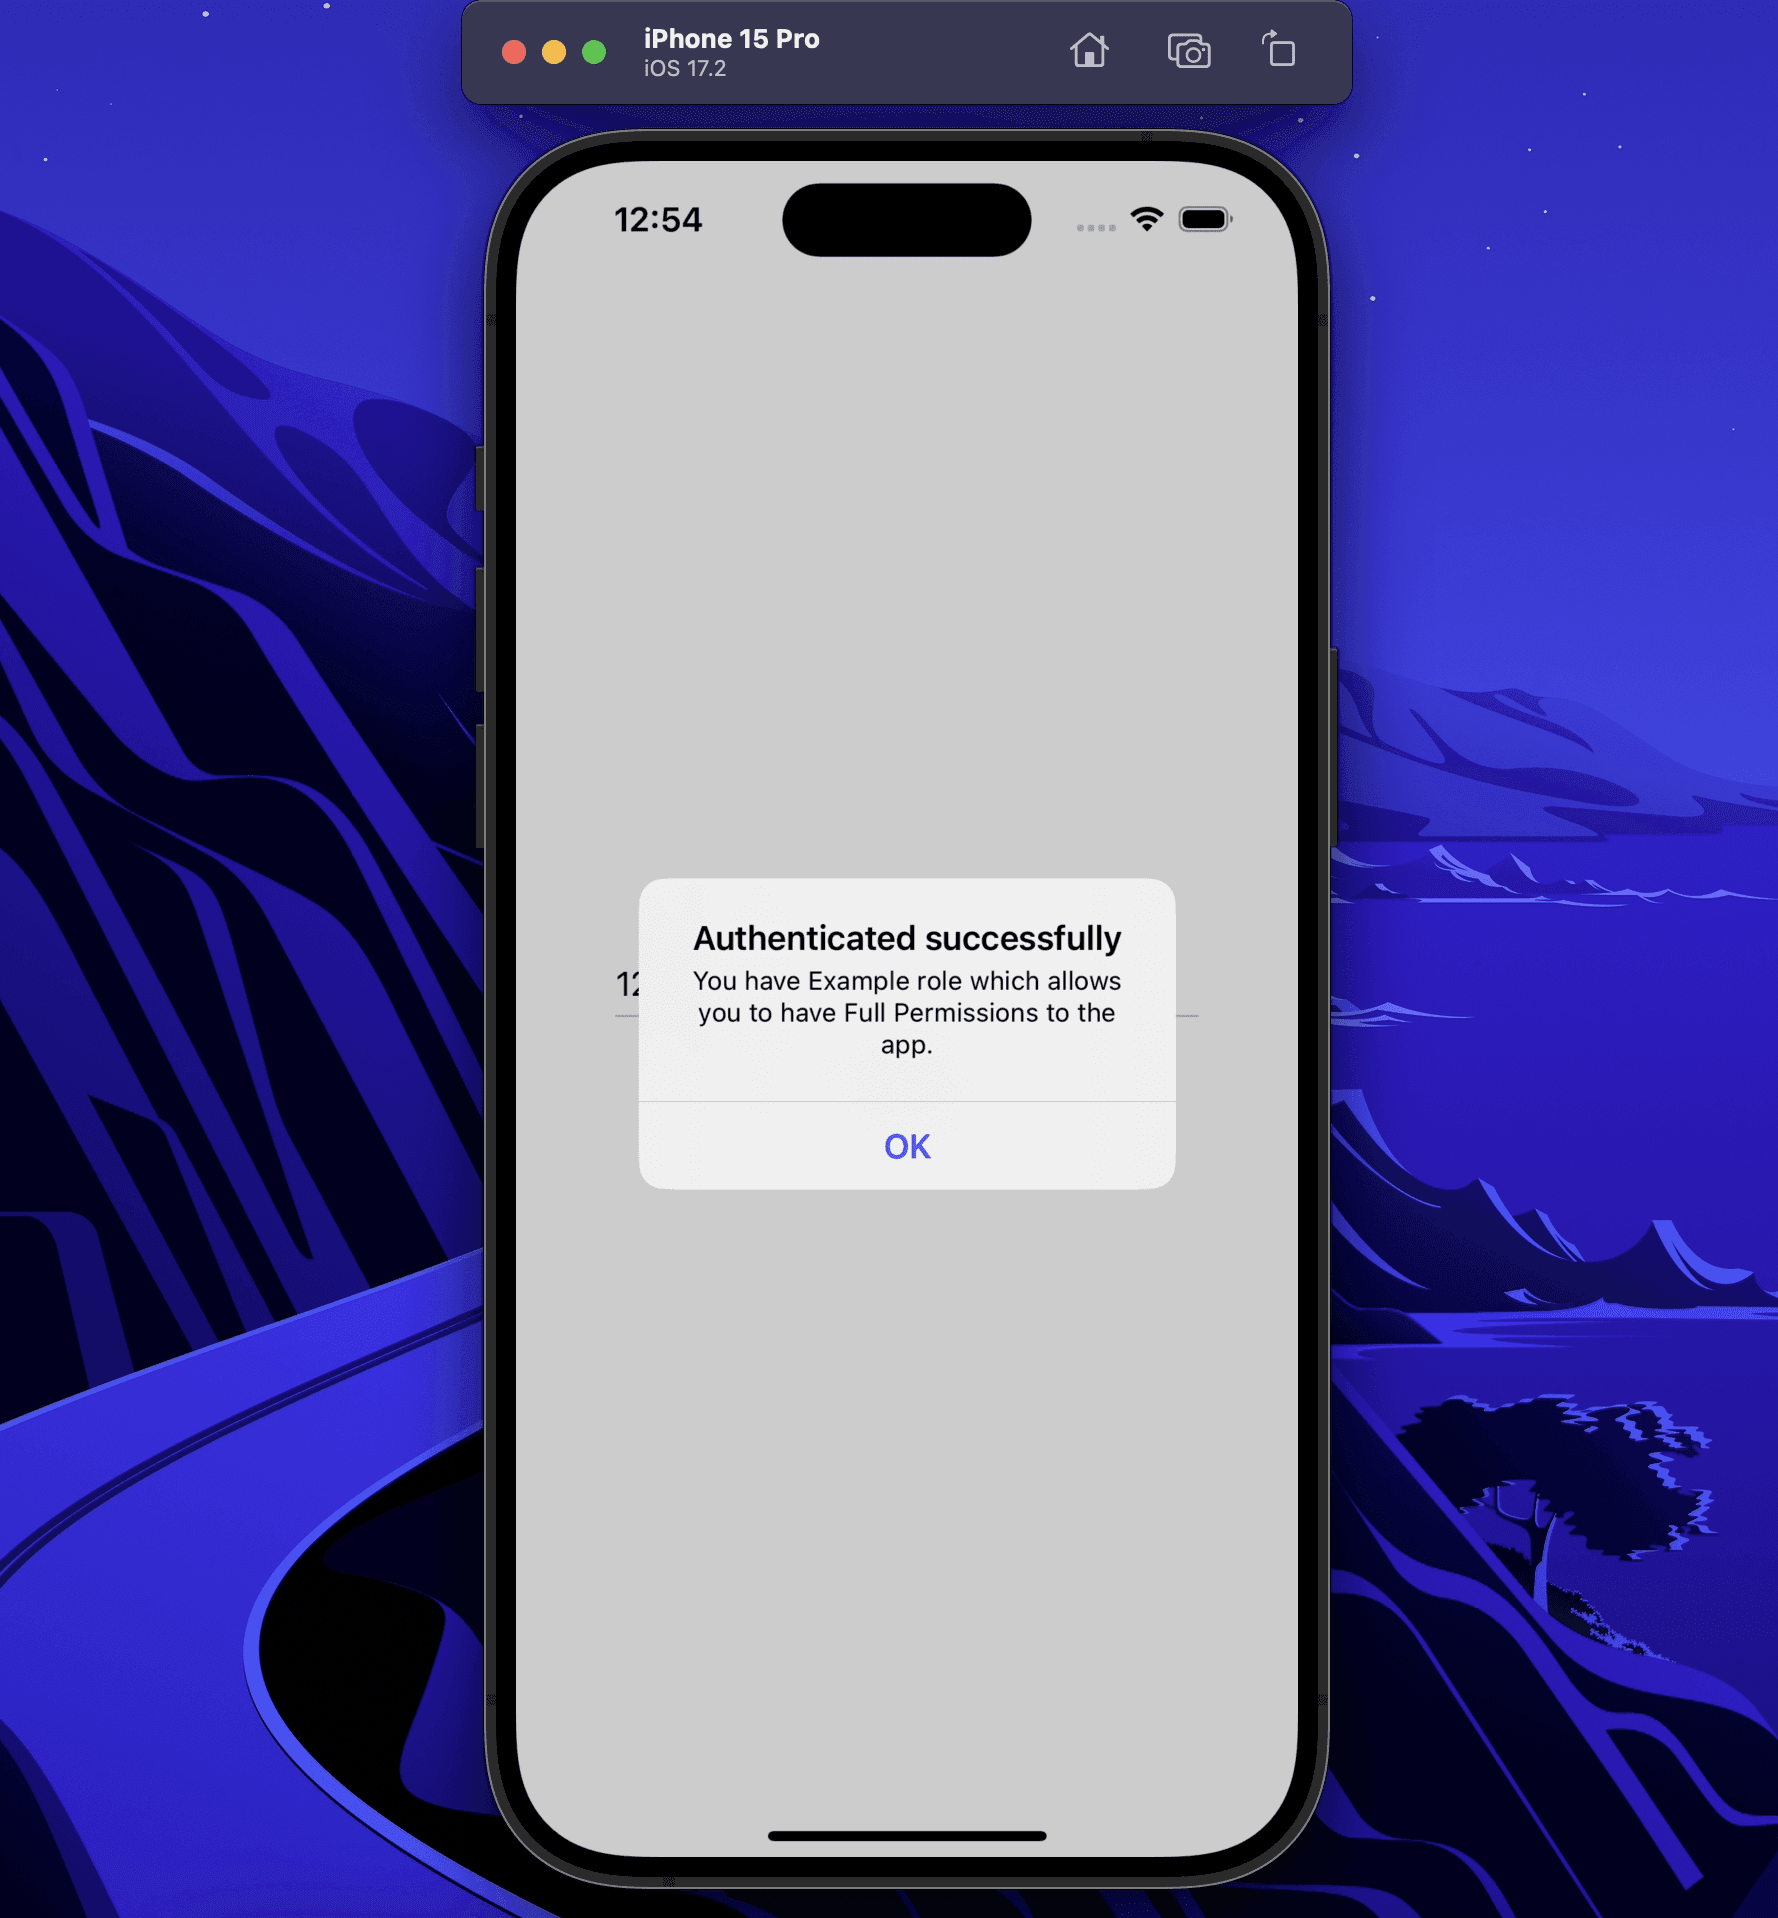
}Then, replace print(userInfo) with the following lines of code to determine the user’s role and the alert’s outcome:
   var outcomeAlertTitle = ""
        var outcomeAlertMessage = ""
        var permissions = userInfo?.permissions?.first
        let role = userInfo?.roles?.first
        switch (role, role == "Example") {
        case (.some(let roleStringValue), true):
            outcomeAlertTitle = "Authenticated successfully"
            outcomeAlertMessage = "You have \(roleStringValue) role which allows you to have \(permissions ?? "access") to the app."
        default:
            outcomeAlertTitle = "Authentication denied"
            outcomeAlertMessage = "You currently do not have role permissions to have full access to the app."
        }
        self.showAlert(title: outcomeAlertTitle, message: outcomeAlertMessage)
Run your project, and if you did everything correctly, your final result, once authenticated, should look like this:
Try changing the user’s role on the Descope console or changing the role name in your code; you should get the Authentication denied alert. If that happens, your project is complete!
Conclusion
In this tutorial, you learned how to build a small iOS project that allows your users to sign up, sign in, and access your app through the powerful Descope authentication system and its Swift SDK. You have also learned how to write extra information about your users and grant role-based permissions with the Descope console and Swift code.
Descope has many more features that you may want to explore to customize your app’s authentication flow. Using Descope’s visual workflows, for example, you can create your platform’s sign-up and login screen views and authentication logic; or you could allow sign-up and login using biometrics or other social profiles such as GitHub, Google, or Facebook. Sign up for a free Descope plan to start implementing your authentication system!