
Table of Contents
If your app is built on Firebase, authentication tends to sit right at the center of everything. Firestore rules, Cloud Functions, Storage access, and even analytics all assume there’s a valid Firebase user session.
At the same time, Firebase Auth can feel limiting once you want to go beyond basic email/password or simple social login. Adding things like passkeys, flexible MFA, or more nuanced sign-in and recovery flows usually means a lot of custom work — or compromises in UX.
Descope External Tokens is designed for exactly this situation. It lets you run Descope Flows natively in your app, then hand off to Firebase at the very end so you still end up with a real Firebase session.
In other words: Descope handles authentication while Firebase continues to power everything else in your app.
External Tokens 101
By using Descope External Tokens with Firebase, Descope is the place where authentication happens, and Firebase is the place where sessions are consumed.
The flow looks like this:
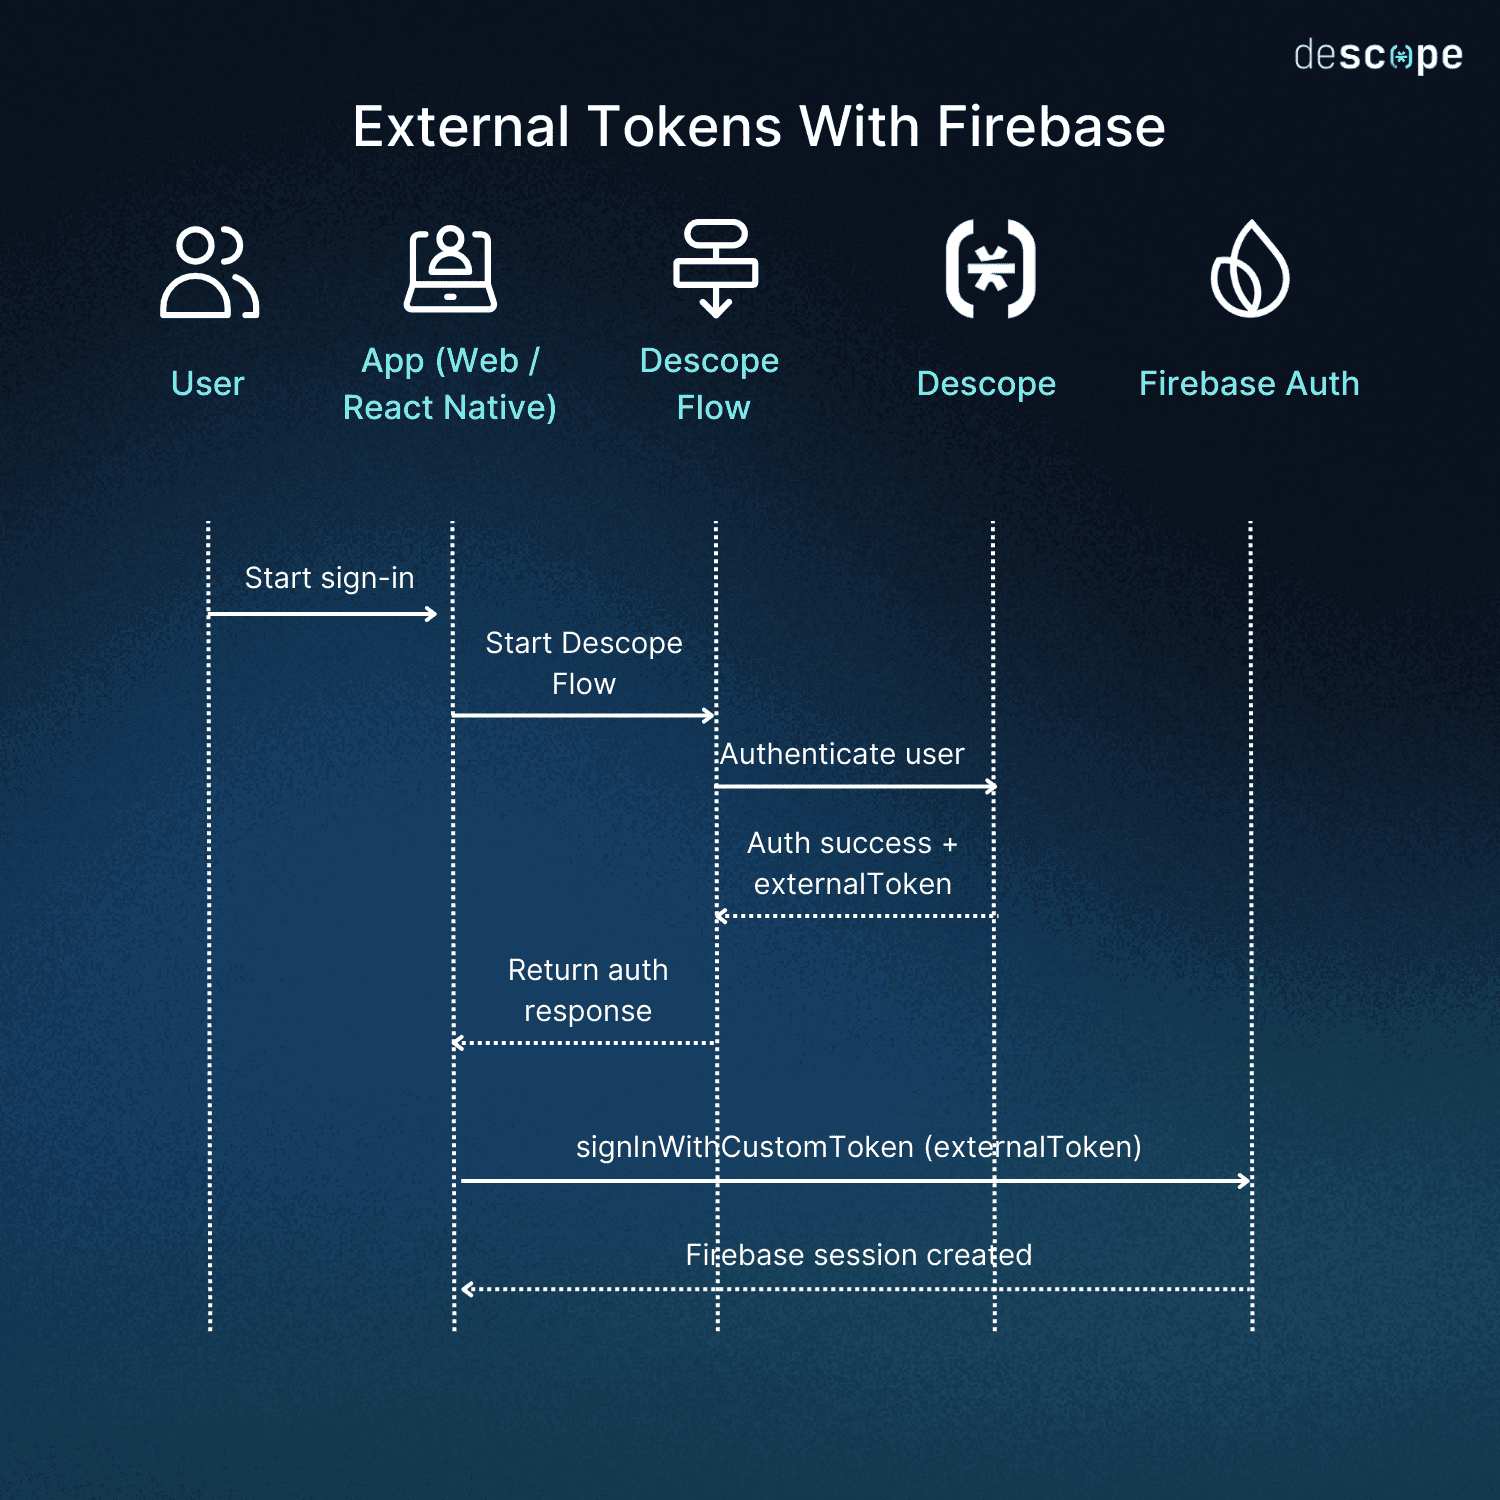
The user signs in using a Descope Flow (passwordless, social, passkeys, MFA — whatever you’ve defined).
When the Flow finishes successfully, Descope returns an externalToken. That token is a Firebase custom auth token, signed by Descope using your Firebase admin credentials.
Your app calls signInWithCustomToken with Firebase.
Firebase creates a normal session, just as if the user had signed in directly with Firebase Auth.
Once that’s done, your app is “Firebase authenticated” in the usual way.
Why use External Tokens
This pattern is useful if:
You want to use Descope’s auth flows and UI
You don’t want redirects or awkward webviews
You already rely heavily on Firebase services
You don’t want to rebuild your backend or security rules
You’re not replacing Firebase, you’re simply plugging Descope into it.
Setting up the Firebase External Token Connector
To generate Firebase custom tokens, Descope needs access to your Firebase project’s service account. This is done through a Firebase External Token connector.
This integration allows you to continue using Firebase’s services while replacing Firebase Auth with Descope Flows.
Configuring the connector in Descope
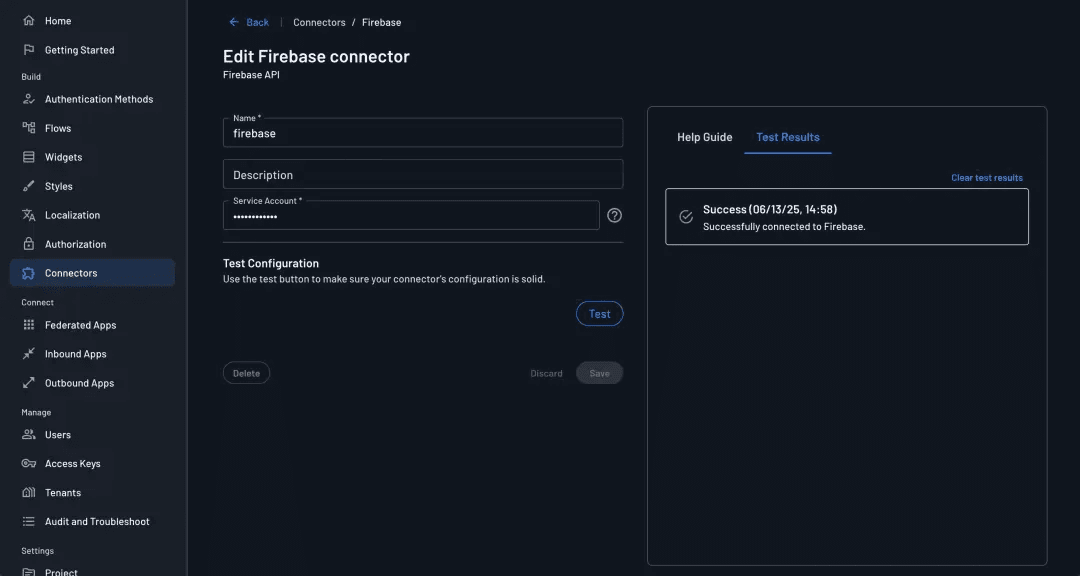
In the Descope Console, navigate to the Connectors page and create a new connector using the Firebase template. You’ll be asked to provide:
Connector Name: A unique name to help distinguish this connector (especially useful if you have multiple Firebase projects or environments).
Connector Description: A short description explaining what the connector is used for.
Service Account private key: The JSON credentials from your Firebase project. This allows Descope to securely sign Firebase custom tokens.
Getting the Firebase service account JSON
To generate a service account key in Firebase:
Open the Firebase Console and select your project
Click the gear icon and go to Project settings
Open the Service Accounts tab
Click Generate new private key
Download the JSON file
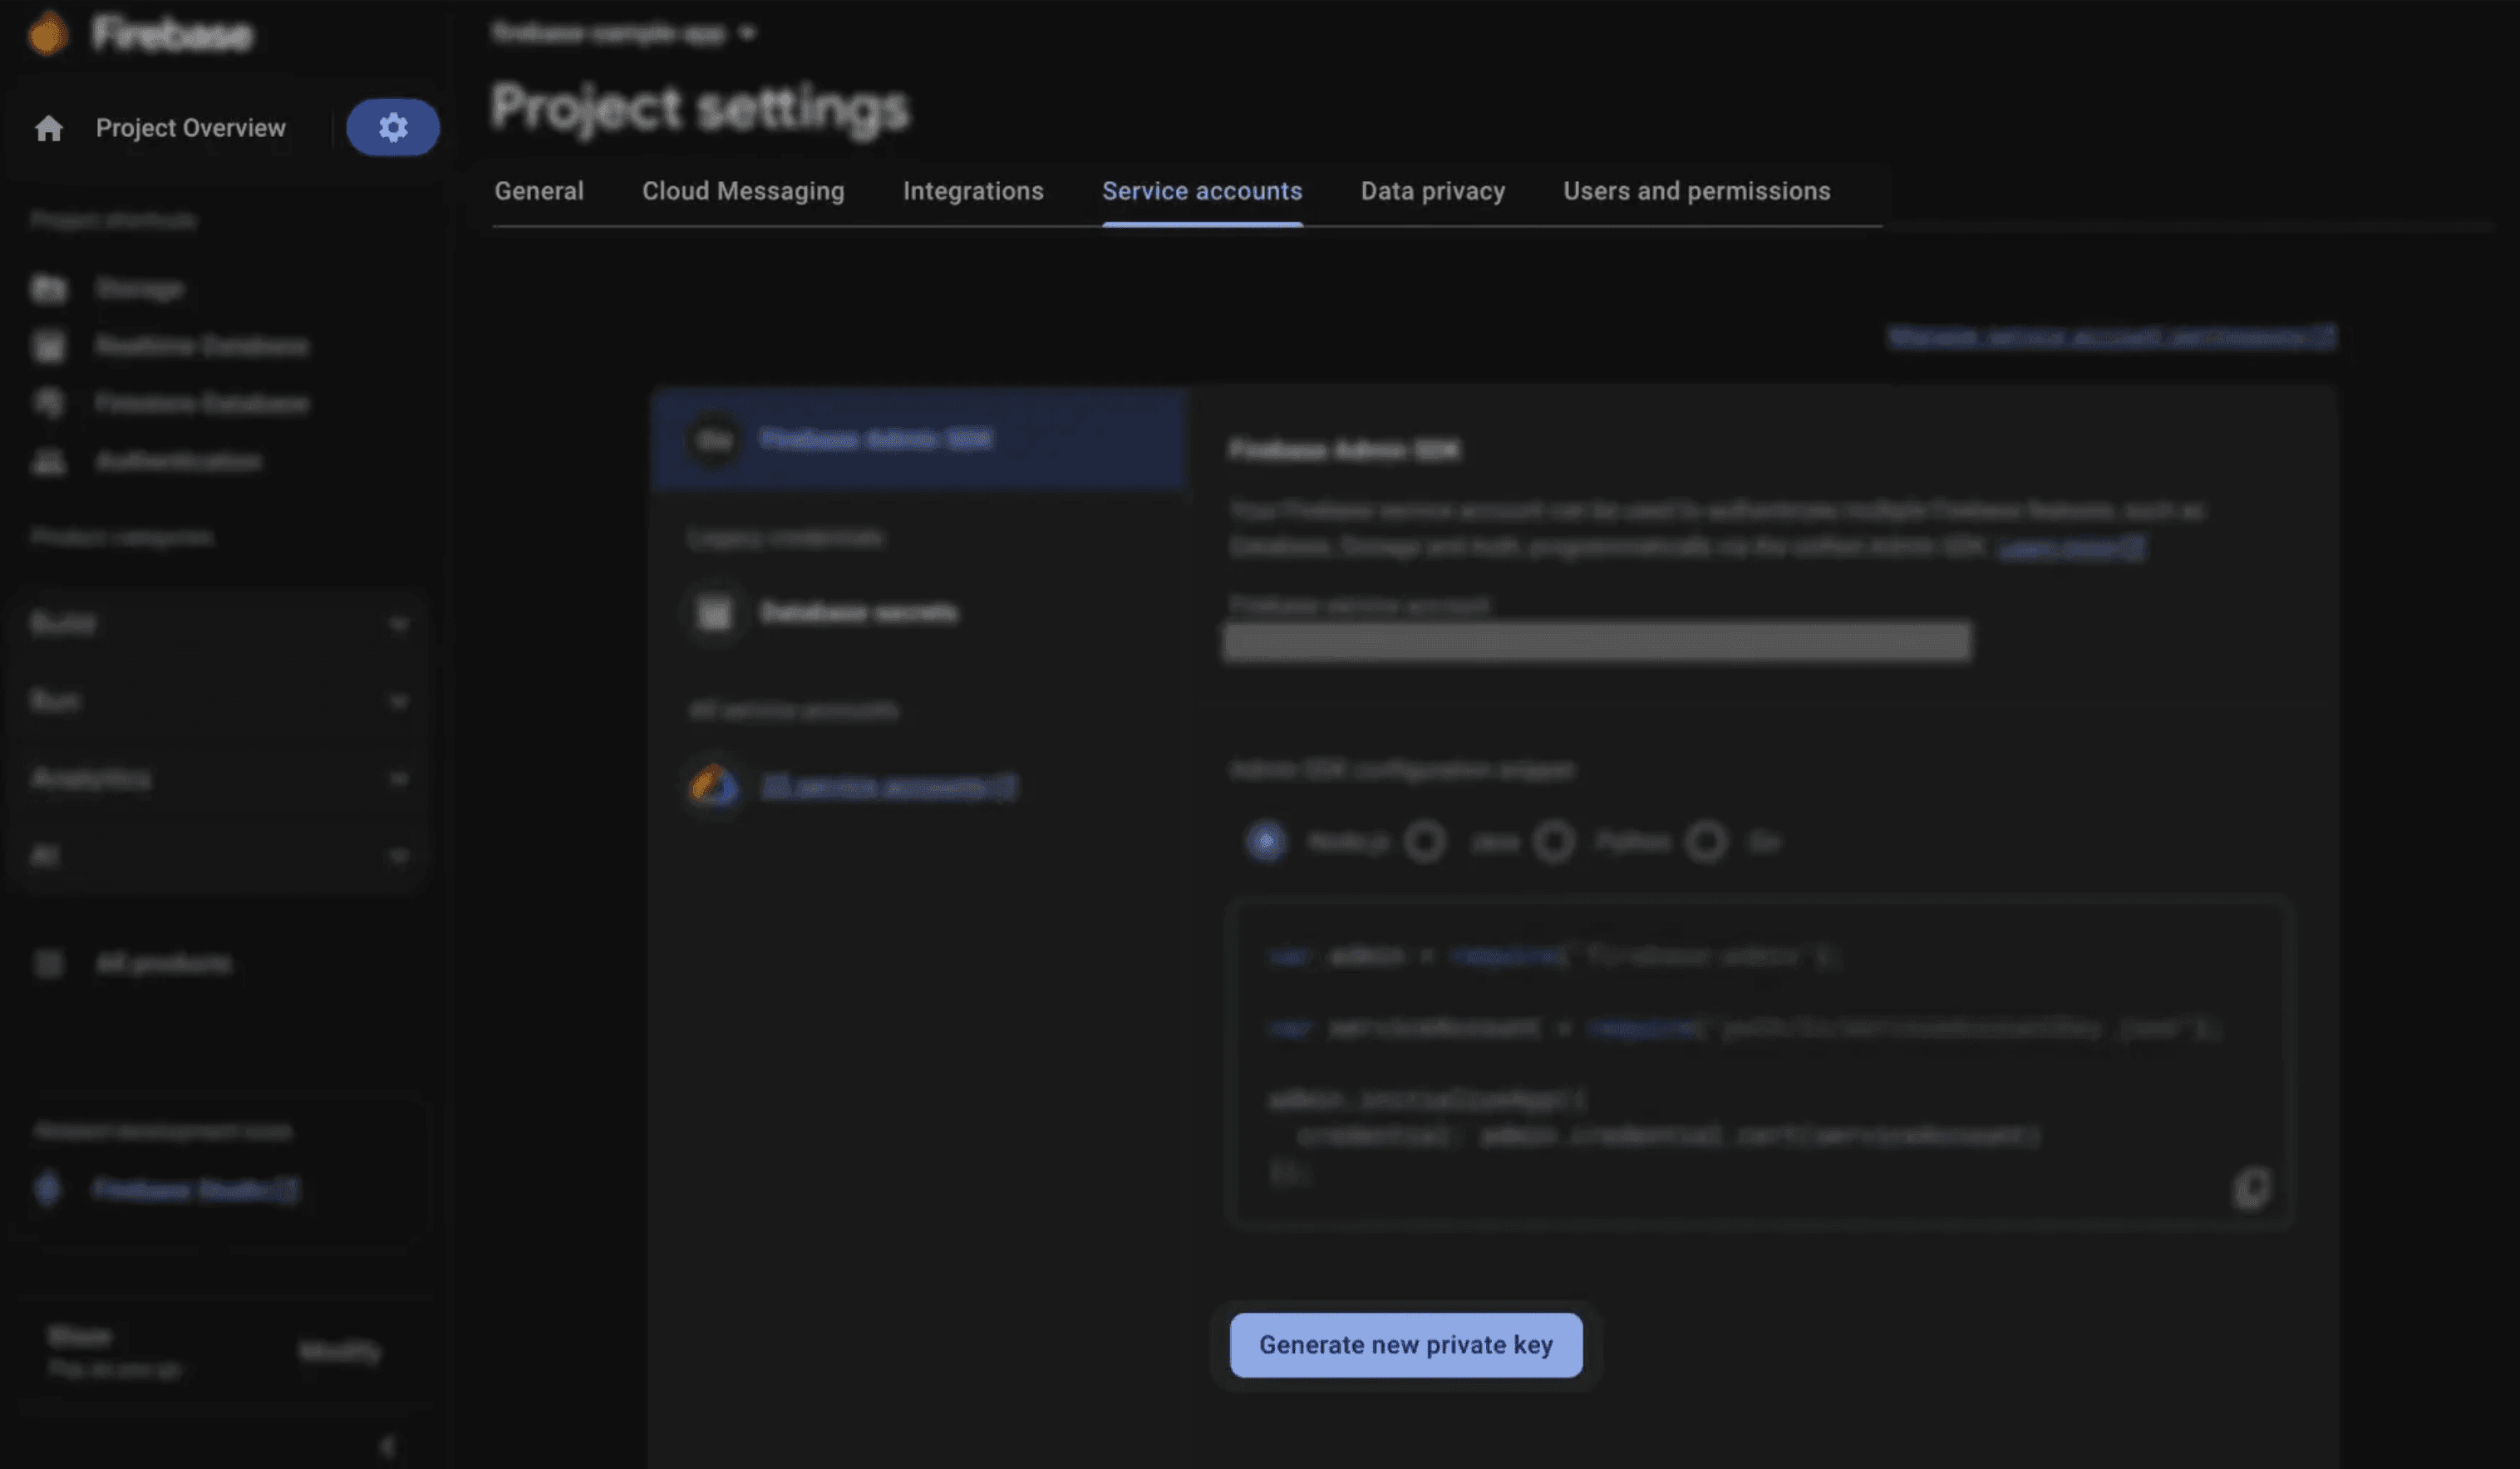
Open the file and copy the entire contents, including the surrounding braces.
Back in the Descope Console, paste this JSON into the Service Account field of the Firebase connector configuration. After saving, use the Test button to confirm the credentials were added correctly.
At this point, the connector itself is fully configured.
Enabling the connector for External Tokens
Once the connector exists, it needs to be enabled for use in authentication flows.
Go to Project Settings in the Descope Console
Open the External Token section and enable External Tokens
Select the Firebase connector you just created
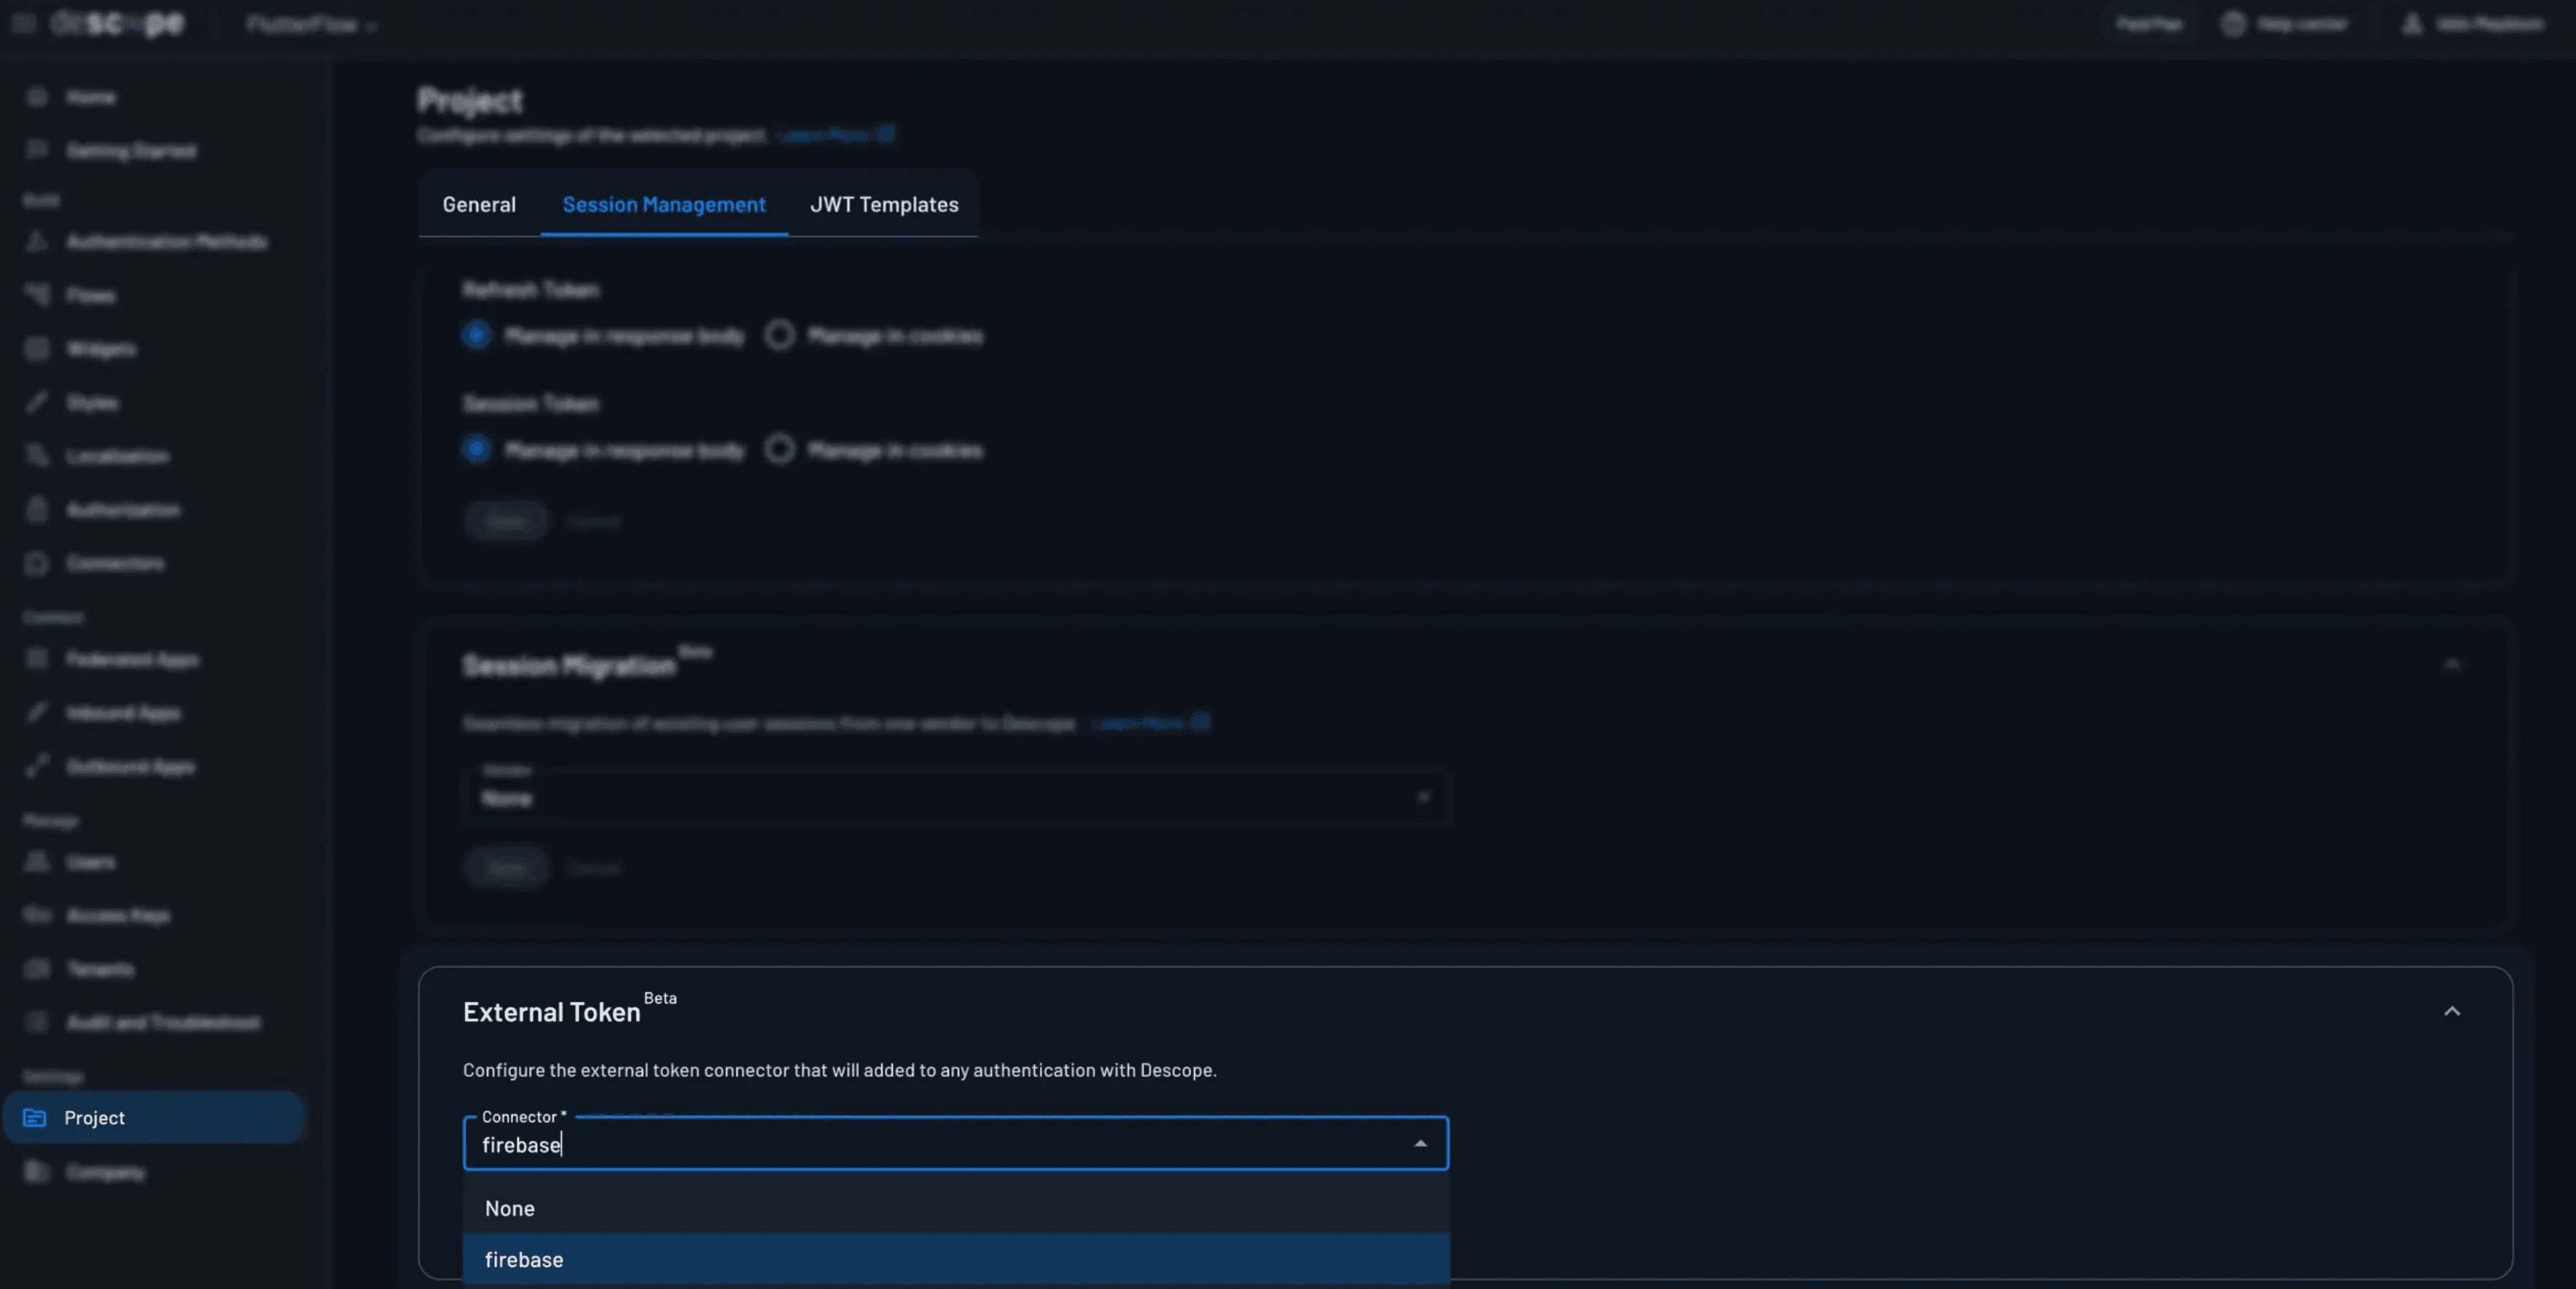
From this point on, Descope will automatically generate a Firebase custom token at the end of a successful flow.
What the authentication response looks like
After a user successfully completes a Descope Flow, the authentication response includes an externalToken field. This value is the Firebase custom token your app should exchange immediately.
Here's what an example response looks like:
{
  "cookieDomain": "",
  "cookieExpiration": 0,
  "cookieMaxAge": 0,
  "cookiePath": "/",
  "externalToken": "FIREBASE_TOKEN",
  "firstSeen": false,
  "idpResponse": null,
  "refreshJwt": "DESCOPE_REFRESH_TOKEN",
  "sessionExpiration": 1750879215,
  "sessionJwt": "DESCOPE_SESSION_TOKEN",
  "user": {}
}
A React web example
On the web, the integration is straightforward: run a Descope Flow, grab the external token, and pass it to Firebase.
Firebase setup
import { initializeApp } from "firebase/app";
import { getAuth } from "firebase/auth";

const firebaseConfig = {
  apiKey: "YOUR_API_KEY",
  authDomain: "YOUR_PROJECT.firebaseapp.com",
  projectId: "YOUR_PROJECT_ID",
  appId: "YOUR_APP_ID",
};

export const app = initializeApp(firebaseConfig);
export const auth = getAuth(app);
Running a Flow and creating a Firebase session
import { AuthProvider, Descope } from "@descope/react-sdk";
import { signInWithCustomToken } from "firebase/auth";
import { auth } from "./firebase";

export default function App() {
  const onSuccess = async (e: any) => {
    const externalToken = e?.detail?.externalToken;
    if (!externalToken) {
      throw new Error("Missing Firebase external token");
    }

    await signInWithCustomToken(auth, externalToken);
    console.log("Firebase user:", auth.currentUser?.uid);
  };

  return (
    <AuthProvider projectId="YOUR_DESCOPE_PROJECT_ID">
      <Descope
        flowId="YOUR_FLOW_ID"
        onSuccess={onSuccess}
        onError={(e) => console.error(e)}
      />
    </AuthProvider>
  );
}
At this point, Firestore rules, Storage access, and Functions all work exactly as they did before.
A React Native example
Note: The Descope React Native SDK does not currently support Expo. If you’re using Expo, follow the Expo OIDC integration instead.
Install the SDK
npm install @descope/react-native-sdk
For iOS:
cd ios && pod install
Wrap your app
import { AuthProvider } from "@descope/react-native-sdk";

export default function AppRoot() {
  return (
    <AuthProvider projectId="YOUR_DESCOPE_PROJECT_ID">
      <App />
    </AuthProvider>
  );
}
Running a Flow and creating a Firebase session
import { FlowView, useSession } from "@descope/react-native-sdk";
import auth from "@react-native-firebase/auth";

function LoginScreen() {
  const { manageSession } = useSession();

  return (
    <FlowView
      flowOptions={{
        url: "https://auth.descope.io/login/YOUR_PROJECT_ID",
        androidOAuthNativeProvider: "google",
        iosOAuthNativeProvider: "apple",
      }}
      onSuccess={async (jwtResponse) => {
        // Save the Descope session
        await manageSession(jwtResponse);

        // Exchange the external token for a Firebase session
        const externalToken = jwtResponse.externalToken;
        await auth().signInWithCustomToken(externalToken);
      }}
      onError={(err) => console.error(err)}
    />
  );
}
After this runs:
Descope manages the auth session lifecycle
Firebase manages the infrastructure session
Your app can safely use both
Descope Auth, Firebase sessions
Descope External Tokens give you a practical way to modernize authentication without undoing the work you’ve already invested in Firebase. You can build richer, more flexible sign-in experiences using Descope Flows, while continuing to rely on Firebase for sessions, access control, and the rest of your backend.
The integration point is intentionally simple: authenticate with Descope, exchange the returned token with Firebase, and move on. There’s no custom token service to maintain, no changes to your Firebase rules, and no need to rethink how your app is structured.
It’s also worth noting that External Tokens aren’t the only way to connect Descope and Firebase. If you prefer not to use signInWithCustomToken at all, Descope can also be configured as a federated OIDC identity provider for Firebase. In that setup, Firebase handles the session directly after an OIDC login — but the tradeoff is that the authentication flow includes an OIDC redirect.
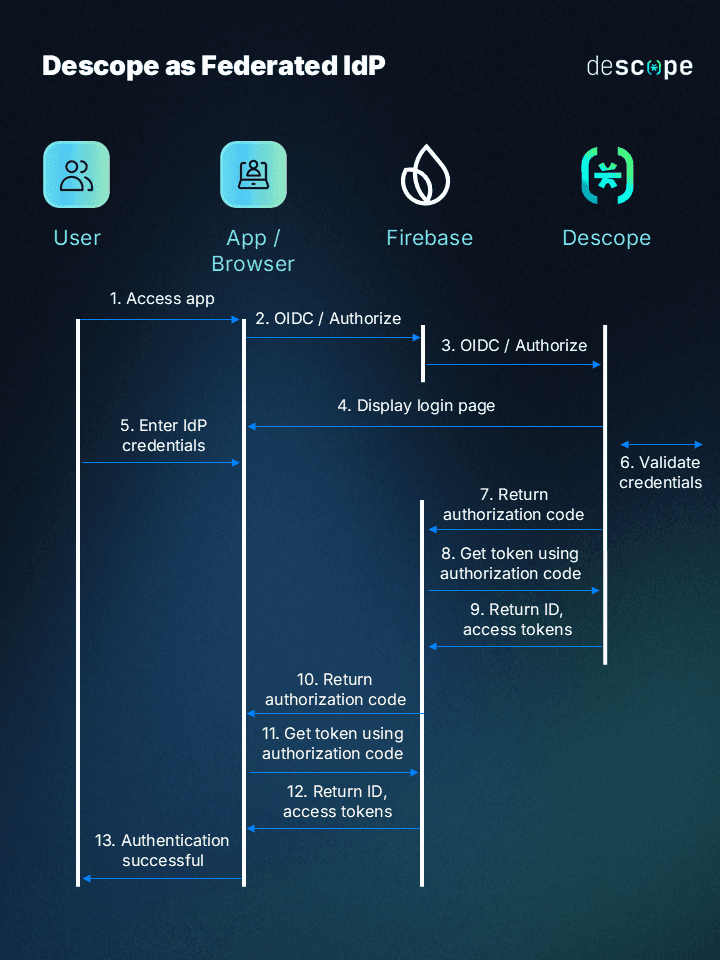
Both approaches are valid. External Tokens are usually the better fit when you want a fully native, no-redirect experience, especially on mobile. OIDC federation can be a good option if redirects are acceptable and you want Firebase to remain the system that completes the sign-in.
Either way, Descope lets you evolve authentication independently of the rest of your Firebase stack: and that flexibility is often the biggest win.
Sign up for Descope to begin your drag & drop auth journey. Have questions about our platform? Book a demo with our auth experts.