

Table of Contents
Don't have the time to read the entire post? Our human writers will be sad, but we understand. Summarize the post with your preferred LLM here instead.
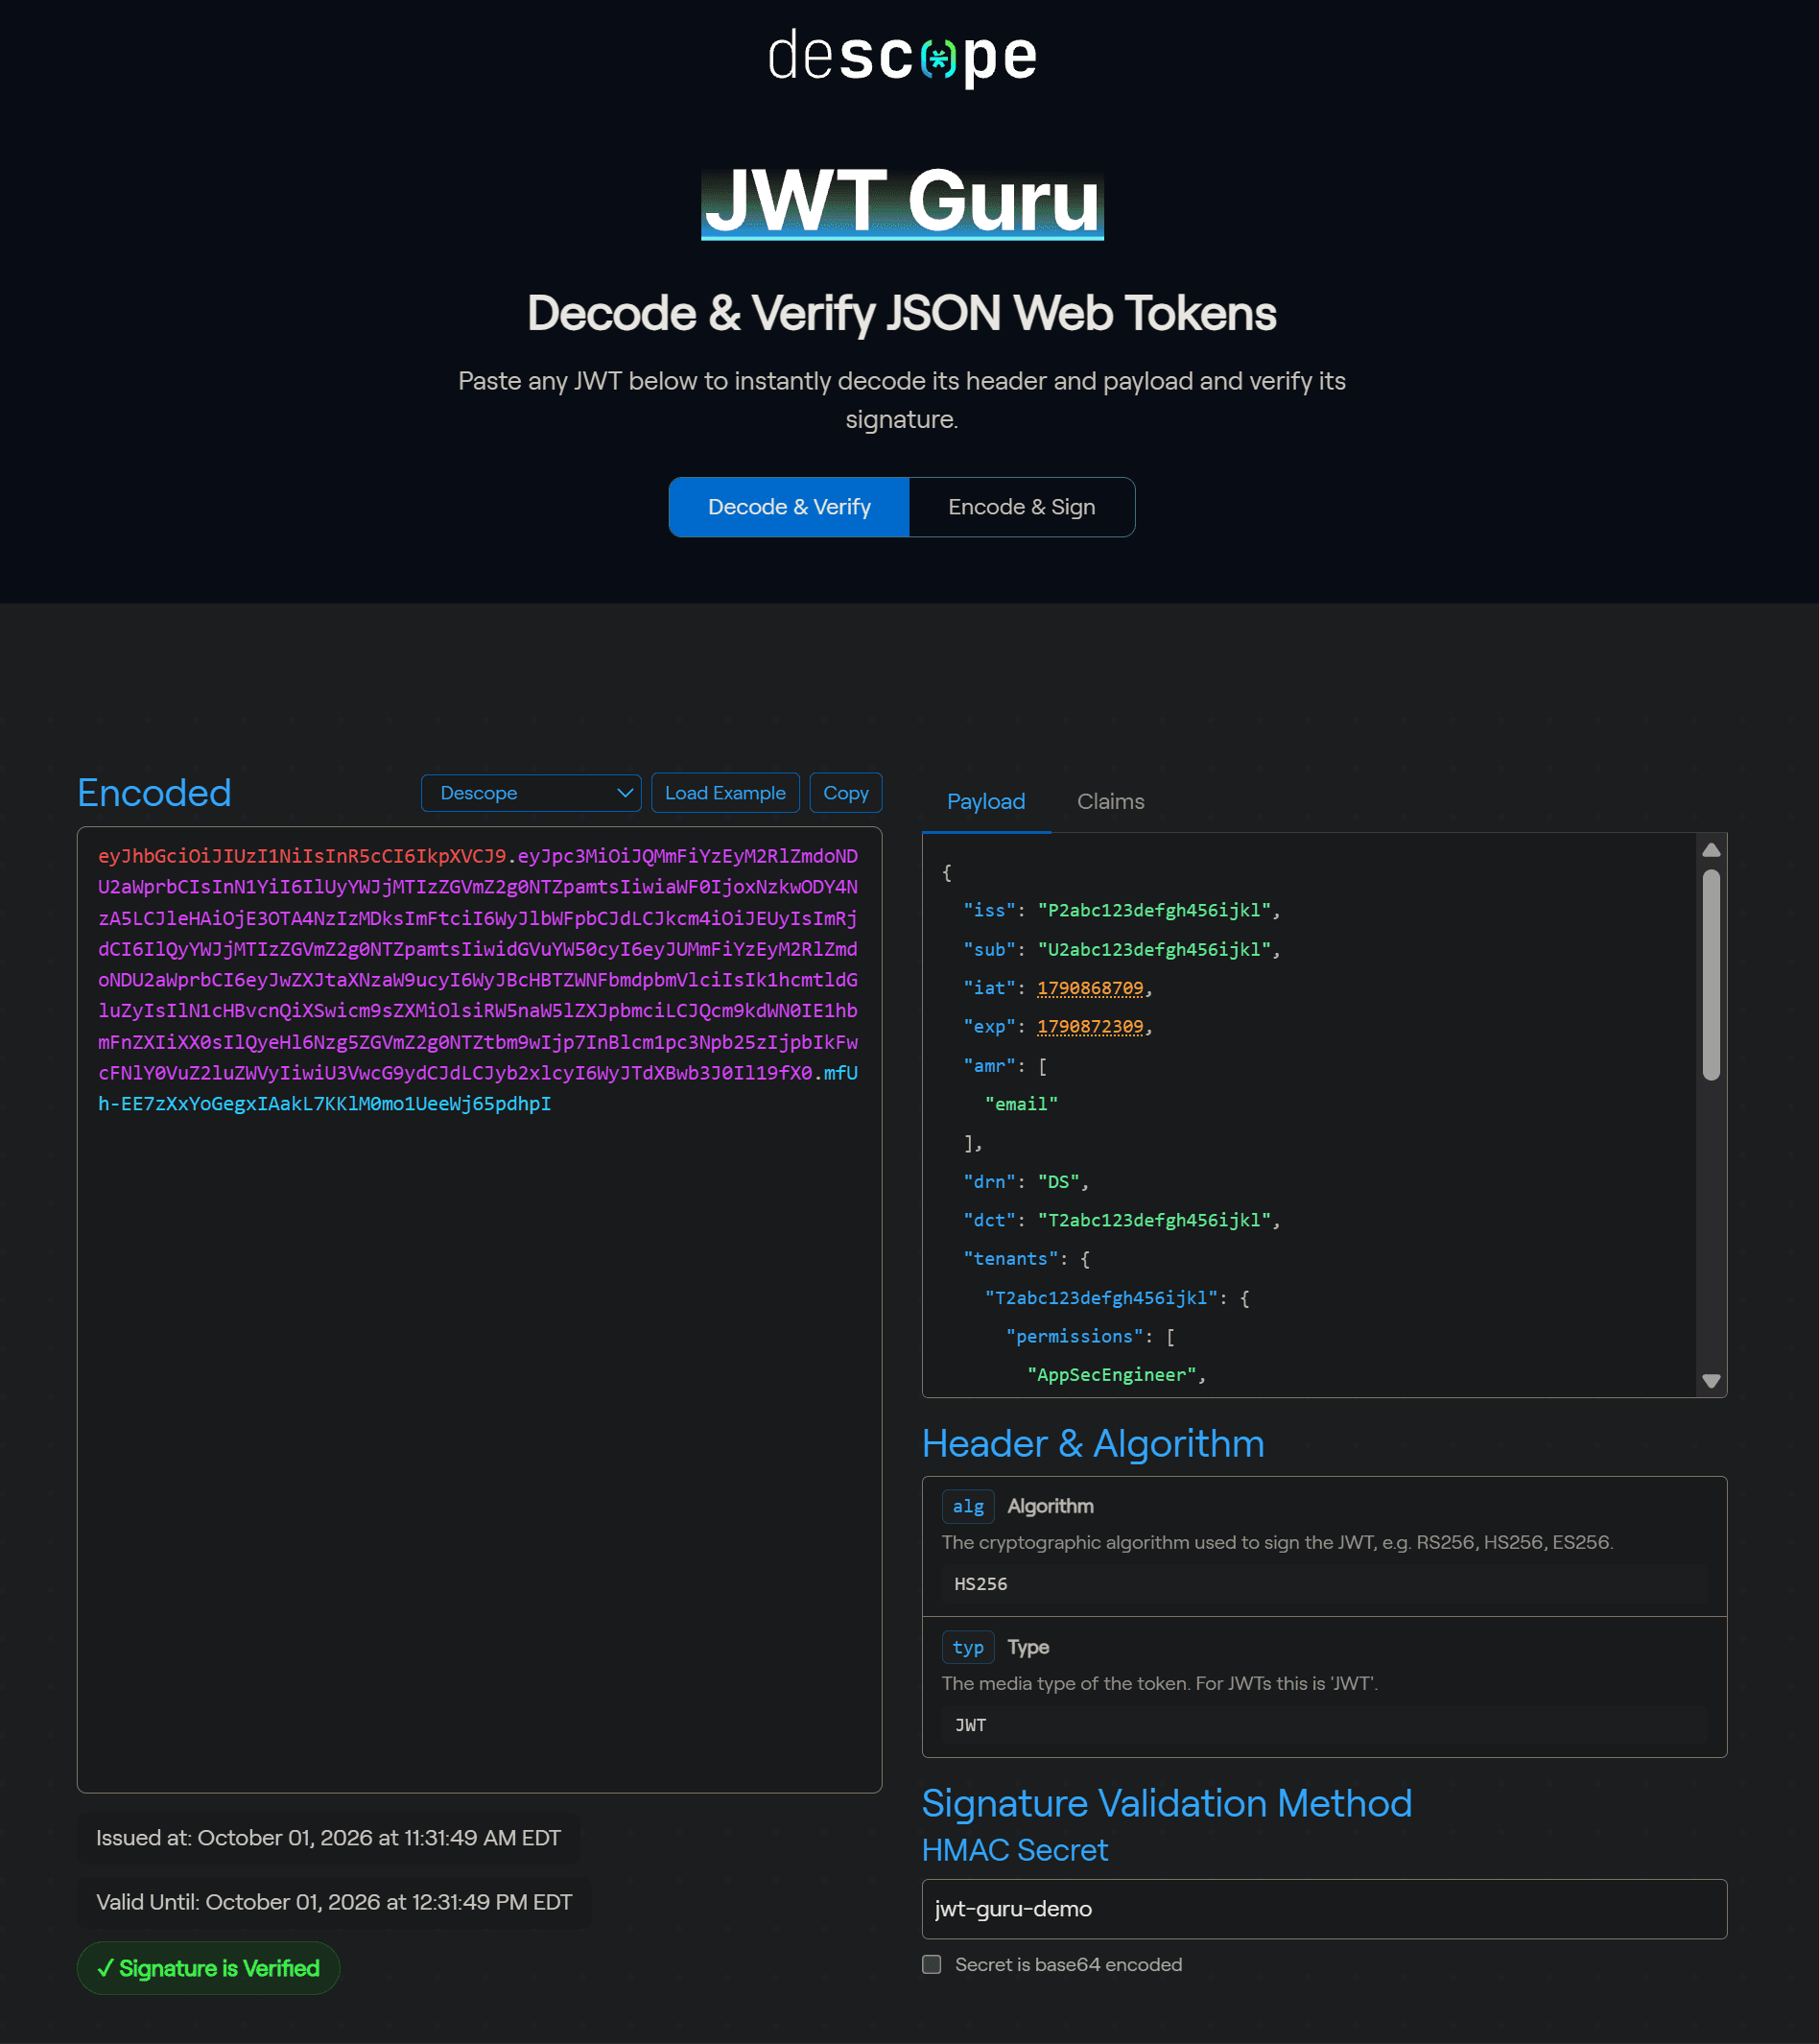
A JWT decoder splits a JSON Web Token into its header, payload, and signature so you can read the claims inside. Paste a token into Descope's free JWT decoder, JWT Guru, and you can read it in your browser without sending it to a server. Reading the claims only gets you halfway, though. Before your application acts on them, it has to verify the signature.
This guide covers how to decode a JWT, how to verify one, and how JWT authentication works.
At a glance
A signed JWT has three parts separated by dots: header, payload, and signature.
Decoding a JWT runs its header and payload through a Base64url decoder so you can read the claims. Decoding alone can't tell you whether you can trust those claims.
Verifying checks the token's signature against the issuer's key. A valid signature means the issuer signed the token and nobody changed it afterward.
A JWT is often a live credential, so use a decoder that runs in your browser and keeps the token on your machine.
Acting on decoded claims without verifying the signature is a common cause of JWT security bugs.
A signed JWT, the kind you'll almost always encounter, has three parts: a header, a payload, and a signature. The table below shows what each part holds and what a verifier checks before trusting it. Encrypted JWTs use a five-part format instead and can't be read without the decryption key.
Part | What it is | Common contents | What a verifier checks |
|---|---|---|---|
Header | JSON metadata describing how the token is secured | alg (the signing algorithm), usually typ (the token type), and often kid (the key ID) | alg is on your allowlist, and kid matches a key in the issuer's key set |
Payload | JSON holding the token's claims | Registered claims such as iss, sub, aud, exp, nbf, and iat, plus custom claims like roles | exp hasn't passed, nbf (if present) has, iss matches the expected issuer, and aud includes your application |
Signature | A digital signature or MAC (message authentication code) computed over the encoded header and payload | Base64url-encoded output of an HMAC, RSA, or ECDSA algorithm | It validates against the issuer's public key or shared secret |
What is a JWT decoder?
A JWT decoder splits a JSON Web Token into its Base64url-encoded header, payload, and signature, then converts the header and payload back into readable JSON. It needs no key or secret, so anyone holding a token can read it.
That makes where you decode a token matter. A JWT is often a live credential, and a decoder that sends it to a server hands that credential to whoever runs the server. Descope's JWT Guru decodes tokens in your browser, so the token never leaves your machine.
What is inside a JWT?
Most of the useful information is in the payload. Most tokens carry a standard set of registered claims defined in RFC 7519, most commonly:
issidentifies the issuer.subidentifies the subject, usually a user ID.audnames the intended audience.expsets when the token expires.nbfsets when it becomes valid.iatrecords when it was issued.
Applications add their own custom claims on top, such as roles, permissions, or a tenant ID. The header is smaller. It names the signing algorithm (alg), usually the token type (typ), and often the ID of the signing key (kid).
Anyone holding a JWT can decode the header and payload and read these claims. Encoding provides no confidentiality, so don't put anything in a JWT you wouldn't want exposed.
How do you decode a JWT?
A signed JWT has three segments separated by dots: header.payload.signature. To decode one, split the token on the two dots and run the header and payload through a Base64url decoder. Both come out as JSON.
The signature decodes too, but only into raw bytes. Checking those bytes against the header and payload is verification, a separate step that needs the issuer's key.
You don't need to write code for any of this. Paste a token into JWT Guru and it decodes the header and payload immediately.
What is the difference between decoding and verifying a JWT?
Decoding and verifying answer two different questions. Decoding tells you what a token claims. Verifying tells you whether those claims came from the expected issuer and arrived unchanged, by checking the signature with the right cryptographic key.
Until you verify it, a decoded JWT is untrusted input. Base64url is an encoding anyone can reverse, so it doesn't hide or protect anything. Anyone can write "role": "admin" into a payload, encode it, and send it to your API, and it will decode just as cleanly as a token your own server issued.
We see this regularly in homegrown JWT implementations: an application reads role or userId from a decoded token and acts on it without checking the signature. The OWASP JSON Web Token Cheat Sheet covers this kind of validation mistake, along with related ones such as accepting unsigned tokens that set alg to none.
How do you verify a JWT?
Verifying a JWT means checking its signature with the issuer's public key or shared secret, restricting which algorithms you accept, and validating claims such as exp, aud, and iss. The steps run in this order:
Get the issuer's key. For public-key algorithms such as RS256 and ES256, fetch the issuer's trusted public key, usually from a JWKS endpoint. HMAC algorithms such as HS256 use a shared secret instead.
Decide which algorithms your application accepts, and reject everything else. Your allowlist makes this decision, never the token's
algheader. Rejectnoneunless your application deliberately uses unsecured JWTs.Check the signature against the header and payload using that key or secret. If the signature is valid and the key belongs to the expected issuer, you can trust the signed contents.
Validate the claims. Reject the token if
exphas passed ornbfis still in the future, and confirm thataudandissmatch what your application expects.
Don't write the cryptography yourself: use a maintained JWT library in your application instead. When you need to check a token by hand, JWT Guru can verify its signature in your browser with a public key (JWK) you paste in or with keys it fetches from the issuer's well-known endpoint.
How does JWT authentication work?
JWT authentication logs users into web applications and APIs with signed tokens instead of server-side sessions. It runs in three stages: issuance, transport, and verification.
During issuance, the user authenticates however your application requires. The server confirms their identity, builds a token with claims such as user ID, role, and expiration time, signs it, and returns it to the client.
In transport, the client sends the token with each request, usually in the Authorization header as Bearer <token>. Between requests, the client has to keep the token somewhere, and that choice decides who else can get to it. Anything in localStorage or sessionStorage is readable by every script on the page, including one injected through cross-site scripting (XSS). That script can copy the token and replay it from anywhere until it expires.
Holding the access token in memory keeps it out of browser storage. That makes it harder to steal, but it doesn't stop an injected script from using the session while it runs. Memory also clears on every reload, so the common pattern pairs it with a refresh token in an HttpOnly, Secure, SameSite cookie. JavaScript can't read that cookie, and on reload the client uses it to get a fresh access token. Our developer's guide to JWT storage covers the trade-offs in more depth.
At verification, the server checks the signature with a trusted key and validates claims such as exp and aud on every request. Because the token carries everything the server needs, there's no session store to consult, which is what makes JWT authentication stateless. Access tokens usually expire within minutes to an hour, which limits how long a stolen one stays useful.
To see how this compares with sending credentials on every request, read our comparison of JWT-based vs. basic authentication.
JWT vs. session tokens: what is the difference?
A JWT is self-contained. It carries its own claims and proves itself with its signature, so the server doesn't need to look anything up. A session token is an opaque ID that points to session data on the server, which the server queries on every request. Both tell the server who's making a request, but they keep that state in opposite places.
That difference drives the trade-offs. Any server with the verification key can check a JWT, so JWTs scale cleanly across distributed systems. But there's no server-side record to delete, so a stolen or outdated token keeps working until it expires. Sessions are the reverse. Delete the record and access ends immediately, at the cost of every server reaching the same shared session store.
Dimension | JWT | Session token |
|---|---|---|
State | Stateless and self-contained | Stored on the server |
Verification | Signature check with no lookup | Lookup on every request |
Revocation | Not before expiry without extra tooling | Delete the session |
Scale | No shared state needed | Needs a shared session store |
Best fit | APIs and distributed systems | Traditional server-rendered apps |
Neither approach wins outright, and most production systems combine them: a short-lived JWT for requests, plus a refresh token the server can revoke. Our JWT vs. bearer token guide compares JWTs with opaque and session tokens in more depth.
Access token vs. refresh token: what is the difference?
An access token is the credential a client presents with each API request to show the request is authorized. A refresh token is a separate credential whose only job is to get a new access token after the current one expires.
Access tokens go out with every API call, which makes them the most exposed credential in the system, so they usually expire within an hour. Refresh tokens only go to the authorization server, so they can last days or months, provided they're stored where scripts can't read them.
Dimension | Access token | Refresh token |
|---|---|---|
Lifetime | Minutes to an hour | Days to months |
Used for | Calling APIs on each request | Getting a new access token |
Where it is sent | Every protected API | Only the authorization server |
If it leaks | Usable until it expires | Can mint new access tokens until revoked or expired |
Storage | Memory | HttpOnly cookie |
Refresh token rotation narrows that last risk. Each time the client uses a refresh token, the server issues a new one and invalidates the old one, so a stolen refresh token is only good until someone redeems it. Rotation alone doesn't stop an attacker who redeems the stolen token first, though. The attacker gets a fresh, valid token, and the legitimate client is the one locked out.
Reuse detection closes that gap. When the server sees an already-used refresh token presented again, it treats that as a sign of theft and revokes the whole session, cutting off the attacker along with the user. Our developer's guide to refresh token rotation walks through the mechanics. Our post on invalidating JWTs after logout covers the rest of the token lifecycle, and our access token vs. refresh token breakdown compares the two in more depth.
What are the most common JWT mistakes, and how do you avoid them?
These five show up again and again in the homegrown JWT implementations we review with customers and prospects.
Trusting decoded claims. Reading
roleoruserIdfrom a decoded token and acting on it without checking the signature is the mistake we see most. Verify first, then trust.Accepting none or letting the alg header decide. Set an explicit allowlist of algorithms and make sure each verification key matches its algorithm. Don't accept
noneunless your application deliberately uses unsecured JWTs.Using weak or leaked signing secrets. An attacker can brute-force a short HMAC secret offline from a single intercepted token. Use a long, random secret, or switch to asymmetric keys such as RS256 or ES256. With those, the private key signs, the public key verifies, and there's no shared secret to leak.
Issuing long-lived tokens without a revocation strategy. A token that's valid for weeks turns one leak into a lasting breach. Keep access tokens short-lived and let refresh tokens, which the server can revoke, carry the long session.
Storing tokens in localStorage. Browser storage is readable by any script on the page, so a single XSS flaw can hand an attacker tokens to replay from their own machine. Keep access tokens in memory and refresh tokens in
HttpOnlycookies.
How does Descope handle JWTs?
Descope issues your JWTs and gives your backend the tools to verify them: its backend SDKs run the signature and claim checks in this guide for you, so your team doesn't maintain that code. Two signed tokens work together. The session token (Descope's term for what this guide calls an access token) is short-lived, and your backend validates it on every request. Descope's backend SDKs fetch and cache your project's public signing keys, so most validations happen locally without a network call. The refresh token lasts longer, and the Descope Client SDK trades it in for a new session token when the current one expires. When a user logs out, Descope revokes the refresh token on the server.
Where those tokens live in the browser is a project setting. New projects return both tokens in the response body, and the Client SDK stores them in localStorage, which keeps local development simple. For production, set the refresh token to Manage in cookies under Project Settings > Session Management. Descope then sets it as an HttpOnly, SameSite=Strict cookie that JavaScript can't read. Cookie delivery requires a custom domain for your project, and our refresh token storage guide covers the setup.
JWT templates let you shape what goes into each token. Session timeouts, cookie delivery, and refresh token rotation (on Pro plans and above) are configurable per project or per tenant.
Keep the JWT decoder handy
Bookmark JWT Guru, Descope's free JWT decoder. The next time a token shows up in a bug report or support ticket, you can decode and verify it in your browser without sending it anywhere. If it's a SAML response instead, our SAML decoder guide walks through reading and debugging those.
When managing token issuance, verification, and refresh yourself stops being worth your team's time, see how Descope handles sessions and tokens, or sign up for a Free Forever account and try the full flow in a few minutes.