
Table of Contents
Adding single sign-on (SSO) to Salesforce Organizations helps streamline the login process for end users while also enhancing security. In this tutorial, we’ll walk you through how to add SSO to Salesforce with Descope and OpenID Connect (OIDC), explore key use cases for this integration, and show you how to leverage Descope Flows to elevate security in Experience Cloud apps.
How to set up Salesforce SSO with Descope
The Salesforce SSO setup process involves a few straightforward steps. Here’s what you’ll need to do:
Create and configure a new Auth Provider
Modify registration handler to create and update users correctly
User attribute mapping
Add Auth Provider (Descope) to login screen
User permission sets and profiles
Before we kick off, sign up or log in to your Free Forever Descope account.
Create a new Auth Provider
The first step is to set up the Auth Provider in Salesforce.
Go to Setup in your Salesforce Org and search for Auth. Providers. Then, click New to create a new Auth Provider and configure it with the following details:
Name: Descope (or can be anything else you want).
Consumer Key: This is your Descope Project ID, found under Project Settings in the Descope Console.
Consumer Secret: This is the Descope Access Key, created under Access Keys in the Descope Console.
Authorize Endpoint URL:
https://api.descope.com/oauth2/v1/authorizeToken Endpoint URL:
https://api.descope.com/oauth2/v1/tokenUser Info Endpoint URL:
https://api.descope.com/oauth2/v1/userinfoCustom Logout URL:
https://api.descope.com/oauth2/v1/logout
Now click on Automatically create a registration handler template, under Registration Handler.
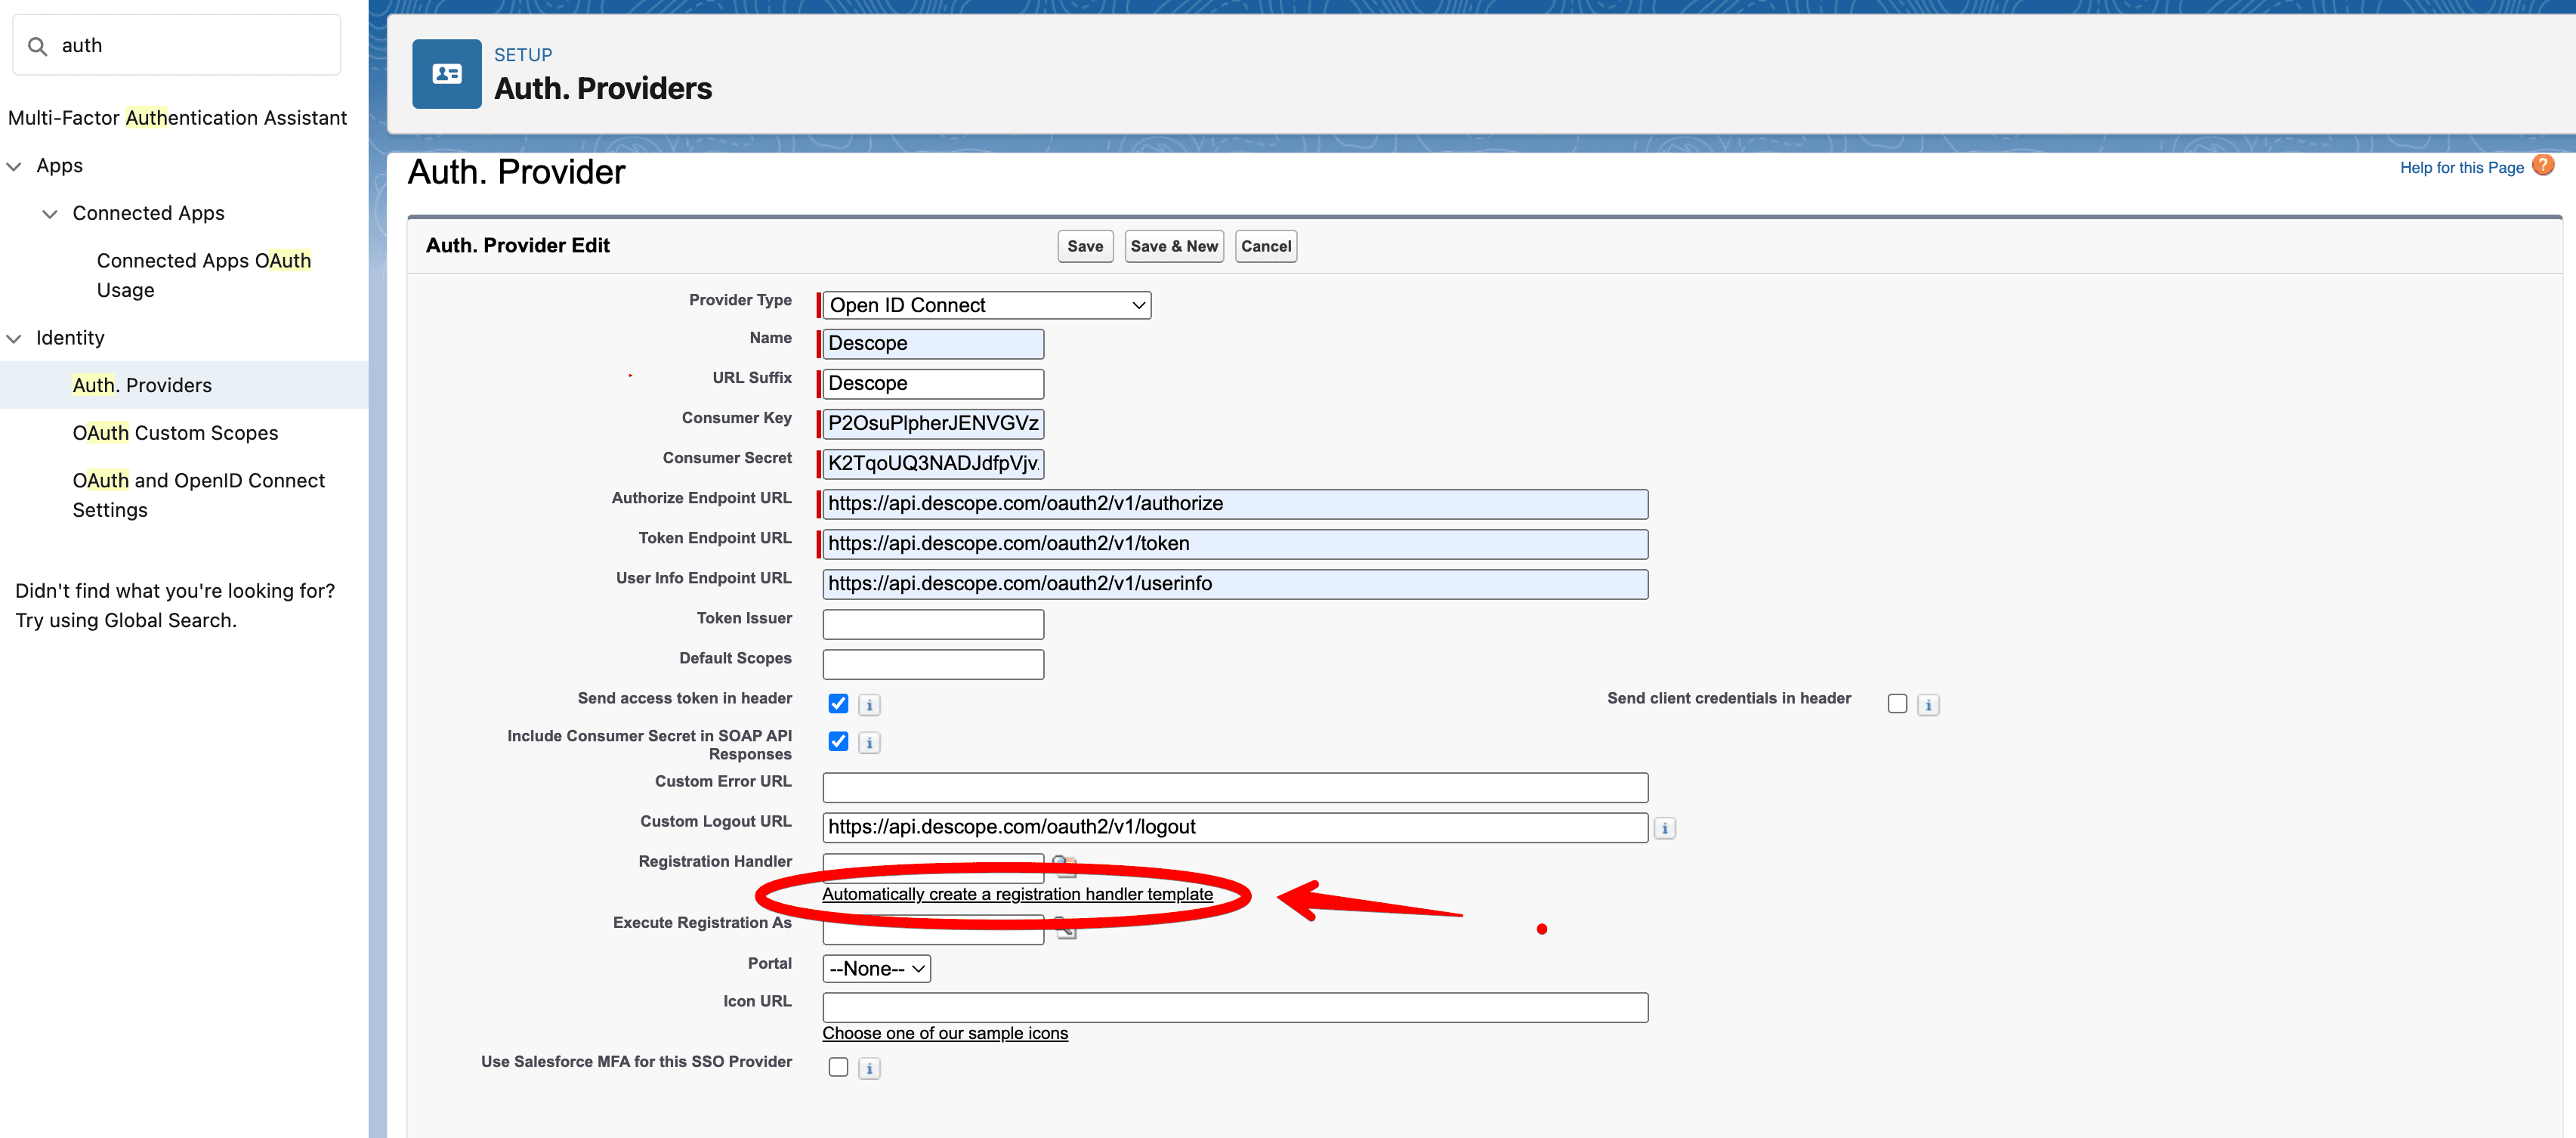
What is the registration handler? When you configure Salesforce SSO using OIDC, the registration handler (which is auto-generated) dictates what actions to take when a user logs in with an external identity (Descope in this case). We will edit the registration handles later—no more actions required as of now.
After filling out the necessary details, you’ll also need to select a user under the Execute Registration As field. This field determines which Salesforce user’s permissions are used when executing methods in the registration handler. Simply click the magnifying glass and select a user with System Administrator permissions or any user with access to run Apex classes and manage user records.
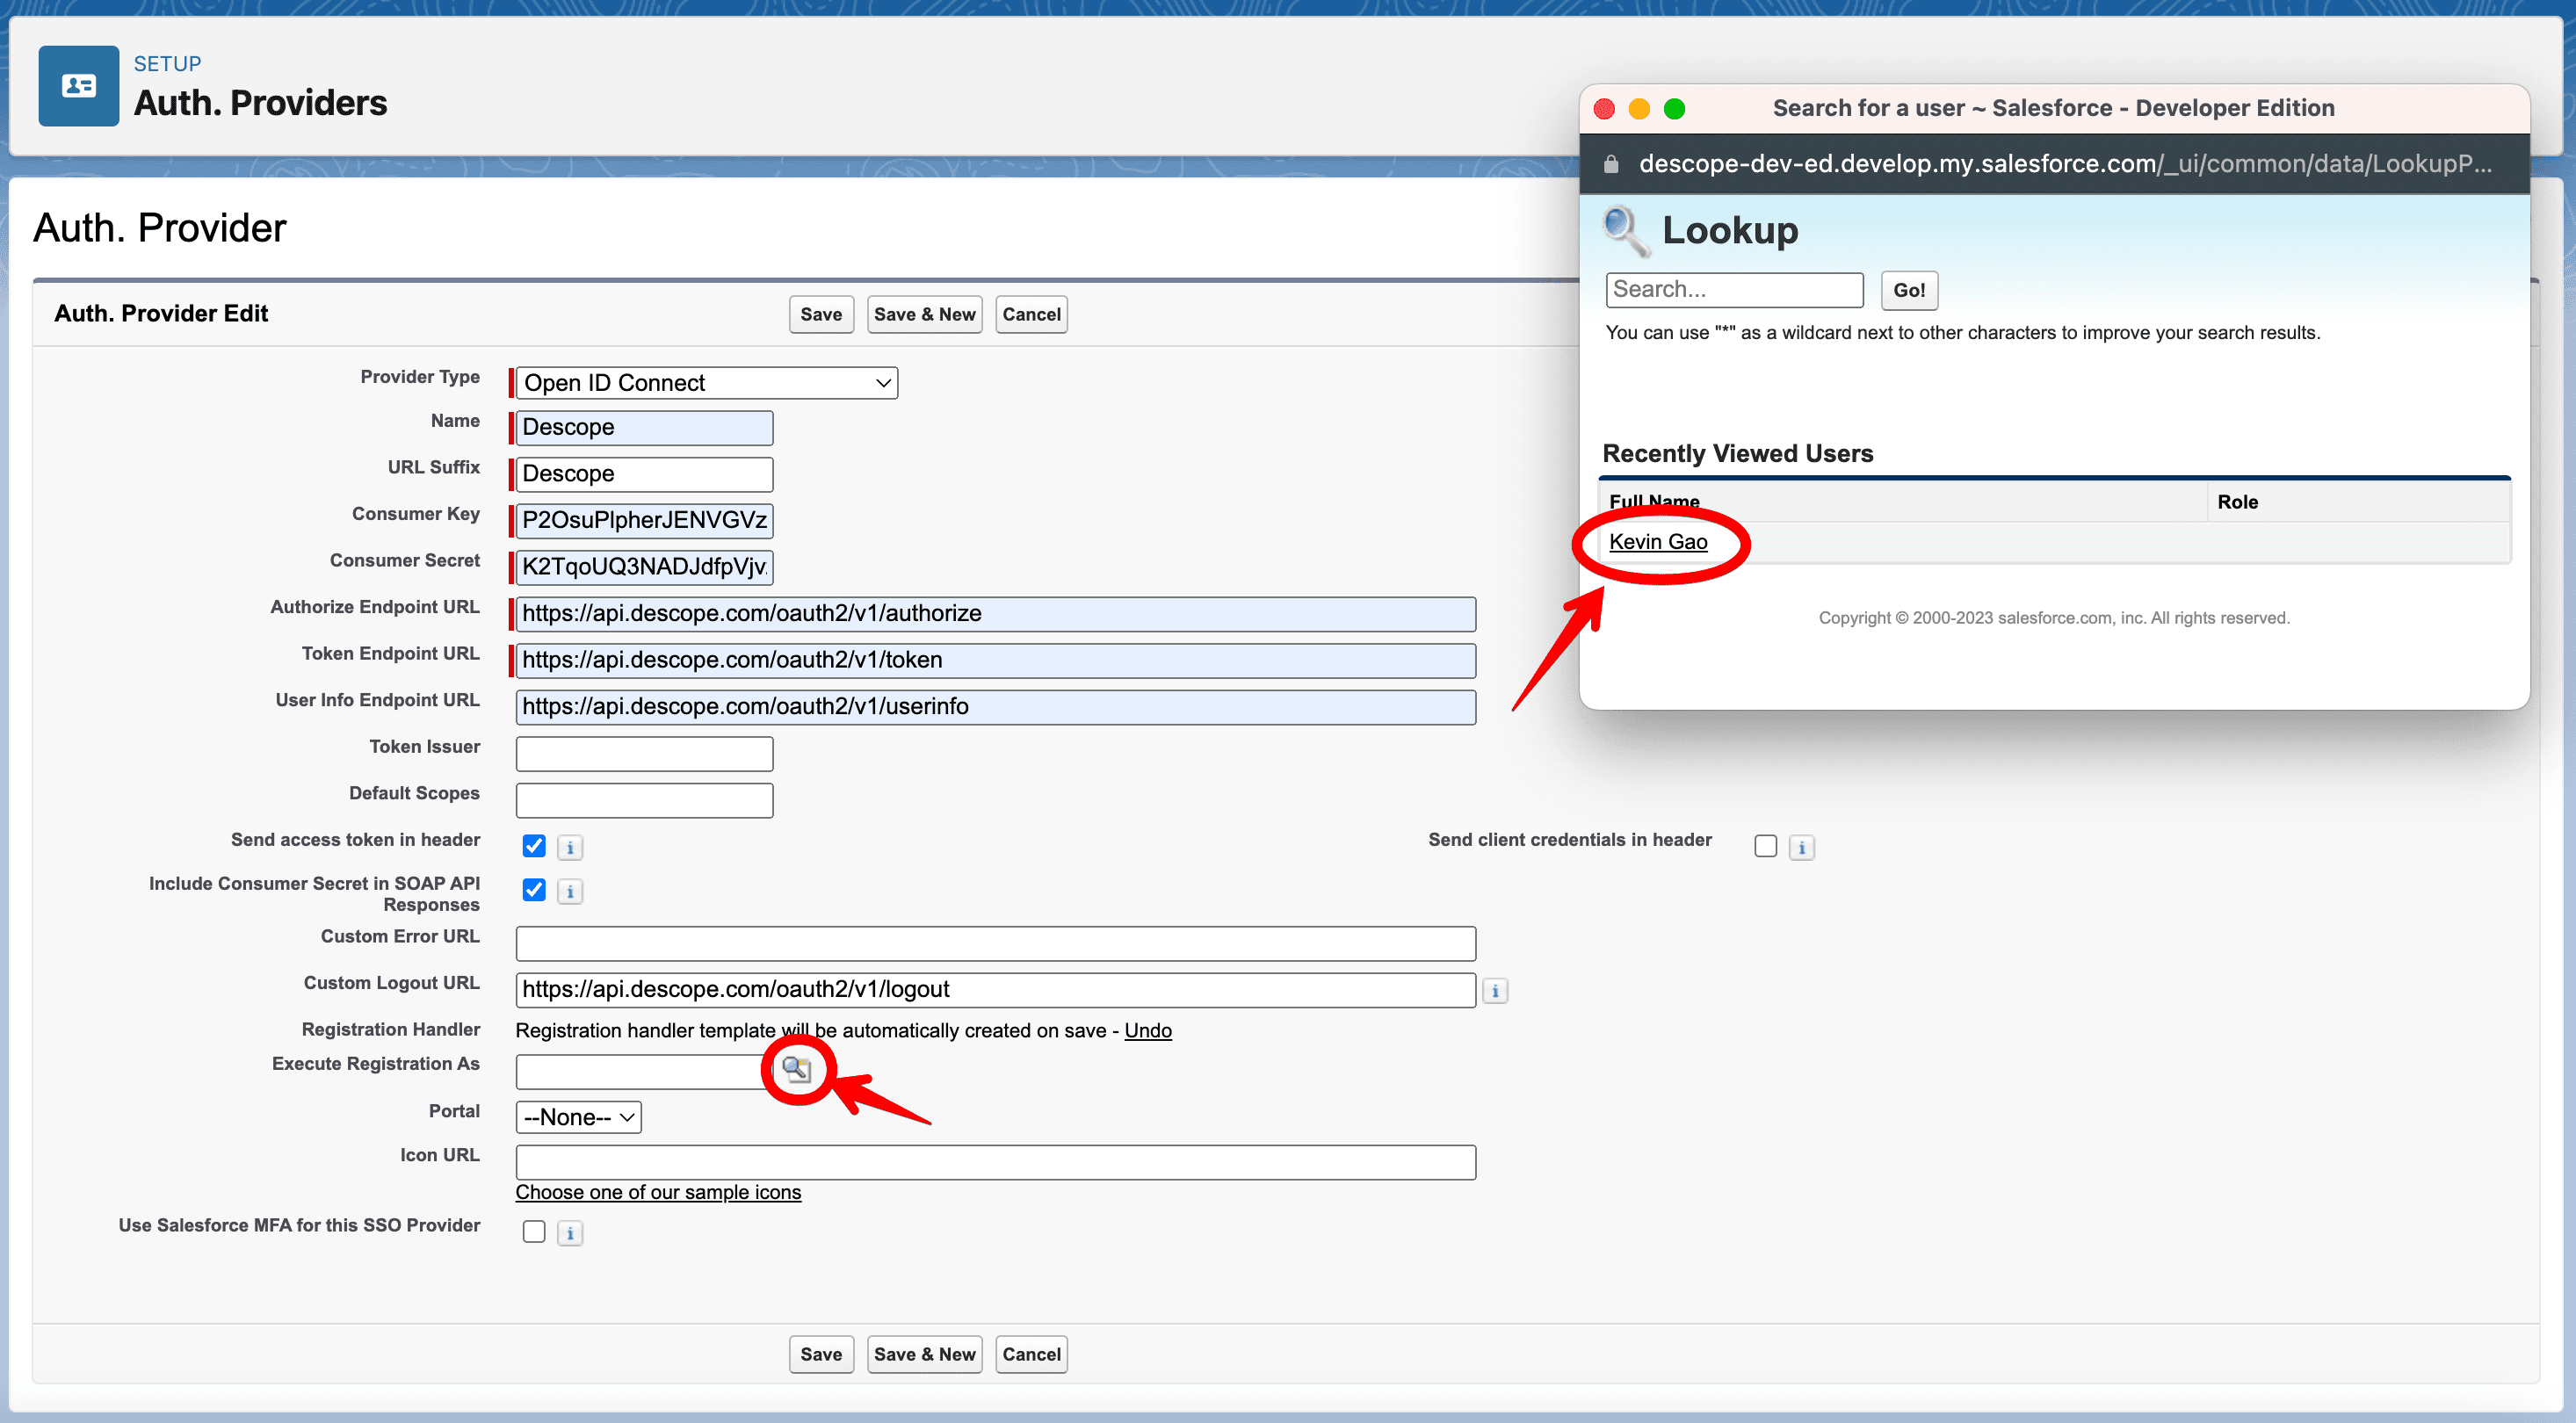
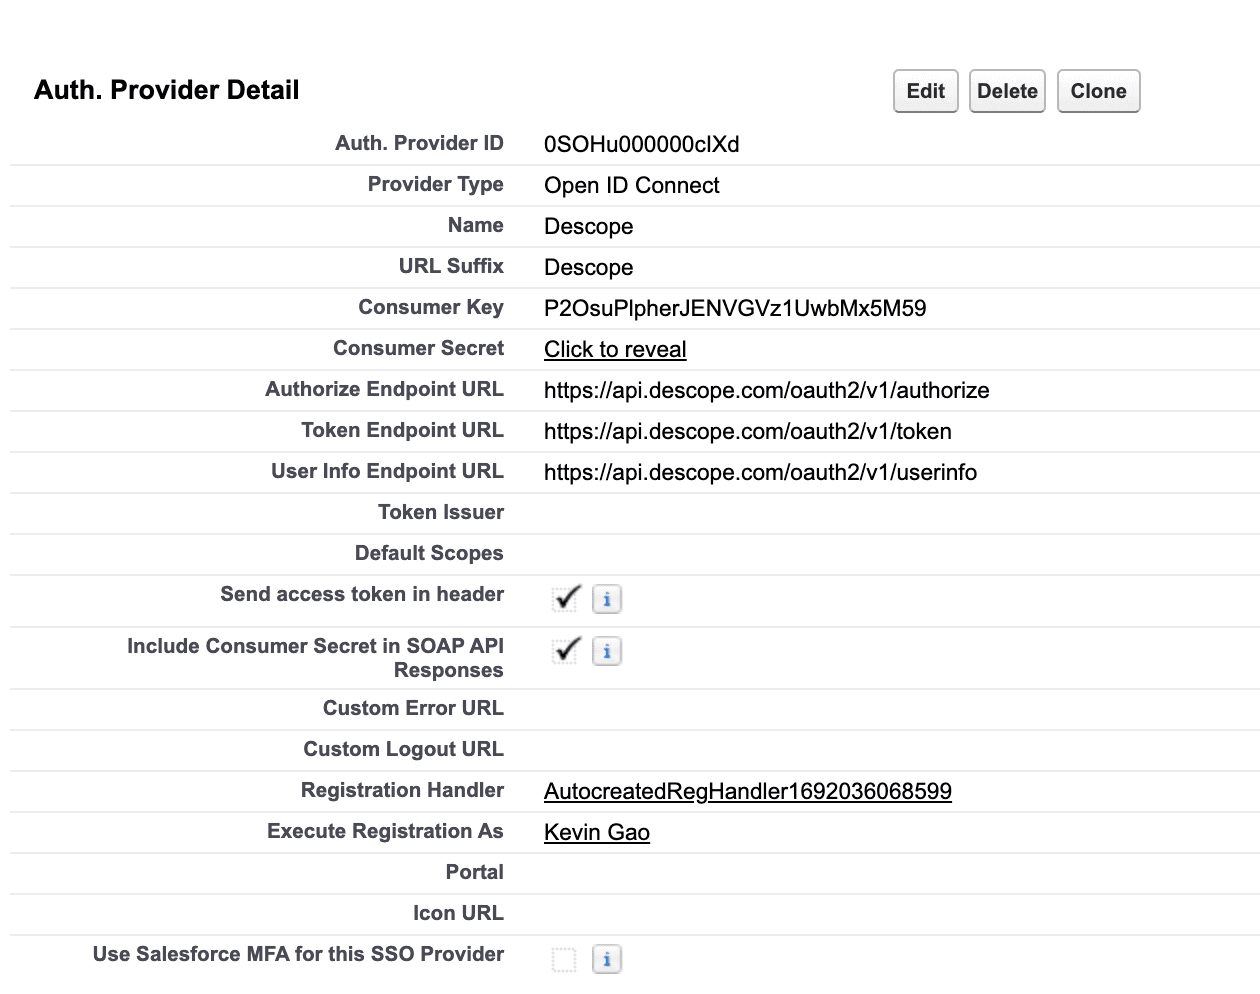
Once done, click Save, then re-click the newly created Auth Provider to access the configuration details screen as seen on the screenshot below.
Modify registration handler
Now it’s time to modify the Registration Handler (also known as Apex Class) we generated in the previous step. But before we do, it’s important to understand its responsibilities in Salesforce:
User Creation: If a new user logs in with Descope, the handler will automatically create a Salesforce user record using information like email and name.
User Lookup: If the user already exists in Salesforce, the handler will find and return the corresponding user.
User Update: Optionally, the handler can update user information (such as job title) if it has changed in Descope since the last login.
Editing the registration handler ensures that users are correctly created, updated, and matched with their Salesforce records upon login. This step helps keep user data in sync with Descope, making the login process smoother and more efficient.
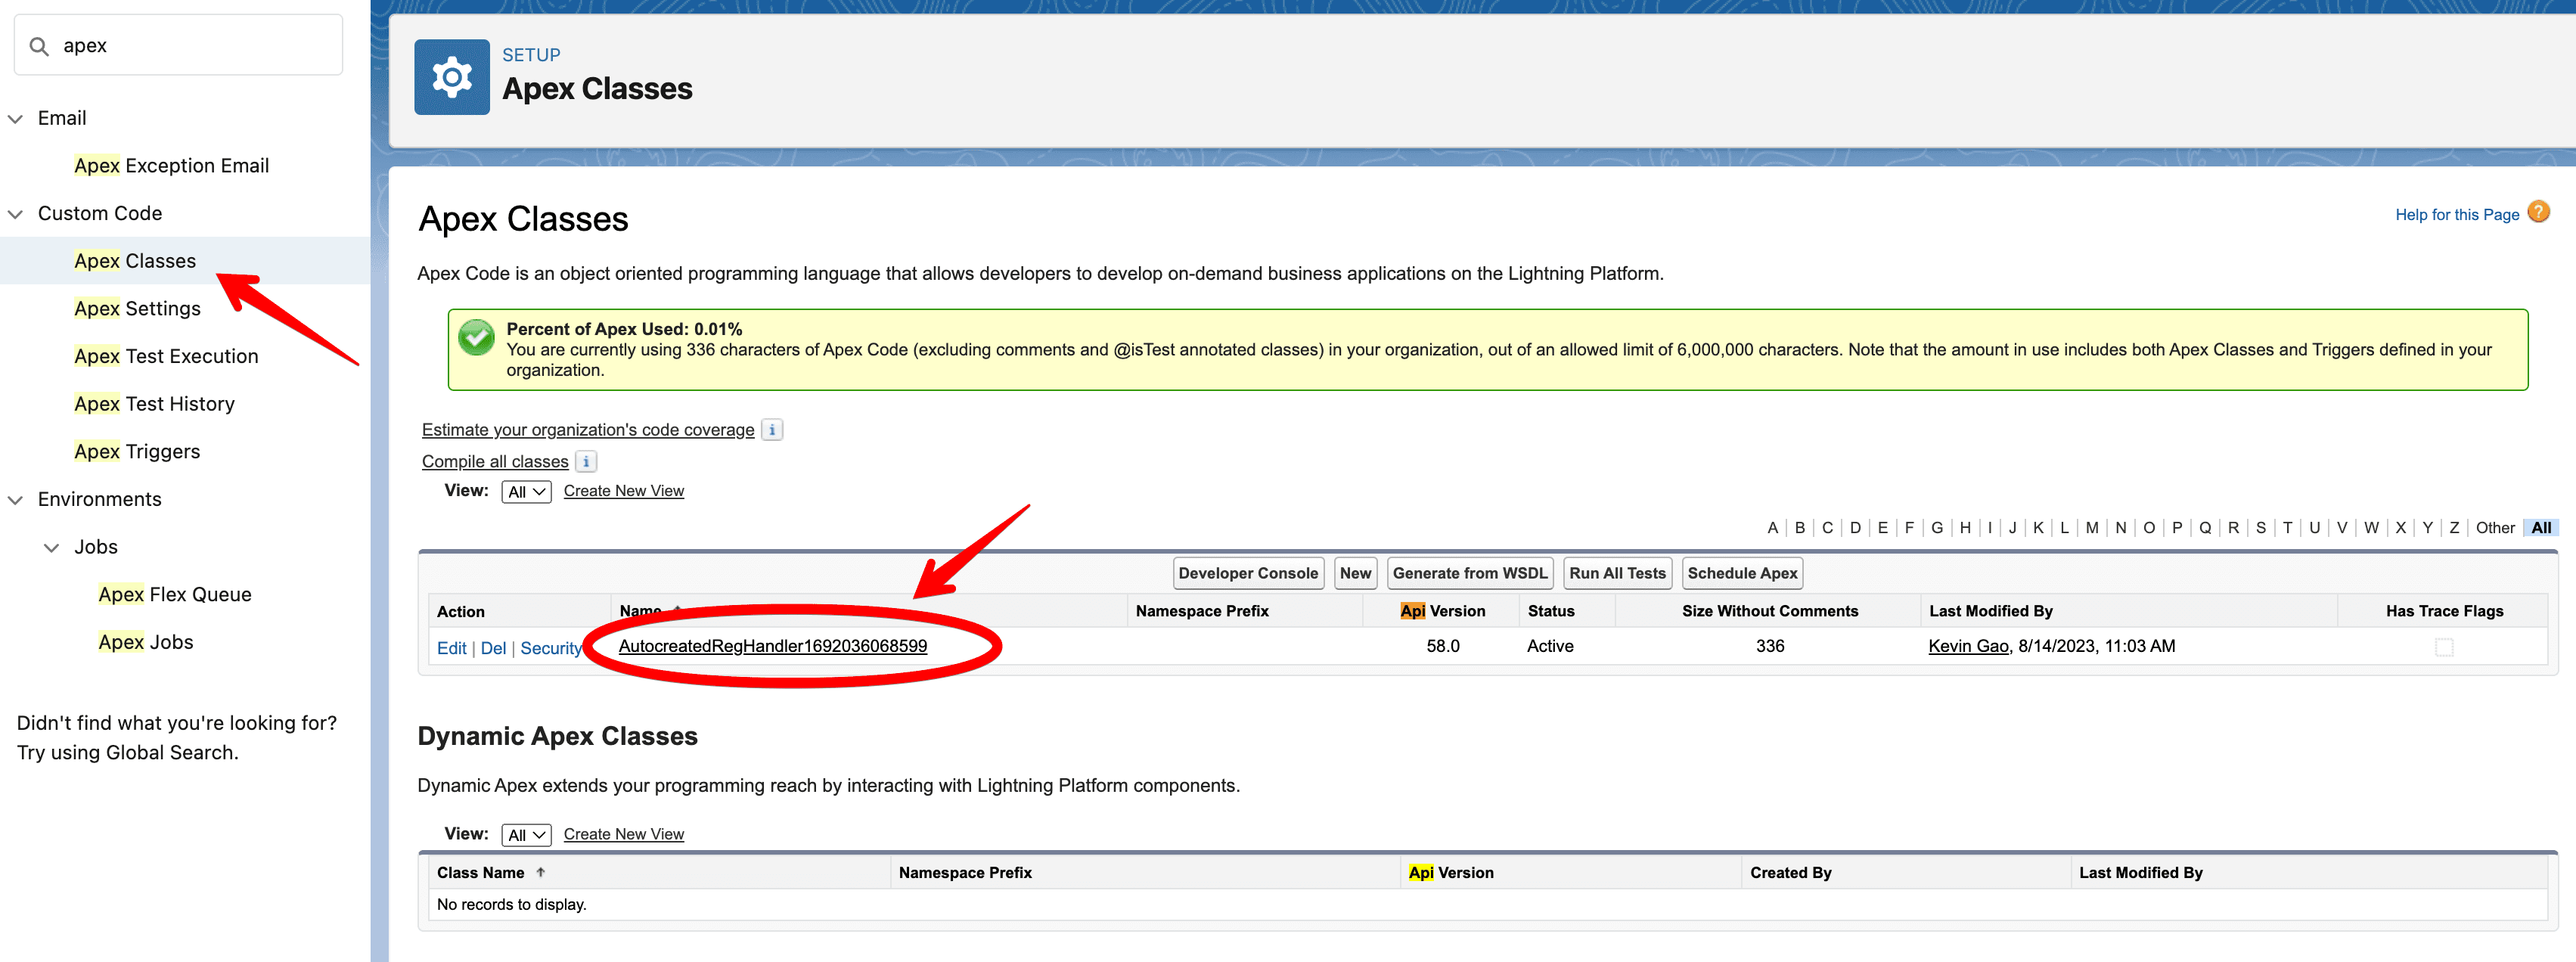
First, locate the auto-generated registration handler in Salesforce. You can find it under Setup > Apex Classes. Then click Edit and copy over this boilerplate code provided to handle all of the registration handler responsibilities discussed above.
global class AutocreatedRegHandler1692036068599 implements Auth.RegistrationHandler{
    global User createUser(Id portalId, Auth.UserData data){
        User u;

        // Try to find an existing user first
        List<User> existingUsers = [SELECT ID FROM User WHERE FederationIdentifier =: data.email];

        System.debug('data: ' + data);
        System.debug('email from data: ' + data.email);

        if (existingUsers.size() > 0) {
            u = existingUsers[0];
        } else {
            // If no user exists, create a new one
            u = new User();

            String firstName = data.attributeMap.containsKey('name') ? data.attributeMap.get('name') : 'DefaultFirst'; // OIDC uses name instead of firstName as the attribute key
            String lastName = data.attributeMap.containsKey('family_name') ? data.attributeMap.get('family_name') : 'DefaultLast'; // OIDC uses family_name instead of firstName as the attribute key

            u.Username = 'DefaultUser' + '@example.com'; // Fill in your own username logic
            u.Email = data.attributeMap.containsKey('email') ? data.attributeMap.get('email') : 'default@email.com';

     u.FirstName = firstName;
            u.LastName = lastName;
            u.FederationIdentifier = data.email;
            u.Alias = (firstName + lastName).length() > 8 ? (firstName + lastName).substring(0, 8) : (firstName + lastName); // Alias logic
            u.ProfileId = '00eHu000002sq8b'; // Insert your own Profile ID
            u.TimeZoneSidKey = 'GMT';
            u.LocaleSidKey = 'en_US';
            u.EmailEncodingKey = 'UTF-8';
            u.LanguageLocaleKey = 'en_US';

            // If working with Communities or Portals, you might also need to set additional fields like AccountId, ContactId, etc.

            insert u;
        }

        return u;
    }

    global void updateUser(Id userId, Id portalId, Auth.UserData data){
        User u = [SELECT Id, Email, FirstName, LastName FROM User WHERE Id =: userId LIMIT 1];

        // Update the user's information based on the incoming data
        u.Email = data.attributeMap.containsKey('email') ? data.attributeMap.get('email') : u.Email;
        u.FirstName = data.attributeMap.containsKey('name') ? data.attributeMap.get('name') : u.FirstName;
        u.LastName = data.attributeMap.containsKey('family_name') ? data.attributeMap.get('family_name') : u.LastName;

        // Update other fields as necessary

        update u;
    }
}
Copy the code into the code editor as shown below, and click Save. This basic registration handler should now be able to create a user with the attributes specified in the code.

Keep in mind that your implementation might vary depending on the custom user attributes you want to assign, time zones, locale settings, and more. Refer to the comments in the code snippet above for all the options that can be tailored to your specific needs.
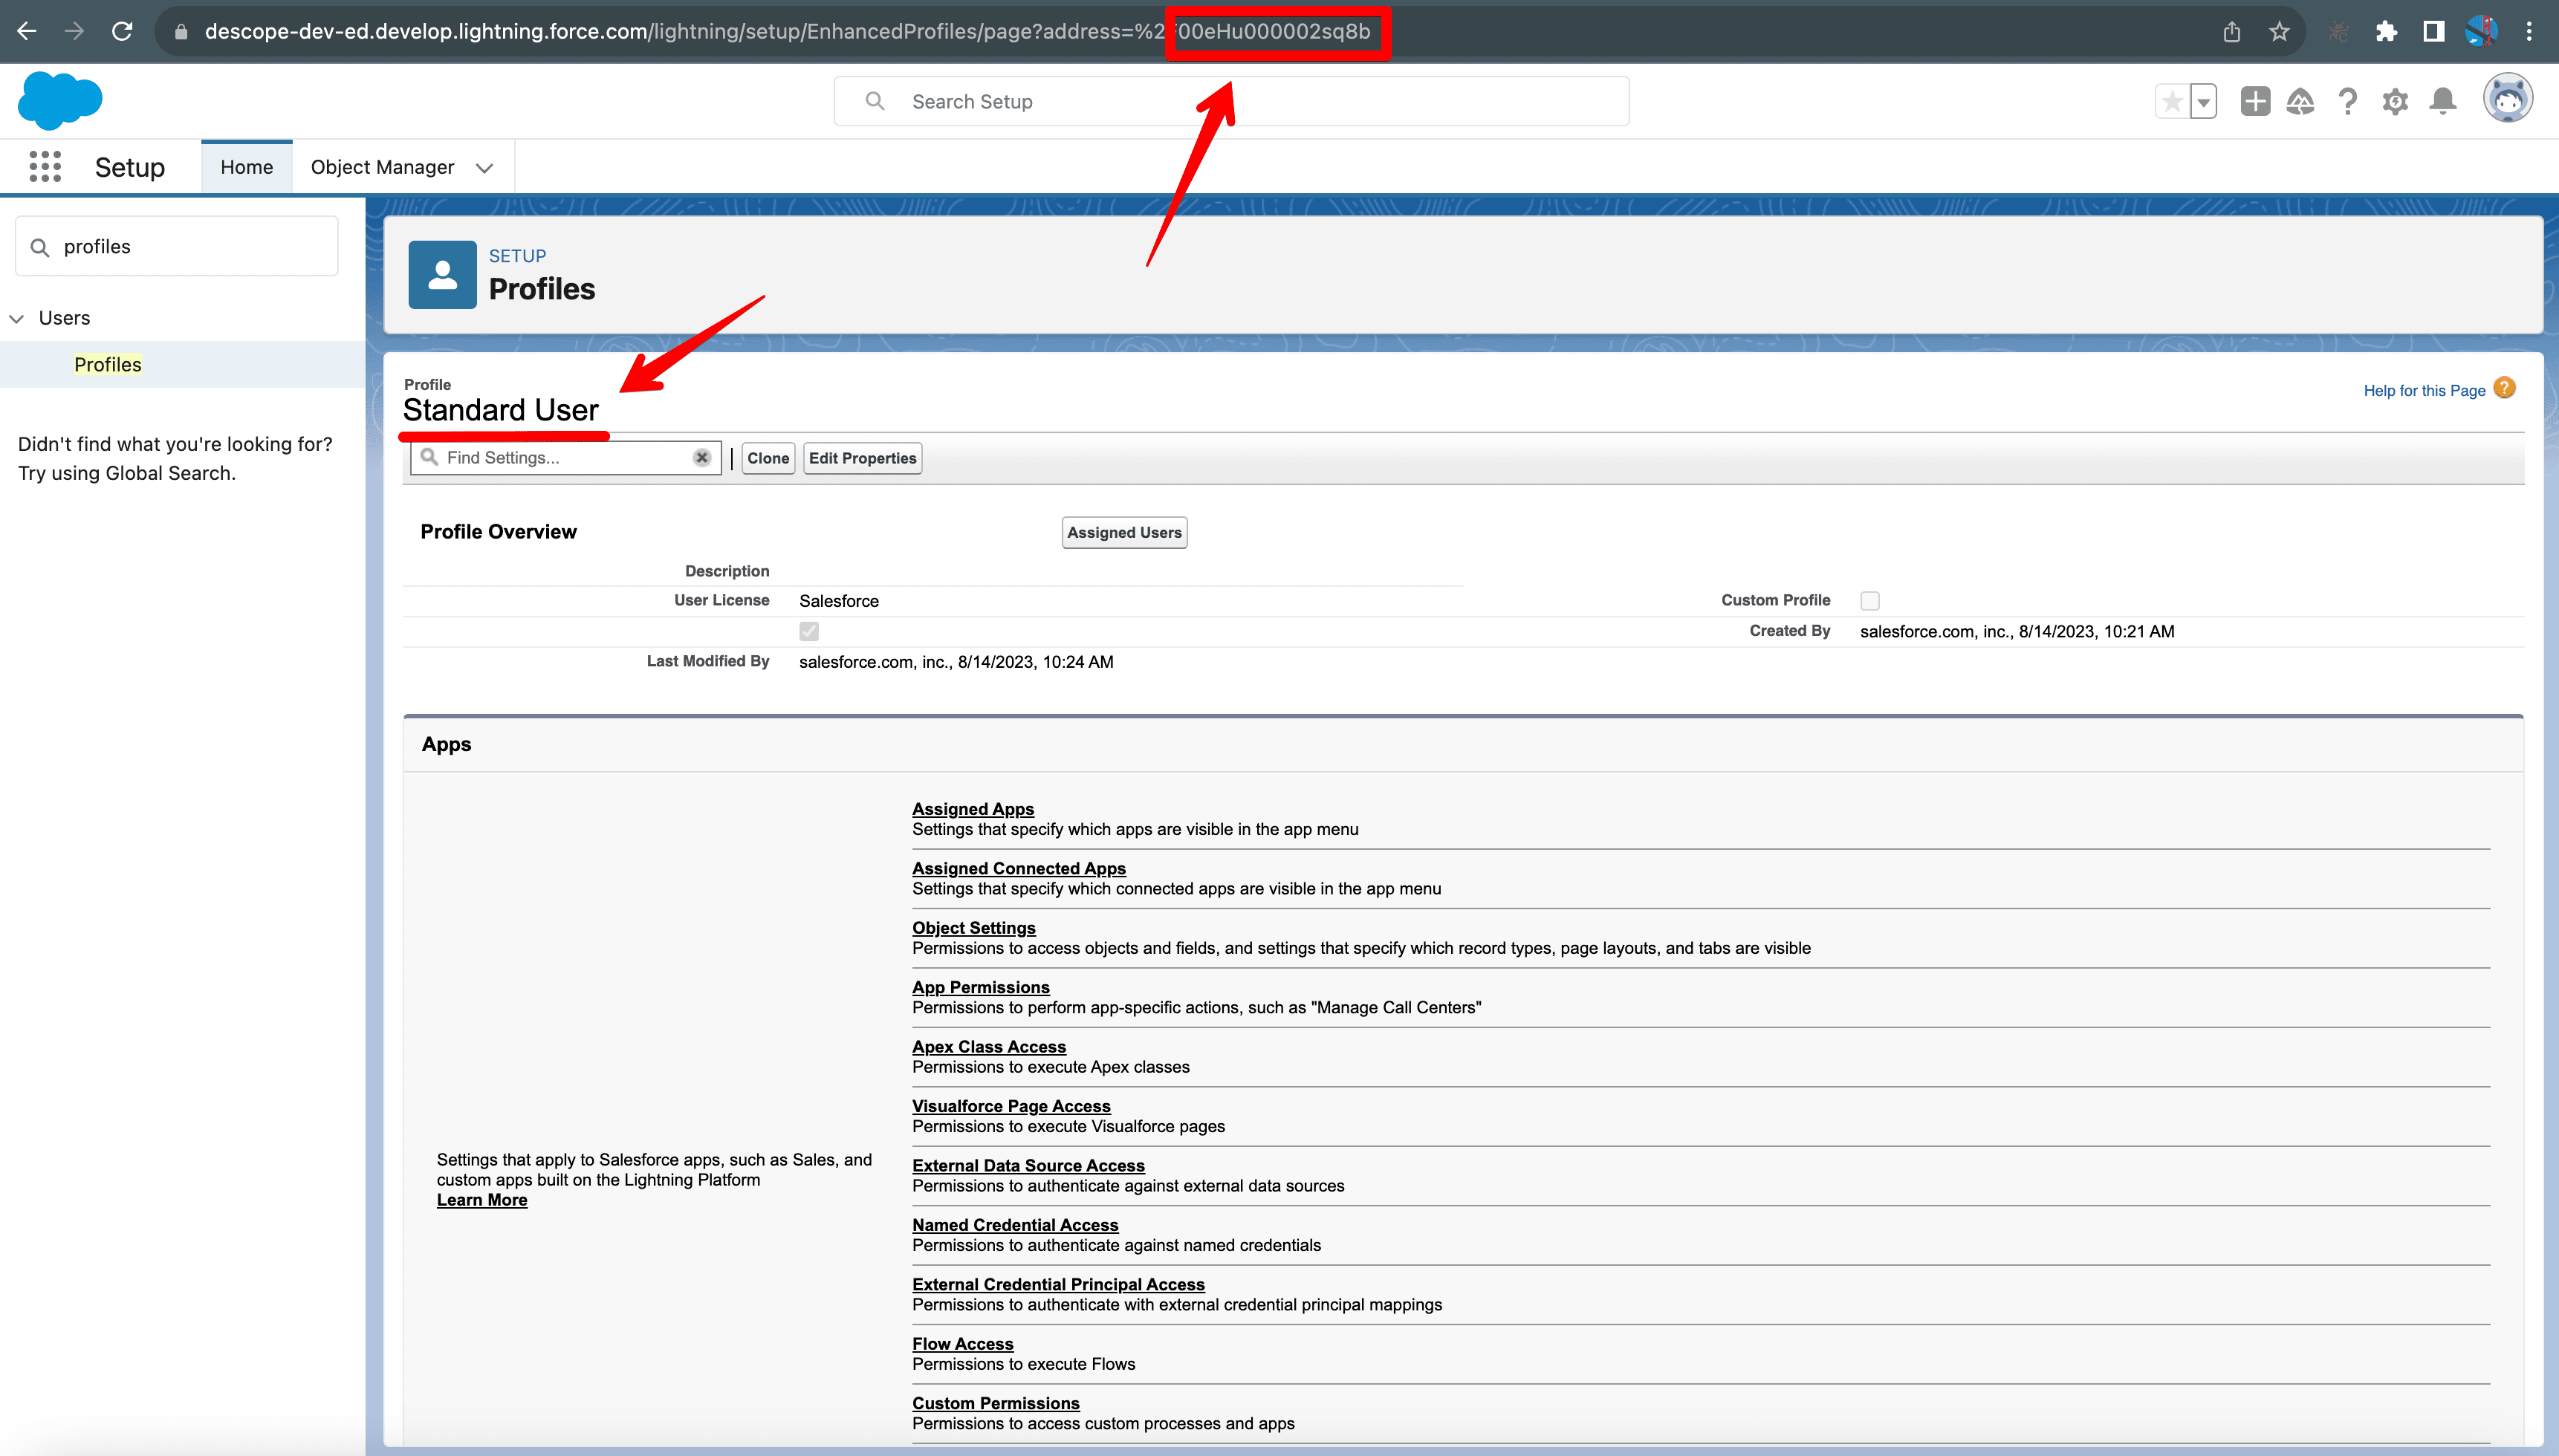
If you’re wondering how to find the Profile ID to associate with your new users, navigate to Setup > Profiles. Then, copy the Profile ID from the URL at the top of the screen.
At this point, you can either continue with the Profile Permissions section of the guide or explore how to enhance your registration handler to include custom JSON Web Token (JWT) claims or other information passed from Descope to Salesforce.
User attribute mapping with OIDC
Custom attributes provide enhanced functionality by allowing you to personalize user data. These attributes are unique to your business and may not be available by default in Salesforce or Descope.
When using OIDC with Descope, you will receive a JWT token that contains claims about the authenticated user, which can include both standard and custom attributes.
To map these attributes in your Apex Class, modify it to use the AttributeMap function, which is part of the UserData class.
u.<some random Salesforce attribute key> = data.attributeMap.containsKey('<Descope custom claim key>') ? data.attributeMap.get('<Descope custom claim key>') : 'defaultValue';Using the AttributeMap function, you can map any custom claims or user attributes you need. Just keep in mind that the user attribute must already exist and be configured for your Salesforce users. Otherwise, you will encounter an error when the Apex handler runs this code.
If you want to explore further, Salesforce’s documentation provides additional details on the various OIDC configurations they support.
Add Descope SSO to login screen
After modifying the registration handler, the next step is to enable users to sign in with Descope via a button on the Salesforce login screen.
To add the Descope login option to the main login screen, follow these steps:
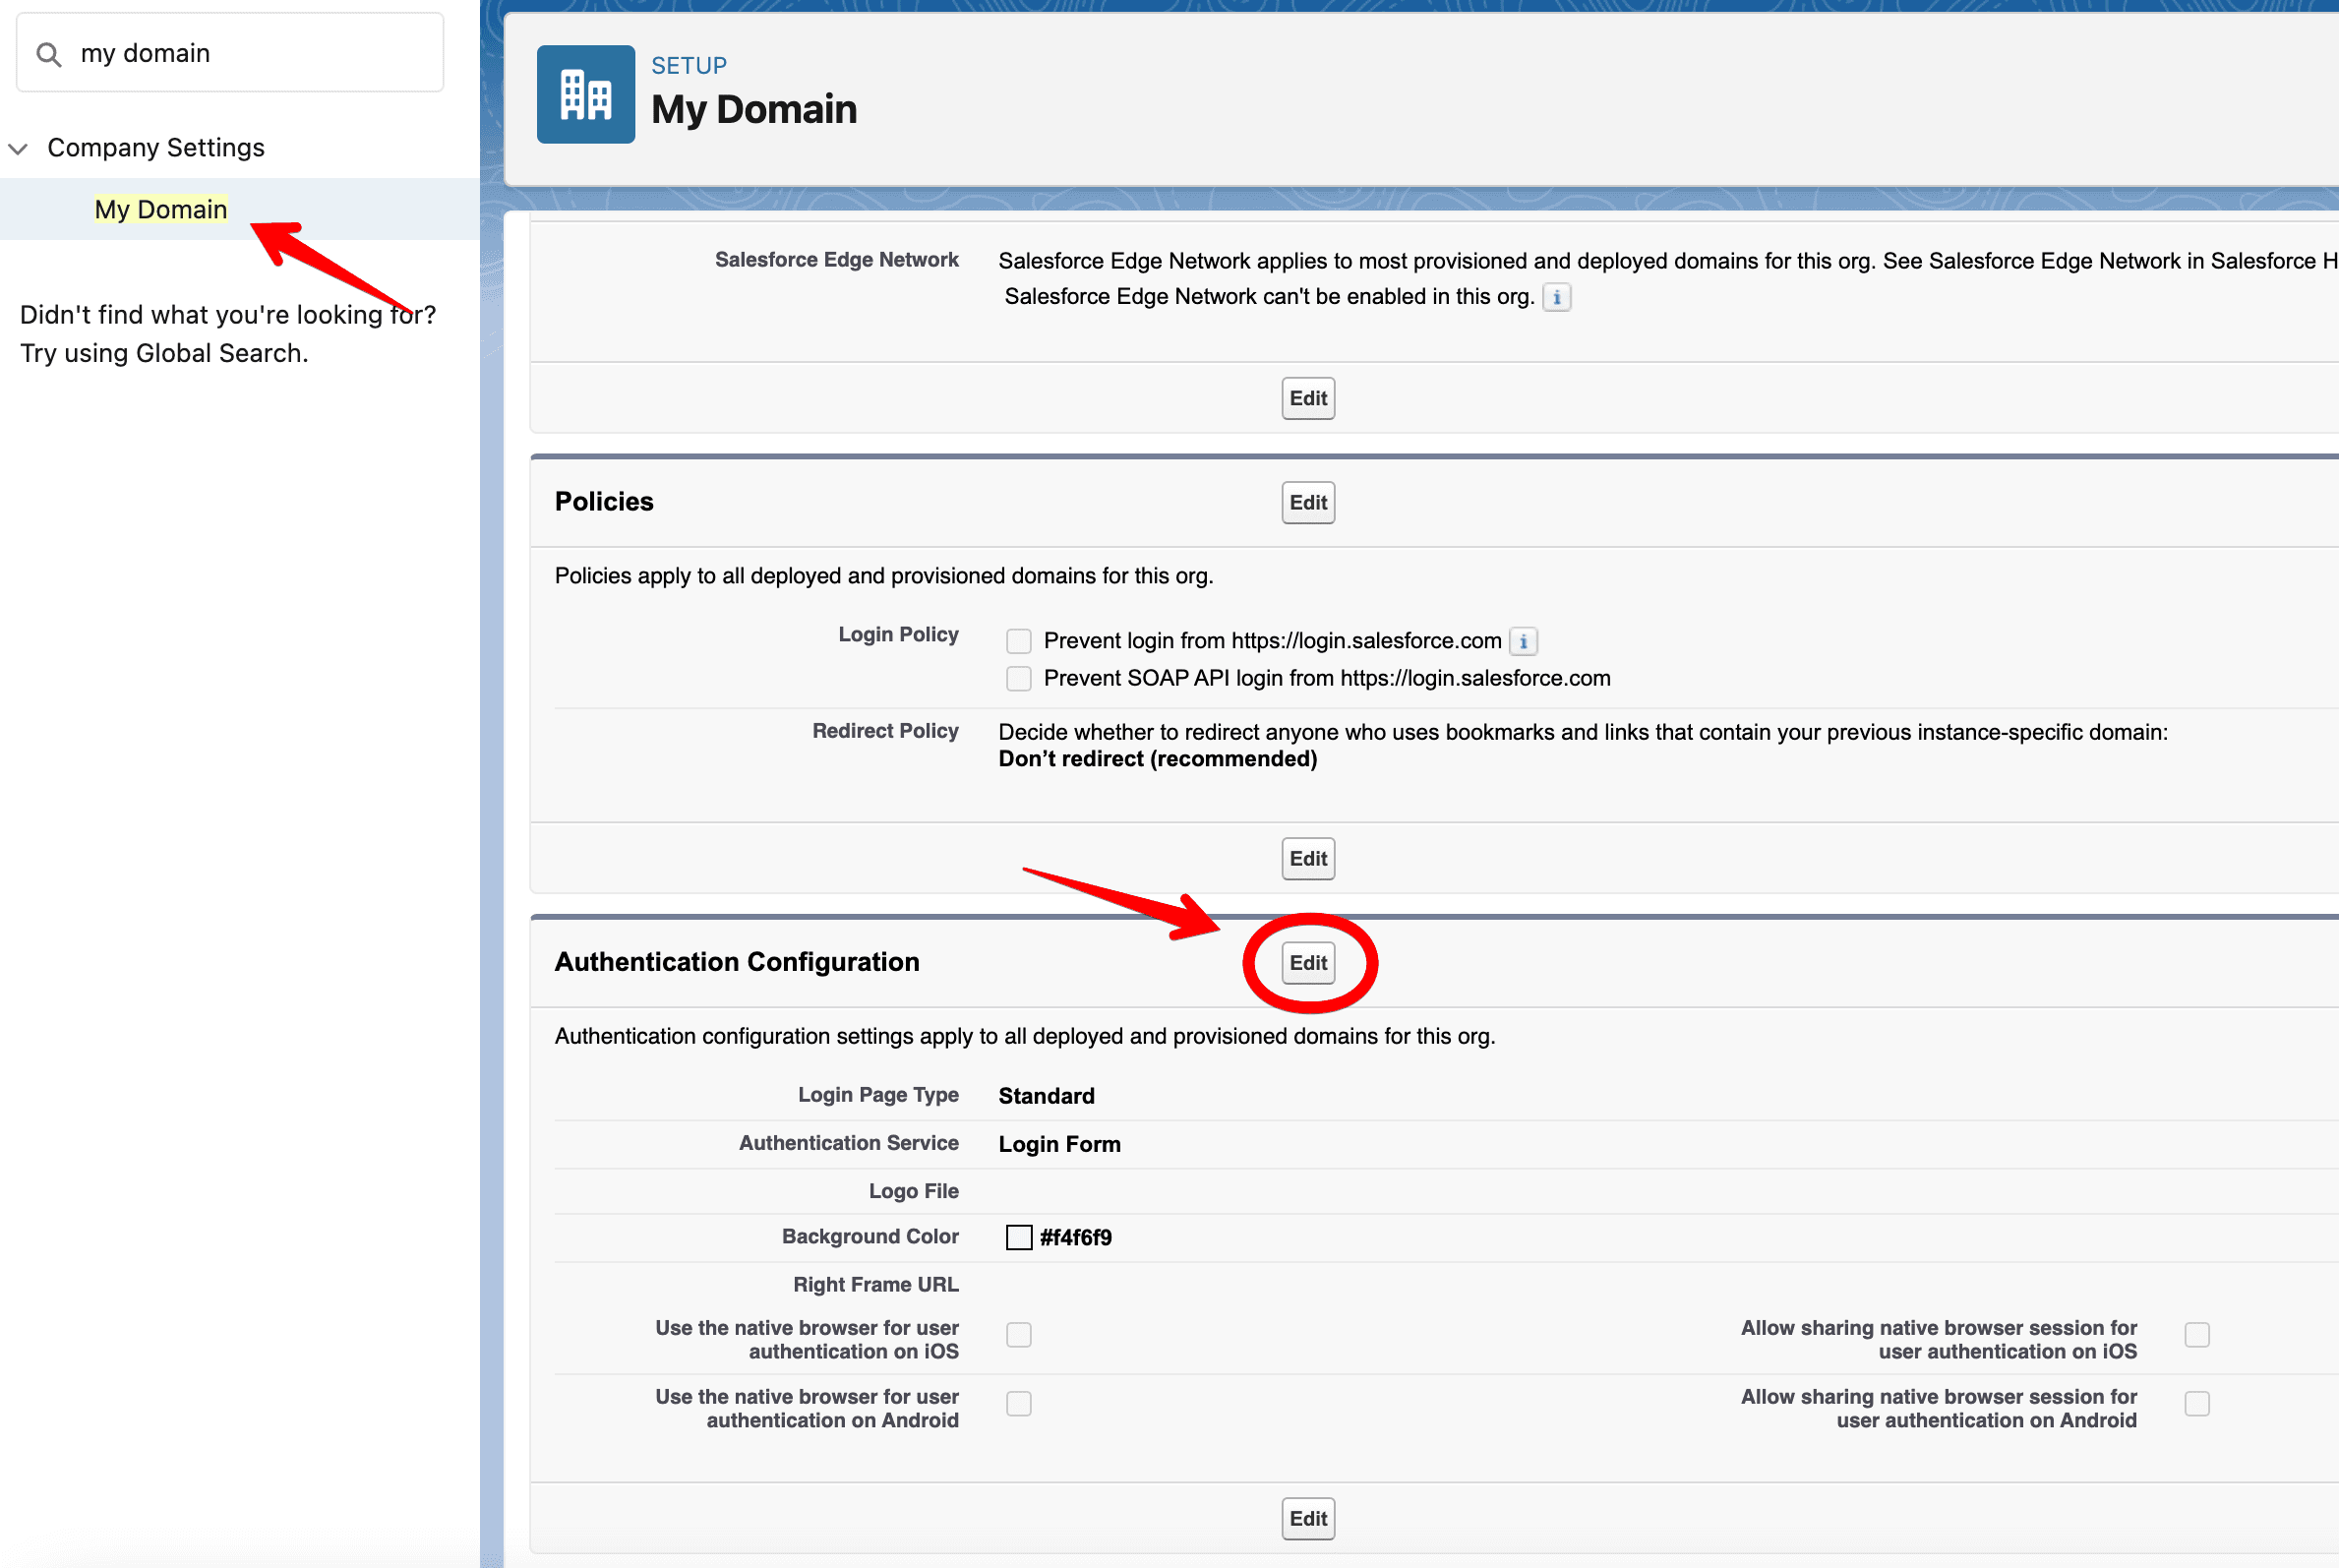
Search for My Domain in Salesforce, and click Edit under Authentication Configuration.
Select the Auth Provider you created (for this tutorial, we selected Descope).
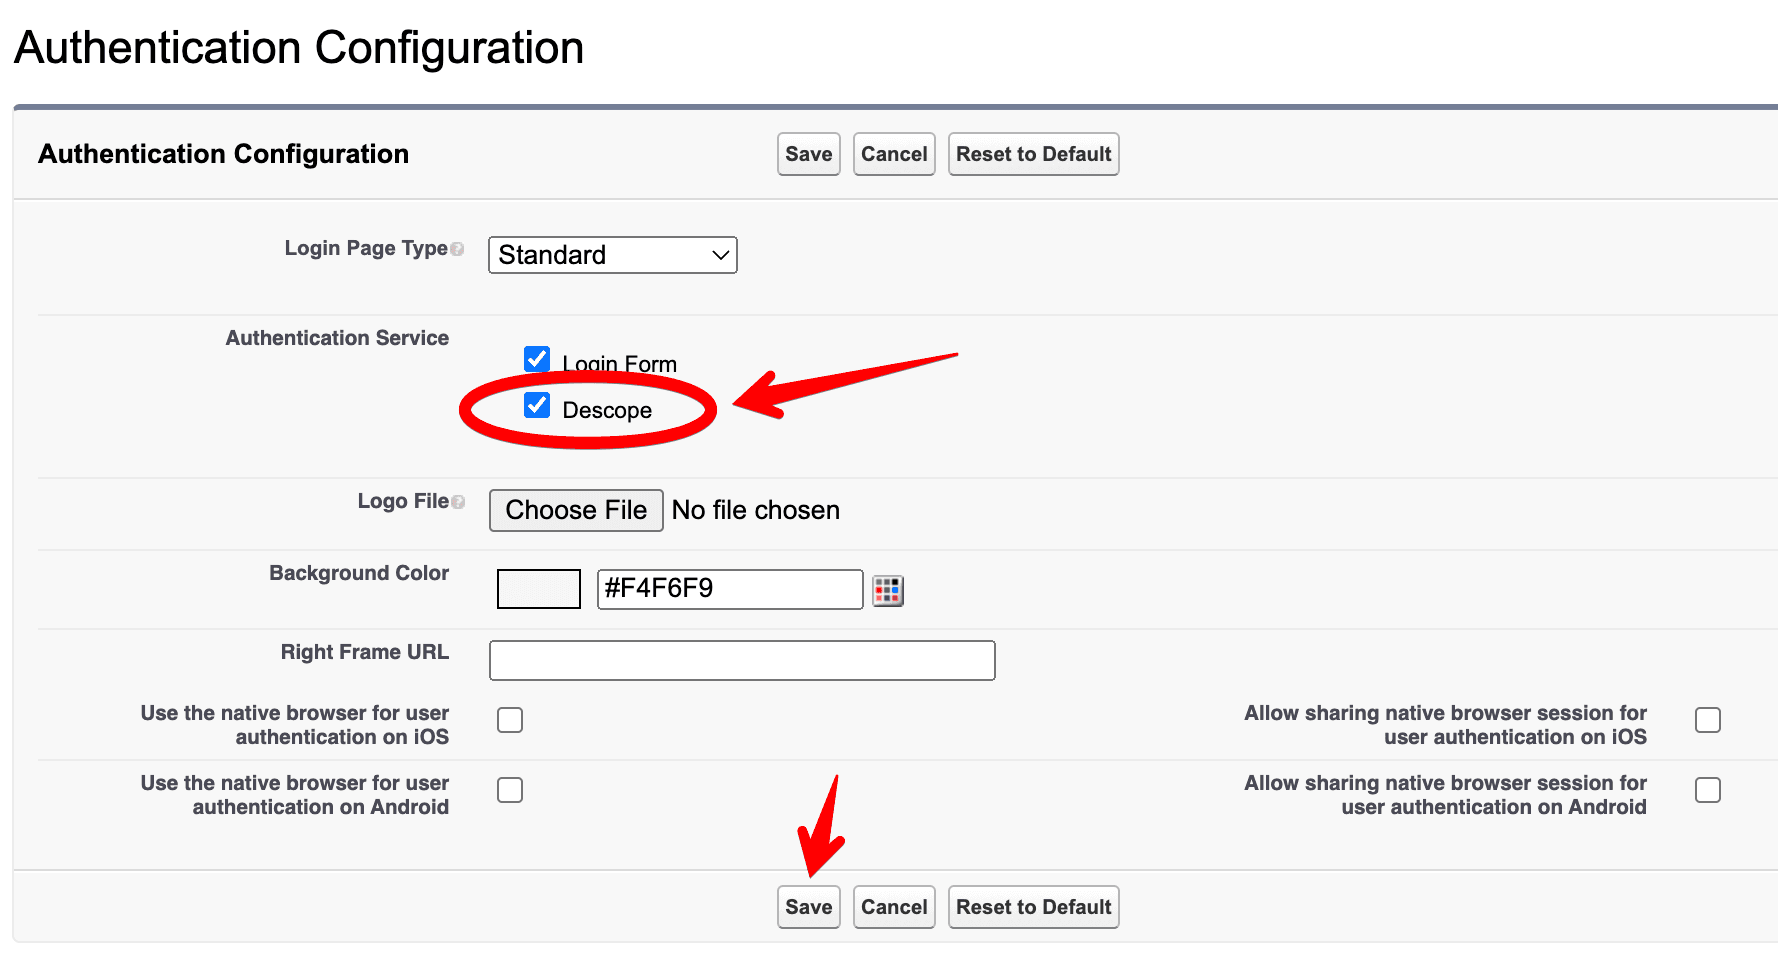
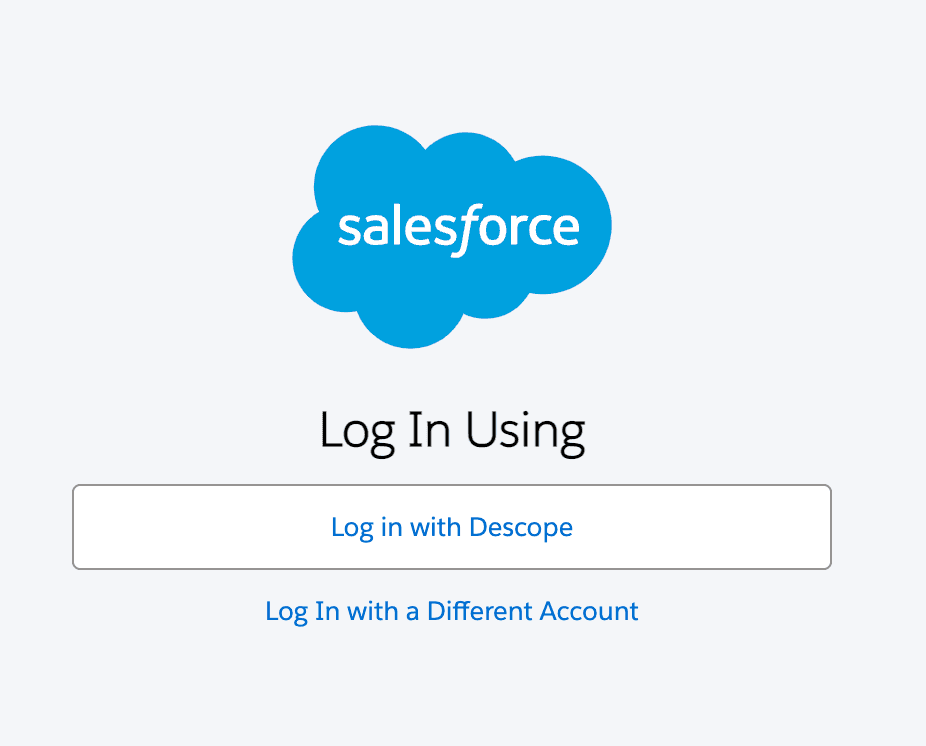
After selecting Descope, click Save. The next time you log in to your Salesforce Organization, you should see Login with Descope as an option.
If you want to enforce Descope SSO, navigate back to My Domain, click Edit, and check the box labeled Prevent login from https://login.salesforce.com.
For a full guide on how to enforce SSO and manage authentication methods within your Salesforce Organization, refer to their documentation.
Next up, we'll cover how to configure profile permissions correctly to use SSO.
Profile permissions
When using the registration handler, it’s vital to ensure that the user being used to run the Apex class has the correct profile permissions. This user is the one defined under Execute Registration As in the OIDC configuration page.
Some permissions may need to be adjusted to ensure everything functions properly. For example, SSO will not work if the user is set as an API-Only User. If you encounter an issue beyond what's covered in this guide, the error message (visible in the URL) will provide details when attempting to log in via SSO.
Besides seeing an error message relating to other permissions, you might also come across this message when setting up SSO for the first time:
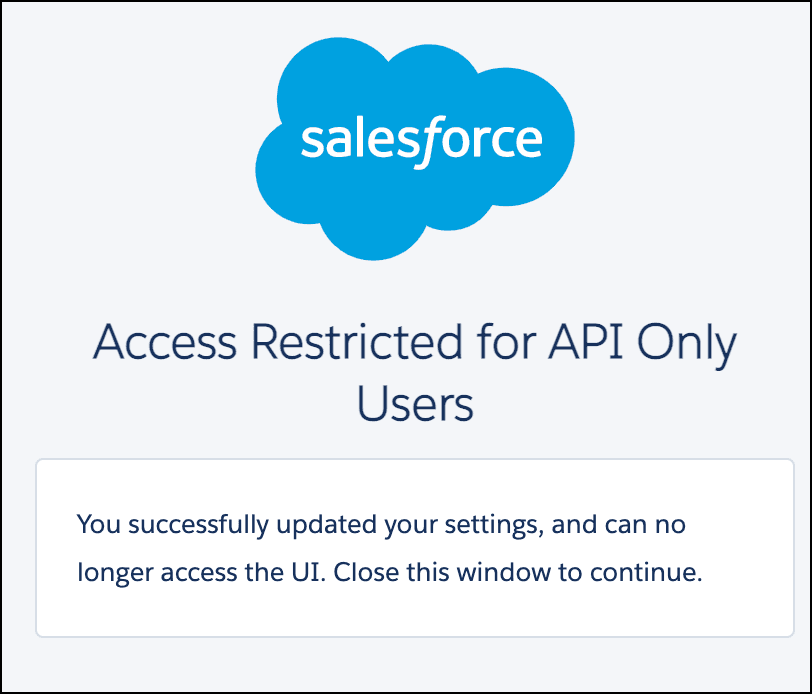
When using registration handlers, your Apex class executor user needs to have the ability to Manage Users. This can be granted by associating the user with the API Integration-licensed permission set.
If you’re seeing the error in the screenshot above, continue reading this guide to learn how to create and assign an API Integration-licensed permission set.
Allowing API integration permissions
To handle the registration handler, you need to create an API-Only integration profile and assign a new or existing user to it.
Go to Setup > Profile, and click New in the top left corner. Then fill in the following information:

Once the profile has been created, open it and select Assigned Users:
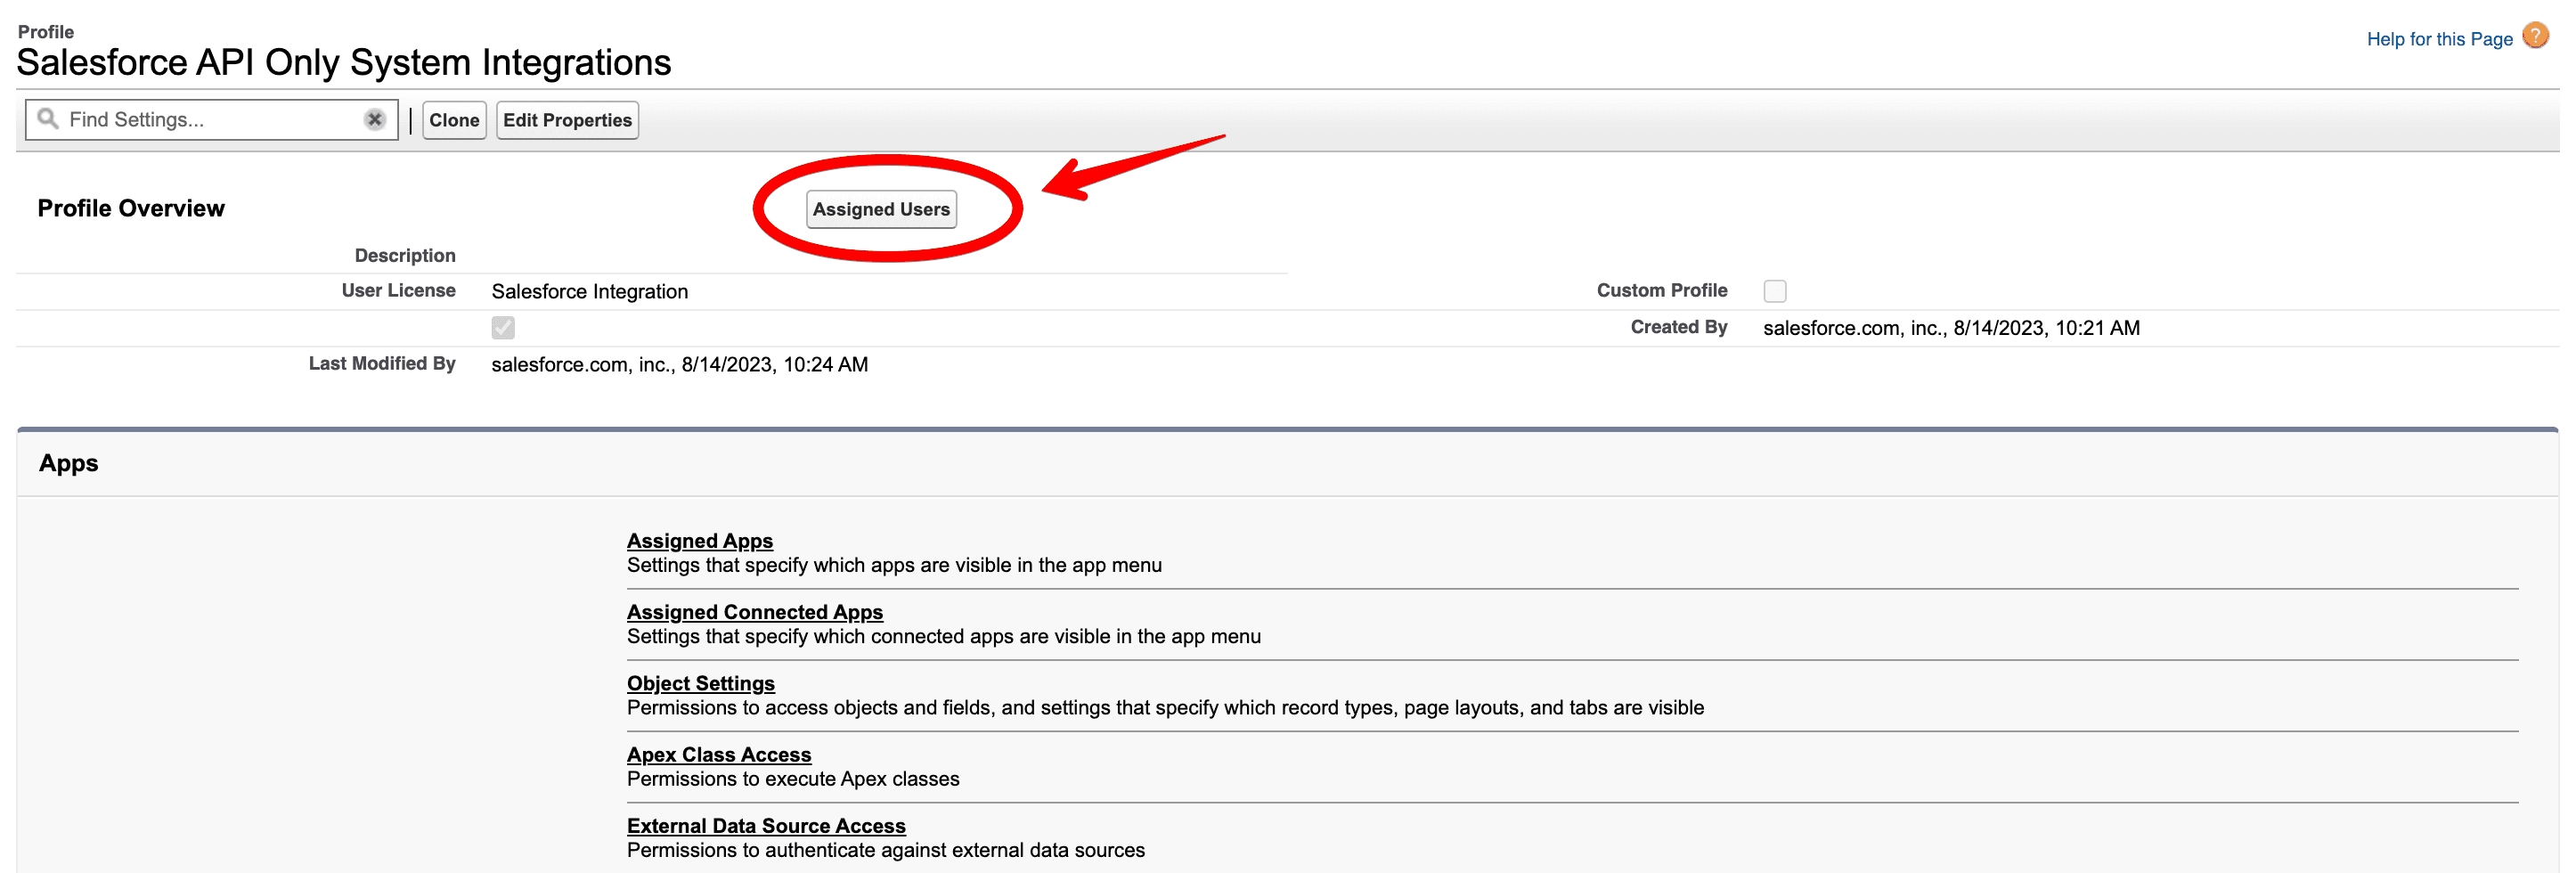
From there, you can either add a new user or select an existing one to execute your registration handler Apex class.

Then, you’ll need to create an API integration permission set. Go to Setup > Permission Set, and click New in the top left corner. Then, configure a new permission set as shown below:

Next, head to Setup > Users and select the user associated with your registration handler. Scroll down to the sections shown below:
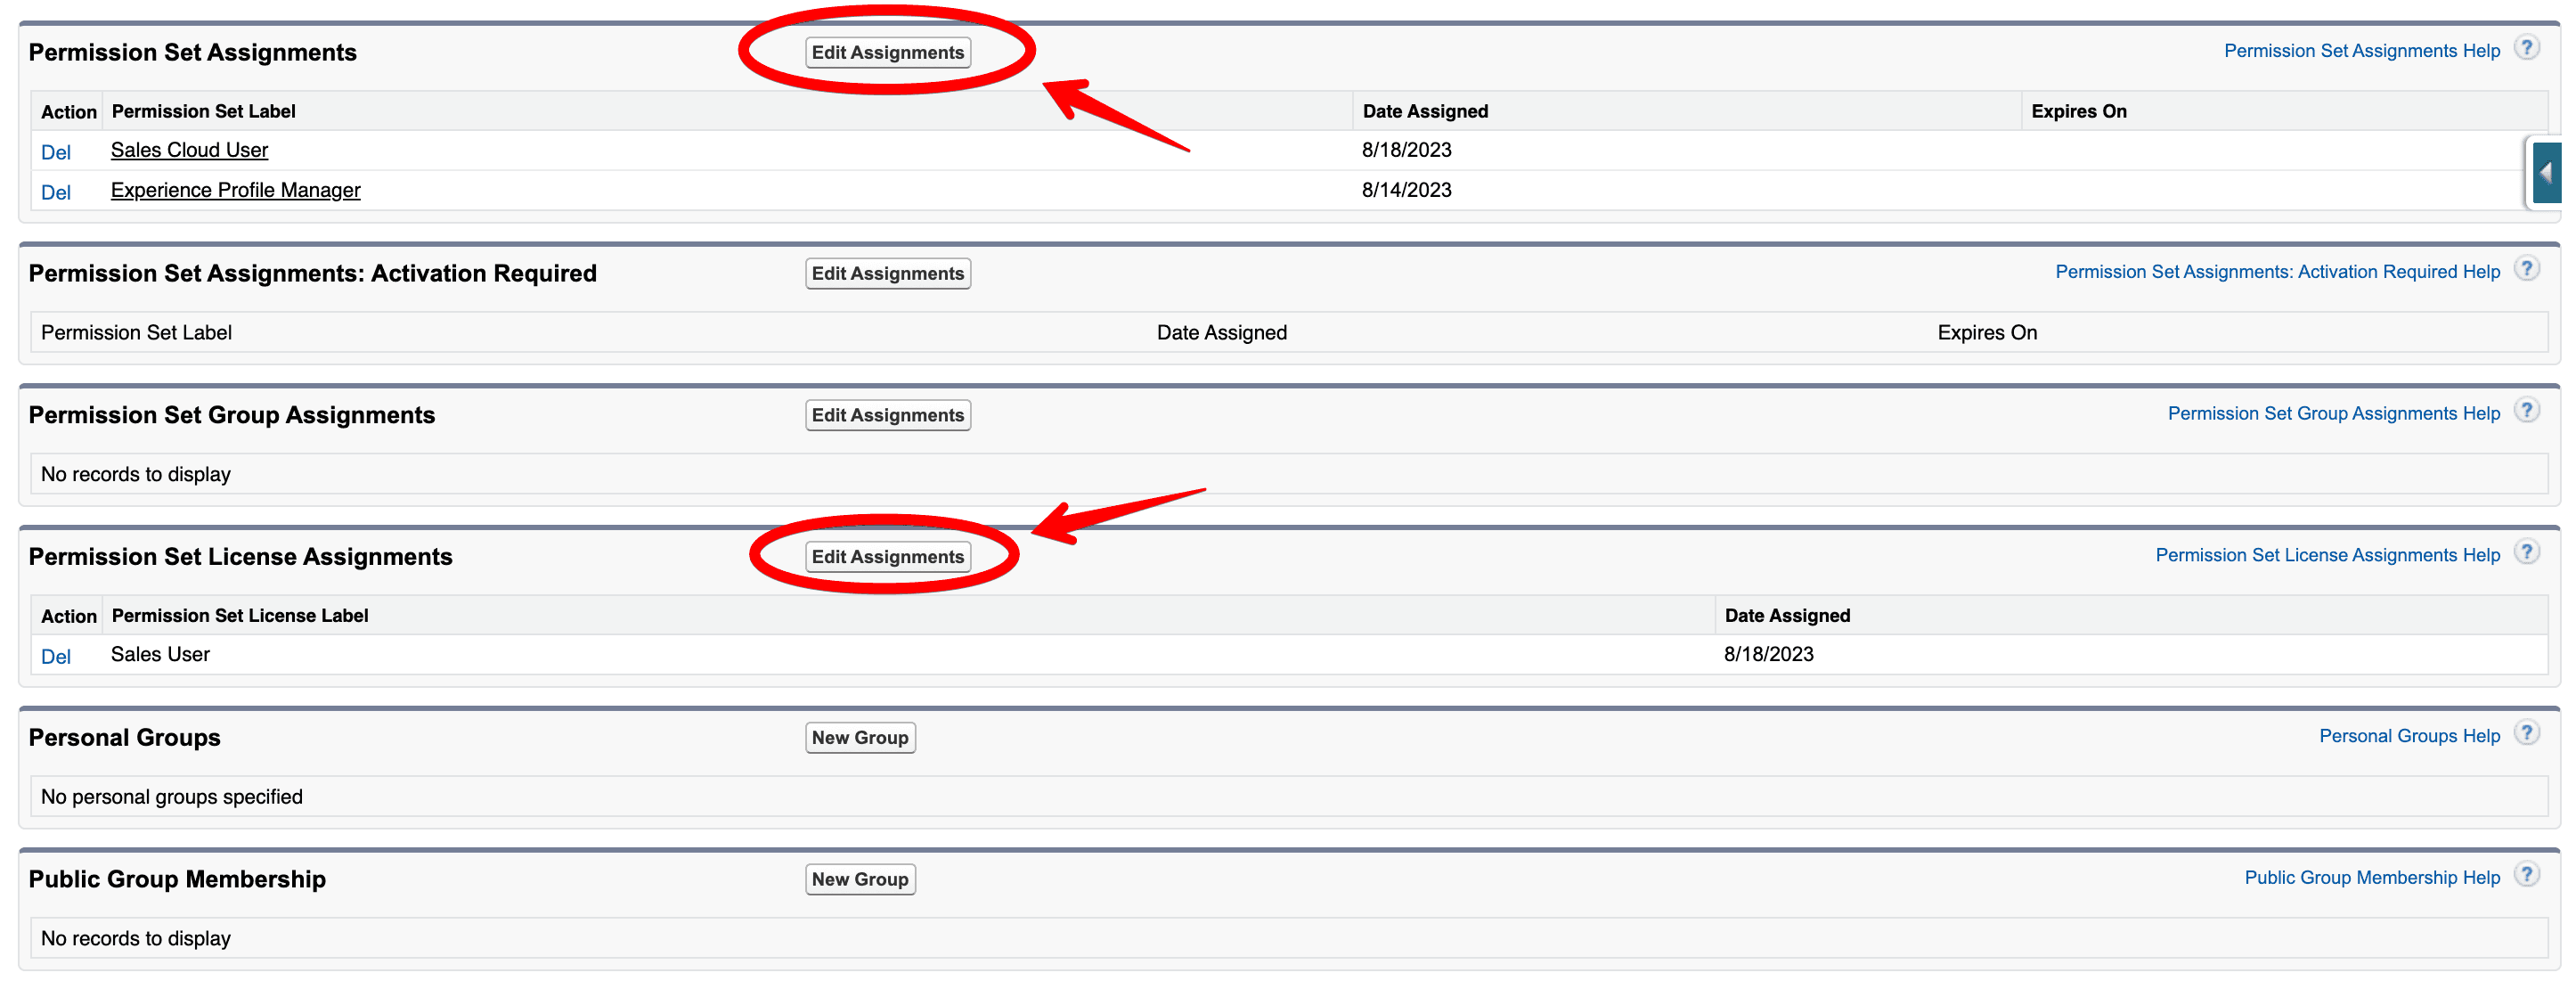
Under Permission Set Assignments, add the newly created Permission Set. Under Permission Set License Assignments, look for and add Salesforce API Integration.
After completing these steps, your page should look like this:
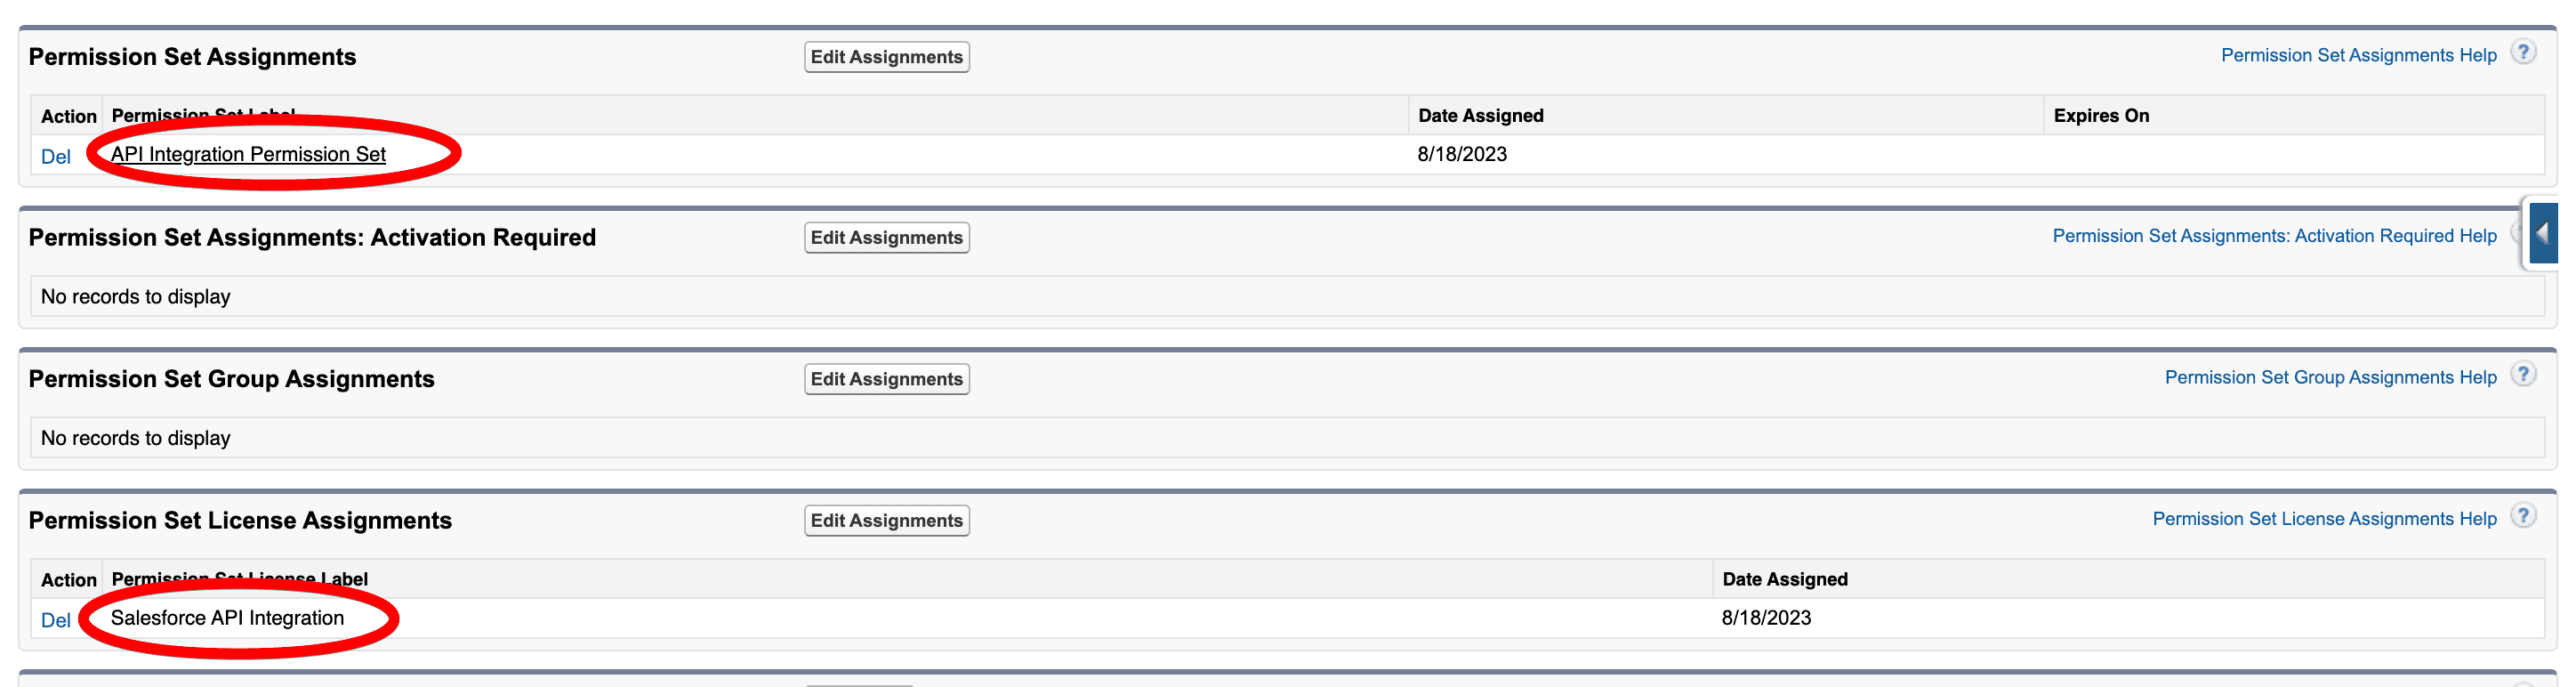
Once that’s done, you shouldn’t see any more errors when logging in with Descope!
Enhanced security in Experience Cloud applications
Using Descope in conjunction with Experience Cloud can significantly improve your security posture while maintaining a seamless user experience. Here is an interesting use case that demonstrates how Descope Flows—our drag-and-drop workflow engine—can be used with an Experience Cloud application.
Scenario: Your enterprise operates on Salesforce Experience Cloud, serving a large audience with access to specialized insights, analytics, or proprietary content. Descope Flows can help safeguard this data.
How Descope Flows help
Dynamic Verification: Depending on the user's profile and the sensitivity of the data being accessed, the Flow can prompt the user for additional authentication factors. This could range from a simple one-time password (OTP) verification to advanced biometrics, determined dynamically based on the context.
User Experience and Trust: Descope Flows can adapt based on a myriad of factors, such as user behavior, geolocation, time of access, and device type.
Audit and Reporting: By utilizing third-party connectors such as Datadog in Descope Flows, you can stream rich data on user access patterns, successful and failed authentication attempts, and more to your observability platform. This information can guide security strategy adjustments and provide insights for compliance and auditing purposes.
Integrating Descope with Salesforce Experience Cloud goes beyond adding a simple security layer. It enhances the platform’s capabilities while ensuring a seamless and trustworthy user experience.
Using Descope with Experience Cloud apps
Since Descope has already been added as an OIDC Auth Provider in Salesforce, integrating Descope SSO into the login page of your Experience Cloud apps is straightforward:
From Setup, in the Quick Find box, enter Sites, and then select All Sites.
Next to your site, click Workspaces.
Select Administration, and then select Login & Registration.
Under Login Page Setup, select an authentication provider to show on the login page.
Save your settings.
To see your changes, click Settings, and then open your site URL in a private (incognito) browser. You should see the authentication provider as a button beneath the login form. When users click the button, they are redirected to the provider to log in.
For detailed instructions and the necessary permissions, refer to the Salesforce documentation site.
Once you've successfully completed these steps, your Experience Cloud application should be accessible through your Descope Flow, enabling you to handle use cases like the one described above.
Read more: The Developer’s Guide to Implementing Single Sign-On
Simple Salesforce SSO setup with Descope
Descope makes it very easy to add SSO capabilities to your Salesforce Organization, even extending it to Experience Cloud applications. With Descope, organizations can enhance security, simplify user management, and deliver a superior user experience.
Thanks to the flexibility of Descope Flows, you can easily implement risk-based MFA, audit streaming, and step-up authentication—no lengthy configurations or app overhauls required.
Interested to learn more about Descope? Book time with our auth experts. Or go ahead and sign up for a Free Forever Descope account and add SSO to your Salesforce Org.